Tag: air hose reels

  • Best Retractable Air Hose Reel: 5 Garage Picks

    Best Retractable Air Hose Reel: 5 Garage Picks

    Affiliate disclosure: As an Amazon Associate I earn from qualifying purchases. This article may contain affiliate links, and Bay & Bench may earn a commission at no extra cost to you. Read our full Affiliate Disclosure.

    A loose air hose finds tires, chair legs, and the busiest walking route with uncanny consistency. The best retractable air hose reel keeps a useful length ready, delivers enough air for the tools, locks where expected, and rewinds without whipping a metal fitting through the room.

    Most home garages are well served by a 3/8 inch, 50 foot reel, but that familiar size is not universal. A short 1/4 inch hose feels lighter with brad nailers. A steel dual arm frame handles frequent pulls better than a light enclosed case. An enclosed hybrid hose stays tidy around vehicles and protects the spool from dust. This guide compares five current reel styles and shows what to measure between the compressor, mounting point, and farthest job.

    Quick answer

    The Flexzilla L8250FZ is the easy general pick for an enclosed 3/8 inch by 50 foot garage reel. Choose its self-leveling Pro sibling when even spooling matters, Milton’s enclosed reel for a high pressure hybrid hose and wide swivel, a Milton dual arm reel for heavier service, or a Coxreels spring reel when parts and industrial construction outweigh a closed case. Match the reel rating to the compressor.

    Five best retractable air hose reel formats compared

    The table separates reels by structure and handling. Pressure capacity is a ceiling, not proof of high airflow. Hose inside diameter, coupler size, and total run determine how easily air reaches the tool. Confirm every rating on the current model before connecting it.

    PickHoseFrame or caseMount movementBest fit
    Flexzilla L8250FZ3/8 inch by 50 feetEnclosed polypropyleneSwivel bracketEveryday home garage
    Flexzilla L8251FZP3/8 inch by 50 feetEnclosed with self-leveling spoolWall mountFrequent neat rewinding
    Milton ZE1459NS3/8 inch by 50 feetClosed case180 degree swivelProtected high pressure hose
    Milton industrial EPDM kit3/8 inch by 50 feetSteel dual arm140 degree pivotHeavy routine shop use
    Coxreels spring reelChoose by seriesOpen steel frameFixed or swivel optionsServiceable industrial style

    Look beyond the reel body. Some packages include only a short leader, while others require it separately. Couplers may not match your current plugs. Include the leader hose, shutoff valve, compatible fittings, mounting fasteners, and a whip check where required in the total plan.

    Choose 3/8 inch hose for a broad garage tool mix

    A 3/8 inch inside diameter is the versatile general choice for a 50 foot garage reel. It limits pressure loss better than 1/4 inch hose when an impact wrench, blow gun, or modest spray tool asks for more flow. The larger hose is heavier, and its bulk is unnecessary for a short brad nailer run.

    Hose length should cover the route with slack, not stretch from reel to tool in a straight line. Measure down the wall, around the parked vehicle, and out to the driveway. Add the leader between compressor and reel. Every coupler, swivel, and narrow fitting adds resistance, so a 3/8 inch hose connected through tiny passages can still perform poorly.

    Plot the route with your garage workshop layout. A reel near the middle of the long wall often reaches more jobs than one beside the compressor. The leader can bridge that distance if its size and pressure rating fit the system.
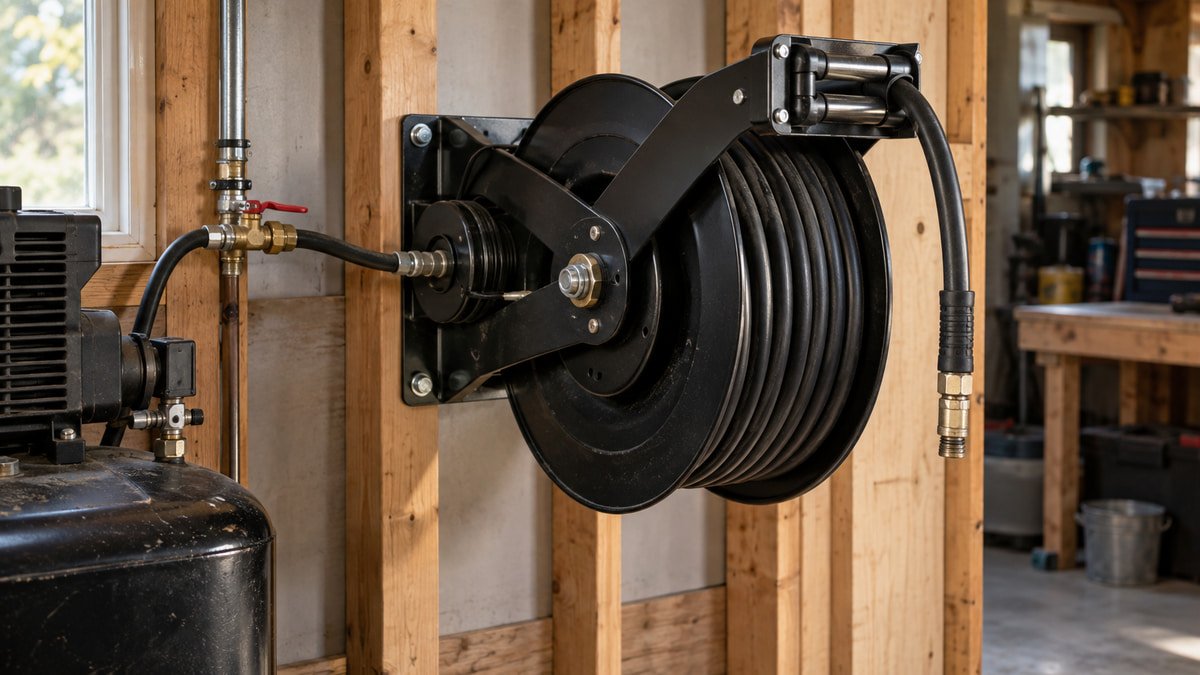
    Steel dual arm air hose reel with leader hose on a framed garage wall
    A rigid dual arm frame suits frequent use when the wall can carry the reel and hose pull.

    Flexzilla L8250FZ for an enclosed everyday reel

    The Flexzilla L8250FZ packages 50 feet of 3/8 inch hybrid hose in an enclosed polypropylene case. Flexzilla says the reel uses an auto retract and latch mechanism and can lock at 18 inch intervals. The case keeps the spool away from grinding dust, leaves, and accidental contact.

    This format works well beside a parked car because the smooth enclosure has fewer exposed edges than an open steel frame. The hose remains flexible in a wide temperature range according to the maker, which helps in an unconditioned garage. The bracket still needs framing that can handle the reel weight and the repeated pull of a long hose.

    The lock interval affects where the stop lands. Pull past the desired length until the latch engages, then ease the hose back. Do not release a pressurized hose and expect the mechanism to absorb the full return. Guide it with one hand as the manual directs.

    Flexzilla L8251FZP for orderly spooling

    The Flexzilla Pro L8251FZP keeps the 3/8 inch by 50 foot format but adds a self-leveling system intended to distribute hose more evenly across the spool. Even layering reduces the pileup that can make a reel bind or leave hose exposed at one side.

    This feature is most useful when the hose comes out at different angles through the day. A central garage reel may feed a tire inflator toward the driveway, a nailer toward the workbench, and a blow gun toward the door. The self-leveling guide helps manage those changes, though the operator still needs to pull and return the hose in a controlled manner.

    Compare the Pro price with the simpler enclosed model. For occasional weekend use, careful hand guidance may be enough. For daily work or a shared garage, the guided spool can remove a small annoyance that otherwise appears every time the hose returns.

    Milton ZE1459NS for a protected high pressure hose

    The closed Milton ZE1459NS includes 50 feet of 3/8 inch hybrid polymer hose. Milton lists a 300 PSI maximum and a bracket that swivels through 180 degrees, with wall, ceiling, or floor mounting options. That wide pivot can serve a workbench inside and a vehicle outside from one location.

    A high pressure rating does not mean the tool receives more CFM. It means the reel components are rated for pressure up to that published limit when installed and used correctly. Set the compressor regulator for the hose, reel, fittings, and tool with the lowest allowed working pressure.

    The closed case suits a dusty garage, but it hides the first wraps of hose. Inspect the accessible length, fitting, and stop regularly. If the retract action changes or the hose develops a damaged spot near the outlet, depressurize the line and follow the service instructions rather than opening a spring case casually.

    Milton dual arm reel for heavier routine use

    Milton’s industrial dual arm kit uses a steel frame, 50 feet of EPDM hose, and a six foot leader. The current listing gives it a 140 degree pivot and pressure capability up to 300 PSI. Two arms support the spool at both sides, which is a reassuring layout for repeated shop use.

    The open frame makes the hose and swivel easier to inspect. It also exposes them to dust, overspray, and impact. Mount this style where a board, mower handle, or car door cannot strike the spool. The steel edges deserve more clearance than a rounded plastic case.

    A six foot leader offers some freedom between compressor and reel, but it may not reach a central wall location. Do not replace it with an undersized hose simply because that hose is available. Keep the supply path at least as generous as the reel path unless the manufacturer specifies otherwise.

    Coxreels for a serviceable industrial style

    Coxreels offers spring driven, hand crank, and motorized reel families with many hose lengths, pressures, and frame arrangements. That catalog breadth suits buyers who know the exact duty and want replaceable components rather than one fixed home garage package.

    The choice takes more homework. Specify hose inside diameter, length, maximum working pressure, inlet and outlet size, reel material, rewind type, and mounting orientation. A compact reel built for a short tool hose is not equivalent to a larger dual pedestal model merely because both accept compressed air.

    The company’s spring reel manual warns users not to exceed the reel pressure rating and not to operate a reel with a malfunctioning spring. That is useful guidance for any brand. A hesitant or uncontrolled rewind is a service signal, not something to defeat with a stronger pull.

    Mount the reel for reach without blocking storage

    Wall mounting at shoulder height keeps the reel accessible and lets the hose feed above bins. Ceiling mounting clears wall space but can make service awkward and may direct the hose across lights or garage door hardware. Floor mounting suits a bench or equipment island but gives up the main benefit of getting the hose off the slab.

    Use the structural mounting pattern and fasteners in the manual. The wall feels more than the static reel weight. A person pulling 50 feet of hose creates leverage at the bracket, and a sudden stop adds a shock load. Drywall anchors by themselves are not an adequate substitute for specified framing.

    Coordinate the swing with garage wall storage. A 180 degree bracket needs open space on both sides. Keep it away from tall cabinet doors, and protect the clear path described in our garage aisle guide.
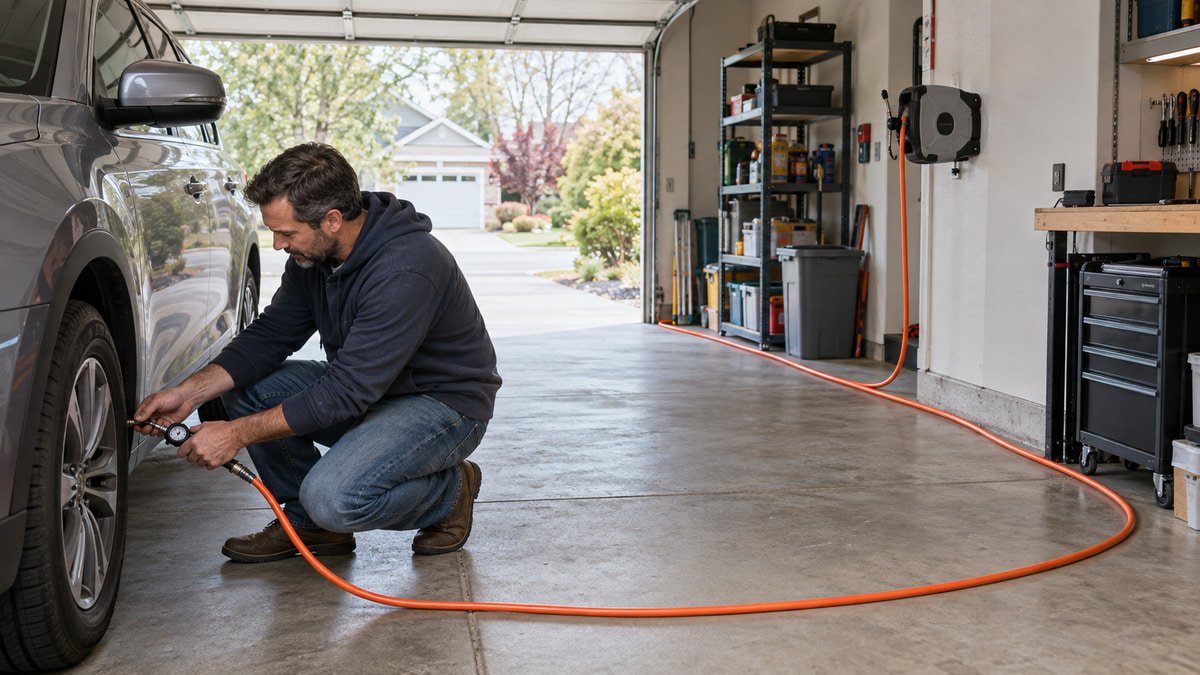
    Air hose routed safely along the side of a garage to a vehicle tire
    The best mounting point reaches the driveway without laying hose across the main path.

    A controlled rewind is a safety feature

    Automatic does not mean unattended. Hold the hose, trigger the release as the manual explains, and walk it back toward the reel. A metal coupler can strike a vehicle, chip a wall, or injure someone if it returns freely. Some reels offer controlled or slowed rewind, but even those deserve guidance at the final few feet.

    Place the stop ball so the fitting remains easy to reach without hanging at eye level. Inspect the bumper, latch, outlet rollers, and first foot of hose because they see the most movement. If the latch stops catching, isolate the air supply before inspection. Spring mechanisms store energy inside the case.

    Keep a manual shutoff valve before the reel where the product instructions allow. Closing it when the garage is idle reduces the amount of hose held under pressure and makes service simpler. Drain compressor moisture and any line trap as directed so water does not sit in the reel.
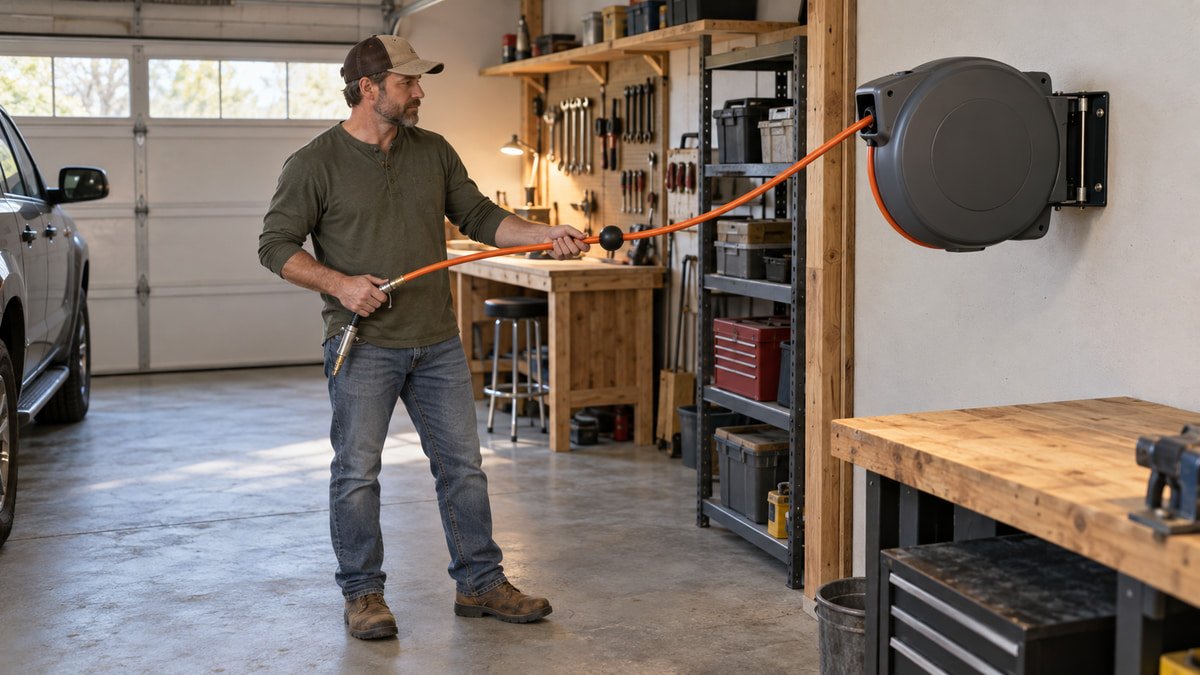
    Homeowner guiding a retractable air hose slowly back toward its reel
    A controlled hand on the hose protects the fitting, case, and anyone standing nearby.

    Match fittings, leader hose, and routine care

    Choose one quick connect profile for the garage and verify that every plug seats fully. A coupler that almost fits can leak or release. Use thread sealant only where specified, keep it away from the air passage, and support the leader so it does not pull sideways on the compressor outlet.

    Route the supply without crowding the workbench or creating a hidden rub point behind a cabinet. Our garage measuring guide is useful for checking the full bracket sweep, case depth, and hose exit against doors and trim.

    Inspect for bubbles at fittings with the approved method, listen for leaks, and replace damaged hose with the correct rated part. Compressed air should never be aimed at skin or used casually to clean clothing. OSHA’s compressed air safety material addresses workplace cleaning limits; home users should still treat the energy seriously and follow the equipment manuals.

    Useful products to compare

    These links open current Amazon search results. Check the dimensions, manual, mounting hardware, warranty, and current availability for the exact model before you order.

    Before you buy or install

    Read the current manual for the exact product you are considering. Confirm its assembled dimensions, rated capacity, mounting requirements, included hardware, working clearances, warranty, and any limits that apply to your wall, floor, electrical circuit, or garage layout.

    Frequently asked questions

    What size air hose is best for a retractable garage reel?

    A 3/8 inch inside diameter is a flexible general choice for a 50 foot reel and common garage tools. A 1/4 inch hose is lighter for nailers but loses more pressure at higher flow. Match the hose, couplers, and leader to the tool demand.

    Can a retractable air hose reel be mounted on the ceiling?

    Many models allow ceiling mounting, but the exact reel manual must approve it. Confirm structural support, fastener type, bracket movement, service access, hose direction, and clearance from garage door tracks and lights before installation.

    Does a 50 foot air hose reduce air pressure?

    Yes, especially when the hose is narrow, airflow is high, or fittings are restrictive. A 3/8 inch hose usually loses less pressure than a 1/4 inch hose at the same flow. Keep couplers full size and avoid unnecessary adapters.

    Should I leave an air hose reel pressurized?

    Follow the reel and compressor manuals. A shutoff valve before the reel makes it easy to isolate the hose when the shop is idle. Depressurize the system before repair, and never open a spring case without the specified service procedure.

    Is an enclosed or open air hose reel better?

    An enclosed case protects the spool and has fewer exposed edges near a vehicle. An open steel reel makes inspection and some repairs easier and can suit heavier service. The better format depends on dust, traffic, mounting room, and use frequency.
  • Where to Mount an Air Hose Reel in a Garage: 5 Checks

    Where to Mount an Air Hose Reel in a Garage: 5 Checks

    Affiliate disclosure: As an Amazon Associate I earn from qualifying purchases. This article may contain affiliate links, and Bay & Bench may earn a commission at no extra cost to you. Read our full Affiliate Disclosure.

    Figuring out where to mount an air hose reel starts with the jobs at the far end of the hose, not with an empty patch of wall. A tidy reel can still fail if the hose rubs a vehicle or reaches the driveway only when stretched tight.

    A good location covers the workbench and vehicle, stays clear of the garage door, connects to sound structure, and gives you a controlled return path. There is no standard mounting height or universal fastener list that works for every reel and every wall. The exact model manual and the building structure decide those details.

    Quick answer

    Mount the reel where a length of hose reaches the farthest regular job with slack, while the reel and hose remain clear of the garage door, vehicle, doors, cabinets, and walking routes. A central side wall often works well. Use only a wall, ceiling, post, or backing assembly approved for the exact reel, follow its mounting pattern, and test the pull and controlled return before settling on the location.

    Begin at the farthest job, then work backward

    List the places that need air during an ordinary month. Common stops include the main workbench, each side of the parked vehicle, the driveway, a mower near the door, and a finishing table. Ignore the one project that might happen someday. A permanent reel should make frequent work easier rather than chase every corner of the property.

    Measure the hose path, not a straight line through cabinets and cars. Walk the route that the hose would take around the front of a vehicle, past a bench leg, and through the open garage door. Add a modest amount of slack so the coupler is not carrying a constant side pull. Then compare that result with the usable tool-side hose length stated for the reel. The bumper position and the wraps that must remain on the drum may reduce usable reach. Do not count the supply-side leader hose toward the tool path.

    This is easier after the room has working zones. The garage workshop zones guide helps separate parking, storage, and project space before a reel claims part of a wall. Mark the farthest regular task on the floor with tape. If two possible reel locations both reach it, choose between them using the next checks rather than buying a longer hose immediately.

    Homeowner testing air hose reach before choosing a permanent reel location
    A temporary mockup and loose hose reveal awkward corners before the first mounting hole is drilled.

    Where to mount an air hose reel in five common garage zones

    Most home garages offer five realistic zones. Each can work, but the tradeoffs are quite different once the door and car start moving.

    Possible locationWhy it can workMain check before drillingBest fit
    Central side wallBalanced reach to bench, car, and drivewayCar door, cabinet, and walking clearanceMixed garage work
    Wall beside workbenchShort tool connection and easy inspectionReach to the far side of the carBench focused projects
    Wall near garage openingEasy access to driveway workDoor track, weather, and vehicle cornerTires and outdoor equipment
    Ceiling or overhead framingOpen wall space and broad pull directionApproved overhead support and service accessOpen center bay
    Structural post or partitionGood central position in a divided shopPost construction and swing clearanceDedicated workshop bay

    A central side wall is the most forgiving starting point in many two car garages. The hose can fan toward the bench, vehicle, and open door without hanging above the car. Still, it only works if the reel body does not crowd a car door or narrow the route into the house. Use the garage workshop layout guide to test the whole room rather than judging one clear photograph.

    Mounting beside the compressor is convenient for the inlet line, but compressor location and reel location solve different problems. The compressor needs ventilation, electrical access, drainage access, and room for service. The reel needs reach and a clean pull. A short leader hose can connect two sensible locations. Do not force them together just to save a few feet of inlet line.

    Wall mounting is usually easier to live with

    A wall mounted reel stays visible. You can inspect the bracket, swivel, hose, and stop without climbing. The user can also guide the hose back while standing on the floor. Those small conveniences matter because a retractable reel works best when it is treated like equipment, not forgotten decoration.

    A fixed wall bracket favors pulls that leave mostly in front of the guide. A swing bracket may cover a wider angle, but it creates a moving envelope of its own. Confirm that the bracket is made for the reel, then swing it through the full arc with nearby drawers, shelves, light switches, and vehicle mirrors in place. The reel should not become a heavy doorstop.

    Workbench placement affects the answer. A reel mounted behind a deep bench may be hard to reach for service, and the hose can drag across workpieces. A location just beyond the bench end often gives a cleaner line. Review where to put a workbench in a garage before committing both fixtures to the same busy wall.

    Ceiling mounting trades wall space for harder service

    A ceiling location can give an even pull across an open bay. It also keeps the reel body away from cabinets. The downside arrives during installation and maintenance. Every mounting point is overhead, the reel is harder to inspect, and the hose end may hang in the same volume used by a raised hatch, roof rack, or garage door.

    Do not assume a reel that can sit on a wall can automatically hang overhead. The manual must allow that orientation, show the correct guide position, and describe the mounting arrangement. Coxreels safety guidance says an overhead reel must not be supported solely by bolts in tension and calls for a safety chain or cable. The exact product manual may add stricter instructions, so follow the document for the reel in front of you.

    Service access belongs in the plan too. If normal inspection requires placing a ladder between a parked car and a freezer, the location will be neglected. A lower wall position may be less visually neat and much more usable. When overhead mounting is still the better fit, have uncertain framing or connections reviewed by a qualified installer.

    Keep the reel outside every garage door path

    The open door is only one position. Panels travel along curved tracks. Rollers move, hinges fold, the opener trolley runs, and the emergency release hangs down. Torsion springs and lift cables need untouched working space. Keep the reel, bracket, leader hose, and pulled hose away from all of it.

    Cycle the door while watching from several angles, following the door maker’s safety directions. Park the tallest expected vehicle and open its hatch. Check roof bars, antennas, mirrors, and the arc of each passenger door. A wall that looks empty with the garage vacant may become the tightest point once the family car comes home.

    Do not attach the reel to door tracks, opener supports, or another system just because the metal looks stout. Those parts have their own job and approved loads. A nearby structural wall section is easier to reason about. If the door hardware leaves no dependable gap, move the reel rather than improvising a shared bracket.

    Make the structure carry the pulling load

    A loaded reel does more than hang. Each pull adds leverage to the bracket, and retraction adds repeated movement. Drywall, thin paneling, and a storage cabinet skin are not a complete load path. The mounting points must transfer the reel forces into structure in the way its maker specifies.

    Use the paper template or dimensional drawing for the exact model. Confirm the hole pattern before adding a backer. A wood board spanning framing can be useful when it is designed and attached for the load, but a random piece of plywood is not proof of capacity. Wall framing, masonry condition, fastener type, edge distance, and bracket shape all affect the result. This is the point to ask a carpenter, contractor, or engineer when the wall is unusual or concealed.

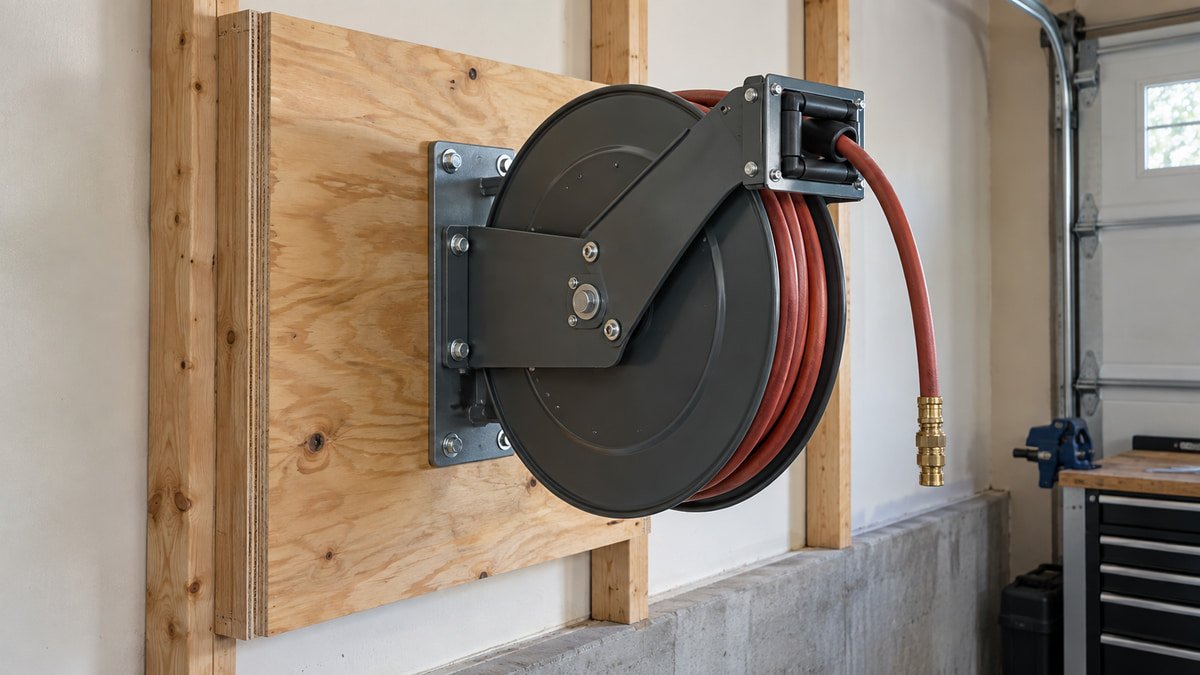
    Reelcraft’s Series RT operating instructions tell installers to use the supplied mounting template for the specific application and to secure that reel with four mounting bolts. That does not make four bolts a rule for every product. It shows why the current manual and its exact pattern come before a shopping list. The structural image here is illustrative rather than a fastener prescription.

    Air hose reel bracket mounted on substantial plywood backing across wall framing
    Illustrative backing layout only; concealed fasteners are not shown. The exact reel manual and verified wall structure must determine the complete load path.

    Treat mounting height as a working variable

    There is no magic eye level number. The reel needs to clear normal traffic, yet remain reachable for inspection and controlled hose return. The guide angle should suit the direction of pull. The stop ball should finish where the user can take the hose without jumping, stretching, or leaving a long tail at face height.

    Test the height with a cardboard outline the size of the reel. Include the bracket and the space needed to swing or remove a cover. Have the shortest regular user reach toward the hose end with both feet on the floor. Then have the tallest person walk underneath. A comfortable compromise is more useful than a tidy line with the top of the cabinets.

    Manufacturer limits still control the final choice. Some manuals state a maximum installation height or restrict a mounting orientation. Others call for the guide arm or bumper stop to be repositioned. Read those instructions before treating a mockup position as approved. Never change spring tension or open a spring housing merely to make a poor location feel better.

    Plan the inlet connection before the bracket

    The supply side is easy to forget because product photos face the hose outlet toward the camera. Behind the reel, the inlet must connect without kinking, rubbing, or forcing the swivel sideways. Leave room for the fittings, the leader hose, and whatever shutoff or filter arrangement the compressor maker calls for.

    The Reelcraft Series RT instructions call for a flexible hose at the input rather than rigid plumbing for that model. A flexible connection can prevent alignment stress, but its size, pressure rating, bend radius, and fittings must match the reel and air system. Do not copy a leader hose from a photograph. Check the reel inlet, compressor outlet, working pressure, and local piping requirements.

    A compressor that barely supplies the tool will not improve because the reel sits closer. Flow depends on compressor delivery, hose inside diameter, length, couplers, and restrictions. Our garage air compressor size guide covers that side of the system. Choose reel placement for movement and reach, then size the air path as one connected system.

    Point the guide along the real pull direction

    A hose lasts longer when it leaves the roller or guide without a sharp sideways bend. Stand at each regular task and look back at the proposed reel. If every pull crosses the edge of the guide, the location or guide orientation needs work. A pivoting bracket can help, though it must remain stable and clear throughout its travel.

    Some enclosed reels allow the guide opening or enclosure to be repositioned for wall, ceiling, or side mounting. Reelcraft explains that process for specific enclosed models in its guide opening adjustment note. Use the instructions for your series. Do not rotate a cover or guide by analogy when the manufacturer has not approved it.

    Test pulls should be slow and unpressurized until the installation is complete and inspected. Extend the hose toward the bench, both sides of the vehicle, and the driveway. Watch the guide, the bracket, and the leader line. If the reel twists, a fitting contacts the wall, or the hose scrapes a corner, stop and correct the setup before connecting the air supply.

    Protect the aisle during use and return

    A reel removes stored coils from the floor, but the hose still crosses the room while a tool is running. Pick a location that keeps the working route near a wall or along the edge of a bay when possible. Crossing the only path to the house turns a quick tire check into a trip hazard for everyone else.

    Think about the return path before the pull. You should be able to walk the hose back without squeezing between a car and shelving. Keep the fitting in hand and allow the reel to retract at a controlled pace. Do not let the end fly toward the guide. That habit protects the coupler, stop, surrounding paint, and anyone who steps into the garage.

    The garage workshop aisle clearance guide can help preserve a usable route around a project. Store blow guns and inflators near the reel without letting them dangle from the coupler. The broader garage tool storage guide offers better homes for those attachments.

    Homeowner guiding an air hose slowly back toward a wall mounted reel
    Walking the hose back under hand control keeps the end fitting from snapping across the garage.

    Use a final location check before installation

    A strong candidate passes five tests. It reaches the farthest regular task with slack. It stays outside door and vehicle movement. Its bracket can connect to verified structure exactly as the manual describes. Its inlet has a suitable route. And the user can pull, latch, inspect, and guide the hose home from a steady stance.

    Confirm the reel pressure rating, hose size, operating temperature, orientation, mounting pattern, fasteners, guide position, stop location, and service clearance from current documentation. Product families change. Instructions for a similar looking model may not apply. Keep the manual with the compressor records so the next owner knows what was installed.

    For many garages, the answer is a central side wall between the workbench and vehicle bay. Sometimes the door, framing, or inlet route makes another position better. Let the mockup and measurements overrule the clean catalog picture. A reel earns its wall space when the hose reaches easily, comes back under control, and disappears from the floor when the job is done.

    Useful products to compare

    These links open current Amazon search results. Check the dimensions, manual, mounting hardware, warranty, and current availability for the exact model before you order.

    Before you buy or install

    Read the current manual for the exact product you are considering. Confirm its assembled dimensions, rated capacity, mounting requirements, included hardware, working clearances, warranty, and any limits that apply to your wall, floor, electrical circuit, or garage layout.

    Frequently asked questions

    Is it better to mount an air hose reel on the wall or ceiling?

    A wall usually makes inspection, hose control, and service easier. A ceiling can give broad reach when wall space is scarce, but it needs an approved overhead orientation, verified structure, door and vehicle clearance, and safe service access. Follow the exact reel manual because mounting choices differ by series.

    How high should an air hose reel be mounted?

    There is no universal height. Place it where the hose end is reachable from the floor, the guide matches the normal pull, the reel clears traffic, and maintenance remains practical. Then check the exact manual for any height or orientation limit. Test a full size cardboard mockup with every regular user.

    Can I mount an air hose reel directly to drywall?

    Drywall alone is not a suitable structural load path for a hose reel. Use the mounting arrangement required by the manufacturer and suited to verified framing or masonry. A backing board can be part of a sound assembly, but its material, span, attachment, and fasteners need to carry the real pulling loads.

    Should the air hose reel be next to the compressor?

    Only if that spot also gives good reach and clearance. The compressor location is chosen for ventilation, service, drainage, power, and noise. The reel location is chosen for hose movement. A correctly sized flexible leader can connect separate locations when the reel and compressor manuals allow it.

    How do I stop a retractable air hose from whipping back?

    Keep control of the hose end and walk it toward the reel while it retracts. Do not release it from across the garage. Stop using a reel that retracts, latches, or guides the hose abnormally. Depressurize the system and follow the manufacturer service instructions rather than opening a spring housing.