Category: Workshop Systems

Tool storage, lighting, power, dust control, and integrated workshop organization.

  • Best LED Shop Lights for Garage: Five Fixtures Compared by Fit

    Best LED Shop Lights for Garage: Five Fixtures Compared by Fit

    Affiliate disclosure: As an Amazon Associate I earn from qualifying purchases. This article may contain affiliate links, and Bay & Bench may earn a commission at no extra cost to you. Read our full Affiliate Disclosure.

    The best LED shop lights for garage use are the ones that put usable light on the bench, floor, and machine surfaces without turning every polished tool into a glare source. That sounds obvious, yet lumen numbers make it easy to buy one fierce fixture and leave the corners dim. This comparison uses current manufacturer data and official retailer specifications, so treat it as a fit shortlist rather than a lab ranking. It covers five current U.S. fixtures, then shows how to judge quantity, mounting, linking, color, and controls in your own room.

    Quick answer

    For an ordinary residential garage, begin with several diffused 4-foot fixtures in two rows rather than one bright line. The Feit SHOP/4/840/MM is a practical control-focused option with 5,000 lumens, 4000K light, motion sensing, and linkability. The Braun 59506 is a simpler 5,500-lumen hanging light, while the Braun 56780 supplies 10,000 lumens where a higher ceiling or demanding task warrants it. Pick the layout first. Then confirm fixture rating, mounting method, cord route, switching, and the manufacturer’s linking limit.

    Best LED shop lights for garage use at a glance

    These are not ranked as universal winners. Each solves a different garage problem, and the published output does not describe beam distribution or glare by itself. Current specifications can change, so use the linked product page and manual as the final reference.

    FixturePublished outputColorMounting and controlsBest fit
    Feit SHOP/4/840/MM5,000 lumens, 55 W4000KPlug-in, hang or flush mount, motion sensor and remoteEveryday garage with automatic entry lighting
    Braun 595065,500 lumens, 55 WCheck current listingHanging chains, pull chain, linkableSimple budget-minded rows
    Braun 5678010,000 lumens, 100 W5000KHanging chains, pull chain, linkableTaller bay or concentrated high-output zone
    Commercial Electric 545911425,500 lumens, 60 W4000KSurface or suspended, pull chain, linkableWider fixture body and general work light
    Lithonia 1290L3,300 lumensCheck exact configuration4-foot integrated shop lightLow-output layer, small bay, or supplemental row

    Before laying out fixtures, map the active stations in the garage workshop layout guide. A light directly over an empty aisle does less work than one positioned beside a bench or machine.

    How this shortlist was built

    We looked for current fixtures with an accessible manufacturer page or official retailer listing, published lumen output, and enough installation information to compare them honestly. The shortlist deliberately includes modest and high-output choices. A 10,000-lumen fixture is not automatically better than a 3,300-lumen one. It may create a hot stripe, pull more power, or feel harsh below a low ceiling.

    We also favored ordinary linear shapes. Four-foot fixtures are easier to place in rows, beside garage door tracks, and across a bench than multi-panel screw-in lamps with intense point sources. The models below are examples of useful configurations, not a claim that their LEDs last exactly as long as a laboratory rating in every hot, cold, dusty, or frequently switched garage. Read the environmental rating and warranty terms for the exact SKU.

    Feit SHOP/4/840/MM for useful controls without an app

    Feit lists the SHOP/4/840/MM at 5,000 lumens, 4000K, 55 watts, and 80 CRI. It can hang or flush mount, and its motion sensor offers several detection and timer settings. A remote gives you manual control without reaching a pull chain. The official Feit product page also describes it as damp-location rated and linkable, with up to six fixtures in the specified arrangement.

    This is the most balanced choice here for a garage that doubles as a passage into the house. The sensor can bring up the room while your hands are full, yet 4000K light is less stark than the daylight cast many people associate with basic shop fixtures. Still, motion control can be annoying over a quiet seated task if the timer is set too short. Confirm that the sensor sees the entry path, and keep a convenient manual option.

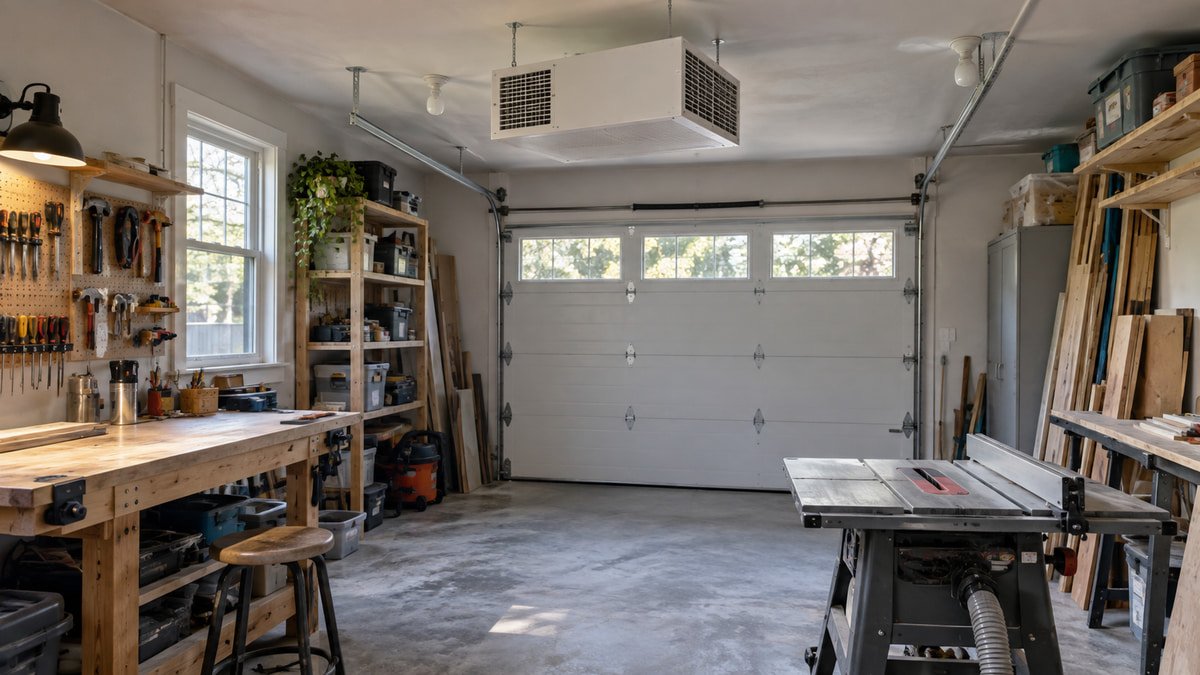
    Four-foot LED shop lights mounted over a garage workbench and tool wall
    A broad fixture over the bench reduces the hard shadows created by a single ceiling bulb.

    Braun 59506 for a straightforward hanging row

    The Braun 59506 is a light, narrow 4-foot hanging fixture. Harbor Freight publishes 5,500 lumens from 55 watts, a 5-foot power cord, included chains and S-hooks, and a limit of eight linked fixtures. The current official Braun listing states a 30,000-hour LED life and ETL certification.

    Its appeal is simplicity. Hang a pair over a bench line or create two parallel rows across a garage, then use the pull chain only where it remains reachable. The narrow body leaves more ceiling space around tracks and openers. It also concentrates the luminous surface, so position it where you cannot stare directly into the LEDs while working under a car hood. If you need a fixed wall switch or flush appearance, another fixture may be cleaner.

    Braun 56780 when 10,000 lumens genuinely help

    The Braun 56780 doubles the nominal output to 10,000 lumens at 100 watts. Its official product page lists 5000K light, a wider 7.43-inch body, included 24-inch chains, and a maximum link of four fixtures. That combination fits a tall bay, a detailed mechanical zone, or a room where one row must cover a broad working area.

    Do not buy four merely because they link. At a low residential ceiling, 10,000 lumens concentrated over a polished workbench can feel brutal. Start with a layout calculation, separate general and task lighting when possible, and use the table saw clearance guide to keep suspended fixtures and cords away from the full material path. The heavier fixture also deserves careful mounting into the structure named in its manual.

    Linkable hanging LED fixtures arranged in two rows above an open garage bay
    Two modest rows usually distribute light more evenly than a high-output strip down the centerline.

    Commercial Electric 54591142 for a broader 4000K source

    The Commercial Electric 54591142 is listed at 5,500 lumens, 60 watts, and 4000K. Its wider 10-inch housing can soften the visual impression compared with a bare narrow strip. The official retailer page describes surface and suspended mounting, included chains and cord, damp-location suitability, and linkability up to the stated limit.

    This model makes sense above a fixed bench where a broader luminous surface matters more than a minimal body. Check the actual mounting kit before choosing its exact ceiling position. A 10-inch housing can conflict with a garage door support or storage rack where a slim strip would pass. If the fixture sits above open drawers or the edge of a wall cabinet, stand at the work position and look up before drilling. That quick sightline test catches a surprising amount of glare.

    Lithonia 1290L for a smaller or layered lighting plan

    Lithonia lists the 4-foot 1290L at 3,300 lumens. The manufacturer page is sparse, so the exact SKU documentation should settle color, input, cord, mounting parts, and environmental limits before purchase. Its lower output can be useful in a one-car bay, over a secondary bench, or as one of several closely spaced fixtures.

    A lower-output light is often easier to live with when the ceiling is low and the walls are pale. More fixtures also let you reduce shadows at the sides of a vehicle or machine. The tradeoff is more mounting points and a more complicated power route. If you are replacing an existing fluorescent body, do not assume a shop light can reuse the old wiring. A plug-in fixture and a hardwired fixture are different installations.
    Plan total light, then split it across the room

    Multiply room length by width to get square feet, then use a starting target appropriate to the work. The number is only a planning estimate because wall color, fixture distribution, mounting height, and shadows change what reaches the surface. A 22 by 22 foot garage is 484 square feet. Four 5,000-lumen fixtures provide 20,000 initial lumens, or about 41 lumens per square foot before losses. That may feel comfortable for general work in one room and weak in another.

    Place the total in two rows and add task lighting at the bench rather than chasing one huge center fixture. Run the positions through the garage workshop aisle clearance guide; you should be able to move a tall project, ladder, or sheet good without striking a low hanging chain. Paint and clean surfaces matter too. A dusty dark ceiling swallows more light than a clean pale one.

    Check linking, cords, and switching as one system

    A published linking limit is not a suggestion to fill every socket. It is the maximum arrangement for that exact model under its instructions. Never mix a manufacturer’s linking cords with unrelated fixtures. Add the input watts of the planned run, follow the manual, and keep cords away from door hardware, sharp edges, hot surfaces, vehicle roofs, and any place they can be snagged.

    Decide what should turn on together. General rows may share a wall control, while a bench light benefits from its own switch. Motion sensing works well for entry light but may switch off during careful stationary work. Smart controls add scheduling, yet an app should not be the only practical way to light a dark garage. Permanent electrical work belongs with a qualified electrician and the requirements that apply at the property.

    Close view of a diffused LED shop light above detailed mechanical work
    A frosted lens and thoughtful angle can be easier on the eyes during close work.

    Look beyond lumens before ordering

    Confirm color temperature, CRI, damp or dry location rating, operating temperature, dimming compatibility, warranty, and whether the LEDs or driver can be serviced. Look at the fixture dimensions rather than the familiar “4-foot” label. Width and hanging depth determine whether it clears an open garage door, ceiling rack, or tall cabinet. If the manufacturer supplies photometric files, they are more useful than a marketing photo for a serious layout.

    Then check the room at night. Tape the proposed fixture centerlines to the ceiling and stand at the bench, vehicle hood, and floor work area. Note where your head and hands cast shadows. A small movable work light can reveal whether the fixed layout needs another row. Lighting should support the garage storage system, not disappear behind open cabinet doors or illuminate the tops of bins.

    The sensible pick for each garage

    Choose the Feit motion model if automatic entry lighting and 4000K color suit the room. Choose the Braun 59506 when you want a simple, light, linkable hanging row. The Braun 56780 earns its place where mounting height and demanding work can use 10,000 lumens without glare. Commercial Electric’s broader body suits a fixed bench, while the Lithonia 1290L makes more sense as a modest layer than a brute-force centerpiece.

    Whichever you choose, order one fixture first when returns are practical. Temporarily hang it at the intended height, inspect shadows and glare, then copy the successful spacing. That small test tells you more than a lumen race and avoids covering the ceiling with a layout you dislike.

    Useful products to compare

    These links open current Amazon search results. Check the dimensions, manual, mounting hardware, warranty, and current availability for the exact model before you order.

    Before you buy or install

    Read the current manual for the exact product you are considering. Confirm its assembled dimensions, rated capacity, mounting requirements, included hardware, working clearances, warranty, and any limits that apply to your wall, floor, electrical circuit, or garage layout.

    Frequently asked questions

    How many LED shop lights does a two-car garage need?

    There is no fixed count. Multiply the room area by a reasonable starting lumen target for your work, then divide that total across several fixtures. Check ceiling height, wall color, beam spread, shadows, and task lighting. A mockup with one temporary fixture is more reliable than choosing by floor area alone.

    Is 4000K or 5000K better for a garage?

    4000K usually feels neutral and comfortable for a mixed-use garage. 5000K looks cooler and can make detail feel crisp, but some people find it stark at night. Color temperature does not measure brightness or color accuracy. Compare both if the room is also a laundry, entry, or hobby space.

    Can I link different brands of LED shop lights?

    Do not assume so. Use only the linking cord, connector, and arrangement approved for the exact fixture. Stay within the manufacturer’s unit and electrical limits. A matching plug shape does not prove electrical or mechanical compatibility.

    Should garage shop lights hang or mount flush?

    Hanging lights are easier to lower over a bench and can avoid an uneven ceiling. Flush fixtures preserve headroom and reduce movement near doors and stored items. Check the exact fixture instructions, structure, cord path, open garage door envelope, and every overhead storage location.

  • 4000K vs 5000K garage lighting: choose by comfort and task

    4000K vs 5000K garage lighting: choose by comfort and task

    Affiliate disclosure: As an Amazon Associate I earn from qualifying purchases. This article may contain affiliate links, and Bay & Bench may earn a commission at no extra cost to you. Read our full Affiliate Disclosure.

    The choice between 4000K vs 5000K garage lighting is mostly about the character of the white light, not how much light you get. A 5000K fixture is not automatically brighter than a 4000K fixture. Lumens, distribution, glare control, and surface reflectance decide visibility. Color fidelity decides whether wood, paint, wires, and skin look believable.

    For a garage shared with vehicles and household storage, 4000K is the safer neutral default. A well-made 5000K source can feel crisp at a detail bench or in a dedicated workshop, but it can also feel stark late at night. The best decision comes from comparing actual fixtures with similar output and color quality in your room.

    Quick answer

    Choose 4000K for a balanced, neutral garage that serves parking, storage, repairs, and general projects. Choose 5000K if you genuinely prefer cooler white light and the garage functions mainly as a workshop. Neither CCT guarantees better visibility. Match lumens, beam distribution, CRI or other color-quality data, flicker performance, and diffusion before comparing the Kelvin value. When uncertain, install one 4000K sample and one 5000K sample temporarily and view familiar materials at night.

    4000K vs 5000K garage lighting at a glance

    Question4000K5000K
    Visual characterNeutral whiteCooler, daylight-like white
    Shared garage comfortUsually the easier defaultCan feel stark to some people
    Detail-work impressionClear without a strongly cool castMay feel crisp when the fixture is well diffused
    BrightnessDepends on lumens and distributionDepends on lumens and distribution
    Color fidelityDepends on the product, not CCT aloneDepends on the product, not CCT alone
    Best buying methodCompare samples with similar output, optics, and color quality

    If the room still lacks enough general output, calculate that separately with the garage lighting calculator. Changing from 4000K to 5000K does not repair a poor lumen budget.

    CCT describes appearance, not brightness

    Correlated color temperature, or CCT, is expressed in kelvins. Lower values generally look warmer; higher values look cooler. The U.S. Department of Energy’s color and spectrum guidance explains that CCT is only one part of how a light source appears.

    Two fixtures can both claim 5000K while one produces 4,000 lumens and another produces 8,000. Their optics may send that output in completely different directions. A brighter-looking wall may come from wider distribution or lighter paint, not the cooler color.

    Shop by lumens and photometrics for quantity and placement. Shop by CCT for the white-light character. Then evaluate color quality, glare, dimming, flicker, temperature range, and warranty. Keeping those questions separate prevents the Kelvin number from carrying jobs it cannot do.

    Why 4000K works in a mixed-use garage

    A 4000K garage usually reads as clean and neutral without feeling aggressively blue. That makes it comfortable for unloading a car, finding storage, maintaining bicycles, repairing household items, and working at a bench. It also transitions more gently to typical indoor lighting when the garage connects directly to the house.

    Wood tones and warm paint colors often feel more natural under a good 4000K source than under a strongly cool one. That is a preference, not a universal performance fact. A low-quality 4000K fixture can still render colors poorly or show an unpleasant green tint.

    Use 4000K as the default when several household members use the garage or when the lights stay on for long evening sessions. Pair it with broad diffusion and local task lighting. Comfort comes from the whole system, not the nominal CCT alone.

    Wood and painted metal samples under neutral 4000K garage lighting
    A good 4000K fixture often feels balanced in a garage shared by tools, storage, and household tasks.

    When 5000K makes sense at a workbench

    Some people prefer the cooler appearance of 5000K for mechanical work, cleaning, sorting hardware, or detailed assembly. It can give the room a crisp visual character, especially when surfaces are pale and the fixture has good diffusion. That preference is legitimate if you have seen the light in person.

    Cooler light can also feel clinical or tiring at night, particularly when bare diodes sit in the field of view. Do not assume a warehouse-like appearance creates better detail. Shadows, glare, and poor color rendering can hide information even when the room feels intensely white.

    A dedicated 5000K task fixture over one bench is a reasonable compromise when the rest of the garage is 4000K. Keep the zones deliberate and view a workpiece at their boundary before committing. Random alternating fixtures often create a patchy ceiling and inconsistent surface color.

    Detailed workbench under crisp 5000K garage task lighting
    5000K can feel crisp at a detail bench, but distribution and color quality still determine what the hands can see.

    Compare color quality after matching CCT

    Color rendering index, or CRI, gives familiar information about color fidelity, but it is not the complete story. DOE’s LED basics notes that lighting performance includes several color and spectral qualities. Newer evaluation methods such as IES TM-30 can add detail when manufacturers publish them.

    For ordinary parking and storage, a credible interior fixture with common color quality may be adequate. When you match stains, paint panels, wire colors, or finishes, look for stronger documentation and sample the light on the real material. An advertised high CRI from an unknown model is less reassuring than a traceable specification from a manufacturer that identifies the exact fixture.

    Also check consistency. Six lights should not vary visibly from greenish to pinkish. Color stability between fixtures and over time can matter more than choosing 4000K or 5000K on paper.

    Do not mistake a cooler source for clearer vision

    Visibility depends on contrast, size, glare, adaptation, age, and where the light lands. A cooler source may feel subjectively brighter at the same nominal output, but that sensation does not guarantee better inspection. A dark pencil line under a body shadow remains dark.

    Match two sample fixtures as closely as possible for lumens, beam pattern, diffuser, mounting height, and color quality. Switch between them after your eyes adapt. Read a small label, inspect a scratch, sort colored wire, and look at the same wood offcut. Avoid judging from a phone camera, which changes white balance automatically.

    Give each sample ten or fifteen minutes at night. The first cool impression can seem energetic, while long-session comfort tells a different story. Ask other regular users, since a garage shared by a household should not be optimized around one quick glance.

    Glare can dominate the CCT decision

    An exposed high-output LED source can be uncomfortable at either 4000K or 5000K. Look from the parked driver’s seat, the house entry, the bench, and a seated repair position. If bright points remain in the normal line of sight, choose a better diffuser, reposition the fixture, or reduce contrast.

    Cooler light may make harsh glare feel more obvious to some users, but fixture design is the larger issue. Deep optics, broad lenses, indirect reflection, and multiple lower-output sources can produce a calmer room than one intense lamp.

    Glossy floors and polished car paint reflect source images. Check them before buying the remaining fixtures. A sample that looks fine against bare concrete may become distracting after an epoxy floor or white worktop is installed.

    Keep the ceiling consistent and zone the exceptions

    A consistent CCT across the ambient ceiling makes the garage feel coherent. If 4000K handles general use, keep that base and add 5000K only where a cooler task source has a clear purpose. Put it on a separate switch. The reverse approach can work in a dedicated cool-white workshop with a warmer inspection area.

    Do not alternate 4000K and 5000K fixtures in the same row. The floor may show visible bands, and workpieces can change appearance as they move. Mixing different manufacturers at the same nominal CCT can also create mismatch because CCT tolerances and spectra vary.

    Plan fixture positions after choosing the bench and machine zones in the garage workshop layout guide. A well-zoned light should support the task without spilling an abrupt color boundary across the main surface.

    Read credible labels and documentation

    ENERGY STAR’s downlight criteria recognize nominal CCT values including 4000K and 5000K and pair color requirements with other performance criteria. Your garage fixture may be another product type, but the useful lesson is that CCT belongs inside a broader specification.

    Look for exact model number, delivered lumens, CCT tolerance, CRI or richer color data, efficacy, operating temperature, location rating, dimming compatibility, expected lifetime, and warranty. Confirm safety listing and installation conditions. Marketing phrases such as daylight, crystal white, or ultra bright are not substitutes for numbers.

    Run a two-fixture sample test

    1. Choose one 4000K and one 5000K fixture with similar lumens, optics, color quality, and size.
    2. Mount or support them safely at the intended height according to instructions.
    3. Test at night with vehicles, shelves, and the garage door in normal positions.
    4. View the bench, floor, storage labels, car paint, wood, wires, and skin.
    5. Check standing, seated, and driver sight lines for glare.
    6. Use each sample for a normal 20-minute task.
    7. Ask every regular user which feels easier, not merely brighter.

    Do not energize an improvised hardwired setup. Use approved temporary arrangements or have a qualified electrician handle wiring. Once you choose, buy the same model and specification together where practical so the ceiling has consistent color.

    Two sample LED fixtures being compared in a finished garage
    Sample one fixture of each CCT at night before ordering a ceiling full of lights.

    Choose from the room you have

    Pick 4000K when the garage is a household transition space, storage room, parking bay, and occasional shop. Pick 5000K when you have sampled it, prefer the cooler appearance, and spend most garage time on focused work. If opinions are split, a 4000K ambient system with separately controlled task lighting is the least risky compromise.

    Check the garage workshop aisle guide while placing fixtures so walking routes stay visible without direct glare. For a compact room, the one-car workshop layout helps account for the open garage door and vehicle shadows.

    Finally, remember the hierarchy: enough lumens, useful distribution, controlled glare, good color quality, then preferred CCT. Get the first four wrong and neither Kelvin choice will feel right. Get them right and both can produce an excellent garage.

    Useful products to compare

    These links open current Amazon search results. Check the dimensions, manual, mounting hardware, warranty, and current availability for the exact model before you order.

    Before you buy or install

    Read the current manual for the exact product you are considering. Confirm its assembled dimensions, rated capacity, mounting requirements, included hardware, working clearances, warranty, and any limits that apply to your wall, floor, electrical circuit, or garage layout.

    Frequently asked questions

    Is 5000K brighter than 4000K in a garage?

    No. Brightness depends on lumen output, distribution, room surfaces, and where the light lands. 5000K looks cooler and may seem crisper, but a 4000K fixture can produce more usable light.

    Is 4000K warm white?

    4000K is generally described as neutral white rather than traditional warm white. It looks cooler than common 2700K or 3000K household lamps but warmer than 5000K.

    Can I mix 4000K and 5000K lights in one garage?

    Yes, but use deliberate zones and separate controls. Keep the ambient ceiling consistent, then add a different CCT only where a task benefits and the color boundary does not cross the work surface.

    What is the best color temperature for a woodworking garage?

    A good 4000K fixture is a comfortable general choice for wood and long sessions. More important, choose strong color fidelity and low glare, then inspect stains and finishes under the light used for the final judgment.

  • Garage Tool Storage Guide: Put Every Tool Near Its Work

    Garage Tool Storage Guide: Put Every Tool Near Its Work

    Affiliate disclosure: As an Amazon Associate I earn from qualifying purchases. This article may contain affiliate links, and Bay & Bench may earn a commission at no extra cost to you. Read our full Affiliate Disclosure.

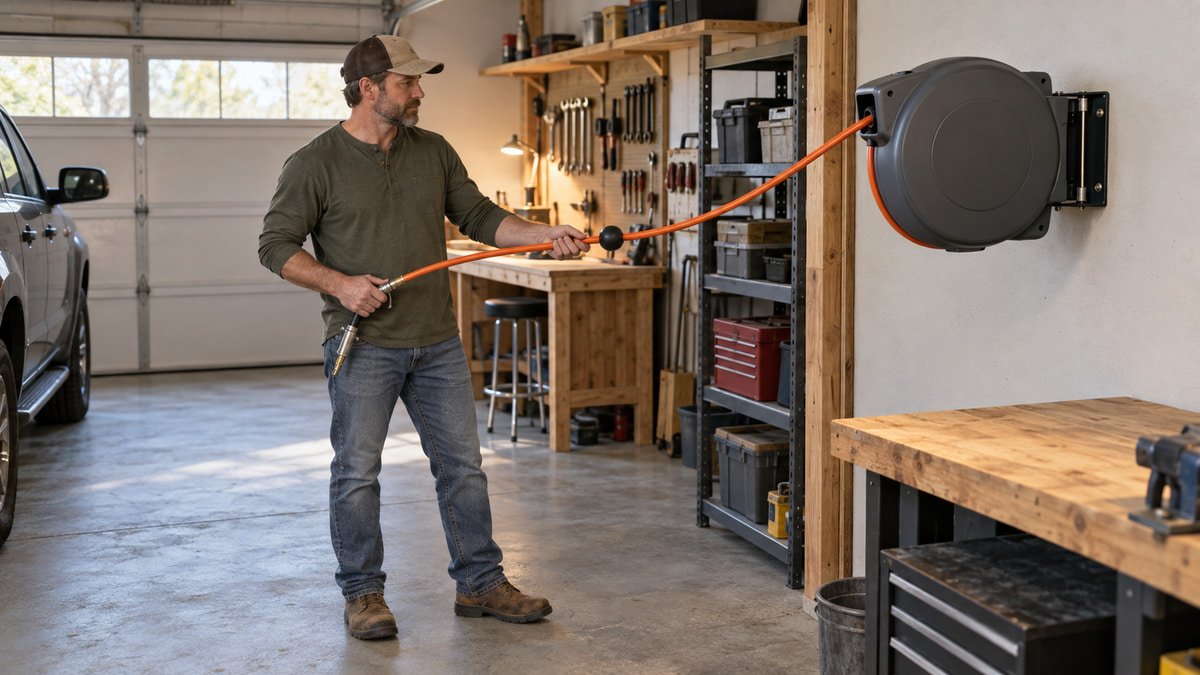
    A garage tool storage guide should begin with the work, not a wall full of matching bins. Put the tools for tire service near the parking bay. Keep measuring and marking tools at the bench. Give portable kits a clear landing place when they come home. This approach may look less showroom-perfect, but it saves steps and makes missing tools obvious. The plan below sorts hand tools, power tools, hardware, batteries, long tools, and mobile cases by frequency, weight, and the route each one takes during a normal project.

    Quick answer

    Sort tools into daily, monthly, and occasional use. Store daily hand tools between knee and shoulder height near their work zone. Put dense tools low in drawers, portable kits on shelves that fit their cases, and long tools on rated wall hardware away from doors and vehicles. Measure the tallest and widest tool before buying drawers. Keep batteries dry and clean, follow each battery manual, and do not treat a charging cabinet as fire protection unless the manufacturer explicitly designed it for that purpose.

    Garage tool storage guide by tool type

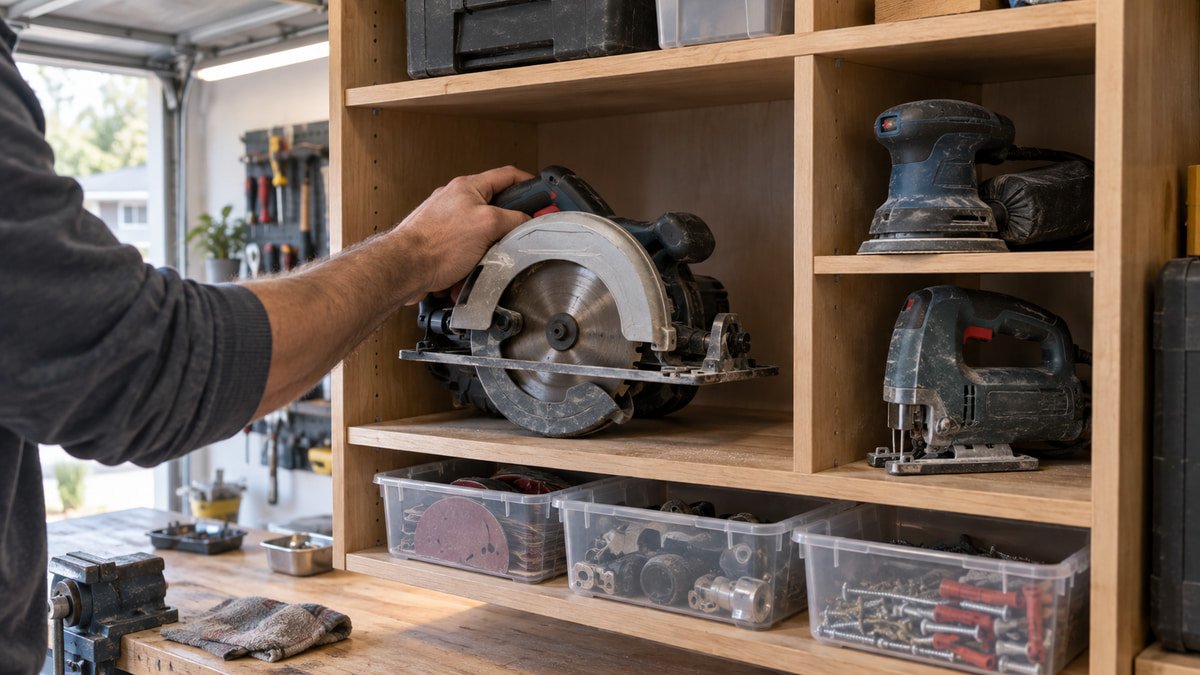
    No single container handles a whole workshop well. Drawers are excellent for shallow, dense tools. Open wall storage keeps familiar hand tools visible. Cases protect tools that leave the garage. Cabinets keep dust off items used less often. Start with this division, then adjust for children, moisture, theft concerns, and the jobs you repeat.

    Tool groupBest first homePlacementMain check
    Sockets, wrenches, pliersShallow labeled drawersBeside mechanical workOpen drawer clears car and stool
    Measuring and marking toolsProtected shallow drawer or cabinetAt the clean benchNo abrasive dust or loose pile
    Cordless toolsDrawer, shelf, or fitted caseNear charging areaTool fits with battery removed if required
    Fasteners and small partsSmall bins or drawer organizersEye level near assemblyLabels visible and bins cannot spill
    Long toolsRated hooks or floor rackNear outdoor doorHead, vehicle, and door clearance
    Jobsite casesMeasured shelf or mobile stackNear exit routeHandles and latches remain reachable

    The broader garage storage systems guide helps place these tool homes beside household and seasonal storage.

    Map the project route before buying organizers

    Choose three recurring jobs. For example: bicycle service, household repair, and vehicle maintenance. Walk each job from setup to cleanup and note where tools accumulate. If sockets always land on a rolling cart next to the car, a chest across the garage creates needless travel. If drills leave in a portable case, unpacking them onto a decorative wall wastes time.

    Draw a simple floor plan using the method in how to plan garage storage. Mark the bench, parking envelope, doors, outlets, and the place where a mobile cart rests. Tool storage belongs on that map. Leave working surfaces deliberately empty. A bench covered with permanent organizers has become a shelf, and every project will begin by moving someone else’s project.

    Use retrieval frequency, not matching colors

    Daily tools deserve the easiest reach. Monthly tools can occupy lower drawers or the second row of wall storage. Once-a-year pullers, specialty sockets, and spare jigs can live in labeled cases higher or farther away. Frequency changes, so write labels that can move rather than printing a permanent museum map on day one.

    There is a useful exception. Hazardous, sharp, or expensive tools may need locked storage even when used often. Security and child access outrank convenience. Put the key or combination where authorized adults can use it without leaving the cabinet unlocked. Store personal protective equipment near the task that needs it, but keep clean respiratory and eye protection away from dust and overspray.

    Choose drawers from tool dimensions

    Count drawers only after measuring the tools. A chest with many shallow drawers is excellent for sockets and pliers but hopeless for a tall cordless saw. Lay each tool group on the floor in a single layer and measure the required width, depth, and height. Add room for dividers and your fingers. Then compare those numbers with the manufacturer’s internal drawer dimensions, not the cabinet’s outside width.

    Dense tools should sit low. Divide them into modest groups so one drawer does not consume its full rating before the rest of the cabinet is loaded. A nonslip liner reduces movement but does not raise capacity. If you need help choosing the furniture around those drawers, compare the storage and work surface in the garage workbench buying guide.

    Shallow tool drawers organized by task with sockets, pliers, and measuring tools
    Shallow drawers let you see small tools without piling them into a deep box.

    Build wall storage around structure and published capacity

    Wall systems keep daily tools visible, but the mounting surface and fasteners carry the load. Milwaukee lists its PACKOUT Compact Wall Plate at 50 pounds in a shop, while the Large Wall Plate is listed at 150 pounds. The manufacturer page and the exact installation manual matter because plate size, substrate, fasteners, and mounting context change the rating.

    Do not transfer a capacity from one plate or hook to another. Include the organizer, case, tool, and attachments in the load. Place heavy cases low enough to lift with control, and keep protruding hooks outside walking and vehicle paths. The existing garage wall storage systems guide compares pegboard, slatwall, and track hardware once you know what the wall needs to hold.

    Give power tools a clean landing place

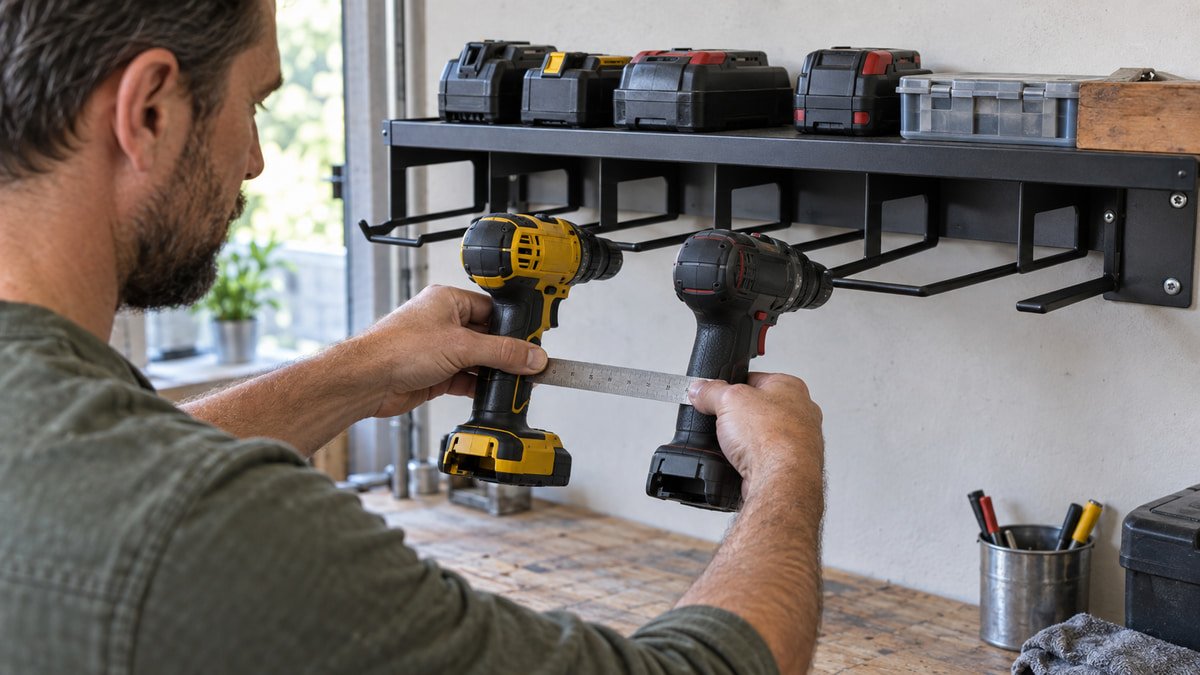
    A cordless drill can stand on a shelf, hang from a tool-specific holder, sit in a drawer, or stay in its transport case. The right choice depends on dust, frequency, and whether the tool leaves the garage. Remove loose bits before hanging a tool overhead. Check that the holder supports the tool body without pressing a trigger or damaging a battery interface.

    Deep modular drawers can keep kits together, but published capacities vary widely. DEWALT lists the TOUGHSYSTEM 2.0 DXL Deep Drawer Unit at 27.5 pounds per drawer and 55 pounds total. See the official product page for the current configuration. Those numbers are a reminder to weigh the actual kit rather than assuming every large plastic drawer can hold a dense pile of metal tools.

    Treat batteries and charging as their own zone

    Keep batteries and chargers dry, clean, and easy to inspect. Follow the temperature, ventilation, and storage instructions for each battery platform. Do not bury an operating charger in a closed drawer unless the manufacturer specifically approves that arrangement. Keep the charging area away from grinding sparks, oily rags, flammable finishes, and a bench where metal offcuts can bridge contacts.

    Mounting a power strip inside a cabinet does not make the cabinet a listed charging enclosure or fireproof box. Use intact chargers and cords, avoid improvised adapters, and give heat somewhere to go. If an electrical outlet is damaged, loose, or badly placed, solve that problem rather than building an extension-cord maze around it.

    Cordless drills and batteries stored in a ventilated garage cabinet beside a workbench
    Battery storage should be dry, easy to inspect, and separated from grinding dust and hot work.

    Separate small parts by decision, not by appearance

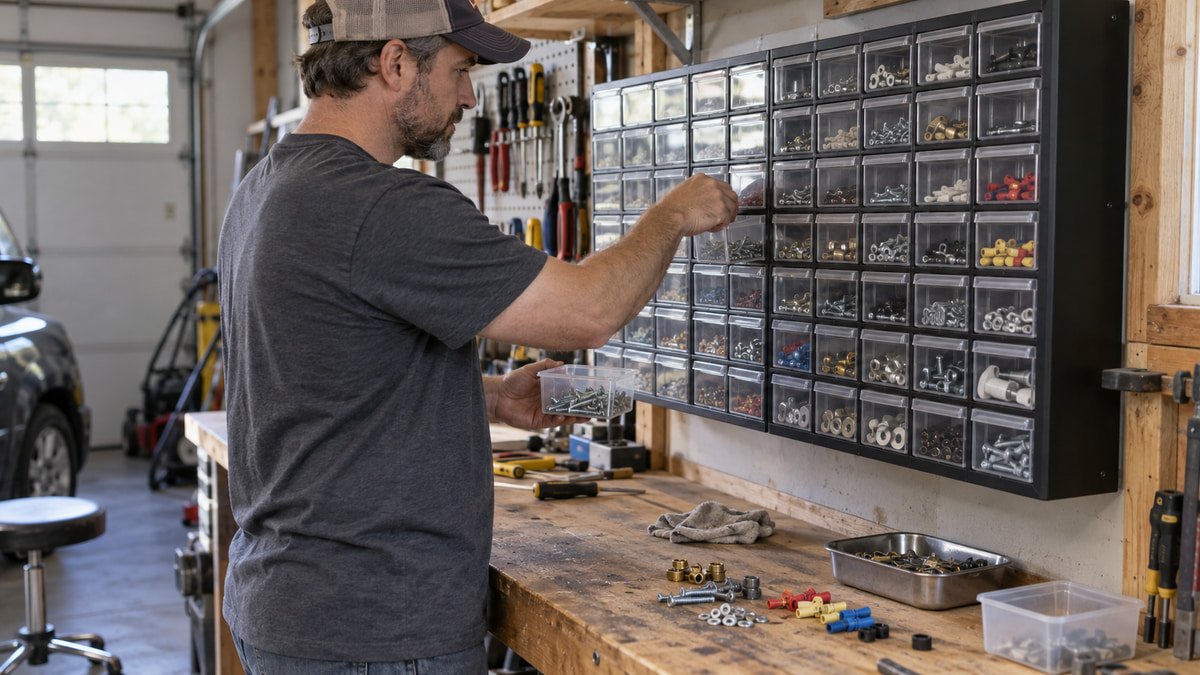
    Fasteners become useful when the label answers the question you ask during a repair. Sort common screws by diameter and length, electrical terminals by type and wire range, and anchors by the wall material they are approved for. Mixing every shiny metal fastener into one bin saves space and wastes the next Saturday afternoon.

    Use lidded organizers for parts that travel. Open bins work for high-use items at a fixed assembly station, provided they cannot be knocked into a car path. Keep an intake bin for loose hardware discovered during cleanup. Empty it weekly. This prevents every drawer from developing a mysterious layer of one-off washers and unidentified clips.

    Store long tools where their movement makes sense

    Rakes, shovels, levels, clamps, and extension poles need more than a hook that carries their static weight. Measure the full sweep as you lift each item on and off. A secure rake can still scratch a vehicle when its handle rotates. Put outdoor tools near the exterior door and shop clamps near the bench, even if that breaks a symmetrical wall display.

    Use two support points for long or awkward items when one hook lets them twist. Keep sharp ends covered or turned away from the aisle. Floor racks are often better for tools used by someone who cannot comfortably lift overhead. Recheck fasteners after the first loaded week and at regular cleanups.

    Make portable cases part of the garage system

    A case needs a home that accepts it without removing the handle, opening a latch, or unloading the stack. Measure the case at its widest projection. Leave enough shelf height to grasp it safely, and put the most frequently carried module between knee and chest height. Heavy boxes belong low.

    Modular wall plates and rolling stacks are handy, but confirm every connection in the exact orientation. Milwaukee’s PACKOUT mounting plate manual, for instance, publishes different limits for plate models and mounting contexts. A case that locks to a floor plate may not be approved on a wall in the same arrangement. Follow the manual instead of reasoning from the shape of the cleats.

    Portable tool cases staged beneath a wall storage panel in a garage workshop
    Portable cases work best when the shelf, cart, and project route all use the same modules.

    Reset one zone at a time

    Do not empty the whole garage unless you can finish the job. Start with one bench drawer or one four-foot wall section. Remove duplicates and broken tools, group what remains by task, then mock up the new home with cartons and tape. Work from the zone for a week before buying inserts for every drawer.

    Take a photo of the successful arrangement. Label only after it proves useful. At the monthly reset, return wandering tools, inspect wall hardware, clean drawer slides, and update the odd-items bin. A tool system earns its floor and wall space by making work easier. If an organizer creates more steps, move it.

    Useful products to compare

    These links open current Amazon search results. Check the dimensions, manual, mounting hardware, warranty, and current availability for the exact model before you order.

    Before you buy or install

    Read the current manual for the exact product you are considering. Confirm its assembled dimensions, rated capacity, mounting requirements, included hardware, working clearances, warranty, and any limits that apply to your wall, floor, electrical circuit, or garage layout.

    Frequently asked questions

    What tools should stay visible on a garage wall?

    Keep frequently used hand tools visible when quick access outweighs dust and security concerns. Measuring tools, high-cost tools, and items sensitive to grit often belong in a drawer or cabinet. Heavy tools should not hang high merely to complete a wall display.

    Are deep drawers better for power tools?

    They are useful when the tool, battery, and accessories fit without stacking into a loose pile. Measure internal height and depth, then compare the full loaded weight with the drawer rating. Shallow drawers are usually better for sockets and pliers because every item remains visible.

    Can I charge tool batteries inside a cabinet?

    Only if the charger and cabinet arrangement follow the manufacturers’ instructions and the space provides the required conditions. Do not assume a metal cabinet is a fire-rated charging enclosure. Keep chargers clean, dry, ventilated, and away from sparks, flammables, and loose conductive debris.

    How often should I reorganize garage tools?

    Use a quick monthly reset and a deeper review when projects or tool ownership change. If a tool repeatedly lands somewhere other than its assigned home, the home is probably wrong. Move the storage closer to the work rather than relying on perfect habits.

  • Lumber Storage in Small Garage Spaces: Keep Stock Straight and Reachable

    Lumber Storage in Small Garage Spaces: Keep Stock Straight and Reachable

    Affiliate disclosure: As an Amazon Associate I earn from qualifying purchases. This article may contain affiliate links, and Bay & Bench may earn a commission at no extra cost to you. Read our full Affiliate Disclosure.

    Lumber storage in small garage spaces becomes difficult for one simple reason: wood arrives in several shapes that do not want to share furniture. Eight-foot boards need support along their length. Full sheets need a broad, stable base. Short offcuts multiply until their bin becomes archaeology. Trying to solve all three with one deep shelf usually wastes wall area and makes the useful piece hard to reach. A better system separates the stock by shape, keeps weight close to sound structure, and reserves a clear route from the garage door to the bench or saw.

    Quick answer

    Store long, dry boards horizontally on a properly rated rack with enough support points to limit sag. Keep full sheet goods low, restrained, and either nearly vertical on a stable cart or flat on a base designed for the load. Use a low divided corral for short pieces. Raise wood off a damp slab, keep rain and direct sun away, and check the rack maker’s capacity and attachment instructions. Leave your longest stock path clear before assigning the wall.

    Lumber storage in small garage spaces starts with an inventory

    Measure the stock you keep, not the idealized stock you imagine buying. Sort it into long boards, short boards, narrow strips, sheet goods, turning blanks, and genuinely useful offcuts. Record the longest length, widest sheet, thickest bundle, and approximate quantity in each group. Then estimate weight from a reliable supplier or material reference. Wet construction lumber can be considerably heavier than the same boards after drying, so do not size a rack from a light sample.

    Measure the room with the same discipline. Our garage measurement guide covers wall width, curb ledges, door tracks, opener hardware, outlets, panels, windows, and vehicle movement. Add the path a full sheet or long board follows from the driveway. A rack can fit perfectly yet fail because a board cannot turn between the garage door and the wall.

    Inventory also reveals what to stop storing. Set a maximum offcut length below which pieces go to a project bin, recycling stream, or disposal route. Small garages are not lumberyards. Keeping twenty nearly identical scraps costs more useful access than it saves in material.

    Match each stock shape to a storage method

    Stock typeCompact storage methodSupport priorityAccess tradeoff
    Long boards and trimHorizontal wall-mounted cantilever rackSeveral level arms under the lengthExcellent visibility, but consumes a long wall
    Short boardsLow vertical corral with front restraintBroad floor base and divided baysFast sorting, limited to pieces that remain stable
    Full plywood or MDFLow sheet cart or rated vertical panel rackWide base, side restraint, suitable castersEasy selection, but heavy to move when full
    Thin strips and moldingNarrow horizontal cubbies or tubes designed for storageContinuous support for flexible piecesCompact, but labels and length sorting help
    Small offcutsShallow open bins near the benchKeep weight low and edges containedConvenient until the bin becomes too deep

    Use this table to divide the wall into smaller jobs. A horizontal rack can sit above a low sheet cart if the loaded projections, lift path, and total wall load all work. A short-stock corral can tuck beneath the lowest rack arm. The pieces may share a wall, but they should not depend on the same restraint.

    The comparison in 18 versus 24 inch garage shelves is helpful for nearby tools and finishes. Lumber itself rarely benefits from a deep general shelf unless the stock is short enough to sit fully supported.

    Keep long boards horizontal and supported

    Horizontal storage is the calmer choice for long stock in a tight room. It puts board ends in view, lets you remove one piece without lifting an entire vertical bundle, and reduces the risk of a tall board sliding into the aisle. The rack arms must share the load and line up so the stock does not twist around a high support.

    Choose support spacing from the rack instructions, stock stiffness, and the quality you need to preserve. Thin trim and flexible molding need closer or nearly continuous support. Thick framing boards tolerate wider spacing, but a visibly sagging board is asking for another arm. Keep the heaviest, thickest stock on lower levels. Put light molding higher, where it is less awkward to lift.

    Do not let ends project into a doorway or the normal head path. If the available wall is shorter than the boards, protect the ends and reconsider the room. The garage wall storage systems guide explains the difference between accessory panels and structural storage. A pegboard hook is not a lumber rack simply because a board rests on it.

    Long boards supported horizontally on three evenly spaced steel cantilever rack uprights
    Several support points reduce sag and make load sharing easier to inspect than one heroic bracket at each end.

    Treat rack capacity as a complete system

    A capacity statement has meaning only with its span, arm arrangement, fasteners, substrate, and loading instructions. Check whether the manufacturer rates each arm, each level, or the complete rack. Confirm whether the number assumes evenly distributed weight. Concentrating a stack over one arm can overload that point even when the arithmetic for the whole rack looks comfortable.

    Attach the uprights exactly as instructed. Find sound framing or use the specified masonry connection. Account for drywall thickness and any wall irregularity that prevents the upright from sitting flat. Do not hide a questionable connection behind more boards. If the wall structure is uncertain, use a freestanding rack designed for lumber and have the site assessed before adding weight.

    OSHA’s workplace rule on secure material storage is not a residential building code, but its plain principle is worth borrowing: stacked material should remain stable against sliding or collapse. In a home shop, that means front stops where needed, no climbing on racks, and no board pile that must be caught when one piece is removed.

    Store short boards vertically only when they stay controlled

    A low vertical corral turns awkward short stock into a readable library. Divide it by length or material, keep the tallest bay against the wall, and add a front rail high enough to retain the pieces. The base should carry the load; the wall connection prevents tipping. Do not hang the full weight from a decorative cabinet side.

    Set a maximum length for vertical storage based on stability and ceiling access. A long board that leans far into the room has a large sweep when it slips. Move those pieces to the horizontal rack. Avoid a bin so deep that retrieving one strip requires leaning over sharp ends. Several shallow bays are kinder than one crowded chest.

    This is also the moment to be ruthless with offcuts. Keep material you can name a plausible use for, not every rectangle larger than your palm. One bay for hardwood, one for common plywood, and a small tray for test pieces may be enough. Empty the bin on a schedule. If the front rail bows or pieces begin standing in the aisle, the collection has passed its designed capacity.

    Short lumber and narrow offcuts sorted upright in a low divided plywood corral
    A low corral makes short stock visible and restrained without putting long, unstable pieces on end.

    Give sheet goods a broad base and a restraint

    Full panels are heavy, flexible, and hard to steer. Store them close to the floor on a base that supports the bottom edge and cannot tip as one sheet is pulled away. A slight lean toward a solid back can be useful when the rack was designed for it. Do not lean sheets loose against drywall, where the stack can slide or trap moisture along the bottom edge.

    A mobile sheet cart works when the route is level, wide, and clear. Use a broad wheelbase, appropriately rated casters, accessible brakes, and side rails that contain the stack. Park it against a wall so it cannot wander. Before building or buying, tape the loaded footprint and try the turn from the garage door. The cart grows difficult quickly as panels accumulate.

    For a fixed shop, a low vertical rack may feel steadier. Flat storage protects sheet shape well but consumes a large footprint and encourages people to pile unrelated objects on top. Pick based on how often you use full sheets and whether you can safely extract the bottom panel. No layout eliminates the weight; it only changes when you handle it.

    Full plywood sheets secured on edge in a low rolling cart beside a clear garage route
    A broad base and side restraints matter more than a tiny footprint when several heavy panels travel together.

    Protect wood from slab moisture and weather swings

    Keep lumber away from liquid water and raise it off the concrete. The USDA Forest Products Laboratory’s Wood Handbook chapter on drying and moisture control recommends protecting stock from precipitation and spray. It also explains that storage conditions should reflect the wood’s intended use and moisture requirements.

    Dry framing lumber and plywood may tolerate solid piling in a protected shed under the conditions discussed by the handbook. Green or rewetted stock needs airflow and stickered stacking. Furniture parts, flooring, and machined stock are more sensitive to uncontrolled humidity. In a garage, the practical lesson is to identify what you bought. Do not seal wet lumber into a tight pile and expect it to behave like kiln-dried cabinet stock.

    Use a moisture meter as a comparative tool if the project demands it, and follow the meter instructions for species and temperature correction. Watch exterior walls and garage corners for condensation or leaks. A dehumidifier can help in a reasonably enclosed space, but it is not a substitute for fixing water entry. Leave inspection access around the rack so dampness does not stay hidden.

    Build the lumber path into the workshop layout

    Stand at the garage opening with an imaginary eight-foot board. Trace its trip to storage, then from storage to the saw. Include the turning arc and the length needed beyond the tool. The rack should face the easiest direction of travel. A beautiful rack on the wrong wall makes every project a furniture-moving exercise.

    Our garage workshop layout guide treats tools as stored and operating envelopes. Lumber needs the same treatment. A table saw’s footprint is small compared with the path of a full sheet. A miter saw needs side support beyond its cabinet. Store long pieces close to the tool that uses them most often, while keeping the stock path away from the parked car.

    Protect the daily aisle. The garage workshop aisle clearance guide shows how to test moving carts, open drawers, and carried materials rather than relying on one generic number. If a board has to pass a water heater, electrical panel, or exterior door, do not narrow that access with a permanent rack.

    Use a measured wall plan before buying brackets

    Draw the wall at scale. Mark every stud or suitable masonry location, the curb, outlets, switches, windows, and the maximum safe reach height. Add rectangles for the loaded rack, sheet cart, and short-stock corral. Then draw the longest board at the angle used to remove it. This small exercise catches conflicts that product dimensions do not show.

    Allow hand room between levels and above the top row. A six-inch gap may look efficient until a gloved hand cannot grip the back board. Leave enough vertical room to lift a piece over the front stop without striking the level above. Keep bark edges, splinters, and sharp metal away from the car door path.

    Run the rest of the room through the garage storage planning sequence. Lumber expands to fill kindness. Assign a maximum depth or board count to each bay and leave a visible empty zone. That blank space is not wasted. It is the buffer that receives material for the next project without forcing stock onto the floor.

    A monthly reset keeps the rack useful

    Inspect supports, fasteners, stops, wall surfaces, casters, and the wood itself. Look for sagging arms, loose screws, rust, mold, insects, water staining, or boards that have shifted beyond the end stop. Remove the stock before tightening or repairing a loaded rack. Follow the manufacturer rather than guessing at torque or replacement hardware.

    Return boards to the level that matches their length and weight. Pull pieces you no longer need. Sweep or vacuum settled dust without blowing it into the air. Keep finishes, fuels, and solvents away from lumber and dust-producing work. A wood rack is fuel storage as well as material storage, so give ignition sources their own safe area.

    The common failure is not structural drama. It is slow loss of access. One temporary board leans against the cart, then another blocks a caster, then the useful sheet sits behind both. Reset the path while the problem takes five minutes. Compact storage succeeds when material can leave without unloading the entire garage first.

    Choose the simplest rack that respects the load

    Buy a modular wall rack when you have sound structure, recurring long-stock storage, and a wall long enough to support it. Choose a low freestanding rack when wall attachment is uncertain or the system may move. Add a sheet cart only if its loaded route works. Build a short-stock corral when the offcuts are truly worth keeping.

    Before checkout, compare total capacity, capacity per arm or level, usable arm depth, upright spacing, fastener requirements, end stops, corrosion protection, warranty, and access to a real manual. Ignore claims such as “heavy duty” without numbers and conditions. If you make the rack yourself, design for the actual loads and substrate, and get qualified help when the structural work exceeds your experience.

    The result does not need to resemble a commercial lumber aisle. One long wall, a low panel cart, and a disciplined scrap limit can hold a surprising amount while leaving the garage usable. Straight stock that you can reach is worth more than twice as much wood buried behind a machine.
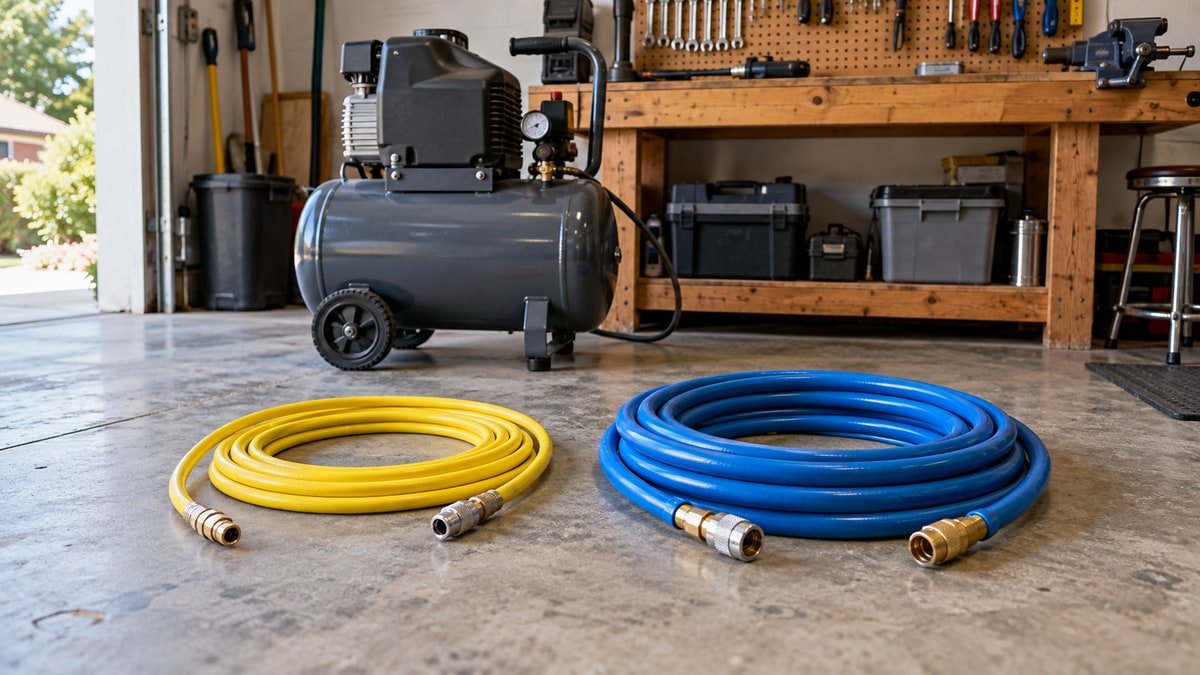
    Useful products to compare

    These links open current Amazon search results. Check the dimensions, manual, mounting hardware, warranty, and current availability for the exact model before you order.

    Before you buy or install

    Read the current manual for the exact product you are considering. Confirm its assembled dimensions, rated capacity, mounting requirements, included hardware, working clearances, warranty, and any limits that apply to your wall, floor, electrical circuit, or garage layout.

    Frequently asked questions

    Is it better to store lumber vertically or horizontally?

    Long boards are usually easier to keep stable and straight on a horizontal rack with several support points. A low vertical corral works well for shorter pieces when it has a broad base and front restraint. Full sheets need their own stable base and side restraint.

    Can lumber sit directly on a garage floor?

    It is better to raise wood off concrete so small leaks, condensation, and floor washing do not wet the stock. Use supports or a rack designed for the load, keep the area dry, and inspect the bottom layer rather than sealing it out of sight.

    How far apart should lumber rack supports be?

    There is no single spacing for every board. Follow the rack manufacturer’s layout and capacity instructions, then consider the stiffness and quality needs of your stock. Thin trim needs closer support than thick framing lumber. Add support if boards visibly sag.

    How should plywood be stored in a small garage?

    Keep full sheets low on a broad, stable base with restraints that prevent sliding or tipping. A rated vertical panel rack or a well-designed rolling cart can work. Test the loaded route and caster capacity before relying on a mobile cart.

  • Shop Vac vs Dust Collector Small Garage Guide: Choose by Tool Port

    Shop Vac vs Dust Collector Small Garage Guide: Choose by Tool Port

    Affiliate disclosure: As an Amazon Associate I earn from qualifying purchases. This article may contain affiliate links, and Bay & Bench may earn a commission at no extra cost to you. Read our full Affiliate Disclosure.

    The shop vac vs dust collector small garage decision starts with the way each machine moves air. A shop vacuum makes high suction through a narrow hose. A traditional dust collector moves a larger volume of air through a wide hose at lower static pressure. Put either one on the wrong tool and the result can be noisy, awkward, and disappointing. Start with the dust port, the material the tool produces, and the hose route you can fit. Then compare filtration, cleanup, electrical load, and storage.

    Quick answer

    Choose a shop vacuum or certified dust extractor for handheld sanders, routers, track saws, cleanup nozzles, and tools with ports around 1 to 2.5 inches. Choose a traditional dust collector for a stationary planer, jointer, cabinet saw, or other machine designed around a 4-inch or larger port. A small garage often benefits from both: a compact extractor at small-port tools and a mobile collector moved to one chip-producing machine at a time.

    Shop vac vs dust collector small garage: the useful distinction

    Airflow and pressure work together, but the machines trade one for the other. A wet/dry shop vacuum uses a relatively narrow hose and produces substantial pressure to pull through that restriction. A dust collector uses a larger impeller and hose to move more air through a broad machine hood. The names are casual; the fan curve, filter, and complete connected system decide performance.

    Oneida’s Super Dust Deputy documentation draws a practical dividing line. It describes traditional collectors as high-airflow, low-pressure systems, generally above 350 CFM and below 10 inches of water column, while shop vacuums are the opposite, generally below 250 CFM and above 60 inches of water. Those ranges explain why shrinking a 4-inch collector to a tiny sander port does not turn it into a better vacuum.

    Read figures as test points, not guarantees at the tool. Hose length, diameter, corrugation, bends, adapters, filter loading, leaks, and the tool hood reduce delivered performance. Manufacturer numbers from different test methods may not be directly comparable.

    Match the collector to the port and the debris

    Tool or taskUsual port behaviorBetter starting systemReason
    Random-orbit sanderSmall port, fine dust, narrow hoseDust extractor or shop vacuum with suitable filter and bagHigh pressure works through the small passage
    Track saw or compact routerSmall to medium port, intermittent chips and dustTool-triggered extractorShort narrow hose and automatic start are convenient
    Thickness planerLarge port, high chip volumeLarge-hose dust collector sized to the machine manualBulk airflow carries chips before the hose plugs
    Cabinet or contractor sawLower cabinet port, sometimes a second guard portDust collector for the large port, possibly a separate small-port solutionThe base and blade area create different capture problems
    Floor and vehicle cleanupHand nozzle, changing restriction, mixed debrisWet/dry shop vacuumPortable high suction suits the nozzle

    Always begin with the tool manufacturer’s port size and collection recommendation. Do not open, remove, or modify a guard merely to attach a hose. NIOSH found that bottom extraction alone often controlled table-saw dust poorly and that an added local hood over the blade substantially reduced emissions in its test. The NIOSH engineering control page is a useful reminder that capture location matters as much as the collector.

    A shop vacuum handles restriction well

    A shop vacuum is compact, readily available, and useful beyond woodworking. It can pull through a narrow tool port, crevice nozzle, or long small-diameter hose. A bag can keep fine dust out of the tank and make disposal cleaner, while a suitable filter addresses the particles that reach it. Neither item should be assumed from the word “vacuum.” Check the exact configuration.

    Current specifications show how this class behaves. Shop-Vac’s 12-gallon Contractor Series model lists a maximum 105 CFM and 70 inches of sealed pressure. The company also explains that maximum sealed pressure occurs at zero airflow and that a dirty filter, accessories, and system load change actual performance. That caveat matters more than the peak horsepower label, which Shop-Vac says is a consumer comparison term rather than operating horsepower.

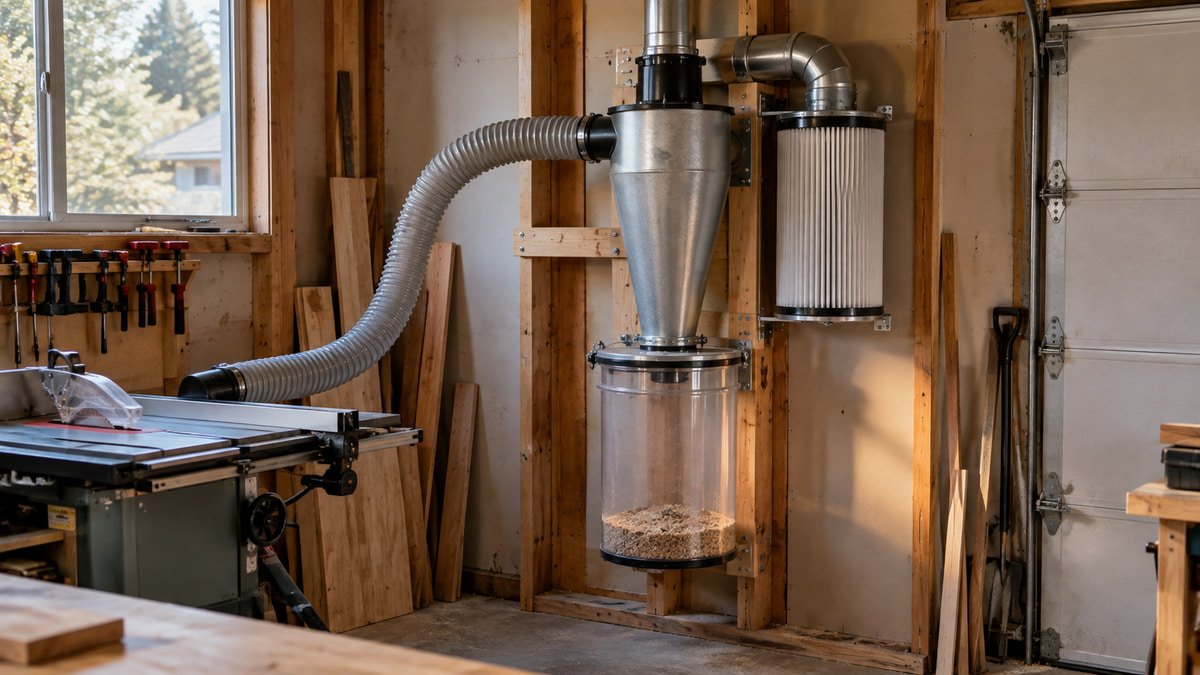
    The drawbacks are familiar: loud high-pitched noise, modest tank volume, rapidly loading filters, and limited performance at a large open machine hood. A cyclone separator can keep much bulk debris out of the vacuum filter, but it adds footprint, hose, joints, and another bin to seal.

    Unplugged random orbit sander connected to a compact dust extractor with a narrow hose
    Small tool ports and long narrow hoses favor a high-pressure vacuum or dust extractor.

    A certified dust extractor adds control features

    A professional dust extractor is still a high-pressure vacuum, but many models add tool activation, antistatic hose options, automatic filter cleaning, adjustable suction, better bags, and a documented filtration configuration. Those features are useful for sanding and portable tools. They do not make a narrow-hose extractor equivalent to a large-volume collector at every stationary machine.
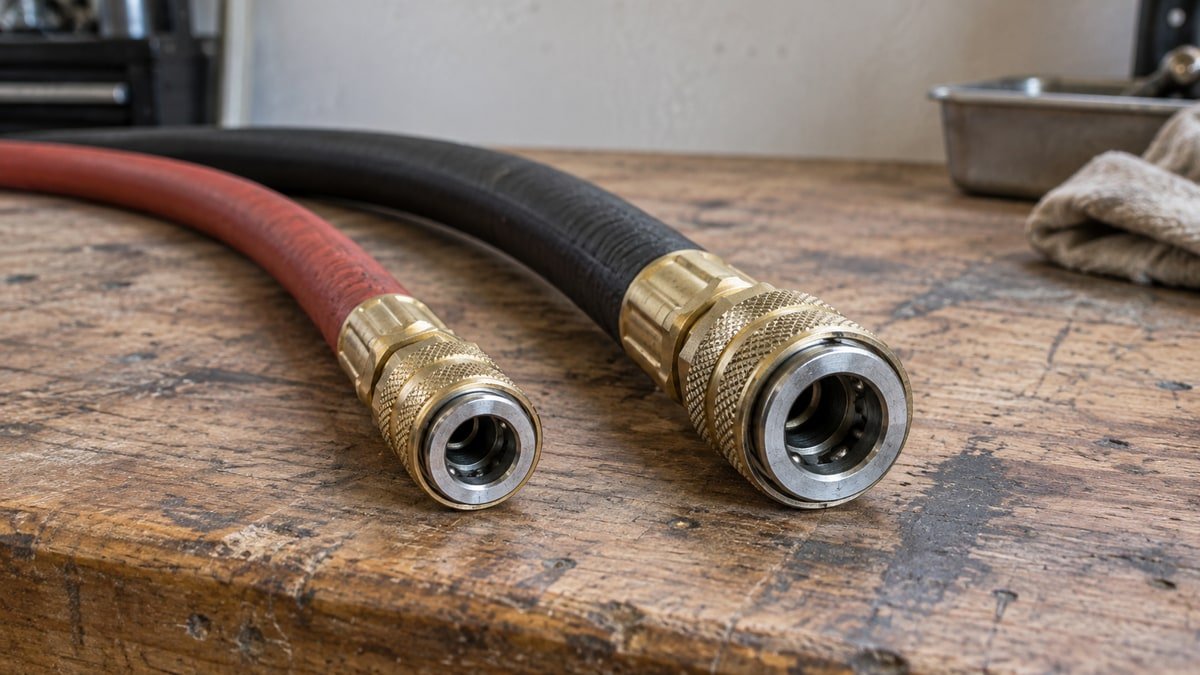
    DeWalt lists its DWV015 at up to 155 CFM and 73 inches of static water lift, plus automatic filter cleaning. This is a current model example, not a ranking or evidence that it fits your tools. Compare its manual with the port, hose, material, and work pattern in your shop.

    Read certification language carefully. A HEPA filter sold for a machine does not automatically prove that the complete vacuum is certified for every regulated application. Use the exact filter, bag, pre-separator, hose, and operating procedure specified for the material and rule involved. For unknown, toxic, lead, silica, asbestos, or other hazardous dust, stop and use the applicable professional guidance.

    A traditional collector moves chips through a wide hose

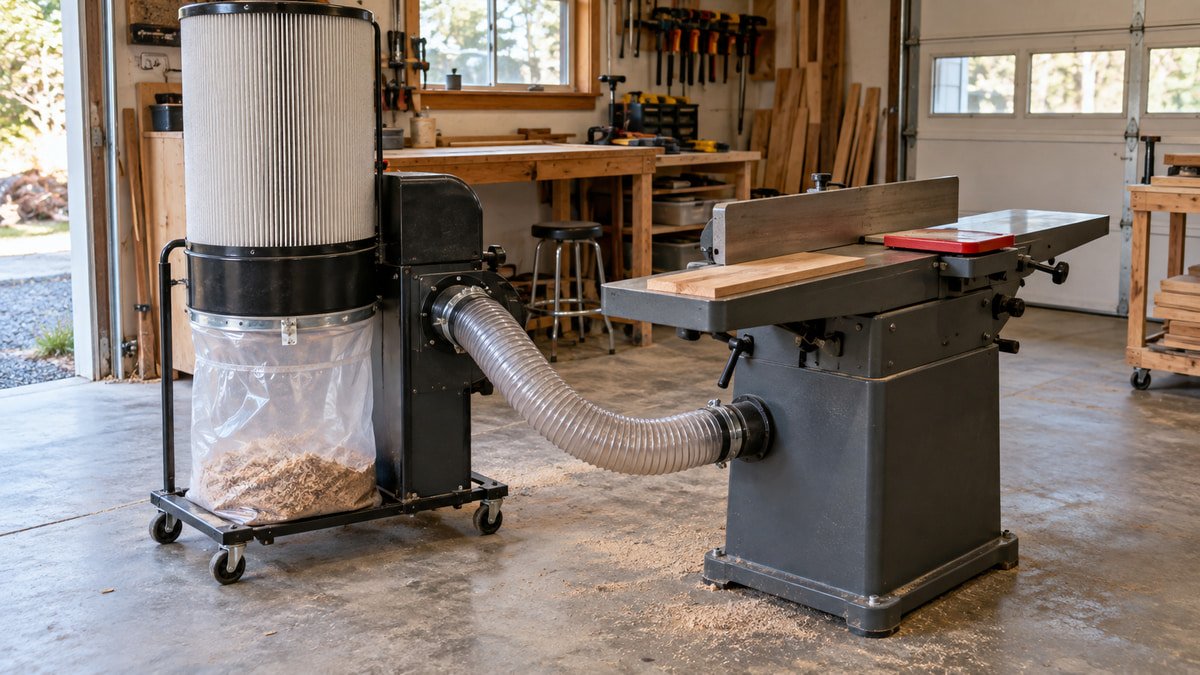
    A mobile single-stage collector can be a compact answer for one planer, jointer, saw, or router table at a time. It usually has a 4-inch inlet, a large filter bag or canister, and much more collection volume than a shop vacuum. Keep the hose short and full size until the machine connection. Every unnecessary reducer spends the airflow advantage you bought.

    Grizzly’s current G8027 one-horsepower collector lists 500 CFM, 2.76 inches maximum static pressure, one 4-inch inlet, and a 2.5-micron filter specification. Grizzly describes it as a point-of-use collector for one average machine at a time. That is an honest model for a small garage: roll the unit close, connect one short hose, and avoid pretending a small fan will support a maze of branches.

    A collector that catches chips may still allow fine dust through its filter or around leaks. Look at the filtration specification and complete-system claims, not the size of the bag. A better filter may add resistance, and actual airflow changes as the filter loads. Leave room to remove the lower bag or drum without dismantling the shop.

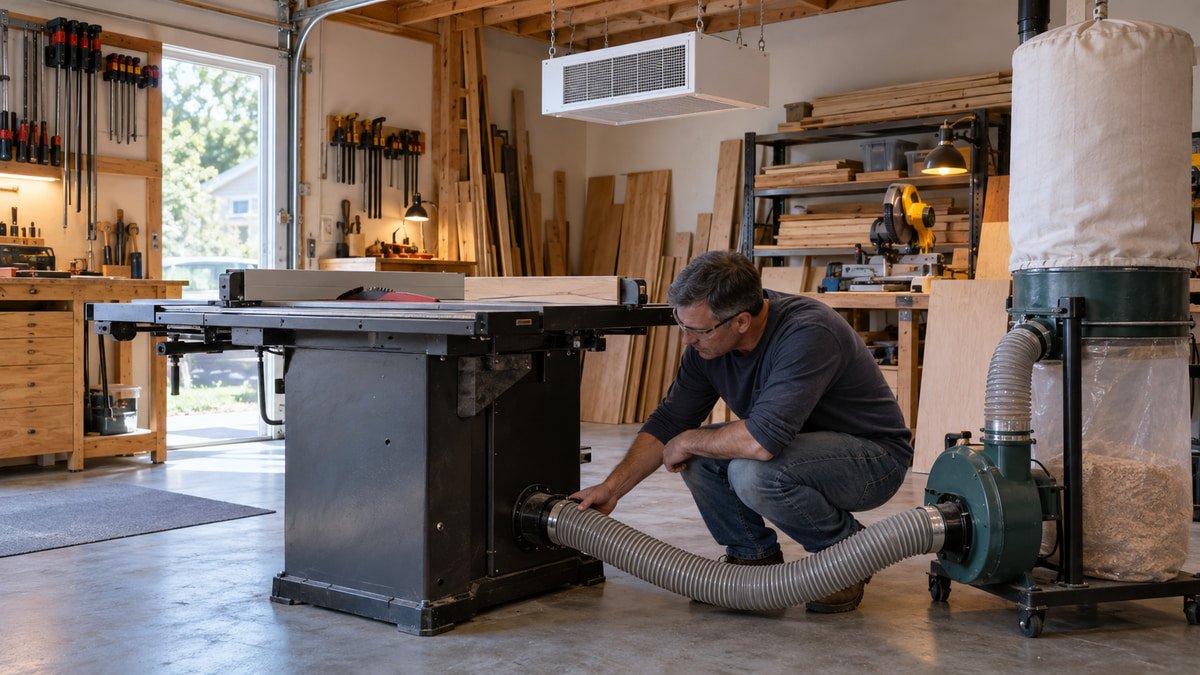
    Table saw cabinet connected to a mobile dust collector by a short four-inch hose
    A short large-diameter hose lets a traditional dust collector move much more air at a stationary machine.
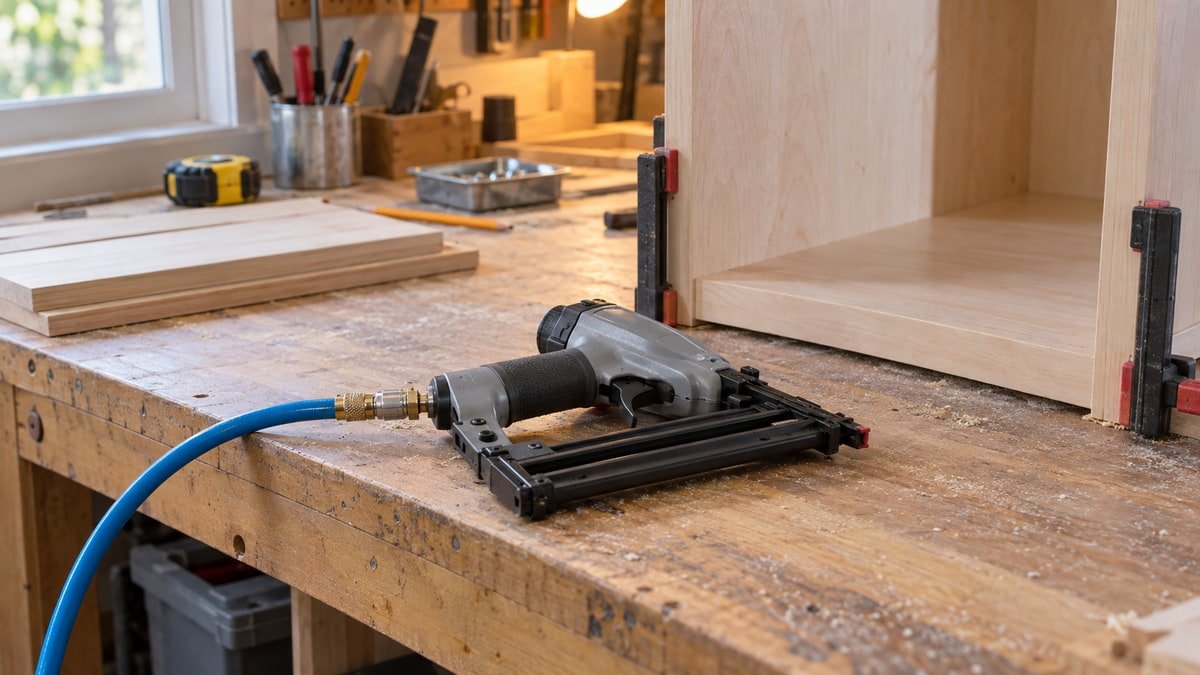
    Hose diameter and fittings can decide the result

    A hose is part of the machine. Long corrugated runs, sharp elbows, undersized adapters, leaky cuffs, and a clogged separator all add resistance. With a shop vacuum, use the tool maker’s recommended hose and keep it as short as the work allows. With a dust collector, preserve the large diameter to the tool and avoid reducing early.
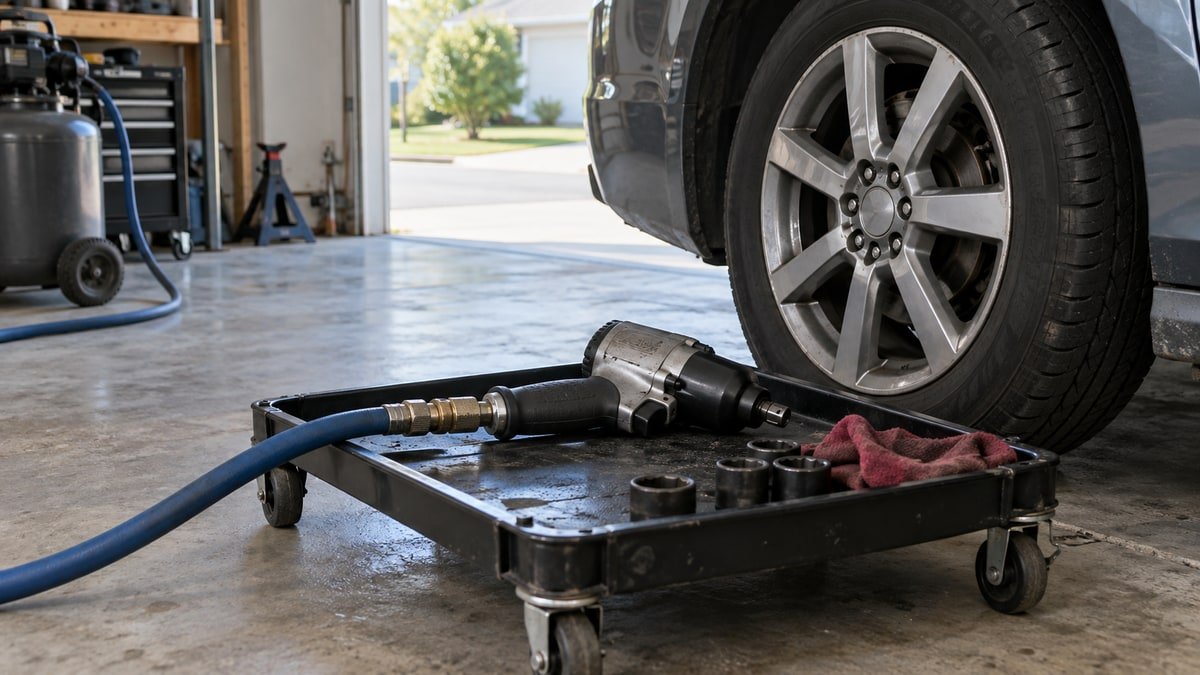
    Do not force a random plumbing fitting onto a dust port and call it sealed. A loose cuff can disconnect, while a fitting that blocks a guard or strain-relieves nothing can create a new hazard. Use compatible adapters and clamps, support hose weight, and keep connections accessible for inspection. If static-control components or grounding are specified by the system manufacturer, follow that design rather than inventing a wire scheme from a forum photo.

    Plan the hose in the room using our garage workshop layout guide. A theoretically efficient run that crosses the only aisle is a poor installation. A mobile collector often wins because it reduces both hose length and permanent obstruction.

    Three dust hose diameters with matching cuffs, reducers, and clamps on a workbench
    Every reducer and corrugated hose section adds resistance, which is why the complete path matters more than one advertised number.

    Filtration and capture are separate questions

    Capture asks whether dust enters the hood. Filtration asks what happens after the air reaches the collector. Strong suction at a sealed small port can capture well, yet a leaking filter can return fine particles to the room. A fine filter cannot repair a hood that misses the dust plume. Inspect the whole path.

    OSHA’s wood-dust guidance says local exhaust ventilation should remove dust at or near its source and that hoods should sit as close to the emission source as practical. It also calls for system inspection and maintenance. Although OSHA rules address workplaces, source capture is a sound planning principle for a home shop too.

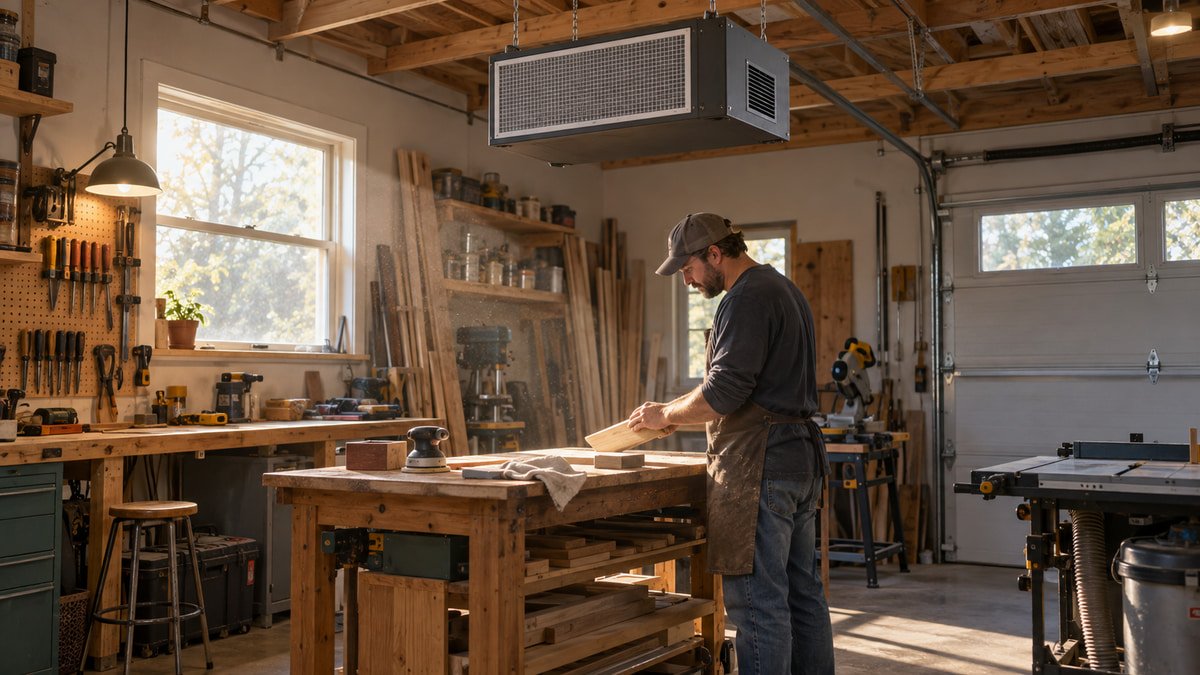
    Do not use a room air cleaner as a substitute for source capture. It may reduce suspended particles that escape, but it cannot pull chips from a planer or stop dust from crossing your breathing zone first. Likewise, a respirator is not a reason to accept a badly connected tool. Use controls in layers and follow current instructions for the material, tool, collector, and personal protective equipment.

    Space, power, and noise matter in a shared garage

    Measure the stored machine, operating footprint, hose coil, filter-cleaning access, and bin-removal path. A tall bag collector may fit the floor yet hit the garage door track. A shop vacuum may slide under the bench until a cyclone doubles its height. Use the method in the small garage workbench guide to protect knee space and avoid burying serviceable equipment behind cabinets.

    Check electrical requirements for both collector and tool. Many tool-triggered extractors limit the connected tool load. A dust collector and planer starting on the same circuit may trip a breaker or exceed the intended setup. Follow both manuals and use a qualified electrician for permanent circuit work. Extension cords are not a substitute for suitable fixed wiring.

    Noise changes behavior. If a screaming vacuum makes you skip collection for a quick cut, the system is failing. Compare published sound data where manufacturers provide it, listen to the machine if possible, and place it without blocking cooling airflow. Hearing protection may still be required for the tool and collector together.

    The best small-garage setup is often a two-machine kit

    For a mixed shop, the most practical arrangement is a compact extractor for sanders, routers, track saws, and cleanup, plus a mobile 4-inch collector for the planer, jointer, and table saw cabinet. Each stays near the tool family it serves. You avoid a permanent duct network and stop asking one fan to work far outside its useful pressure range.

    If the budget only allows one, list the hours spent on each tool and the volume of debris it makes. Mostly sanding and portable-tool work points toward an extractor. Regular planing or jointing points toward the large-hose collector, with a separate strategy for cleanup. Someone making occasional small projects with benchtop tools may begin with a well-filtered vacuum and separator, provided the tool manuals support that connection.

    Start with measured garage dimensions, then test the parked and operating machine against the daily aisle. If a table saw is part of the plan, preserve the full material path described in the table saw clearance guide. Do not buy a tall collector before checking the door path and ceiling hardware. The machine you cannot position near the tool will spend its life parked and disconnected.

    Common buying mistakes

    Peak horsepower is a poor shortcut. So is CFM by itself. Compare airflow and pressure at stated conditions, hose size, filter configuration, bin capacity, sound, electrical load, dimensions, and maintenance access. Be suspicious when a listing gives one heroic number without a manual or test context.

    Another mistake is building too much duct too soon. Small collectors lose useful performance through long branches, tight elbows, reducers, and open gates. Start with one short connection and observe real capture. Add complexity only after the base system works and the manufacturer supports the design.

    Finally, do not treat ordinary wood dust as harmless housekeeping. NIOSH links wood-dust exposure with several adverse health effects and recommends limiting exposure. Capture at the source, maintain the system, clean with a suitable vacuum rather than blowing dust into the air, and deal carefully with unknown or hazardous materials. A clean-looking floor is not proof that the finest particles were controlled.

    Useful products to compare

    These links open current Amazon search results. Check the dimensions, manual, mounting hardware, warranty, and current availability for the exact model before you order.

    Before you buy or install

    Read the current manual for the exact product you are considering. Confirm its assembled dimensions, rated capacity, mounting requirements, included hardware, working clearances, warranty, and any limits that apply to your wall, floor, electrical circuit, or garage layout.

    Frequently asked questions

    Can a shop vacuum replace a dust collector?

    It can serve small-port handheld tools and cleanup very well, but it usually cannot move the air volume expected by a stationary machine designed for a 4-inch port. Match the collector to the tool manufacturer’s requirement rather than adapting by convenience alone.

    Is a dust extractor different from a shop vacuum?

    Both are high-pressure vacuum systems. Many professional extractors add tool activation, automatic filter cleaning, antistatic hose options, documented filter configurations, and better dust bags. The exact features and certifications vary by model, so read the current manual.

    Does a cyclone separator improve filtration?

    A cyclone can remove much of the bulk debris before it reaches the vacuum filter, which can slow filter loading. It does not replace the final filter, prove HEPA performance, or fix leaks. Use a separator designed for the airflow class and hose size of your system.

    Should I use a room air cleaner instead of dust collection?

    No. A room air cleaner may reduce particles that escape, but source capture should collect dust where the tool produces it. Use room filtration only as another layer, not as a replacement for a suitable hood, hose, collector, and work practice.

  • Small Garage Dust Collection Layout: Short Hoses, Clear Aisles

    Small Garage Dust Collection Layout: Short Hoses, Clear Aisles

    Affiliate disclosure: As an Amazon Associate I earn from qualifying purchases. This article may contain affiliate links, and Bay & Bench may earn a commission at no extra cost to you. Read our full Affiliate Disclosure.

    A small garage dust collection layout succeeds by refusing to imitate a large commercial shop. Long mains, several branches, and a blast gate at every machine look tidy in a diagram, but a modest collector may lose too much performance along the route. In a one-car or shared garage, short hoses and mobile equipment are often the more honest design. Put capture close to the tool, connect one chip-producing machine at a time, store hoses off the floor, and leave enough room to empty the bin without rebuilding the room.

    Quick answer

    Group tools by port size and dust behavior. Park a high-pressure vacuum or extractor near small-port tools, and roll a large-hose collector to the planer, jointer, or saw it serves. Keep hoses short, avoid early reducers and tight bends, and capture dust at the factory hood or approved guard. Protect the walking aisle, check electrical loads, and reserve straight-out access for the collection drum and filter.

    Small garage dust collection layout: map dust sources first

    List every task that creates dust or chips. Include handheld sanding, routing, track-saw work, table-saw cuts, planing, jointing, miter cuts, sweeping, and vehicle cleanup. Record each tool’s dust-port diameter, factory hood, electrical requirement, stored location, and operating location. The manual should tell you what collection connection the maker intended.

    Next, mark how often each task happens and what it produces. A planer may run for twenty minutes and fill a bin with chips. A sander may run for two hours while making far less visible but finer dust. That difference argues for separate collection strategies even if both tools fit the same room.

    Put those notes on the measured plan from our garage measurement guide. Add the garage door, opener, windows, panels, outlets, service doors, parked vehicle, and the path used to carry long stock. Dust equipment must fit during real work and in its stored position against the wall.

    Divide the shop by airflow class, not brand

    Tool groupConnection patternPractical small-garage layoutMain warning
    Sanders, routers, track sawsSmall port and narrow hoseCompact extractor near the bench, short tool hoseDo not assume every filter configuration is HEPA
    Planer, jointer, table-saw cabinet4-inch or larger portMobile collector moved to one machineDo not reduce the hose early
    Miter sawMixed port and open dust plumeManufacturer connection plus a well-designed close hood where permittedDo not interfere with guard or saw travel
    Floor cleanupHand nozzle and variable restrictionWet/dry vacuum stored near the exitDo not blow dust across the room
    Ambient cleanupRoom air rather than source portSupplemental room filtration after source captureIt cannot replace collection at the tool

    The rule is simple: narrow restrictions need pressure, while open hoods need air volume. One collector can sometimes cover a small set of similar machines, but adapters cannot change the fan it contains. Sort tools by port behavior before buying hose or committing wall space.

    Put the collector close to the highest-volume machine

    Start with the planer, jointer, or saw that produces the most chips. Give the collector a parked position close enough for one short, gentle hose. If two large-port machines sit nearby, use quick connections and move the hose between them while both are off. A small fan is more likely to perform well through ten uncomplicated feet than through a ceiling loop and several branches.

    Grizzly’s current support guidance for its compact G8027 says the 500 CFM unit is intended for one average machine at a time and recommends keeping hose lengths short. It also says the collector is not intended as general room filtration. That model-specific FAQ should not be applied to every collector, but it illustrates a sensible layout for a small unit.

    Keep the collector away from the garage door track and the stock path. Do not bury its air inlet or motor cooling openings against a cabinet. If the machine has a tall filter, draw its full height beneath open door hardware. The overhead clearance method is useful even when the storage item is a dust collector.

    A mobile cart can replace a permanent duct network

    A well-built cart can carry a collector or vacuum, cyclone, hoses, cuffs, and a small adapter drawer. Give it a low center of gravity, rated locking casters, secure components, and a handle that does not become the widest part by surprise. The bin must come out without lifting the upper assembly.

    Mobility only helps when the route is clear. Roll the empty cart between its parking spot and each tool. Cross the slab joints, curb, and threshold. Check whether the hose or cord catches a caster. Then mark a parking box on the floor so the cart returns to a location where it cannot drift into a vehicle or door.

    The cart in a shared garage should connect after the car moves out, not snake a hose around the bumper. Use the measured scenarios in the one-car garage workshop layout to decide whether shop mode and parking mode overlap at all. A rolling collector is easier to move than a fixed duct, but it still needs a safe home in both modes.

    Mobile cyclone dust collection cart parked beside an unplugged benchtop planer and a coiled vacuum hose
    A mobile cart can serve several tool families without asking a small collector to pull through a permanent maze.

    Source capture begins at the factory hood

    Use the tool’s intended port, hood, shroud, and guard. Keep the opening close to where chips or dust leave the work. OSHA’s wood-dust guidance identifies local exhaust ventilation as the primary control and says hoods should sit as close as practical to the emission source. That is workplace guidance, but the physics does not change in a garage.

    Do not remove a blade guard or defeat a safety interlock to improve hose access. If capture from a tool is poor, check the manual, clear blockages with the machine safely de-energized, inspect the hose, and ask the manufacturer about approved accessories. A homemade box around a miter saw can obstruct the head, fence, or stock. Test the full operating envelope before adding any enclosure.

    NIOSH’s table-saw dust control research found that bottom exhaust alone often missed high-speed dust and that an auxiliary hood over the blade substantially reduced emissions in its laboratory test. The takeaway is not to copy an old research hood blindly. It is to treat upper and lower capture as separate problems and use current approved solutions.

    Unplugged thickness planer connected at its dust hood to a nearby collector with a short hose
    The shortest useful hose begins at a hood close to the chip source and reaches the collector without a sharp bend.

    Route hoses where feet, wheels, and stock do not travel

    Keep the active hose inside the tool’s work zone. Run it along a wall or behind the machine when the manual permits, with enough slack for normal movement and no loop underfoot. Store inactive hoses on large-radius hooks so they do not kink. A floor hose across the only exit is not temporary if every cut requires it.

    Avoid tight elbows and sudden reductions. Keep large hose at full diameter until the tool connection. Support the weight of a hanging hose so it does not pull on a plastic port. Use compatible cuffs, gates, clamps, and static-control parts specified for the system. Seal leaks in the manner the manufacturer allows; do not wrap a failing fitting in layers of unknown tape and forget it.

    Our garage workshop aisle guide treats a hose as a moving obstruction, not a line on a plan. Walk the route carrying a full sheet, push the mobile cart, open every drawer, and simulate the collector connection. If the hose gets crushed under a wheel or forces a sideways step, change the layout.

    Plan service space before the filter gets dirty

    Draw the bin or bag removal direction. Some drums roll forward; others drop down; fabric bags need room around their clamps. Canister filters may need overhead or side access for cleaning. A transparent collection bin still needs room to unlatch. Leave the straight path the manual expects.

    Put spare bags, filters, and approved cleaning tools nearby but outside the dust stream. Keep a lidded disposal container accessible. Empty the collector before the waste becomes too heavy or reaches the maker’s fill limit. Fine dust disposal can release what the system captured, so follow the manual and the material’s precautions.

    Inspect ducts, hoses, seals, gates, filters, and collection containers regularly. OSHA specifically calls for maintaining local exhaust systems and checking damaged or loose ductwork. Power down and isolate equipment before service. Never use compressed air to blast accumulated wood dust around the room; OSHA’s fire guidance warns against creating a dust cloud that way.

    Cyclone dust collector with clear access to its drum, filter, latches, and unplugged power cord
    Service clearance is part of the layout because a filter or bin that is hard to reach will be maintained late.

    Check power and automatic-start limits

    Map circuits along with hoses. A tool-triggered extractor may have a stated maximum connected-tool load. A planer and dust collector can draw substantial current at startup. Do not assume two nearby receptacles are separate circuits. Consult the manuals and have a qualified electrician evaluate permanent wiring or repeated breaker trips.

    Keep cords out of the aisle and away from wet areas. Do not hide extension-cord connections inside cabinets or treat an extension cord as permanent wiring. The collector’s emergency controls should remain visible and reachable from the operator’s normal position. Remote starts are convenient only when you can confirm which gates or hoses are connected and no one is servicing the unit.

    Grounding and static-control advice varies with equipment and duct material. Follow the complete system manufacturer’s instructions. Do not add a loose wire inside a hose because a generic diagram online shows one. Dust collection combines moving air, combustible material, electrical equipment, and sometimes plastic components. Use components designed to work together.

    Keep dust work away from clean storage and ignition sources

    Put sanding and chip-producing tools on the collector side of the room. Keep clean household items, soft goods, and vehicle detailing supplies in closed storage across the aisle. Finishes, solvents, fuel, and battery charging need separate handling according to their labels and equipment instructions.

    OSHA’s woodworking fire and explosion guidance notes that fine wood dust can accumulate in unexpected high places and recommends controlling ignition sources, using local exhaust, and separating combustible stock from flammable chemicals. A hobby garage is not an industrial facility, yet the housekeeping lesson is straightforward. Dust on rafters and motors is not harmless decoration.

    Vacuum settled dust with equipment and filters suitable for the material. Clean the slab, ledges, door tracks, lights, and cabinet tops. Do not dry sweep or blow a cloud into the driveway. If the project involves silica, lead paint, treated materials, or unknown dust, use the specific control method and professional guidance for that hazard.

    Test the layout with one tool at a time

    Commission the simplest connection first. Clean the filter, empty the bin, use the correct hose, close unused openings, and connect one tool exactly as the manufacturer intends. Observe whether chips escape at the hood, the hose plugs, the bag inflates normally, or the filter loads unusually fast. Stop if the machine behaves unexpectedly.

    Add only one change at a time: a slightly longer hose, an approved separator, a second pickup, or a different filter configuration. That discipline tells you which addition cost performance. A system assembled all at once leaves you guessing whether the problem is the hood, duct, filter, or leak.

    Document the final configuration with photos and a short list of compatible cuffs. Mark which collector serves which tool and where the cart parks. Revisit the table-saw stock-path guide before accepting a hose route behind or beside the saw. Dust control should support safe material movement rather than stealing the outfeed area.

    A compact layout should be easy to explain

    If another adult cannot understand how to connect, start, stop, empty, and park the system after a two-minute explanation, simplify it. One large-hose collector, one small-port extractor, two obvious parking places, and a few compatible adapters can outperform a clever wall of gates that nobody maintains.

    Measure before adding future branches. Keep the source hood close, the hose short, the filter appropriate, and the service path open. Capture chips and dust before they cross the breathing zone. Use room filtration only as another layer. Clean the high ledges on a schedule.

    The visual test is useful: the aisle should still look like an aisle when the collector is connected. The filter and bin should still look removable. The garage door should still move. If dust control makes the room harder to use, it will eventually be bypassed. A modest system that connects in seconds and parks cleanly has a better chance of running for every job.

    Useful products to compare

    These links open current Amazon search results. Check the dimensions, manual, mounting hardware, warranty, and current availability for the exact model before you order.

    Before you buy or install

    Read the current manual for the exact product you are considering. Confirm its assembled dimensions, rated capacity, mounting requirements, included hardware, working clearances, warranty, and any limits that apply to your wall, floor, electrical circuit, or garage layout.

    Frequently asked questions

    Should dust collection hose run overhead in a small garage?

    Only if the collector can handle the added length and resistance, the structure supports the installation, and the route clears the garage door, lights, vehicles, and tall stock. A short floor-level mobile connection is often simpler for a modest collector.

    Can one dust collector serve every tool?

    Sometimes one collector can serve similar tools one at a time. Small-port handheld tools and large-port stationary machines usually need different pressure and airflow characteristics. Match each connection to the tool and collector manuals rather than relying on reducers.

    Where should a dust collector sit in a garage?

    Place it close to the highest-volume machine while preserving the walking aisle, garage door travel, cooling airflow, electrical access, and bin-removal path. A mobile unit should have a marked parking spot where its casters can lock.

    Does ambient air filtration replace source collection?

    No. Capture dust at the hood or tool port before it spreads. Ambient filtration may reduce particles that escape, but it cannot collect planer chips or stop the initial plume from crossing the operator’s breathing area.

  • Garage Workshop Zones: Make Parking, Storage, and Work Cooperate

    Garage Workshop Zones: Make Parking, Storage, and Work Cooperate

    Affiliate disclosure: As an Amazon Associate I earn from qualifying purchases. This article may contain affiliate links, and Bay & Bench may earn a commission at no extra cost to you. Read our full Affiliate Disclosure.

    Garage workshop zones solve a problem that shelves alone cannot: the same floor often has to park a car, move long material, support a project, store household gear, and leave access to doors and utilities. When every activity spreads everywhere, a ten-minute repair begins with forty minutes of moving bins. Zoning gives each kind of work a home and a boundary. The boundaries do not need paint or permanent walls. They need measurements, a clear operating rule, and a reset routine that the room can survive on an ordinary weeknight.

    Quick answer

    Start with fixed boundaries and the vehicle envelope. Put the main bench and daily tools in a fixed work zone, dusty machines near source capture, household items in closed clean storage, and mobile equipment in a marked parking zone. Keep one uninterrupted movement path from the garage door to the house or service door. In a parking-first garage, define shop mode and parking mode so tools, cords, hoses, and stock return to known locations before the car enters.

    Garage workshop zones begin with nonnegotiable space

    Measure finished wall to finished wall at several heights. Record the curb, steps, columns, overhead door tracks, opener, windows, electrical panel, water heater, utility equipment, and every door swing. Then measure the vehicle with mirrors, open doors, raised hatch, charging or fueling access, and the path used to park it. The instructions in our garage measurement guide turn those facts into a usable boundary plan.

    Color the nonnegotiable areas first: door travel, electrical access, utility service, parking envelope, and normal exit path. Do not assign these spaces to a zone simply because they are empty most of the day. A rolling cart parked in front of a panel is still an obstruction when something goes wrong.

    The remaining area is the workshop budget. It may be one full bay, an eight-foot rear wall, or a narrow strip beside the car. Accepting that budget early prevents a layout that functions only when every object is temporarily in the driveway.

    Use six zones instead of dozens of categories

    ZoneWhat belongs thereBest locationBoundary test
    Fixed workWorkbench, vise, daily hand toolsWall with light, power, and no door conflictDrawers and vise open without entering the aisle
    Dirty workSawing, sanding, grinding appropriate materialsNear source capture and cleanup equipmentDust does not start beside clean household storage
    Clean storageSeasonal gear, paper goods, household suppliesClosed cabinets across from dusty workDoors open without touching a vehicle
    Mobile workAssembly cart, wheeled machines, project standOpen bay during work, marked parking spot afterwardEvery mobile item has a smaller stored envelope
    Material pathLumber, sheet goods, mower, bicyclesDirect route between door, storage, and toolLongest item can turn without striking fixed storage
    Vehicle and transitionCar envelope and changeover spaceMeasured parking bayShop resets before the vehicle crosses the threshold

    Six zones are enough to guide placement without creating a label for every shelf. Some can overlap in time. The mobile work zone may occupy the vehicle bay only after the car leaves. The material path can become assembly space once long stock is put away. Fixed and utility zones should not depend on such overlap.

    Anchor the fixed work zone to a useful wall

    The fixed work zone holds the bench, vise, task light, daily tools, and the outlets used most often. Choose a wall where the bench does not block a door, window, panel, or vehicle opening. Add the open depth of drawers, cabinet doors, and the vise handle. A 24-inch bench can require much more room during use.

    Keep frequently used tools within one step, but leave the bench surface mostly free. Shallow wall storage works better here than deep shelves over the user’s head. Put heavy cases low. Place chargers where their ventilation and instructions are respected, away from sawdust accumulation and liquids.

    The small garage workbench guide compares fixed, folding, and mobile formats. A fixed bench earns its permanence when it is used often and the room does not need that wall for parking clearance. If the car door collides with the bench or a folding top, the vehicle boundary wins.

    Keep dirty work close to capture and away from clean goods

    Group sanding, sawing, and other dust-producing work near the correct extraction equipment and cleanup route. The goal is not to make a sealed industrial room. It is to avoid starting a dust plume beside open sports bags, paper supplies, or the car’s cabin air intake. Closed cabinets on the far wall are easier to wipe than open wire shelves beside a sander.

    OSHA’s wood-dust guidance identifies local exhaust at or near the source as the primary control in woodworking workplaces. A home garage should likewise put the collector close enough that the hose stays short and does not cross the aisle. Use the tool and collector manuals, and do not remove guards to improve a connection.

    Separate finishes, solvents, fuels, and ignition sources according to their labels and applicable local requirements. OSHA’s woodworking fire guidance warns about fine dust accumulation and recommends separating combustible lumber from flammable chemicals. The garage is easier to manage when the dirty zone does not double as chemical storage.

    Open garage aisle separating a woodworking bench and dust collector from closed household storage cabinets
    Keeping dusty work across the aisle from closed clean storage reduces the amount of cleanup each project creates.

    Give clean storage doors, not wishful distance

    Distance helps, but enclosure does more. Put household supplies, camping textiles, spare paper goods, pet items, and seasonal decorations in closed cabinets or lidded bins. Choose a wall outside the direct line of sanding and cutting. Label bins clearly in the real room, even though decorative labels are unnecessary on every shelf.

    Reserve low shelves for dense items and high shelves for light seasonal goods. Keep chemicals only in storage suited to the product and separate incompatible materials. Do not put a cardboard archive below a plumbing connection or directly on a damp slab.

    Use the comparison in wall-mounted versus freestanding garage cabinets to choose the format. Wall-mounted cabinets reveal the floor for cleaning and may protect against minor water, but they need suitable structure and reduce flexible wall use. Freestanding cabinets are easier to move and can be leveled, though their feet and backs collect dust. The clean zone should be easy to close and easy to wipe.

    Make the mobile zone genuinely mobile

    A machine on casters is not mobile if its cord, dust hose, outfeed support, and stored materials take fifteen minutes to disconnect. Design the entire move. Give each cart a handle, locking casters, a safe push direction, and a parked footprint that does not block a fixed zone.

    Mark operating and parking positions with painter’s tape. Roll the cart between them while every other normal object remains in the room. Cross slab joints and test the turning radius. Open the garage door and nearby cabinets. If the cart has folding wings, include both states on the plan.

    Our workbench caster guide explains why load capacity, wheel material, mounting plate, floor condition, and brake access all matter. Choose casters from the complete loaded weight and use the manufacturer’s instructions. A cart that drifts under hand pressure is not ready for precise work.

    Mobile assembly table with locked casters beside its taped parking footprint in a garage workshop
    A mobile zone needs both an operating position and a smaller parked position, or it is simply furniture on wheels.

    Protect one continuous movement path

    Draw the route used to enter from the driveway, reach the house door, carry groceries, move a bicycle, and bring long stock to a tool. Pick the most important path and keep it continuous through every zone. Avoid floor storage along its edges because a narrow path tends to get narrower.

    OSHA’s walking-surface rule applies to workplaces, not as a garage design code, yet its expectation of clean, orderly, dry passageways is a useful standard to borrow. Hoses, cords, scrap, and wet mats should not turn ordinary movement into an obstacle course.

    Test the route with objects, not an empty-handed walk. Carry a sheet-sized cardboard panel, push the widest cart, and open the service door while someone stands at the bench. The garage workshop aisle guide helps map these open and moving states. A zone boundary works when it remains obvious during the job and after cleanup.

    Define parking mode and workshop mode

    A shared garage needs a changeover script. Workshop mode begins after the vehicle leaves and the door is in a safe position. The folding bench opens, the mobile cart rolls to its tape mark, dust collection connects, and task lights come on. Parking mode reverses those steps: tools stop, dust settles and is captured, stock returns, cords and hoses leave the floor, the bench closes, and the vehicle envelope is checked.

    Keep the script short enough to follow. Five minutes is realistic; half an hour invites shortcuts. Store each movable item close to its parked position. Use wall hooks for hoses and cords, one bin for the current project, and a dedicated landing spot for the mobile bench.

    The measured plans in our two-car parking and workshop layout show how a work bay and vehicle bay can cooperate. A one-car room may need a stronger rule: no machine operation with the car inside. Choose based on the actual tool, dust, sparks, finishes, and vehicle exposure.

    Empty garage parking bay converted to workshop mode with an open folding bench and a rolling tool cart
    Parking-first rooms work when the changeover is short, predictable, and free of loose cords or tools.

    Treat utilities as protected zones

    Electrical panels, water heaters, shutoffs, HVAC equipment, doors, windows, and garage-door hardware need service access. Do not count their working space as temporary cart storage. Keep shelves, lumber, and hanging tools outside the access defined by the equipment instructions and local requirements.

    OSHA’s electrical rules for workplaces require sufficient working space around electrical equipment and keep dedicated space clear of foreign systems. Your residential requirements come from the adopted electrical code and local authority, not from this article. The planning habit is still useful: mark the panel area on the floor and wall before storage claims it.

    Keep heat-producing equipment and ignition sources away from dust, fuel, finishes, and stored tires. Maintain ventilation openings. Never box a compressor, charger, collector motor, or appliance into a cabinet unless the manufacturer expressly supports that installation. A neat utility corner that overheats or cannot be serviced is not organized.

    Assign storage by frequency and consequence

    Daily hand tools belong at the fixed bench. Weekly machines can live on accessible lower shelves or mobile bases. Seasonal goods can go higher, provided the lift is reasonable and the storage clears door hardware. Hazardous items need their own compliant location even if they are used rarely. Frequency matters, but consequence outranks convenience.

    Use a simple rule for every shelf: who uses it, how often, how heavy, and what must move to reach it? If the answer involves a ladder behind the parked car or removing three bins, the item belongs elsewhere. The broader garage storage planning guide helps assign walls after the vehicle and movement layers are fixed.

    Leave spare capacity. One empty cabinet shelf and one open cart bay absorb the active project. Without that buffer, workpieces migrate to the car hood, floor, and service path. Empty space is part of the zone plan, not evidence that the storage purchase was too large.

    Run a weekly ten-minute reset

    Return mobile items to their marks, clear the movement path, empty scrap, vacuum settled dust with suitable equipment, coil hoses, inspect cords, and close clean storage. Put the current project’s parts in one labeled container. If an item has no home, decide whether to assign one or remove the item before it becomes permanent floor storage.

    Once a month, check rack fasteners, caster brakes, cabinet stability, leaks, water entry, filter condition, utility access, and the vehicle envelope. Re-tape a boundary if the car or workbench changes. A layout should respond to real use rather than preserving a pretty drawing.

    The sign of good zoning is not a spotless room. It is a room that recovers quickly. You can start a small job without relocating the household, and you can park without carrying tools into the house. Fixed boundaries stay respected, mobile zones move on purpose, and the aisle remains boring. That is exactly what you want from a shared garage.

    Useful products to compare

    These links open current Amazon search results. Check the dimensions, manual, mounting hardware, warranty, and current availability for the exact model before you order.

    Before you buy or install

    Read the current manual for the exact product you are considering. Confirm its assembled dimensions, rated capacity, mounting requirements, included hardware, working clearances, warranty, and any limits that apply to your wall, floor, electrical circuit, or garage layout.

    Frequently asked questions

    What are the basic zones in a garage workshop?

    A useful starting set is fixed work, dirty work, clean storage, mobile work, material movement, and vehicle transition. Utilities and door travel remain protected boundaries rather than storage zones.

    Can workshop zones overlap?

    Yes, when they overlap at different times. A parked-car bay can become assembly space after the car leaves. Fixed utility access, door travel, and the main exit path should not depend on movable overlap.

    Should a workbench go beside the car?

    Only if the measured vehicle envelope, open door, bench depth, drawers, vise, and walking space all fit together. Tape both operating states on the floor and test them before installing a fixed bench.

    How do I keep zones from turning into clutter?

    Give every mobile item a marked parking spot, limit active-project storage to one container or cart bay, preserve an empty buffer shelf, and run a short weekly reset. Items without a home need a deliberate storage decision or removal.

  • Garage Air Compressor Size Guide: Match Air Delivery to the Job

    Garage Air Compressor Size Guide: Match Air Delivery to the Job

    Affiliate disclosure: As an Amazon Associate I earn from qualifying purchases. This article may contain affiliate links, and Bay & Bench may earn a commission at no extra cost to you. Read our full Affiliate Disclosure.

    This garage air compressor size guide starts with the number printed on the air tool, not the gallon badge on the tank. A compact compressor can run a brad nailer because the tool uses short bursts and waits between fasteners. The same machine may disappoint with a die grinder or orbital sander that consumes air continuously. Tank volume can soften a brief peak, but it cannot make a small pump replace air as quickly as a demanding tool uses it. Match delivered airflow at the required pressure, then check the duty pattern, electrical supply, noise, footprint, and maintenance access.

    Quick answer

    Find the required CFM or SCFM and PSI in the manual for every air tool you intend to use. Size around the most demanding tool you plan to run, or add demands only when tools truly operate at the same time. Choose a compressor whose rated delivery at that pressure exceeds the requirement with reasonable breathing room for hose losses and recovery. Then verify duty cycle, voltage, startup current, sound level, tank orientation, drain access, hose size, and the compressor maker’s ventilation clearances.

    Garage air compressor size guide: begin with the tool manual

    Make a short worksheet before comparing compressors. For each pneumatic tool, record the manufacturer’s airflow requirement, working pressure, inlet size, recommended hose, and expected duty pattern. Note whether the published flow is average use or continuous consumption. The difference matters. An impact wrench may consume air in several short pulls, while a sander can keep asking until the compressor falls behind.

    Use current documentation for the exact tool model. Ingersoll Rand’s air-consumption chart, for example, lists typical averages such as 4 CFM for a half-inch impact wrench, 5 CFM for a quarter-inch die grinder, and 10 CFM for an orbital sander. The chart also tells readers to check the tool manufacturer for actual consumption. Treat the examples as a first sort, not a substitute for the manual in your hand.

    Add the work pattern in plain English: six lug nuts, fifty brads, ten minutes of sanding, or a quick tire top-up. That description keeps the purchase grounded. A compressor for occasional trim work is a different machine from one expected to sand panels through an afternoon.

    Read CFM, PSI, tank volume, and duty as separate facts

    SpecificationWhat it tells youWhat it does not tell youBuying check
    CFM or SCFM at a stated PSIRated air delivery under the stated test conditionPerformance at every pressure or hose setupCompare at the pressure your tool needs
    Maximum PSIUpper pressure limit or storage capabilityHow much air the pump delivers while workingDo not use max PSI as a power ranking
    Tank gallonsStored-air buffer and part of the machine’s footprintSustained pump outputUse it to judge cycling and portability after CFM
    Duty cycleHow long the pump may run within a stated period or conditionPermission to ignore cooling and ventilationRead the model’s manual, not a generic definition
    Sound ratingNoise measured under the maker’s stated methodHow the garage will amplify vibrationCompare published conditions and placement

    Never compare one compressor’s CFM at 40 PSI with another’s figure at 90 PSI as though they are the same measurement. Look for the delivery rating closest to the tool’s working pressure. Also distinguish pump displacement or intake claims from delivered air. The useful number is the manufacturer’s rated output at a stated downstream pressure.

    Tank size deserves attention, just later in the sequence. A larger receiver gives a short tool more reserve and may lengthen the pause between pump starts. Once that reserve drops, the pump still has to replace what the tool consumes. If continuous demand exceeds delivered flow, the pressure will fall or work will pause while the compressor recovers.

    Match the hardest real tool cycle

    Choose the highest verified airflow demand among tools that run one at a time. Do not add every tool in the cabinet. If two people will operate tools simultaneously, or a pneumatic device runs while another consumes air, add only those overlapping demands and follow the compressor manufacturer’s sizing advice.

    Leave practical margin above the documented requirement. Hose length, fittings, regulators, elevation, temperature, and normal wear can reduce what reaches the tool. There is no universal percentage that fits every installation, so avoid turning a convenient buffer into a law. The sound decision is a rated output clearly above the tool’s need at the correct pressure, backed by the manuals for the compressor, tool, and accessories.

    Consider how tolerant the job is of waiting. Framing one small wall can survive an occasional recovery pause. Paint finishing, continuous sanding, or production work is less forgiving. If the tool manual specifies a much larger compressor, do not plan to defeat the mismatch with a larger portable tank. Stored air changes timing, not sustained delivery.

    Pneumatic impact wrench, brad nailer, tire inflator, and sander arranged beside an air compressor manual
    Air tools that look equally portable can ask for very different flow, pressure, and run time.

    Use current compressor examples as brackets, not winners

    Current manufacturer specifications show how quickly the categories separate. Makita rates the portable MAC210Q at 2.0 CFM at 90 PSI with a 2-gallon tank, 135 PSI maximum pressure, and a stated 60 dB noise level. That profile suits intermittent tasks whose documented demand fits the output. It is not a sensible match for a continuous 5 or 10 CFM tool.

    California Air Tools rates its 10020C at 5.30 CFM at 90 PSI with a 10-gallon tank and a stated 70 dB sound level. DeWalt lists 6.2 SCFM at 90 PSI for the current DXCM201 20-gallon model. Those numbers place the machines in different airflow and footprint brackets, but they still do not answer whether a specific sander, spray gun, or grinder is supported.

    Compare weight, dimensions, voltage, oil requirements, warranty, duty guidance, and available service along with output. Product pages and model specifications can change, so check the current manual before buying. The right bracket is the one that supports your hardest tool cycle and still fits its assigned spot in the garage.

    Let tank size follow the work rhythm

    A small tank keeps the compressor lighter and easier to carry. It works well when the tool uses quick bursts and the pump can recover between them. A larger tank adds stored air, reduces how abruptly a brief demand reaches the pump, and may make intermittent work feel calmer. It also adds weight, floor area, and more condensate capacity to manage.

    Horizontal tanks often fit under a bench or shelf, while vertical tanks use less floor area but claim height and can be awkward near garage-door tracks. Draw the complete machine in its operating position, including handle, wheels, gauges, hose connection, intake, drain, and access panel. The garage measurement process catches conflicts with the curb, car door, and overhead hardware.

    Do not wedge a compressor into the smallest outline it can physically occupy. The motor and pump need the clearances and ventilation stated by the manufacturer. The drain needs access, and a serviceable machine may need to roll straight forward. A two-gallon unit that lives on a shelf can be more useful than a twenty-gallon unit trapped behind lumber.

    Two gallon portable compressor and ten gallon wheeled compressor shown in separate garage floor footprints
    Tank volume changes the buffer and physical footprint, but the pump's rated air delivery determines recovery.

    Check voltage, circuit capacity, and startup behavior

    Read the compressor nameplate and manual for voltage, phase, full-load current, cord requirements, and branch-circuit guidance. A label that says 120 volts does not guarantee that the machine can share a circuit with a saw, heater, refrigerator, or dust collector. Motors can draw a substantial starting current even when their normal running current looks manageable.

    Map the receptacles and known circuits before assigning a corner. Do not assume two outlets on opposite walls are independent. Repeated breaker trips, hot plugs, damaged cords, or flickering are reasons to stop and have a qualified electrician evaluate the installation. Do not replace a breaker with a larger one to make a compressor run.

    The garage workshop layout guide treats power as part of placement rather than an afterthought. Permanent wiring and local code questions belong with a licensed professional and the local authority. Extension cords are not a substitute for a correctly located circuit; if a manual permits one for temporary use, follow its gauge and length requirements exactly.

    Place the compressor for air, sound, and safe access

    Set the unit on a stable surface in the orientation the maker specifies. Keep intake and cooling openings clear. Avoid an unventilated closet unless the manufacturer specifically approves the enclosure and its ventilation. Heat that cannot leave shortens the usefulness of a quiet-looking cabinet.

    Distance and isolation can make the garage more comfortable, but do not place the compressor where you cannot hear an abnormal cycle or reach the controls. Rubber feet supplied or approved for the machine may reduce transmitted vibration. Do not improvise a soft platform that makes a wheeled unit unstable. Keep the unit protected from vehicle contact, water, dust piles, and material handling.

    Mark the operating envelope with the same method used in our workshop aisle guide. Include the hose coupling, drain position, oil fill or service cover, and route used to roll the unit out. Sound ratings help compare documented models, but bare walls, a metal door, and a hollow bench can make the perceived result harsher than the number suggests.

    Size the hose and fittings as part of the system

    A capable compressor can feel weak behind a long, narrow hose and a stack of restrictive quick couplers. Use the tool and compressor guidance for hose inside diameter, maximum practical length, fittings, regulator, lubricator where required, and filtration. Keep the run short enough for the layout, but long enough that it does not pull tight or cross the normal aisle.

    Place a readable regulator where the operator can set the tool’s working pressure. Maximum tank pressure is not the pressure every tool should receive. Never exceed the pressure rating of the hose, fitting, accessory, or tool. Inspect for wear, cuts, heat damage, and secure connections before use.

    Store the hose on a reel or broad hanger designed for it, outside the vehicle path. A ceiling reel can save floor space only if it clears the garage door and the hanging lead does not become a head-level obstacle. The broader garage storage systems guide helps place reels after doors, utilities, and parking are mapped.

    Plan moisture control and drainage before purchase

    Compressing air produces condensate. How often the receiver needs draining depends on the machine, climate, use, and manufacturer instructions. Choose a location where the drain can be reached without crawling beneath a hot pump or tipping the compressor. Use only the drain arrangement and approved accessories specified for the receiver.

    Moisture-sensitive tools and finishing work may need filtration or drying beyond the receiver drain. Select equipment from the downstream air-quality requirement, not from a generic accessory bundle. Keep filters and separators visible enough to inspect and install them within their stated pressure, flow, and orientation limits.

    OSHA’s air-receiver rule covers workplaces, not residential compressor selection, but it points to sound habits: receivers need pressure-relief protection, gauges, and a drain at the lowest point. Do not weld, drill, patch, or improvise pressure components. Corrosion, a damaged tank, a questionable relief valve, or an altered receiver needs qualified evaluation rather than a home repair.

    Unplugged garage air compressor with drain valve accessible above a shallow maintenance tray
    A drain that can be reached without moving half the shop is more likely to receive the routine care its manual requires.

    Do not use compressed air as a cleanup shortcut

    Blowing dust from clothes, skin, benches, or the garage floor creates flying debris and puts captured material back into the breathing zone. OSHA’s compressed-air safety guidance explains that workplace cleaning with compressed air is tightly limited and still requires guarding and personal protection. A home shop should use a suitable vacuum and material-specific controls instead.

    Compressed air can drive chips into eyes and skin, damage hearing, and push dust into motors or ignition areas. Never aim an air gun at a person. Use approved nozzles for their intended task, wear the protection specified by the tool and material guidance, and keep bystanders out of the work zone.

    For tire inflation, use a rated inflator with a readable gauge and follow the vehicle, tire, and inflator instructions. A large tank or high maximum PSI does not make careless inflation safer. Stand clear of questionable assemblies and seek professional tire service when damage, corrosion, or an improper fit is involved.

    Use a final buying and placement checklist

    Write down the hardest tool cycle, required CFM or SCFM at PSI, simultaneous demand if any, acceptable recovery pause, compressor delivery at that pressure, duty guidance, tank size, voltage, circuit, dimensions, weight, sound rating, oil type, hose, fittings, regulator, drain access, and service support. Then verify the current manual for every shortlisted model.

    Tape the complete footprint on the floor. Roll the largest nearby cart, open the vehicle door, and reach the drain. Confirm that ventilation stays open and the hose reaches the tool without crossing the main walking path. The planning sequence in our garage storage guide is useful because a compressor competes with shelves, cabinets, and parking for the same edges of the room.

    Common mistakes are easy to name: buying by gallons alone, comparing airflow at different pressures, trusting peak horsepower language, ignoring duty guidance, undersizing the hose, assuming outlets are separate circuits, hiding the machine in a sealed cabinet, and making the drain unreachable. Avoid those, and the right compressor often becomes obvious. It is the smallest model that comfortably supports the documented job and still fits the room as a machine that needs air, service, power, and respect.

    Useful products to compare

    These links open current Amazon search results. Check the dimensions, manual, mounting hardware, warranty, and current availability for the exact model before you order.

    Before you buy or install

    Read the current manual for the exact product you are considering. Confirm its assembled dimensions, rated capacity, mounting requirements, included hardware, working clearances, warranty, and any limits that apply to your wall, floor, electrical circuit, or garage layout.

    Frequently asked questions

    What size air compressor is enough for a home garage?

    There is no single garage size. Use the highest documented airflow demand at the required pressure among tools that will run one at a time. Add overlapping demands only when tools truly run together, then choose rated delivery above that requirement and verify duty, circuit, noise, and footprint.

    Is a bigger air-compressor tank always better?

    No. A larger tank stores more air and can smooth brief demand, but it adds weight and space. It does not increase the pump’s sustained air delivery. Pick CFM or SCFM at the required PSI first, then choose tank volume for the work rhythm and room.

    Can a small compressor run an impact wrench?

    Possibly, when the exact wrench’s pressure and airflow needs fit the compressor and the work involves short bursts with recovery time. Check both manuals. Do not assume every half-inch impact has the same consumption or that a large tank badge guarantees performance.

    Where should an air compressor sit in a garage?

    Use a stable, protected location with the ventilation and clearances required by the manufacturer. Keep controls, intake, drain, and service points accessible. Avoid the vehicle path, water, dust accumulation, sealed unventilated cabinets, and hose routes across the main aisle.

    How much extra CFM should I buy?

    Choose rated delivery clearly above the tool’s verified requirement to allow for practical losses and recovery, but do not treat one universal percentage as a rule. Hose layout, duty pattern, simultaneous use, and manufacturer sizing guidance determine how much margin is appropriate.

  • Table Saw Clearance in Garage Workshop Plans: Follow the Full Stock Path

    Table Saw Clearance in Garage Workshop Plans: Follow the Full Stock Path

    Affiliate disclosure: As an Amazon Associate I earn from qualifying purchases. This article may contain affiliate links, and Bay & Bench may earn a commission at no extra cost to you. Read our full Affiliate Disclosure.

    Table saw clearance in garage workshop plans starts with the moving stock. A tidy rectangle around the machine only shows how it parks. An eight foot board travels past the blade, so its ends occupy different parts of the room during one cut. The fence opens, outfeed support takes floor space, and the operator needs a stable stance outside the kickback line. A garage door, vehicle, hose, or bench can interrupt that path even when the saw fits easily. Measure the exact saw and the longest stock you expect to cut. Map setup, cutting, and parking as separate room states, while following the saw manual and applicable safety requirements.

    Quick answer

    Use the blade line as the origin. For stock length L, record starting gap S and final travel P after the trailing end clears the blade. Axial sweep is 2L + S + P. Measure blade to front edge F and blade to supported rear edge R; clear floor beyond the saw is max(0, L + S – F) in front and max(0, L + P – R) behind. Add fence travel, stock width, supports, operator stance, helper, hose, cord, doors, and vehicle state. Replace the examples below with measurements from your saw, manual, stock, and garage.

    Calculate table saw clearance in garage workshop plans from the blade line

    The blade line is the useful datum. Call the stock length in the feed direction L. Add S, the starting gap between the leading edge and blade, plus P, the final travel of the trailing edge past the blade. The full axial sweep is 2L + S + P.

    This formula describes movement only. The manual sets the operating method and safety constraints; the material, supports, stance, and room decide the fit. When measuring open floor from the saw body, subtract the table already within the path. With F as the blade to front table edge distance, infeed projection beyond the saw is max(0, L + S – F). With R as the blade to the back of the last continuous support, outfeed projection is max(0, L + P – R).

    Keep every measurement in one unit. A sketch based on measuring a garage for storage will catch wall jogs, door tracks, and fixed equipment that a listing photo misses.

    Configure the unplugged saw before measuring its footprint

    Parking dimensions are rarely operating dimensions. Before installing the guard or dust fittings, extending rails, changing the setup, or making adjustments, disconnect the saw from its specified power source and follow the exact model’s manual. Put the disconnected saw on a level floor in working position, lock the base as directed, fit the required guard and accessories, and set the fence for the planned cut. Include every rail, wing, shelf, support, handle, and knob used in that operation.

    A product page may quote a compact body and a much larger rip capacity. The current Bosch GTS15-10 specifications, for example, list a 28.1 inch length, 27.8 inch width, and 32.125 inch right rip capacity. Those figures don’t include an eight foot board, the person feeding it, or an outfeed stand.

    Record F, the rear table edge, maximum rail width, table height, dust port, and base outline. If a bench will act as outfeed, check its height and rigidity against the saw instructions.

    Draw the whole stock path, including setup and removal

    With the saw unplugged, mark the blade line and lay a light, full length substitute along the feed axis. Put its leading end at the planned starting gap and trace the trailing end. Slide it to the planned finish position and trace the leading end. This layout check never needs a powered cut.

    Now trace how the stock enters, turns onto the saw, transfers to support, and leaves. A long board can clip a shelf or car before it reaches the blade. A full sheet needs a loading rotation that its straight feed rectangle does not show.

    Label the workpiece and orientation. A 96 by 48 inch sheet has a 96 inch feed length for a lengthwise rip and 48 inches when it travels the other way. The cut must still suit the saw, guide, and manual.

    Overhead view of a garage table saw with the full infeed and outfeed stock path marked on the floor
    Measure from the blade line to the stock’s farthest starting and finishing positions, then add the real support and handling zones.

    Compare stock path scenarios before choosing a saw position

    The table below uses only the geometric 2L sweep. It leaves S and P blank because those values come from the real setup and manual. Use the figures as planning examples, then calculate your working clearances.

    Illustrative stock and feedFeed length LBasic axial sweep 2LAdd to the drawingLikely garage conflict
    48 inch board, rip along its length48 in96 inS + P, stance, rear supportBench drawer or wall storage behind operator
    96 inch board, rip along its length96 in192 inS + P, stand feet, handling routeClosed service door at one end of the path
    96 by 48 inch sheet, lengthwise rip96 in192 inS + P, 48 inch lateral stock span, side support, corner sweepVehicle side, wall cabinet, or fence rail
    120 inch board, rip along its length120 in240 inS + P, support stations, helper position if allowedGarage door, driveway traffic, or storage at the back wall

    For a custom row, write the actual stock size, feed orientation, S, P, F, and R. The garage storage fit calculator can compare fixed room and storage depths, but it cannot decide whether a moving workpiece is stable or whether a cut is appropriate.

    Add stock width, fence travel, and side support

    Length gets the attention. Width is where many garage layouts quietly fail. Set the fence and measure the saw’s full operating width. Add the stock across the blade, offcut support, and room for hands to guide it as the manual directs.

    A sheet needs stable support wherever its weight would pull it off line. One narrow roller may not control a wide panel. The current DeWalt DWE7491RS manual tells users to support long or wide workpieces at the rear, sides, or both, and to allow enough room to handle the workpiece. Choose the operation and support plan first, then see whether the room accepts it.

    Keep lumber and clamps outside the fence’s travel. If a bench is part of the support plan, compare its top, base, drawers, and mobility in the garage workbench buying guide.

    Reserve an operator zone beside the kickback line

    Draw the operator as a moving shape. Mark both feet, a balanced feeding stance, side steps, hand travel, and switch access with the saw unplugged and blade lowered. The stance cannot overlap a car, support leg, cord, or door swing.

    The OSHA table saw guidance says to leave sufficient stock clearance, stand to the side of the blade, keep hands out of the cut line, and support every piece. It also advises against crosscutting long boards on a table saw. OSHA rules address workplaces, but these hazard descriptions help with a home layout. The manual and local requirements still apply.

    Keep the operator upright and away from the blade even in a tight room. If the manual permits a helper, give that person an exact task and floor position.

    Give every infeed and outfeed support its own footprint

    Trace the support base, knobs, and setup route. A roller may sit under the stock while one foot blocks the operator’s step. A folding outfeed table can block a service door. Casters and uneven concrete can let a cabinet move.

    The current SawStop Jobsite Saw Pro manual calls for adequate support so long material does not shift past the table edge. It also gives model specific rules for guards, feeding, and push sticks. Read the manual for the exact model and cut; don’t copy an accessory rule from another saw.

    Set support height on the actual floor in operating mode. Move a light substitute over the whole path. It should neither climb nor drop at a support.

    Treat the garage door and vehicle as changing boundaries

    Draw parking and cutting states. Parking mode shows the vehicle in its normal range, doors and hatch in use, and the saw stored. Cutting mode shows the marked saw position, open supports, staged stock, and the vehicle’s agreed location. Note which doors may open.

    An open overhead door can add length, but the threshold, slope, weather, driveway traffic, people, pets, and door hardware remain. Prevent door movement during the operation and follow both manuals. Record any reliance on good weather or an empty driveway.

    Give a mobile saw a repeatable home within the garage storage plan. Mark its wheel and blade positions. After moving it, recheck level, stability, locks, power, dust connection, and required assembly.

    Mobile table saw parked against a garage wall with its operating position taped beside a vehicle
    Parking mode and cutting mode are separate layouts. A marked operating position makes the changeover repeatable.

    Route the dust hose and power cord outside the movement path

    Connect the actual hose and cord before accepting the layout. Move the fence through its range and roll the saw between its marks. A hose can tug the saw, catch a support leg, or enter the board’s path. A cord underfoot can spoil an otherwise stable stance.

    Route both as their makers allow, away from sharp edges, heat, tires, and the garage door. Use the supply arrangement specified for the saw. Keep plugs and shutoff access reachable without entering the stock path.

    Wall storage can lift accessories off the floor. Check projection and mounting limits in garage wall storage systems. For anything above the saw, measure the lowest point using overhead garage storage clearance.

    Run an unplugged setup rehearsal before accepting the layout

    Tape the saw, rail, support, operator, and stock envelopes in different colors. With the saw disconnected and blade lowered, move a light full size substitute from storage through the traced path. Open the service door, place the dust extractor, and approach the switch. Stop at any collision or unstable foot position.

    Repeat with the longest and widest planned stock; they expose different failures. While equipment stays off, check the household route and decide whether it must close during work. Nobody should cross an active feed or outfeed path.

    Leave the tape down for several days. Parking drift and returned bins expose weak spots. This fit rehearsal does not prove that a cut, support arrangement, or technique is safe.

    Change the operation when the full path will not fit

    Rotate the saw so stock follows the garage’s longer axis, move the vehicle out, or relocate shallow storage. Compare full operating envelopes after every change. A compact parking footprint says nothing about the cutting state.

    Large material may need a different suitable tool and supported breakdown method before smaller pieces reach the table saw. Follow that tool’s instructions. Renting workspace or buying prepared stock beats forcing a ten foot path through a busy doorway.

    Never remove a guard, skip support, stand in line with the blade, or borrow an exit route to rescue the plan. Keep the stock path drawing near the saw. Recalculate when the stock, fence, vehicle, support, or saw changes.

    Before you buy or install

    Check the current manual for the exact product you are considering. Confirm the assembled dimensions, load rules, mounting requirements, included hardware, clearances, warranty, and any limits that apply to your wall, floor, or garage layout.

    Frequently asked questions

    How much table saw clearance do I need for an eight foot board?

    An eight foot board has a basic blade centered sweep of 16 feet: one board length before the blade and one beyond it. Add the model specific starting gap and final travel, then map support, stance, and stock width. Subtract blade to table edge distances only when calculating clear floor beyond the saw body. Check the exact manual.

    Can a workbench be used as a table saw outfeed table?

    Only when the saw manual permits the arrangement and the bench gives stable support at the correct height without trapping the workpiece. Check the real floor, top height, base, casters, drawers, and anything stored on the bench. Trace the worker and door paths too. A nominally matching height does not prove the stock will transfer smoothly.

    Can I point a table saw through an open garage door?

    It may create physical length, but include the threshold, driveway slope, weather, people, pets, traffic, supports, and door hardware in the plan. Prevent door movement during the operation and follow both equipment manuals. If the stock cannot stay fully supported or the outside path cannot be controlled, use another layout or a suitable breakdown method.

    Does rip capacity tell me how much side clearance a table saw needs?

    No. Rip capacity describes a cutting capability relative to the blade and fence. Side clearance also includes the opened rails, full stock width, offcut and panel support, hands, operator stance, knobs, hose, nearby storage, and the stock’s corner sweep during loading. Measure the saw at the intended fence setting with the planned workpiece.

  • Garage Workshop Aisle Clearance: Measure the Space You Actually Use

    Garage Workshop Aisle Clearance: Measure the Space You Actually Use

    Affiliate disclosure: As an Amazon Associate I earn from qualifying purchases. This article may contain affiliate links, and Bay & Bench may earn a commission at no extra cost to you. Read our full Affiliate Disclosure.

    Garage workshop aisle clearance changes with the job, so one borrowed gap cannot describe the whole room. Pull a drawer or stand at the bench, and the empty strip gets smaller. Carry a tote, steer a tool cart, open a car door, or feed a long board through a machine, and its shape changes again. A path that feels generous while the room is empty can vanish during an ordinary job. Measure the garage in those active states, at its narrowest points, and with the people and loads that will use it. Any stated tool clearance, local building rule, fire requirement, or accessibility requirement still applies. The method below helps you find your working envelope; it does not replace those instructions.

    Quick answer

    Don’t choose one workshop walkway width for the whole room. Mark each route by purpose: simple passage, working stance, an open drawer or door, material handling, cart movement, vehicle access, and any mobility device. Measure fixed projections first, add the largest moving part, then walk or roll the real task through a taped mockup. Record the narrowest clear point. Keep exit routes and required access separate, and check local rules plus every tool and storage manual before fixing the layout.

    Plan garage workshop aisle clearance by activity

    A floor plan usually shows cabinets and machines as closed rectangles. That view is useful for storage mode and almost nothing else. Give each busy part of the garage its own state: closed, being opened, in use, and moving through the room.

    A passage is the strip used to get from one place to another. A work zone includes the person’s feet, hips, elbows, and the motion of the task. An open state adds drawers, doors, clamp handles, and vehicle panels. A handling route includes the tote, sheet, board, cart, or mobility device being moved. Those envelopes may overlap at different times, but they cannot occupy the same space at the same moment.

    This distinction prevents a common mistake. The measured gap between a bench and a car might be a workable walking path while the bench is closed. It may fail as soon as a drawer opens or someone turns with a storage bin.

    Map fixed faces before drawing the walkway

    Measure between finished, protruding faces rather than walls on an old plan. Cabinet handles, a benchtop overhang, a vise screw, shelf lips, wall mounted tools, a curb, and car mirrors can all become the true edge. Take readings near the floor, at hip height, and higher up. The tight point may change with height.

    Record doors, steps, posts, appliances, electrical panels, garage door tracks, opener parts, pipes, and anything that must remain reachable. The worksheet in our guide to measuring a garage for storage is a practical place to collect those dimensions.

    Then mark uncertainty. A car will not stop on precisely the same line every night. A bowed wall can steal an inch at one end. Treat the smallest measured gap and normal parking variation as real conditions, not rounding errors.

    Use a worksheet instead of borrowing one aisle width

    Build one row for every route or station. The final dimension comes from the task and the user’s trial, not from averaging the rows. This table is meant to be filled with measurements from your garage.

    Route or stationFixed boundaries to measureOpen or moving state to addTest to performResult to record
    Everyday passageNearest handles, shelves, mirrors, and wall edgesNormal parking variation and items left in placeWalk through carrying the usual tote, bag, or tool caseNarrowest usable point and snag locations
    Workbench in useBench face to the opposing fixed or parked objectDeepest drawer, cabinet door, vise handle, and clampsStand, reach, bend, step back, and change toolsFull working envelope for that task
    Mobile cart routeDoorways, corners, parked tools, and thresholdsCart handle, caster swing, cord, and carried loadPush, turn, stop, and park an empty substituteTurn outline plus a marked parking home
    Long material pathMachine, walls, cars, doors, and storage facesLeading end, trailing end, side sweep, and supportsMove a light full length mockup through the planned operationComplete travel path, including setup and removal
    Mobility and exit routeFinished faces, thresholds, door hardware, and door swingDevice, hands, turning approach, and other usersCheck the real user and applicable requirementsProtected route that storage never borrows

    Store the figures beside the layout, not in your head. The garage storage fit calculator can help reconcile room width, storage depth, and the remaining clear strip, but the physical movement test still decides whether that strip works.

    Measure passage with the load in your hands

    Walking through empty handed is the easiest version of an aisle. Try the trip that happens on a wet Tuesday: carrying recycling, a bulky tote, groceries, a compressor hose, or a project box while a vehicle is parked. Watch elbows and knuckles. Note where the load forces the person to turn sideways.

    Long objects need a different check. A ladder or board rotates around the person carrying it, so the ends sweep well beyond shoulder width. A sheet may need two people and room for both sets of hands. Do not count a nearby bench as part of the path if it will hold a project at the same time.

    Separate household traffic from workshop staging where you can. A plan for garage storage zones and routes can keep daily gear near its destination, which reduces the number of wide loads crossing the work area.

    Add the worker’s stance around a bench or machine

    The worker is part of the machine footprint. At a bench, mark where the toes land during close work and where the hips move while planing or filing. Then see how far the person steps back to inspect or lift a project. Repeat the check while reaching into the lowest drawer. A shallow toe recess may help standing posture, but it does not create room for another person to pass behind.

    Machines add controls, guards, fences, dust fittings, cords, supports, and stock. Read the manual for setup and operating restrictions. If the maker specifies a clearance or a safe operating position, use it. Floor tape cannot cancel an instruction.

    Bench depth, top size, vises, drawers, and mobility all change the working envelope. Compare those parts before buying in the garage workbench buying guide. A smaller top is useful only if the work still fits on it.

    Open drawers, doors, hatches, and vises

    Open every moving part to the position you really use. Measure a drawer from the fixed cabinet face to its outermost handle. Swing cabinet doors through their arcs. Extend pullout bins, folding tops, vise screws, and clamp tails. Then check whether the worker can stand where the contents are visible and lift an item out.

    Do the same with the vehicle parked in its normal range. Driver doors, sliding doors, trunks, hatches, charging leads, and fuel access create different shapes. Two open states that are individually acceptable may collide, such as a bench drawer and a car door.

    Some conflicts can be scheduled. You might open the deep bench drawer only after the car leaves. Write that rule down. If the drawer contains daily tools, though, the arrangement will be annoying from the first week.

    Man working at a garage bench with several drawers and a cabinet door open beside a parked car
    Open drawers and doors occupy the same floor area that looks like a clear walkway when the storage is closed.

    Trace carts and long material through each turn

    A rolling cabinet does not turn inside its body outline. Swivel casters swing, handles project, and the person pushing it needs a place to stand. Tight corners may require a pull, correction, and second push. Tape the proposed route, then steer an empty cart or a light cardboard mockup from its storage home to its work position.

    Check thresholds, floor cracks, slopes, cords, and door tracks. A cart that crosses them badly may twist toward a car or bench. Follow the caster and cabinet instructions for loading, locking, and use on the floor you have. Do not perform the first route test with a fully loaded tool chest.

    For boards and sheet goods, trace the ends, not just the carrier’s feet. Include infeed, cutting or assembly position, outfeed, and the route back out. Keep that sweep away from people entering through a service door. If a helper is normally involved, give the helper a measured stance too.

    Man turning a rolling tool cart through the aisle between a garage workbench and a parked car
    A rolling cart needs space for its handle, caster swing, and turning path as well as the cabinet body.

    Protect mobility routes, exit paths, and stated clearances

    A person using a cane, walker, wheelchair, or other mobility device may need more room at a turn, threshold, latch, or transfer point than a standing adult carrying nothing. Measure the device with the user’s hands and normal approach. Involve that person in the mockup if they want to participate and the test can be done safely. Do not infer a personal fit from a generic aisle number.

    Accessibility, building, fire, electrical, and workplace rules depend on the property, location, use, and project. A home shop, shared building, and commercial workspace may face different requirements. Confirm what applies with the local authority or a qualified professional before construction. Keep required access to panels, appliances, controls, and exits clear.

    Treat an exit route as protected space. A movable cart still blocks it while parked there, and an open drawer can narrow it at the worst time. Manuals for tools, cabinets, heaters, chargers, and garage door equipment may add their own access or separation instructions.

    Tape the room and run three ordinary scenarios

    Mark fixed equipment in one tape color and moving edges in another. Use cardboard to give cabinets and handles real height. A line on the floor will not reveal a shoulder level collision with a shelf or mirror.

    Run the room in three states. First, use storage mode with vehicles and mobile tools parked. Second, use setup mode while carts move, stock comes in, and drawers open. Third, use active work mode with the operator, supports, dust hose, and project in place. Add a fourth state if another household member must pass during work.

    Carry familiar loads and wear normal footwear. Reach the house door, open the deepest drawer, turn the cart, and move a light full size material substitute. Never simulate a powered cut. Leave the tape down for several days so ordinary traffic can expose the awkward spots.

    Recover clearance when the layout fails

    Start by reducing projection, not by asking people to squeeze. Move seldom used items above or outside the busy route. Replace deep floor storage with a shallower wall zone where the structure and product instructions allow it. Our guide to garage wall storage systems compares common rail, panel, and pegboard arrangements.

    Next, question the base. Wall mounted and freestanding garage shelves use floor and wall space differently, and either choice can be wrong near a door, curb, or parked car. Compare the full range of garage storage systems before solving every problem with another cabinet.

    Rotate the bench, give a cart a better home, reverse a door where permitted, or split one congested station into two. After each change, repeat the open state and movement checks. Keep the tape marks that matter. They make creeping boxes and temporarily parked tools easy to spot.

    Before you buy or install

    Check the current manual for the exact product you are considering. Confirm the assembled dimensions, load rules, mounting requirements, included hardware, clearances, warranty, and any limits that apply to your wall, floor, or garage layout.

    Frequently asked questions

    How much garage workshop aisle clearance do I need?

    There is no single width for every aisle. A simple passage, a bench work zone, a material path, a mobility route, and a required exit path solve different problems. Measure the narrowest fixed gap, add open doors or drawers, then test the real user and normal load. Follow any applicable code and manufacturer dimensions.

    Does an open drawer count as part of workbench clearance?

    Yes, whenever the drawer can be open while someone works or passes. Measure to the outermost drawer or handle and include the person’s stance for seeing and lifting its contents. If the drawer may open only after a car or cart moves, make that operating rule explicit.

    How should I plan a workshop route for a wheelchair or walker?

    Measure the actual device, hands, turning approach, thresholds, and door operation with the person who will use the route. Protect that envelope from temporary storage. Also check the accessibility and building requirements that apply to the property and project, since a personal movement test does not establish compliance.

    Can the gap beside a parked car double as a workshop aisle?

    It can serve some tasks if the measured car envelope, normal parking variation, door or hatch movement, worker, and carried load all fit at the same time. Test the parked state with the actual vehicle. Keep hard tool edges and material paths away from the paint, and do not borrow a required exit or access route.