Category: Garage Storage

Cabinets, shelving, wall storage, overhead racks, and garage organization systems.

  • Best Garage Ceiling Storage Lift: 5 Smart Picks

    Best Garage Ceiling Storage Lift: 5 Smart Picks

    Affiliate disclosure: As an Amazon Associate I earn from qualifying purchases. This article may contain affiliate links, and Bay & Bench may earn a commission at no extra cost to you. Read our full Affiliate Disclosure.

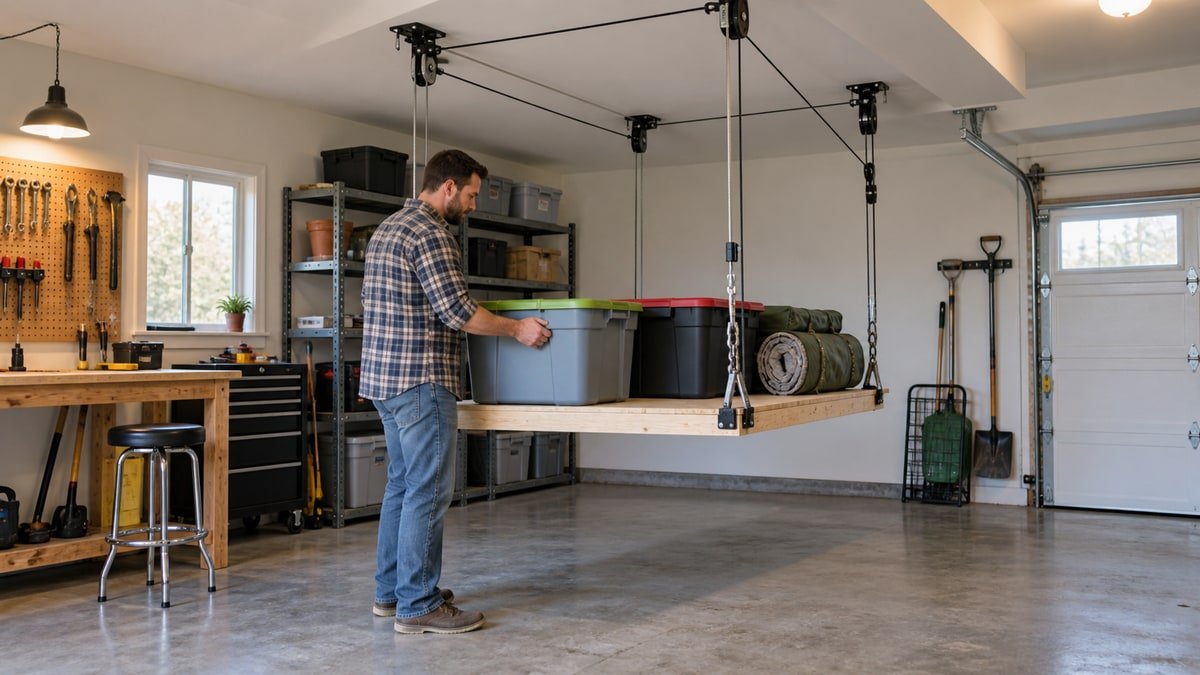
    The best garage ceiling storage lift brings seasonal totes down to a safe loading height, raises them above the parking zone, and stops before cargo reaches the door tracks or ceiling. Motorized systems add remote or wall controls. Manual systems use a drill or crank and avoid another powered motor overhead.

    Capacity is only one part of the decision. Platform size, lifting travel, minimum stored height, joist direction, opener position, and emergency lowering all matter. A four by eight platform can hold plenty of light household gear, yet it also occupies the same ceiling rectangle as two sheets of plywood. This guide compares five current lift styles and walks through the measurements that should happen before installation.

    Quick answer

    Auxx-Lift offers the widest range of platform sizes and capacity configurations, while Auxx-One is a simpler single motor option for loads up to 400 pounds. GarageSmart’s 4 by 4 lifter fits a smaller ceiling bay and uses app controls. ONRAX Ascension suits buyers who prefer a keyed wall control. The E-Z 4 by 8 lift is the straightforward drill powered choice with no dedicated outlet or app.

    Best garage ceiling storage lift choices at a glance

    The figures below come from current manufacturer pages, but capacity can change with platform size, motor count, cable layout, and installation kit. Match the exact model and manual before purchase. Never transfer the headline capacity from one configuration to another.

    PickPlatform choicesPublished cargo or system capacityOperationBest fit
    Auxx-Lift3 by 6 through 4 by 8 feet400, 600, or 800 pounds by setupMotorized remoteConfigurable large storage
    Auxx-OneMultiple platform packagesUp to 400 poundsSingle motor remoteSimpler powered lift
    GarageSmart 4 by 44 by 4 feet400 pound system, 365 pound cargoMotorized app controlCompact smart platform
    ONRAX Ascension3 by 4 through 4 by 8 feet400 poundsMotorized wall controlKeyed fixed controls
    E-Z 4 by 8 lift4 by 8 feet400 poundsDrill poweredNo outlet or app needed

    Capacity includes more than the totes. Some makers state cargo capacity after subtracting the platform, while others publish a total system rating or offer different ratings by motor package. Read the definitions closely and stay within every component limit.

    Measure the moving volume, not one ceiling rectangle

    Mark the platform outline on the floor, then imagine that rectangle moving from loading height to the ceiling. Nothing may enter that column: the car roof, an open hatch, a raised garage door, shelves, lights, opener rail, people, or a ladder. Cargo can extend above the deck, so measure the tallest loaded tote too.

    Our garage measuring guide helps capture wall offsets and obstructions. The more specific overhead storage clearance guide covers doors, vehicles, and the usable zone near the ceiling. Record measurements with the door open and closed because its panels occupy different positions during travel.

    Check the lowest point on the platform, not the ceiling height. Motors, cable drums, frames, and deck structure consume vertical room. A lift that stores close to the ceiling can leave more headroom, while another may hang nearly two feet even when empty.
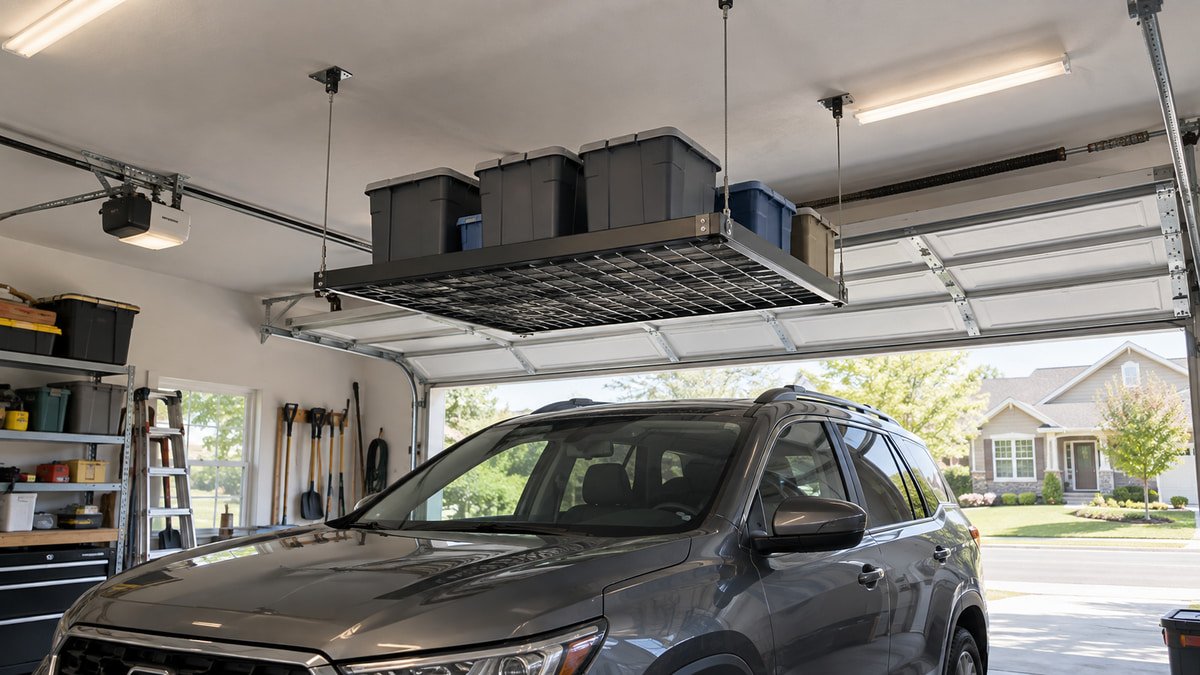
    Ceiling storage lift raised above an SUV with clear door track space
    The raised platform must clear the vehicle, open door, tracks, opener, lights, and carried cargo.

    Auxx-Lift for configurable platform size and capacity

    The Auxx-Lift comes in 3 by 6, 3 by 8, 4 by 6, and 4 by 8 foot formats. The maker lists 400, 600, and 800 pound capacity configurations, depending on platform and motor setup. It operates from 120 volt power with a remote, and Auxx-Lift publishes a minimum stored height of eight inches for specified arrangements.

    This range makes it the strongest choice when the ceiling bay is unusual or the owner wants more than a 400 pound class. More capacity also raises the installation stakes. Joist position, fastener pattern, motor spacing, cable geometry, and electrical routing need to match the selected manual.

    Use the platform for evenly distributed household storage within its rating, not as a person lift or vehicle service device. Heavy items still need to be raised onto the lowered deck, so a high capacity number does not make dense equipment easy to handle.

    Auxx-One for a simpler powered lift

    The Auxx-One is the streamlined sibling. Auxx-Lift describes one motor, an E-beam structure, remote operation, 120 volt power, and capacity up to 400 pounds. A 22 foot travel option is available for tall spaces, which can suit a lofted garage or high ceiling installation.

    One motor reduces the number of powered units to coordinate, but the complete cable and platform system still has to remain level. Follow the balancing, limit setting, and inspection procedures for the exact configuration. A platform that begins to tilt should be stopped and checked before another cycle.

    This model fits a homeowner who wants powered convenience without selecting a multi-motor high capacity package. Compare its stored height, platform kit, control method, and installation needs with the full Auxx-Lift. The cheaper or simpler motor arrangement may not be the better fit when ceiling obstructions dictate cable positions.

    GarageSmart 4 by 4 for a compact smart platform

    The GarageSmart 4 by 4 Platform Storage Lifter targets a smaller ceiling bay. GarageSmart lists a 400 pound system capacity with 365 pounds available for cargo after the 35 pound platform. Published travel is 11 feet 9 inches, and the empty hanging height is 18 inches. Control comes through the company’s Bluetooth connected system and app.

    A 4 by 4 platform fits where a full 4 by 8 deck would conflict with lights or an opener. It also creates a more modest load area, which can make even distribution easier. The 18 inch empty hanging dimension needs attention in a low garage because totes add more depth below that.

    App control introduces a phone, software, and hub relationship. Confirm current device compatibility, local manual controls, shared household access, and recovery after a phone change. A storage lift should have a clear operating plan even when the primary phone is missing.

    ONRAX Ascension for a keyed wall control

    The ONRAX Ascension series includes platforms from 3 by 4 through 4 by 8 feet. ONRAX publishes a 400 pound lifting capacity, use with ceilings up to 16 feet, and a minimum clearance figure of 29 inches. Operation uses a wall pushbutton with a key lock rather than relying on a mobile app.

    A keyed fixed control can suit a shared household because the operating point is predictable and access can be limited. Place the switch where the user sees the entire platform path. A control hidden around a corner makes it harder to notice an open hatch, shifted bin, or person entering the area.

    The 29 inch minimum clearance is meaningful in a standard eight foot garage. Add vehicle height and cargo height, then compare the result with our overhead garage storage buying guide. The platform may fit above a sedan and fail above an SUV.

    E-Z 4 by 8 lift for drill powered operation

    The E-Z 4 by 8 lift uses a common drill to raise and lower the platform. The current product page lists 400 pound capacity and configurations for eight to fourteen foot ceilings. There is no dedicated lift motor, wall switch, or app to power.

    Manual drill operation trades pushbutton convenience for mechanical simplicity. The drill still needs the torque, chuck fit, direction, and speed called for by the instructions. Keep it under control throughout travel and store the operating tool where authorized adults can find it.

    A 4 by 8 deck holds bulky seasonal bins well, but its size makes obstruction checks especially important. Compare it with the fixed rack formats in our 2 by 4 versus 4 by 8 overhead rack guide. A lift adds access, while a smaller fixed rack can preserve ceiling room for lights and door travel.

    Distribute weight across the platform

    Think in zones rather than one total. Put similar weight in opposite corners and keep the center of mass near the platform center. Do not stack one edge with dense boxes while the other holds pillows. Strap or contain items as the manufacturer directs so a tote cannot walk toward the edge during travel.

    The limit includes every stored object and may include the deck or accessories depending on the maker’s definition. Our overhead storage weight guide explains why product rating, attachment points, framing, and load distribution are separate limits. The lowest limit governs the installation.

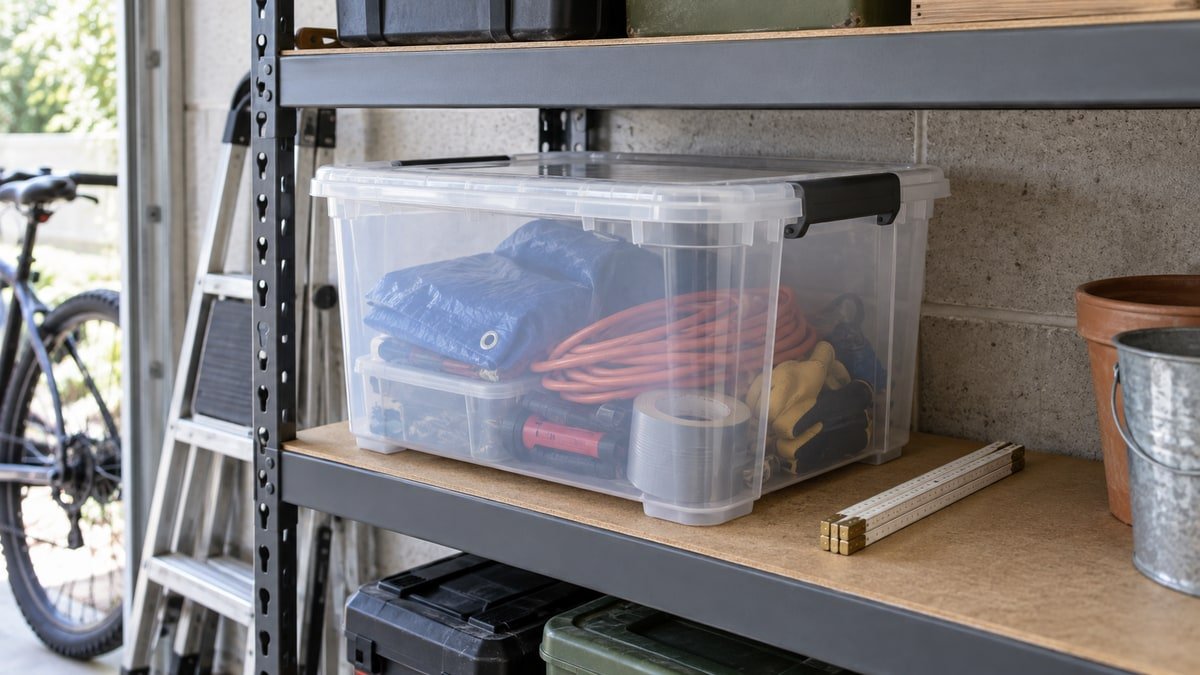
    Use lidded, undamaged totes that sit flat. Keep loose balls, folding chairs, and long objects restrained. Label bins on the side visible from the floor. That avoids unnecessary cycles just to discover which opaque box contains holiday lights.
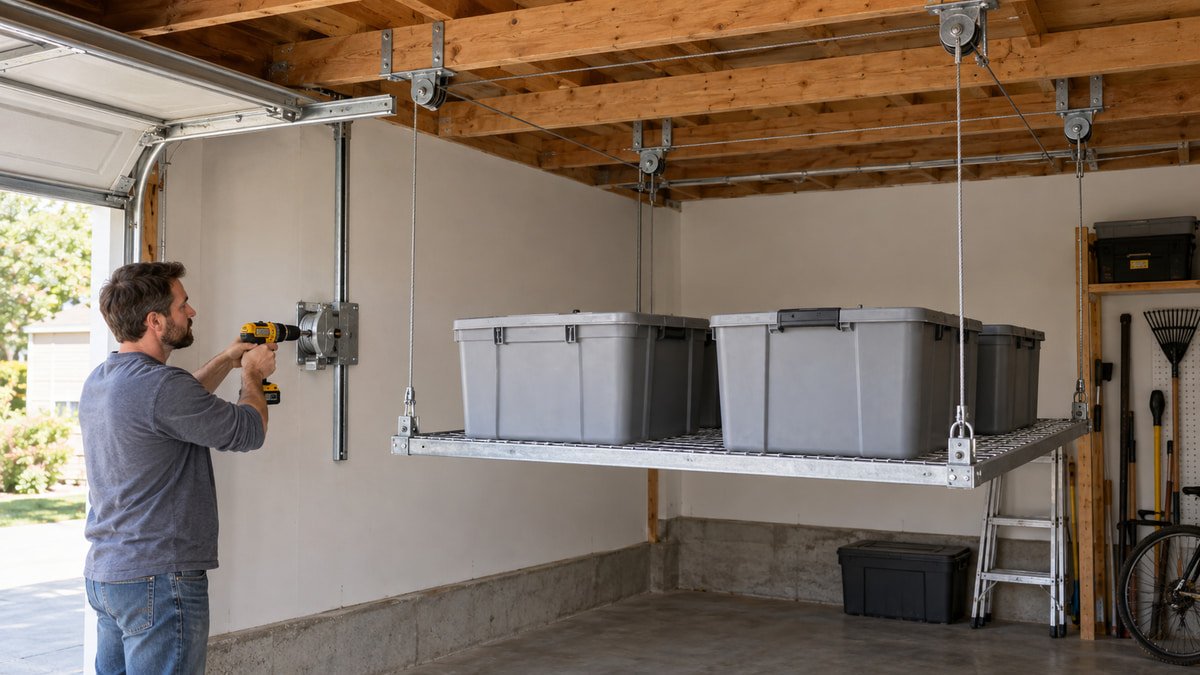
    Drill powered garage ceiling lift holding evenly spaced lightweight totes
    A manual drill powered lift removes a dedicated motor while keeping loads balanced across the platform.

    Treat installation as a structural project

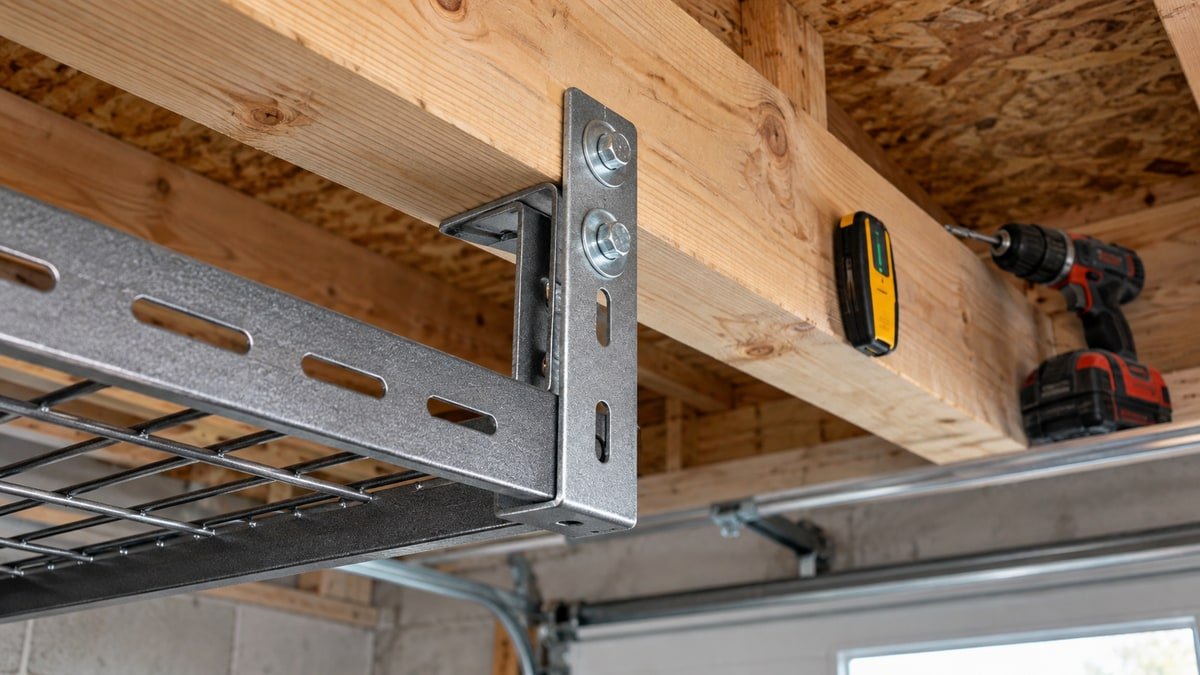
    A ceiling lift applies static load, moving load, and repeated cycles to its attachment points. Joist size, direction, spacing, condition, and any engineered truss restrictions matter. Do not drill or cut structural members merely to make a bracket land neatly. When framing is hidden, damaged, or unclear, bring in a qualified professional.

    Lay out every attachment from the exact manual. Check diagonals and level before the platform is loaded. Follow torque, cable routing, limit setup, electrical, and inspection instructions. A motorized lift also needs a suitable power route that remains clear of moving hardware and complies with local electrical rules.

    Compare installation complexity with a fixed system using our fixed versus adjustable overhead rack guide. A lift earns its cost when frequent access or a high ceiling makes lowering useful. Infrequently used light bins may not need a motor and cables.

    Inspect controls, cables, and recalls over time

    Before each cycle, look for a shifted load, frayed or crossed cable, loose fastener, damaged deck, odd motor sound, and anything entering the travel path. Stop if the platform tilts or one corner moves differently. Keep people, pets, and vehicles out of the moving zone, and never stand beneath a loaded platform.

    Check current safety notices by manufacturer and exact model. CPSC issued separate 2022 recalls for certain Fleximounts overhead racks and SafeRacks and Monsterrax racks. Those notices concern other fixed products, not the five lifts above. They are a useful reminder to identify the exact model, hardware, and remedy rather than assuming all overhead products share one status.

    Save the manual and purchase record. Know the emergency lowering or release process before the first full load. A ceiling lift is most useful when everyone who operates it understands the same limits and stopping procedure.
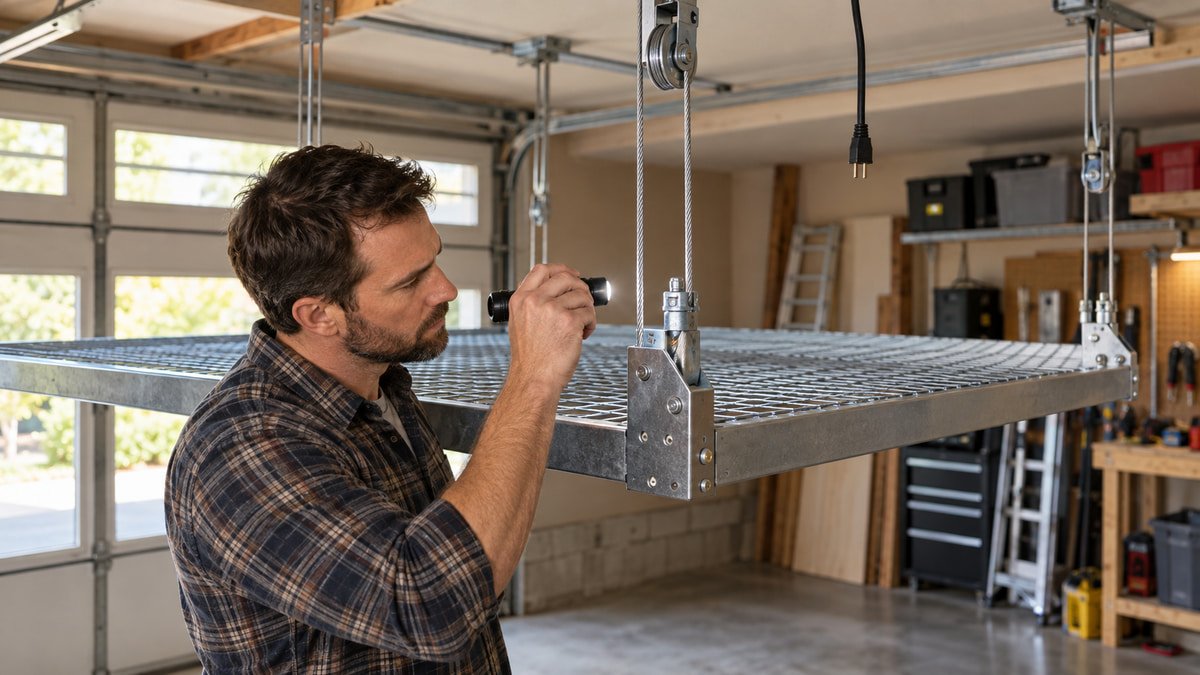
    Garage owner inspecting lift cables and platform corners from floor level
    Routine visual checks can catch a shifted tote, frayed cable, or loose corner before the next cycle.

    Useful products to compare

    These links open current Amazon search results. Check the dimensions, manual, mounting hardware, warranty, and current availability for the exact model before you order.

    Before you buy or install

    Read the current manual for the exact product you are considering. Confirm its assembled dimensions, rated capacity, mounting requirements, included hardware, working clearances, warranty, and any limits that apply to your wall, floor, electrical circuit, or garage layout.

    Frequently asked questions

    How much weight can a garage ceiling storage lift hold?

    Current home garage systems commonly publish capacities around 400 pounds, while some configurations go higher. Confirm whether the number covers cargo or the whole platform system. The framing, fasteners, platform, cables, and lift each have limits, and the lowest one controls.

    Can a ceiling storage lift go above a garage door?

    Sometimes, but only when the raised platform and cargo clear the door panels, tracks, springs, opener rail, and service zones through the full door cycle. Measure with the door open and closed, then keep the lift outside every moving path.

    Is a motorized or drill powered garage lift better?

    Motorized lifts offer convenient remote or wall controls and may suit frequent access. Drill powered lifts avoid a dedicated motor and app, but require controlled manual operation. Compare capacity, travel, emergency procedure, electrical needs, and who will use it.

    Do I need a professional to install a garage ceiling lift?

    A qualified installer is sensible when framing is hidden, engineered, damaged, unusually spaced, or when electrical work is required. Follow the product manual and local rules. Never cut a truss or improvise attachment hardware to force a layout.

    What should be stored on a garage ceiling lift?

    Use secure, evenly distributed items within the exact cargo rating, such as lidded seasonal totes or restrained light gear. Avoid leaking fluids, unstable stacks, loose objects, and anything that could be damaged by temperature. Follow the maker’s prohibited item list.
  • Best rolling tool cart for small garage: five useful setups

    Best rolling tool cart for small garage: five useful setups

    Affiliate disclosure: As an Amazon Associate I earn from qualifying purchases. This article may contain affiliate links, and Bay & Bench may earn a commission at no extra cost to you. Read our full Affiliate Disclosure.

    The driver’s door is open, one wheel is off, and the cart has nowhere useful to stand. That familiar squeeze is why the best rolling tool cart for small garage work cannot be chosen by drawer count alone. You need a cart that moves beside the car, opens without pinning you against a wall, and parks after the project. A deep mechanics cart can hold plenty, yet its handle, lid, and drawers may turn a narrow aisle into a dead end.

    This guide favors useful access over maximum capacity. The three named carts have current published dimensions and load information, while two generic cart styles cover jobs that a drawer cabinet handles poorly. Prices and colors change often, so confirm the exact model page before buying. More important, measure your garage with the vehicle parked. Empty floor space has a habit of disappearing once a door swings open.

    Quick answer

    For most small garages, a 30 to 33 inch mechanics cart with four or five drawers offers the best balance of access and storage. The five drawer U.S. General cart is the broad value pick, and the Husky 33 inch cart gives you a useful open bottom shelf. Sunex suits a heavier collection but needs more room and costs more. Choose an open shelf cart for bulky project supplies or a narrow two drawer cart when aisle width is the hard limit.

    Best rolling tool cart for small garage use at a glance

    Start with the parked footprint, then compare drawers. Width alone can fool you because a handle adds several inches and a raised lid may hit a shelf. The table separates the five layouts by the job each handles well.

    Cart setupApproximate body sizeStorage styleBest small garage fitMain compromise
    U.S. General 30 inch mechanics cart37.25 x 22 inches with handleFive drawers, top compartment, bottom trayBroad home mechanic tool setLid must open for full access
    Husky 33 inch mechanics cart33 x 20 x 39.8 inchesFour drawers, top compartment, open shelfTools plus one bulky caseOpen shelf collects dust
    Sunex 8057XT39.25 x 21.5 x 39.25 inches with handleSix full drawers and top compartmentDense hand tool collectionHeavy and less compact
    Open shelf service cartVaries, often 30 to 36 inches wideTwo or three open shelvesProject bins and cleaning gearNo secure small parts storage
    Narrow two drawer utility cartVaries, often under 30 inches wideShallow drawers and open shelfTight side aisle and light tool kitLimited drawer depth and load

    If you are still deciding between fixed and mobile storage, the tool chest and cabinet comparison explains where each format fits.

    U.S. General 30 inch cart for the strongest value balance

    Harbor Freight lists its 30 inch U.S. General five drawer mechanics cart at 37.25 inches long, 22 inches wide, and 41.375 inches high. The current product page states 15,000 cubic inches of total storage, a 700 pound working load, and 75 pounds per pair of drawer slides. Five inch casters include two fixed wheels and two locking swivels.

    That combination makes it the easy value choice for someone who keeps sockets, wrenches, pliers, and a few power tools close to a car. The top compartment is fast to scan, and the bottom tray accepts items that do not belong in shallow drawers. An integrated power port can route charger cords with the lid closed, though any charging setup still needs suitable electrical protection and open ventilation around the equipment.

    The catch is geometry. The 37.25 inch length includes the working shape, not just a tidy nominal width. Its lid opens to 90 degrees, so check shelves and wall rails above the parking spot. A 144 pound empty weight also means you will feel a rough slab once the drawers are filled.

    Husky 33 inch cart when an open lower shelf helps

    The Husky four drawer cart takes a slightly different approach. Its Home Depot product listing gives assembled dimensions of 33 inches wide, 20 inches deep, and 39.8 inches high, with a load capacity of up to 672 pounds. Four drawers ride on 75 pound ball bearing slides, and the lower reinforced shelf leaves roughly 14.5 inches of vertical storage room.

    That shelf is useful for a compact vacuum, fluid drain pan, or one rugged tool case. It also shows every bit of sanding dust and road grit. If the cart will live near a woodworking bench, keep precision instruments in the enclosed drawers and reserve the shelf for items that wipe clean. The lid and drawers lock together, which is convenient for basic household security but does not turn a mobile cabinet into a safe.

    The 20 inch depth is friendly to a narrow aisle. Still, the push handle and open lid change the real envelope. Tape those projections on the floor and wall before pickup. This cart makes sense for mixed work where the bottom shelf will be used every week, not filled with forgotten bottles.

    Sunex 8057XT for a dense hand tool collection

    The Sunex 8057XT is the grown up option in this group. Sunex publishes 18 gauge steel construction, six full extension drawers, a 600 pound total capacity, and a 244 pound product weight. On the official 8057XT page, the cabinet measures 34.5 inches wide without its handle and 39.25 inches with it, by 21.5 inches deep and 39.25 inches high. The open lid raises the total height to 60 inches.

    Six full width drawers are easier to divide than a small drawer stack over an open shelf. They suit a serious socket collection, diagnostic tools, and specialty hand tools that need their own layer. Four swivel casters can make tight turns easier than a fixed wheel pair, although every wheel needs room to rotate under load.

    For many home garages, this is more cart than the aisle wants. It is heavy before the first wrench goes in, and its handle width approaches 40 inches. Buy it because the drawer layout solves a real access problem, not because the capacity sounds reassuring. A lighter kit on a smaller cart often moves more pleasantly.

    Open shelf carts for bulky project supplies

    An open steel or polymer service cart can be the better tool cart when the job changes every weekend. One shelf can hold a project bin, the top can carry measuring gear, and the lower level can take a small vacuum or finishing supplies. There are no drawer slides to consume interior width. You can also see what was left behind before rolling the cart back into its corner.

    The trade is containment. Loose sockets rattle away, spray cans fall when a wheel catches a joint, and fine dust settles on everything. Use low bins with fitted lids, keep liquids upright, and respect the manufacturer’s shelf and total load ratings. A raised lip helps, but it does not secure a tall object during movement.

    This format pairs well with fixed tool storage. The garage tool storage guide suggests keeping tools near the work that uses them. Load only the current project’s kit, roll it to the bench, then put the tools back. That rhythm stops a utility cart from becoming a permanent pile on wheels.

    Narrow two drawer carts for the side of a parked car

    A narrow cart with one or two shallow drawers and an open base earns a place where every inch counts. It can hold daily screwdrivers, a ratchet set, a meter, and the current job’s parts without creating a second full tool cabinet. Look for a genuine push handle, drawer latches, and casters large enough for the actual slab.

    Small carts can be surprisingly tippy. A narrow wheelbase, a tall load, and an open top drawer form an unhappy combination. Store dense tools at or below axle height when the design allows it. Open one drawer at a time, apply the brakes while working, and do not use the cart as a step. If a product has no published limits or manual, skip it. Mystery steel thickness is not a bargain.

    This is the sensible choice for apartment style garages, motorcycle bays, and one car shops with a fixed bench along the opposite wall. It will not absorb a growing collection forever. That constraint can be healthy because it forces rarely used gear back into cabinets instead of letting the aisle shrink by inches each season.

    Measure the cart in its working position

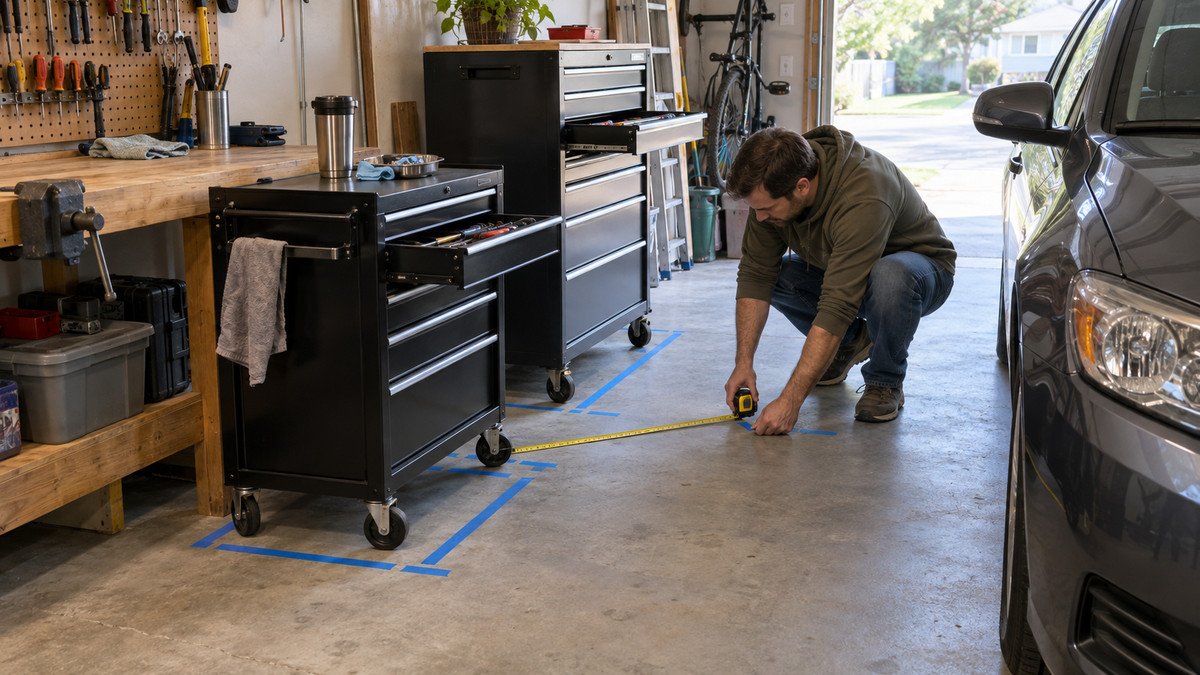
    Park the largest vehicle as it sits on an ordinary evening. Open the driver’s door, passenger door, hatch, and any garage entry door that shares the aisle. Mark the cart body with painter’s tape, then add the handle, side tray, and the deepest open drawer. Raise a cardboard panel to the stated open lid height. The garage measuring guide covers tracks, curbs, outlets, and other obstacles that a clean floor plan misses.

    Walk through the mockup carrying a grocery bag and a long workpiece. Can you reach the driver’s door without turning sideways? Can you pull the cart toward the workbench while the garage door is down? Does the handle strike a cabinet before the cart clears the car? Those ordinary movements decide whether the cart will be used.

    Measure the parking location too. A cart that fits beside a fender during work may need to tuck under a bench afterward. Confirm closed height, caster height, handle position, and any lip beneath the bench. Allow finger room rather than designing a slot so tight that every parking attempt scrapes paint.

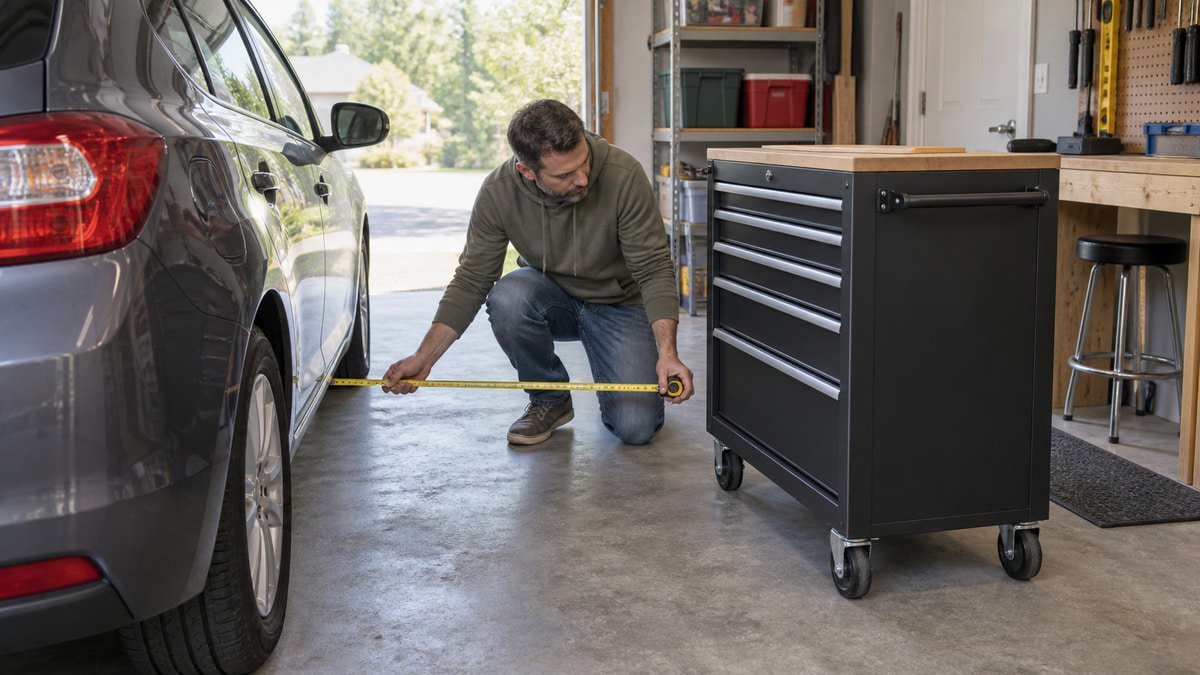
    Homeowner measuring aisle clearance beside a rolling garage tool cart
    Measure the cart in its working position, since the handle and open drawers can consume more aisle than the cabinet body.

    Choose drawer depths from the tools you own

    Shallow drawers are excellent for sockets, ratchets, pliers, and layout tools because you see the whole layer. Deep drawers accept drills and bulky cases but encourage stacking. Once three tools occupy the same vertical column, the bottom one becomes invisible. Count the drawer heights and sketch a home for the ten tools you use most.

    Bring the dimensions of molded cases, not just the tools inside them. A compact drill may fit while its charger or bit case does not. Decide which cases can move to a shelf and which protect calibrated or delicate gear. Drawer liners reduce sliding, while fitted organizers save search time at the cost of some capacity.

    Do not treat every published drawer limit as permission to fill each drawer to that number. The overall cart rating still applies, and a heavy upper drawer changes stability. The rolling tool chest buying guide goes deeper into slide ratings, drawer layout, and loaded weight. Keep dense sockets low and leave one shallow drawer slightly loose for the tools that are on the job today.

    Organized shallow drawer inside a compact rolling mechanics tool cart
    Shallow drawers keep sockets and hand tools visible, while a few deeper spaces can hold bulkier cases and meters.

    Match casters to the garage floor

    Five inch casters are common on full mechanics carts for good reason. They cross shallow joints and stray grit more easily than small hard wheels. Diameter is only part of the story. Wheel material, tread width, bearing quality, mounting, and caster layout determine how the cart steers once loaded.

    Two fixed wheels with two swivels track predictably down a straight aisle. Four swivels can rotate inside a smaller area but may wander when pushed over a seam. Try to push from the provided handle rather than pulling the cart behind you. Close and latch drawers, remove loose objects from the top, and slow down before thresholds. Sunex tells owners of the 8057XT to push from the end handle, lock the lid and drawers before moving, and use the cart on flat surfaces.

    Check the full route under real lighting. The garage aisle clearance guide is useful when a bench, shelving, or vehicle creates a pinch point. Sweep abrasive grit before rolling. It damages finishes and turns a manageable joint into a sudden stop.

    Rolling tool cart casters approaching a concrete garage floor joint
    Large casters and a clear floor path make a loaded cart easier to control across joints, grit, and small changes in level.

    Read load ratings as limits, not goals

    A cart’s large total capacity number can distract from smaller limits. Drawer slides may have their own ratings. A side tray can carry far less than the cabinet. The top compartment may have another number, and the total usually assumes the load is distributed. Read the current manual for the exact model and color code because similar looking generations can differ.

    Weigh the heavy drawer groups if you are unsure. A few socket sets, pullers, and large wrenches add up quickly. Put the dense drawers near the bottom, keep the left and right sides reasonably balanced, and avoid hanging heavy accessories from one end. Never climb, sit, or lean hard on an open drawer.

    Brakes stop rolling; they do not widen the wheelbase. The cart can still tip if several loaded drawers are extended or if someone uses the open lid as a work shelf. Load conservatively, especially around children and pets. If you need to move hundreds of pounds of tools only twice a year, a fixed cabinet plus a light project cart may be the calmer answer.

    Inspect assembly and service parts before buying

    Look for a downloadable manual and a real parts list. Replacement keys, slides, caster hardware, liners, and gas struts can matter more than a decorative accessory after five years. Sunex publishes a parts breakdown for the 8057XT, while the U.S. General and Husky pages link manuals and support material. Save the model number and key code somewhere outside the locked cart.
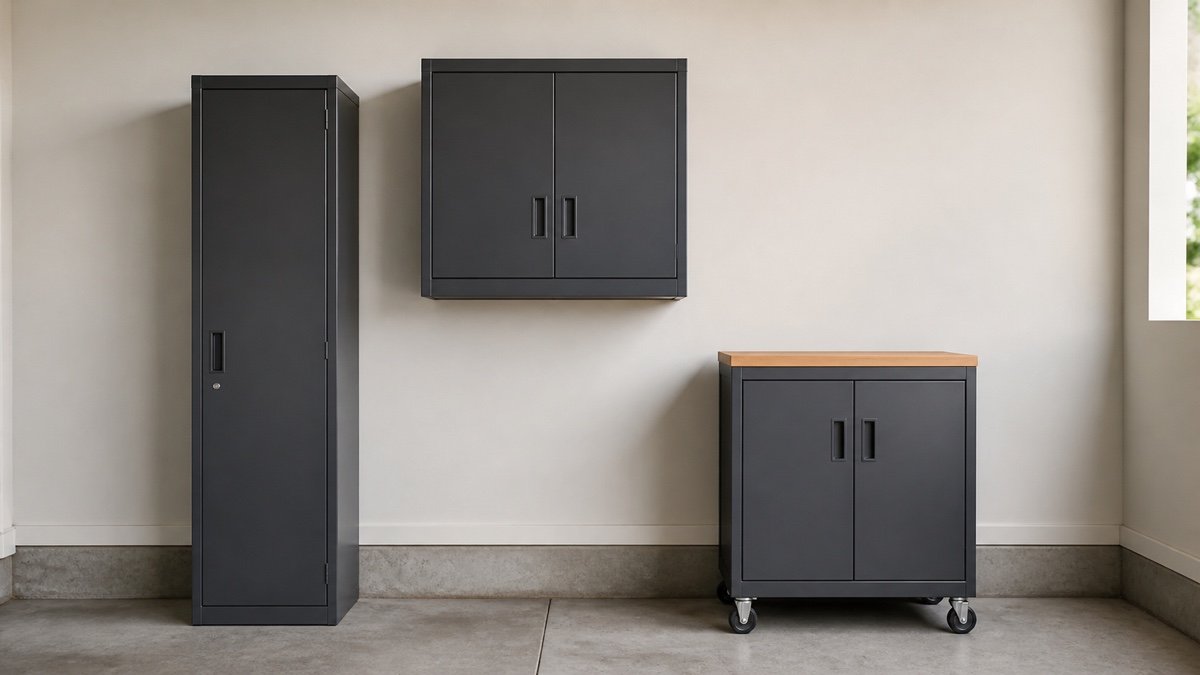
    After assembly, verify that every caster fastener is tight, drawers latch, locks operate without force, and the cart sits level. Recheck hardware after a few loaded trips. Clean grit from wheel treads and drawer slides. A modest cart that rolls straight and closes cleanly is far more pleasant than a larger one that fights you at every floor joint.

    Useful products to compare

    These links open current Amazon search results. Check the dimensions, manual, mounting hardware, warranty, and current availability for the exact model before you order.

    Before you buy or install

    Read the current manual for the exact product you are considering. Confirm its assembled dimensions, rated capacity, mounting requirements, included hardware, working clearances, warranty, and any limits that apply to your wall, floor, electrical circuit, or garage layout.

    Frequently asked questions

    What size rolling tool cart works in a small garage?

    A body around 30 to 33 inches wide and about 20 to 22 inches deep is a useful starting range, but the right size comes from your parked aisle. Add the handle, open drawer depth, side accessories, and lid height before deciding. Mock up the complete working envelope with tape and cardboard.

    Are four swivel casters better than two fixed and two swivel casters?

    Four swivels can turn in a smaller area, which helps beside a parked car. Two fixed and two swivel casters tend to track more predictably on a straight run. Wheel size, floor joints, load distribution, and handle placement matter as much as the layout. Follow the cart manual and lock the brakes while working.

    Should power tools go in a rolling tool cart?

    They can, if the drawer or shelf fits the tools and stays within its rating. Deep drawers often waste space around bulky molded cases. Many owners get better access by keeping hand tools in shallow drawers and putting one or two current power tools on a lower shelf or in a fitted deep drawer.

    Can I charge tool batteries inside a closed cart?

    Use only an arrangement allowed by the battery and charger instructions. A cart power port only routes a cord. It does not guarantee ventilation, temperature control, cord protection, or electrical suitability. Keep chargers clear of combustible clutter, avoid pinched leads, and unplug temporary connections before moving the cart.

    How should I load a mechanics cart to reduce tipping?

    Keep dense tools low, balance weight across the cabinet, and open one loaded drawer at a time. Stay below every drawer, shelf, accessory, and total rating. Close and latch the drawers before moving. Apply the brakes on a flat surface while you work, and never stand or sit on the cart.

  • Best small parts organizer for garage: five practical picks

    Best small parts organizer for garage: five practical picks

    Affiliate disclosure: As an Amazon Associate I earn from qualifying purchases. This article may contain affiliate links, and Bay & Bench may earn a commission at no extra cost to you. Read our full Affiliate Disclosure.

    You know the missing screw is somewhere in the garage. The problem is whether it lives under forty nearly identical drawer fronts or at the bottom of a portable case. The best small parts organizer for garage use makes that one screw easy to find without turning sorting into a second hobby. Tiny drawers look orderly when empty, but real bolts, anchors, and dark washers expose every poor compartment choice.

    This shortlist covers three stationary drawer cabinets and two portable cases. Each solves a different retrieval problem. The dimensions and construction notes come from current manufacturer pages, but model colors and availability can change. Before buying, spread your hardware on the bench, group it the way you search for it, and measure the longest item in every group.

    Quick answer

    The Akro-Mils 10144 is the broad home garage pick because its 44 drawers include two useful sizes. Choose the IRIS 64 drawer cabinet for many small, light fasteners, or the steel Durham 013-95 for fewer, deeper drawers and heavier shop use. A Stanley FatMax shallow organizer suits portable project kits, while the smaller SortMaster Junior works for mixed parts and a few hand tools.

    Best small parts organizer for garage: quick comparison

    The right format depends on whether parts stay at one bench or travel to the job. A wall cabinet gives instant access to dozens of groups. A latched case uses more shelf space, yet it keeps a selected kit together while you move.

    OrganizerLayoutPublished outside sizeBest fitWatch for
    Akro-Mils 1014444 clear drawers in two sizes20 x 6.375 x 15.813 inchesMixed screws, anchors, connectorsLimited included dividers
    IRIS 64 drawer cabinet64 small clear drawers19.5 x 7 x 15.5 inchesMany light, compact fastenersLong parts need another home
    Durham 013-9512 deep steel drawers33.813 x 12.313 x 7.375 inchesHeavier or larger small partsWide footprint and no clear fronts
    Stanley FatMax shallow organizerRemovable cups under clear lid17.5 inches longPortable project kitsNeeds horizontal shelf space
    Stanley SortMaster Junior14 compartments with dividers14.8 x 2.6 inchesCompact mixed kitLower total capacity

    For a wider plan that includes hand and power tools, start with the garage tool storage guide.

    Akro-Mils 10144 for a mixed hardware collection

    The Akro-Mils 10144 has 32 small drawers and 12 large drawers, which is a useful split for an ordinary garage. Its official product page lists the cabinet at 20 inches wide, 6.375 inches deep, and 15.813 inches high. Clear drawers have finger pulls and rear stop tabs. The frame can stack or mount to a wall using its keyhole slots.

    The two drawer sizes let you separate small screws and electrical terminals without forcing longer lag bolts into the same narrow compartment. Akro-Mils includes a limited set of molded dividers, so count how many split drawers you need and price extras before ordering. A divider steals a little usable length too.

    This is the most versatile all-around pick for someone starting with several coffee cans of mixed hardware. It offers enough categories to be useful without demanding a label for every screw length on the first afternoon.

    IRIS 64 drawer cabinet for many tiny fasteners

    The IRIS 64 drawer cabinet goes all in on small compartments. IRIS lists each inner drawer at 6 by 1.75 by 1.5 inches, with outside dimensions of 19.5 inches wide, 7 inches deep, and 15.5 inches high. The manufacturer page shows side mounting holes and ribs intended to help stacked units stay in place.

    Sixty four identical drawers suit electronics parts, machine screws, small nuts, rivets, and specialty clips. They are less friendly to hand tools, long anchors, or a broad assortment of plumbing fittings. Before committing, fill a paper rectangle with the largest expected group. A drawer may fit ten bolts but become irritating when you need room for fifty.

    The cabinet is light enough that mounting details matter. Support it according to the instructions, keep dense contents low, and avoid yanking a stuck drawer. Clear fronts save search time, though a small sample fixed to a label slot can be easier to read than a handwritten size viewed from across the bench.

    Durham 013-95 for deeper steel drawers

    Durham’s 013-95 uses twelve cold rolled steel drawers rather than dozens of clear plastic ones. The official specification page lists a 20 gauge cabinet, an outside size of 33.813 by 12.313 by 7.375 inches, and individual drawers roughly 4.469 inches wide, 11.25 inches deep, and 3.188 inches high. The unit ships assembled.

    Those long drawers make room for larger anchors, U bolts, drill accessories, electrical fittings, and repair parts that never settle comfortably in tiny plastic cells. Durham says its drawers include two adjustable dividers on one inch centers. The cabinet is wide, low, and heavy compared with a plastic drawer grid, so plan a full shelf or suitable mounting support.

    This is the shop minded choice. It has fewer categories, but each category can hold a meaningful supply. Because the fronts are opaque, a consistent label system matters. Put a sample, size, and material on the label rather than relying on a vague word such as bolts.

    Stanley FatMax shallow organizer for project kits

    A portable case is better than a wall drawer when the parts need to travel across the garage, up a ladder, or into the house. The Stanley FatMax shallow organizer page describes removable cups in two sizes, a clear impact resistant lid, metal latches and hinges, and a lid design that holds the cups in place. Stanley also lists an integrated water seal.

    Removable cups are the clever part. Carry the full case to the job, lift out only the screws and anchors you need, and return the cups later. The lid must meet the cup rims closely enough to stop small pieces migrating when the case is turned upright. Test that before trusting it with tiny washers.

    This organizer uses far more shelf depth per category than a drawer cabinet, but it controls active project kits beautifully. Store it flat or upright only as the manufacturer permits, and keep the latches clear of grit.

    Stanley SortMaster Junior for a compact mixed kit

    The SortMaster Junior is a smaller case with fourteen compartments and eight removable dividers. The official Stanley SortMaster Junior page lists an overall length of 14.8 inches, a height of 2.6 inches, and a special angled main compartment that can accept a hammer or tape measure beside the small parts. Its lid is shaped to meet the dividers and reduce movement between compartments.

    This case makes sense for household repairs where a few anchors, picture hooks, wire nuts, and hand tools travel together. It is easier to grab than a large professional case and less tempting to overload. The angled bay does reduce the tidy grid, which is either useful or annoying depending on the kit.

    Buy this for one repeatable job, such as wall hanging or bicycle repair, rather than as the main home for every fastener. A portable case works best when its contents have a clear theme. Otherwise it becomes another mystery box.

    Match drawer dimensions to the parts you keep

    Empty the old jars and group hardware on a tray. Sort first by how you look for a part. That may mean screw type, diameter, and length for woodworking fasteners, while plumbing repair parts may make more sense by fixture. Do not create forty categories merely because the cabinet has forty drawers.

    Measure the longest item, the biggest useful handful, and the volume of each group. A six inch drawer does not provide six inches of internal length, and a divider reduces it again. Leave finger room above the pile. If you must shake a drawer to expose the item underneath, it is too full.

    Use larger drawers for odd shapes and reserve the smallest cells for parts that remain easy to distinguish. The garage shelf spacing guide helps when deep organizer cases or steel cabinets need a dedicated shelf. Build around the actual outside depth, including handles and space to pull a case forward.

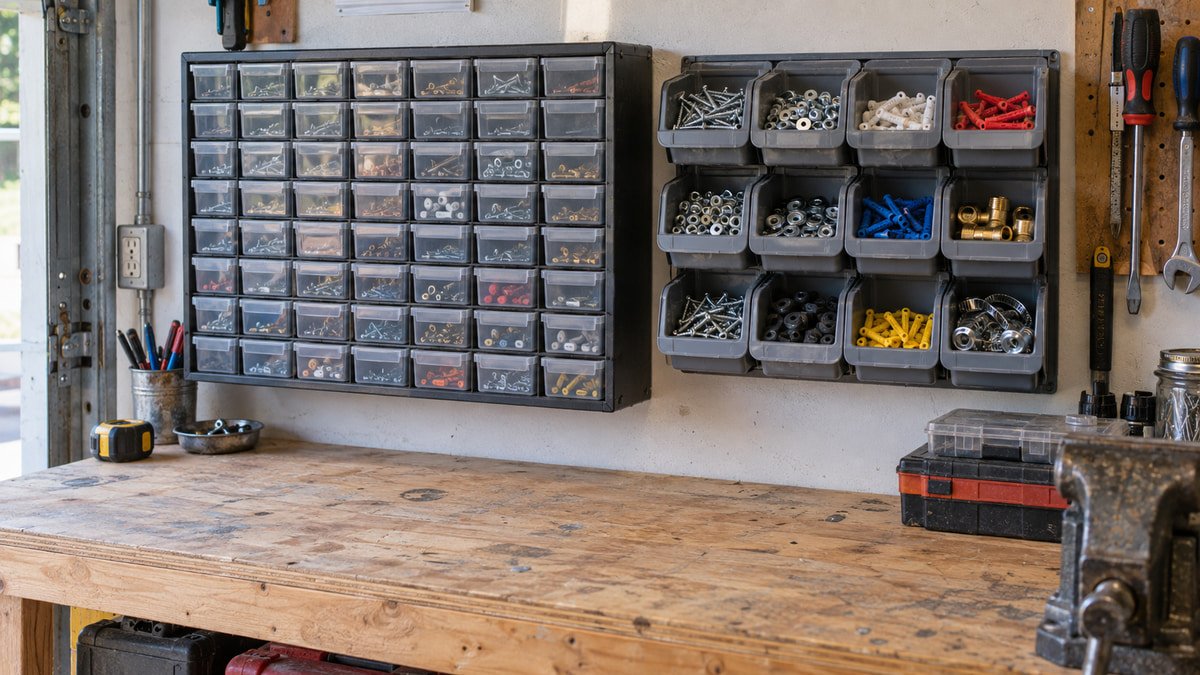
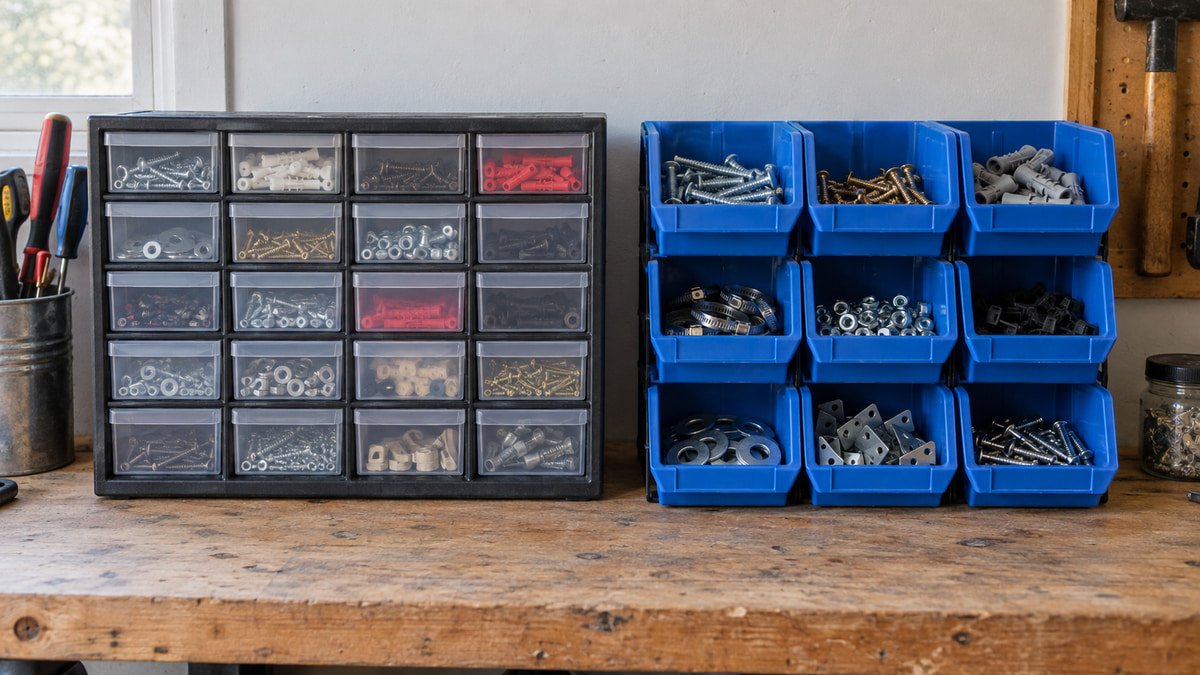
    Different clear drawers holding screws bolts washers and wall anchors
    Test your longest and bulkiest hardware against the real drawer dimensions before choosing a high drawer count.

    Use portable organizers for work that moves

    A wall drawer is quick at the bench but awkward when the repair is beside the garage door. Portable cases cut the return trips. Give each repeatable job its own case, or keep one empty project case and load cups from the main cabinet as needed. The second method uses less duplicate hardware and reveals what needs restocking.

    Close every latch before lifting. Carry the case level until you know the lid contains the smallest pieces, then gently tip it over a clean bench as a test. Removable cup cases usually control migration better than loose dividers, but fit and wear still matter. Replace cracked cups or warped lids before a spill.

    A case should have a parking spot. Shoving it vertically between paint cans may deform the lid or hide its contents. Open shelving sized to the case can work well; the garage storage planning guide explains how to assign homes before buying more containers.

    Portable compartment organizer carried level across a home garage workshop
    A lidded organizer can take a project kit to the bench without moving the entire wall cabinet or spilling loose parts.

    Mount drawer cabinets where hands can reach safely

    A parts cabinet belongs close enough that you can read and open drawers without leaning across the bench. It should not crowd a vise, block task lighting, or sit where long stock can strike it. Hold the empty cabinet at the proposed height and reach the top corners with both feet flat on the floor.

    Use the manufacturer’s mounting points and fasteners suited to the real wall. A wood backing board fixed to structure can give multiple cabinets a continuous mounting surface, but it must be sized and installed for the load. Plastic keyhole slots are not a reason to guess. If the wall construction is uncertain, get qualified help.

    The garage wall storage systems guide covers wall conditions and access. Renters can also review nonpermanent garage wall storage. A freestanding cabinet can sit on a stable shelf when wall holes are off limits, provided it cannot slide forward as a drawer opens.

    Homeowner mounting an empty small parts drawer cabinet above a workbench
    A secure backing board and a comfortable mounting height keep the cabinet steady while drawers are pulled open.

    Make labels useful from three feet away

    Label by the decision you make at the drawer. For a screw, that might be number 8, one and a quarter inches, exterior. For a metric bolt, use diameter, pitch, and length. Material and finish matter when corrosion or strength is part of the repair. Avoid labels such as misc or small metal. They postpone the same sorting problem.

    Print is neat, but clear block handwriting works. Put the same information in the same order and use a sample fastener where the drawer front allows it. Blank label slots in the images are intentional because real text belongs on the organizer, not baked into a stock photo.

    Leave several drawers unassigned. New hardware arrives, and an empty drawer is easier to rename than a crowded category is to split. The garage pegboard layout guide offers a similar lesson for tools: organize around retrieval and return, not a perfect display.

    Control dust moisture and accidental mixing

    Open front bins offer the fastest access, but garages send dust into every horizontal pocket. Clear drawers and fitted lids slow contamination. Neither is airtight unless the manufacturer says so. Keep rust prone hardware away from doors that admit rain and from floor level where condensation and splash are common.

    Do not store incompatible chemicals or loose batteries beside metal hardware. Leaking fluids can ruin an entire cabinet, and exposed terminals can short against conductive parts. Give electrical components clean, dry compartments and follow their storage instructions. Sharp items should not protrude through thin plastic.

    Vacuum the empty frame rather than blowing dust through the drawers. Wash removable plastic parts only with cleaners allowed by the manufacturer and dry them fully before refilling. Once a year, pull every drawer, discard damaged fasteners, and merge tiny duplicate groups. The organizer should become easier to use with age, not denser and more mysterious.

    Buy enough capacity without buying empty categories

    Lay the parts into temporary cups and count the groups that deserve separate access. Add roughly a fifth more compartments for growth, unusual project leftovers, and future splits. That is usually better than doubling the count. Sixty four drawers sound efficient until half remain empty and the long hardware still needs a box.

    Compare the full cost: cabinet, dividers, labels, mounting hardware, shelf space, and portable cases. A mixed system often wins. One drawer cabinet can hold the reserve supply while two lidded cases carry active kits. Deep bins can take bulky fittings that would waste ten small drawers.

    Start with the hardware you already own. Sort it, discard unsafe or unidentified pieces, and buy the organizer after the pile has a shape. That slightly untidy afternoon produces a better result than selecting a cabinet from a pretty empty grid.

    Useful products to compare

    These links open current Amazon search results. Check the dimensions, manual, mounting hardware, warranty, and current availability for the exact model before you order.

    Before you buy or install

    Read the current manual for the exact product you are considering. Confirm its assembled dimensions, rated capacity, mounting requirements, included hardware, working clearances, warranty, and any limits that apply to your wall, floor, electrical circuit, or garage layout.

    Frequently asked questions

    Are drawers or open bins better for garage hardware?

    Drawers protect small hardware from dust and accidental bumps, while open bins are faster for bulky parts used constantly. In most home garages, clear drawers suit screws and fittings, and a few larger open bins suit gloves, sanding discs, or wrapped project parts. Mount any open bin where contents cannot spill into a walkway.

    How many drawers should a small parts organizer have?

    Count the groups you already use, then add room for future splits. A useful starting margin is about twenty percent. Drawer dimensions matter more than the total count. Forty four mixed drawers can be more useful than sixty four tiny drawers when your collection includes long bolts and bulky anchors.

    Can plastic parts cabinets be wall mounted?

    Many can, including models with molded keyhole slots or mounting holes. Follow the exact manufacturer’s instructions and use fasteners suited to the wall and loaded cabinet. Mount the cabinet empty, keep heavy parts low, and confirm that pulling a drawer does not flex or shift the frame.

    What is the easiest way to label nuts and bolts?

    Use diameter, thread pitch when relevant, length, material, and finish in the same order on every label. A sample fastener attached safely near the label can speed recognition. Avoid broad labels such as bolts. They force you to search the whole drawer each time.

    How do I stop small parts moving between case compartments?

    Choose a case whose lid meets the cups or dividers closely, keep all dividers seated, and replace warped or cracked pieces. Test the closed case over a clear bench before carrying tiny washers vertically. Removable cup designs often contain mixed sizes more reliably than short loose dividers.

  • Best power tool organizer for garage: five setups that fit

    Best power tool organizer for garage: five setups that fit

    Affiliate disclosure: As an Amazon Associate I earn from qualifying purchases. This article may contain affiliate links, and Bay & Bench may earn a commission at no extra cost to you. Read our full Affiliate Disclosure.

    The best power tool organizer for garage use starts with the tools you reach for, not the number of drill slots in an online photo. Pistol grip tools hang neatly from a narrow opening. A circular saw wants a supported shelf. A jigsaw can snag by its base, and a sander sheds dust on whatever sits below it. One rack rarely treats every shape well.

    This shortlist covers three open access wall stations, one modular case rack, and a simple cubby shelf. The named products use current manufacturer information. Check the exact accessory compatibility and installation guide before purchase, since each wall system has its own plates, slots, and load rules. Keep chargers and battery care separate from the question of where tool bodies hang.

    Quick answer

    Wall Control’s three slot steel holder is a good compact choice when you already use its metal pegboard. Milwaukee’s Packout Tool Station fits drills and similar tools on a modular plate. The Ryobi Link shelf gives a broader landing area, while DeWalt ToughSystem racking suits tools that stay inside compatible cases. A plain deep cubby shelf remains the best answer for mixed saws, sanders, and odd shapes.

    Best power tool organizer for garage walls at a glance

    Choose by access pattern. Bare tools used every week benefit from open slots. Dusty, delicate, or rarely used tools often deserve a case or enclosed cabinet. The wall and fasteners remain part of the system.

    SetupStorage methodPublished detailBest fitMain limit
    Wall Control drill holderThree hanging tool openings14 gauge steel, proprietary slotted panelCompact drills and driversTool geometry varies
    Milwaukee Packout Tool StationOpen tool slots on wall plate25 pound capacityDaily cordless toolsNeeds compatible mounting plate
    Ryobi Link organizer shelfShelf with hanging positionsSystem accessoryTools plus cases or suppliesBest inside one wall ecosystem
    DeWalt ToughSystem rackAdjustable arms support casesUp to 440 pounds overallCased tools and portable modulesDeep wall projection
    Open cubby shelfSupported individual baysDepends on build or productSaws, sanders, mixed shapesNo automatic retention

    The garage wall storage systems guide helps compare the base panels before you choose an accessory.

    Wall Control drill holder for a compact metal pegboard

    Wall Control’s ASM-DR-314 is a three position holder made from 14 gauge steel. The manufacturer page describes openings that are 3 by 3.5 inches at the front, narrowing to 1.75 inches at the bottom. Three upper slots can hold batteries. The rack works with Wall Control’s slotted metal panels rather than ordinary standalone pegboard.

    This is a tidy fit for compact drills, impact drivers, and similar pistol grip tools. Belt clips, wide battery packs, side handles, and unusually thick grips can change the hanging position. Wall Control notes that some tools fit battery up while others work better battery down. Test each one without forcing it.

    The steel construction is appealing, but the rack does not set the capacity of the whole wall. Panel attachment, load position, and the substrate still matter. Use it when you already own the compatible panel or want a metal pegboard with movable accessories.

    Milwaukee Packout Tool Station for modular open access

    The Packout Tool Station 48-22-8343 locks onto Packout wall plates and provides quick access slots for drills, impact wrenches, and similar tools. Milwaukee’s official page lists a 25 pound capacity and an impact resistant polymer body. The station is one piece in a broader plate and accessory system.

    Its strength is rearrangement. A tool station can move when a bench layout changes, and other hooks or shelves can share the wall plate. That flexibility makes more sense when several compatible accessories will be used. Buying a complete plate for one drill may be an expensive way to avoid a simple shelf.

    Twenty five pounds is a limit for the station, not a target. Weigh the actual tools with batteries attached, distribute them as instructed, and keep long bits from pointing into the aisle. Confirm the plate’s own wall capacity and fastening pattern before planning a row.

    Ryobi Link organizer shelf for a broad landing zone

    Ryobi’s STM401 Link Tool Organizer Shelf combines hanging positions with a shelf surface. The official support page provides the product manual and identifies it as part of the Link system. That manual is the place to confirm current mounting, capacity, and compatibility information for the exact unit.

    A shelf changes the use case. Chargers, bit cases, or a compact sander can sit above hanging drills, provided every item stays within the stated limits and cannot vibrate off. The arrangement is denser than separate hooks, which is useful above a short bench. It also concentrates load and cord clutter in one spot.

    This option suits an owner already committed to Link rails. System compatibility matters more than paint color. Do not assume a hook or shelf from one brand will lock safely into another brand’s rail just because the profiles look close.

    DeWalt ToughSystem rack for tools that live in cases

    Some tools should stay in their cases. The DeWalt DWST08260 workshop rack uses adjustable arms to support compatible ToughSystem modules. DeWalt’s product page lists up to 440 pounds overall and describes brackets that can accept a shelf add on. It is a wall rack for modules, not a row of bare drill cradles.

    This format works for routers, specialty saws, nailers, and kits that travel outside the garage. The case keeps accessories with the tool and controls dust. Sliding a module onto open arms can also be easier than unstacking a tower. On the other hand, the rack projects far enough to deserve a careful aisle check.

    Use only compatible modules and follow the current installation manual. The overall rating does not cancel bracket limits, wall requirements, or uneven loading. Put the heaviest cases lower and keep handles clear for a two handed lift.

    Open cubbies for saws sanders and awkward bodies

    A plain shelf divided into bays often beats a purpose built drill rack for a mixed tool collection. Circular saws sit on their shoes, jigsaws stand on their bases, and sanders rest without hanging from a dust port or cord. Each cubby can hold the tool’s immediate accessories in a shallow bin.

    Depth needs care. Support the full base without burying the tool against the back. Leave hand room above the grip, keep sharp accessories removed or guarded, and prevent cords from dangling. If you build the shelf, use material, joinery, wall attachment, and span dimensions suitable for the loaded weight. A pretty row of plywood boxes is still structural storage.

    Open cubbies are forgiving when brands and battery platforms change. Their weakness is dust and security. Put dusty tools below clean ones, vacuum shelves often, and use a lockable cabinet for tools that should not remain visible.

    Measure every tool against the rack opening

    Measure the narrowest part of each grip, the width of its battery, and every projection that must pass through the opening. Belt clips are common troublemakers. So are side handles, belt hooks, dust bags, and large capacity batteries. A drill that fits bare may jam once equipped for work.

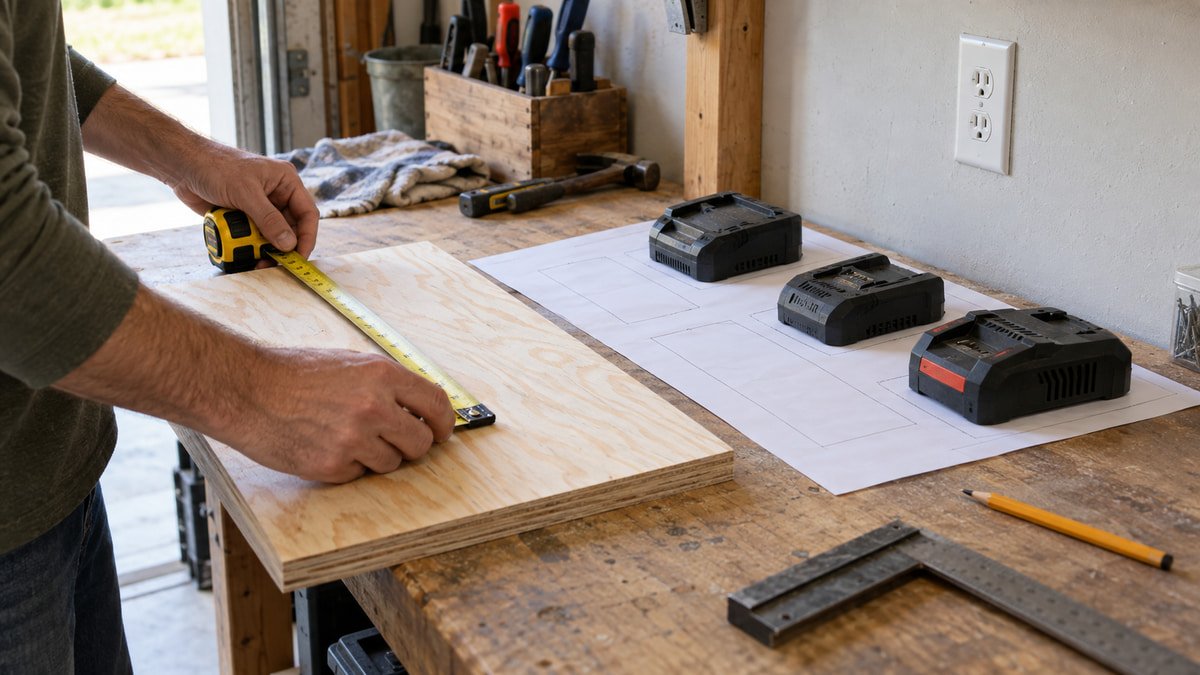
    Make a cardboard template of the advertised opening and test the tool over a padded bench. Consider how you will lift and return it. If the tool needs to twist around a neighboring handle, the spacing is too tight. Leave room for future batteries, which are often wider than the compact packs sold in starter kits.

    The garage pegboard layout guide explains why the most used items belong between shoulder and hip height. Put lighter occasional tools above or beside them. Heavy tools should never require a stretched one handed lift.

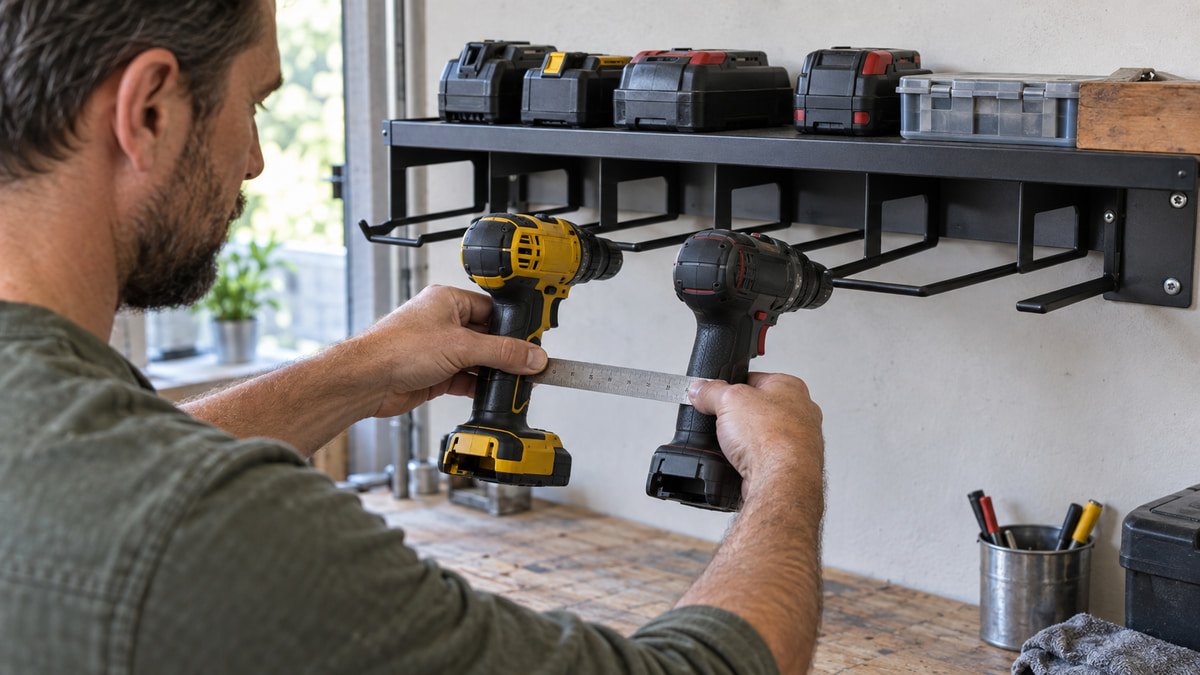
    Homeowner measuring cordless drill bodies against metal rack openings
    Measure handles, belt clips, batteries, and accessory projections because nominal drill slots do not fit every tool shape.

    Support saws and sanders by stable surfaces

    Hang a tool only from a point meant to carry it. A drill handle can rest in a shaped slot when the fit is secure. A circular saw belongs on its shoe or in its case, with the blade guard closed. A random hook through a plastic opening may stress the housing or let the tool rotate into the wall.

    Sanders and grinders carry dust. Empty collection bags, wipe vents, and store abrasive accessories in their own bin. Remove blades or discs when the tool instructions call for it, and never leave a sharp edge where a reaching hand can meet it. Keep guards installed.

    Plan a stable landing zone near the rack so you can set a tool down while opening a case or removing a battery. The garage tool storage guide is useful for mapping that short trip from wall to bench. Good storage reduces awkward carrying, not merely visible clutter.

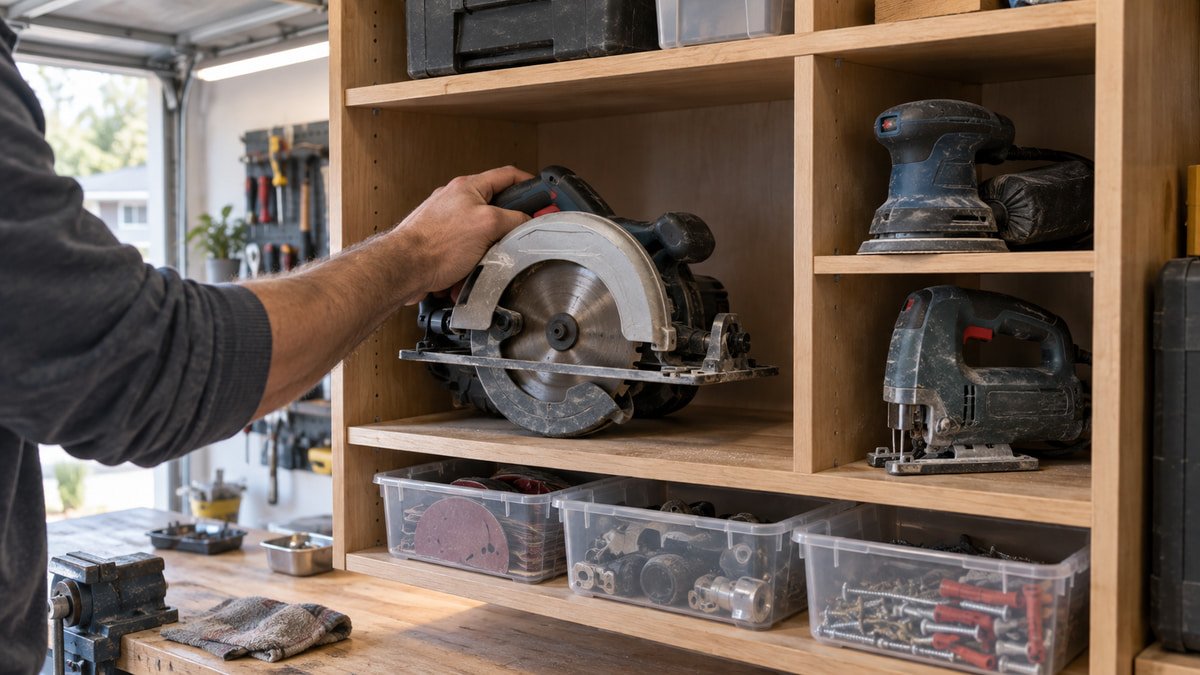
    Circular saw jigsaw and sander stored upright in open workshop cubbies
    Saws and sanders often need supported shelves or cubbies rather than narrow hanging slots designed for drills.

    Mount the empty system into suitable structure

    Install wall storage before loading it. Locate the structure, check for hidden utilities, and use the manufacturer’s required fasteners and hole pattern. A backing board can bridge stud positions and give accessories a clean surface, but the board itself must be securely fixed and sized for the load.

    Hold the empty rack at the intended height. Check the garage door, vehicle doors, bench light, and longest tool. Then fasten, level, and test the unloaded system. Add one light tool at a time while watching for movement or flex. Stop if a fastener loosens, the panel bows, or a bracket fails to seat.

    The slatwall, pegboard, and track comparison covers the different attachment families. If you are choosing between metal and fiberboard panels, the metal versus wood pegboard guide gives the practical tradeoffs.

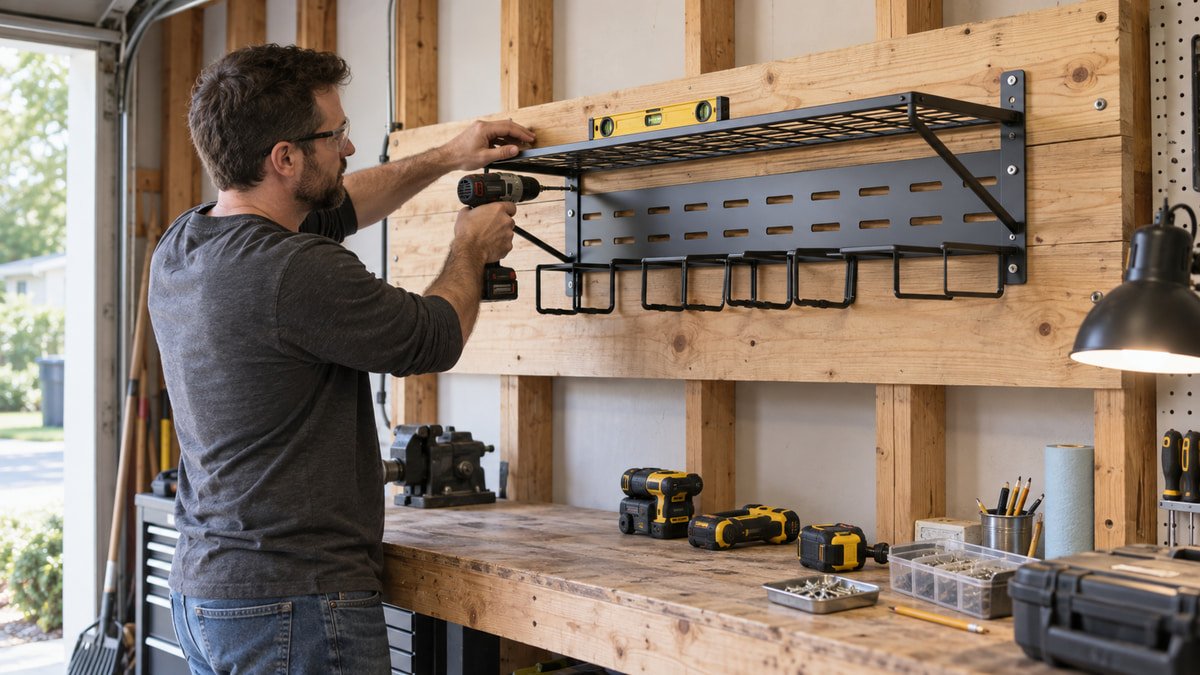
    Homeowner fastening an empty power tool rack to a wooden garage backing board
    Mount the unloaded rack into suitable structure, then add tools gradually while checking deflection and clearances.

    Keep charging separate from simple storage

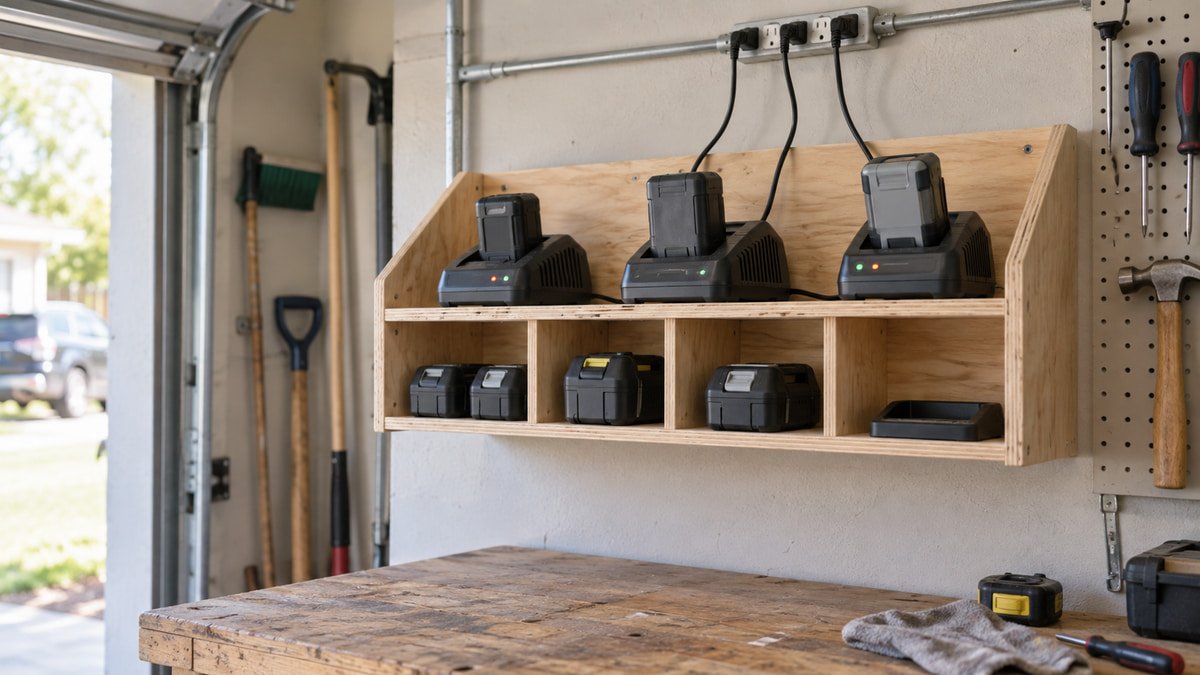
    A shelf above drill slots looks like a charging station, but a place to set a charger is only the beginning. Follow each charger and battery manual for temperature, ventilation, clearances, and acceptable surfaces. Do not trap heat inside a crowded cubby or route cords where a tool can pinch them.

    Use a suitable permanent receptacle near the station. Extension cords are temporary equipment, not built in wiring. Do not mount an outlet strip until its instructions permit that use, and never overload one because the shelf has room for six chargers. Remove damaged batteries from service according to the manufacturer guidance.

    It can be simpler to store tool bodies on the wall and charge batteries on a clear bench area. That separates weight from heat, keeps indicator lights visible, and makes it easier to unplug chargers before closing the garage.

    Plan the wall around reach and aisle depth

    Measure projection from the wall to the furthest battery or handle, not just the bare panel. Add the reach needed to pull a cased tool off rack arms. Stand in the aisle with the car parked and mimic the lift. If your elbow touches the vehicle, the rack is too deep or too high for that location.

    Keep storage clear of door tracks, openers, electrical panels, windows, and utility shutoffs. The garage measuring guide helps capture those fixed obstacles. Mark the complete rack outline with tape, including projected tools, and leave it for a few days. Daily movement exposes conflicts that a drawing misses.

    A short station beside the main bench is often more useful than a full display wall. Place daily tools there and let cases or cabinets handle the rest. Empty wall space is not a problem that must be filled.

    Choose a system that can change without trapping you

    Battery platforms, tool shapes, and project habits change. Proprietary panels offer secure accessories and neat movement inside one ecosystem. Generic shelves accept nearly anything and are easier to repair. The best setup often combines both: a small modular station for drivers and batteries, plus open cubbies for everything that refuses a standard slot.

    Price the complete system, including plate, rail, fasteners, holders, shelves, and any adapters. A low cost holder is not low cost when it needs a new wall panel. Check whether accessories remain available and whether the system lets you move one holder without unloading the whole wall.

    Leave one open bay and one spare rail position. The garage workshop zones guide can help keep that expansion inside the work area rather than creeping into parking. A little unused capacity keeps the system flexible.

    Build a return routine that survives real projects

    Open storage works only when returning a tool takes one easy motion. Keep each charger, case, and accessory near its tool without building a puzzle. Outline labels or simple shelf positions can help, though the station should remain understandable without a perfect silhouette board.

    At the end of a job, remove batteries as the tool manual directs, brush off dust, coil cords loosely, and check guards. Return bits and blades to containers rather than leaving them in tools. Vacuum the rack before fine dust works into vents or shelf corners.

    Review the arrangement after a month. A tool that always stays on the bench needs a closer slot. A pristine tool above eye level can move into a case. Storage should follow use, and a good organizer makes that adjustment painless.

    Useful products to compare

    These links open current Amazon search results. Check the dimensions, manual, mounting hardware, warranty, and current availability for the exact model before you order.

    Before you buy or install

    Read the current manual for the exact product you are considering. Confirm its assembled dimensions, rated capacity, mounting requirements, included hardware, working clearances, warranty, and any limits that apply to your wall, floor, electrical circuit, or garage layout.

    Frequently asked questions

    Is it safe to hang cordless drills by the handle?

    Use a holder designed for the tool shape and follow both manufacturers’ instructions. The grip must seat securely without pressing controls or stressing a weak housing area. Check belt clips, battery width, and side handles. If the fit is doubtful, store the drill on a supported shelf or in its case.

    How deep should a garage power tool shelf be?

    Measure the complete tool in its stable storage position, then add hand clearance. Circular saws need full support under the shoe, while sanders may need less depth. Also measure the aisle with the vehicle parked. A deeper shelf is not useful if it makes retrieval awkward.

    Can power tool batteries stay attached in storage?

    Follow the tool and battery manuals. Many owners remove packs to reduce accidental activation and store them in a temperature controlled, dry place, but requirements vary by system. Never use a wall rack as a reason to ignore damaged terminals, heat limits, or charger ventilation.

    Do universal drill racks fit every cordless tool brand?

    No. Grip width, belt clips, batteries, housings, and balance points differ even within one brand. Compare each tool to the published opening and test carefully over a padded bench. Do not grind or bend a rack unless its manufacturer permits modification.

    Should saws be stored on hooks or shelves?

    A shelf or case is usually the better starting point because it supports the saw by its shoe or housing. Use a hook only when the tool and storage manufacturers identify a suitable support point. Keep guards closed, sharp accessories controlled, and heavy tools below a stretched reach.

  • Tool cart vs tool chest: which fits a small garage?

    Tool cart vs tool chest: which fits a small garage?

    Affiliate disclosure: As an Amazon Associate I earn from qualifying purchases. This article may contain affiliate links, and Bay & Bench may earn a commission at no extra cost to you. Read our full Affiliate Disclosure.

    The tool cart vs tool chest decision is really a choice between tools that travel to the job and tools that live in a compact bank of drawers. A cart gives you a useful top compartment or work surface close to the car. A rolling chest, often sold as a rolling cabinet or chest and cabinet combination, stores more tools in the same stretch of wall.

    The right choice depends on where repairs happen and what each unit blocks when a drawer is open. Start with the tools you already own and the garage with its vehicle parked. Capacity matters, but daily access decides whether storage works.

    Quick answer

    Choose a tool cart if you regularly move a focused set of tools to the car, driveway, or bench and want parts at hand while you work. Choose a rolling tool chest or cabinet if you have a larger hand tool collection, want more shallow drawers, and can give it a dependable wall position. In a very small garage, a modest chest plus a light project cart often works better than one oversized mobile box.

    Tool cart vs tool chest at a glance

    The words on store pages are not always consistent. In this guide, a tool cart is a waist-high mobile unit intended to follow a job. A rolling tool chest means a drawer cabinet on casters, or a chest and cabinet combination that normally parks in one place. A separate top chest without casters belongs on a suitable cabinet or bench and is not a direct cart substitute.

    Decision pointTool cartRolling tool chest or cabinetSmall garage advantage
    Daily movementDesigned to roll near the workMovable, but often parkedCart
    Drawer densityUsually fewer drawers plus top storageMore shallow and medium drawersChest
    Work surfaceOpen top, lid, or tray close to the jobTop may be fixed, covered, or occupiedCart
    Wall footprintMay park compactly, but needs a travel routeUses one defined parking bayDepends on layout
    SecurityBasic locks and latchesMore enclosed drawer storageChest
    Growing collectionBest for a selected working setBetter for a broad hand tool inventoryChest

    The tool chest and cabinet comparison explains the naming and stacking options in more detail.

    What makes a tool cart different

    A mechanics cart is arranged around use at arm’s reach. Many have a deep top compartment under a hinged lid, several drawers, a side handle, and an open bottom tray. Others use two open shelves with only one or two drawers. Both styles are meant to carry the current job rather than archive every specialty tool you own.

    The current U.S. General 30 inch five drawer cart gives a useful example. Its official product page lists a 37.25 by 22 inch footprint with the handle, a 41.375 inch height, 15,000 cubic inches of total storage, and a 700 pound working load. It weighs 144 pounds empty and rides on two fixed and two locking swivel five inch casters.

    Those figures show the cart bargain. You get substantial capacity and an accessible top, but the body is not tiny. The handle, lid, and steering arc all need room. A cart earns that room only when it moves regularly to the repair or becomes a useful station beside the bench.

    What a rolling tool chest does better

    A rolling chest or cabinet turns vertical space into layers. Shallow drawers prevent wrenches, sockets, pliers, and measuring tools from piling on one another. Deeper bottom drawers can take power tools or cases. Because the unit usually stays against a wall, you can plan lighting, drawer opening space, and nearby charging without rebuilding the arrangement for every job.

    Harbor Freight’s 27 inch Series 3 roll cabinet illustrates the format. The manufacturer listing gives seven drawers, 10,900 cubic inches of storage, a 1,200 pound capacity, and cabinet dimensions of 27 inches wide, 22 inches deep, and 41.25 inches high. The listed empty weight is 182 pounds.

    It is narrower than the example cart but denser and heavier. That makes it easier to assign a permanent wall bay, yet less appealing to push around a vehicle every weekend. Read the rolling tool chest buying guide before comparing slide ratings, drawer depths, and cabinet generations.

    A tool cart wins at the point of work

    A cart is at its best when a repair scatters tools across the garage. Roll it beside the front wheel for brake work, park it near the mower in the driveway, or bring it to the assembly bench. The top tray can hold removed fasteners in order, and the drawers keep frequently used sizes close. Fewer walks back to the wall cabinet also mean fewer chances to lose a bolt on another surface.

    Mobility needs a clear route. Shut and latch every drawer, remove loose items from the top, unlock the correct casters, and push from the handle supplied by the maker. Joints, extension cords, floor mats, and stray hardware can stop a loaded caster suddenly. The garage aisle clearance guide helps identify pinch points beside a parked vehicle.

    A cart is less convincing if it never leaves its corner. In that role, its deep top bin can hide tools beneath one another, and its fixed wheel pair may make the last few inches of parking awkward. Be honest about the route and frequency. Moving a cart once a year is storage theater, not a useful workflow.

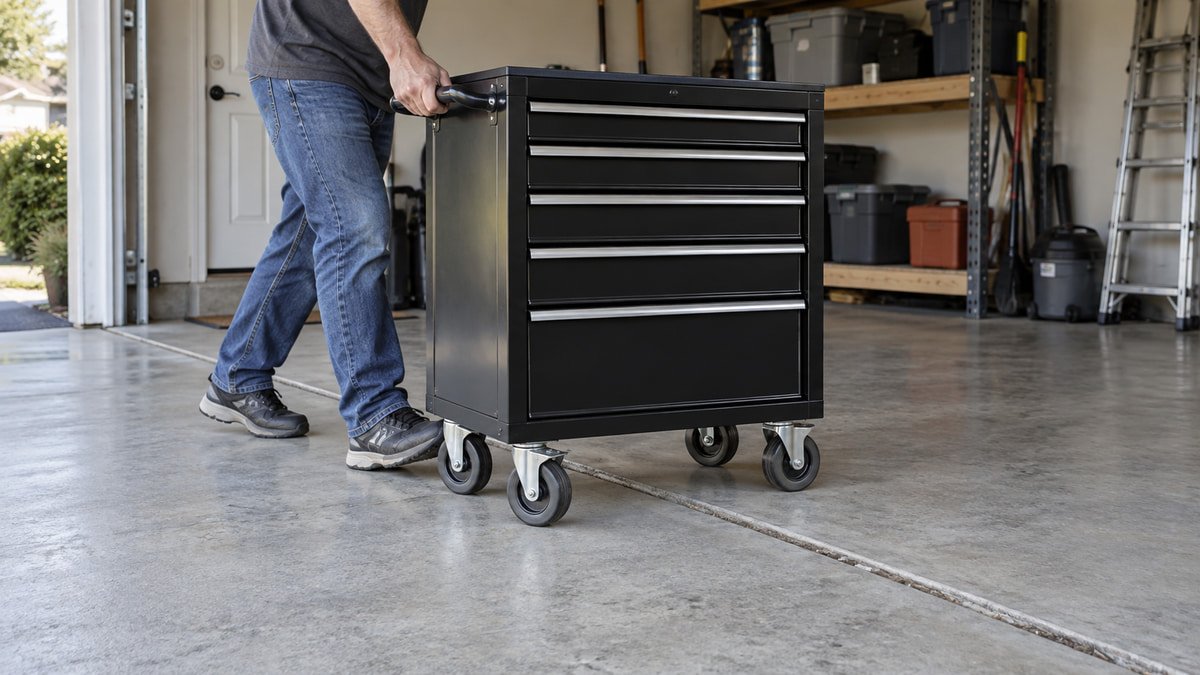
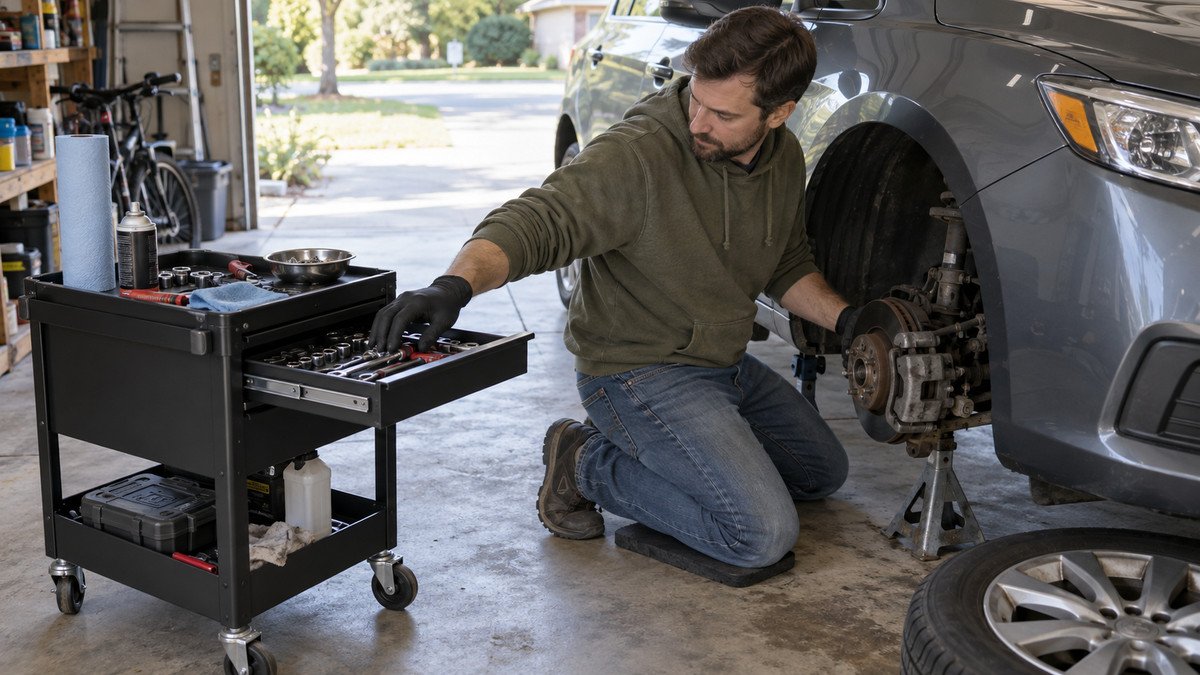
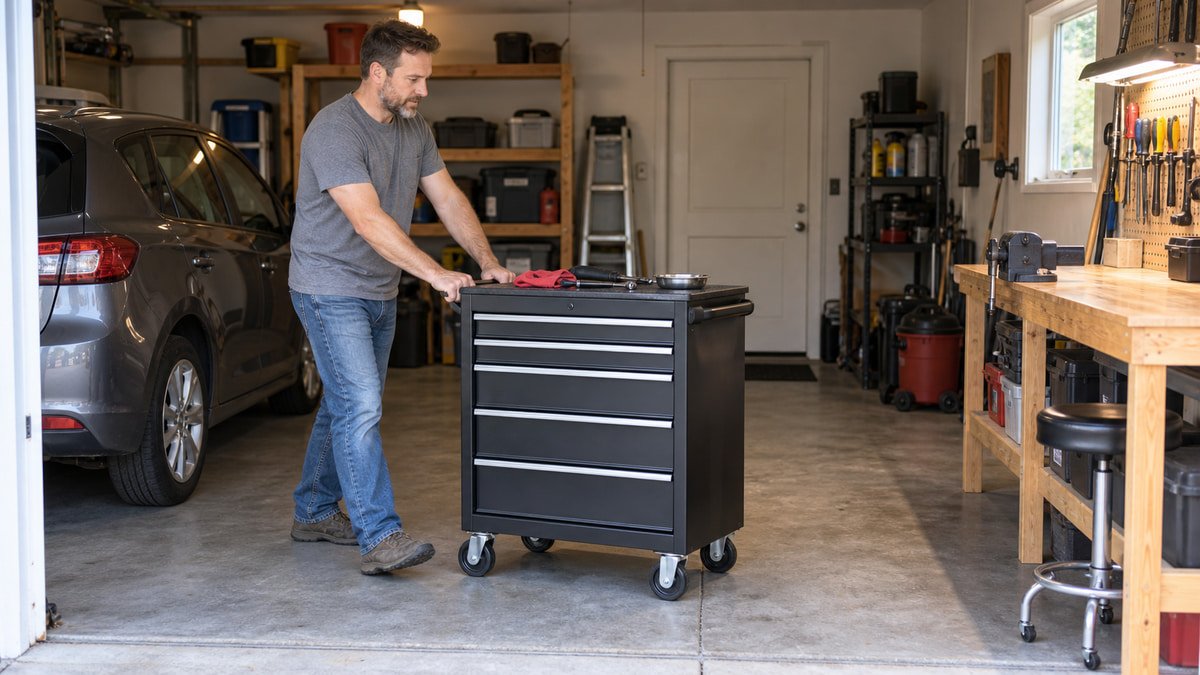
    Rolling tool cart parked beside a car during a home garage repair
    A cart saves steps during a repair because sockets, hand tools, and parts can stay beside the work area.

    A rolling chest wins for dense drawer storage

    Tool collections grow sideways in a cart and upward in a chest. Extra shallow drawers earn their space because they display one layer at a time. You can dedicate one drawer to sockets, another to pliers, and another to marking tools without stacking cases. Labels inside the drawer lip or consistent foam and tray layouts make missing tools obvious.

    A rolling cabinet also supports a stable home for tools used across several work zones. The garage tool storage guide favors storing items near the task that uses them, but a central chest can still work when the garage is too narrow for several cabinets. Keep daily tools between knee and chest height, heavy sockets low, and seldom used gear in the least convenient drawers.

    More drawers do not automatically mean more usable capacity. Measure tall sockets, torque wrenches, molded cases, and power tool batteries. A drawer that is half an inch too shallow may force the whole category elsewhere. Look for published inside dimensions instead of relying on cabinet width and cubic inches.

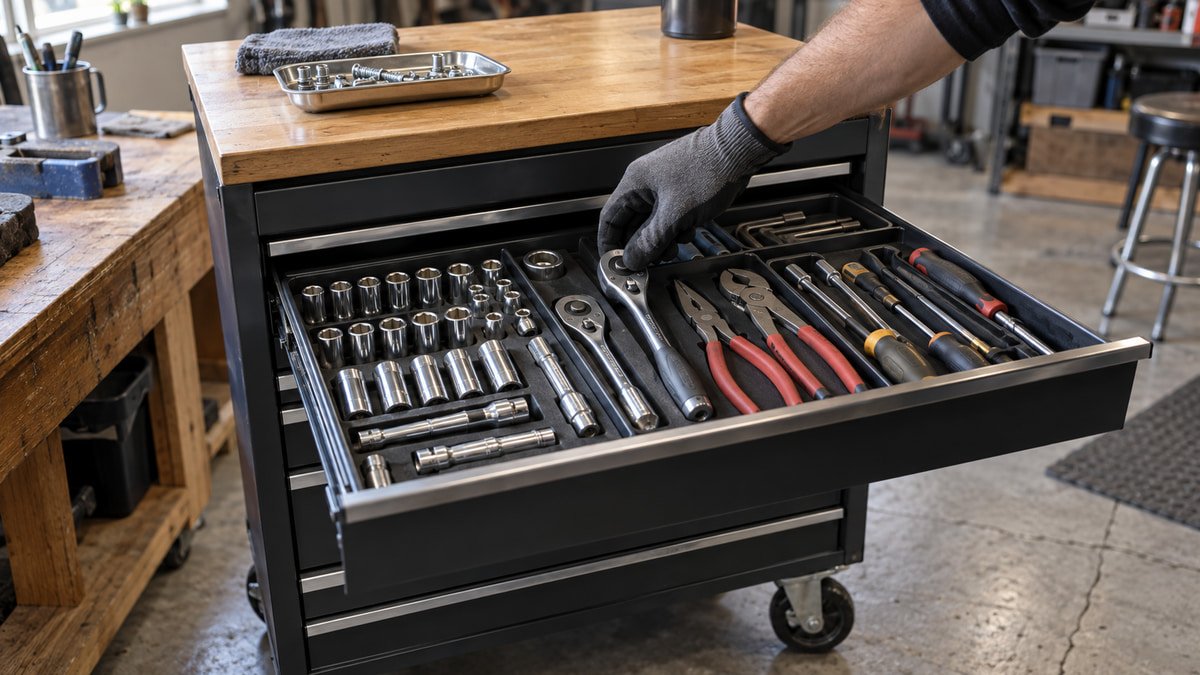
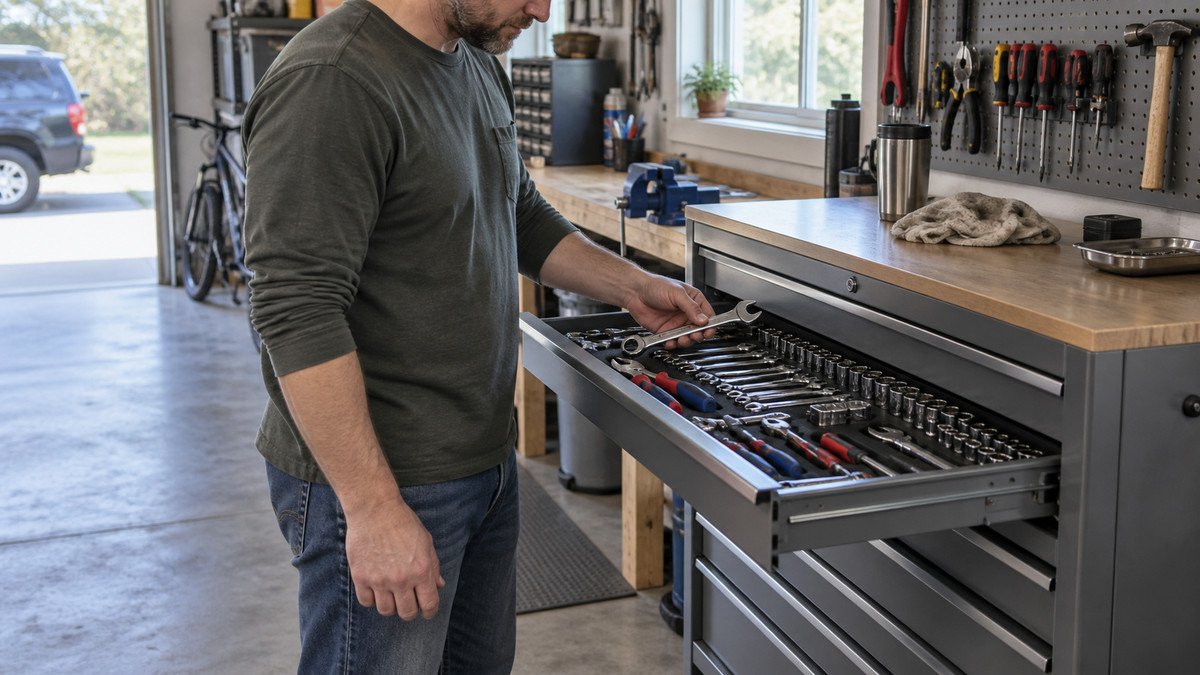
    Homeowner selecting a wrench from an organized rolling tool chest drawer
    A rolling chest favors dense storage, with shallow drawers that let a larger hand tool collection remain visible.

    Compare the full working footprint

    Measure with the largest vehicle parked and the garage door closed. Mark the body of each candidate with painter’s tape. Add the side handle, cord wrap, paper holder, and the deepest open drawer. For a lidded cart, stand a piece of cardboard at the open height so you can see conflicts with shelves, tracks, and wall cabinets.

    The cabinet itself is only part of the footprint. You need room to stand squarely in front of a drawer and lift out a heavy tool without backing into the car. A cart needs a travel lane plus enough space for its swivel casters to align. A chest needs a parking bay that remains usable when the vehicle door or laundry room door is open. Follow the garage measuring checklist for curbs, outlets, base trim, and overhead obstacles.

    Do not count on sliding a loaded unit sideways. Even four swivel casters can resist when their wheels point different directions. Mock up the working envelope, not the glossy front view. Ten minutes with tape will expose a bad fit before delivery day.

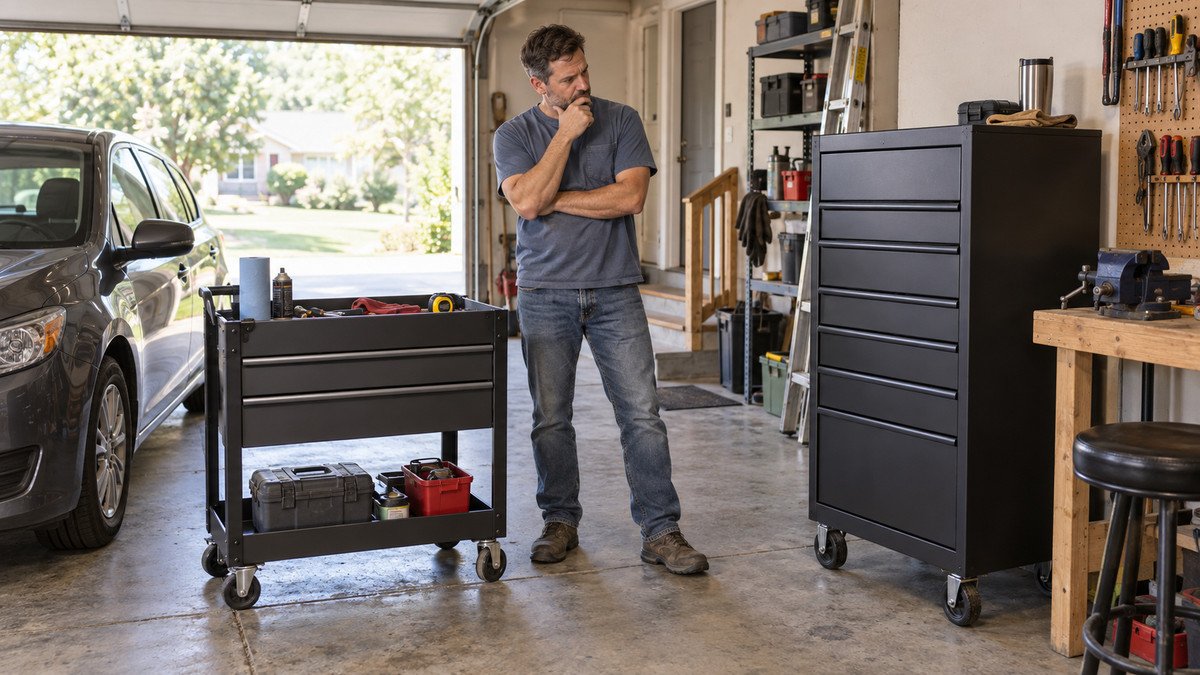
    Homeowner measuring floor space around a tool cart and rolling chest
    The usable footprint includes handles, open drawers, lids, and the standing room needed to reach every compartment.

    Drawer access matters more than the capacity headline

    Cubic inch totals help compare related models, but they do not tell you how the space is divided. A deep cart lid can swallow bulky tools, yet every item at the bottom has items above it. A chest with many shallow drawers improves visibility but may reject tall cases. List twenty tools you reach for most and give each one a specific home on the candidate layout.

    Check full extension travel, latch feel, and the rating for each pair of slides. Some cabinets prevent more than one drawer from opening, which can reduce tip risk but changes how quickly you browse. If a model allows several drawers open at once, develop the habit of closing one before opening another. A brake holds wheels; it does not prevent a top-heavy cabinet from tipping.

    Drawer liners keep steel tools from skating when the unit moves. Fitted trays improve scanning but consume space, so use them where the time saving is real. Leave one small drawer or top section flexible for the fasteners and tools involved in today’s job.

    Caster layout decides how pleasant movement feels

    Most full size carts and cabinets use either two fixed casters with two swivels or four swivels. The first arrangement tracks well down a straight aisle. Four swivels can pivot in less space, though a loaded unit may wander over a joint. Wheel diameter, tread material, bearings, floor texture, and weight distribution matter as much as the pattern.

    Sunex takes the mobile idea farther with its six drawer 8057XT service cart. The official specifications list four swivel casters, a 600 pound capacity, a 244 pound product weight, and a width of 39.25 inches with the handle. It is a serious cart, but its weight and width show why a large mobile unit can behave more like a parked cabinet in a small garage.

    Test every proposed route for slab lips and thresholds. Never tow a tool box with a vehicle or roll it down a meaningful slope. Keep dense items low, push from the intended handle, and slow down before any change in level.

    Use load ratings as safety limits

    The large number printed on a sales card is usually a total limit under stated conditions. Drawers, shelves, side trays, tops, and casters may carry lower individual ratings. Similar looking sizes can change between product generations, so read the manual for the exact model number rather than borrowing limits from an older review.

    A cabinet filled with sockets, pullers, hammers, and steel fixtures becomes heavy quickly. Keep the densest drawers near the floor and balance the left and right sides. Open one loaded drawer at a time. Do not sit, stand, climb, or lean hard on an extended drawer, and do not let children play around an unlocked unit.

    Consider the floor too. A sound concrete slab is a different base from cracked paving, an uneven threshold, or a raised wood platform. Level the parking area by an approved method, keep caster brakes accessible, and leave enough clearance to inspect wheels and fasteners.

    Work surfaces, lids, and charging change the choice

    A cart often gives you the better temporary work surface. An open top tray contains sockets and fasteners, while a closed lid may support light assembly if the manufacturer allows it. The drawback is access: some carts require the lid to be open before drawers can unlock, and a raised lid can block a shelf or window.

    The chest top may have a flat panel, a protective mat, or another approved chest occupying that space. A wood work surface can support small tasks, but it should not become a permanent pile that blocks upper drawers. Decide before purchase if the top is storage, assembly space, or the base for another approved component.

    Power strips and built-in ports are conveniences, not permission to ignore charger instructions. Protect cords from drawer edges and casters, provide the ventilation the charger requires, and keep combustible clutter away. The garage workshop zones guide can help place charging away from grinding debris and wet work.

    A two piece setup often serves a small garage best

    You do not need to force the whole collection into one moving cabinet. A compact rolling chest can stay against the wall with specialty tools, while a light utility cart carries the current project’s tools and parts. At the end of the job, return tools to the chest and park the empty cart under a bench or on its assigned footprint.

    This split keeps the travel load reasonable and stops a deep cart lid from becoming an archive. It also lets you replace either piece without redesigning the full system. The cart can be inexpensive if it carries fifty pounds instead of five hundred. The chest can use better shallow drawers because it does not need to steer around a bumper.

    Set a reset rule that fits your habits. Five minutes of returning sockets and clearing the cart after each job keeps both units useful. Without that reset, two storage pieces simply create two places to search.

    Who should choose a tool cart or rolling chest

    Choose a cart if you work in several spots, need a parts tray beside the repair, own a focused tool set, and have a clean route across the slab. Choose a rolling chest if most work returns to one bench, the collection contains many hand tools, and you value shallow drawers over a mobile top compartment.

    For a one car garage that also parks a daily driver, favor the smaller working envelope even if the larger unit technically fits. For a dedicated workshop, a denser chest may justify its weight. For mixed household repair, a fixed cabinet and a modest open cart can be calmer than either extreme.

    Make the final call from a taped floor outline, your actual tool dimensions, and the current manual. Good small garage cabinet planning leaves room for people and projects, not just steel boxes. The winning format is the one you can reach, move safely, and reset without turning the aisle into storage.

    Useful products to compare

    These links open current Amazon search results. Check the dimensions, manual, mounting hardware, warranty, and current availability for the exact model before you order.

    Before you buy or install

    Read the current manual for the exact product you are considering. Confirm its assembled dimensions, rated capacity, mounting requirements, included hardware, working clearances, warranty, and any limits that apply to your wall, floor, electrical circuit, or garage layout.

    Frequently asked questions

    Is a tool cart safer to move than a rolling tool chest?

    A lighter cart with a low, balanced load can be easier to control, but the label alone does not make it safer. Check the caster design, floor route, drawer latches, handle, and current load. Close drawers, clear the top, unlock the correct wheels, and push from the manufacturer’s intended handle.

    Does a rolling tool chest hold more than a tool cart?

    Usually, a rolling chest or cabinet offers more separate drawers and better density for hand tools. Some large mechanics carts have high total capacity, though much of it may be in a deep top compartment or lower tray. Compare interior drawer dimensions and your actual tools, not just total cubic inches.

    Can I put a top tool chest directly on a cart?

    Only do so if both manufacturers approve the combination and provide a secure mounting method. A top chest changes height, weight distribution, lid access, and tip behavior. A compatible rolling cabinet is generally the intended base. Never rely on gravity or a loose nonslip mat to secure a heavy chest.

    What width tool storage is best for a one car garage?

    There is no universal width. Measure the parked car, door swing, handle, open drawer depth, and the space where you stand. A 27 inch cabinet may use wall space efficiently, while a 30 inch nominal cart can be much wider with its handle. Tape the complete working footprint on the floor before choosing.

    Should I buy a cart first or a rolling chest first?

    Buy the chest first if loose tools already need organized drawer homes. Buy the cart first if your storage is adequate but every project spreads tools across several surfaces. If the budget permits only one, choose the piece that solves today’s repeated frustration and leaves a measured place for a future companion.

  • Garage Power Tool Charging Station: A Safer Setup

    Garage Power Tool Charging Station: A Safer Setup

    Affiliate disclosure: As an Amazon Associate I earn from qualifying purchases. This article may contain affiliate links, and Bay & Bench may earn a commission at no extra cost to you. Read our full Affiliate Disclosure.

    A garage power tool charging station should make one ordinary task easier: finding a charged battery without hunting through drawers. It also needs to respect heat, cord condition, charger compatibility, and the electrical limits of the space. A handsome plywood shelf is a poor bargain if its chargers are crowded behind sawdust or plugged into a chain of adapters.

    The best station is usually smaller than the first sketch. It holds the chargers you use, provides an honest spot for batteries waiting to charge, and leaves damaged packs out of circulation. You can build one from a wall shelf, a shallow cabinet with an open front, or a ready made organizer. The layout matters more than the format. This guide works through that layout before the first hook or screw goes into the wall.

    Quick answer

    Place compatible chargers on an open, stable surface within reach of a suitable wall receptacle. Follow each charger manual for mounting, clearance, temperature, and power requirements. Keep cords visible and separate charged packs from packs waiting to charge. Remove damaged or questionable packs from the charging and storage area, do not charge or use them, and follow the maker’s handling guidance and your local battery disposal program. If the circuit, receptacle, or load is uncertain, have a licensed electrician check it.

    Garage power tool charging station choices at a glance

    A station can be as plain as a shelf above the bench. More structure helps only when it solves a real problem, such as mixed battery platforms, loose cords, or chargers that get buried during a project. Start with the smallest format that gives every charger room to work.

    FormatBest fitAccessDust controlWatch for
    Open wall shelfTwo or three chargersExcellentLowCord drop and wall attachment
    Open front cubbiesSeveral battery familiesGoodModerateHeat trapped in tight cells
    Shallow cabinetClean storage near dirty workGood with doors openBetter when idleCharging with doors closed
    Mobile cart stationWork that moves around the garageExcellentLowWheel locks and cord strain
    Commercial organizerFast installationVariesVariesCharger and battery fit

    Do not treat a cabinet door as fire protection. If a maker calls for open airflow, leave the charger in the open while it runs. A door can hide indicator lights and make an unusual smell or sound easier to miss. The station should put charging activity in view, not tuck it away.

    Garage charging shelf with spaced battery chargers and neatly routed power cords
    Spacing and open air around each charger matter more than squeezing every device onto one narrow shelf.

    Inventory batteries before building a shelf

    Gather every battery and charger that still belongs in the garage. Group them by voltage and tool platform, then remove packs that are cracked, swollen, leaking, unusually hot, or already set aside for disposal. Do not test a questionable pack merely to see if it still works. Follow its maker’s instructions and local battery disposal program.

    Count charging bays, not charger housings. A dual port unit may charge both packs at once or only one after the other. That difference affects how many batteries can be ready by morning. Note the cord exit, battery insertion path, indicator location, and the space your hand needs to release a pack.

    This inventory also exposes tools that no longer deserve prime wall space. The broader garage tool storage guide uses frequency and work zone to decide what stays close. An old platform used twice a year can live on a shelf without joining the daily charging row.

    Check charger instructions and circuit demand

    Read the nameplate and manual for every charger. Record its input rating, approved operating temperature, mounting position, and clearance instructions. Do not estimate the electrical load from battery voltage. The charger’s input information is the relevant figure for the receptacle and circuit.

    The U.S. Fire Administration’s lithium ion battery safety handout advises using the charger supplied by the manufacturer, avoiding overloaded outlets, and having a licensed electrician test a circuit when its suitability is uncertain. That is sound guidance for a garage full of mixed tools. A charging shelf does not increase what one branch circuit can carry.

    If lights dim, a plug fits loosely, a receptacle is discolored, or a breaker trips, stop using that setup. Do not solve repeated trips with a larger breaker or a new power strip. An electrician can assess the receptacle, wiring, circuit load, and local requirements without guesswork.

    Keep each battery with a compatible charger

    Similar looking battery packs are not interchangeable by default. Match the exact charger and battery families named by the tool maker. Avoid improvised adapters, altered housings, and a generic charger that claims broad compatibility without approval from the battery manufacturer.

    Use labels when two platforms look alike. A small printed platform name above each bay works better than writing on a charger’s vents. Leave the model and warning label readable. If several people use the garage, the station should make the right pairing obvious without asking anyone to remember plug shape or color.

    The federal handout also recommends checking for a recognized testing laboratory mark before purchase. That mark is one screening tool, not permission to ignore the manual. Compatibility, condition, temperature, and correct use still decide whether a given charge cycle belongs on the station.

    Leave open air around chargers

    Chargers make heat, even when they are operating normally. Keep ventilation slots clear and follow the exact clearances in each manual. Do not use a battery pack as a bookend, pile gloves over a charger, or line a cubby with loose paper. Sawdust should not be allowed to build up around the intake and outlet openings.

    A current DeWalt charger instruction manual says its charger may sit upright on a work surface or be wall mounted. For wall mounting, it directs the user to stay near an outlet and away from corners or obstructions that impede airflow. Your charger may differ, so use the instructions packed with its exact model.

    An open shelf is forgiving because warm air can leave in several directions. Cubbies need more thought. Make them broad enough for the charger, inserted battery, cord bend, and the hand that removes it. If that creates a bulky box, the shelf format was probably the better choice.

    Choose a location away from dirty work

    Put the station near the tools it supports but outside the direct spray from grinding, sanding, painting, and vehicle washing. Fine dust settles inside vents. Water and wet hands have no place around charging equipment. A side wall near the assembly bench often works better than the wall directly behind a saw.

    Reach matters too. Charger lights should be visible without stooping, and the heaviest battery should come out without an overhead pull. Plan the station within the storage and work areas described in the garage workshop zones guide. Shorter travel makes it more likely that a flat pack lands in the waiting area instead of on the nearest car roof.

    Keep the station clear of the main walking line and car door swing. The workshop aisle clearance guide can help when a shallow charging shelf competes with a narrow passage. Include the protruding battery and hanging cord in the measurement.

    Lay out the station at full scale

    Place the chargers on a sheet of paper or scrap board before building. Insert the largest compatible battery in each one. Mark the charger outline, cord exit, mounting holes, release button, and hand space. Then route pieces of string toward the planned outlet to see where cords want to cross.

    This plain rehearsal catches awkward details. A battery may have to slide forward before lifting. A tall pack may block the shelf above it. A cord wrapper can add depth behind the charger. Indicator lamps that look clear on a table can disappear beneath a deep shelf lip.

    Use the same measured approach when locating the station near a bench. Our guide on where to put a garage workbench covers movement, door swing, and access to utilities. Charging should fit that plan, not occupy the last open patch of wall by accident.

    Homeowner measuring a plywood charging shelf beside a garage workbench outlet
    A paper layout and a few measurements reveal cord, handle, and battery clearance before holes reach the wall.

    Mount the charger only as its maker allows

    Some chargers have molded mounting slots. Others are meant to stay on a horizontal surface. Never drill a charger housing, bury it in foam, or rely on adhesive strips when the manual calls for screws. Mounting hardware must suit the wall structure as well as the charger.

    The Milwaukee four bay sequential charger page lists integrated hanging holes and sequential charging. That is a useful reminder to verify two separate facts: how the charger attaches and how its ports behave. A four slot body is not necessarily four simultaneous charge cycles.

    Fasten a shelf or backboard to sound structure with hardware appropriate for the wall and expected load. Chargers, batteries, hooks, and future additions all count. If the framing location is unclear, open wall storage planning in the garage wall storage systems guide can help you choose a system that fits the wall you have.

    Route cords without hiding damage

    Give each cord a relaxed route to the receptacle. Avoid sharp bends at the charger body, screws pinching insulation, and cords stretched tight across an edge. A removable clip or broad cable loop can guide slack while leaving the full cord visible for inspection.

    Do not bury a power strip, adapter, or bundled cord inside a closed compartment. The USFA handout warns against overloaded outlets and charging through extension cords or multiplug adapters. When the station needs more permanent receptacles, the clean answer is an electrician designed installation, not another layer of plugs.

    Keep low voltage accessories separate from charger cords so one cable can be removed without disturbing the row. A small channel beside the shelf is easier to clean than a decorative false back. Function wins here. You want to see a scuff, crushed jacket, or loose plug before it becomes ordinary.

    Separate waiting and charged packs

    Two simple locations prevent most status confusion. One tray holds packs waiting to charge. Another holds charged packs. If a battery acts strangely, is dropped, gets wet, or shows damage, remove it from the charging and storage area. Do not charge or use it. Follow the maker’s handling instructions and your local battery disposal program rather than leaving it on the station for later.

    Use dividers or shallow labeled bins rather than stacking healthy packs into a deep basket. Terminals should be protected from loose screws, wire offcuts, and other metal objects. Never toss a battery into the same drawer as drill bits. Follow the maker’s storage and terminal protection instructions.

    A pegboard can hold light accessories near the station, but batteries and chargers need support designed for their weight and shape. The garage pegboard layout guide explains reach zones and spacing. Keep charger vents free instead of framing them with hanging gloves and cords.

    Cordless tool batteries sorted into waiting and charged areas in a garage
    Simple waiting and ready zones reduce mix-ups; damaged or questionable packs do not belong at the charging station.

    Respect garage temperature and battery condition

    Garages can be much hotter or colder than the house. Charge and store batteries only within the ranges stated by the manufacturer. A pack brought in from a freezing vehicle or hot trunk may need time to reach an approved temperature before charging. Let the charger indicators and manual guide the decision.

    Stop using a pack that is swollen, cracked, leaking, unusually hot, smells odd, or has damaged terminals. Do not open it or attempt a home repair. Move people away if a battery is smoking, hissing, or heating rapidly, call emergency services, and follow local emergency guidance. Personal safety matters more than saving the station.

    Check current recall information for the exact model you own. Keep purchase records and model numbers in a phone note or drawer near the station. Battery appearance changes slowly, so a quick comparison during each seasonal cleanup can catch damage that daily users have stopped noticing.

    Test the routine before adding more storage

    Run the station for a week with only the planned chargers, following every maker instruction. Watch how people return packs. Notice whether cords snag, indicator lights vanish, or the waiting tray fills faster than chargers can clear it. Those observations are better than a larger first build based on imagined needs.

    Clean with the chargers unplugged and use only the method permitted by each manual. Inspect plugs, cords, housings, mounting screws, shelf joints, and battery terminals. A loose shelf or hot plug calls for stopping, not tightening things while equipment remains powered.

    Leave one empty position, but resist covering the wall with speculative cubbies. A good garage battery charging station has a calm, legible routine. Flat packs enter one side, compatible chargers sit in open air, and ready batteries leave from another. When that path works without thought, the station is finished.

    Useful products to compare

    These links open current Amazon search results. Check the dimensions, manual, mounting hardware, warranty, and current availability for the exact model before you order.

    Before you buy or install

    Read the current manual for the exact product you are considering. Confirm its assembled dimensions, rated capacity, mounting requirements, included hardware, working clearances, warranty, and any limits that apply to your wall, floor, electrical circuit, or garage layout.

    Frequently asked questions

    Can power tool chargers be mounted on a wall?

    Some can, but only when the manufacturer provides mounting slots and permits that position. Follow the manual for screw size, attachment, airflow, and orientation. Do not drill the charger body or assume that a model designed for a bench can hang vertically.

    Can several power tool chargers share one outlet?

    That depends on charger input ratings, other loads on the circuit, the receptacle, wiring, and local electrical rules. Do not guess from the battery voltage or add adapters until everything fits. If the total load or circuit condition is uncertain, ask a licensed electrician to assess it.

    Should a garage charging station have doors?

    Doors can keep dust off equipment when it is unplugged and idle. Charging behind closed doors may trap heat and hide status lights, so follow each charger manual. An open shelf or an open front cabinet is often easier to ventilate, inspect, and keep clean.

    Where should spare tool batteries be stored?

    Store healthy packs in the temperature range and condition described by the manufacturer, away from water, direct heat, and loose metal that could contact terminals. Separate charged packs from packs waiting to charge. Remove damaged or questionable packs from the station, do not charge or use them, and follow the maker’s handling guidance and your local battery disposal program.

    Can I charge a cold battery as soon as I enter the garage?

    Use the operating temperature range and indicator guidance in the exact battery and charger manuals. A pack outside that range may need time to warm or cool naturally. Do not force charging or heat a pack with a space heater, heat gun, or other improvised method.

  • Small Parts Storage Drawers vs Bins: Choose by Workflow

    Small Parts Storage Drawers vs Bins: Choose by Workflow

    Affiliate disclosure: As an Amazon Associate I earn from qualifying purchases. This article may contain affiliate links, and Bay & Bench may earn a commission at no extra cost to you. Read our full Affiliate Disclosure.

    Small parts storage drawers vs bins is less a contest than a sorting question. Shallow drawers are excellent for dozens of tiny hardware categories that need protection from dust. Open bins are faster when you grab the same screws, connectors, or fittings throughout a project. The wrong format turns either advantage into friction.

    A drawer full of long lag screws wastes space and gets heavy. A deep open bin of mixed washers becomes a dark pocket nobody wants to search. Most working garages need both formats, but not in equal amounts. This comparison shows where each one earns its wall or shelf space, how to measure capacity, and how to build a mixed system without buying a container for every object you own.

    Quick answer

    Choose small drawers for tiny, varied parts that benefit from shallow layers, dividers, and dust protection. Choose open bins for repeat-use stock that you want to grab with one hand and refill quickly. Drawers usually offer better category density, while bins handle larger pieces and changing quantities. A hybrid system works best for most garages.

    Small parts storage drawers vs bins at a glance

    The best format follows part size and retrieval pattern. Tiny machine screws used once a month belong in a labeled drawer. A box of common deck screws used all weekend belongs near the front of an open bin. Trying to standardize both categories into one container usually creates wasted volume or slow access.

    Decision pointSmall parts drawersOpen front bins
    Best part sizeTiny to smallSmall to medium
    Retrieval speedOpen, inspect, removeReach in directly
    Category densityHigh in a shallow footprintModerate
    Dust protectionBetter, though rarely sealedLow
    Changing quantitiesLimited by drawer volumeEasy to swap bin sizes
    Portable sortingOne drawer at a time if removableWhole bin lifts out easily
    Fast inventory checkClear fronts helpOpen top shows stock level

    Neither format fixes a vague category. A label such as miscellaneous fasteners guarantees rummaging. Name the part family and size range, then choose the smallest container that can accept a normal refill without being packed to the rim.

    Side by side small parts drawers and open front bins holding garage hardware
    A useful comparison starts with the parts and retrieval pattern; matching colors and container counts can wait.

    Drawer cabinets win with tiny varied hardware

    Small drawers divide a broad cabinet face into many shallow spaces. That geometry suits nuts, washers, cotter pins, anchors, electrical terminals, and other parts that vanish beneath one another in a deep bin. With one layer or a thin pile, you can spot the needed diameter before emptying the whole category.

    Removable dividers make drawers more efficient when two closely related items have low stock. Do not create compartments so narrow that fingers cannot reach the back. A divider system should leave room for a pinch grip and for the inevitable extra handful bought midway through a repair.

    Place the cabinet near the work that uses those parts. The garage tool storage guide explains why frequency matters more than visual symmetry. Fasteners for the assembly bench deserve easy reach. Spare furniture glides can live higher or farther away.

    Hand pulling a shallow clear drawer filled with sorted nuts and washers
    A shallow drawer makes tiny mixed hardware easier to divide, scan, and carry to the bench.

    Open bins win with repeat use stock

    An open front bin removes one motion. Your hand reaches in, takes what it needs, and returns for more without setting down a drawer. That feels trivial during a two screw repair. Across an afternoon of assembly, the difference is obvious.

    Bins also tolerate parts that stick above a shallow drawer, such as hose fittings, sanding sleeves, wire connectors, short clamps, and boxes of driver bits. A removable bin can travel to the project and return as one unit. Pick a size that remains comfortable to carry when full, not a cavern that invites several unrelated categories.

    The open face is the tradeoff. Dust lands on contents, and small pieces can spill if the bin gets bumped or tilted. Put open bins away from grinding and sawing debris. A layout based on the garage workshop zones can keep frequently handled stock near assembly without putting it in the dirty work stream.

    Hand reaching into an open front bin filled with common wood screws
    Open bins suit parts used repeatedly because one hand can retrieve stock without opening anything.

    Compare storage density with real dimensions

    Drawer cabinets use wall area efficiently because the front is almost all access points. Their depth is often modest, which helps above a bench. Bins need shelf depth, vertical clearance, and enough front space for a hand. Their wider openings make them faster, but fewer categories fit within the same rectangle.

    Count usable compartments rather than drawer count. One drawer split into three workable cells may beat three tiny drawers whose handles and frames consume more space. With bins, compare inside floor dimensions and front opening size. Outside volume does not tell you whether a hand can reach the last washer.

    Measure the wall or shelf before shopping. Our garage wall storage systems guide covers attachment and working depth, while the garage shelf spacing guide helps set the open height above bins. Include the hand path as well as the plastic shell.

    Use manufacturer dimensions as a fit check

    Product names do not form a standard size system. The Akro-Mils 10144 drawer cabinet page lists a cabinet about 20 inches wide, 6 3/8 inches deep, and 15 13/16 inches high. Its large and small drawers have different openings, and the maker includes a limited number of dividers. Those details matter more than the headline count of 44.

    Akro-Mils lists its four inch tall shelf bin family in several lengths and widths, including models made for shelves close to 12, 18, or 24 inches deep. A garage shelf that is nominally 18 inches deep may lose space to a rear brace or front lip, so compare the exact outside bin length with the usable deck.

    Do not carry one brand’s measurements over to another product. Buy one sample when possible. Fill it with the intended parts, reach into it from the planned height, and see whether the label remains visible while the container is in place.

    Think about dust spills and moisture

    Most plastic parts drawers reduce falling dust but are not airtight. Fine sanding powder can enter around the face, especially when a dust collector exhausts nearby. Open bins collect more. If a part needs genuinely sealed storage, use an appropriate lidded container rather than pretending a drawer cabinet is a gasketed box.

    Drawers contain a tip better during ordinary use because the cabinet stays on the wall. A drawer pulled too far can still spill, so rear stop tabs are worth checking. Bins move more often and may need a front retaining lip or a rack designed for their hanging edge.

    Moisture calls for fixing the garage problem first. Plastic organizers protect parts from a damp rag, not from roof leaks, wall condensation, or standing water. Keep steel hardware dry, avoid packing wet parts, and leave enough visual access to catch rust before a whole drawer turns orange.

    Label for identification not decoration

    Labels should answer the question asked at the bench. For fasteners, name type, diameter, length, thread, and material when those distinctions affect the job. For electrical pieces, use the description printed by the maker. Color alone is a weak code because bins move and people remember colors differently.

    Drawer labels need to be readable without opening the cabinet. Open bin labels belong above or below the hand opening so stock does not hide them. Use replaceable cards or removable tape when the category changes often. Permanent marker tends to survive longer than the sorting decision.

    A photo on a label can help with an unfamiliar clip or specialty fitting, but dozens of pictures make the wall noisy. Start with plain names. The planning advice in the garage pegboard layout guide applies here too: reserve the strongest visual cues for items that must be found quickly.

    Put frequent parts in the comfortable reach band

    The easiest containers belong between roughly knee and shoulder level for the person who uses them, adjusted to the actual bench and body. Tiny drawers mounted near the ceiling are hard to read. Heavy bins near the floor invite a bent reach and an awkward pull.

    The NIOSH Revised Lifting Equation overview explains that weight, horizontal reach, vertical position, travel distance, frequency, and grip all affect a lifting task. It is a workplace assessment tool, not a garage bin weight limit. The lesson still travels well: a manageable load in a good position feels very different from the same load reached at arm’s length.

    Keep dense hardware in smaller containers. If a bin needs two hands, the path to the bench should be clear and the shelf should be low enough for a controlled lift. A bin full of bolts can exceed what its size suggests long before it looks full.

    Secure the cabinet rack and shelf

    A wall mounted drawer cabinet must use the attachment points and hardware described by its maker. The organizer, all contents, and the force of opening a sticky drawer reach the wall together. Drywall alone may not be an approved support. Find suitable structure or use a mounting system rated for the load and wall type.

    Bin racks need the same attention. A full row puts weight forward of the wall, and pulling a stubborn bin adds motion. Freestanding shelves should be level, stable, and anchored when their instructions call for it. Do not exceed a shelf or rack rating simply because each plastic bin seems light.

    If small parts live inside a larger cabinet, allow drawer travel and label visibility before buying the enclosure. The garage cabinets buying guide covers interior depth, shelf adjustment, and wall attachment. A steel door that cannot close over an organizer is wasted protection.

    A hybrid organizer fits most garages

    Use drawers for the long tail of small categories and bins for the short list of parts consumed often. A sensible starting split is one drawer cabinet beside one narrow row of bins. Live with it before expanding. The ratio will become obvious as refills arrive and unfinished projects leave leftovers.

    Portable compartment cases can bridge the two systems. They keep a project assortment together, then stack on a shelf when the job ends. Do not use them as permanent dumping grounds. Return common stock to its drawer or bin, and leave only the parts tied to that project in the case.

    Keep a small empty tray at the bench for parts removed during repair. Mixing those pieces into the permanent organizer before reassembly is an easy way to lose track. Once the job is done, leftovers can join labeled stock or leave the garage.

    Shop by the refill and the retrieval motion

    Bring measurements and a sample part when comparing organizers. For drawers, test handle grip, stop tabs, divider fit, front clarity, and whether the drawer comes out without a fight. For bins, test the hand opening, inside corners, rack engagement, label holder, and balance when carried.

    Think about how supplies arrive. A one pound box of screws should fit without opening a second half empty bin. A specialty washer bought six at a time should not occupy a shoebox sized container. Leave some headroom, but do not pay for rows of air.

    Put the system near a bench that has enough landing space for an open drawer or removed bin. The guide to workbench placement in a garage explains why door swing and travel paths can matter more than the blank wall that looks good in a product photo.

    Run a thirty day sorting test

    Start with broad temporary labels and sort only parts you can name. For one month, notice which containers are opened repeatedly, which are hard to reach, and which categories overflow. Move the everyday stock into bins. Split the crowded tiny parts into drawers. Combine categories that remain almost empty and are easy to tell apart.

    Set a rule for stray hardware. If you cannot identify a fastener or imagine a reasonable use, one small holding cup is enough. Date it. Revisit the cup after a few months instead of seeding unidentified screws across every drawer.

    A useful organizer makes returning a part nearly as easy as taking it. Drawers bring density and protection. Open bins bring speed and flexibility. Put each advantage where the garage routine can use it.

    Useful products to compare

    These links open current Amazon search results. Check the dimensions, manual, mounting hardware, warranty, and current availability for the exact model before you order.

    Before you buy or install

    Read the current manual for the exact product you are considering. Confirm its assembled dimensions, rated capacity, mounting requirements, included hardware, working clearances, warranty, and any limits that apply to your wall, floor, electrical circuit, or garage layout.

    Frequently asked questions

    Are drawers or bins better for screws?

    Drawers suit small quantities of many screw sizes because shallow compartments make identification easier. Open bins suit one or two screw types used repeatedly during a project. Keep dense boxes low enough for a controlled lift, and label diameter and length rather than relying on appearance.

    Do clear drawers keep garage hardware dust free?

    They reduce direct falling dust, but most small parts cabinets are not sealed. Fine sanding or grinding dust can enter around drawer faces. Place the cabinet outside the dirty work stream, clean it periodically, and use a suitable closed container when a part needs better protection.

    Can small parts bins hang directly on pegboard?

    Only use hooks, rails, or adapters designed for the bin system, pegboard material, hole pattern, and expected load. A bin that hangs securely while empty may pull away when filled with bolts. Follow the capacity and attachment instructions for every part of the setup.

    How many small parts drawers do I need?

    Count named categories, then allow a little room for divisions and normal refills. Do not buy one drawer for every stray fastener. A month with temporary labels will reveal which groups deserve separate drawers and which can share space without causing a search.

    What is the best way to combine drawers and bins?

    Put tiny, varied, slower moving parts in shallow drawers. Put common repeat-use stock in open bins near the workbench. Keep both within a comfortable reach, leave space for labels and hands, and use a portable case for assortments that travel to a project.

  • Garage Storage Lift vs Overhead Rack: Which Fits Better?

    Garage Storage Lift vs Overhead Rack: Which Fits Better?

    Affiliate disclosure: As an Amazon Associate I earn from qualifying purchases. This article may contain affiliate links, and Bay & Bench may earn a commission at no extra cost to you. Read our full Affiliate Disclosure.

    A garage storage lift vs overhead rack decision comes down to access more than appearance. Both put light, bulky belongings near the ceiling. A fixed rack costs less and stores more per dollar, yet every retrieval involves a ladder. A lift brings the platform down, which is easier on knees and shoulders, although the mechanism takes more room and asks for a more involved installation.

    The garage decides which compromise works. Ceiling height, joist direction, garage door travel, parked vehicle clearance, and how often the bins come down all matter. So does the person using the system. A healthy adult who reaches holiday decorations twice a year may be happy with a fixed rack. Someone who rotates camping gear every month may soon resent it. This comparison works through those ordinary details before the shopping begins.

    Quick answer

    Choose a fixed overhead rack when budget and maximum storage area matter most, the items are light, and access is infrequent. Choose a ceiling storage lift when comfortable retrieval matters enough to justify higher cost, moving parts, and a smaller platform. In either case, verify framing, door movement, vehicle clearance, and the exact rated load before installation.

    Garage storage lift vs overhead rack at a glance

    The two systems solve the same floor space problem in different ways. A rack stays put. A lift trades some capacity and simplicity for a platform that travels between storage height and loading height. That difference affects almost every part of ownership.

    Decision pointFixed overhead rackCeiling storage lift
    Purchase costUsually lowerUsually higher
    Loading methodLadder or step platformPlatform lowers toward the floor
    Storage areaMany large formats availableTravel path limits platform placement
    Moving partsNone after installationCables, drive, locks, or pulleys
    Best useRarely accessed light itemsSeasonal items accessed several times a year
    Routine checksFasteners, frame, deckFasteners plus lifting mechanism

    A rack is the plain answer, and that is often a compliment. It has fewer failure points and uses a broad ceiling rectangle efficiently. The lift earns its keep when a ladder has become the weak part of the routine. If the comparison still feels abstract, the broader overhead garage storage buying guide explains rack formats and the measurements behind them.

    Start with the items and retrieval schedule

    Write down what will live overhead. Holiday decor, empty coolers, folding camp chairs, and spare bedding are common candidates because they are bulky without being dense. Paint, fuel, car batteries, loose tools, and liquids that can leak are poor candidates. Heavy objects are awkward above shoulder height even when a product rating appears generous.

    Frequency changes the answer. A fixed rack is easy to tolerate for two planned visits each year. Monthly retrieval is different. The ladder has to come out, a safe landing spot has to remain open, and each tote must move through the same narrow path. People begin storing things on the floor again when overhead access feels like a chore.

    Mark every planned bin as monthly, seasonal, or archival. Give the lift to monthly and seasonal gear if access is the reason for buying one. Archival bins can stay on a rack. This mixed approach often beats forcing one system across the whole ceiling.

    A fixed rack wins on simple capacity

    Fixed racks come in broad platforms and can fill long runs along a side wall or above part of the garage door. Their structure is straightforward: ceiling supports, vertical drops, a perimeter frame, and a deck. Once correctly installed, there is no winding mechanism to operate and no platform travel zone to keep open.

    Capacity on the carton is not permission to load every square inch with dense objects. The framing connection, installation pattern, load distribution, and condition of the hardware remain part of the system. Work through the limits in the overhead rack weight capacity guide, then set a lower household limit that is easy to remember. A large label on each tote can record its contents and weight without advertising a made up total for the rack.

    Fixed racks also work better where the platform never needs to descend. A narrow band above shelving may hold a rack nicely but leave no clear landing rectangle for a lift.

    A storage lift wins on comfortable access

    The useful part of a lift is the lowered platform. Instead of carrying a tote down a ladder, the user loads or unloads near waist or chest height. That can reduce an awkward sequence, especially for someone with limited shoulder reach or balance. It also makes a quick inventory possible because several bins come down together.

    The platform still needs rules. Keep people clear while it moves, stop if the load shifts, and follow the operating steps for the exact model. A manual crank asks for a reachable operating position. A powered lift needs the specified electrical setup and controls that cannot be triggered accidentally. Neither type turns overhead space into a place for very heavy shop equipment.

    FlexiMounts shows the parts and staged installation of one manual platform in its GL44B lift installation guide. Use that as a picture of the work involved, then use the current manual packed with the product you buy.

    Ceiling storage lift lowered for loading lightweight seasonal garage bins
    A lift is most useful when stored items need to come down several times during the year.

    Clearance can eliminate one choice quickly

    A lift needs two clear volumes: its raised storage envelope and its travel path. A fixed rack needs only the first. That sounds small on paper, but the lowered platform may meet a car hood, workbench, freezer, or the path people use to reach the house. If the floor rectangle cannot stay clear during operation, the lift will be annoying or unsafe.

    Park the tallest expected vehicle, open its hatch, and cycle the garage door by hand after disconnecting the opener according to its manual. Watch the door panels, tracks, springs, opener rail, emergency release, lights, and wiring. Then use the steps in the overhead garage storage clearance guide to record the smallest gap, not the nicest one.

    Low ceilings often favor a shallow fixed rack because the lift mechanism and platform consume some of the height. Tall ceilings can favor a lift because ladder access becomes less pleasant as the rack rises.

    Homeowner measuring vehicle clearance below a fixed garage ceiling rack
    Measure with the vehicle parked because the roof, hatch, and garage door can all enter the storage zone.

    Joist direction shapes the installation

    Ceiling storage hardware must connect to the structure specified by the manufacturer. Drywall is a finish, not the supporting frame. Joist direction, spacing, engineered trusses, finished ceilings, ducts, and hidden wiring can all change the plan. When the structure is uncertain, a qualified installer or contractor is cheaper than guessing overhead.

    The manufacturer pattern matters because loads enter the framing through specific brackets. Moving a bracket a few inches to dodge a light may no longer match the tested arrangement. The FlexiMounts GR48F fixed rack installation guide shows the measuring, bracket placement, and assembly sequence for that model. Other products can use different spacing and fasteners.

    Do the structural check before comparing finishes. A black frame and a white frame perform the same job. A layout that misses framing does not.

    Steel overhead rack bracket secured beneath a solid wooden ceiling joist
    Either system depends on a sound structural connection, straight hardware, and the fasteners specified by its maker.

    Compare total cost, not the first price

    A fixed rack usually has a lower purchase price. It may also be a realistic project for an experienced homeowner who can identify framing, work safely at ceiling height, and follow the manual. A lift costs more because the package includes a drive or pulley system, cables, locks, and extra hardware. Installation time tends to rise with the part count.

    Add the costs that sit outside the box: delivery, a suitable ladder, blocking or mounting boards if approved, electrical work for a powered unit, professional installation, and matching totes. If a fixed rack requires buying a tall platform ladder that has nowhere to live, part of its apparent savings disappears.

    Compare usable square feet after leaving clearance around obstacles. The 2×4 versus 4×8 overhead rack guide shows why one wide platform is not automatically a better fit than two smaller ones.

    Maintenance is different, even when both look sturdy

    A fixed rack needs periodic inspection for loose fasteners, corrosion, bent members, damaged decking, and shifted loads. The habit is simple. Look up when seasonal bins come down, empty any tote that has collected moisture, and correct a leaning stack before it becomes permanent.

    A lift adds cables, pulleys, drums, drive parts, stops, and locks, depending on the design. Follow its manual for inspection and lubrication. Do not substitute a household oil where the manufacturer calls for another product. Frayed cable, uneven travel, binding, a changed sound, or a platform that will not stay level calls for stopping the system until it is checked.

    Fixed systems generally age quietly. Lift systems announce some problems during movement, but only if the user pays attention. Either one deserves a short inspection after a ceiling leak, a vehicle strike, or work on nearby framing.

    Choose the right position in the garage

    Side wall ceiling zones are often easier than the center of the bay. They can avoid the opener rail and keep a lowered lift away from the vehicle. The tradeoff is reach. A rack too close to the wall can be difficult to load because the tote must clear both the platform edge and the wall.

    Space above the garage door can be useful for a fixed rack when the door, tracks, springs, and opener retain their required clearances. Read the over garage door storage rack guide before assuming that empty looking space is available. A lift in that zone is less common because its moving platform must share the door’s operating envelope.

    Keep emergency controls, lighting, attic access, and fire protection equipment visible and reachable. The cleanest visual arrangement is secondary. The system should work with the garage on a rainy night, with the car parked and the door moving.

    A hybrid ceiling plan often works best

    One small lift can handle the things that rotate through the year. One fixed rack can hold empty luggage, spare patio cushions, and other light items that rarely move. This pairing keeps the expensive moving platform focused on access instead of paying lift prices for every square foot.

    Another good split uses adjustable and fixed racks in separate zones. The fixed versus adjustable overhead rack comparison explains how drop length affects fit. Adjustable drops help around uneven ceiling zones, while a fixed format can feel stiffer and simpler where the height is already known.

    Do not cover the entire ceiling simply because space exists. Open areas make leaks easier to spot, give future tradespeople access, and keep the garage from feeling pressed down. Buy enough capacity for named belongings, plus a modest reserve. Undefined spare capacity has a way of filling with things nobody planned to keep.

    Use a final fit check before ordering

    Draw the platform outline on the floor with painter’s tape. For a lift, keep that rectangle clear and pretend the platform is down. Walk around it, open the car doors, move the mower, and carry a tote toward the house. For a fixed rack, place the ladder where it will stand and repeat the same routine.

    Next, confirm ceiling structure, smallest vertical clearance, bin dimensions, proposed load, hardware access, and delivery path. Read the current manual from beginning to end. If the maker requires two installers, special blocking, a particular joist arrangement, or professional electrical work, put that into the decision now.

    The better system is the one the household can use without improvising. A fixed rack is hard to beat for economical, quiet storage. A lift is worth its premium when it removes a ladder from a job that happens often. The measurements usually make the choice less dramatic than the product photos suggest.

    Useful products to compare

    These links open current Amazon search results. Check the dimensions, manual, mounting hardware, warranty, and current availability for the exact model before you order.

    Before you buy or install

    Read the current manual for the exact product you are considering. Confirm its assembled dimensions, rated capacity, mounting requirements, included hardware, working clearances, warranty, and any limits that apply to your wall, floor, electrical circuit, or garage layout.

    Frequently asked questions

    Is a garage storage lift safer than a fixed overhead rack?

    A lift can remove much of the ladder handling, which is a meaningful benefit. It also has moving parts and an operating zone that must stay clear. Safety depends on correct structural installation, sensible loading, inspection, and following the exact manual. Neither design is safe when overloaded or attached only to ceiling finish.

    How much ceiling height does a garage storage lift need?

    There is no single number because the mechanism, platform, tote height, door path, and vehicle all consume space. Add those dimensions using the clearances required by the chosen model. Measure the lowest obstruction and the tallest expected vehicle rather than using the nominal ceiling height alone.

    Can a ceiling storage lift go above a parked car?

    Storage above a car needs verified clearance and explicit approval for the chosen model. Account for the raised load, vehicle roof, antennas, open hatch, and garage door movement. Move the vehicle before raising or lowering the platform, and keep every person and pet outside the full travel zone during operation.

    What should be stored on an overhead garage rack?

    Light, bulky, dry belongings that tolerate garage temperature changes are the best candidates. Seasonal decorations, empty coolers, folding chairs, and soft goods in sealed totes often fit. Keep fuel, paint, leaking liquids, batteries, loose tools, and very dense objects in safer storage closer to the floor.

    Do garage ceiling racks need to attach to joists?

    They need the structural attachment described by the product manufacturer. In many residential installations that means wood framing or approved blocking, not drywall alone. Engineered trusses and unusual ceilings may need professional review. Do not invent a bracket pattern to make the rack fit around an obstacle.

  • Storage Bins for 18 Inch Deep Shelves: A Fit Guide

    Storage Bins for 18 Inch Deep Shelves: A Fit Guide

    Affiliate disclosure: As an Amazon Associate I earn from qualifying purchases. This article may contain affiliate links, and Bay & Bench may earn a commission at no extra cost to you. Read our full Affiliate Disclosure.

    The best storage bins for 18 inch deep shelves fit by their outside footprint, not by the capacity printed on the label. An 18 quart tote may be close to 18 inches long, but handles, lid rims, and tapered walls can make the real dimension larger. A bin that overhangs the shelf catches clothing, blocks an aisle, and puts its load where the shelf was not meant to carry it.

    Shallow shelves are still a smart garage choice. They keep small tools and household supplies from disappearing behind one another, and they preserve walking room beside a car. The trick is buying bins after the shelf has been measured. This guide covers the small clearances, lid styles, weights, and shapes that decide whether a container feels tidy six months after it comes home.

    Quick answer

    For an 18 inch deep shelf, choose a bin whose widest outside front-to-back dimension fits fully on the usable deck, with extra room for any rear brace or front lip. Many 16 to 20 quart totes are close, but model dimensions vary. Measure the shelf at its narrowest point, verify the maker’s outside dimensions, and leave enough vertical space to grip and open the bin.

    Storage bins for 18 inch deep shelves at a glance

    Start with the kind of object, then choose the container. Small hardware needs shallow organizers. Hand tools and cleaning refills often suit medium totes. Bulky, light gear can use a taller bin if the shelf spacing allows it.

    Bin formatTypical garage useFit checkCommon drawback
    Shallow latching boxFasteners and small partsLatch width and handle projectionToo many tiny boxes to track
    16 to 20 quart toteHand tools and suppliesOutside length near shelf depthLid may need removal in the bay
    Open front binFrequently used consumablesFront reach and rear taperDust enters easily
    Tall narrow toteSoft goods and light gearShelf opening above the lidEasy to make top heavy
    Large garage toteBulky seasonal itemsUsually too deep for this shelfOverhang and heavy lifting

    Capacity names are poor shortcuts. Two bins sold as 18 quart containers can have different lids and bases. Use the exact model dimensions and compare them with the measuring steps in the 18 versus 24 inch garage shelf guide.

    Clear lidded storage tote fitting fully on an eighteen inch deep shelf
    Measure the outside base, lid, latches, and handles because the advertised capacity does not describe the footprint.

    Measure usable shelf depth, not nominal depth

    An 18 inch shelf is not guaranteed to provide a flat 18 inch deck. A rear cross brace, diagonal support, wall baseboard, or raised front lip may steal part of that number. On wire shelving, the posts can narrow the corners. Measure each bay at the left, center, and right, then use the smallest result.

    Check the wall too. A shelf pushed against a bowed foundation ledge may sit farther forward at one end. If the unit has leveling feet, set it in its final position before measuring. A half inch correction at the feet can change how a tall bin meets the shelf above.

    Write three numbers for every opening: usable depth, clear width between posts, and clear height from deck to the lowest obstruction. The broader garage shelf spacing guide helps turn those numbers into sensible shelf levels. Do not order containers from the overall rack dimensions on a retailer page.

    Read outside dimensions in the right order

    Retail listings often show length, width, and height, but sellers do not always use the terms consistently. On a tote, the longest dimension usually runs front to back on the shelf. Confirm that assumption from a dimensional drawing or the maker’s product page. If the listing gives only capacity, keep shopping.

    Measure the widest point, which is often the lid rim or handle rather than the base. A tapered bin may sit on the deck while its lid hits a wall post. Latches can add width. Hinged lids sometimes need an inch or more behind the bin to swing, which turns an apparent 18 inch fit into a 19 inch problem.

    The Sterilite 16 Qt Stacker Box page, for example, publishes outside dimensions of 18 by 12 5/8 by 7 1/8 inches. That length uses the full nominal depth, so the particular shelf needs a truly clear deck and a suitable front edge.

    Leave a little breathing room at the front and back

    A bin that fits with zero spare room can still be irritating. Fingers need a place to pull. A lid lip may scrape the wall. A small rear gap also keeps condensation on a masonry wall from sitting against the tote. Aim for a container that rests fully on the deck without needing to be pressed into place.

    Some metal shelves have a raised perimeter. Bin feet must land inside that lip rather than balancing on it. Wire decks can create another issue: narrow feet settle between wires, making the container rock. A manufacturer approved shelf liner or a thin rigid deck can help if it does not change the load rating or create a fire concern.

    Front overhang is tempting when a bin misses by half an inch. Resist it. The projected corner snags people, and the shifted center of gravity puts more load near the shelf edge. A smaller tote is cheaper than turning the storage aisle into an obstacle course.

    Match bin height to the shelf opening

    Vertical fit needs more than the bin height. Add room for the lid, latches, and both hands. A tote that clears the shelf above by a quarter inch may slide in when empty, then refuse to leave once the lid bows under a full load. Three or four inches of hand space feels much better for a medium bin.

    A removable lid can work in a tight opening if the bin holds things accessed once a year. For regular use, a latching lid that can be opened after pulling the bin forward is simpler. Hinged lids need space behind and above. Open front bins trade dust protection for immediate reach, which is sensible for sanding discs, clean rags, or garden gloves.

    Adjust shelf levels around what you own. The garage shelving buying guide explains why beam spacing and tool free adjustment can matter more than the total number of shelves in the box.

    Shallow parts bins and medium storage totes organized on garage shelves
    A mix of container heights works better than forcing every tool and supply into one large tote format.

    Compare useful 16 to 20 quart formats

    The 16 to 20 quart range often suits an 18 inch shelf because it keeps loads manageable and makes decent use of depth. Still, a model name cannot replace measurements. Sterilite lists its 18 Qt Ultra Latch Box at 18 1/8 by 12 1/4 by 7 inches outside. That extra eighth of an inch matters on a shelf with a front lip or a wall directly behind it.

    The company’s 20 Qt Hinged Lid Storage Box is listed at 18 1/4 by 13 by 8 inches. Its attached lid prevents a loose lid from wandering, but the hinge changes the space needed to open it. It may fit an open shelf that stands slightly off the wall and feel cramped in a closed cabinet.

    Use these examples to see why quart count is not a size system. Verify the exact current dimensions for every model and buy one sample before ordering a dozen.

    Choose clear, opaque, or open front bins

    Clear totes make forgotten contents visible, which helps in a garage where labels fade and categories drift. They also show the visual mess inside. Opaque bins look calmer and may protect light sensitive supplies, though the user depends more on labels. A simple printed card in a clear sleeve is easier to update than marker written directly on plastic.

    Open front bins are good for items touched every week. Put them between knee and shoulder height where the contents can be seen. Dusty garages change the calculation. Grinding debris and sawdust enter open bins quickly, so closed boxes belong near dirty work even when access takes a few more seconds.

    Color can carry a small amount of information. One color for car care and another for household backup supplies is enough. Ten colors create a code nobody remembers. The same restraint helps a complete garage storage system look organized after new supplies arrive.

    Keep weight low enough for the person using it

    A compact tote can become surprisingly heavy when filled with sockets, bolts, or bottles. The shelf may hold it, yet the person still has to slide and lower it. Set a household bin limit based on a comfortable two hand lift. Dense hardware is better divided between two shallow boxes than packed into one deep tote.

    Place heavy containers from floor level to waist height. Light, bulky items can go higher. Frequently used bins belong in the easiest reach zone even if their contents are light. Rarely used gear can occupy the top, provided it can be retrieved with a stable step platform and without leaning over a parked car.

    Check the shelf rating per level and for the complete unit. Loads should be distributed instead of concentrated on one wire or corner. The heavy duty garage shelving guide covers capacity, deck construction, and anchoring questions that bin shopping cannot solve.

    Homeowner removing a medium tote from a waist height garage shelf
    Every bin needs enough space above it for hands, lid movement, and a controlled pull into the aisle.

    Test one bin before buying the full set

    Buy a single sample or use a returnable local purchase. Load it with the actual category, slide it onto every intended shelf, open the lid, grip the handles, and carry it through the garage door. A dimensionally perfect tote may still have sharp latches or a lid that flexes under a stack.

    Try the bin in hot and cold conditions if the garage sees big temperature swings. Plastic grows more brittle in the cold, and an overfilled lid can bow in summer heat. The product instructions should decide stacking limits. Do not assume the empty display stack at a store predicts safe loaded stacking at home.

    One sample also reveals whether the tote wastes width. Three 13 inch bins need 39 clear inches, not a nominal 36 inch bay. Posts and diagonal braces can spoil an otherwise neat row, so test the exact shelf rather than sketching rectangles from memory.

    Avoid chemical and moisture surprises

    Garage temperature and humidity can be hard on contents. Paper, fabric, and electronics need sealed bins with dry contents, and even then they may not belong in a damp or freezing garage. A desiccant pack is not a cure for an active leak. Find the water source first.

    Do not treat an ordinary storage tote as a safety cabinet. Fuel, solvents, pool chemicals, oily rags, pesticides, and incompatible cleaners have storage requirements that a plastic box cannot satisfy. Keep products in their original containers and follow the label, local rules, and any required ventilation or separation.

    Look for roof leaks and wall condensation during the wettest season. Leave a visual gap behind bins so damp spots can be seen. Shelving that holds supplies off the slab helps after minor water entry, but the bottom tote still needs a lid and a base that is not cracked.

    Build a simple bin map that lasts

    Give every shelf bay a broad job, such as automotive, painting, hardware, or outdoor gear. Put the category name on the shelf edge and the specific contents on the bin. This two level system survives when a container moves because the shelf still tells the user what belongs there.

    Leave roughly one open bin position for new supplies. Without it, the first bulk pack lands on the floor and starts another pile. Empty space is working capacity, not waste. Keep an inventory in a phone note only for categories that are expensive or easy to duplicate.

    Measure the room before adding another rack. The garage measuring guide accounts for door swings, baseboards, outlets, and parked car space. Eighteen inch shelves save aisle width, but only when their bins stay inside the footprint and the shelves sit where a person can use them.

    Useful products to compare

    These links open current Amazon search results. Check the dimensions, manual, mounting hardware, warranty, and current availability for the exact model before you order.

    Before you buy or install

    Read the current manual for the exact product you are considering. Confirm its assembled dimensions, rated capacity, mounting requirements, included hardware, working clearances, warranty, and any limits that apply to your wall, floor, electrical circuit, or garage layout.

    Frequently asked questions

    Will an 18 inch long bin fit an 18 inch deep shelf?

    Maybe. The shelf may lose usable depth to a rear brace, front lip, wall, or posts, and the bin dimension may omit a projecting latch or lid. Measure the actual deck and the widest outside point of the exact bin. It should rest fully on the shelf without being forced against the wall.

    What tote capacity usually fits shallow garage shelves?

    Many containers in the 16 to 20 quart range are close to the right depth, but capacity is not a reliable dimension. Some 18 quart models exceed 18 inches outside, while another shape may fit. Shop from published outside measurements and test one bin in the shelf bay.

    Can storage bins hang over the front of a garage shelf?

    A small overhang may look harmless, but it creates a snag point and moves the load toward the unsupported edge. It can also narrow the aisle. Choose a shorter bin or a deeper shelf instead. Follow the shelf manufacturer directions for load placement and deck use.

    Are clear or opaque bins better for a garage?

    Clear bins make contents easy to identify. Opaque bins hide visual clutter and may suit light sensitive contents. Both need durable lids and readable labels. Dusty work zones favor closed containers, while open front bins are convenient for clean items used every week.

    How much space should be left above a storage bin?

    Leave enough room to grip both handles and operate the lid without scraping the shelf above. For a medium tote, a few inches is far more usable than a very tight fit. The exact amount depends on whether the lid lifts off, hinges backward, or opens after the bin is pulled forward.

  • Best garage cabinets under $1000: five smart ways to spend the budget

    Best garage cabinets under $1000: five smart ways to spend the budget

    Affiliate disclosure: As an Amazon Associate I earn from qualifying purchases. This article may contain affiliate links, and Bay & Bench may earn a commission at no extra cost to you. Read our full Affiliate Disclosure.

    The best garage cabinets under $1000 are usually focused setups, not wall-to-wall suites. That is a useful constraint. A tall cabinet can swallow garden gear and shop cases. A base cabinet gives you a landing surface. Two wall cabinets rescue space above a bench. Trying to buy all three at maximum size often leads to thin shelves, awkward delivery, or a layout that crowds the car.

    This shortlist uses current U.S. brand and retailer pages, with prices checked on September 1, 2026. Prices, bundles, colors, and stock move quickly, so open the linked page and confirm the total before ordering. None of these picks is a universal winner. Each one earns its place by fitting a clear storage job and staying below the stated budget at the time of review.

    Quick answer

    For a compact cabinet wall with a work surface, the NewAge Bold 48-inch five-piece set is the strongest all-in-one fit here. A Husky ready-to-assemble tall, base, and wall trio gives more mixed storage when the individual pieces are in stock. Choose a Seville Classics UltraHD 60-inch cabinet if one broad, deep enclosure matters more than a coordinated suite. For mobility, the 36-inch UltraHD rolling cabinet is the cleanest starting point. Measure the wall, door swings, parked vehicle, and largest stored item before deciding.

    Best garage cabinets under $1000 at a glance

    The prices below were visible on official U.S. pages when this article was prepared. A sale can push one option up or down the list overnight. Compare the current checkout total, shipping, and required accessories rather than treating the table as a promise.

    SetupPrice checkedPublished sizeBest useMain compromise
    NewAge Bold 48-inch five-piece set$699.9948 W x 18 D x 76.75 H overallCompact bench and cabinet wallNarrow work surface
    Husky RTA tall, base, and wall trioAbout $747 from displayed unit pricesTall 36.6 W x 18.3 D x 72 H; base 28 W; wall 28 WMixed bulky and everyday storageBundle stock was unavailable
    Seville UltraHD 60-inch cabinet$579.9960 W x 24 D x 72 HOne deep, broad enclosureLarge delivery path and footprint
    Seville UltraHD 36-inch rolling cabinet$319.9936 W x 18 D x 72 HMobile enclosed storageNo bench-height top
    NewAge Bold 36-inch base plus wall cabinetAbout $575 before worktopBase 36 W x 16 D; wall 36 W x 12 DBuild a starter bench zoneWorktop and installation add cost

    Run the proposed footprint through the garage cabinet capacity calculator before comparing colors or handles.

    What a $1000 cabinet budget can realistically buy

    A thousand dollars can buy one substantial cabinet, a compact coordinated set, or several lighter ready-to-assemble pieces. It rarely buys a deep welded suite across a full two-car wall. Delivery and tax can also consume part of the budget. If the price ceiling is firm, leave at least ten percent unassigned until you know whether you need a worktop, anchors, extra shelves, lighting, or help carrying a large carton.

    Closed storage costs more per cubic foot than open shelving, so give cabinets the items that benefit from doors: cleaners, paints permitted by their labels, dusty cases, sharp tools, or gear that makes the room look chaotic. Totes and bulky seasonal items can stay on a measured rack. The garage storage budget calculator helps split the total between cabinets, shelves, wall hardware, and small bins.

    Do not confuse a lock with a rated security container. Most garage cabinet locks discourage casual access. They do not turn thin sheet steel or resin into a safe.

    NewAge Bold 48-inch set for a compact work zone

    NewAge lists its compact Bold five-piece set at 48 inches wide, 18 inches deep, and 76.75 inches high. The configuration combines wall cabinets, a base cabinet, a worktop, and narrow storage in a remarkably small run. On the official product page, the set was priced at $699.99 when checked.

    This is the neatest answer for a small garage where one person needs a repair or packing station without surrendering an entire wall. The 48-inch width fits many gaps that cannot accept two full base cabinets. It also creates a coordinated setup immediately, which can be cheaper than discovering later that separate doors, tops, and fillers do not line up.

    The compromise is obvious once a project lands on the top. Forty-eight inches fills quickly. A vise, charger, and open tool case can leave little assembly room. Measure the task as well as the available wall, and keep the floor in front clear enough for drawers and doors.

    Tall wall and rolling garage cabinets compared against one wall
    Locker, wall, and base cabinets solve different storage problems even when their prices look similar.

    Husky RTA trio when you need three cabinet formats

    Home Depot’s Husky three-piece ready-to-assemble bundle pairs a 36.6-inch tall cabinet with a 28-inch base cabinet and a 28-inch wall cabinet. The official retailer page showed the bundle out of stock during this check, but it also showed the component dimensions and current unit pricing. The displayed tall, base, and wall prices added to roughly $747 before tax.

    This mix is more flexible than the compact NewAge run. The tall cabinet takes upright tools and cases, the base handles dense everyday items, and the wall cabinet uses space above a separate bench. It also asks more from the wall. The three pieces do not form one narrow block, so map every door swing and decide whether the tall cabinet belongs near outdoor tools or beside the bench.

    Ready-to-assemble steel saves shipping volume but transfers work to the buyer. Inspect every panel before bending tabs or peeling protective film. A damaged corner can turn a simple assembly into an afternoon of forced alignment.

    Seville UltraHD 60-inch cabinet for bulky enclosed storage

    Seville Classics lists the 60-inch UltraHD cabinet at $579.99, with published exterior dimensions of 60 inches wide, 24 inches deep, and 72 inches high. The official UltraHD cabinet collection also lists narrower 18-inch-deep and 24-inch-deep versions. That range makes the brand useful when depth is the deciding variable rather than a matching workbench.

    The 60-inch model is a serious piece of furniture. Its width can hold wide cases and its depth can accept bins that hang out of an 18-inch cabinet. Those same dimensions make delivery, assembly, and final placement harder. Measure the carton route, steps, door openings, ceiling fixtures, and the turn from driveway to garage. A cabinet that fits the wall may not fit the path to it.

    This option suits someone who wants one broad enclosure and already owns a bench. It is less persuasive if small tools need many shallow drawers or if the car leaves only a narrow side aisle.

    Seville UltraHD rolling cabinet for storage that moves

    The 36-inch-wide, 18-inch-deep, 72-inch-high UltraHD rolling cabinet was listed at $319.99 in the same official collection. Its tall shape and casters make it different from a rolling base cabinet. Think of it as a movable enclosure for lighter bulky gear, cleaning supplies, or project kits, not as a substitute for a low mechanic’s tool cabinet.

    Mobility helps when one wall must change between parking and project use. It also introduces a clearance problem. Count the caster width, handle projections, door opening, and the force required to control a loaded cabinet on a sloped slab. Use brakes whenever the cabinet is parked, and follow the manufacturer’s loading and movement instructions. Do not add a heavy top or vise unless the exact product permits it.

    I would choose this only when moving the storage is part of the weekly routine. If it will sit in one corner forever, a fixed cabinet usually gives you fewer compromises.

    NewAge base and wall pair for a starter bench

    A coordinated base and wall cabinet can be smarter than a discounted set with a locker you do not need. NewAge publishes its Bold 36-inch base cabinet at 36 inches wide and 16 inches deep, with a listed price of $354.99 during the check. The matching 36-inch wall cabinet was $219.99 and is 12 inches deep. The base cabinet page lists a 600-pound total capacity, while the wall cabinet page lists 100 pounds for that wall model.

    Together they leave room in a $1000 budget for a suitable top, installation supplies, and a task light. The shallow 16-inch base preserves aisle width better than a 24-inch cabinet, although it may reject deep cases. Confirm the worktop support method and final height. A loose board laid across a cabinet is not automatically a safe bench.

    Measure the parked garage before choosing a sale item

    Park the largest vehicle in its normal position. Open every passenger door and the hatch, then tape the cabinet footprint on the floor. Mark the height and width on the wall. Repeat the test with garage doors open and closed. The garage measuring guide covers tracks, outlets, windows, base curbs, and other details that disappear from a simple width measurement.

    Depth deserves special attention. An 18-inch cabinet may preserve a comfortable route where a 24-inch cabinet makes you turn sideways. Door and drawer projections add to the working depth, even though they do not appear in the closed product dimension. Measure the largest tote, case, and long-handled tool too. Buying a deep cabinet for one oversized item can waste the rest of the shelves.

    Use cardboard boxes to mock up the front edge for two days. If everyone bumps it while carrying groceries, the cabinet is too deep or in the wrong place.

    Homeowner measuring a garage wall for affordable storage cabinets
    Tape the cabinet outlines on the actual wall before a sale price talks you into the wrong footprint.

    Compare shelf limits with real load placement

    Published capacity usually assumes an evenly distributed load and correct assembly. A dense toolbox in the center of a wide shelf creates a different demand from several light bins spread across it. Read the exact manual, count the shelf itself where required, and keep heavy items low. Never borrow a rating from a similar cabinet in the same product family.

    Adjustable shelves are useful only if the hole spacing matches your items. Measure the tallest bottle or case and sketch a shelf plan before ordering extras. Leave room to lift objects over the shelf lip. Check whether additional shelves are sold for the exact model and whether adding one changes the allowed total cabinet load.

    A wall cabinet also transfers its load through the mounting system into the structure. Use the specified brackets and fasteners for the actual wall. When the substrate is uncertain, bring in someone qualified to inspect it.

    Open steel garage cabinet loaded with tools and household gear
    Shelf spacing and sensible weight placement matter more than an impressive outside dimension.

    Plan for delivery, assembly, and anchoring

    Welded cabinets save assembly time but arrive large and heavy. Flat-pack cabinets fit through tighter routes but expose more panels to assembly errors. Neither style is automatically easier. Check package count, individual package weight, required people, and the point at which the cabinet must be stood upright. A tall unit may fit under the ceiling once vertical yet lack room to rotate from the floor.

    Open cartons while the carrier’s damage policy still applies. Photograph dents, missing hardware, and torn packaging before repair attempts. Build on a protected flat surface so a small twist does not become a door alignment problem. Level the cabinet on the real slab, connect adjoining units as instructed, then install the required anti-tip or wall hardware.

    Do not rely on weight alone to stop a tall cabinet from tipping. Children, open doors, uneven floors, and a heavy item pulled from an upper shelf can change the balance quickly.

    Spend the last part of the budget where it fixes friction

    A cabinet purchase often fails in the final ten percent. The shelves are too far apart, there is no light under the wall unit, or every charger cord hangs across the worktop. Hold money for shelf liners, approved extra shelves, bins that fit the measured interior, and a task light. Skip decorative pieces until the cabinet has survived a few projects.

    Use the garage cabinets buying guide to compare steel gauge, door construction, leveling, worktops, and warranties. Then pick one storage problem to solve first. Bulky sports gear wants a locker. Dense hand tools want drawers. Car-care bottles want protected shelves with enough height. A mixed starter zone wants one base and one wall unit.

    The best budget result can look incomplete on day one. That is fine. A measured pair of cabinets leaves room to expand. A cheap wall of mismatched boxes can trap the layout for years.

    Useful products to compare

    These links open current Amazon search results. Check the dimensions, manual, mounting hardware, warranty, and current availability for the exact model before you order.

    Before you buy or install

    Read the current manual for the exact product you are considering. Confirm its assembled dimensions, rated capacity, mounting requirements, included hardware, working clearances, warranty, and any limits that apply to your wall, floor, electrical circuit, or garage layout.

    Frequently asked questions

    Can a good garage cabinet system really cost less than $1000?

    Yes, if the system is focused. A compact bench set, one broad tall cabinet, or a tall, base, and wall trio can fit below the limit. Full welded suites across a large wall usually cost more once delivery, worktops, and accessories are counted.

    Is an 18-inch cabinet deep enough for a garage?

    It is enough for many tool cases, bottles, and smaller totes, and it protects aisle width. Measure the deepest item before buying. Large storage bins and automotive gear may need a 24-inch cabinet, but that extra six inches can crowd a parked car.

    Should I buy one large cabinet or several small cabinets?

    Buy one large cabinet when wide bulky items need a shared enclosure. Choose smaller cabinets when different zones need separate access or when delivery and wall interruptions make a wide unit awkward. Several cabinets cost more hardware and assembly time, so compare the full setup.

    Do garage cabinets have to be anchored?

    Follow the exact installation manual. Tall and wall-mounted cabinets commonly require attachment to suitable structure, and adjoining units may need to be connected. Leveling feet do not replace anti-tip hardware. If the wall or fastener choice is uncertain, use a qualified installer.