Category: Layout Guides

Garage measurements, clearances, zones, and practical workshop floor plans.

  • Where to Mount an Air Hose Reel in a Garage: 5 Checks

    Where to Mount an Air Hose Reel in a Garage: 5 Checks

    Affiliate disclosure: As an Amazon Associate I earn from qualifying purchases. This article may contain affiliate links, and Bay & Bench may earn a commission at no extra cost to you. Read our full Affiliate Disclosure.

    Figuring out where to mount an air hose reel starts with the jobs at the far end of the hose, not with an empty patch of wall. A tidy reel can still fail if the hose rubs a vehicle or reaches the driveway only when stretched tight.

    A good location covers the workbench and vehicle, stays clear of the garage door, connects to sound structure, and gives you a controlled return path. There is no standard mounting height or universal fastener list that works for every reel and every wall. The exact model manual and the building structure decide those details.

    Quick answer

    Mount the reel where a length of hose reaches the farthest regular job with slack, while the reel and hose remain clear of the garage door, vehicle, doors, cabinets, and walking routes. A central side wall often works well. Use only a wall, ceiling, post, or backing assembly approved for the exact reel, follow its mounting pattern, and test the pull and controlled return before settling on the location.

    Begin at the farthest job, then work backward

    List the places that need air during an ordinary month. Common stops include the main workbench, each side of the parked vehicle, the driveway, a mower near the door, and a finishing table. Ignore the one project that might happen someday. A permanent reel should make frequent work easier rather than chase every corner of the property.

    Measure the hose path, not a straight line through cabinets and cars. Walk the route that the hose would take around the front of a vehicle, past a bench leg, and through the open garage door. Add a modest amount of slack so the coupler is not carrying a constant side pull. Then compare that result with the usable tool-side hose length stated for the reel. The bumper position and the wraps that must remain on the drum may reduce usable reach. Do not count the supply-side leader hose toward the tool path.

    This is easier after the room has working zones. The garage workshop zones guide helps separate parking, storage, and project space before a reel claims part of a wall. Mark the farthest regular task on the floor with tape. If two possible reel locations both reach it, choose between them using the next checks rather than buying a longer hose immediately.

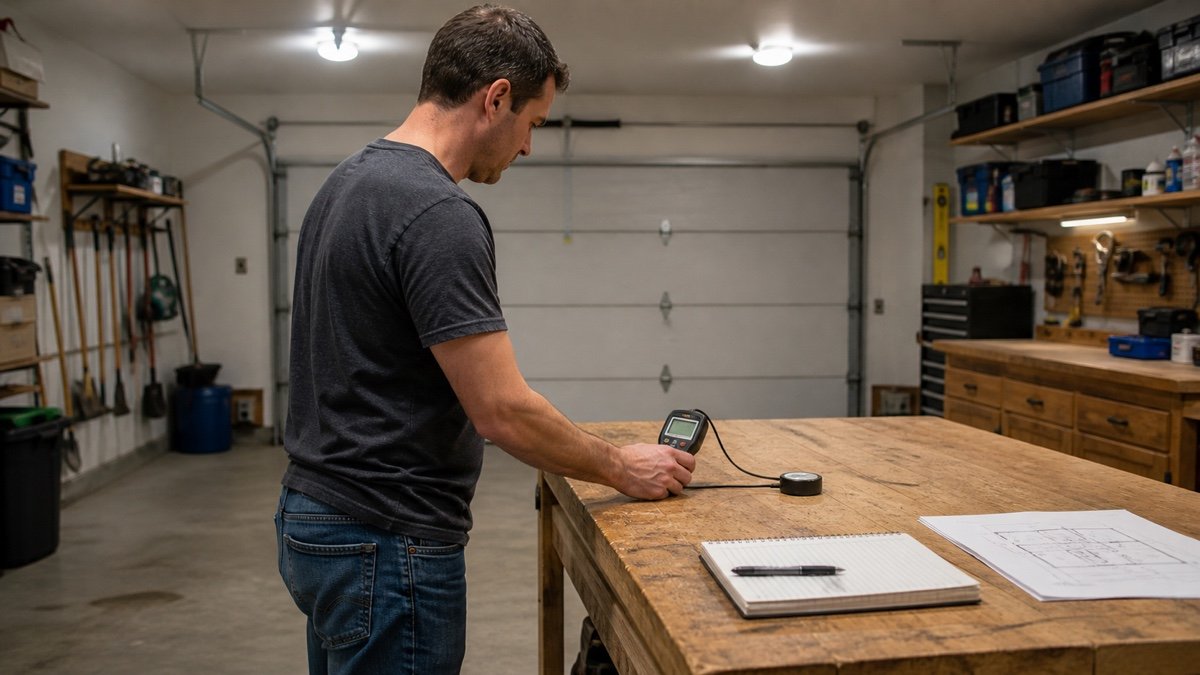
    Homeowner testing air hose reach before choosing a permanent reel location
    A temporary mockup and loose hose reveal awkward corners before the first mounting hole is drilled.

    Where to mount an air hose reel in five common garage zones

    Most home garages offer five realistic zones. Each can work, but the tradeoffs are quite different once the door and car start moving.

    Possible locationWhy it can workMain check before drillingBest fit
    Central side wallBalanced reach to bench, car, and drivewayCar door, cabinet, and walking clearanceMixed garage work
    Wall beside workbenchShort tool connection and easy inspectionReach to the far side of the carBench focused projects
    Wall near garage openingEasy access to driveway workDoor track, weather, and vehicle cornerTires and outdoor equipment
    Ceiling or overhead framingOpen wall space and broad pull directionApproved overhead support and service accessOpen center bay
    Structural post or partitionGood central position in a divided shopPost construction and swing clearanceDedicated workshop bay

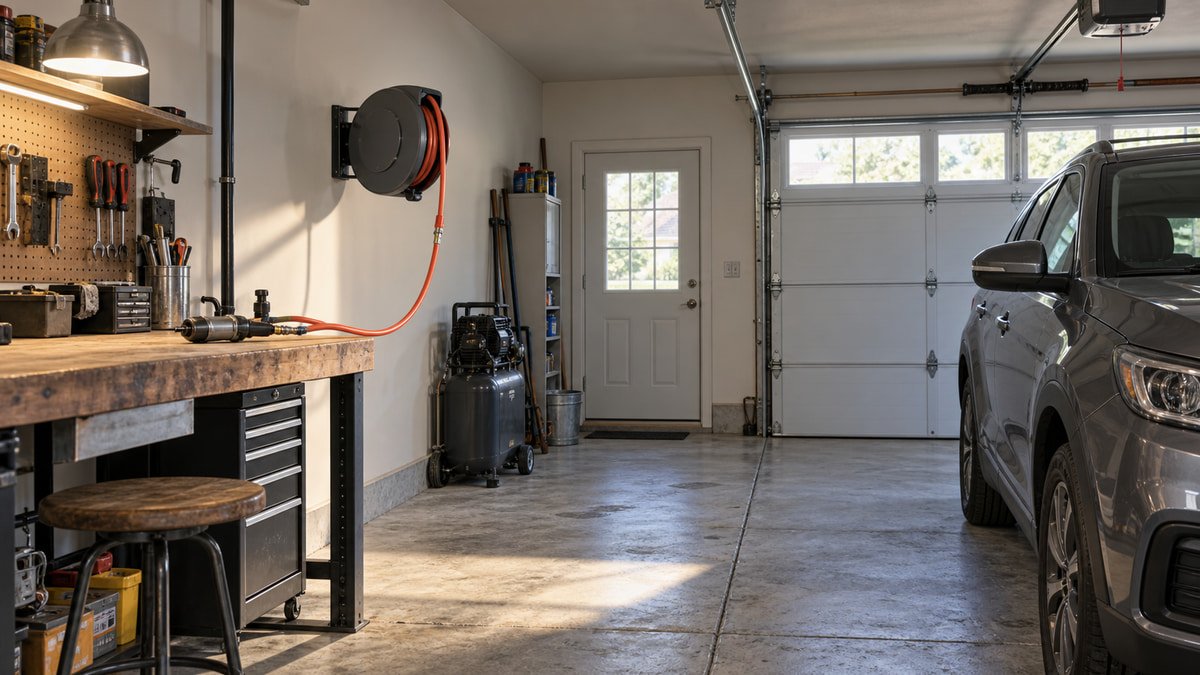
    A central side wall is the most forgiving starting point in many two car garages. The hose can fan toward the bench, vehicle, and open door without hanging above the car. Still, it only works if the reel body does not crowd a car door or narrow the route into the house. Use the garage workshop layout guide to test the whole room rather than judging one clear photograph.

    Mounting beside the compressor is convenient for the inlet line, but compressor location and reel location solve different problems. The compressor needs ventilation, electrical access, drainage access, and room for service. The reel needs reach and a clean pull. A short leader hose can connect two sensible locations. Do not force them together just to save a few feet of inlet line.

    Wall mounting is usually easier to live with

    A wall mounted reel stays visible. You can inspect the bracket, swivel, hose, and stop without climbing. The user can also guide the hose back while standing on the floor. Those small conveniences matter because a retractable reel works best when it is treated like equipment, not forgotten decoration.

    A fixed wall bracket favors pulls that leave mostly in front of the guide. A swing bracket may cover a wider angle, but it creates a moving envelope of its own. Confirm that the bracket is made for the reel, then swing it through the full arc with nearby drawers, shelves, light switches, and vehicle mirrors in place. The reel should not become a heavy doorstop.

    Workbench placement affects the answer. A reel mounted behind a deep bench may be hard to reach for service, and the hose can drag across workpieces. A location just beyond the bench end often gives a cleaner line. Review where to put a workbench in a garage before committing both fixtures to the same busy wall.

    Ceiling mounting trades wall space for harder service

    A ceiling location can give an even pull across an open bay. It also keeps the reel body away from cabinets. The downside arrives during installation and maintenance. Every mounting point is overhead, the reel is harder to inspect, and the hose end may hang in the same volume used by a raised hatch, roof rack, or garage door.

    Do not assume a reel that can sit on a wall can automatically hang overhead. The manual must allow that orientation, show the correct guide position, and describe the mounting arrangement. Coxreels safety guidance says an overhead reel must not be supported solely by bolts in tension and calls for a safety chain or cable. The exact product manual may add stricter instructions, so follow the document for the reel in front of you.

    Service access belongs in the plan too. If normal inspection requires placing a ladder between a parked car and a freezer, the location will be neglected. A lower wall position may be less visually neat and much more usable. When overhead mounting is still the better fit, have uncertain framing or connections reviewed by a qualified installer.

    Keep the reel outside every garage door path

    The open door is only one position. Panels travel along curved tracks. Rollers move, hinges fold, the opener trolley runs, and the emergency release hangs down. Torsion springs and lift cables need untouched working space. Keep the reel, bracket, leader hose, and pulled hose away from all of it.

    Cycle the door while watching from several angles, following the door maker’s safety directions. Park the tallest expected vehicle and open its hatch. Check roof bars, antennas, mirrors, and the arc of each passenger door. A wall that looks empty with the garage vacant may become the tightest point once the family car comes home.

    Do not attach the reel to door tracks, opener supports, or another system just because the metal looks stout. Those parts have their own job and approved loads. A nearby structural wall section is easier to reason about. If the door hardware leaves no dependable gap, move the reel rather than improvising a shared bracket.

    Make the structure carry the pulling load

    A loaded reel does more than hang. Each pull adds leverage to the bracket, and retraction adds repeated movement. Drywall, thin paneling, and a storage cabinet skin are not a complete load path. The mounting points must transfer the reel forces into structure in the way its maker specifies.

    Use the paper template or dimensional drawing for the exact model. Confirm the hole pattern before adding a backer. A wood board spanning framing can be useful when it is designed and attached for the load, but a random piece of plywood is not proof of capacity. Wall framing, masonry condition, fastener type, edge distance, and bracket shape all affect the result. This is the point to ask a carpenter, contractor, or engineer when the wall is unusual or concealed.

    Reelcraft’s Series RT operating instructions tell installers to use the supplied mounting template for the specific application and to secure that reel with four mounting bolts. That does not make four bolts a rule for every product. It shows why the current manual and its exact pattern come before a shopping list. The structural image here is illustrative rather than a fastener prescription.
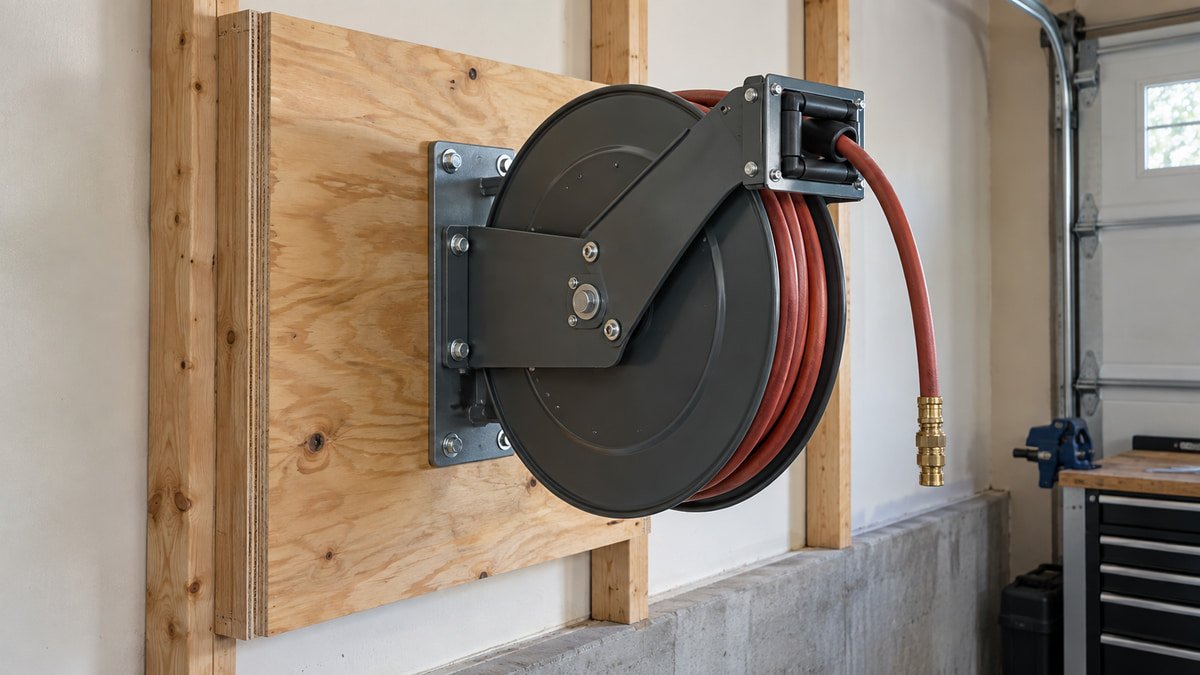
    Air hose reel bracket mounted on substantial plywood backing across wall framing
    Illustrative backing layout only; concealed fasteners are not shown. The exact reel manual and verified wall structure must determine the complete load path.

    Treat mounting height as a working variable

    There is no magic eye level number. The reel needs to clear normal traffic, yet remain reachable for inspection and controlled hose return. The guide angle should suit the direction of pull. The stop ball should finish where the user can take the hose without jumping, stretching, or leaving a long tail at face height.

    Test the height with a cardboard outline the size of the reel. Include the bracket and the space needed to swing or remove a cover. Have the shortest regular user reach toward the hose end with both feet on the floor. Then have the tallest person walk underneath. A comfortable compromise is more useful than a tidy line with the top of the cabinets.

    Manufacturer limits still control the final choice. Some manuals state a maximum installation height or restrict a mounting orientation. Others call for the guide arm or bumper stop to be repositioned. Read those instructions before treating a mockup position as approved. Never change spring tension or open a spring housing merely to make a poor location feel better.

    Plan the inlet connection before the bracket

    The supply side is easy to forget because product photos face the hose outlet toward the camera. Behind the reel, the inlet must connect without kinking, rubbing, or forcing the swivel sideways. Leave room for the fittings, the leader hose, and whatever shutoff or filter arrangement the compressor maker calls for.

    The Reelcraft Series RT instructions call for a flexible hose at the input rather than rigid plumbing for that model. A flexible connection can prevent alignment stress, but its size, pressure rating, bend radius, and fittings must match the reel and air system. Do not copy a leader hose from a photograph. Check the reel inlet, compressor outlet, working pressure, and local piping requirements.

    A compressor that barely supplies the tool will not improve because the reel sits closer. Flow depends on compressor delivery, hose inside diameter, length, couplers, and restrictions. Our garage air compressor size guide covers that side of the system. Choose reel placement for movement and reach, then size the air path as one connected system.

    Point the guide along the real pull direction

    A hose lasts longer when it leaves the roller or guide without a sharp sideways bend. Stand at each regular task and look back at the proposed reel. If every pull crosses the edge of the guide, the location or guide orientation needs work. A pivoting bracket can help, though it must remain stable and clear throughout its travel.

    Some enclosed reels allow the guide opening or enclosure to be repositioned for wall, ceiling, or side mounting. Reelcraft explains that process for specific enclosed models in its guide opening adjustment note. Use the instructions for your series. Do not rotate a cover or guide by analogy when the manufacturer has not approved it.

    Test pulls should be slow and unpressurized until the installation is complete and inspected. Extend the hose toward the bench, both sides of the vehicle, and the driveway. Watch the guide, the bracket, and the leader line. If the reel twists, a fitting contacts the wall, or the hose scrapes a corner, stop and correct the setup before connecting the air supply.

    Protect the aisle during use and return

    A reel removes stored coils from the floor, but the hose still crosses the room while a tool is running. Pick a location that keeps the working route near a wall or along the edge of a bay when possible. Crossing the only path to the house turns a quick tire check into a trip hazard for everyone else.

    Think about the return path before the pull. You should be able to walk the hose back without squeezing between a car and shelving. Keep the fitting in hand and allow the reel to retract at a controlled pace. Do not let the end fly toward the guide. That habit protects the coupler, stop, surrounding paint, and anyone who steps into the garage.

    The garage workshop aisle clearance guide can help preserve a usable route around a project. Store blow guns and inflators near the reel without letting them dangle from the coupler. The broader garage tool storage guide offers better homes for those attachments.

    Homeowner guiding an air hose slowly back toward a wall mounted reel
    Walking the hose back under hand control keeps the end fitting from snapping across the garage.

    Use a final location check before installation

    A strong candidate passes five tests. It reaches the farthest regular task with slack. It stays outside door and vehicle movement. Its bracket can connect to verified structure exactly as the manual describes. Its inlet has a suitable route. And the user can pull, latch, inspect, and guide the hose home from a steady stance.

    Confirm the reel pressure rating, hose size, operating temperature, orientation, mounting pattern, fasteners, guide position, stop location, and service clearance from current documentation. Product families change. Instructions for a similar looking model may not apply. Keep the manual with the compressor records so the next owner knows what was installed.

    For many garages, the answer is a central side wall between the workbench and vehicle bay. Sometimes the door, framing, or inlet route makes another position better. Let the mockup and measurements overrule the clean catalog picture. A reel earns its wall space when the hose reaches easily, comes back under control, and disappears from the floor when the job is done.

    Useful products to compare

    These links open current Amazon search results. Check the dimensions, manual, mounting hardware, warranty, and current availability for the exact model before you order.

    Before you buy or install

    Read the current manual for the exact product you are considering. Confirm its assembled dimensions, rated capacity, mounting requirements, included hardware, working clearances, warranty, and any limits that apply to your wall, floor, electrical circuit, or garage layout.

    Frequently asked questions

    Is it better to mount an air hose reel on the wall or ceiling?

    A wall usually makes inspection, hose control, and service easier. A ceiling can give broad reach when wall space is scarce, but it needs an approved overhead orientation, verified structure, door and vehicle clearance, and safe service access. Follow the exact reel manual because mounting choices differ by series.

    How high should an air hose reel be mounted?

    There is no universal height. Place it where the hose end is reachable from the floor, the guide matches the normal pull, the reel clears traffic, and maintenance remains practical. Then check the exact manual for any height or orientation limit. Test a full size cardboard mockup with every regular user.

    Can I mount an air hose reel directly to drywall?

    Drywall alone is not a suitable structural load path for a hose reel. Use the mounting arrangement required by the manufacturer and suited to verified framing or masonry. A backing board can be part of a sound assembly, but its material, span, attachment, and fasteners need to carry the real pulling loads.

    Should the air hose reel be next to the compressor?

    Only if that spot also gives good reach and clearance. The compressor location is chosen for ventilation, service, drainage, power, and noise. The reel location is chosen for hose movement. A correctly sized flexible leader can connect separate locations when the reel and compressor manuals allow it.

    How do I stop a retractable air hose from whipping back?

    Keep control of the hose end and walk it toward the reel while it retracts. Do not release it from across the garage. Stop using a reel that retracts, latches, or guides the hose abnormally. Depressurize the system and follow the manufacturer service instructions rather than opening a spring housing.
  • Garage workshop lighting guide: build layers instead of chasing brightness

    Garage workshop lighting guide: build layers instead of chasing brightness

    Affiliate disclosure: As an Amazon Associate I earn from qualifying purchases. This article may contain affiliate links, and Bay & Bench may earn a commission at no extra cost to you. Read our full Affiliate Disclosure.

    A useful garage workshop lighting guide should begin with shadows, not fixture count. One bright lamp in the center can make the floor look impressive while your hands disappear into darkness at the bench. Open garage doors, tall cabinets, your own shoulders, and raised workpieces all interrupt light. A successful room uses several calm sources and a focused task layer.

    Plan around what happens in each zone: parking, walking, storage labels, bench work, machine setup, finishing, and cleanup. Then choose fixtures that spread light where it is needed, render colors honestly, suit the garage environment, and can be controlled without turning on the entire room.

    Quick answer

    Use two lighting layers. Start with evenly spaced, diffused ceiling fixtures for safe movement and general work. Add dedicated task lights at the bench, saw, sharpening area, or inspection surface. Put ceiling rows to either side of the main work line so your body does not cast one deep shadow. Compare lumens, beam distribution, CCT, color quality, dimming, temperature limits, and fixture listing. Install a small sample before committing to the whole ceiling.

    Garage workshop lighting guide: the layers at a glance

    LayerJobGood placementCommon mistake
    AmbientWalking, parking, cleanup, finding storageEven ceiling rows across active floor areaOne central fixture with dark walls
    Bench taskAssembly, measuring, repair, hand toolsForward of the worker or from both sidesLight behind the head
    Machine taskSetup lines, controls, cut line inspectionFixed to illuminate the machine surface safelyPortable lamp and loose cord near moving work
    Vertical storageLabels, cabinets, wall toolsWide distribution toward the wall faceAll light aimed straight at the floor
    InspectionFinish, paint, defects, color decisionsAccurate, controlled light from more than one angleJudging color under one harsh source

    Start by mapping these zones in the garage workshop layout guide. Lighting follows the layout, because a bench moved after wiring can put the user directly between the fixture and the work.

    Begin with tasks and surfaces

    Write down what you do after sunset. Reading tote labels needs vertical illumination. Sanding a panel needs grazing light that reveals texture. Measuring a pencil line needs contrast at the work surface. Parking needs broad, low-glare coverage, especially near steps and door thresholds.

    Note surface colors. A white ceiling and pale walls return more useful light than black cabinets, dark rafters, and a charcoal floor. Dust, fixture aging, and storage that grows toward the ceiling also reduce the light reaching the work. This is why a lumen total alone cannot describe the finished room.

    Walk the garage with the door open and closed. The raised door may sit between ceiling fixtures and the workbench. If so, mount task lighting below that shadow plane or locate the bench elsewhere. Never place a fixture where door movement or service work can strike it.

    Use two ceiling rows to control body shadows

    In many rectangular garages, two rows running with the long dimension create more useful overlap than one bright center row. Place them on either side of the primary standing and work line. When one side is blocked by your body, the other still reaches the surface.

    Do not space fixtures by appearance alone. Look at the manufacturer’s photometric information or distribution diagram when available. A fixture with a broad, diffuse pattern can cover a larger area smoothly; a narrow pattern may create bright lanes and dim gaps even with the same lumen rating. Ceiling height changes the spread.

    Draw circles or cones on the plan, then verify with a temporary sample. The exact spacing depends on beam distribution, mounting height, surface reflectance, and the work below. The garage lighting calculator gives a starting lumen budget, but the layout turns that budget into usable light.

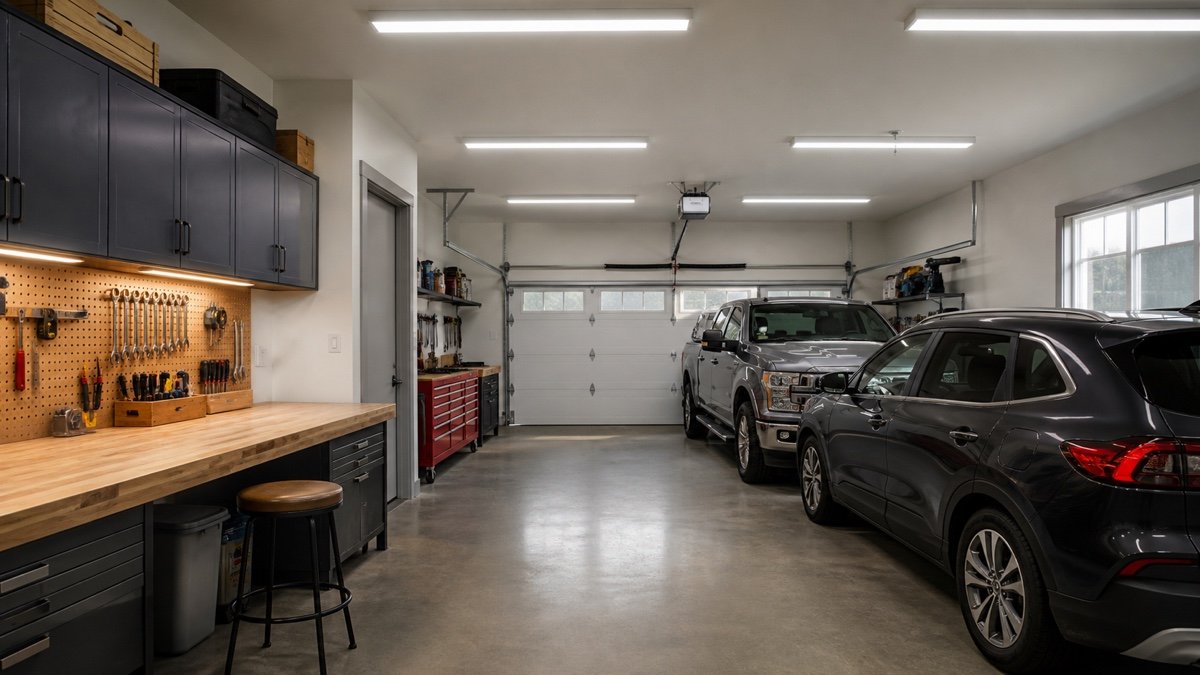
    Two rows of diffused LED fixtures over a garage workshop
    Two deliberate rows usually control body shadows better than one intense strip down the center.

    Add bench light in front of the worker

    A task fixture mounted behind your shoulders lights the back of your head. Place it near the front edge of the bench, above and slightly forward of the normal hand position, or use two sources from opposing sides. Diffusion matters when tools, varnish, or metal reflect a bare LED image.

    The task layer should have its own switch. Quick jobs should not require flooding the parking bay, and delicate inspection may benefit from a brighter local setting than the rest of the room. Dimming can help when a reflective surface becomes uncomfortable, provided the fixture and control are compatible.

    Keep fixtures, cords, and controls outside clamp paths and material travel. A swinging arm lamp can be convenient for small work, but lock it away from rotating tools and hot or wet processes. Follow product instructions for mounting, clearance, and environment.

    Focused task light illuminating a wooden workbench without glare
    Task light should reach the front of the bench without placing a bare source in the normal line of sight.

    Read lumens and distribution together

    Lumens describe the light output leaving a source. They do not guarantee that the workbench receives an even or comfortable level. The U.S. Department of Energy’s LED basics explains that LED products vary in efficacy, distribution, color, lifetime, and other performance characteristics. Compare the complete fixture, not watts alone.

    A high-lumen shop light can waste output above cabinets or create sharp glare if its optics are poor. Several lower-output fixtures may provide better overlap, easier zoning, and fewer deep shadows. More fixtures also mean more connections and cost, so balance smoothness against installation complexity.

    Use the lumen calculation as a first pass, then examine photometric files or manufacturer spacing guidance where provided. For demanding design work, the Illuminating Engineering Society offers its official Illuminance Selector for application-specific recommendations. A residential garage owner can also consult a lighting professional when the work is specialized.

    Choose color temperature for the room, not the label

    Correlated color temperature, or CCT, describes whether white light appears warmer or cooler. Around 4000K often feels neutral and works well in a garage shared with household storage. Around 5000K looks cooler and can feel crisp for detail, though a poor-quality product may appear stark.

    CCT does not tell you brightness or color fidelity. Two 4000K fixtures can render wood, paint, wire insulation, and skin differently. If material color matters, compare color quality metrics and sample the actual fixture. In a compact room, the one-car garage workshop layout helps you see how the raised door, vehicle, and bench can divide the lighting zones.

    Avoid random mixtures. Warm and cool stripes across one workpiece make finish inspection confusing. If you want a cooler task zone, separate it deliberately and check how the transition feels from the normal standing position.

    Color quality matters at the bench

    Color rendering index, or CRI, is familiar, but it does not capture every aspect of color appearance. DOE notes that color quality is broader than CCT and that newer tools such as IES TM-30 provide additional information. For ordinary interior lighting, CRI in the 80s is common; work involving finishes, wiring colors, or matching materials often benefits from a well-made higher-fidelity source.

    Do not buy by a single CRI number from an untraceable listing. Look for complete manufacturer documentation, consistent model identification, and warranty support. Color consistency between fixtures matters too. A replacement that looks greener than its neighbors can be distracting even if both boxes claim the same CCT.

    Inspect familiar objects under a sample: red and blue wire, unfinished wood, painted metal, and your skin. If colors look dull or strange, another fixture is worth trying before the full purchase.

    Control glare before adding more output

    Glare comes from a bright source in the line of sight, hard reflections, or a large contrast between a brilliant fixture and a dark room. Look up from the normal bench posture. If exposed diodes dominate your view, diffusion, repositioning, or a different fixture may help more than lower wattage.

    Glossy floors can mirror ceiling strips. Polished tools and white benchtops can produce their own hot spots. Test a fixture at night, when contrast is strongest. A phone photo may reveal gross unevenness, but your eyes and the work surface are the final judge.

    Place light to reveal texture when sanding or inspecting a finish. A source that skims across the surface shows scratches better than one directly overhead. Keep this inspection light controllable so it does not create constant sideways glare.

    Select fixtures for the garage environment

    A garage may see cold starts, summer heat, humidity, dust, insects, and occasional dampness. Check the fixture’s listed operating temperature, location rating, enclosure, mounting orientation, and compatibility with the intended control. A generic indoor lamp may not be suitable for every unfinished or damp garage condition.

    ENERGY STAR’s downlight criteria illustrate the breadth of performance details that credible lighting documentation can address, including light output, color, dimming, and lifetime requirements. Your chosen product need not be a downlight, but the principle holds: a fixture is more than wattage and color temperature.

    Use listed equipment and follow the instructions. Hardwired additions, new circuits, or uncertain boxes should be assessed and installed by a qualified electrician under applicable local requirements.

    Divide controls around real visits

    At minimum, separate general lighting from bench task lighting. A larger garage may benefit from parking, workshop, and storage zones. Put controls where you enter from both the overhead door and the house, or use suitable controls that achieve the same convenience.

    Occupancy sensing can be helpful for quick trips, but an aggressive timeout is maddening when you are standing still at a bench. Confirm sensor coverage and provide manual control. Dimmers need compatible fixtures and controls; otherwise flicker, limited range, or buzzing can appear.

    Consider what happens during a power outage and whether any path needs separate emergency planning. Do not let decorative smart functions replace a dependable wall control that every household member understands.

    Test the finished lighting with actual work

    After installation, park the vehicles, open the garage door, load the shelves, and place a project on the bench. Check the floor, steps, wall labels, machine surfaces, and the underside of shelves. Look for alternating bright and dark bands as you move.

    Use the workshop aisle guide to walk each route while carrying a box. Light should reveal obstacles without forcing you to stare into a fixture. Clean lenses after dusty work and recheck output as storage changes.

    Finish with a short punch list:

    • No fixture conflicts with the moving door or stored items.
    • Both hands stay visible at the bench.
    • Vertical labels can be read without a flashlight.
    • Glare is controlled from seated and standing positions.
    • Switches match quick visits and long work sessions.
    • Model numbers, instructions, and warranty records are saved.

    If a corner remains dim, fix that corner. Raising the output of every fixture can make the comfortable zones worse.

    Homeowner checking garage workshop light at several work surfaces
    Final aiming and switching decisions should follow real tasks, not the appearance of an empty room.

    Useful products to compare

    These links open current Amazon search results. Check the dimensions, manual, mounting hardware, warranty, and current availability for the exact model before you order.

    Before you buy or install

    Read the current manual for the exact product you are considering. Confirm its assembled dimensions, rated capacity, mounting requirements, included hardware, working clearances, warranty, and any limits that apply to your wall, floor, electrical circuit, or garage layout.

    Frequently asked questions

    How should shop lights be arranged in a garage?

    Two even rows on either side of the main work line often control shadows better than one center row. Adjust spacing for ceiling height and the fixture’s distribution, then add local task light at benches and machines.

    Is one very bright garage light enough for a workshop?

    Usually not. A central source creates body shadows and poor vertical light. Several well-spaced ambient fixtures plus a separate task layer give smoother coverage and more useful control.

    Should garage workshop lighting be 4000K or 5000K?

    Both can work. 4000K usually feels neutral and comfortable in a shared garage. 5000K looks cooler and may appeal in a detail-focused shop. Compare fixtures with similar color quality and sample one in the room.

    Do I need high CRI lighting in a garage?

    For parking and storage, a credible fixture with ordinary interior color quality may be adequate. Higher-fidelity light is helpful when matching finishes, identifying wire colors, painting, or judging material appearance.

  • Where to put a workbench in a garage: choose the wall by movement

    Where to put a workbench in a garage: choose the wall by movement

    Affiliate disclosure: As an Amazon Associate I earn from qualifying purchases. This article may contain affiliate links, and Bay & Bench may earn a commission at no extra cost to you. Read our full Affiliate Disclosure.

    If you are deciding where to put a workbench in a garage, start with the moving objects, not the empty wall. A bench must coexist with car doors, the garage door, drawers, sheet goods, long boards, a shop vacuum, and your own stance. The prettiest location can become useless once a vehicle is parked six inches closer than expected.

    The right spot is usually the wall that preserves the cleanest work path while keeping everyday tools, light, and power within sensible reach. That may be a rear wall in a deep garage, a side wall in a wide bay, or a mobile station with a marked parking nook. Test those choices at full scale before drilling anything.

    Quick answer

    Put a fixed workbench on a wall that remains usable with the vehicle parked, leaves room to stand and open storage, and gives long workpieces a clear feed path. A rear wall is strong in a deep garage; a side wall works when vehicle-door clearance is generous. Avoid garage-door tracks, electrical panels, utility service zones, damp corners, and a direct path from the car into the house. Use painter’s tape and cardboard to test the full bench depth, then perform a normal task inside the outline.

    Where to put a workbench in a garage by layout type

    LocationWorks best whenMain advantageWatch for
    Rear wallThe garage has extra depthClear left-to-right work zoneReduced parking depth and door-to-house traffic
    Side wallThe bay is wideLong run for cabinets and toolsCar doors, mirrors, and narrow standing room
    Front corner near overhead doorThe corner clears tracks and weatherEasy outdoor material handlingRain, wind, security, and door hardware
    Center islandVehicles leave during projectsAccess from several sidesPermanent parking conflict
    Mobile parking nookSpace must change rolesFlexible project positionCaster stability, floor cords, and no true home

    These are starting patterns, not rules. Sketch the whole room with the garage workshop layout guide, then test the likely bench wall in person.

    Map the garage while it is occupied

    Park each vehicle in its normal position, including the one that tends to arrive crooked. Open all doors, the hatch, and the door into the house. Roll out trash carts, bikes, or a mower if they share the same route. A measurement taken in an empty garage hides the moments that cause daily frustration.

    Mark fixed obstacles: foundation ledges, water heaters, laundry equipment, stairs, outlets, panels, windows, pipework, garage-door tracks, sensors, opener rails, and storage that must remain. Do not cover service equipment or reduce access required by its manufacturer or local rules. If you are unsure about electrical or utility clearance, ask the relevant qualified professional before settling on the plan.

    Use the garage measurement guide to record wall segments and obstructions. A single width number is not enough. The usable wall may narrow at knee height or lose depth exactly where the bench legs need to stand.

    Tape the complete working footprint

    Tape the bench top on the floor at its finished depth. Add a second line for open drawers, cabinet doors, a vise handle, and anything that projects from the front. Then mark the standing zone. Put boxes or folding tables inside the outline so your eyes cannot mentally erase the volume.

    Perform a common task. Stand at the proposed vise position, reach for an imaginary tool, carry a tote past the bench, and open the nearest car door. If the work surface is 24 inches deep but storage doors need another 18 inches, the working footprint is not 24 inches.

    Check the garage workshop aisle guide for a measurement sequence. Treat its numbers as planning aids, then test your body, mobility needs, clothing, and carried loads in the actual room.

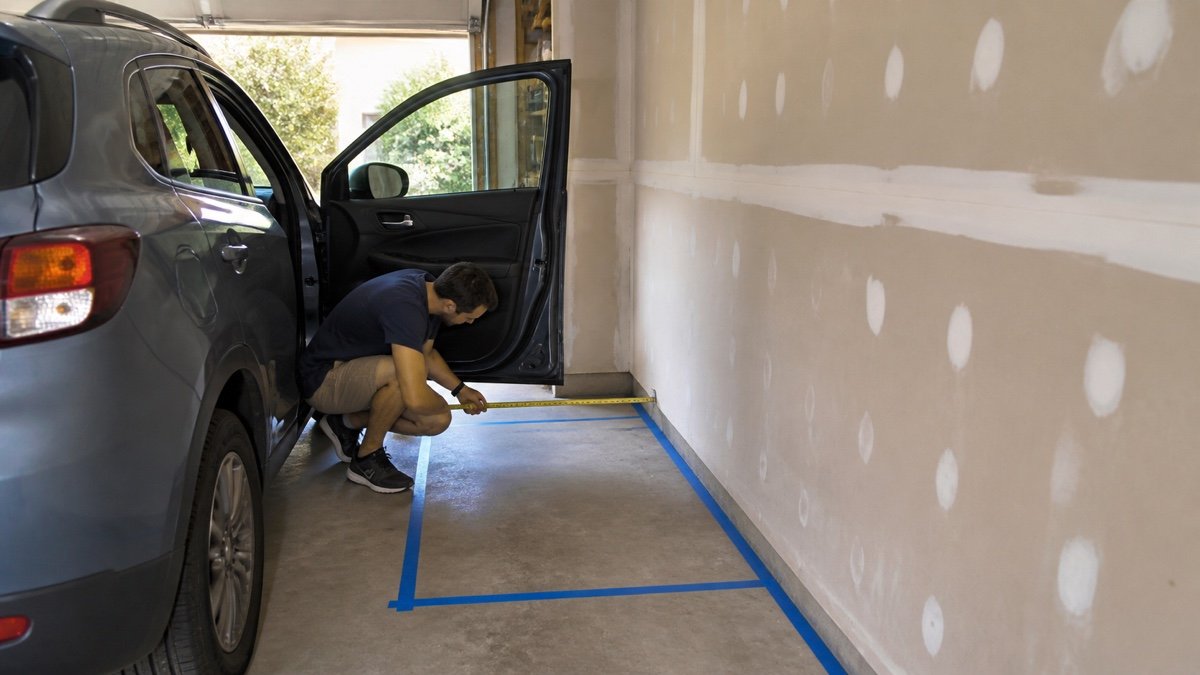
    Tape outline marking a proposed garage workbench footprint
    A taped footprint reveals door, drawer, and walking conflicts before a heavy bench arrives.

    Rear wall placement suits a deep garage

    A rear-wall bench creates a natural horizontal tool zone and keeps both side walls available for shallow storage. It can also place the bench near the house door, which is convenient for quick repairs. The cost is parking depth. A 24-inch top, front overhang, and standing room can consume the buffer behind a long vehicle.

    Open the vehicle hatch while it is parked. Test the route from the driver’s door to the house. A bench directly in that path collects bags and groceries, and then stops being a workbench. Shift the station to one side or preserve a deliberate landing shelf away from the main work surface.

    A rear wall is especially good for hand-tool and assembly work when long boards can extend left and right. It is less convincing if the only board path crosses a stair or utility appliance.

    Side wall placement needs honest door clearance

    A long side wall can hold a bench, upper cabinets, pegboard, and task lighting in one efficient run. The bench may also align long material with the garage opening. In a narrow bay, however, the car door becomes the deciding object.

    Park at the least favorable realistic position and open the widest door used daily. Include mirrors and charging connectors. Stand between the open door and the proposed bench. If your hips brush either side, the layout will not improve after drawers and clamps appear.

    Shallow work surfaces can rescue a side wall. A 20-inch bench may suit small repairs, sharpening, electronics, or garden-tool maintenance better than a conventional 24 to 30-inch top. Match the depth to the task, not to furniture proportions seen online.

    Plan a straight path for long stock

    A bench used for boards, pipe, conduit, or molding needs more than elbow room. Place a tape measure or broom at bench height and walk the imagined workpiece through the room. Check both ends against vehicles, shelves, door trim, and the overhead door.

    For a miter saw station, the support surface and stock path matter more than the saw’s tabletop footprint. A bench that faces the short dimension of the garage may force every long cut outdoors. That can be acceptable in a mild climate if setup is easy, but it should be an intentional compromise.

    Table saw planning has a different feed path. Use the table saw clearance guide if the bench must support an outfeed role. Never let a parking aisle become the presumed feed zone while a vehicle remains in place.

    Put light on the work, not behind your shoulders

    A window beside the bench gives pleasant daylight and makes color easier to judge, but it should not be the only plan. Sun angle changes, winter evenings arrive early, and a raised garage door can block ceiling fixtures. Provide dedicated task light that reaches the front half of the work surface without putting your head between the lamp and the job.

    Check glare from glossy tops and polished tools. A bright bare lamp in the normal line of sight can be more tiring than a lower-output fixture with good diffusion. Wire and mount fixtures according to their listings and applicable requirements. Portable cords should not cross the main route.

    Natural light can also heat finishes or create harsh contrast. A shade or blind may make the bench more consistent throughout the day.

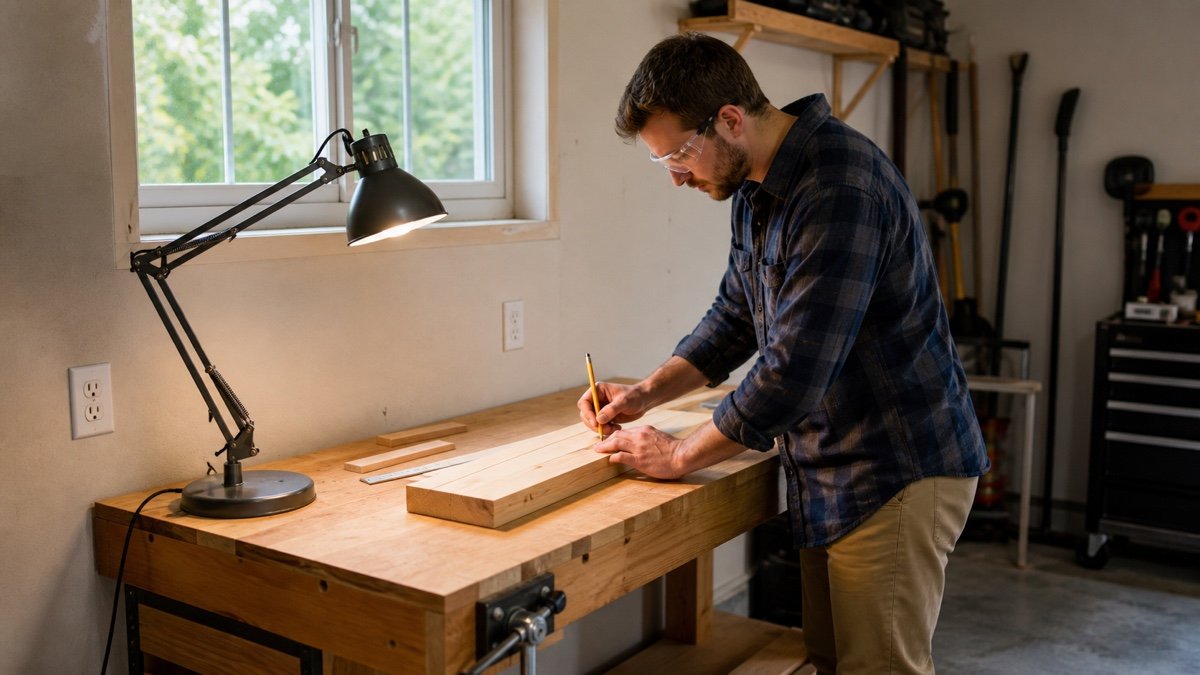
    Garage workbench near window with focused task lighting
    Window light is useful, but reliable task lighting keeps the bench workable after sunset and on cloudy days.

    Treat outlets and dust collection as routing problems

    Count the tools used together, including chargers, task lights, a vacuum, and occasional equipment. A nearby receptacle is helpful only if the setup avoids overloaded adapters and cords across walkways. Electrical changes belong with a qualified electrician who can assess the circuit, load, protection, garage conditions, and local requirements.

    Dust collection needs a short, smooth route and a place for the machine that does not block knees or doors. A vacuum hidden behind the bench is quiet in a plan and irritating in use. Leave room to empty it and clean filters. Keep combustible dust and finishing materials managed according to their product guidance.

    Noise also travels. A bench fixed to a wall shared with a bedroom can transmit impact and machine vibration. A small gap, isolation where appropriate, or another wall may improve the house more than a tidier tool layout.

    Set height around the work and the user

    Bench height changes leverage and posture. Fine assembly often feels better higher, while forceful planing or pressing benefits from a lower surface. The Canadian Centre for Occupational Health and Safety notes that precision work, light work, and heavy work call for different work-surface relationships in its standing workstation guidance.

    Do not copy one universal height. Mock up the surface with a sturdy table or stacked material, then spend fifteen minutes on a real task. The UK Health and Safety Executive’s posture guidance recommends avoiding prolonged awkward positions and arranging work so the hands and elbows can stay in a comfortable range.

    A thick vise, bench appliance, anti-fatigue mat, or seated stool changes the effective height. Plan those pieces together and allow a posture change during longer sessions.

    A mobile bench still needs a permanent home

    Mobility is useful when the center of the garage becomes a shop only after the car leaves. Choose casters rated for the complete loaded bench, use a reliable lock or leveling-foot system, and roll across the actual floor before committing. Expansion joints, slopes, and small debris can make a heavy bench surprisingly stubborn.

    Mark a parking nook that preserves normal garage movement. If the bench lives wherever there is temporary space, it will eventually block a door or trap a bicycle. Provide cord and hose storage on the bench so nothing drags while moving.

    Compare sizes and storage formats in the garage workbench buying guide. A mobile bench should become stable when parked. It should not skate across the floor during sanding, clamping, or hand-tool work.

    Mobile workbench stored in a compact garage parking nook
    A mobile bench still needs a defined parking spot, clear casters, and a safe place to lock in position.

    Run a one-week cardboard trial

    Leave the taped footprint and cardboard volume in place for a full week. Park, unload groceries, roll out bins, and do one small repair. Notice where objects are set down and where people cut corners. Those habits are more predictive than a neat floor plan.

    Use this final checklist:

    • The car, hatch, and interior door work normally.
    • Drawers and cabinet doors open without a shuffle.
    • There is a straight path for the longest common workpiece.
    • Task light reaches the surface without body shadow.
    • Power and dust routes stay out of walking paths.
    • Utilities and service equipment remain accessible.
    • The floor is dry, stable, and practical to clean.
    • A mobile bench has a defined storage position.

    If two walls pass, choose the one that supports the task done every month, not the ambitious project imagined once a year. A modest bench used comfortably will outperform a grand station that must be excavated before every repair.

    Useful products to compare

    These links open current Amazon search results. Check the dimensions, manual, mounting hardware, warranty, and current availability for the exact model before you order.

    Before you buy or install

    Read the current manual for the exact product you are considering. Confirm its assembled dimensions, rated capacity, mounting requirements, included hardware, working clearances, warranty, and any limits that apply to your wall, floor, electrical circuit, or garage layout.

    Frequently asked questions

    Should a garage workbench go against the back wall or side wall?

    Use the rear wall when the garage has spare depth and a clear traffic route. Use a side wall when the bay is wide enough for the vehicle door, standing space, and open drawers. Test both with the car parked.

    How much room should I leave in front of a workbench?

    Leave enough room for your stance, open storage, carried materials, and anyone passing behind you. Tape those zones at full size and perform a normal task. A single generic aisle number cannot account for every user and project.

    Is it a good idea to put a workbench under a window?

    It can provide useful daylight, but check glare, heat, security, water intrusion, and whether tools block the window. Add dependable task lighting because daylight changes and may disappear while you are still working.

    Can a mobile workbench replace a fixed bench in a small garage?

    Yes, if it has a clear parking location, suitable casters, stable locks or leveling feet, and safe cord storage. It should roll easily when unloaded for movement and become solid enough for the intended work.

  • Small Garage Dust Collection Layout: Short Hoses, Clear Aisles

    Small Garage Dust Collection Layout: Short Hoses, Clear Aisles

    Affiliate disclosure: As an Amazon Associate I earn from qualifying purchases. This article may contain affiliate links, and Bay & Bench may earn a commission at no extra cost to you. Read our full Affiliate Disclosure.

    A small garage dust collection layout succeeds by refusing to imitate a large commercial shop. Long mains, several branches, and a blast gate at every machine look tidy in a diagram, but a modest collector may lose too much performance along the route. In a one-car or shared garage, short hoses and mobile equipment are often the more honest design. Put capture close to the tool, connect one chip-producing machine at a time, store hoses off the floor, and leave enough room to empty the bin without rebuilding the room.

    Quick answer

    Group tools by port size and dust behavior. Park a high-pressure vacuum or extractor near small-port tools, and roll a large-hose collector to the planer, jointer, or saw it serves. Keep hoses short, avoid early reducers and tight bends, and capture dust at the factory hood or approved guard. Protect the walking aisle, check electrical loads, and reserve straight-out access for the collection drum and filter.

    Small garage dust collection layout: map dust sources first

    List every task that creates dust or chips. Include handheld sanding, routing, track-saw work, table-saw cuts, planing, jointing, miter cuts, sweeping, and vehicle cleanup. Record each tool’s dust-port diameter, factory hood, electrical requirement, stored location, and operating location. The manual should tell you what collection connection the maker intended.

    Next, mark how often each task happens and what it produces. A planer may run for twenty minutes and fill a bin with chips. A sander may run for two hours while making far less visible but finer dust. That difference argues for separate collection strategies even if both tools fit the same room.

    Put those notes on the measured plan from our garage measurement guide. Add the garage door, opener, windows, panels, outlets, service doors, parked vehicle, and the path used to carry long stock. Dust equipment must fit during real work and in its stored position against the wall.

    Divide the shop by airflow class, not brand

    Tool groupConnection patternPractical small-garage layoutMain warning
    Sanders, routers, track sawsSmall port and narrow hoseCompact extractor near the bench, short tool hoseDo not assume every filter configuration is HEPA
    Planer, jointer, table-saw cabinet4-inch or larger portMobile collector moved to one machineDo not reduce the hose early
    Miter sawMixed port and open dust plumeManufacturer connection plus a well-designed close hood where permittedDo not interfere with guard or saw travel
    Floor cleanupHand nozzle and variable restrictionWet/dry vacuum stored near the exitDo not blow dust across the room
    Ambient cleanupRoom air rather than source portSupplemental room filtration after source captureIt cannot replace collection at the tool

    The rule is simple: narrow restrictions need pressure, while open hoods need air volume. One collector can sometimes cover a small set of similar machines, but adapters cannot change the fan it contains. Sort tools by port behavior before buying hose or committing wall space.

    Put the collector close to the highest-volume machine

    Start with the planer, jointer, or saw that produces the most chips. Give the collector a parked position close enough for one short, gentle hose. If two large-port machines sit nearby, use quick connections and move the hose between them while both are off. A small fan is more likely to perform well through ten uncomplicated feet than through a ceiling loop and several branches.

    Grizzly’s current support guidance for its compact G8027 says the 500 CFM unit is intended for one average machine at a time and recommends keeping hose lengths short. It also says the collector is not intended as general room filtration. That model-specific FAQ should not be applied to every collector, but it illustrates a sensible layout for a small unit.

    Keep the collector away from the garage door track and the stock path. Do not bury its air inlet or motor cooling openings against a cabinet. If the machine has a tall filter, draw its full height beneath open door hardware. The overhead clearance method is useful even when the storage item is a dust collector.

    A mobile cart can replace a permanent duct network

    A well-built cart can carry a collector or vacuum, cyclone, hoses, cuffs, and a small adapter drawer. Give it a low center of gravity, rated locking casters, secure components, and a handle that does not become the widest part by surprise. The bin must come out without lifting the upper assembly.

    Mobility only helps when the route is clear. Roll the empty cart between its parking spot and each tool. Cross the slab joints, curb, and threshold. Check whether the hose or cord catches a caster. Then mark a parking box on the floor so the cart returns to a location where it cannot drift into a vehicle or door.

    The cart in a shared garage should connect after the car moves out, not snake a hose around the bumper. Use the measured scenarios in the one-car garage workshop layout to decide whether shop mode and parking mode overlap at all. A rolling collector is easier to move than a fixed duct, but it still needs a safe home in both modes.

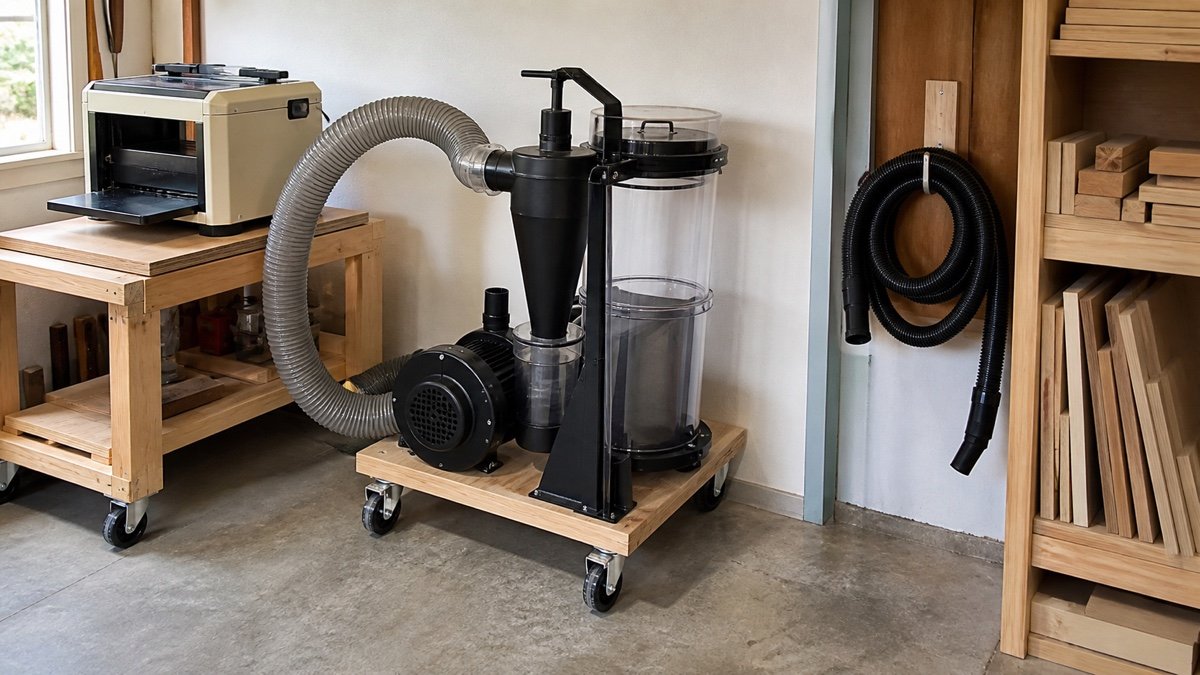
    Mobile cyclone dust collection cart parked beside an unplugged benchtop planer and a coiled vacuum hose
    A mobile cart can serve several tool families without asking a small collector to pull through a permanent maze.

    Source capture begins at the factory hood

    Use the tool’s intended port, hood, shroud, and guard. Keep the opening close to where chips or dust leave the work. OSHA’s wood-dust guidance identifies local exhaust ventilation as the primary control and says hoods should sit as close as practical to the emission source. That is workplace guidance, but the physics does not change in a garage.

    Do not remove a blade guard or defeat a safety interlock to improve hose access. If capture from a tool is poor, check the manual, clear blockages with the machine safely de-energized, inspect the hose, and ask the manufacturer about approved accessories. A homemade box around a miter saw can obstruct the head, fence, or stock. Test the full operating envelope before adding any enclosure.

    NIOSH’s table-saw dust control research found that bottom exhaust alone often missed high-speed dust and that an auxiliary hood over the blade substantially reduced emissions in its laboratory test. The takeaway is not to copy an old research hood blindly. It is to treat upper and lower capture as separate problems and use current approved solutions.

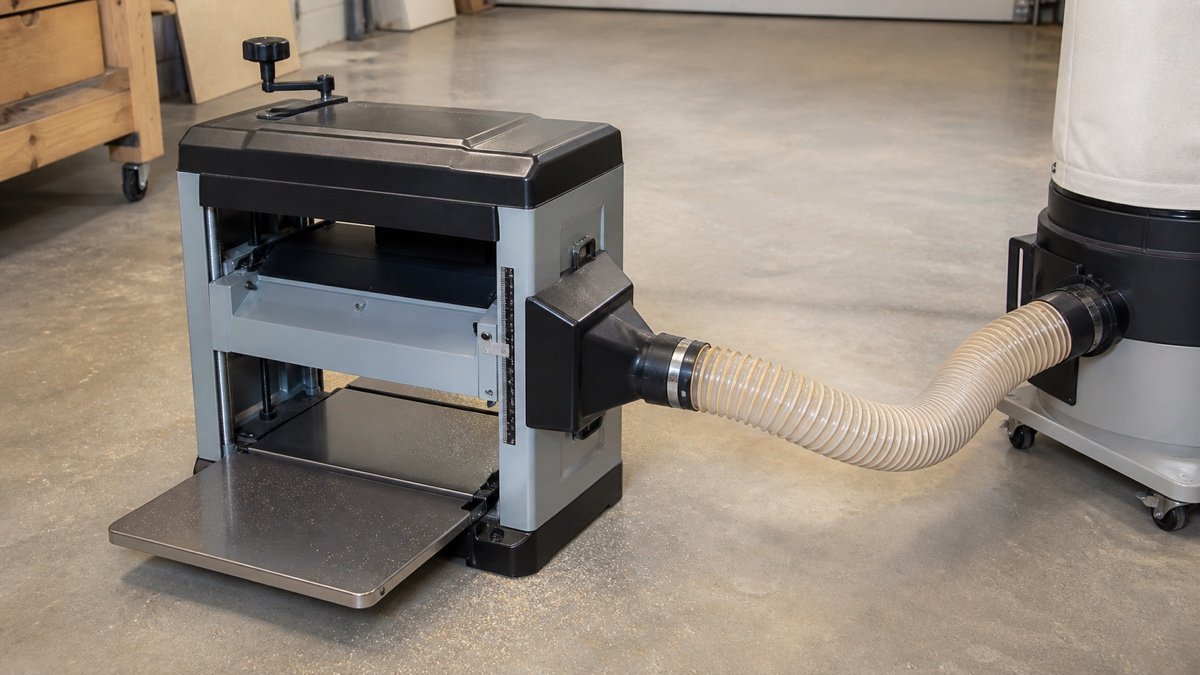
    Unplugged thickness planer connected at its dust hood to a nearby collector with a short hose
    The shortest useful hose begins at a hood close to the chip source and reaches the collector without a sharp bend.

    Route hoses where feet, wheels, and stock do not travel

    Keep the active hose inside the tool’s work zone. Run it along a wall or behind the machine when the manual permits, with enough slack for normal movement and no loop underfoot. Store inactive hoses on large-radius hooks so they do not kink. A floor hose across the only exit is not temporary if every cut requires it.

    Avoid tight elbows and sudden reductions. Keep large hose at full diameter until the tool connection. Support the weight of a hanging hose so it does not pull on a plastic port. Use compatible cuffs, gates, clamps, and static-control parts specified for the system. Seal leaks in the manner the manufacturer allows; do not wrap a failing fitting in layers of unknown tape and forget it.

    Our garage workshop aisle guide treats a hose as a moving obstruction, not a line on a plan. Walk the route carrying a full sheet, push the mobile cart, open every drawer, and simulate the collector connection. If the hose gets crushed under a wheel or forces a sideways step, change the layout.

    Plan service space before the filter gets dirty

    Draw the bin or bag removal direction. Some drums roll forward; others drop down; fabric bags need room around their clamps. Canister filters may need overhead or side access for cleaning. A transparent collection bin still needs room to unlatch. Leave the straight path the manual expects.

    Put spare bags, filters, and approved cleaning tools nearby but outside the dust stream. Keep a lidded disposal container accessible. Empty the collector before the waste becomes too heavy or reaches the maker’s fill limit. Fine dust disposal can release what the system captured, so follow the manual and the material’s precautions.

    Inspect ducts, hoses, seals, gates, filters, and collection containers regularly. OSHA specifically calls for maintaining local exhaust systems and checking damaged or loose ductwork. Power down and isolate equipment before service. Never use compressed air to blast accumulated wood dust around the room; OSHA’s fire guidance warns against creating a dust cloud that way.

    Cyclone dust collector with clear access to its drum, filter, latches, and unplugged power cord
    Service clearance is part of the layout because a filter or bin that is hard to reach will be maintained late.

    Check power and automatic-start limits

    Map circuits along with hoses. A tool-triggered extractor may have a stated maximum connected-tool load. A planer and dust collector can draw substantial current at startup. Do not assume two nearby receptacles are separate circuits. Consult the manuals and have a qualified electrician evaluate permanent wiring or repeated breaker trips.

    Keep cords out of the aisle and away from wet areas. Do not hide extension-cord connections inside cabinets or treat an extension cord as permanent wiring. The collector’s emergency controls should remain visible and reachable from the operator’s normal position. Remote starts are convenient only when you can confirm which gates or hoses are connected and no one is servicing the unit.

    Grounding and static-control advice varies with equipment and duct material. Follow the complete system manufacturer’s instructions. Do not add a loose wire inside a hose because a generic diagram online shows one. Dust collection combines moving air, combustible material, electrical equipment, and sometimes plastic components. Use components designed to work together.

    Keep dust work away from clean storage and ignition sources

    Put sanding and chip-producing tools on the collector side of the room. Keep clean household items, soft goods, and vehicle detailing supplies in closed storage across the aisle. Finishes, solvents, fuel, and battery charging need separate handling according to their labels and equipment instructions.

    OSHA’s woodworking fire and explosion guidance notes that fine wood dust can accumulate in unexpected high places and recommends controlling ignition sources, using local exhaust, and separating combustible stock from flammable chemicals. A hobby garage is not an industrial facility, yet the housekeeping lesson is straightforward. Dust on rafters and motors is not harmless decoration.

    Vacuum settled dust with equipment and filters suitable for the material. Clean the slab, ledges, door tracks, lights, and cabinet tops. Do not dry sweep or blow a cloud into the driveway. If the project involves silica, lead paint, treated materials, or unknown dust, use the specific control method and professional guidance for that hazard.

    Test the layout with one tool at a time

    Commission the simplest connection first. Clean the filter, empty the bin, use the correct hose, close unused openings, and connect one tool exactly as the manufacturer intends. Observe whether chips escape at the hood, the hose plugs, the bag inflates normally, or the filter loads unusually fast. Stop if the machine behaves unexpectedly.

    Add only one change at a time: a slightly longer hose, an approved separator, a second pickup, or a different filter configuration. That discipline tells you which addition cost performance. A system assembled all at once leaves you guessing whether the problem is the hood, duct, filter, or leak.

    Document the final configuration with photos and a short list of compatible cuffs. Mark which collector serves which tool and where the cart parks. Revisit the table-saw stock-path guide before accepting a hose route behind or beside the saw. Dust control should support safe material movement rather than stealing the outfeed area.

    A compact layout should be easy to explain

    If another adult cannot understand how to connect, start, stop, empty, and park the system after a two-minute explanation, simplify it. One large-hose collector, one small-port extractor, two obvious parking places, and a few compatible adapters can outperform a clever wall of gates that nobody maintains.

    Measure before adding future branches. Keep the source hood close, the hose short, the filter appropriate, and the service path open. Capture chips and dust before they cross the breathing zone. Use room filtration only as another layer. Clean the high ledges on a schedule.

    The visual test is useful: the aisle should still look like an aisle when the collector is connected. The filter and bin should still look removable. The garage door should still move. If dust control makes the room harder to use, it will eventually be bypassed. A modest system that connects in seconds and parks cleanly has a better chance of running for every job.

    Useful products to compare

    These links open current Amazon search results. Check the dimensions, manual, mounting hardware, warranty, and current availability for the exact model before you order.

    Before you buy or install

    Read the current manual for the exact product you are considering. Confirm its assembled dimensions, rated capacity, mounting requirements, included hardware, working clearances, warranty, and any limits that apply to your wall, floor, electrical circuit, or garage layout.

    Frequently asked questions

    Should dust collection hose run overhead in a small garage?

    Only if the collector can handle the added length and resistance, the structure supports the installation, and the route clears the garage door, lights, vehicles, and tall stock. A short floor-level mobile connection is often simpler for a modest collector.

    Can one dust collector serve every tool?

    Sometimes one collector can serve similar tools one at a time. Small-port handheld tools and large-port stationary machines usually need different pressure and airflow characteristics. Match each connection to the tool and collector manuals rather than relying on reducers.

    Where should a dust collector sit in a garage?

    Place it close to the highest-volume machine while preserving the walking aisle, garage door travel, cooling airflow, electrical access, and bin-removal path. A mobile unit should have a marked parking spot where its casters can lock.

    Does ambient air filtration replace source collection?

    No. Capture dust at the hood or tool port before it spreads. Ambient filtration may reduce particles that escape, but it cannot collect planer chips or stop the initial plume from crossing the operator’s breathing area.

  • Garage Workshop Zones: Make Parking, Storage, and Work Cooperate

    Garage Workshop Zones: Make Parking, Storage, and Work Cooperate

    Affiliate disclosure: As an Amazon Associate I earn from qualifying purchases. This article may contain affiliate links, and Bay & Bench may earn a commission at no extra cost to you. Read our full Affiliate Disclosure.

    Garage workshop zones solve a problem that shelves alone cannot: the same floor often has to park a car, move long material, support a project, store household gear, and leave access to doors and utilities. When every activity spreads everywhere, a ten-minute repair begins with forty minutes of moving bins. Zoning gives each kind of work a home and a boundary. The boundaries do not need paint or permanent walls. They need measurements, a clear operating rule, and a reset routine that the room can survive on an ordinary weeknight.

    Quick answer

    Start with fixed boundaries and the vehicle envelope. Put the main bench and daily tools in a fixed work zone, dusty machines near source capture, household items in closed clean storage, and mobile equipment in a marked parking zone. Keep one uninterrupted movement path from the garage door to the house or service door. In a parking-first garage, define shop mode and parking mode so tools, cords, hoses, and stock return to known locations before the car enters.

    Garage workshop zones begin with nonnegotiable space

    Measure finished wall to finished wall at several heights. Record the curb, steps, columns, overhead door tracks, opener, windows, electrical panel, water heater, utility equipment, and every door swing. Then measure the vehicle with mirrors, open doors, raised hatch, charging or fueling access, and the path used to park it. The instructions in our garage measurement guide turn those facts into a usable boundary plan.

    Color the nonnegotiable areas first: door travel, electrical access, utility service, parking envelope, and normal exit path. Do not assign these spaces to a zone simply because they are empty most of the day. A rolling cart parked in front of a panel is still an obstruction when something goes wrong.

    The remaining area is the workshop budget. It may be one full bay, an eight-foot rear wall, or a narrow strip beside the car. Accepting that budget early prevents a layout that functions only when every object is temporarily in the driveway.

    Use six zones instead of dozens of categories

    ZoneWhat belongs thereBest locationBoundary test
    Fixed workWorkbench, vise, daily hand toolsWall with light, power, and no door conflictDrawers and vise open without entering the aisle
    Dirty workSawing, sanding, grinding appropriate materialsNear source capture and cleanup equipmentDust does not start beside clean household storage
    Clean storageSeasonal gear, paper goods, household suppliesClosed cabinets across from dusty workDoors open without touching a vehicle
    Mobile workAssembly cart, wheeled machines, project standOpen bay during work, marked parking spot afterwardEvery mobile item has a smaller stored envelope
    Material pathLumber, sheet goods, mower, bicyclesDirect route between door, storage, and toolLongest item can turn without striking fixed storage
    Vehicle and transitionCar envelope and changeover spaceMeasured parking bayShop resets before the vehicle crosses the threshold

    Six zones are enough to guide placement without creating a label for every shelf. Some can overlap in time. The mobile work zone may occupy the vehicle bay only after the car leaves. The material path can become assembly space once long stock is put away. Fixed and utility zones should not depend on such overlap.

    Anchor the fixed work zone to a useful wall

    The fixed work zone holds the bench, vise, task light, daily tools, and the outlets used most often. Choose a wall where the bench does not block a door, window, panel, or vehicle opening. Add the open depth of drawers, cabinet doors, and the vise handle. A 24-inch bench can require much more room during use.

    Keep frequently used tools within one step, but leave the bench surface mostly free. Shallow wall storage works better here than deep shelves over the user’s head. Put heavy cases low. Place chargers where their ventilation and instructions are respected, away from sawdust accumulation and liquids.

    The small garage workbench guide compares fixed, folding, and mobile formats. A fixed bench earns its permanence when it is used often and the room does not need that wall for parking clearance. If the car door collides with the bench or a folding top, the vehicle boundary wins.

    Keep dirty work close to capture and away from clean goods

    Group sanding, sawing, and other dust-producing work near the correct extraction equipment and cleanup route. The goal is not to make a sealed industrial room. It is to avoid starting a dust plume beside open sports bags, paper supplies, or the car’s cabin air intake. Closed cabinets on the far wall are easier to wipe than open wire shelves beside a sander.

    OSHA’s wood-dust guidance identifies local exhaust at or near the source as the primary control in woodworking workplaces. A home garage should likewise put the collector close enough that the hose stays short and does not cross the aisle. Use the tool and collector manuals, and do not remove guards to improve a connection.

    Separate finishes, solvents, fuels, and ignition sources according to their labels and applicable local requirements. OSHA’s woodworking fire guidance warns about fine dust accumulation and recommends separating combustible lumber from flammable chemicals. The garage is easier to manage when the dirty zone does not double as chemical storage.

    Open garage aisle separating a woodworking bench and dust collector from closed household storage cabinets
    Keeping dusty work across the aisle from closed clean storage reduces the amount of cleanup each project creates.

    Give clean storage doors, not wishful distance

    Distance helps, but enclosure does more. Put household supplies, camping textiles, spare paper goods, pet items, and seasonal decorations in closed cabinets or lidded bins. Choose a wall outside the direct line of sanding and cutting. Label bins clearly in the real room, even though decorative labels are unnecessary on every shelf.

    Reserve low shelves for dense items and high shelves for light seasonal goods. Keep chemicals only in storage suited to the product and separate incompatible materials. Do not put a cardboard archive below a plumbing connection or directly on a damp slab.

    Use the comparison in wall-mounted versus freestanding garage cabinets to choose the format. Wall-mounted cabinets reveal the floor for cleaning and may protect against minor water, but they need suitable structure and reduce flexible wall use. Freestanding cabinets are easier to move and can be leveled, though their feet and backs collect dust. The clean zone should be easy to close and easy to wipe.

    Make the mobile zone genuinely mobile

    A machine on casters is not mobile if its cord, dust hose, outfeed support, and stored materials take fifteen minutes to disconnect. Design the entire move. Give each cart a handle, locking casters, a safe push direction, and a parked footprint that does not block a fixed zone.

    Mark operating and parking positions with painter’s tape. Roll the cart between them while every other normal object remains in the room. Cross slab joints and test the turning radius. Open the garage door and nearby cabinets. If the cart has folding wings, include both states on the plan.

    Our workbench caster guide explains why load capacity, wheel material, mounting plate, floor condition, and brake access all matter. Choose casters from the complete loaded weight and use the manufacturer’s instructions. A cart that drifts under hand pressure is not ready for precise work.

    Mobile assembly table with locked casters beside its taped parking footprint in a garage workshop
    A mobile zone needs both an operating position and a smaller parked position, or it is simply furniture on wheels.

    Protect one continuous movement path

    Draw the route used to enter from the driveway, reach the house door, carry groceries, move a bicycle, and bring long stock to a tool. Pick the most important path and keep it continuous through every zone. Avoid floor storage along its edges because a narrow path tends to get narrower.

    OSHA’s walking-surface rule applies to workplaces, not as a garage design code, yet its expectation of clean, orderly, dry passageways is a useful standard to borrow. Hoses, cords, scrap, and wet mats should not turn ordinary movement into an obstacle course.

    Test the route with objects, not an empty-handed walk. Carry a sheet-sized cardboard panel, push the widest cart, and open the service door while someone stands at the bench. The garage workshop aisle guide helps map these open and moving states. A zone boundary works when it remains obvious during the job and after cleanup.

    Define parking mode and workshop mode

    A shared garage needs a changeover script. Workshop mode begins after the vehicle leaves and the door is in a safe position. The folding bench opens, the mobile cart rolls to its tape mark, dust collection connects, and task lights come on. Parking mode reverses those steps: tools stop, dust settles and is captured, stock returns, cords and hoses leave the floor, the bench closes, and the vehicle envelope is checked.

    Keep the script short enough to follow. Five minutes is realistic; half an hour invites shortcuts. Store each movable item close to its parked position. Use wall hooks for hoses and cords, one bin for the current project, and a dedicated landing spot for the mobile bench.

    The measured plans in our two-car parking and workshop layout show how a work bay and vehicle bay can cooperate. A one-car room may need a stronger rule: no machine operation with the car inside. Choose based on the actual tool, dust, sparks, finishes, and vehicle exposure.

    Empty garage parking bay converted to workshop mode with an open folding bench and a rolling tool cart
    Parking-first rooms work when the changeover is short, predictable, and free of loose cords or tools.

    Treat utilities as protected zones

    Electrical panels, water heaters, shutoffs, HVAC equipment, doors, windows, and garage-door hardware need service access. Do not count their working space as temporary cart storage. Keep shelves, lumber, and hanging tools outside the access defined by the equipment instructions and local requirements.

    OSHA’s electrical rules for workplaces require sufficient working space around electrical equipment and keep dedicated space clear of foreign systems. Your residential requirements come from the adopted electrical code and local authority, not from this article. The planning habit is still useful: mark the panel area on the floor and wall before storage claims it.

    Keep heat-producing equipment and ignition sources away from dust, fuel, finishes, and stored tires. Maintain ventilation openings. Never box a compressor, charger, collector motor, or appliance into a cabinet unless the manufacturer expressly supports that installation. A neat utility corner that overheats or cannot be serviced is not organized.

    Assign storage by frequency and consequence

    Daily hand tools belong at the fixed bench. Weekly machines can live on accessible lower shelves or mobile bases. Seasonal goods can go higher, provided the lift is reasonable and the storage clears door hardware. Hazardous items need their own compliant location even if they are used rarely. Frequency matters, but consequence outranks convenience.

    Use a simple rule for every shelf: who uses it, how often, how heavy, and what must move to reach it? If the answer involves a ladder behind the parked car or removing three bins, the item belongs elsewhere. The broader garage storage planning guide helps assign walls after the vehicle and movement layers are fixed.

    Leave spare capacity. One empty cabinet shelf and one open cart bay absorb the active project. Without that buffer, workpieces migrate to the car hood, floor, and service path. Empty space is part of the zone plan, not evidence that the storage purchase was too large.

    Run a weekly ten-minute reset

    Return mobile items to their marks, clear the movement path, empty scrap, vacuum settled dust with suitable equipment, coil hoses, inspect cords, and close clean storage. Put the current project’s parts in one labeled container. If an item has no home, decide whether to assign one or remove the item before it becomes permanent floor storage.

    Once a month, check rack fasteners, caster brakes, cabinet stability, leaks, water entry, filter condition, utility access, and the vehicle envelope. Re-tape a boundary if the car or workbench changes. A layout should respond to real use rather than preserving a pretty drawing.

    The sign of good zoning is not a spotless room. It is a room that recovers quickly. You can start a small job without relocating the household, and you can park without carrying tools into the house. Fixed boundaries stay respected, mobile zones move on purpose, and the aisle remains boring. That is exactly what you want from a shared garage.

    Useful products to compare

    These links open current Amazon search results. Check the dimensions, manual, mounting hardware, warranty, and current availability for the exact model before you order.

    Before you buy or install

    Read the current manual for the exact product you are considering. Confirm its assembled dimensions, rated capacity, mounting requirements, included hardware, working clearances, warranty, and any limits that apply to your wall, floor, electrical circuit, or garage layout.

    Frequently asked questions

    What are the basic zones in a garage workshop?

    A useful starting set is fixed work, dirty work, clean storage, mobile work, material movement, and vehicle transition. Utilities and door travel remain protected boundaries rather than storage zones.

    Can workshop zones overlap?

    Yes, when they overlap at different times. A parked-car bay can become assembly space after the car leaves. Fixed utility access, door travel, and the main exit path should not depend on movable overlap.

    Should a workbench go beside the car?

    Only if the measured vehicle envelope, open door, bench depth, drawers, vise, and walking space all fit together. Tape both operating states on the floor and test them before installing a fixed bench.

    How do I keep zones from turning into clutter?

    Give every mobile item a marked parking spot, limit active-project storage to one container or cart bay, preserve an empty buffer shelf, and run a short weekly reset. Items without a home need a deliberate storage decision or removal.

  • Table Saw Clearance in Garage Workshop Plans: Follow the Full Stock Path

    Table Saw Clearance in Garage Workshop Plans: Follow the Full Stock Path

    Affiliate disclosure: As an Amazon Associate I earn from qualifying purchases. This article may contain affiliate links, and Bay & Bench may earn a commission at no extra cost to you. Read our full Affiliate Disclosure.

    Table saw clearance in garage workshop plans starts with the moving stock. A tidy rectangle around the machine only shows how it parks. An eight foot board travels past the blade, so its ends occupy different parts of the room during one cut. The fence opens, outfeed support takes floor space, and the operator needs a stable stance outside the kickback line. A garage door, vehicle, hose, or bench can interrupt that path even when the saw fits easily. Measure the exact saw and the longest stock you expect to cut. Map setup, cutting, and parking as separate room states, while following the saw manual and applicable safety requirements.

    Quick answer

    Use the blade line as the origin. For stock length L, record starting gap S and final travel P after the trailing end clears the blade. Axial sweep is 2L + S + P. Measure blade to front edge F and blade to supported rear edge R; clear floor beyond the saw is max(0, L + S – F) in front and max(0, L + P – R) behind. Add fence travel, stock width, supports, operator stance, helper, hose, cord, doors, and vehicle state. Replace the examples below with measurements from your saw, manual, stock, and garage.

    Calculate table saw clearance in garage workshop plans from the blade line

    The blade line is the useful datum. Call the stock length in the feed direction L. Add S, the starting gap between the leading edge and blade, plus P, the final travel of the trailing edge past the blade. The full axial sweep is 2L + S + P.

    This formula describes movement only. The manual sets the operating method and safety constraints; the material, supports, stance, and room decide the fit. When measuring open floor from the saw body, subtract the table already within the path. With F as the blade to front table edge distance, infeed projection beyond the saw is max(0, L + S – F). With R as the blade to the back of the last continuous support, outfeed projection is max(0, L + P – R).

    Keep every measurement in one unit. A sketch based on measuring a garage for storage will catch wall jogs, door tracks, and fixed equipment that a listing photo misses.

    Configure the unplugged saw before measuring its footprint

    Parking dimensions are rarely operating dimensions. Before installing the guard or dust fittings, extending rails, changing the setup, or making adjustments, disconnect the saw from its specified power source and follow the exact model’s manual. Put the disconnected saw on a level floor in working position, lock the base as directed, fit the required guard and accessories, and set the fence for the planned cut. Include every rail, wing, shelf, support, handle, and knob used in that operation.

    A product page may quote a compact body and a much larger rip capacity. The current Bosch GTS15-10 specifications, for example, list a 28.1 inch length, 27.8 inch width, and 32.125 inch right rip capacity. Those figures don’t include an eight foot board, the person feeding it, or an outfeed stand.

    Record F, the rear table edge, maximum rail width, table height, dust port, and base outline. If a bench will act as outfeed, check its height and rigidity against the saw instructions.

    Draw the whole stock path, including setup and removal

    With the saw unplugged, mark the blade line and lay a light, full length substitute along the feed axis. Put its leading end at the planned starting gap and trace the trailing end. Slide it to the planned finish position and trace the leading end. This layout check never needs a powered cut.

    Now trace how the stock enters, turns onto the saw, transfers to support, and leaves. A long board can clip a shelf or car before it reaches the blade. A full sheet needs a loading rotation that its straight feed rectangle does not show.

    Label the workpiece and orientation. A 96 by 48 inch sheet has a 96 inch feed length for a lengthwise rip and 48 inches when it travels the other way. The cut must still suit the saw, guide, and manual.

    Overhead view of a garage table saw with the full infeed and outfeed stock path marked on the floor
    Measure from the blade line to the stock’s farthest starting and finishing positions, then add the real support and handling zones.

    Compare stock path scenarios before choosing a saw position

    The table below uses only the geometric 2L sweep. It leaves S and P blank because those values come from the real setup and manual. Use the figures as planning examples, then calculate your working clearances.

    Illustrative stock and feedFeed length LBasic axial sweep 2LAdd to the drawingLikely garage conflict
    48 inch board, rip along its length48 in96 inS + P, stance, rear supportBench drawer or wall storage behind operator
    96 inch board, rip along its length96 in192 inS + P, stand feet, handling routeClosed service door at one end of the path
    96 by 48 inch sheet, lengthwise rip96 in192 inS + P, 48 inch lateral stock span, side support, corner sweepVehicle side, wall cabinet, or fence rail
    120 inch board, rip along its length120 in240 inS + P, support stations, helper position if allowedGarage door, driveway traffic, or storage at the back wall

    For a custom row, write the actual stock size, feed orientation, S, P, F, and R. The garage storage fit calculator can compare fixed room and storage depths, but it cannot decide whether a moving workpiece is stable or whether a cut is appropriate.

    Add stock width, fence travel, and side support

    Length gets the attention. Width is where many garage layouts quietly fail. Set the fence and measure the saw’s full operating width. Add the stock across the blade, offcut support, and room for hands to guide it as the manual directs.

    A sheet needs stable support wherever its weight would pull it off line. One narrow roller may not control a wide panel. The current DeWalt DWE7491RS manual tells users to support long or wide workpieces at the rear, sides, or both, and to allow enough room to handle the workpiece. Choose the operation and support plan first, then see whether the room accepts it.

    Keep lumber and clamps outside the fence’s travel. If a bench is part of the support plan, compare its top, base, drawers, and mobility in the garage workbench buying guide.

    Reserve an operator zone beside the kickback line

    Draw the operator as a moving shape. Mark both feet, a balanced feeding stance, side steps, hand travel, and switch access with the saw unplugged and blade lowered. The stance cannot overlap a car, support leg, cord, or door swing.

    The OSHA table saw guidance says to leave sufficient stock clearance, stand to the side of the blade, keep hands out of the cut line, and support every piece. It also advises against crosscutting long boards on a table saw. OSHA rules address workplaces, but these hazard descriptions help with a home layout. The manual and local requirements still apply.

    Keep the operator upright and away from the blade even in a tight room. If the manual permits a helper, give that person an exact task and floor position.

    Give every infeed and outfeed support its own footprint

    Trace the support base, knobs, and setup route. A roller may sit under the stock while one foot blocks the operator’s step. A folding outfeed table can block a service door. Casters and uneven concrete can let a cabinet move.

    The current SawStop Jobsite Saw Pro manual calls for adequate support so long material does not shift past the table edge. It also gives model specific rules for guards, feeding, and push sticks. Read the manual for the exact model and cut; don’t copy an accessory rule from another saw.

    Set support height on the actual floor in operating mode. Move a light substitute over the whole path. It should neither climb nor drop at a support.

    Treat the garage door and vehicle as changing boundaries

    Draw parking and cutting states. Parking mode shows the vehicle in its normal range, doors and hatch in use, and the saw stored. Cutting mode shows the marked saw position, open supports, staged stock, and the vehicle’s agreed location. Note which doors may open.

    An open overhead door can add length, but the threshold, slope, weather, driveway traffic, people, pets, and door hardware remain. Prevent door movement during the operation and follow both manuals. Record any reliance on good weather or an empty driveway.

    Give a mobile saw a repeatable home within the garage storage plan. Mark its wheel and blade positions. After moving it, recheck level, stability, locks, power, dust connection, and required assembly.

    Mobile table saw parked against a garage wall with its operating position taped beside a vehicle
    Parking mode and cutting mode are separate layouts. A marked operating position makes the changeover repeatable.

    Route the dust hose and power cord outside the movement path

    Connect the actual hose and cord before accepting the layout. Move the fence through its range and roll the saw between its marks. A hose can tug the saw, catch a support leg, or enter the board’s path. A cord underfoot can spoil an otherwise stable stance.

    Route both as their makers allow, away from sharp edges, heat, tires, and the garage door. Use the supply arrangement specified for the saw. Keep plugs and shutoff access reachable without entering the stock path.

    Wall storage can lift accessories off the floor. Check projection and mounting limits in garage wall storage systems. For anything above the saw, measure the lowest point using overhead garage storage clearance.

    Run an unplugged setup rehearsal before accepting the layout

    Tape the saw, rail, support, operator, and stock envelopes in different colors. With the saw disconnected and blade lowered, move a light full size substitute from storage through the traced path. Open the service door, place the dust extractor, and approach the switch. Stop at any collision or unstable foot position.

    Repeat with the longest and widest planned stock; they expose different failures. While equipment stays off, check the household route and decide whether it must close during work. Nobody should cross an active feed or outfeed path.

    Leave the tape down for several days. Parking drift and returned bins expose weak spots. This fit rehearsal does not prove that a cut, support arrangement, or technique is safe.

    Change the operation when the full path will not fit

    Rotate the saw so stock follows the garage’s longer axis, move the vehicle out, or relocate shallow storage. Compare full operating envelopes after every change. A compact parking footprint says nothing about the cutting state.

    Large material may need a different suitable tool and supported breakdown method before smaller pieces reach the table saw. Follow that tool’s instructions. Renting workspace or buying prepared stock beats forcing a ten foot path through a busy doorway.

    Never remove a guard, skip support, stand in line with the blade, or borrow an exit route to rescue the plan. Keep the stock path drawing near the saw. Recalculate when the stock, fence, vehicle, support, or saw changes.

    Before you buy or install

    Check the current manual for the exact product you are considering. Confirm the assembled dimensions, load rules, mounting requirements, included hardware, clearances, warranty, and any limits that apply to your wall, floor, or garage layout.

    Frequently asked questions

    How much table saw clearance do I need for an eight foot board?

    An eight foot board has a basic blade centered sweep of 16 feet: one board length before the blade and one beyond it. Add the model specific starting gap and final travel, then map support, stance, and stock width. Subtract blade to table edge distances only when calculating clear floor beyond the saw body. Check the exact manual.

    Can a workbench be used as a table saw outfeed table?

    Only when the saw manual permits the arrangement and the bench gives stable support at the correct height without trapping the workpiece. Check the real floor, top height, base, casters, drawers, and anything stored on the bench. Trace the worker and door paths too. A nominally matching height does not prove the stock will transfer smoothly.

    Can I point a table saw through an open garage door?

    It may create physical length, but include the threshold, driveway slope, weather, people, pets, traffic, supports, and door hardware in the plan. Prevent door movement during the operation and follow both equipment manuals. If the stock cannot stay fully supported or the outside path cannot be controlled, use another layout or a suitable breakdown method.

    Does rip capacity tell me how much side clearance a table saw needs?

    No. Rip capacity describes a cutting capability relative to the blade and fence. Side clearance also includes the opened rails, full stock width, offcut and panel support, hands, operator stance, knobs, hose, nearby storage, and the stock’s corner sweep during loading. Measure the saw at the intended fence setting with the planned workpiece.

  • Garage Workshop Aisle Clearance: Measure the Space You Actually Use

    Garage Workshop Aisle Clearance: Measure the Space You Actually Use

    Affiliate disclosure: As an Amazon Associate I earn from qualifying purchases. This article may contain affiliate links, and Bay & Bench may earn a commission at no extra cost to you. Read our full Affiliate Disclosure.

    Garage workshop aisle clearance changes with the job, so one borrowed gap cannot describe the whole room. Pull a drawer or stand at the bench, and the empty strip gets smaller. Carry a tote, steer a tool cart, open a car door, or feed a long board through a machine, and its shape changes again. A path that feels generous while the room is empty can vanish during an ordinary job. Measure the garage in those active states, at its narrowest points, and with the people and loads that will use it. Any stated tool clearance, local building rule, fire requirement, or accessibility requirement still applies. The method below helps you find your working envelope; it does not replace those instructions.

    Quick answer

    Don’t choose one workshop walkway width for the whole room. Mark each route by purpose: simple passage, working stance, an open drawer or door, material handling, cart movement, vehicle access, and any mobility device. Measure fixed projections first, add the largest moving part, then walk or roll the real task through a taped mockup. Record the narrowest clear point. Keep exit routes and required access separate, and check local rules plus every tool and storage manual before fixing the layout.

    Plan garage workshop aisle clearance by activity

    A floor plan usually shows cabinets and machines as closed rectangles. That view is useful for storage mode and almost nothing else. Give each busy part of the garage its own state: closed, being opened, in use, and moving through the room.

    A passage is the strip used to get from one place to another. A work zone includes the person’s feet, hips, elbows, and the motion of the task. An open state adds drawers, doors, clamp handles, and vehicle panels. A handling route includes the tote, sheet, board, cart, or mobility device being moved. Those envelopes may overlap at different times, but they cannot occupy the same space at the same moment.

    This distinction prevents a common mistake. The measured gap between a bench and a car might be a workable walking path while the bench is closed. It may fail as soon as a drawer opens or someone turns with a storage bin.

    Map fixed faces before drawing the walkway

    Measure between finished, protruding faces rather than walls on an old plan. Cabinet handles, a benchtop overhang, a vise screw, shelf lips, wall mounted tools, a curb, and car mirrors can all become the true edge. Take readings near the floor, at hip height, and higher up. The tight point may change with height.

    Record doors, steps, posts, appliances, electrical panels, garage door tracks, opener parts, pipes, and anything that must remain reachable. The worksheet in our guide to measuring a garage for storage is a practical place to collect those dimensions.

    Then mark uncertainty. A car will not stop on precisely the same line every night. A bowed wall can steal an inch at one end. Treat the smallest measured gap and normal parking variation as real conditions, not rounding errors.

    Use a worksheet instead of borrowing one aisle width

    Build one row for every route or station. The final dimension comes from the task and the user’s trial, not from averaging the rows. This table is meant to be filled with measurements from your garage.

    Route or stationFixed boundaries to measureOpen or moving state to addTest to performResult to record
    Everyday passageNearest handles, shelves, mirrors, and wall edgesNormal parking variation and items left in placeWalk through carrying the usual tote, bag, or tool caseNarrowest usable point and snag locations
    Workbench in useBench face to the opposing fixed or parked objectDeepest drawer, cabinet door, vise handle, and clampsStand, reach, bend, step back, and change toolsFull working envelope for that task
    Mobile cart routeDoorways, corners, parked tools, and thresholdsCart handle, caster swing, cord, and carried loadPush, turn, stop, and park an empty substituteTurn outline plus a marked parking home
    Long material pathMachine, walls, cars, doors, and storage facesLeading end, trailing end, side sweep, and supportsMove a light full length mockup through the planned operationComplete travel path, including setup and removal
    Mobility and exit routeFinished faces, thresholds, door hardware, and door swingDevice, hands, turning approach, and other usersCheck the real user and applicable requirementsProtected route that storage never borrows

    Store the figures beside the layout, not in your head. The garage storage fit calculator can help reconcile room width, storage depth, and the remaining clear strip, but the physical movement test still decides whether that strip works.

    Measure passage with the load in your hands

    Walking through empty handed is the easiest version of an aisle. Try the trip that happens on a wet Tuesday: carrying recycling, a bulky tote, groceries, a compressor hose, or a project box while a vehicle is parked. Watch elbows and knuckles. Note where the load forces the person to turn sideways.

    Long objects need a different check. A ladder or board rotates around the person carrying it, so the ends sweep well beyond shoulder width. A sheet may need two people and room for both sets of hands. Do not count a nearby bench as part of the path if it will hold a project at the same time.

    Separate household traffic from workshop staging where you can. A plan for garage storage zones and routes can keep daily gear near its destination, which reduces the number of wide loads crossing the work area.

    Add the worker’s stance around a bench or machine

    The worker is part of the machine footprint. At a bench, mark where the toes land during close work and where the hips move while planing or filing. Then see how far the person steps back to inspect or lift a project. Repeat the check while reaching into the lowest drawer. A shallow toe recess may help standing posture, but it does not create room for another person to pass behind.

    Machines add controls, guards, fences, dust fittings, cords, supports, and stock. Read the manual for setup and operating restrictions. If the maker specifies a clearance or a safe operating position, use it. Floor tape cannot cancel an instruction.

    Bench depth, top size, vises, drawers, and mobility all change the working envelope. Compare those parts before buying in the garage workbench buying guide. A smaller top is useful only if the work still fits on it.

    Open drawers, doors, hatches, and vises

    Open every moving part to the position you really use. Measure a drawer from the fixed cabinet face to its outermost handle. Swing cabinet doors through their arcs. Extend pullout bins, folding tops, vise screws, and clamp tails. Then check whether the worker can stand where the contents are visible and lift an item out.

    Do the same with the vehicle parked in its normal range. Driver doors, sliding doors, trunks, hatches, charging leads, and fuel access create different shapes. Two open states that are individually acceptable may collide, such as a bench drawer and a car door.

    Some conflicts can be scheduled. You might open the deep bench drawer only after the car leaves. Write that rule down. If the drawer contains daily tools, though, the arrangement will be annoying from the first week.

    Man working at a garage bench with several drawers and a cabinet door open beside a parked car
    Open drawers and doors occupy the same floor area that looks like a clear walkway when the storage is closed.

    Trace carts and long material through each turn

    A rolling cabinet does not turn inside its body outline. Swivel casters swing, handles project, and the person pushing it needs a place to stand. Tight corners may require a pull, correction, and second push. Tape the proposed route, then steer an empty cart or a light cardboard mockup from its storage home to its work position.

    Check thresholds, floor cracks, slopes, cords, and door tracks. A cart that crosses them badly may twist toward a car or bench. Follow the caster and cabinet instructions for loading, locking, and use on the floor you have. Do not perform the first route test with a fully loaded tool chest.

    For boards and sheet goods, trace the ends, not just the carrier’s feet. Include infeed, cutting or assembly position, outfeed, and the route back out. Keep that sweep away from people entering through a service door. If a helper is normally involved, give the helper a measured stance too.

    Man turning a rolling tool cart through the aisle between a garage workbench and a parked car
    A rolling cart needs space for its handle, caster swing, and turning path as well as the cabinet body.

    Protect mobility routes, exit paths, and stated clearances

    A person using a cane, walker, wheelchair, or other mobility device may need more room at a turn, threshold, latch, or transfer point than a standing adult carrying nothing. Measure the device with the user’s hands and normal approach. Involve that person in the mockup if they want to participate and the test can be done safely. Do not infer a personal fit from a generic aisle number.

    Accessibility, building, fire, electrical, and workplace rules depend on the property, location, use, and project. A home shop, shared building, and commercial workspace may face different requirements. Confirm what applies with the local authority or a qualified professional before construction. Keep required access to panels, appliances, controls, and exits clear.

    Treat an exit route as protected space. A movable cart still blocks it while parked there, and an open drawer can narrow it at the worst time. Manuals for tools, cabinets, heaters, chargers, and garage door equipment may add their own access or separation instructions.

    Tape the room and run three ordinary scenarios

    Mark fixed equipment in one tape color and moving edges in another. Use cardboard to give cabinets and handles real height. A line on the floor will not reveal a shoulder level collision with a shelf or mirror.

    Run the room in three states. First, use storage mode with vehicles and mobile tools parked. Second, use setup mode while carts move, stock comes in, and drawers open. Third, use active work mode with the operator, supports, dust hose, and project in place. Add a fourth state if another household member must pass during work.

    Carry familiar loads and wear normal footwear. Reach the house door, open the deepest drawer, turn the cart, and move a light full size material substitute. Never simulate a powered cut. Leave the tape down for several days so ordinary traffic can expose the awkward spots.

    Recover clearance when the layout fails

    Start by reducing projection, not by asking people to squeeze. Move seldom used items above or outside the busy route. Replace deep floor storage with a shallower wall zone where the structure and product instructions allow it. Our guide to garage wall storage systems compares common rail, panel, and pegboard arrangements.

    Next, question the base. Wall mounted and freestanding garage shelves use floor and wall space differently, and either choice can be wrong near a door, curb, or parked car. Compare the full range of garage storage systems before solving every problem with another cabinet.

    Rotate the bench, give a cart a better home, reverse a door where permitted, or split one congested station into two. After each change, repeat the open state and movement checks. Keep the tape marks that matter. They make creeping boxes and temporarily parked tools easy to spot.

    Before you buy or install

    Check the current manual for the exact product you are considering. Confirm the assembled dimensions, load rules, mounting requirements, included hardware, clearances, warranty, and any limits that apply to your wall, floor, or garage layout.

    Frequently asked questions

    How much garage workshop aisle clearance do I need?

    There is no single width for every aisle. A simple passage, a bench work zone, a material path, a mobility route, and a required exit path solve different problems. Measure the narrowest fixed gap, add open doors or drawers, then test the real user and normal load. Follow any applicable code and manufacturer dimensions.

    Does an open drawer count as part of workbench clearance?

    Yes, whenever the drawer can be open while someone works or passes. Measure to the outermost drawer or handle and include the person’s stance for seeing and lifting its contents. If the drawer may open only after a car or cart moves, make that operating rule explicit.

    How should I plan a workshop route for a wheelchair or walker?

    Measure the actual device, hands, turning approach, thresholds, and door operation with the person who will use the route. Protect that envelope from temporary storage. Also check the accessibility and building requirements that apply to the property and project, since a personal movement test does not establish compliance.

    Can the gap beside a parked car double as a workshop aisle?

    It can serve some tasks if the measured car envelope, normal parking variation, door or hatch movement, worker, and carried load all fit at the same time. Test the parked state with the actual vehicle. Keep hard tool edges and material paths away from the paint, and do not borrow a required exit or access route.

  • Two-Car Garage Workshop and Parking Layout: Make Both Jobs Fit

    Two-Car Garage Workshop and Parking Layout: Make Both Jobs Fit

    Affiliate disclosure: As an Amazon Associate I earn from qualifying purchases. This article may contain affiliate links, and Bay & Bench may earn a commission at no extra cost to you. Read our full Affiliate Disclosure.

    A two car garage workshop and parking layout can behave like three rooms across a typical week. In parking mode, both vehicles come inside and the movable shop disappears to the perimeter. With one car out, its bay becomes a practical assembly zone. When both cars leave, longer tool and material paths can open across the floor. The trick is giving every cart, cord, and workpiece a measured place in each version. The worked room below measures 264 x 252 inches inside. It is not a standard garage size, a clearance recommendation, or proof that the same arrangement will fit another room.

    Quick answer

    Measure both vehicle envelopes first, including mirrors, doors, hatches, charging or fuel access, and normal parking variation. Keep fixed benches and storage shallow at the walls. Put a folding or rolling island in a marked storage spot when both cars are home, move it into the vacant bay for one car work, and center it only when both vehicles are outside. Store a bench upright only when its manufacturer expressly approves that position and provides instructions for stable restraint. Tape all three modes on the floor before buying equipment, then check garage door travel, retrieval routes, open drawers, cords, and the reset sequence.

    Build the two car garage workshop and parking layout around three modes

    Decide what the room must do on a weekday morning, halfway through a project, and at night. Those moments produce three plans: both cars parked, one car beside a flex bay, and both cars outside. Draw each one. A cart that works in shop mode is still a problem if it has nowhere to go when the second car returns.

    Give parking mode priority because it has the least forgiving geometry. Cars stop slightly off their marks, doors move, and people carry bags toward the house. Once those envelopes work, assign the leftover perimeter to a closed bench or shallow storage. The center is shared territory.

    Write one rule for each movable piece. The sample assumes an island that its manufacturer approves for upright storage with the specified restraint. It returns to a marked rear-left position, rolls into the empty left bay, then moves to room center in full shop mode. If the maker does not approve upright storage, plan around the documented folded or parked footprint instead.

    Measure the room, cars, and every moving edge

    Measure between finished surfaces at the floor, mirror height, bench height, and near the ceiling. A curb, bowed wall, column, or cabinet handle can change the useful width. Record the garage opening, tracks, opener rail, sensors, service doors, steps, outlets, panels, pipes, lights, and appliances. The worksheet in our guide to measuring a garage for storage keeps those obstructions on the drawing.

    For each car, note length, body width, mirror width, and where people enter. Trace the driver door at the opening people need, plus the hatch, charging lead, or fuel door. Include normal forward and rearward parking variation. Two cars rarely need equal strips.

    Measure tools stored and operating. Include handles, drawers, vise screws, clamp tails, hoses, cords, and stock passing through a machine. The working outline often matters more than the cabinet beneath it.

    Work through one measured three mode example

    This hypothetical example uses a 264 x 252 inch finished room. Car A is 76 inches across its mirrors and 184 inches long. Car B is 80 inches across its mirrors and 193 inches long. The side bench is 18 x 84 inches. For the arithmetic only, the example assigns a 10 x 60 inch stored envelope to a 30 x 60 inch folding table. Do not use that position or dimension unless the exact table’s manufacturer approves upright storage, documents the stored size, and specifies a restraint that prevents tipping or rolling. All three configurations are examples, not minimums or targets.

    Example modeMeasured placementArithmeticCheck in the actual room
    Both cars parkedBench closed; approved and restrained island at rear left18 inch bench + 22 inch strip + 76 inch Car A + 32 inch center strip + 80 inch Car B + 36 inch outer strip = 264 inchesDocumented storage position, restraint, door arcs, walking posture, mirrors, and house route
    One car flex modeCar B stays right; 30 inch wide island enters the left bayFrom bench face: 30 inches to island + 30 inch island + 70 inches to Car B mirror = 130 inchesWorker, drawers, cords, and project size
    Both cars outside30 x 60 inch island sits at room center99 inches from bench face to island, 117 inches to the opposite wall, and 96 inches at each endTool zones, material paths, dust control, and door movement

    The rectangles reconcile, but they do not certify the layout. Substitute your numbers in the garage storage fit calculator, then use tape to check every open state.

    Parking mode should feel almost uneventful

    With both cars home, the shop is mostly storage. The island returns to its outline, its casters are secured as directed, and nothing remains on top. Use the upright position only if the exact product’s manufacturer approves it, then apply the specified stabilizing or wall restraint. Otherwise, store it in its approved folded position and redo the depth calculation. Drawers close. The vise handle turns inward. Cords and clamps leave the floor.

    In the sample, Car A starts 24 inches inside the threshold and uses 184 inches. A 34 inch rear gap plus the island’s assumed 10 inch stored projection completes the 252 inch depth. Car B uses the same front position, its 193 inch length, and a 35 inch rear gap. Those are arithmetic examples. Bumpers, hatches, steps, and thresholds may change them.

    The strip between mirrors is not a shelf. It carries people and perhaps an open driver door. Keep hard tool edges away from it.

    Two cars in parking mode beside an upright folding workbench and shallow rear tool storage
    Upright storage is only a planning option when the bench maker approves it and specifies a stable restraint. Otherwise, use its approved folded footprint.

    One car mode turns the vacant bay into a flex zone

    This may be the most useful version. One car moves outside while the other keeps its full envelope. The island rolls into the empty bay, away from the center gap. Hands, clamps, and drawers can move without leaning over paintwork.

    The sample island is 30 inches wide and 60 inches long. Its mark leaves 30 inches to the fixed bench and 70 inches to Car B’s mirror. Neither number is a recommended aisle. Stand at the bench, pull a drawer, carry the usual workpiece, and open the parked car’s door in the mockup.

    Keep the island parallel to the vehicle for assembly. Rotate it only after the car leaves if a board or machine path would point toward the paint. Its stored size matters as much as its open top. Our garage workbench buying guide covers top dimensions, bases, drawers, and casters.

    Mobile workbench open in the vacant left garage bay beside a parked silver sedan
    The vacant bay holds the mobile workbench while the remaining sedan keeps a separate parking and door envelope.

    Full shop mode opens the long material paths

    With both cars outside, move the island to its center mark and put mobile machines in their setup outlines. A saw needs stock space before and after the blade. A miter station needs side support. An assembly top needs room for clamps and a person walking around it.

    Mark operating zones in a second tape color. They may overlap when only one tool runs at a time and the idle tool has a stable home. A stock path should never point through a service door someone may open.

    Leave enough room and energy to put every piece away. If one machine blocks the island’s storage spot, the sequence needs work.

    Keep perimeter storage shallow and retrieval paths deliberate

    Deep cabinets look harmless when the cars are outside. Park both first. A 24 inch cabinet may erase a door strip, while a shallow rail can hold daily tools above the bench. Compare cabinets, shelves, rails, and ceiling options in the overview of garage storage systems.

    Measure wall storage loaded. A drill on a hook or a coiled hose projects past the bare panel. Keep daily hand tools near the bench, dense cases low, and long tools in retainers that stop them falling toward a car. Our garage wall storage systems guide compares tracks, slatwall, and pegboard.

    Plan retrieval with both cars home. Supplies, recycling, sports gear, and the house door need routes that avoid paintwork. The sample’s 32 inch strip between mirrors is only a proposal. Carry the normal bag or bin through the taped room before accepting it. Move anything that requires unfolding the workshop for access.

    Check the vertical layout, power, and messy work

    A floor plan hides door panels moving overhead, an open hatch rising into a cabinet, and a ladder beside a track. Draw a side view with the door closed, partly open, and fully open. Include the opener rail, release cord, lights, hatches, cabinets, and tallest tool. Our overhead garage storage clearance guide organizes that check.

    Place power so leads avoid tires, service doors, and the route between cars. Permanent wiring must follow local requirements and may need a qualified electrician. Follow the manuals, and do not use an extension lead as hidden permanent wiring.

    Sawdust, sparks, vapors, welding, fuel work, and battery charging need more than a floor plan. Move vehicles outside for work that could coat or damage them. Use the ventilation and separation required for the process, and keep flammables away from ignition sources.

    Make the reset sequence short and visible

    Mark a home outline for the island, mobile cabinet, shop vacuum, and each wheeled machine. It may seem fussy until the second car arrives in the rain. Then the outline answers one question: where does this go?

    Reset from the outside inward. Store long stock and machines before folding the island. Empty its top, hang clamps and cords, close drawers, and sweep the parking lanes. After drilling or metal work, look for sharp fragments and use the cleanup tool suited to the debris.

    If reset resembles a precise puzzle, remove one piece. One rolling table with storage may earn its place better than carts that trap each other. Keep brakes, folding hardware, and wall restraints accessible and follow their manuals.

    Rehearse each operating mode before buying equipment

    Tape both cars, the closed bench, open island, and proposed cabinets. Add cardboard at cabinet depth and a strip for handles. Mark door arcs and drawers in another color. Leave the mockup down while the household parks, unloads groceries, reaches the service door, and retrieves common gear.

    Run the garage door only after people and loose objects are clear. Open each car door and hatch. Carry a typical project box around the island. Roll empty substitutes through machine paths before moving heavy tools. A plan that fails on a dull Tuesday will be worse during a project.

    Install in stages. Start with the wall system or bench, repeat the parking check, then add one mobile piece. Our guide on how to plan garage storage helps place household items before the workshop absorbs every surface. Choose the layout that returns to parking mode without negotiation.

    Before you buy or install

    Check the current manual for the exact product you are considering. Confirm the assembled dimensions, load rules, mounting requirements, included hardware, clearances, warranty, and any limits that apply to your wall, floor, or garage layout.

    Frequently asked questions

    Can a two car garage hold two cars and a workshop?

    Sometimes. Both measured vehicle envelopes must fit with their door, hatch, charging or fuel access, and the household’s walking routes. Fixed storage then has to stay at the perimeter, while the island and mobile tools need marked storage positions for two car parking mode.

    Where should the workbench go in a two car garage?

    A shallow side or rear wall position often preserves the open bays, but doors, steps, utilities, and vehicle length may rule out either wall. Measure the bench with its vise, handles, drawers, and user space. A folding or rolling bench can work when its closed position is genuinely compact.

    How wide should the path between two parked cars be?

    There is no universal figure for every garage, car, or user. Start with the actual mirror positions, then open the needed doors and carry the items that use the route. Check applicable building, access, and equipment requirements rather than treating the 32 inch example in this article as a rule.

    Can a rolling workbench stay between the cars?

    It is usually a poor storage spot because it occupies door and retrieval space and puts hard edges near both vehicles. Give the bench a marked wall or rear storage position for parking mode. Use the center only after the cars leave and the bench’s operating clearance has been checked.

  • Half of a Two-Car Garage Workshop Layout: Keep One Bay Usable

    Half of a Two-Car Garage Workshop Layout: Keep One Bay Usable

    Affiliate disclosure: As an Amazon Associate I earn from qualifying purchases. This article may contain affiliate links, and Bay & Bench may earn a commission at no extra cost to you. Read our full Affiliate Disclosure.

    A half of a two car garage workshop layout works only when the parked side remains usable on an ordinary day. A clean floor plan alone cannot prove that. The car needs room for its mirrors, door, hatch, charging cable or fuel door, and the path people use to reach the house. The shop needs a bench, tool access, task light, and operating room for each machine. Those demands meet at the center boundary.

    To show the arithmetic, the worked example uses a measured 21 x 20 foot interior. That is not a standard two car garage size or a recommended minimum. Replace every sample figure with measurements from your room, car, and tools.

    Quick answer

    Reserve the parking envelope first, including the car’s widest point and every open state you use. Mark its inner edge with tape. Keep fixed benches and deep cabinets against the workshop side wall, park mobile equipment fully inside that boundary, and treat rear wall storage as a separate clearance problem. Before buying anything, run the garage door, open the car doors and hatch, pull out bench drawers, and carry a normal project through the remaining path.

    Mark the boundary in half of a two car garage workshop layout

    Start at the finished walls, not at a concrete seam or the visual center of the garage door. Measure the interior width at the floor, workbench height, and mirror height. A foundation curb, bowed wall, center post, or projecting handle can change the useful width at each level. Record the door tracks, opener, sensors, steps, outlets, panels, windows, and service door as well. The room sheet in our guide to measuring a garage for storage catches many of these easy to miss projections.

    Now park the car where it can enter without a fussy correction. Mark its tires and mirror edges. Open the driver door to the position actually needed, lift the hatch, and trace those movements with tape. The workshop boundary belongs outside that complete parking envelope. It may land near the middle of the room, but it does not have to.

    Use a bright tape color and carry the line from the garage opening to the back wall. The line is not decoration. Any wheel, drawer, cord, clamp, or board that crosses it has borrowed space from the car bay.

    Overhead view of a taped center boundary with workbenches and rolling tools confined to one garage bay
    Mark the protected parking edge before placing the bench, then keep stored equipment on the workshop side of the tape.

    Work through one measured starting plan

    The sample below shows how the arithmetic can work. It describes a finished 252 x 240 inch interior with the parked car on the left and the shop on the right. The vehicle measures 78 inches at its mirrors and 188 inches bumper to bumper. In this hypothetical example, 12 inches sit between the passenger mirror and outer wall, while 36 inches remain between the driver side mirror and the taped boundary. The sketch assumes that the driver door can open far enough within that space, but the number does not prove it. Park your exact vehicle in its normal position, open the door as people actually use it, and move the boundary if the test fails.

    Item in the sampleMeasured figurePlanning use
    Finished room252 inches wide by 240 inches deepActual inside surfaces, not the nominal building size
    Parking side126 inches wide12 inch wall gap + 78 inch car + 36 inch driver side space
    Workshop side126 inches wideEverything stored here stays inside the taped boundary
    Fixed side bench24 x 96 inchesLeaves 102 inches from bench front to the boundary before people or projects enter
    Rolling assembly cart30 x 60 inchesParks lengthwise under the bench overhang or in a marked rear spot
    Rear cabinet candidate12 inches deepAllowed only where bumper, hatch, service door, and walking checks still pass

    The numbers show relationships, not a clearance rule. Put your own room width, car envelope, and storage projections into the garage storage fit calculator, then confirm the result with tape. A total that works on paper can still fail at a door handle or open drawer.

    Put the fixed bench on the outside edge

    A bench against the workshop side wall gives the center boundary some peace. In the sample plan, the 24 inch deep bench runs only 96 inches, leaving part of the wall free for a tall tool or a turning path. A full length bench would create more surface, but it could trap a mower, crowd a side door, or encourage permanent piles.

    Choose depth from the work you do most often. Add the vise, backsplash, drawer handles, clamp tails, and anything mounted behind the top. The listed cabinet depth rarely equals the largest operating projection. Our garage workbench buying guide explains top size, base styles, storage, and caster details.

    A mobile cart can fill the open floor when the vehicle is away, provided it has a real parking spot afterward. Measure that spot with the cart loaded and its handles attached. If putting it away requires lifting tools, folding stock, and moving three bins, it will eventually live in the center lane.

    Protect the car bay in every open state

    The parked footprint is the smallest version of a car. The usable envelope includes the approach angle, mirrors, the door arc, an open hatch or trunk, and the person carrying bags around it. If a child seat is loaded from the workshop side, trace that wider door position too. A charging lead needs a route that cannot be pinched by a tire or turned into a trip line.

    Repeat the check with the car a little forward and a little rearward. People do not stop on the same inch every night. A wheel stop can improve repeatability if it suits the floor, vehicle, and door operation, but it should be located only after the actual parking position is settled.

    Keep sharp tools and projecting handles away from the inner edge. Even when the car fits, brushing a saw fence while getting out makes the arrangement tiresome. That irritation is useful information. Move the shop boundary before buying more equipment.

    Keep the center boundary deliberately empty

    The center strip attracts temporary objects because it looks like spare floor. Give it one job: separation. Do not park the shop vacuum there, lean sheet goods across it, or let lumber rest on the car side while it feeds through a saw. A narrow strip of clean floor is more useful than another shallow rack.

    Drawers near the boundary should open toward the work area or remain far enough back that a person can use them without stepping beside the car. Caster brakes, floor slope, and bumps matter too. Turn the wheels of stored carts away from the line and lock them as their instructions direct.

    Loose cords are frequent trespassers. Put power at the wall or overhead only where the cord can reach the tool without crossing the vehicle path or garage door travel. Unplug and store temporary leads when workshop mode ends.

    Make rear wall storage earn the word shared

    The back wall often spans both bays, yet it is rarely one continuous storage opportunity. The parked side may need bumper space, hatch travel, or access to a door into the house. The shop side may need room behind a bench tool, a dust collector drum, or long stock. Design each part of the wall around the activity in front of it.

    In the sample, a 12 inch deep cabinet is only a candidate. With a 240 inch room and a 188 inch car, 52 inches remain in the length before the cabinet, front threshold, bumper gaps, and parking variation are deducted. That arithmetic does not prove the cabinet fits. Tape its full depth, park normally several times, and open the hatch.

    Closed cabinets can keep household supplies away from shop dust, while open shelving makes bins faster to reach. Compare those roles in the overview of garage storage systems. Keep the service door, electrical equipment, appliances, vents, and required access clear.

    Shared garage rear wall with storage cabinets between a side workbench and a parked SUV
    Rear storage works as a shared zone only after the parked vehicle, service door, and workshop access are measured together.

    Use shallow wall storage where hands can reach it

    Tool rails, pegboard, and slatwall can keep the workbench clear without filling the floor. Measure the loaded system, not the bare panel. A drill on a hook, a coiled hose, or a shelf lip may project several inches beyond the advertised panel depth.

    Place daily hand tools near the bench and dense cases low. Long handled tools need clips that prevent them from falling toward the car. Avoid hanging anything above the parking side simply because there is open wall; a failed hook should not drop a steel tool onto the vehicle.

    The comparison of garage wall storage systems covers rails, pegboard, and slatwall attachment patterns. Follow the selected product’s mounting instructions and verify what is behind the wall before drilling.

    Draw the garage door hardware in side view

    A floor plan hides tracks, hinges, springs, opener rails, release cords, and door panels as they travel. Measure their lowest points with the door closed, partly open, and fully open. Then add the height of wall cabinets, a raised vehicle hatch, task lights, and anything stored on top of a tall cabinet.

    Do not mount lumber racks or lights where they obstruct service access to the door system. Keep tools and storage away from photo eyes, cables, springs, and tracks. Garage door springs and related parts can carry dangerous tension, so repairs and alterations belong with a qualified professional.

    Use the overhead garage storage clearance guide to make the vertical drawing. Ceiling height alone says little about what the moving door occupies.

    Give workshop mode a closing routine

    A shared garage stays usable because the reset is short. Give the rolling cart one outlined parking spot. Hang the extension lead. Close drawers. Lower the vise handle, clear the boundary, and sweep fasteners from the parking side before the car returns. A magnetic sweeper is useful after drilling or metal work, but a visual floor check still matters.

    Dusty cutting, grinding, finishing, welding, fuel work, and battery charging need precautions beyond layout. Follow tool and product instructions, provide suitable ventilation, separate ignition sources from flammable vapors, and keep the vehicle outside when the job could coat or damage it. Local electrical and fire requirements apply to wiring, storage, and hazardous materials.

    If the reset takes twenty minutes, reduce the number of mobile pieces. One cart that rolls home easily beats a row of machines that must be shuffled in order.

    Rehearse parking and workshop reset for several days

    Tape the bench, cabinet, cart, and parking envelope on the floor. Add cardboard at the proposed bench depth so the projection feels real. Mark open drawers and tool operating zones with a second color. Then leave the mockup in place for several days.

    Park after dark, bring groceries through the house door, remove a bicycle, and wheel the trash bin out. Simulate one common project with empty boxes as workpieces. The plan should survive those dull routines. They expose problems that a carefully staged Saturday afternoon will miss.

    When the room works, build in stages. Install the fixed bench or wall system, check the car again, then add mobile storage. The broader process in how to plan garage storage helps when sports gear, garden tools, and household overflow compete with the shop for the same wall.

    Choose the layout that leaves one honest parking bay

    The strongest layout may look a little underfilled. That open center boundary is what lets a car door move, a person pass, and a rolling tool return home without a nightly puzzle. Keep fixed pieces on the outside wall, make mobile pieces easy to park, and question every object assigned to the shared rear wall.

    Recheck the room whenever the vehicle or a large tool changes. One new mirror width, hatch arc, vise, or cabinet handle can alter the fit. The tape line can move. Heavy cabinets are much less cooperative.

    Before you buy or install

    Check the current manual for the exact product you are considering. Confirm the assembled dimensions, load rules, mounting requirements, included hardware, clearances, warranty, and any limits that apply to your wall, floor, or garage layout.

    Frequently asked questions

    Can I build a workshop in half of any two car garage?

    No layout works in every garage. Measure the finished room, vehicle envelope, door hardware, utilities, service doors, and each tool in stored and operating positions. Some rooms can support a fixed bench in one bay, while others need folding or mobile equipment.

    Should I divide the garage exactly down the middle?

    Only if the measured parking envelope and garage door system support that line. The useful boundary may sit off center because of the driver’s door, wall steps, a center post, or different storage projections.

    How deep should the workbench be beside a parked car?

    Choose the shallowest depth that supports your common work, then add the vise, handles, wall tools, clamps, and operator space. The 24 inch bench in this article is a worked example, not a recommended depth for every room.

    Can storage span the rear wall behind both bays?

    Sometimes. Check bumper position, parking variation, hatch travel, service door access, and the operating space behind workshop tools. A shallow cabinet may fit one section while another section needs to remain open.

  • One-Car Garage Workshop Layout: Three Measured Starting Plans

    One-Car Garage Workshop Layout: Three Measured Starting Plans

    Affiliate disclosure: As an Amazon Associate I earn from qualifying purchases. This article may contain affiliate links, and Bay & Bench may earn a commission at no extra cost to you. Read our full Affiliate Disclosure.

    A one car garage workshop layout has to solve a slightly rude geometry problem: benches need depth, cars need room around them, and tools need space beyond their footprints. A measured layout tied to your room, vehicle, and equipment solves it. The examples that follow use 10 x 20 foot and 12 x 20 foot interiors for planning, not as standard garage sizes. One favors shop work, one keeps overnight parking, and one shares the room. Borrow the logic, then replace every sample number with your own.

    Quick answer

    Start with the parking decision. If a car rarely enters, put a fixed bench on the rear wall, shallow storage on one side, and mobile tools in the center. If parking comes first, use a folding bench and work only with the car outside. For shared use, a measured 12 x 20 example can fit a 20 inch side bench beside a 72 inch vehicle envelope, but only after door swing, walking room, and the opposite wall are included in the arithmetic.

    A one car garage workshop layout begins with hard boundaries

    Measure finished wall to finished wall at the floor, bench height, and shoulder height. Garages are not always square, and a curb or foundation ledge can steal useful depth. Then record the door opening, tracks, opener, steps, service doors, windows, outlets, panels, pipes, and anything that must remain reachable.

    Next, make a vehicle envelope from the actual car. Include mirrors, charging cable or fuel door access, the hatch at full height, and the door opening you use. A 72 inch wide car does not consume only 72 inches when someone has to get out. Our guide to measuring a garage for storage gives you a room sheet for those obstructions.

    Finally, measure equipment twice: once stored and once operating. A table saw may have a compact cabinet yet need several feet in front and behind for stock. A miter saw needs side support. Mark both envelopes, because the operating one decides whether the shop works.

    Three measured starting plans at a glance

    These dimensions are deliberate examples, not recommended minimums. The 10 x 20 and 12 x 20 rooms are measured interior rectangles after wall finishes. Real doors, columns, steps, and utilities reduce them. The vehicle in the parking examples uses a measured 72 x 180 inch envelope that includes its mirrors, but not its open doors.

    Starting planMeasured room exampleFixed work and storageMovable elementSpace rule in this example
    Workshop first10 x 20 feet24 x 96 inch rear bench and 18 x 144 inch side shelving30 x 60 inch center cartThe cart has two 36 inch side passages where it overlaps the shelving
    Parking first10 x 20 feet7 inch deep folded bench that opens to 24 x 72 inches72 x 180 inch vehicle envelopeThe car leaves before the bench opens or tools enter the floor area
    Shared use12 x 20 feet20 x 72 inch side bench with 12 inch deep upper storage24 x 48 inch cart stored under the bench20 inch bench + 36 inch gap + 72 inch car + 16 inch gap = 144 inches

    Run your substituted numbers through the garage storage fit calculator. A plan stops being plausible as soon as one required door, drawer, or path cannot open.

    Plan 1: a workshop first 10 x 20 example

    This plan assumes the garage does not hold a car on a normal night. Put the 24 x 96 inch bench across the rear wall, leaving the ends free where a side door, corner pipe, or long board needs passage. An 18 inch deep, 12 foot shelf run occupies one long wall. On the open floor, a 30 x 60 inch cart provides assembly space and rolls aside for sheet goods or a wheeled machine.

    The width calculation is simple. The 120 inch room loses 18 inches to shelving. Centering a 30 inch cart in the remaining 102 inches leaves 36 inches on either side. That figure applies only along the overlapping section and does not certify a safe aisle. Handles, vises, bowed bins, and a person at the bench can narrow it.

    Choose the rear bench depth after checking the jobs and clamps you own. The garage workbench buying guide covers depth, base style, mobility, and load wording before you commit floor space.

    Plan 2: a parking first 10 x 20 example

    Here, parking is nonnegotiable and workshop mode begins when the car moves to the driveway. A wall bench folds to 7 inches deep and opens to a 24 x 72 inch top. That folded dimension must include brackets, handles, and anything left on the wall behind it. A tool rail on the side wall stays shallow enough to clear the measured mirror and walking path.

    The sample 72 x 180 inch vehicle leaves 60 inches of total room length inside a 20 foot interior before any bench, bumper gap, or door threshold is counted. Divide that remainder according to the actual garage door, nose clearance, and rear access. Do not center the car by habit. Offset it only after the driver’s door, passenger access, and wall equipment have been tried with tape.

    This is a tidy arrangement, but it has a firm rule: the bench never opens over the vehicle. Casters stay locked when mobile storage is parked, and loose tools return to closed cabinets before the car comes in.

    Car parked in a narrow garage with a wall mounted workbench folded flat beside it
    The parking first plan treats the clear vehicle envelope as fixed and changes the workshop around it.

    Plan 3: a shared use 12 x 20 example

    The extra 24 inches of width changes the arithmetic, though it does not create a full machine shop beside a parked car. In this example, a 20 inch deep bench runs 72 inches along the driver’s side wall. The measured car envelope is offset toward the opposite wall. From left to right, the cross section is 20 inches of bench, a 36 inch gap, 72 inches of vehicle, and a 16 inch wall gap. Together they use the full 144 inches.

    The 36 inch strip is a working gap in this particular sketch, not a universal aisle standard. Test whether the driver’s door can open far enough and whether a person can pass without touching a vise or sharp tool. Place the bench away from the widest part of the door swing if the room allows.

    A 24 x 48 inch cart nests below the bench. With the car parked, the room supports quiet hand work at the bench. The car leaves before the cart rolls out, long stock appears, or a tool throws dust and chips into the vehicle.

    Taped car footprint next to a mobile wood workbench and wall tool storage
    The shared use example reserves a measured car footprint before assigning the remaining strip to a bench.

    Treat every moving object as a larger envelope

    Footprints are the easy part. Open states cause most collisions. Draw the garage door and tracks in their lowest position. Lift the vehicle hatch and measure its highest point. Swing service doors through their full arc. Pull every planned drawer out, open cabinet doors, and add the space your hands need at a vise.

    Do the same for tools. Add infeed and outfeed length to a saw, the operator’s standing area at a grinder, and the hose bend behind a dust collector. Two operating envelopes may overlap if those tools are never used together and one can be moved safely. A fixed bench cannot make that promise.

    Ceiling storage deserves its own section drawing. The overhead garage storage clearance guide helps map door travel, opener hardware, lighting, hatch height, and reach. Measure at several door positions rather than trusting a single ceiling height.

    Keep storage out of the work stroke

    A narrow shop gets worse when every wall becomes deep storage. Put frequently used hand tools within one step of the bench, but keep the surface above a saw’s stock path clear. Long handled garden tools belong where they cannot fall into the vehicle lane. Heavy cases sit low, preferably close to the point of use, so they do not have to cross the room.

    Shallow rails, pegboard, or slatwall can turn an awkward wall into useful tool storage. Their hooks and loaded tools project farther than the panel, so measure the finished depth with the bulkiest item attached. Compare attachment options in the garage wall storage systems guide.

    Reserve some empty capacity. A shelf packed on day one pushes the next tool onto the bench or floor. One open bay under the bench and one unassigned wall section give the layout somewhere to absorb change.

    Plan power, light, dust, and hot work as separate layers

    Mark outlets before placing the bench. A cord across the car path or service door is a layout failure, even when the tool fits. Permanent wiring, added circuits, and outlets in a garage may need an electrician and must follow local requirements. Extension cords should follow their product instructions and should not become hidden permanent wiring.

    Task light belongs in front of the worker so the body does not shadow the cut line. Check whether open cabinet doors block it. Dust collection needs room for the hose, drum removal, and filter service, not just the machine body. Route hoses where a vehicle tire cannot crush them.

    Grinding, welding, finishes, fuel, and battery charging need their own precautions. Read the product instructions, separate incompatible activities, and keep ignition sources away from flammable vapors. A shared garage often works best when dusty or hot jobs happen only with the car outside and the nearby storage cleared.

    Mock up the room before buying the heavy pieces

    Use painter’s tape for the car, bench, shelves, and stored machines. Add a second tape line for each open door or operating tool. Cardboard boxes make convincing cabinets because you can feel how a 12 or 18 inch projection changes the room. Leave the mockup in place for several normal days.

    Park using the usual approach, carry groceries through the service door, take out the mower, and reach the electrical panel. Then simulate a project with empty boxes standing in for workpieces. Awkward turns show up quickly. So do wall sections that looked free on paper but sit behind an open car door.

    Photograph the tape and write the measurements on the image. That record is useful when comparing products, since a listed overall dimension may include feet, handles, hinges, or a top that overhangs the frame.

    Let the parking routine choose the plan

    Pick workshop first when the center floor supports projects more often than parking. Pick parking first when the car must come inside every night and you can accept a setup ritual. Choose shared use when light bench work needs to remain available with the car present, and when your measured width supports that arrangement.

    None of the three plans is permanent. Start with the fixed boundaries, buy the least movable item last, and keep rolling pieces genuinely easy to relocate. If tools, sports gear, and household supplies also compete for the room, use the broader process in how to plan garage storage before assigning the last open wall.

    Useful products to compare

    These links open current Amazon search results so you can compare dimensions, manuals, ratings, and availability for the exact models on your shortlist.

    Before you buy or install

    Check the current manual for the exact product you are considering. Confirm the assembled dimensions, load rules, mounting requirements, included hardware, clearances, warranty, and any limits that apply to your wall, floor, or garage layout.

    Frequently asked questions

    Can a one car garage hold both a workshop and a parked car?

    Sometimes. Measure the finished room, the vehicle with mirrors, door and hatch movement, and the open depth of the bench. A folding bench supports parking first use. A wider room may allow light bench work beside the car, while machines and long stock still require the car to move outside.

    Is 10 x 20 feet a standard one car garage size?

    No. It is only a planning example in this article. Actual garages vary, and nominal building dimensions may not match the finished interior. Measure at several heights and account for curbs, steps, framing, utilities, and the garage door system.

    How deep should a workbench be in a narrow garage?

    Use the shallowest depth that supports your regular workpieces, clamps, and tools. The examples use 20 and 24 inch tops, but those are not universal targets. Tape the proposed depth on the floor, open the car door, and test your reach before choosing.

    Should the workbench go on the side wall or rear wall?

    A rear bench suits a workshop first room because it leaves both long walls available for shallow storage. A side bench can suit shared use if the measured car envelope and door swing leave a workable gap. Garage doors, service doors, windows, and utilities may settle the choice.