
Affiliate disclosure: As an Amazon Associate I earn from qualifying purchases. This article may contain affiliate links, and Bay & Bench may earn a commission at no extra cost to you. Read our full Affiliate Disclosure.
The best power tool organizer for garage use starts with the tools you reach for, not the number of drill slots in an online photo. Pistol grip tools hang neatly from a narrow opening. A circular saw wants a supported shelf. A jigsaw can snag by its base, and a sander sheds dust on whatever sits below it. One rack rarely treats every shape well.
This shortlist covers three open access wall stations, one modular case rack, and a simple cubby shelf. The named products use current manufacturer information. Check the exact accessory compatibility and installation guide before purchase, since each wall system has its own plates, slots, and load rules. Keep chargers and battery care separate from the question of where tool bodies hang.
Quick answer
Wall Control’s three slot steel holder is a good compact choice when you already use its metal pegboard. Milwaukee’s Packout Tool Station fits drills and similar tools on a modular plate. The Ryobi Link shelf gives a broader landing area, while DeWalt ToughSystem racking suits tools that stay inside compatible cases. A plain deep cubby shelf remains the best answer for mixed saws, sanders, and odd shapes.
Best power tool organizer for garage walls at a glance
Choose by access pattern. Bare tools used every week benefit from open slots. Dusty, delicate, or rarely used tools often deserve a case or enclosed cabinet. The wall and fasteners remain part of the system.
| Setup | Storage method | Published detail | Best fit | Main limit |
|---|---|---|---|---|
| Wall Control drill holder | Three hanging tool openings | 14 gauge steel, proprietary slotted panel | Compact drills and drivers | Tool geometry varies |
| Milwaukee Packout Tool Station | Open tool slots on wall plate | 25 pound capacity | Daily cordless tools | Needs compatible mounting plate |
| Ryobi Link organizer shelf | Shelf with hanging positions | System accessory | Tools plus cases or supplies | Best inside one wall ecosystem |
| DeWalt ToughSystem rack | Adjustable arms support cases | Up to 440 pounds overall | Cased tools and portable modules | Deep wall projection |
| Open cubby shelf | Supported individual bays | Depends on build or product | Saws, sanders, mixed shapes | No automatic retention |
The garage wall storage systems guide helps compare the base panels before you choose an accessory.
Wall Control drill holder for a compact metal pegboard
Wall Control’s ASM-DR-314 is a three position holder made from 14 gauge steel. The manufacturer page describes openings that are 3 by 3.5 inches at the front, narrowing to 1.75 inches at the bottom. Three upper slots can hold batteries. The rack works with Wall Control’s slotted metal panels rather than ordinary standalone pegboard.
This is a tidy fit for compact drills, impact drivers, and similar pistol grip tools. Belt clips, wide battery packs, side handles, and unusually thick grips can change the hanging position. Wall Control notes that some tools fit battery up while others work better battery down. Test each one without forcing it.
The steel construction is appealing, but the rack does not set the capacity of the whole wall. Panel attachment, load position, and the substrate still matter. Use it when you already own the compatible panel or want a metal pegboard with movable accessories.
Milwaukee Packout Tool Station for modular open access
The Packout Tool Station 48-22-8343 locks onto Packout wall plates and provides quick access slots for drills, impact wrenches, and similar tools. Milwaukee’s official page lists a 25 pound capacity and an impact resistant polymer body. The station is one piece in a broader plate and accessory system.
Its strength is rearrangement. A tool station can move when a bench layout changes, and other hooks or shelves can share the wall plate. That flexibility makes more sense when several compatible accessories will be used. Buying a complete plate for one drill may be an expensive way to avoid a simple shelf.
Twenty five pounds is a limit for the station, not a target. Weigh the actual tools with batteries attached, distribute them as instructed, and keep long bits from pointing into the aisle. Confirm the plate’s own wall capacity and fastening pattern before planning a row.
Ryobi Link organizer shelf for a broad landing zone
Ryobi’s STM401 Link Tool Organizer Shelf combines hanging positions with a shelf surface. The official support page provides the product manual and identifies it as part of the Link system. That manual is the place to confirm current mounting, capacity, and compatibility information for the exact unit.
A shelf changes the use case. Chargers, bit cases, or a compact sander can sit above hanging drills, provided every item stays within the stated limits and cannot vibrate off. The arrangement is denser than separate hooks, which is useful above a short bench. It also concentrates load and cord clutter in one spot.
This option suits an owner already committed to Link rails. System compatibility matters more than paint color. Do not assume a hook or shelf from one brand will lock safely into another brand’s rail just because the profiles look close.
DeWalt ToughSystem rack for tools that live in cases
Some tools should stay in their cases. The DeWalt DWST08260 workshop rack uses adjustable arms to support compatible ToughSystem modules. DeWalt’s product page lists up to 440 pounds overall and describes brackets that can accept a shelf add on. It is a wall rack for modules, not a row of bare drill cradles.
This format works for routers, specialty saws, nailers, and kits that travel outside the garage. The case keeps accessories with the tool and controls dust. Sliding a module onto open arms can also be easier than unstacking a tower. On the other hand, the rack projects far enough to deserve a careful aisle check.
Use only compatible modules and follow the current installation manual. The overall rating does not cancel bracket limits, wall requirements, or uneven loading. Put the heaviest cases lower and keep handles clear for a two handed lift.
Open cubbies for saws sanders and awkward bodies
A plain shelf divided into bays often beats a purpose built drill rack for a mixed tool collection. Circular saws sit on their shoes, jigsaws stand on their bases, and sanders rest without hanging from a dust port or cord. Each cubby can hold the tool’s immediate accessories in a shallow bin.
Depth needs care. Support the full base without burying the tool against the back. Leave hand room above the grip, keep sharp accessories removed or guarded, and prevent cords from dangling. If you build the shelf, use material, joinery, wall attachment, and span dimensions suitable for the loaded weight. A pretty row of plywood boxes is still structural storage.
Open cubbies are forgiving when brands and battery platforms change. Their weakness is dust and security. Put dusty tools below clean ones, vacuum shelves often, and use a lockable cabinet for tools that should not remain visible.
Measure every tool against the rack opening
Measure the narrowest part of each grip, the width of its battery, and every projection that must pass through the opening. Belt clips are common troublemakers. So are side handles, belt hooks, dust bags, and large capacity batteries. A drill that fits bare may jam once equipped for work.
Make a cardboard template of the advertised opening and test the tool over a padded bench. Consider how you will lift and return it. If the tool needs to twist around a neighboring handle, the spacing is too tight. Leave room for future batteries, which are often wider than the compact packs sold in starter kits.
The garage pegboard layout guide explains why the most used items belong between shoulder and hip height. Put lighter occasional tools above or beside them. Heavy tools should never require a stretched one handed lift.
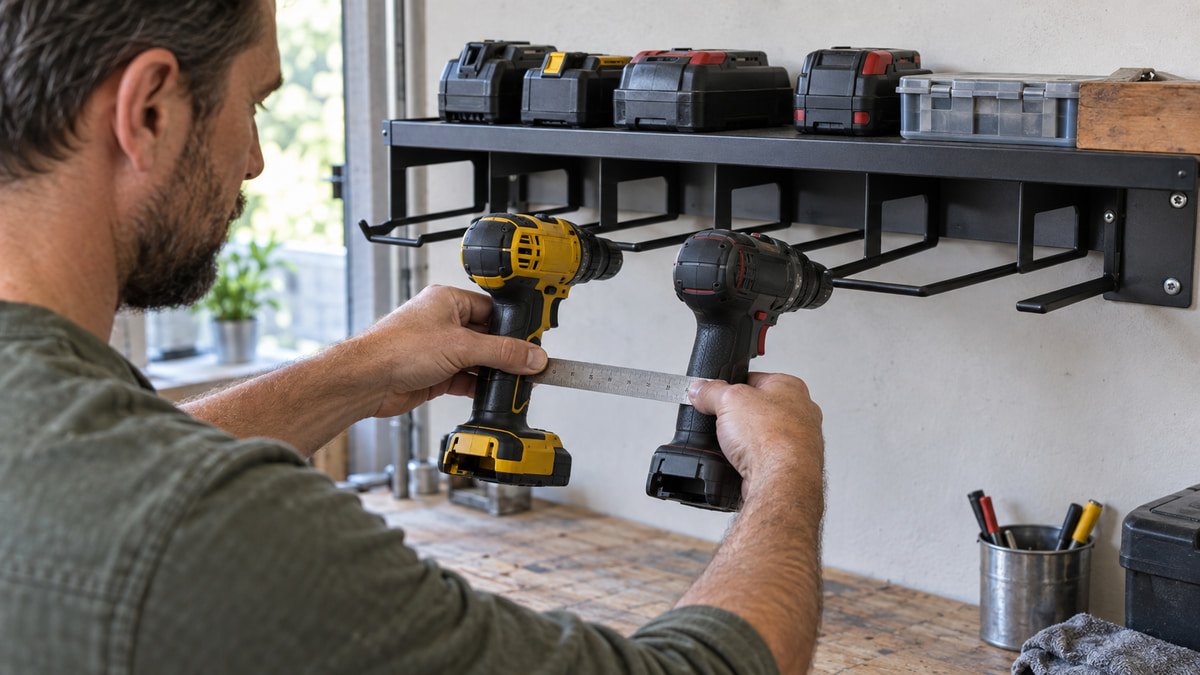
Support saws and sanders by stable surfaces
Hang a tool only from a point meant to carry it. A drill handle can rest in a shaped slot when the fit is secure. A circular saw belongs on its shoe or in its case, with the blade guard closed. A random hook through a plastic opening may stress the housing or let the tool rotate into the wall.
Sanders and grinders carry dust. Empty collection bags, wipe vents, and store abrasive accessories in their own bin. Remove blades or discs when the tool instructions call for it, and never leave a sharp edge where a reaching hand can meet it. Keep guards installed.
Plan a stable landing zone near the rack so you can set a tool down while opening a case or removing a battery. The garage tool storage guide is useful for mapping that short trip from wall to bench. Good storage reduces awkward carrying, not merely visible clutter.
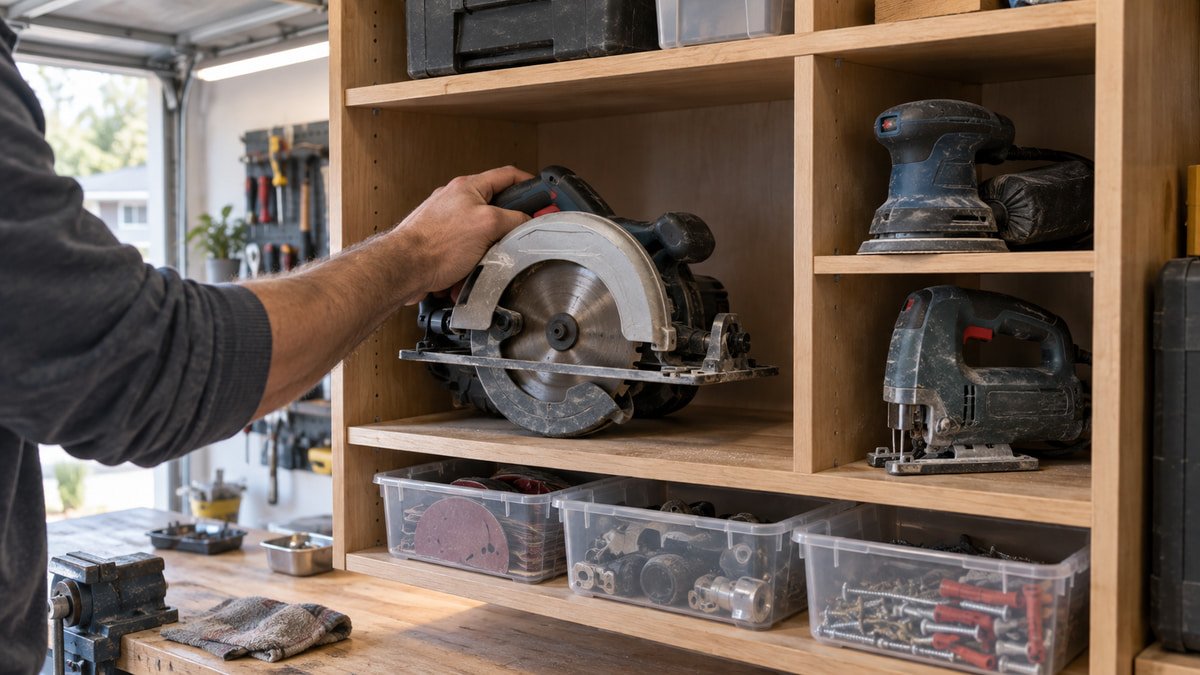
Mount the empty system into suitable structure
Install wall storage before loading it. Locate the structure, check for hidden utilities, and use the manufacturer’s required fasteners and hole pattern. A backing board can bridge stud positions and give accessories a clean surface, but the board itself must be securely fixed and sized for the load.
Hold the empty rack at the intended height. Check the garage door, vehicle doors, bench light, and longest tool. Then fasten, level, and test the unloaded system. Add one light tool at a time while watching for movement or flex. Stop if a fastener loosens, the panel bows, or a bracket fails to seat.
The slatwall, pegboard, and track comparison covers the different attachment families. If you are choosing between metal and fiberboard panels, the metal versus wood pegboard guide gives the practical tradeoffs.
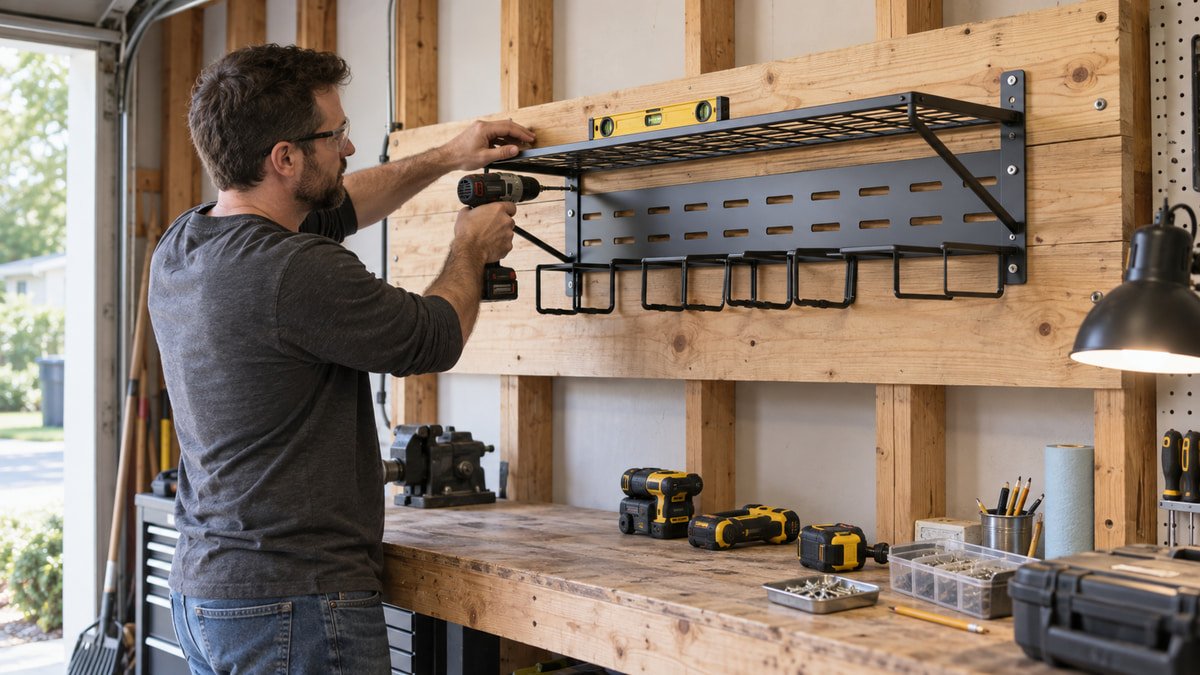
Keep charging separate from simple storage
A shelf above drill slots looks like a charging station, but a place to set a charger is only the beginning. Follow each charger and battery manual for temperature, ventilation, clearances, and acceptable surfaces. Do not trap heat inside a crowded cubby or route cords where a tool can pinch them.
Use a suitable permanent receptacle near the station. Extension cords are temporary equipment, not built in wiring. Do not mount an outlet strip until its instructions permit that use, and never overload one because the shelf has room for six chargers. Remove damaged batteries from service according to the manufacturer guidance.
It can be simpler to store tool bodies on the wall and charge batteries on a clear bench area. That separates weight from heat, keeps indicator lights visible, and makes it easier to unplug chargers before closing the garage.
Plan the wall around reach and aisle depth
Measure projection from the wall to the furthest battery or handle, not just the bare panel. Add the reach needed to pull a cased tool off rack arms. Stand in the aisle with the car parked and mimic the lift. If your elbow touches the vehicle, the rack is too deep or too high for that location.
Keep storage clear of door tracks, openers, electrical panels, windows, and utility shutoffs. The garage measuring guide helps capture those fixed obstacles. Mark the complete rack outline with tape, including projected tools, and leave it for a few days. Daily movement exposes conflicts that a drawing misses.
A short station beside the main bench is often more useful than a full display wall. Place daily tools there and let cases or cabinets handle the rest. Empty wall space is not a problem that must be filled.
Choose a system that can change without trapping you
Battery platforms, tool shapes, and project habits change. Proprietary panels offer secure accessories and neat movement inside one ecosystem. Generic shelves accept nearly anything and are easier to repair. The best setup often combines both: a small modular station for drivers and batteries, plus open cubbies for everything that refuses a standard slot.
Price the complete system, including plate, rail, fasteners, holders, shelves, and any adapters. A low cost holder is not low cost when it needs a new wall panel. Check whether accessories remain available and whether the system lets you move one holder without unloading the whole wall.
Leave one open bay and one spare rail position. The garage workshop zones guide can help keep that expansion inside the work area rather than creeping into parking. A little unused capacity keeps the system flexible.
Build a return routine that survives real projects
Open storage works only when returning a tool takes one easy motion. Keep each charger, case, and accessory near its tool without building a puzzle. Outline labels or simple shelf positions can help, though the station should remain understandable without a perfect silhouette board.
At the end of a job, remove batteries as the tool manual directs, brush off dust, coil cords loosely, and check guards. Return bits and blades to containers rather than leaving them in tools. Vacuum the rack before fine dust works into vents or shelf corners.
Review the arrangement after a month. A tool that always stays on the bench needs a closer slot. A pristine tool above eye level can move into a case. Storage should follow use, and a good organizer makes that adjustment painless.
Useful products to compare
These links open current Amazon search results. Check the dimensions, manual, mounting hardware, warranty, and current availability for the exact model before you order.
Before you buy or install
Read the current manual for the exact product you are considering. Confirm its assembled dimensions, rated capacity, mounting requirements, included hardware, working clearances, warranty, and any limits that apply to your wall, floor, electrical circuit, or garage layout.
Frequently asked questions
Is it safe to hang cordless drills by the handle?
Use a holder designed for the tool shape and follow both manufacturers’ instructions. The grip must seat securely without pressing controls or stressing a weak housing area. Check belt clips, battery width, and side handles. If the fit is doubtful, store the drill on a supported shelf or in its case.
How deep should a garage power tool shelf be?
Measure the complete tool in its stable storage position, then add hand clearance. Circular saws need full support under the shoe, while sanders may need less depth. Also measure the aisle with the vehicle parked. A deeper shelf is not useful if it makes retrieval awkward.
Can power tool batteries stay attached in storage?
Follow the tool and battery manuals. Many owners remove packs to reduce accidental activation and store them in a temperature controlled, dry place, but requirements vary by system. Never use a wall rack as a reason to ignore damaged terminals, heat limits, or charger ventilation.
Do universal drill racks fit every cordless tool brand?
No. Grip width, belt clips, batteries, housings, and balance points differ even within one brand. Compare each tool to the published opening and test carefully over a padded bench. Do not grind or bend a rack unless its manufacturer permits modification.
Should saws be stored on hooks or shelves?
A shelf or case is usually the better starting point because it supports the saw by its shoe or housing. Use a hook only when the tool and storage manufacturers identify a suitable support point. Keep guards closed, sharp accessories controlled, and heavy tools below a stretched reach.