Tag: garage pegboard

  • Garage Pegboard Layout Ideas That Keep Tools Easy to Reach

    Garage Pegboard Layout Ideas That Keep Tools Easy to Reach

    Affiliate disclosure: As an Amazon Associate I earn from qualifying purchases. This article may contain affiliate links, and Bay & Bench may earn a commission at no extra cost to you. Read our full Affiliate Disclosure.

    The most useful garage pegboard layout ideas begin with the tools in your hands, not the holes in the board. A good pegboard lets you grab a driver, put it back without moving three other things, and clear the bench before the next job. Most awkward layouts fail because somebody designed them while the tools were still in drawers.

    Start with the work you actually do and the reach of the person who does it. The holes are only a grid. Your habits create the layout.

    Quick answer

    Put daily hand tools in the comfortable area between the worktop and eye level. Group them by task, not by color or shape. Keep heavy and sharp tools on rated holders with positive retention, move rarely used items higher or toward the edges, and leave roughly one fifth of the board open for changes. Arrange everything on paper or on the bench before installing hooks.

    Begin with the bench, not the board

    The work surface sets the useful lower edge of a pegboard. Leave enough gap above the bench for tool handles, chargers, a vise, and materials standing on end. If the board begins too low, hanging tools swing into projects. If it begins too high, the most convenient holes are out of reach.

    Stand where you normally work and trace a comfortable reach with an empty hand. Do it again while the bench holds a typical project. The second reach is usually smaller. Mark the easy zone with painter’s tape. That is where screwdrivers, pliers, a square, and other frequent tools belong.

    Our workbench height calculator can help with the bench itself, while the wall layout planner estimates available storage area. Neither can measure your shoulders or the depth of a vise. Use the numbers as a first draft and make the final marks in the room.
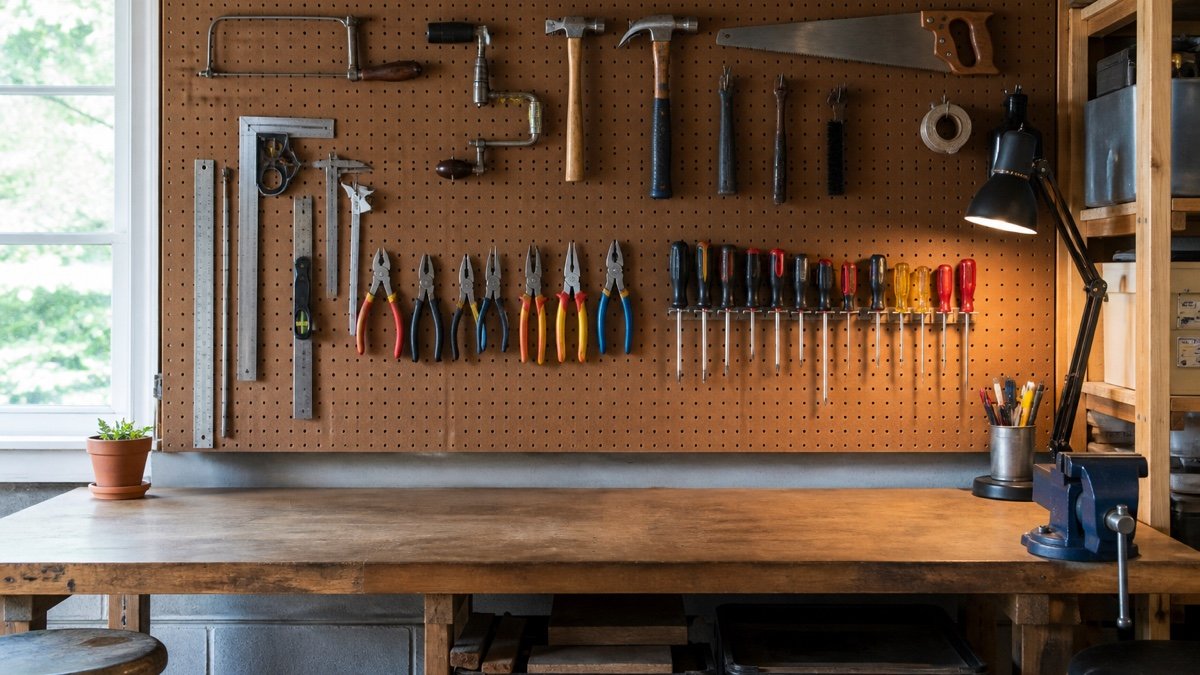
    Begin with the bench, not the board in a practical garage setup
    Begin with the bench, not the board, shown in a practical garage layout.

    Sort tools into working families

    A row of every tool in size order looks satisfying, but the better arrangement follows tasks. Keep measuring and marking tools together. Put electrical hand tools near the small parts bins used with them. Place drill bits and drivers close to the drill storage, not across the board because their cases happen to fit there.

    Make five temporary groups on the bench: measuring, fastening, cutting, gripping, and project specific tools. You may end up with more or fewer groups. A bicycle repair area might deserve its own tire levers and hex keys. A garden bench will have a different map.

    Watch for tools that belong in two routines. The tape measure is a common example. Give it a central home instead of forcing it into one category. The point is to reduce hand travel and forgotten tools, not to produce a museum display.

    Use reach zones with a purpose

    ZoneBest contentsCommon mistake
    Prime reachTools used during most projectsFilling it with matching sets that rarely leave the wall
    Upper zoneLight, occasional tools and spare holdersHanging heavy items above the face or bench
    Side zonesLong tools, clamps, rulers, and task groupsLetting handles project into a walkway
    Below or beside benchBulky cases, chargers, and dense itemsUsing pegboard for objects better stored on a shelf
    Open zoneFuture tools and temporary project stagingEliminating every empty hole on day one

    There is no universal mounting height that works for every person and bench. A shorter user, deep worktop, or seated task changes the comfortable zone. If two people share the garage, place common tools where both can reach them and give each person a smaller personal area.

    Lay out the tools before touching the hooks

    Place a sheet of kraft paper or taped cardboard on the bench in the same dimensions as the board. Arrange the tools and their holders on that rectangle. Include the space needed to lift each tool off its hook. A hammer may need room above the head. A drill holder may need forward clearance for the battery.

    Photograph the layout, then walk away for a day. On the next project, note which tools you reached for first. Move those closer to the center. This small pause catches the strange choices that happen when neat rows become more important than actual use.

    Do not outline every tool with paint yet. Outlines make changes look messy and encourage you to keep a weak arrangement. A discreet photo saved on your phone does the same inventory job without freezing the wall in place.
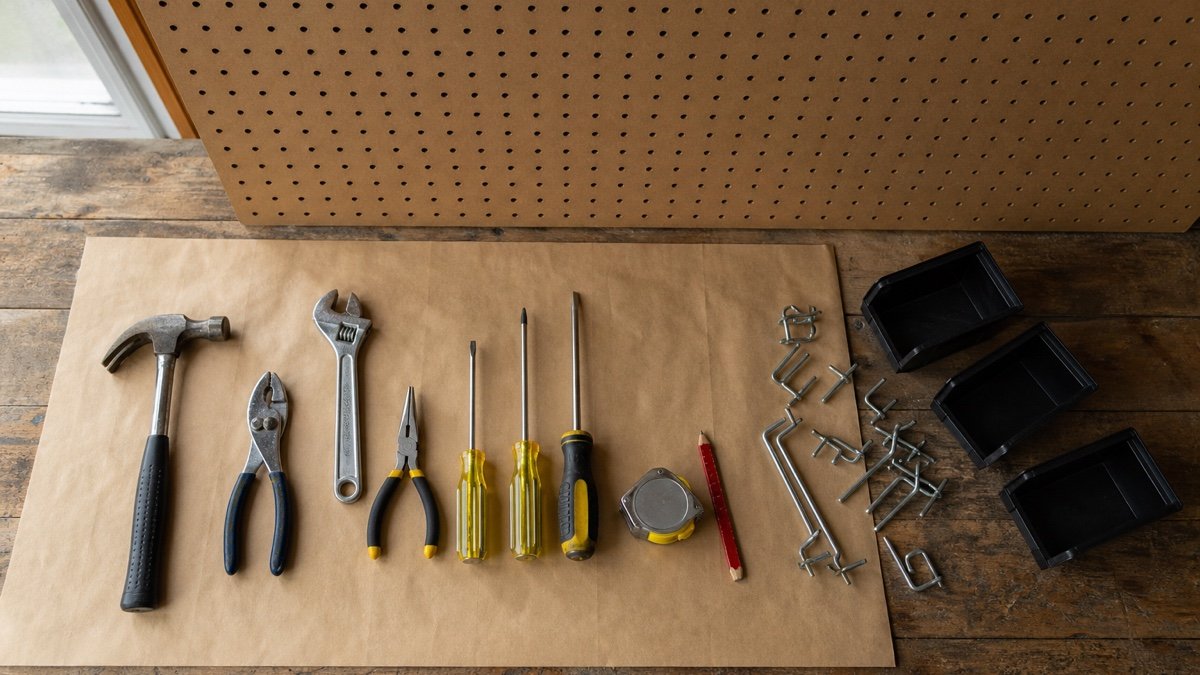
    Lay out the tools before touching the hooks in a practical garage setup
    Lay out the tools before touching the hooks, with the storage details visible in context.

    Choose holders by tool shape and movement

    Basic straight hooks suit tools with a closed hole or handle loop. Double hooks support cases and wider objects. Small shelves work for chargers and consumables, provided the shelf and board are rated for the load. Cups and bins catch loose items, though too many open containers turn the board into a dusty parts drawer.

    Tools that get pulled forward can lift a loose hook out of the board. Locking clips or holders with positive retention are worth considering for frequently handled items. Sharp tools need covers or a holder that protects the edge. Heavy objects belong low, on a separately supported shelf, or in a cabinet if the pegboard documentation does not clearly allow them.

    Check board thickness, hole diameter, hole spacing, and holder compatibility before ordering a mixed kit. The phrase “pegboard hook” does not guarantee a snug fit on every board. Follow the board and holder manufacturers’ ratings rather than guessing from the wire diameter.

    Leave breathing room around the tools

    A tightly packed wall forces you to remove one tool before reaching another. Space should follow the pickup motion. Pliers need room for a hand around the handles. A level needs horizontal clearance to slide or lift free. Coiled cords expand when they are returned in a hurry.

    Leave some empty holes between task groups. The gaps make the wall faster to scan and give new tools somewhere sensible to land. About 15 to 20 percent open area is a useful planning target, not a rule. If the current board is already full, adding another small panel may be better than buying increasingly clever hooks.

    Keep the work surface visually quieter than the storage edges. A calm center above the bench makes it easier to see small parts and protects the project from swinging handles.

    Four layouts worth copying

    The central daily tool layout

    Put the dozen most used hand tools in a compact band centered on the main standing position. Less frequent sets move outward. This works well for general repairs.

    The left to right workflow

    Arrange measuring and marking tools first, cutting tools next, then fastening and finishing tools. It suits repeatable assembly work, though left handed users may prefer the reverse direction.

    The split user layout

    Give each side of the board to one person and reserve the center for shared tools. This stops a shared wall from slowly drifting toward one person’s reach and habits.

    The project bay layout

    Keep a permanent daily zone and leave one open bay for the current project. Temporary hooks can hold the exact tools needed for a bicycle tune-up, furniture repair, or seasonal job. Clear the bay when the work is done.

    Mounting and loading still matter

    Pegboard needs space behind it for hooks. That usually means a frame or spacers, installed into suitable wall structure. The exact method depends on the board material, dimensions, wall type, and manufacturer instructions. A large sheet carrying steel tools should not rely on decorative fasteners chosen for picture frames.

    Locate wiring, plumbing, and other hidden services before drilling. Keep the board away from water sources or heat when its material is not approved for that environment. Hardboard, metal, and plastic boards behave differently in a damp garage, so read the current product guidance.

    After loading, lift and replace every tool once. Look for board flex, loose hooks, sharp projections, and handles that block switches. Recheck the fasteners after the layout has been used for a while. If the board changes shape or pulls away from its supports, unload it before investigating.

    A simple reset routine keeps the layout useful

    Pegboard gets messy gradually. One borrowed hook becomes a permanent exception, then new tools fill the remaining holes. Schedule a short reset every few months. Remove empty packaging, return tools to their real task groups, and move anything that has not been touched for a year to less valuable storage.

    Wipe the board and inspect holders while it is partly empty. Replace bent hooks and worn retention clips. Check cords for damage before hanging them again. If one tool constantly lands on the bench instead of its assigned hook, the wall is giving you feedback. Move the hook closer or choose a holder that is easier to use.

    A pegboard should make cleanup almost automatic. When returning a tool feels fussy, the layout is the problem, not the person.

    Useful products to compare

    These links open current Amazon search results so you can compare dimensions, manuals, ratings, and availability for the exact models on your shortlist.

    Before you buy or install

    Check the current manual for the exact product you are considering. Confirm the assembled dimensions, load rules, mounting requirements, included hardware, clearances, warranty, and any limits that apply to your wall, floor, or garage layout.

    Frequently asked questions

    How high should a garage pegboard be?

    Set the useful area from the workbench and the users, not from a universal number. Daily tools should be reachable without leaning across the bench or raising the shoulder awkwardly.

    Should I outline tools on pegboard?

    A photo of the finished layout is easier to update. Painted outlines can help with inventory, but they make future rearrangement look untidy.

    What should not go on pegboard?

    Keep items off the board when their weight, shape, sharp edge, heat, or movement exceeds the board and holder instructions. Dense tools often belong on a supported shelf or in a cabinet.

    How much empty space should I leave?

    Leaving about 15 to 20 percent open gives new tools and temporary projects room. Treat that as a flexible planning target rather than a fixed requirement.
  • Metal vs Wood Pegboard: Which Belongs in Your Garage?

    Metal vs Wood Pegboard: Which Belongs in Your Garage?

    Affiliate disclosure: As an Amazon Associate I earn from qualifying purchases. This article may contain affiliate links, and Bay & Bench may earn a commission at no extra cost to you. Read our full Affiliate Disclosure.

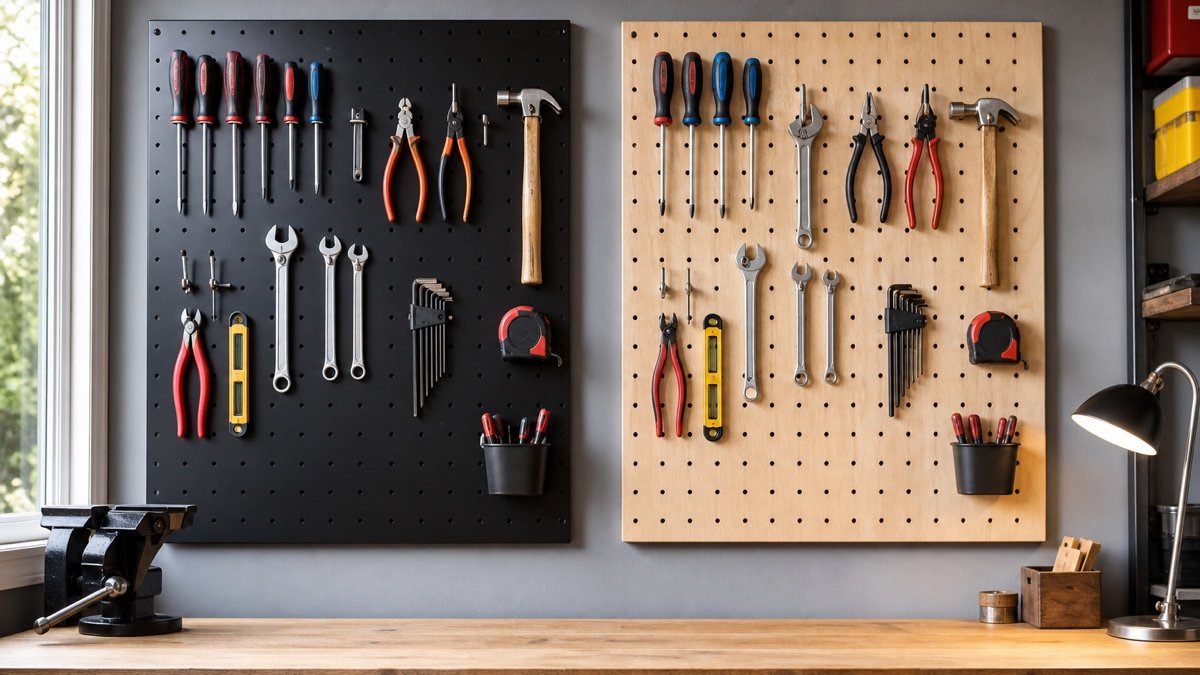
    The metal vs wood pegboard choice becomes clearer once you picture a wet shovel beside a row of clean bench tools. Both materials can hold the same pliers, yet they feel quite different in daily use. Metal panels are tidy, rigid, and often arrive with formed edges that create space for hooks. Wood based panels are easy to cut and visually at home above a traditional bench. The better material depends less on style than on moisture, tool weight, mounting, and which hooks you already own.

    Quick answer

    Choose metal pegboard for a damp or hard working garage, a clean finished appearance, and panels with published load ratings. Choose wood or hardboard pegboard for a dry workshop, easy custom cutting, a lower initial cost, and a warmer look. Before buying either one, confirm hole diameter, spacing, panel thickness, standoff depth, accessory fit, and the manufacturer’s mounting requirements.

    Wood pegboard is not one material

    Shoppers often use wood pegboard to describe two different products. Traditional hardboard pegboard is an engineered fiber panel with a regular grid of holes. Plywood pegboard uses layered wood veneer and is often thicker, stiffer, and more decorative. Their behavior around moisture, fasteners, and hooks is not identical.

    Hardboard is easy to find and cut with ordinary woodworking tools. It is a practical way to organize light hand tools in a dry shop. Unsealed edges and holes can absorb moisture, though, and a thin panel may bow if it lacks enough support. Plywood offers a more finished appearance and accepts custom joinery well, but it still needs an appropriate finish when humidity is a concern.

    Do not assume thickness from a product photograph. Hook engagement depends on the real panel thickness and the space behind it. Check the product sheet, then test one hook before laying out the whole wall.

    What metal pegboard changes

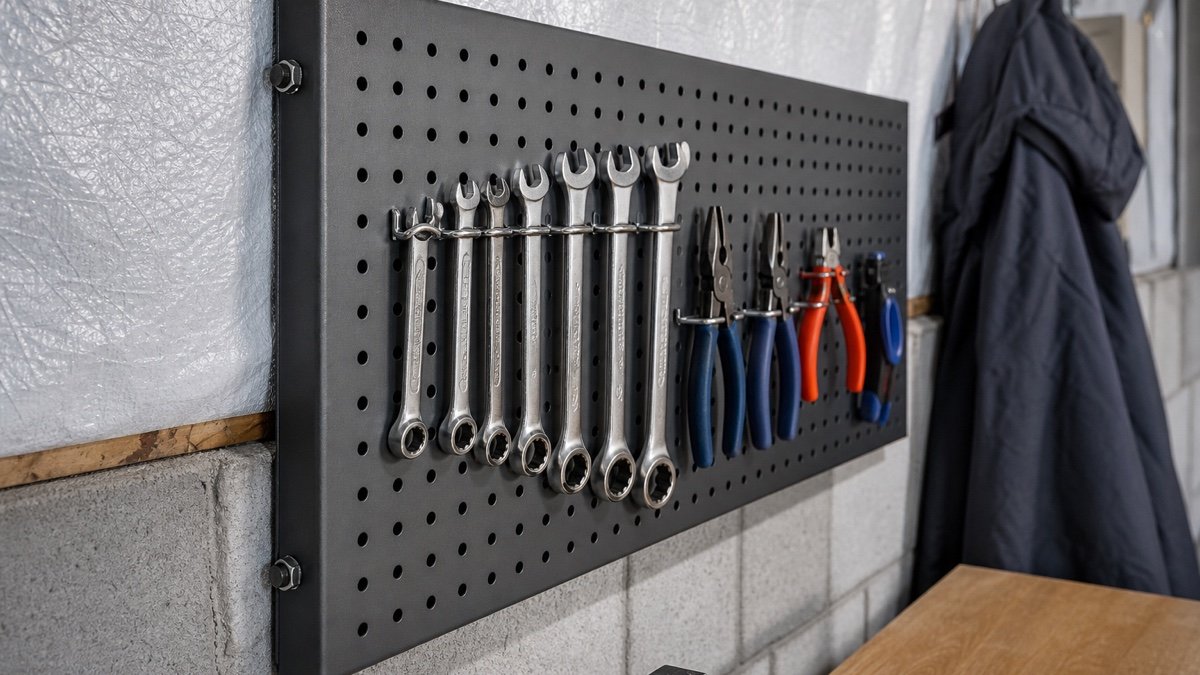
    Metal pegboard is commonly made as a smaller powder coated steel panel rather than one large sheet. Formed edges can stiffen the panel and hold it away from the wall, so you may not need separate wood furring strips. Some panels also use slots alongside round holes for proprietary shelves and bins.

    That construction feels crisp. Hooks do not enlarge fiber holes through repeated use, and a coated surface wipes clean after dusty or greasy work. In a garage where wet jackets, road salt, or garden tools come through the door, metal is often the less fussy option.

    It is not maintenance free. A deep scratch can expose steel, and water trapped against an unprotected edge may start corrosion. Thin panels can dent. The safest assumption is that finish quality and panel geometry matter as much as the word metal.

    Metal panels also produce more sound. Dropping a wrench onto a holder or bumping a loose hook can ring through the wall. Rubber tipped accessories and a solid mounting job reduce the rattle, but they will not make steel sound like plywood.

    What metal pegboard changes in a practical garage setup
    What metal pegboard changes, shown in a practical garage layout.

    Side by side comparison

    FactorMetal pegboardWood or hardboard pegboard
    MoistureCoated panels handle routine dampness well, but scratches need attentionEdges and holes may swell if the panel is not sealed
    RigidityFormed panels are often stiff for their sizeDepends heavily on material, thickness, and frame support
    CuttingPossible only with suitable tools and edge treatmentEasy to cut with common woodworking tools
    AppearanceClean industrial finishTraditional shop look or warm plywood grain
    Mounting gapSome panels have built in flangesUsually needs spacers or a frame
    NoiseMore likely to clang or rattleQuieter during everyday handling
    Accessory choiceMay combine holes and brand specific slotsBroad basic hook selection when dimensions match

    These are tendencies, not promises. A well braced plywood panel may be more rigid than a flimsy steel panel. Compare actual specifications and installation diagrams.

    Load ratings deserve a closer look

    Do not compare pegboards using one large capacity number. First ask whether the rating applies to the whole panel, one attachment point, or an evenly distributed load. Then check the hook rating and mounting pattern. The wall connection remains part of the system.

    Tool leverage matters. A compact wrench sits close to the panel. A cordless drill on a long shelf places its weight farther from the wall. The drill may weigh less than a row of wrenches but place more force on the panel and fasteners.

    Keep dense tools near the lower part of the panel and near support points. Leave large battery tools on a shelf designed for them rather than improvising with two long hooks. If a manufacturer does not publish a clear rating for the proposed accessory, choose another arrangement.

    Our wall layout planner helps with available area, but it cannot calculate structural capacity. Use the manual for that decision.

    Hook compatibility can decide the purchase

    Many pegboard accessories are sold by nominal hook size, often associated with common hole diameters. That does not guarantee a good fit. Hole spacing, board thickness, backing clearance, slot shapes, and retaining features can all differ.

    Metal systems sometimes pair round holes with slots that accept special brackets. Those accessories may lock more positively than a plain hook, but they can tie future purchases to the same brand. Traditional hardboard often accepts a broad range of simple hooks, although loose hooks may lift out when you grab a tool.

    Before ordering a large bundle, buy or borrow one hook in each format you plan to use. Load it with the intended tool and remove that tool several times. Watch whether the hook rocks, scratches the panel, or comes away in your hand. A five minute test tells you more than an accessory count printed on a box.

    Wood is easier to customize

    A wood panel is forgiving when the wall has an odd width. You can trim it around a cabinet, frame the edges, drill a custom opening, or finish it to match the workbench. Plywood pegboard can become part of the furniture rather than looking like an organizer added later.

    Seal every cut edge and the inside of exposed holes when the product and chosen finish allow it. The bottom edge deserves attention because it is close to bench spills. Let the finish cure fully before hanging tools.

    Metal panels offer less casual customization. Cutting may damage the coating, leave sharp edges, and affect how the panel mounts. Smaller modular panels are usually the cleaner answer. Arrange standard sections around outlets and cabinets instead of modifying them unless the manufacturer permits cutting.

    There is one useful compromise: mount wood pegboard over the bench for chisels and layout tools, then place a metal panel near the garage entry for wet or dirty hand tools.

    Wood is easier to customize in a practical garage setup
    Wood is easier to customize, with the storage details visible in context.

    Mounting details that prevent frustration

    A pegboard needs empty space behind the face so hook legs can pass through. For wood panels, that usually means a perimeter frame plus intermediate support sized for the panel. Support should not block the holes you expect to use. Metal panels with formed sides may include the needed gap, but only when installed in the approved orientation.

    Locate studs and any hidden services. Mark the panel outline, check it with a level, and make sure drawers, cabinet doors, and task lights still work. Do not cover an outlet or electrical panel. If the wall is masonry, use the installation method specified for that panel and substrate.

    Set the lower edge high enough to clear items on the bench but low enough that short tools remain reachable. Lay the tools on the bench in rough groups before placing hooks. Keep a clear patch for the tool you will buy next month.

    For a full garage measurement routine, use our guide to measuring a garage for storage.

    Cost is more than the panel

    Basic hardboard usually has a low entry cost, but add the frame, finish, fasteners, hooks, bins, and time spent cutting. A metal kit may cost more at checkout while including standoffs or mounting flanges. It may still need proprietary brackets for the layout you want.

    Build a short bill of materials for one complete work zone. Count the drill shelf, plier holders, small bins, hook retainers, and mounting hardware. Price replacement accessories too. A cheap panel paired with awkward hooks is not a bargain.

    If the wall will hold only twelve everyday tools, either material can work. Spend the decision on fit and placement. If the wall will keep changing, accessory availability becomes more important. A common hook format or a dependable modular system is worth paying for.

    Which one should you buy?

    Metal pegboard is the straightforward choice for a garage exposed to damp gear, frequent cleaning, and hard use. Look for published ratings, a durable finish, a practical accessory range, and a mounting system that suits the wall.

    Wood or hardboard is a good fit in a dry workshop where easy cutting, low cost, and a warm appearance matter. Use enough support and protect vulnerable surfaces. Plywood is the attractive version when the tool wall is part of a carefully built bench.

    Neither material should carry every object in the garage. Move bikes, ladders, and long yard tools to an appropriate rail or slatwall zone. Our slatwall, pegboard, and track comparison shows how those formats divide the work.

    Useful products to compare

    These links open current Amazon search results so you can compare dimensions, manuals, ratings, and availability for the exact models on your shortlist.

    Before you buy or install

    Check the current manual for the exact product you are considering. Confirm the assembled dimensions, load rules, mounting requirements, included hardware, clearances, warranty, and any limits that apply to your wall, floor, or garage layout.

    Frequently asked questions

    Does metal pegboard use regular pegboard hooks?

    Some panels do, while others rely on a particular hole, slot, or locking pattern. Match hole size, spacing, panel thickness, and the manufacturer’s compatibility list before buying accessories.

    Should wood pegboard be painted or sealed?

    In a garage, protecting exposed faces, edges, and cutouts can reduce moisture absorption. Use a finish suitable for the panel material and let it cure before loading the board.

    Can metal pegboard rust?

    Coated steel resists routine exposure, but scratches, bare cut edges, standing moisture, and salt can lead to corrosion. Inspect damage and follow the maker’s care instructions.

    Which pegboard is better for heavy tools?

    Choose by the exact panel, mounting, and accessory ratings rather than material alone. Keep dense tools close to supports and use a purpose built shelf or holder for power tools.