Affiliate disclosure: As an Amazon Associate I earn from qualifying purchases. This article may contain affiliate links, and Bay & Bench may earn a commission at no extra cost to you. Read our full Affiliate Disclosure.
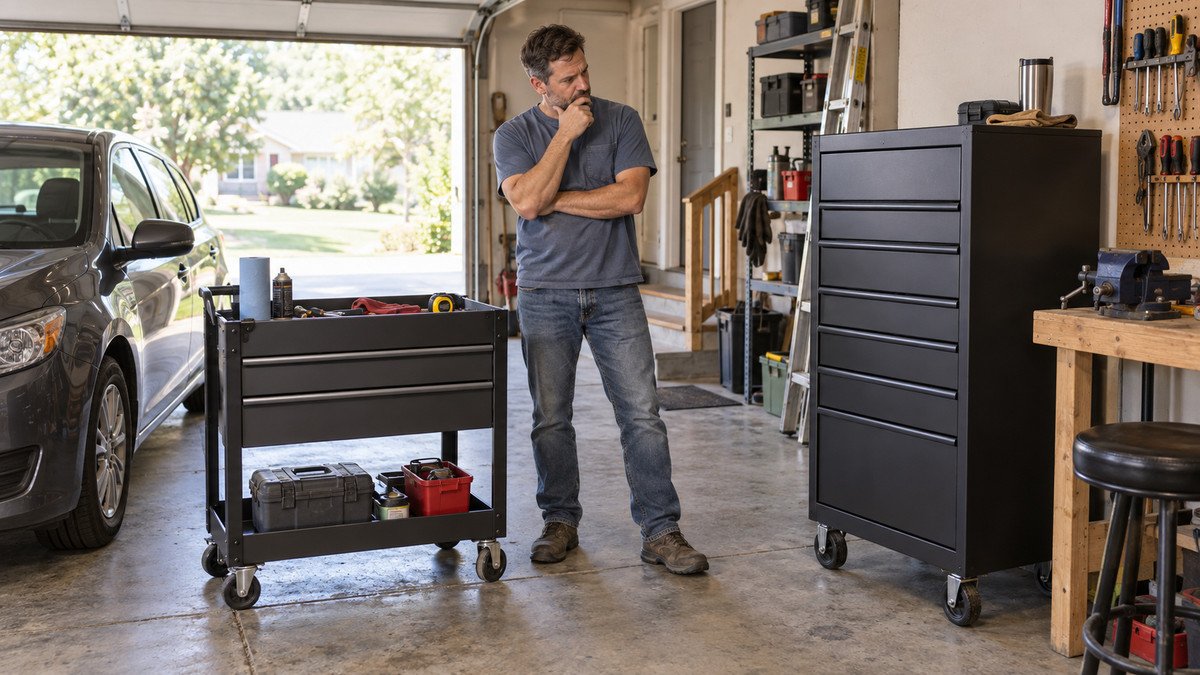
The tool cart vs tool chest decision is really a choice between tools that travel to the job and tools that live in a compact bank of drawers. A cart gives you a useful top compartment or work surface close to the car. A rolling chest, often sold as a rolling cabinet or chest and cabinet combination, stores more tools in the same stretch of wall.
The right choice depends on where repairs happen and what each unit blocks when a drawer is open. Start with the tools you already own and the garage with its vehicle parked. Capacity matters, but daily access decides whether storage works.
Quick answer
Choose a tool cart if you regularly move a focused set of tools to the car, driveway, or bench and want parts at hand while you work. Choose a rolling tool chest or cabinet if you have a larger hand tool collection, want more shallow drawers, and can give it a dependable wall position. In a very small garage, a modest chest plus a light project cart often works better than one oversized mobile box.
Tool cart vs tool chest at a glance
The words on store pages are not always consistent. In this guide, a tool cart is a waist-high mobile unit intended to follow a job. A rolling tool chest means a drawer cabinet on casters, or a chest and cabinet combination that normally parks in one place. A separate top chest without casters belongs on a suitable cabinet or bench and is not a direct cart substitute.
| Decision point | Tool cart | Rolling tool chest or cabinet | Small garage advantage |
|---|---|---|---|
| Daily movement | Designed to roll near the work | Movable, but often parked | Cart |
| Drawer density | Usually fewer drawers plus top storage | More shallow and medium drawers | Chest |
| Work surface | Open top, lid, or tray close to the job | Top may be fixed, covered, or occupied | Cart |
| Wall footprint | May park compactly, but needs a travel route | Uses one defined parking bay | Depends on layout |
| Security | Basic locks and latches | More enclosed drawer storage | Chest |
| Growing collection | Best for a selected working set | Better for a broad hand tool inventory | Chest |
The tool chest and cabinet comparison explains the naming and stacking options in more detail.
What makes a tool cart different
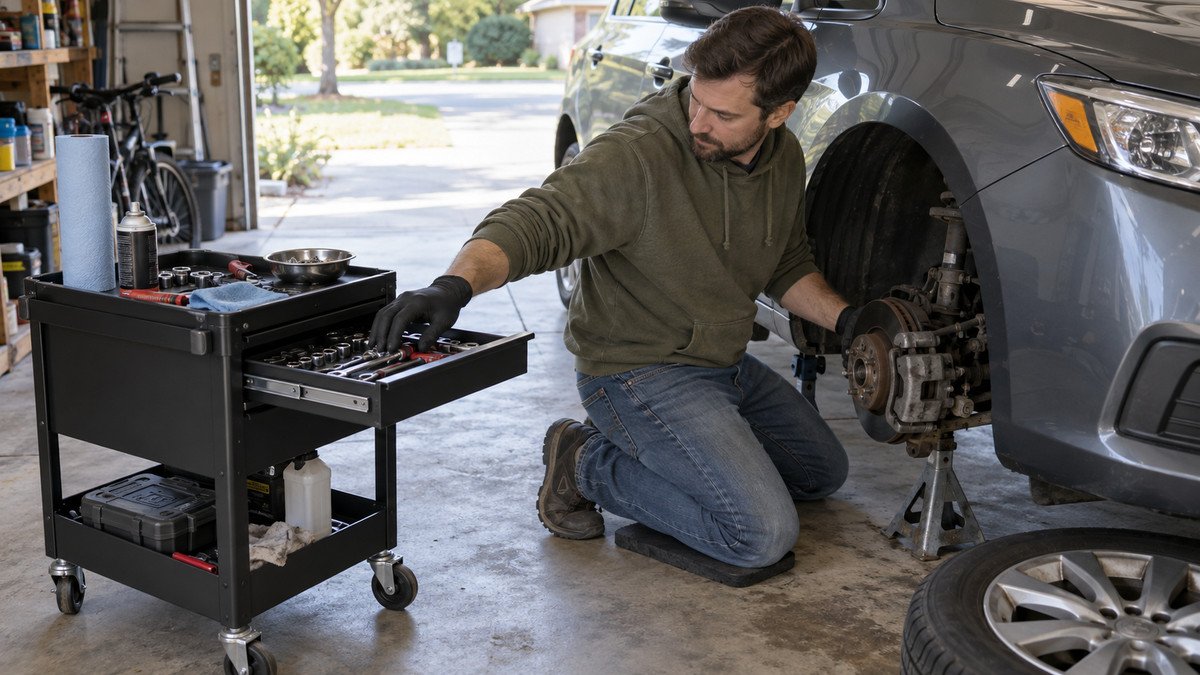
A mechanics cart is arranged around use at arm’s reach. Many have a deep top compartment under a hinged lid, several drawers, a side handle, and an open bottom tray. Others use two open shelves with only one or two drawers. Both styles are meant to carry the current job rather than archive every specialty tool you own.
The current U.S. General 30 inch five drawer cart gives a useful example. Its official product page lists a 37.25 by 22 inch footprint with the handle, a 41.375 inch height, 15,000 cubic inches of total storage, and a 700 pound working load. It weighs 144 pounds empty and rides on two fixed and two locking swivel five inch casters.
Those figures show the cart bargain. You get substantial capacity and an accessible top, but the body is not tiny. The handle, lid, and steering arc all need room. A cart earns that room only when it moves regularly to the repair or becomes a useful station beside the bench.
What a rolling tool chest does better
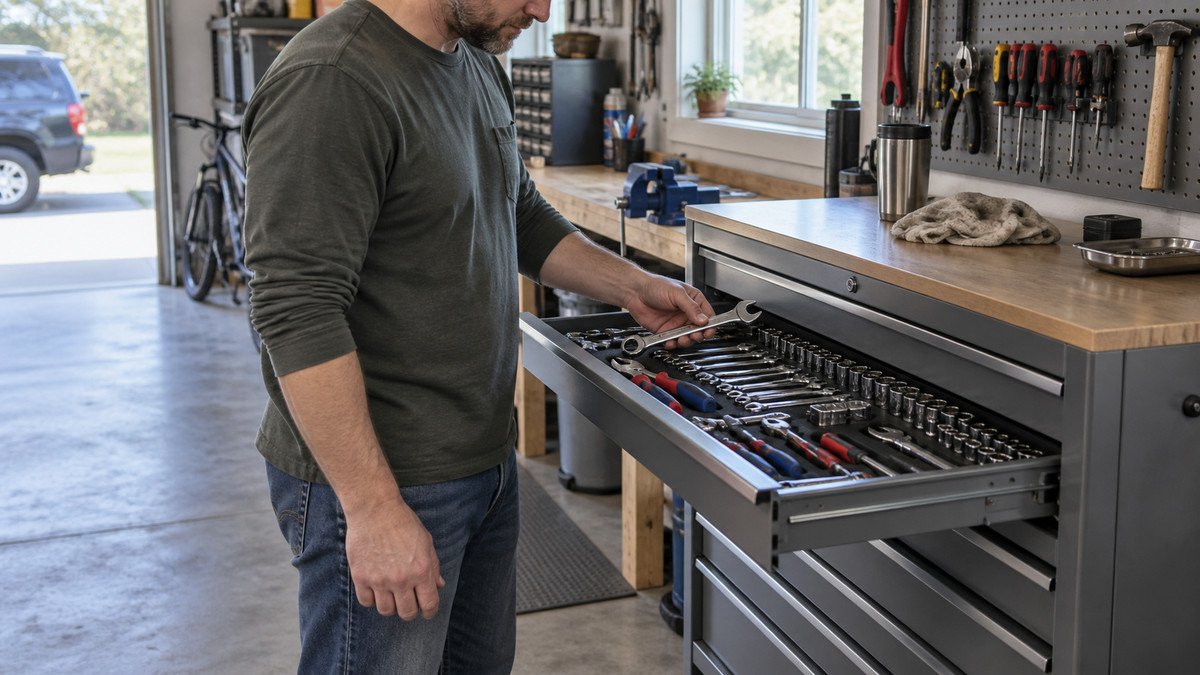
A rolling chest or cabinet turns vertical space into layers. Shallow drawers prevent wrenches, sockets, pliers, and measuring tools from piling on one another. Deeper bottom drawers can take power tools or cases. Because the unit usually stays against a wall, you can plan lighting, drawer opening space, and nearby charging without rebuilding the arrangement for every job.
Harbor Freight’s 27 inch Series 3 roll cabinet illustrates the format. The manufacturer listing gives seven drawers, 10,900 cubic inches of storage, a 1,200 pound capacity, and cabinet dimensions of 27 inches wide, 22 inches deep, and 41.25 inches high. The listed empty weight is 182 pounds.
It is narrower than the example cart but denser and heavier. That makes it easier to assign a permanent wall bay, yet less appealing to push around a vehicle every weekend. Read the rolling tool chest buying guide before comparing slide ratings, drawer depths, and cabinet generations.
A tool cart wins at the point of work
A cart is at its best when a repair scatters tools across the garage. Roll it beside the front wheel for brake work, park it near the mower in the driveway, or bring it to the assembly bench. The top tray can hold removed fasteners in order, and the drawers keep frequently used sizes close. Fewer walks back to the wall cabinet also mean fewer chances to lose a bolt on another surface.
Mobility needs a clear route. Shut and latch every drawer, remove loose items from the top, unlock the correct casters, and push from the handle supplied by the maker. Joints, extension cords, floor mats, and stray hardware can stop a loaded caster suddenly. The garage aisle clearance guide helps identify pinch points beside a parked vehicle.
A cart is less convincing if it never leaves its corner. In that role, its deep top bin can hide tools beneath one another, and its fixed wheel pair may make the last few inches of parking awkward. Be honest about the route and frequency. Moving a cart once a year is storage theater, not a useful workflow.
A rolling chest wins for dense drawer storage
Tool collections grow sideways in a cart and upward in a chest. Extra shallow drawers earn their space because they display one layer at a time. You can dedicate one drawer to sockets, another to pliers, and another to marking tools without stacking cases. Labels inside the drawer lip or consistent foam and tray layouts make missing tools obvious.
A rolling cabinet also supports a stable home for tools used across several work zones. The garage tool storage guide favors storing items near the task that uses them, but a central chest can still work when the garage is too narrow for several cabinets. Keep daily tools between knee and chest height, heavy sockets low, and seldom used gear in the least convenient drawers.
More drawers do not automatically mean more usable capacity. Measure tall sockets, torque wrenches, molded cases, and power tool batteries. A drawer that is half an inch too shallow may force the whole category elsewhere. Look for published inside dimensions instead of relying on cabinet width and cubic inches.
Compare the full working footprint
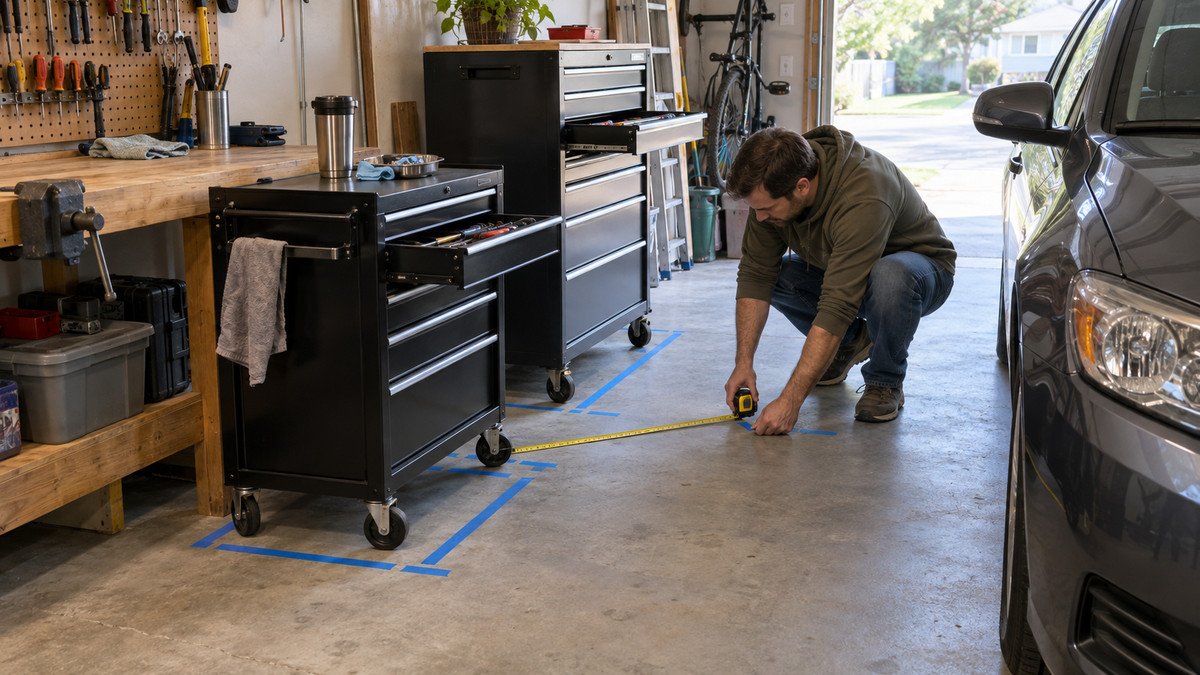
Measure with the largest vehicle parked and the garage door closed. Mark the body of each candidate with painter’s tape. Add the side handle, cord wrap, paper holder, and the deepest open drawer. For a lidded cart, stand a piece of cardboard at the open height so you can see conflicts with shelves, tracks, and wall cabinets.
The cabinet itself is only part of the footprint. You need room to stand squarely in front of a drawer and lift out a heavy tool without backing into the car. A cart needs a travel lane plus enough space for its swivel casters to align. A chest needs a parking bay that remains usable when the vehicle door or laundry room door is open. Follow the garage measuring checklist for curbs, outlets, base trim, and overhead obstacles.
Do not count on sliding a loaded unit sideways. Even four swivel casters can resist when their wheels point different directions. Mock up the working envelope, not the glossy front view. Ten minutes with tape will expose a bad fit before delivery day.
Drawer access matters more than the capacity headline
Cubic inch totals help compare related models, but they do not tell you how the space is divided. A deep cart lid can swallow bulky tools, yet every item at the bottom has items above it. A chest with many shallow drawers improves visibility but may reject tall cases. List twenty tools you reach for most and give each one a specific home on the candidate layout.
Check full extension travel, latch feel, and the rating for each pair of slides. Some cabinets prevent more than one drawer from opening, which can reduce tip risk but changes how quickly you browse. If a model allows several drawers open at once, develop the habit of closing one before opening another. A brake holds wheels; it does not prevent a top-heavy cabinet from tipping.
Drawer liners keep steel tools from skating when the unit moves. Fitted trays improve scanning but consume space, so use them where the time saving is real. Leave one small drawer or top section flexible for the fasteners and tools involved in today’s job.
Caster layout decides how pleasant movement feels
Most full size carts and cabinets use either two fixed casters with two swivels or four swivels. The first arrangement tracks well down a straight aisle. Four swivels can pivot in less space, though a loaded unit may wander over a joint. Wheel diameter, tread material, bearings, floor texture, and weight distribution matter as much as the pattern.
Sunex takes the mobile idea farther with its six drawer 8057XT service cart. The official specifications list four swivel casters, a 600 pound capacity, a 244 pound product weight, and a width of 39.25 inches with the handle. It is a serious cart, but its weight and width show why a large mobile unit can behave more like a parked cabinet in a small garage.
Test every proposed route for slab lips and thresholds. Never tow a tool box with a vehicle or roll it down a meaningful slope. Keep dense items low, push from the intended handle, and slow down before any change in level.
Use load ratings as safety limits
The large number printed on a sales card is usually a total limit under stated conditions. Drawers, shelves, side trays, tops, and casters may carry lower individual ratings. Similar looking sizes can change between product generations, so read the manual for the exact model number rather than borrowing limits from an older review.
A cabinet filled with sockets, pullers, hammers, and steel fixtures becomes heavy quickly. Keep the densest drawers near the floor and balance the left and right sides. Open one loaded drawer at a time. Do not sit, stand, climb, or lean hard on an extended drawer, and do not let children play around an unlocked unit.
Consider the floor too. A sound concrete slab is a different base from cracked paving, an uneven threshold, or a raised wood platform. Level the parking area by an approved method, keep caster brakes accessible, and leave enough clearance to inspect wheels and fasteners.
Work surfaces, lids, and charging change the choice
A cart often gives you the better temporary work surface. An open top tray contains sockets and fasteners, while a closed lid may support light assembly if the manufacturer allows it. The drawback is access: some carts require the lid to be open before drawers can unlock, and a raised lid can block a shelf or window.
The chest top may have a flat panel, a protective mat, or another approved chest occupying that space. A wood work surface can support small tasks, but it should not become a permanent pile that blocks upper drawers. Decide before purchase if the top is storage, assembly space, or the base for another approved component.
Power strips and built-in ports are conveniences, not permission to ignore charger instructions. Protect cords from drawer edges and casters, provide the ventilation the charger requires, and keep combustible clutter away. The garage workshop zones guide can help place charging away from grinding debris and wet work.
A two piece setup often serves a small garage best
You do not need to force the whole collection into one moving cabinet. A compact rolling chest can stay against the wall with specialty tools, while a light utility cart carries the current project’s tools and parts. At the end of the job, return tools to the chest and park the empty cart under a bench or on its assigned footprint.
This split keeps the travel load reasonable and stops a deep cart lid from becoming an archive. It also lets you replace either piece without redesigning the full system. The cart can be inexpensive if it carries fifty pounds instead of five hundred. The chest can use better shallow drawers because it does not need to steer around a bumper.
Set a reset rule that fits your habits. Five minutes of returning sockets and clearing the cart after each job keeps both units useful. Without that reset, two storage pieces simply create two places to search.
Who should choose a tool cart or rolling chest
Choose a cart if you work in several spots, need a parts tray beside the repair, own a focused tool set, and have a clean route across the slab. Choose a rolling chest if most work returns to one bench, the collection contains many hand tools, and you value shallow drawers over a mobile top compartment.
For a one car garage that also parks a daily driver, favor the smaller working envelope even if the larger unit technically fits. For a dedicated workshop, a denser chest may justify its weight. For mixed household repair, a fixed cabinet and a modest open cart can be calmer than either extreme.
Make the final call from a taped floor outline, your actual tool dimensions, and the current manual. Good small garage cabinet planning leaves room for people and projects, not just steel boxes. The winning format is the one you can reach, move safely, and reset without turning the aisle into storage.
Useful products to compare
These links open current Amazon search results. Check the dimensions, manual, mounting hardware, warranty, and current availability for the exact model before you order.
Before you buy or install
Read the current manual for the exact product you are considering. Confirm its assembled dimensions, rated capacity, mounting requirements, included hardware, working clearances, warranty, and any limits that apply to your wall, floor, electrical circuit, or garage layout.
Frequently asked questions
Is a tool cart safer to move than a rolling tool chest?
A lighter cart with a low, balanced load can be easier to control, but the label alone does not make it safer. Check the caster design, floor route, drawer latches, handle, and current load. Close drawers, clear the top, unlock the correct wheels, and push from the manufacturer’s intended handle.
Does a rolling tool chest hold more than a tool cart?
Usually, a rolling chest or cabinet offers more separate drawers and better density for hand tools. Some large mechanics carts have high total capacity, though much of it may be in a deep top compartment or lower tray. Compare interior drawer dimensions and your actual tools, not just total cubic inches.
Can I put a top tool chest directly on a cart?
Only do so if both manufacturers approve the combination and provide a secure mounting method. A top chest changes height, weight distribution, lid access, and tip behavior. A compatible rolling cabinet is generally the intended base. Never rely on gravity or a loose nonslip mat to secure a heavy chest.
What width tool storage is best for a one car garage?
There is no universal width. Measure the parked car, door swing, handle, open drawer depth, and the space where you stand. A 27 inch cabinet may use wall space efficiently, while a 30 inch nominal cart can be much wider with its handle. Tape the complete working footprint on the floor before choosing.
Should I buy a cart first or a rolling chest first?
Buy the chest first if loose tools already need organized drawer homes. Buy the cart first if your storage is adequate but every project spreads tools across several surfaces. If the budget permits only one, choose the piece that solves today’s repeated frustration and leaves a measured place for a future companion.