Affiliate disclosure: As an Amazon Associate I earn from qualifying purchases. This article may contain affiliate links, and Bay & Bench may earn a commission at no extra cost to you. Read our full Affiliate Disclosure.
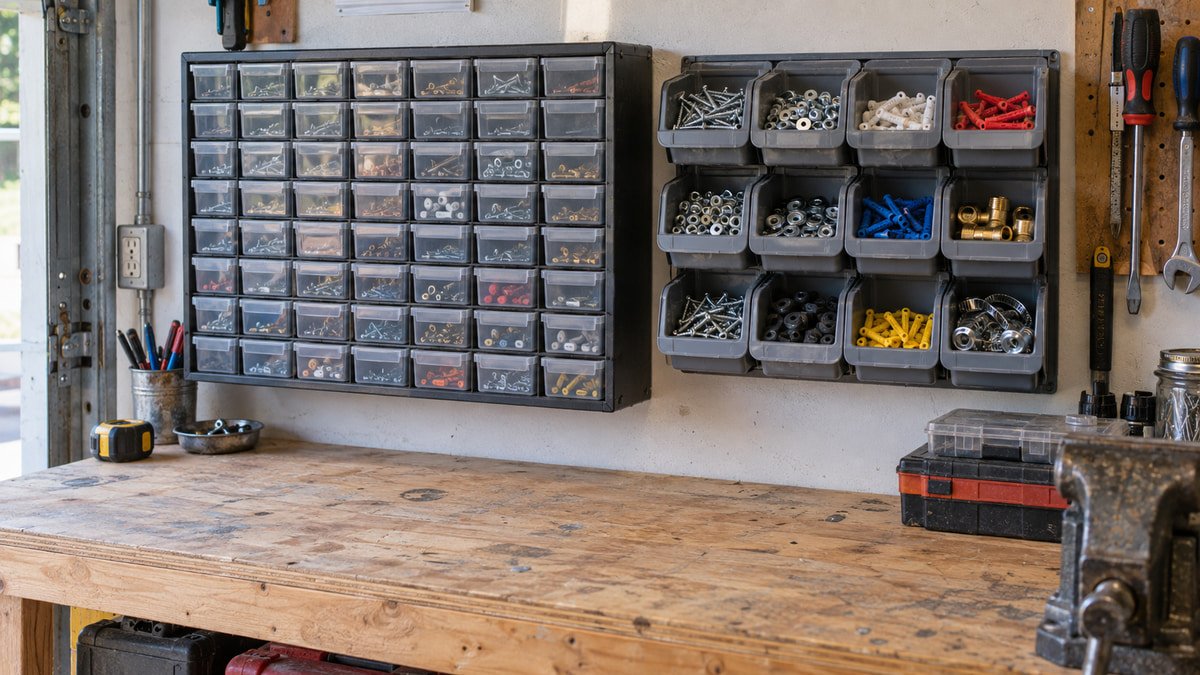
Small parts storage drawers vs bins is less a contest than a sorting question. Shallow drawers are excellent for dozens of tiny hardware categories that need protection from dust. Open bins are faster when you grab the same screws, connectors, or fittings throughout a project. The wrong format turns either advantage into friction.
A drawer full of long lag screws wastes space and gets heavy. A deep open bin of mixed washers becomes a dark pocket nobody wants to search. Most working garages need both formats, but not in equal amounts. This comparison shows where each one earns its wall or shelf space, how to measure capacity, and how to build a mixed system without buying a container for every object you own.
Quick answer
Choose small drawers for tiny, varied parts that benefit from shallow layers, dividers, and dust protection. Choose open bins for repeat-use stock that you want to grab with one hand and refill quickly. Drawers usually offer better category density, while bins handle larger pieces and changing quantities. A hybrid system works best for most garages.
Small parts storage drawers vs bins at a glance
The best format follows part size and retrieval pattern. Tiny machine screws used once a month belong in a labeled drawer. A box of common deck screws used all weekend belongs near the front of an open bin. Trying to standardize both categories into one container usually creates wasted volume or slow access.
| Decision point | Small parts drawers | Open front bins |
|---|---|---|
| Best part size | Tiny to small | Small to medium |
| Retrieval speed | Open, inspect, remove | Reach in directly |
| Category density | High in a shallow footprint | Moderate |
| Dust protection | Better, though rarely sealed | Low |
| Changing quantities | Limited by drawer volume | Easy to swap bin sizes |
| Portable sorting | One drawer at a time if removable | Whole bin lifts out easily |
| Fast inventory check | Clear fronts help | Open top shows stock level |
Neither format fixes a vague category. A label such as miscellaneous fasteners guarantees rummaging. Name the part family and size range, then choose the smallest container that can accept a normal refill without being packed to the rim.
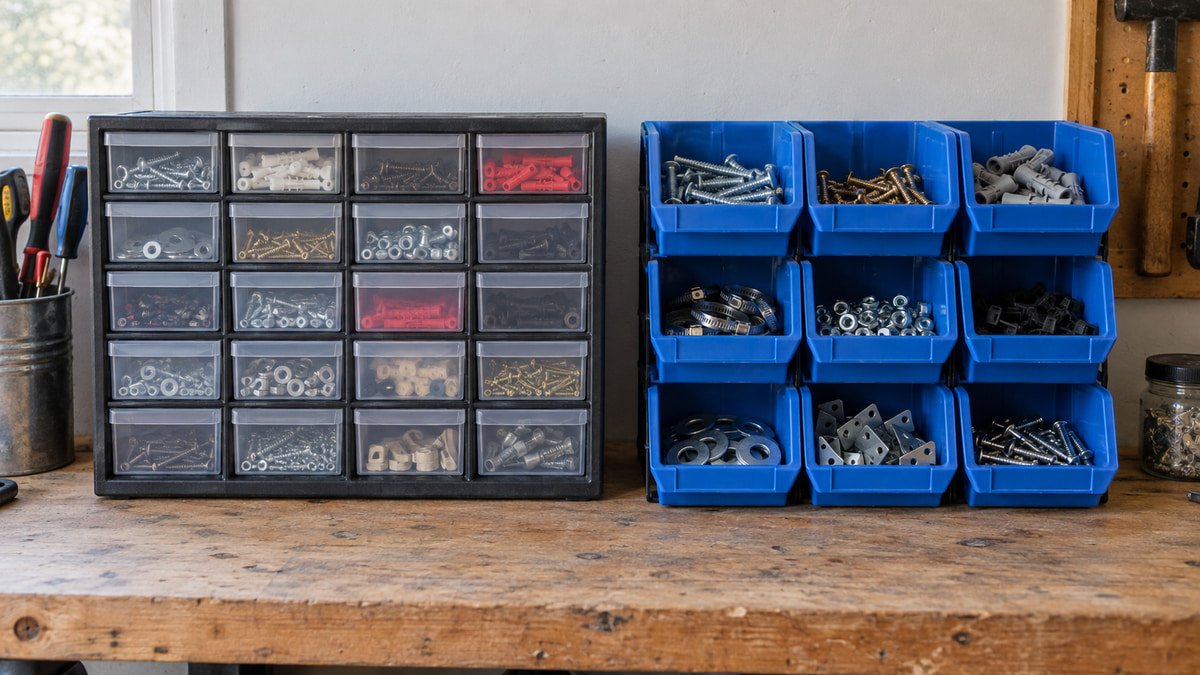
Drawer cabinets win with tiny varied hardware
Small drawers divide a broad cabinet face into many shallow spaces. That geometry suits nuts, washers, cotter pins, anchors, electrical terminals, and other parts that vanish beneath one another in a deep bin. With one layer or a thin pile, you can spot the needed diameter before emptying the whole category.
Removable dividers make drawers more efficient when two closely related items have low stock. Do not create compartments so narrow that fingers cannot reach the back. A divider system should leave room for a pinch grip and for the inevitable extra handful bought midway through a repair.
Place the cabinet near the work that uses those parts. The garage tool storage guide explains why frequency matters more than visual symmetry. Fasteners for the assembly bench deserve easy reach. Spare furniture glides can live higher or farther away.

Open bins win with repeat use stock
An open front bin removes one motion. Your hand reaches in, takes what it needs, and returns for more without setting down a drawer. That feels trivial during a two screw repair. Across an afternoon of assembly, the difference is obvious.
Bins also tolerate parts that stick above a shallow drawer, such as hose fittings, sanding sleeves, wire connectors, short clamps, and boxes of driver bits. A removable bin can travel to the project and return as one unit. Pick a size that remains comfortable to carry when full, not a cavern that invites several unrelated categories.
The open face is the tradeoff. Dust lands on contents, and small pieces can spill if the bin gets bumped or tilted. Put open bins away from grinding and sawing debris. A layout based on the garage workshop zones can keep frequently handled stock near assembly without putting it in the dirty work stream.
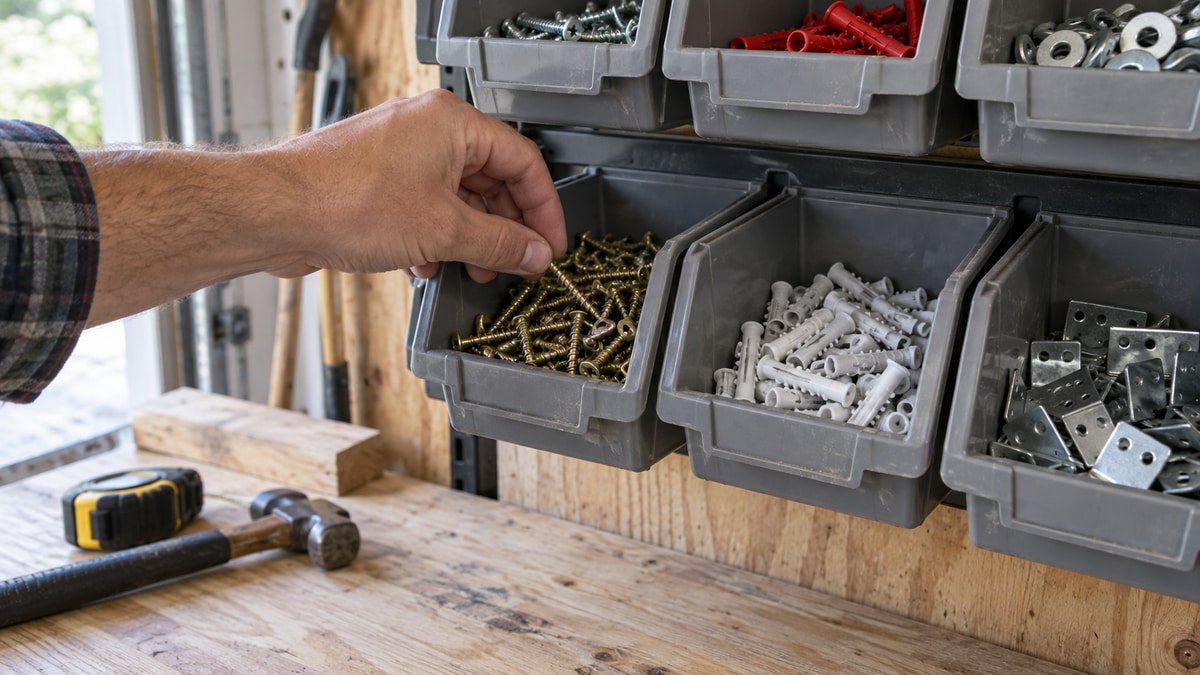
Compare storage density with real dimensions
Drawer cabinets use wall area efficiently because the front is almost all access points. Their depth is often modest, which helps above a bench. Bins need shelf depth, vertical clearance, and enough front space for a hand. Their wider openings make them faster, but fewer categories fit within the same rectangle.
Count usable compartments rather than drawer count. One drawer split into three workable cells may beat three tiny drawers whose handles and frames consume more space. With bins, compare inside floor dimensions and front opening size. Outside volume does not tell you whether a hand can reach the last washer.
Measure the wall or shelf before shopping. Our garage wall storage systems guide covers attachment and working depth, while the garage shelf spacing guide helps set the open height above bins. Include the hand path as well as the plastic shell.
Use manufacturer dimensions as a fit check
Product names do not form a standard size system. The Akro-Mils 10144 drawer cabinet page lists a cabinet about 20 inches wide, 6 3/8 inches deep, and 15 13/16 inches high. Its large and small drawers have different openings, and the maker includes a limited number of dividers. Those details matter more than the headline count of 44.
Akro-Mils lists its four inch tall shelf bin family in several lengths and widths, including models made for shelves close to 12, 18, or 24 inches deep. A garage shelf that is nominally 18 inches deep may lose space to a rear brace or front lip, so compare the exact outside bin length with the usable deck.
Do not carry one brand’s measurements over to another product. Buy one sample when possible. Fill it with the intended parts, reach into it from the planned height, and see whether the label remains visible while the container is in place.
Think about dust spills and moisture
Most plastic parts drawers reduce falling dust but are not airtight. Fine sanding powder can enter around the face, especially when a dust collector exhausts nearby. Open bins collect more. If a part needs genuinely sealed storage, use an appropriate lidded container rather than pretending a drawer cabinet is a gasketed box.
Drawers contain a tip better during ordinary use because the cabinet stays on the wall. A drawer pulled too far can still spill, so rear stop tabs are worth checking. Bins move more often and may need a front retaining lip or a rack designed for their hanging edge.
Moisture calls for fixing the garage problem first. Plastic organizers protect parts from a damp rag, not from roof leaks, wall condensation, or standing water. Keep steel hardware dry, avoid packing wet parts, and leave enough visual access to catch rust before a whole drawer turns orange.
Label for identification not decoration
Labels should answer the question asked at the bench. For fasteners, name type, diameter, length, thread, and material when those distinctions affect the job. For electrical pieces, use the description printed by the maker. Color alone is a weak code because bins move and people remember colors differently.
Drawer labels need to be readable without opening the cabinet. Open bin labels belong above or below the hand opening so stock does not hide them. Use replaceable cards or removable tape when the category changes often. Permanent marker tends to survive longer than the sorting decision.
A photo on a label can help with an unfamiliar clip or specialty fitting, but dozens of pictures make the wall noisy. Start with plain names. The planning advice in the garage pegboard layout guide applies here too: reserve the strongest visual cues for items that must be found quickly.
Put frequent parts in the comfortable reach band
The easiest containers belong between roughly knee and shoulder level for the person who uses them, adjusted to the actual bench and body. Tiny drawers mounted near the ceiling are hard to read. Heavy bins near the floor invite a bent reach and an awkward pull.
The NIOSH Revised Lifting Equation overview explains that weight, horizontal reach, vertical position, travel distance, frequency, and grip all affect a lifting task. It is a workplace assessment tool, not a garage bin weight limit. The lesson still travels well: a manageable load in a good position feels very different from the same load reached at arm’s length.
Keep dense hardware in smaller containers. If a bin needs two hands, the path to the bench should be clear and the shelf should be low enough for a controlled lift. A bin full of bolts can exceed what its size suggests long before it looks full.
Secure the cabinet rack and shelf
A wall mounted drawer cabinet must use the attachment points and hardware described by its maker. The organizer, all contents, and the force of opening a sticky drawer reach the wall together. Drywall alone may not be an approved support. Find suitable structure or use a mounting system rated for the load and wall type.
Bin racks need the same attention. A full row puts weight forward of the wall, and pulling a stubborn bin adds motion. Freestanding shelves should be level, stable, and anchored when their instructions call for it. Do not exceed a shelf or rack rating simply because each plastic bin seems light.
If small parts live inside a larger cabinet, allow drawer travel and label visibility before buying the enclosure. The garage cabinets buying guide covers interior depth, shelf adjustment, and wall attachment. A steel door that cannot close over an organizer is wasted protection.
A hybrid organizer fits most garages
Use drawers for the long tail of small categories and bins for the short list of parts consumed often. A sensible starting split is one drawer cabinet beside one narrow row of bins. Live with it before expanding. The ratio will become obvious as refills arrive and unfinished projects leave leftovers.
Portable compartment cases can bridge the two systems. They keep a project assortment together, then stack on a shelf when the job ends. Do not use them as permanent dumping grounds. Return common stock to its drawer or bin, and leave only the parts tied to that project in the case.
Keep a small empty tray at the bench for parts removed during repair. Mixing those pieces into the permanent organizer before reassembly is an easy way to lose track. Once the job is done, leftovers can join labeled stock or leave the garage.
Shop by the refill and the retrieval motion
Bring measurements and a sample part when comparing organizers. For drawers, test handle grip, stop tabs, divider fit, front clarity, and whether the drawer comes out without a fight. For bins, test the hand opening, inside corners, rack engagement, label holder, and balance when carried.
Think about how supplies arrive. A one pound box of screws should fit without opening a second half empty bin. A specialty washer bought six at a time should not occupy a shoebox sized container. Leave some headroom, but do not pay for rows of air.
Put the system near a bench that has enough landing space for an open drawer or removed bin. The guide to workbench placement in a garage explains why door swing and travel paths can matter more than the blank wall that looks good in a product photo.
Run a thirty day sorting test
Start with broad temporary labels and sort only parts you can name. For one month, notice which containers are opened repeatedly, which are hard to reach, and which categories overflow. Move the everyday stock into bins. Split the crowded tiny parts into drawers. Combine categories that remain almost empty and are easy to tell apart.
Set a rule for stray hardware. If you cannot identify a fastener or imagine a reasonable use, one small holding cup is enough. Date it. Revisit the cup after a few months instead of seeding unidentified screws across every drawer.
A useful organizer makes returning a part nearly as easy as taking it. Drawers bring density and protection. Open bins bring speed and flexibility. Put each advantage where the garage routine can use it.
Useful products to compare
These links open current Amazon search results. Check the dimensions, manual, mounting hardware, warranty, and current availability for the exact model before you order.
Before you buy or install
Read the current manual for the exact product you are considering. Confirm its assembled dimensions, rated capacity, mounting requirements, included hardware, working clearances, warranty, and any limits that apply to your wall, floor, electrical circuit, or garage layout.
Frequently asked questions
Are drawers or bins better for screws?
Drawers suit small quantities of many screw sizes because shallow compartments make identification easier. Open bins suit one or two screw types used repeatedly during a project. Keep dense boxes low enough for a controlled lift, and label diameter and length rather than relying on appearance.
Do clear drawers keep garage hardware dust free?
They reduce direct falling dust, but most small parts cabinets are not sealed. Fine sanding or grinding dust can enter around drawer faces. Place the cabinet outside the dirty work stream, clean it periodically, and use a suitable closed container when a part needs better protection.
Can small parts bins hang directly on pegboard?
Only use hooks, rails, or adapters designed for the bin system, pegboard material, hole pattern, and expected load. A bin that hangs securely while empty may pull away when filled with bolts. Follow the capacity and attachment instructions for every part of the setup.
How many small parts drawers do I need?
Count named categories, then allow a little room for divisions and normal refills. Do not buy one drawer for every stray fastener. A month with temporary labels will reveal which groups deserve separate drawers and which can share space without causing a search.
What is the best way to combine drawers and bins?
Put tiny, varied, slower moving parts in shallow drawers. Put common repeat-use stock in open bins near the workbench. Keep both within a comfortable reach, leave space for labels and hands, and use a portable case for assortments that travel to a project.