Affiliate disclosure: As an Amazon Associate I earn from qualifying purchases. This article may contain affiliate links, and Bay & Bench may earn a commission at no extra cost to you. Read our full Affiliate Disclosure.
Garage shelf spacing looks tidy when every opening is equal, at least in an empty product photo. Once real bins arrive, that symmetry often wastes a surprising amount of height. One opening is too short for a cooler. Another holds a small parts case with a foot of air above it. Better spacing starts with the objects, not with a favorite number. Measure the loaded items, add room for your hands, and build a few useful opening sizes instead of repeating the same gap from floor to top.
Quick answer
There is no universal best spacing for garage shelves. Measure the tallest point of each loaded bin or object, then add enough clearance to lift, tilt, and slide it without catching the shelf above. Group similar heights together. Keep heavy items low, everyday items within comfortable reach, and light seasonal gear on the highest usable level.
Measure the clear opening, not the post holes
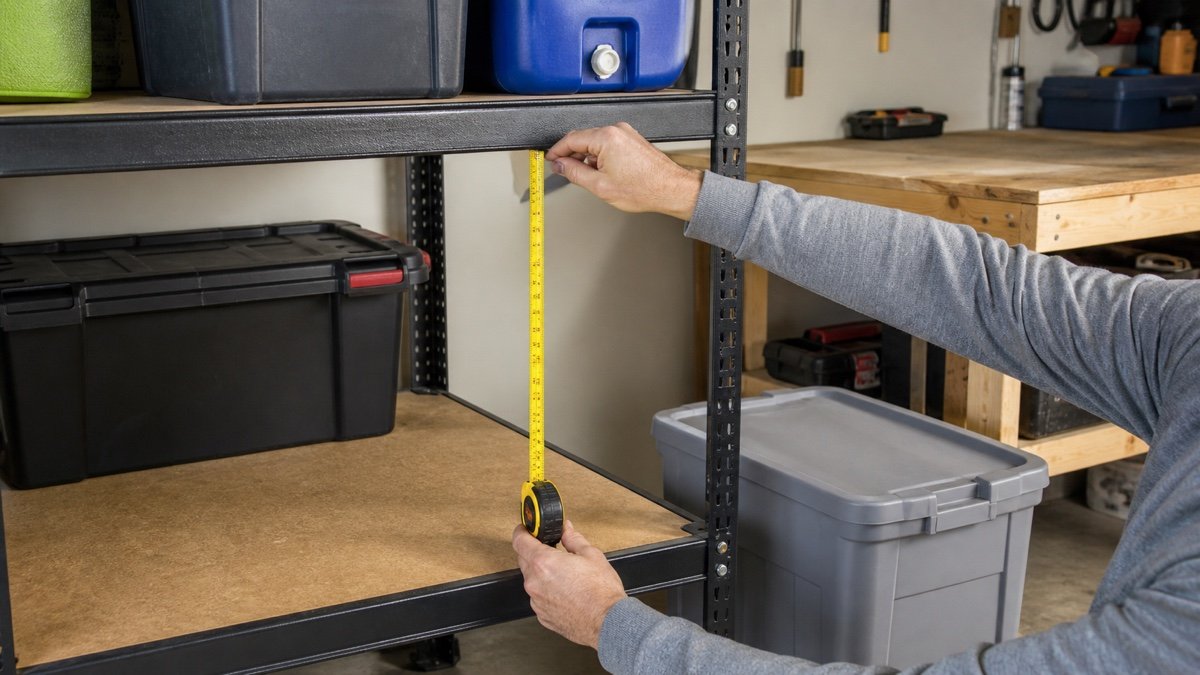
Shelf listings may describe overall height or adjustment increments, but your tote only cares about the clear opening. Measure from the usable top surface of the lower shelf to the lowest solid part of the shelf above. That part might be the deck, a front beam, or a brace.
Then measure the stored object at its tallest loaded point. Include the lid, handle, wheels, a bow in the plastic, and anything that sticks above the rim. Empty totes are often shorter and squarer than packed ones.
The difference between those two measurements is handling clearance. You need room to raise the tote over a shelf lip and angle it into the opening. A box that technically clears by a fraction of an inch will become irritating after the third use. It may not fit at all when the lid bulges.
Use the garage shelving planner to test opening heights and tote counts before moving every shelf.
Inventory first, then sort by height
Pull the items intended for the rack into one place. This is the slightly messy part, but it prevents a worse result later. Measure each item and note how often you use it. A phone note is enough.
Sort the list into a few height groups rather than designing a custom opening for every box. Common totes may share one group, small parts cases another, and bulky coolers or camping bags a third. Leave one adjustable bay for the odd item that never matches anything else.
Frequency matters as much as height. Daily and weekly items should sit where you can see and lift them without crouching deeply or climbing. Heavy cases stay low even if they would fit on a higher shelf. Light seasonal goods can occupy the upper opening.
If you haven’t chosen a rack yet, compare usable dimensions in the garage shelving buying guide. Outside height and width don’t tell you the space between beams.
Useful starting ranges, not fixed rules
The ranges below are rough planning prompts for common household objects. They are not standards and they don’t replace measuring your own items. Add or remove space based on handles, shelf lips, retrieval angle, and the adjustment increments available on the rack.
| Storage group | Planning opening to test | What to check |
|---|---|---|
| Shallow parts cases and trays | 6 to 10 inches | Finger room and room to open or remove the case |
| Small bins and compact tool cases | 10 to 14 inches | Handle height and front beam clearance |
| Common lidded totes | 14 to 18 inches | Loaded lid height and lifting angle |
| Coolers and medium bulky gear | 18 to 24 inches | Handle swing, wheels, and safe lifting |
| Large seasonal items | 24 inches or more | Whether a shelf is better than an open floor bay |
A 17 inch tote does not promise that an 18 inch opening will feel good. Test the real tote. If the front beam is deep or the tote has a raised handle, more room may be needed.
Build different zones into the same rack
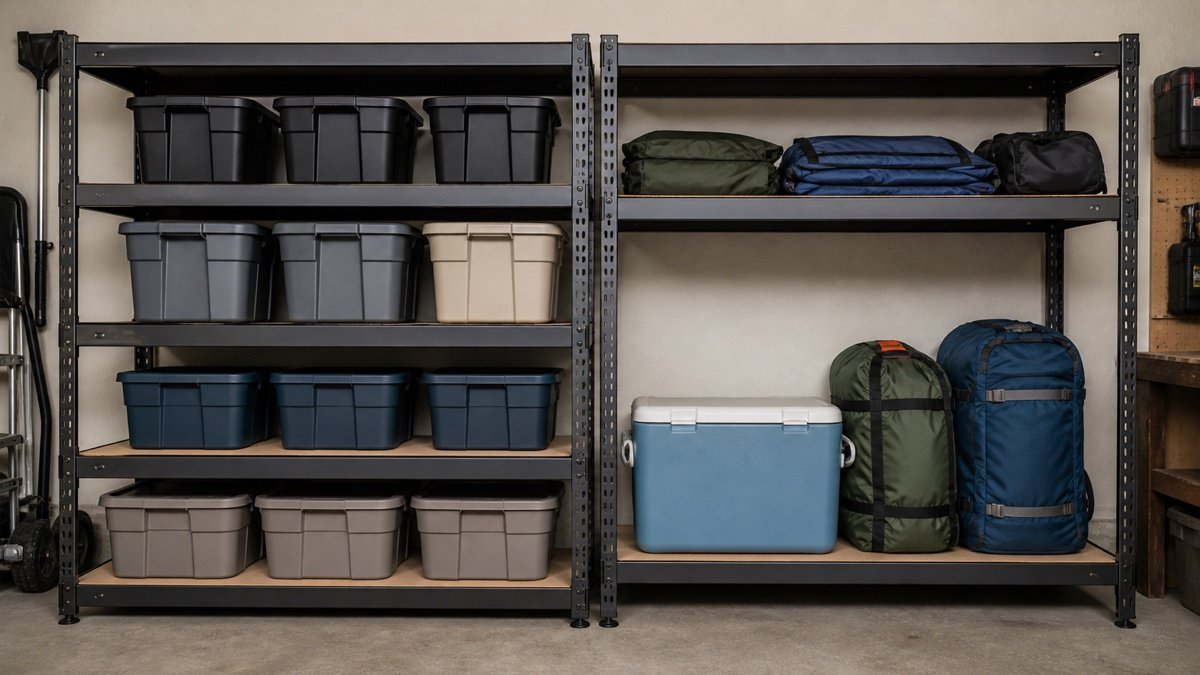
A useful rack rarely needs identical openings. A tall bottom bay can accept coolers, rolling cases, or large camping bags. Two medium openings can take the tote size you own most. A shallow shelf near eye level keeps batteries, sanding supplies, or small cases from vanishing inside a tall cavity.
This approach also limits stacking. Two totes piled inside one oversized opening seem efficient until you need the bottom one. If the rack has enough shelf levels, giving each row its own opening is usually easier to maintain.
Don’t remove shelf levels just to create dramatic empty height. Many racks use shelves or beams as part of the assembled structure, and the maker may specify their position or minimum number. Follow the instructions. If the desired layout conflicts with them, choose a different rack.
The example shown here uses compact tote openings on one side and a tall gear bay on the other. It is a reminder to design around categories, not symmetry.
Adjustment pitch changes the final number
Adjustable shelving moves in steps. If the post slots are spaced at fixed intervals, the exact opening you calculated may not be available. Round up to the next permitted position, assemble one bay, and test it with the loaded item.
Remember that moving one shelf changes two openings. Gaining two inches below takes two inches from the space above. Work from the largest fixed object first, then set the nearby levels. It is much quicker than making tiny changes from the top downward.
Wire decks, solid panels, and shelf beams can also have different thicknesses. Measure the finished shelf, not just the distance between matching holes. Our wire vs solid shelf comparison covers the practical differences between those surfaces.
Plan for hands, lids, and awkward movement
Most spacing mistakes happen because the planner measures only the object. Retrieval uses extra room. Your hands wrap around handles. A hinged lid rises. A long tool case rotates before it clears the posts. A cooler with wheels may need to tip slightly before it comes forward.
Set the tote on a table at the proposed shelf height and mimic the real movement. If you have to pinch your fingers or drag the lid against the surface above, increase the opening. For a frequently used object, a little empty air is not wasted space. It buys an easier routine.
Front posts reduce the clear width, too. Check both height and width where the item passes through the frame. A wide tote may fit on the deck but fail to enter between the posts.
Keep the top and bottom shelves practical
The highest shelf should hold items you can retrieve by the access method you actually intend to use. If a stable step ladder is required, plan a clear place to open it. Don’t depend on a bumper, rolling stool, or lower shelf as a step.
At floor level, leave enough room to sweep and notice moisture if the shelf design permits adjustment. Garages can take in rainwater and melting snow. Cardboard sitting close to a wet slab is a poor match, even when it fits perfectly. Use suitable containers and follow the shelf maker’s requirements for the lowest level.
Keep required access clear around electrical equipment, appliances, door hardware, sprinklers, and utilities. Those clearances depend on the equipment and local rules, so shelf spacing should not be used to squeeze storage into a prohibited area.
A five-minute spacing worksheet
- Measure every loaded item at its tallest and widest point.
- Group items by similar height and note how often each group is used.
- Choose a handling allowance by physically lifting and sliding one sample item.
- Round each planned opening up to an adjustment position the rack permits.
- Check the total against the rack’s usable height, including beams and shelf thickness.
- Load one bay as a trial before rebuilding the rest.
If the numbers do not fit, don’t shave every opening until retrieval becomes miserable. Reduce the number of categories on the rack, use shallower containers, or move one bulky object to a different storage format. The garage storage planning guide can help place that overflow elsewhere.
Useful products to compare
These links open current Amazon search results so you can compare dimensions, manuals, ratings, and availability for the exact models on your shortlist.
Before you buy or install
Check the current manual for the exact product you are considering. Confirm the assembled dimensions, load rules, mounting requirements, included hardware, clearances, warranty, and any limits that apply to your wall, floor, or garage layout.
Frequently asked questions
What is the standard spacing between garage shelves?
There is no single standard that fits every garage. The right clear opening comes from the loaded item height, handling room, shelf construction, and the rack’s adjustment increments.
How much clearance should I leave above a storage tote?
Leave enough to lift the tote over any shelf lip and slide it out without scraping the lid or your hands. Test a loaded tote at the planned shelf height instead of relying on a universal allowance.
Should garage shelves be evenly spaced?
Usually not. A mix of shallow, medium, and tall openings uses vertical space better when your bins and equipment have different heights.
Where should heavy items go on garage shelves?
Keep heavy items on lower levels when practical, within the shelf’s published limits and distribution rules. This reduces awkward lifting and helps keep a freestanding rack’s center of gravity lower.