Tag: small garage

  • Garage Bike Storage Guide: Fit the Rack to the Bike and Rider

    Garage Bike Storage Guide: Fit the Rack to the Bike and Rider

    Affiliate disclosure: As an Amazon Associate I earn from qualifying purchases. This article may contain affiliate links, and Bay & Bench may earn a commission at no extra cost to you. Read our full Affiliate Disclosure.

    A garage bike storage guide has to account for more than the number of bicycles. A light road bike, a long trail bike, a child’s bike, and a 65-pound electric bike ask different things of the rack and the rider. Tires, fenders, frame shape, handlebar width, brake cables, and lifting ability all affect fit. Start by measuring each bike and watching how it enters the garage. Then choose floor, vertical, pivoting, horizontal, or ceiling storage for that exact routine.

    Quick answer

    Use floor stands for heavy bikes, children’s bikes, and anything ridden daily by someone who cannot lift it comfortably. Vertical wheel racks save wall width and work well for several bikes when heights are staggered. Pivoting vertical racks reduce aisle projection after loading. Horizontal frame cradles suit one or two display-worthy bikes and avoid wheel hooks, but they consume a long wall. Verify bike weight, tire width, wheel diameter, fenders, frame contact, mounting structure, and the clear loading lane before buying.

    Garage bike storage guide by rack style

    Every style trades floor area, wall width, lifting, and access differently. Use the table as a first filter, not a substitute for the product fit chart.

    Storage styleBest useSpace tradeoffFit check
    Floor standHeavy, daily, children’s, or rental bikesUses floor depth, little liftingTire width, rotor and derailleur clearance
    Fixed vertical hookSeveral light to medium bikesSaves wall width, projects bike lengthWheel and tire fit, lift height, solid mounting
    Pivoting vertical rackDense row with side pivotCan fold bikes toward wallHandlebar overlap, pivot sweep, weight
    Horizontal frame cradleOne or two bikes at reachable heightConsumes roughly a bike-length wallFrame shape, bar width, cradle contact
    Ceiling systemRarely used light bikesClears floor, hardest accessRated structure, door envelope, safe operation

    Map the bike zone inside the garage storage plan so the rack does not inherit a wall needed by tools or parking.

    Measure every bicycle in its normal setup

    Record overall length, handlebar width, total weight, wheel diameter, inflated tire width, and the highest point. Note fenders, front baskets, child seats, mirrors, kickstands, and cables. A printed tire size is a starting point; measure the real inflated width when the rack manufacturer tells you to.

    Photograph the frame from the side. Horizontal cradles may struggle with low step-through tubes, compact full-suspension shapes, or cables routed where the cradle touches. Wheel racks need clearance around rims, tires, fenders, and the frame near the front wheel. Do not remove a safety accessory merely to force a bike into an unsuitable rack.

    Give each rider a rack they can use

    A storage system fails when one person cannot load it. Ask each rider to lift the bike into the proposed orientation. Use a wall mark or an empty hook mockup rather than holding a bicycle overhead near a car. If the motion is awkward when rested and the bike is clean, it will be worse after a wet ride.

    Children’s bikes usually belong low or on the floor. A heavy electric bike may fit a wall rack’s published capacity yet remain a poor daily choice because lifting it risks the rider, wall, or bike. Put the most frequently used bikes closest to the exit and leave enough room to roll them out without moving two others.

    Use vertical racks when wall width is scarce

    Vertical storage turns a bike’s length into wall projection. Several bikes can occupy a shorter wall if the handlebars overlap. Feedback Sports recommends roughly 16 to 24 inches between Velo Hinge hooks depending on stud spacing and staggered heights. Its current Velo Hinge 2.0 FAQ explains a practical mockup: lay bikes near each other to see how handlebars nest, then transfer the height difference to the wall.

    That spacing is product guidance, not a universal rule. Wide mountain-bike bars, baskets, and brake levers demand more. Mark the full wheel and handlebar envelope, then protect the adjacent car door and the person loading the bike.
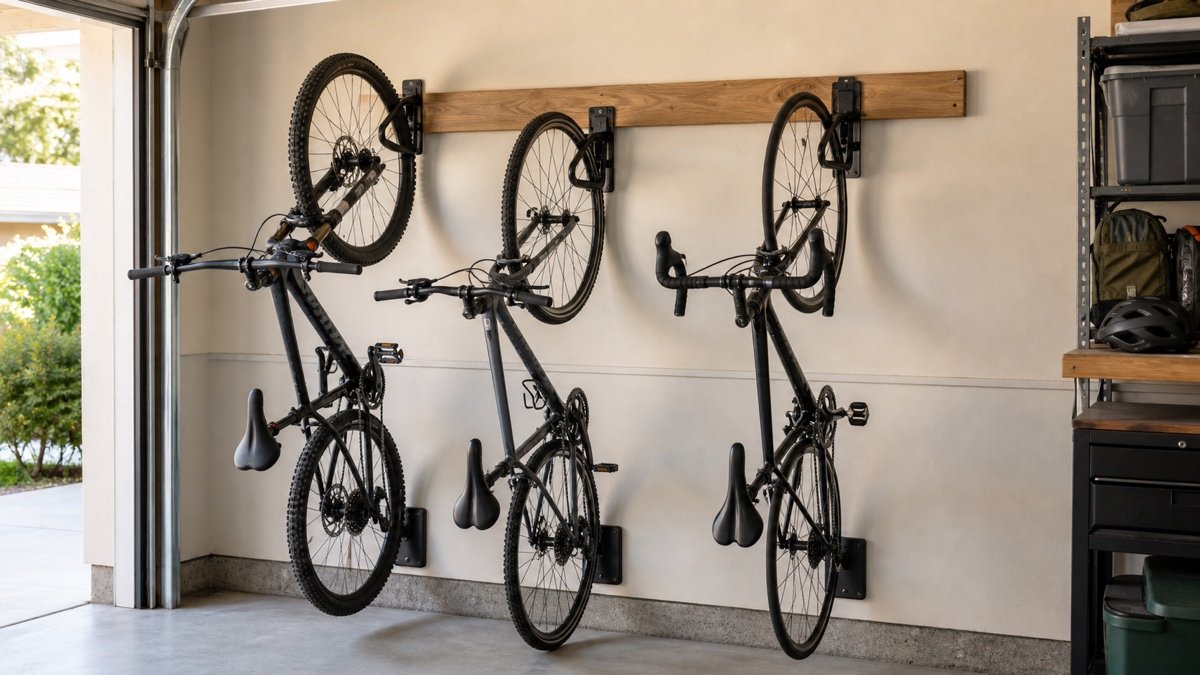
    Mountain bikes on staggered vertical wall racks beside an open garage bay
    Staggering vertical racks helps handlebars overlap, but each bicycle still needs a clear loading lane.

    Pivoting racks can recover the aisle after loading

    A pivoting rack holds the bike vertically, then swings it toward the wall. This can reduce how far the row occupies the aisle when stored. Feedback Sports lists the Velo Hinge 2.0 for up to 50 pounds when properly mounted to a wall stud, with a 4-inch hook opening and published compatibility from 700C by 23 mm through 29 by 3.0 inch combinations. See the manufacturer page for the exact fit diagram and instructions.

    Include the pivot sweep in the layout. Pedals and handlebars move sideways as the bike folds. A neighboring cabinet, car mirror, or second bike can stop the hinge before it reaches the useful angle.

    Horizontal cradles favor easy access and a long wall

    Horizontal racks support the frame on padded arms. The bike stays closer to normal carrying height and becomes easy to inspect before a ride. This format works nicely above a low cabinet or along a wall with no door, although the full wheelbase and handlebars occupy considerable width.

    Feedback Sports lists its Velo Wall Rack 2D at a 50-pound maximum, with cradle projection adjustable from 8 to 12 inches and vertical arm adjustment. The official product page warns that very wide handlebars, long wheelbases, and fat bikes may not suit it. Frame contact matters. Confirm that both cradles support strong tube locations without pressing cables or delicate finishes.
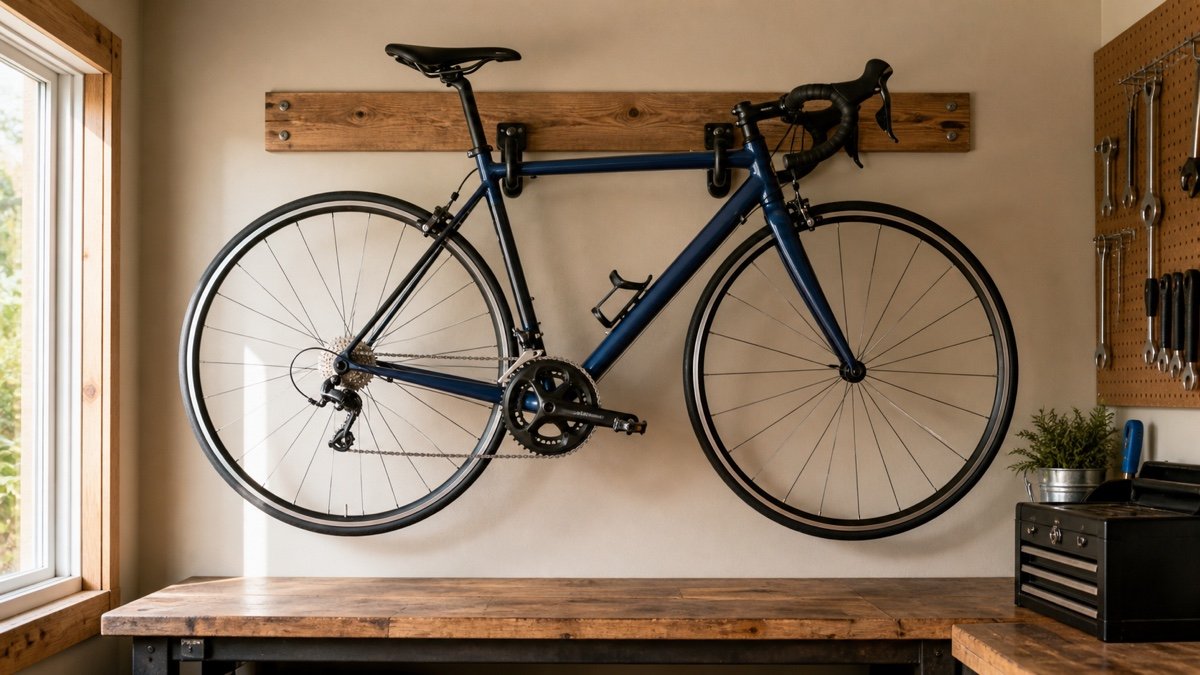
    Road bicycle held horizontally on padded frame cradles in a garage
    Horizontal cradles keep a favorite bike low and visible while consuming a long stretch of wall.

    Simple hooks still require a structural decision

    A vinyl-coated hook can be a sensible low-cost answer for a standard bike. Park Tool lists its 451 wood-thread hook at a 115-pound hook limit when securely screwed into solid material, while making the user responsible for the mounting material. Read the manufacturer page closely. The large hook rating does not turn thin drywall into structure.

    Confirm tire and rim fit, thread engagement, and the direction of loading. Use the fastener and substrate called for by the manufacturer. If you do not know what is inside the wall, find out before drilling or choose a supported floor rack.

    Keep bicycles outside the parking and door envelopes

    A vertically stored bike projects about its length from the wall until it pivots. A horizontal bike projects by its handlebar and pedal width while stretching along the wall. Tape both shapes on the floor and wall. Open the vehicle doors, house door, garage door, cabinets, and freezer. Then walk the normal path with grocery bags or a trash bin.

    Compare the remaining route with the garage workshop aisle clearance guide. A handlebar end at face height deserves extra space. Place a rear-wheel bumper or wall protector where the system expects one, and keep oily chains away from clothing paths and painted car panels.

    Store electric bikes for weight, heat, and cables

    The motor does not harm a rack, but the added weight changes lifting and mounting. Use the complete bike weight with battery and accessories when comparing rack capacity. Follow the bicycle and battery manufacturers’ storage and charging instructions. Do not assume removing the battery is optional or required; platform guidance varies.

    A floor rack is often the honest solution. It lets a rider roll the bike into place and keeps a heavy frame low. Give the kickstand, pedals, and handlebars room, and keep charging cords out of tire and walking paths. Check whether a front-wheel stand clears the brake rotor and fender, and whether the tire stays stable at normal pressure. A plain arrangement that works after a tiring ride will beat an overhead system that everyone avoids.
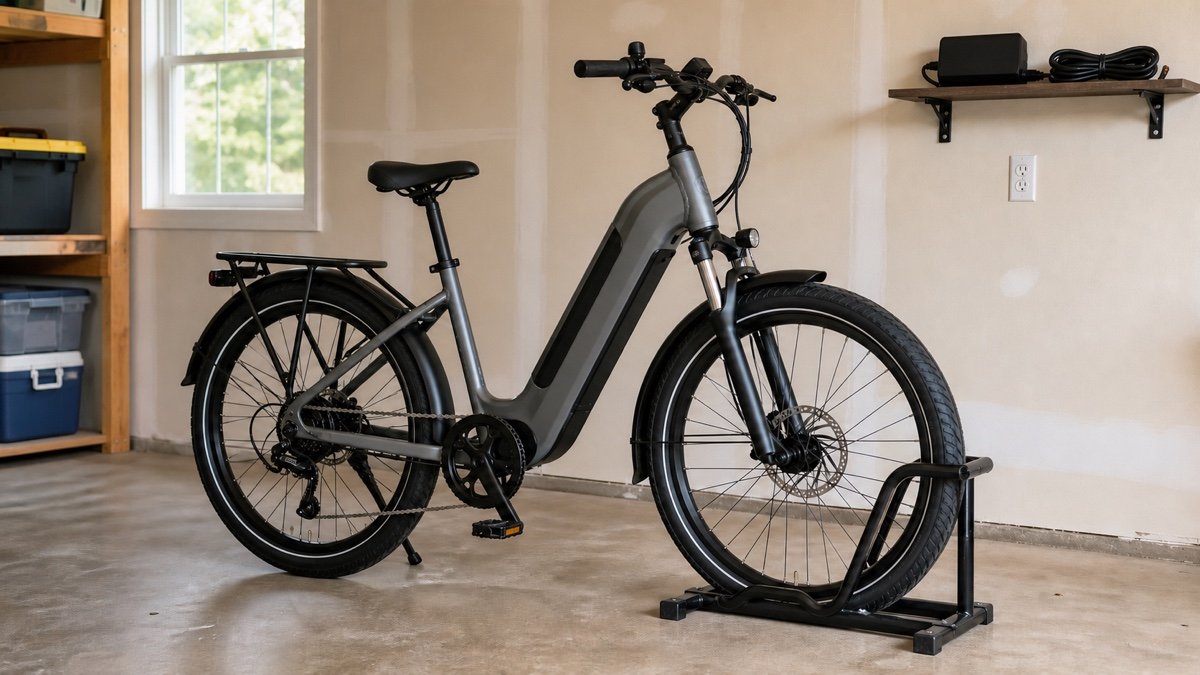
    Heavy electric bicycle parked in a floor rack near a garage outlet
    A floor rack is often the better answer when lifting a heavy electric bike would discourage daily use.

    Be cautious with ceiling storage

    Ceiling hoists and overhead cradles free wall and floor space, but they add lifting, rope management, and a falling-object concern. They also compete with the open garage door, tracks, opener, lights, and overhead racks. Use them only for bicycles light enough to handle safely and ridden rarely enough that the access penalty is acceptable.

    Verify the structure, fasteners, hardware capacity, locking method, and clear operating route from the exact manual. Never hang a bicycle where a partial release could reach a person or vehicle. If the ceiling location requires standing on another ladder while controlling the bike, choose a different storage method.

    Mock up the row before drilling

    Cut cardboard rectangles for the rack bodies and tape outlines for wheels, bars, and pedals. Mark stud locations. Bring every bicycle into position one at a time and rehearse the loading motion. Stagger heights only as much as each rider can manage.

    Leave the mockup for several days. If it blocks the route or requires moving another bike, revise it. Check the garage wall storage options for renters when permanent anchors are not permitted. A freestanding rack may consume more floor area, but it avoids unsafe guesses about an unfamiliar wall. If bikes must share the same surface with tools, compare the hardware and working heights in the garage wall storage systems guide before committing the studs.

    Write each rider’s name on the temporary position and try a normal weekday reset. Helmets, locks, pumps, and child seats need homes too. Watch which bike gets left in the aisle when someone returns tired or in a hurry. That abandoned bike usually exposes a hook set too high, a blocked loading lane, or an accessory that catches the neighboring handlebars. Fix the awkward step before drilling.

    Useful products to compare

    These links open current Amazon search results. Check the dimensions, manual, mounting hardware, warranty, and current availability for the exact model before you order.

    Before you buy or install

    Read the current manual for the exact product you are considering. Confirm its assembled dimensions, rated capacity, mounting requirements, included hardware, working clearances, warranty, and any limits that apply to your wall, floor, electrical circuit, or garage layout.

    Frequently asked questions

    Is it safe to hang a bike by one wheel?

    Use a rack designed for wheel storage and confirm the wheel, tire, bike weight, mounting surface, and hardware meet the manufacturer’s requirements. Do not force a fat tire, deep rim, fender, or incompatible wheel into a basic hook. Inspect the rack and contact point regularly.

    How far apart should vertical bike racks be?

    Spacing depends on handlebar width, bike size, stud locations, and whether heights are staggered. Feedback Sports suggests roughly 16 to 24 inches for its Velo Hinge setup as a starting point. Mock up the actual bikes and follow the exact rack instructions.

    What is the easiest storage for a heavy electric bike?

    A compatible floor stand is usually easiest because the bike can roll into place. A wall rack may carry the published weight but still require an uncomfortable lift. Consider the shortest and least strong regular rider, battery guidance, tire fit, and charging-cord route.

    Can a bike rack mount only to drywall?

    Use only the substrate and fasteners specified by the rack manufacturer. Many wall racks require a wood stud, masonry, or another solid support. Drywall by itself is not a safe default. If the wall structure is uncertain, choose a freestanding system or get qualified installation help.
  • Best Folding Workbenches for Garage Use: A Fit First Shortlist

    Best Folding Workbenches for Garage Use: A Fit First Shortlist

    Affiliate disclosure: As an Amazon Associate I earn from qualifying purchases. This article may contain affiliate links, and Bay & Bench may earn a commission at no extra cost to you. Read our full Affiliate Disclosure.

    The best folding workbenches for garage projects fall into several distinct formats. A wall mounted shelf, a clamping platform, a compact resin table, and a larger portable surface behave differently. This shortlist compares current manufacturer documentation checked on August 21, 2026. It looks beyond the largest load number to open size, stored size, clamping method, setup, restrictions, and missing specifications. Those details matter when the car must return after the project.

    Quick answer

    The WORX Pegasus is the clearest documented all-around clamping model, while the Duramax Spence makes sense when a clear wall can support a permanent folding surface. The current U.S. Keter table weighs 24.03 pounds, includes two adjustable clamps, and carries a 1,000 pound stated load with important manual restrictions. DEWALT emphasizes rapid setup and a large stated support load. BLACK+DECKER offers versatile clamping, yet its current page contains conflicting load figures, so capacity alone should not decide the purchase.

    Best folding workbenches for garage: normalized comparison

    This table keeps manufacturer wording visible instead of forcing unlike claims into one ranking. Dimensions describe what the cited page actually labels. A missing folded measurement is marked as missing, not estimated from a photograph. Stated loads are not directly comparable because the brands use different modes, surfaces, and wording.

    Model and formatDocumented working sizeDocumented folded sizePublished load wordingHolding formatBest fit
    Duramax Spence, wall mounted48 by 20 inch topNot stated on current page250 lbPlain wood surfacePermanent wall station
    WORX Pegasus WX051, portable clamping31 by 25 inches, 32 inches high35 by 25 by 5 inches300 lb table, 1,000 lb sawhorseTwo clamps, four dogsGeneral repair and clamping
    BLACK+DECKER WM425-A, clamping centerNot labeled; overall panel lists 33.6 high by 28.7 long by 9.5 wideNot separately labeledPage conflicts between 550 lb and 55 lbOne handed clamp and four jaw positionsIrregular workpieces
    Keter Folding Work Table, resin portableNot labeled; U.S. page lists exterior dimensions of 35.8 deep by 21.6 wide by 29.7 highNot stated on current pageUp to 1,000 lb, with balanced load rulesTwo adjustable clampsTemporary support and hand clamping
    DEWALT Express DWST11556, portable tableNot stated on current pageNot stated on current pageMetal legs support up to 1,000 lbCompatible with trigger clampsFast temporary setup

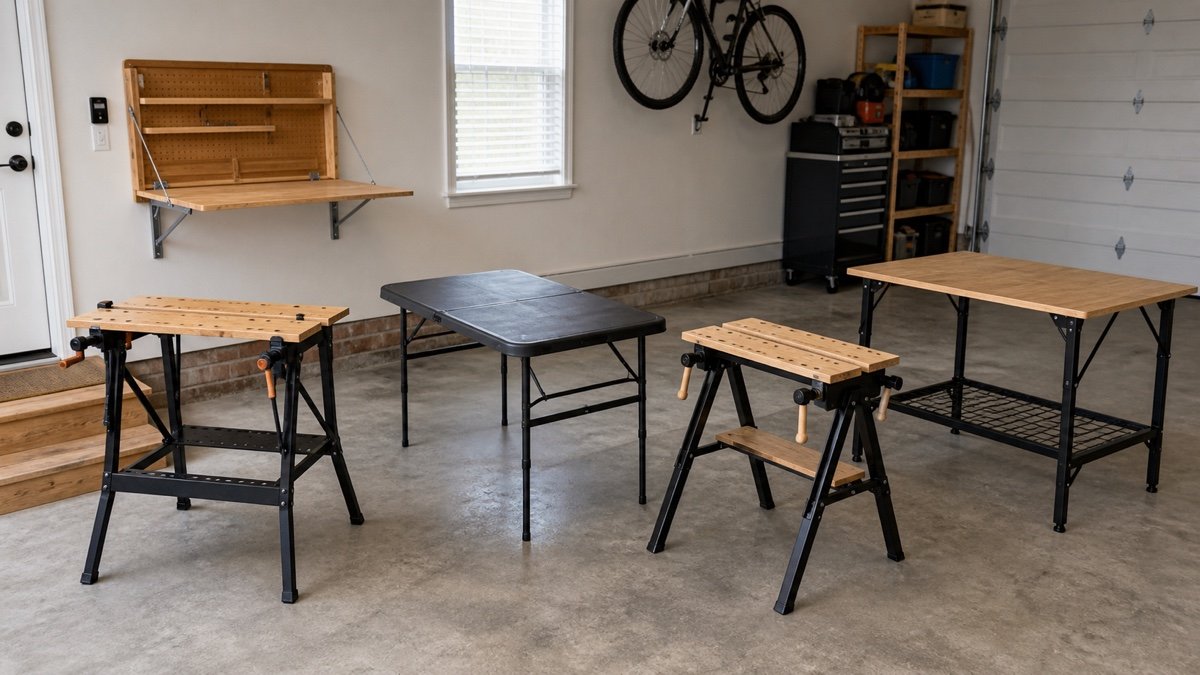
    Once a format looks plausible, compare its full station requirements with the garage workbench buying guide. A folded table still needs a safe storage position, and a wall bench still needs open floor space for the person using it.

    How this documentation based shortlist was built

    Each model fills a distinct role and has a current official page with enough information to discuss honestly. The shortlist rewards transparent dimensions, a clear folding method, useful holding features, and a believable place in a residential garage. It does not claim that the benches were tested side by side. Manufacturer capacity statements are reported as statements, not independently verified performance.

    Before ordering, draw the open footprint and the stored footprint. Include clamps, handles, legs, wall brackets, and the working stance. The garage storage fit calculator helps keep those two states separate. If the exact product page omits a folded dimension, ask the manufacturer or measure a local display. Do not invent the number from shipping dimensions, which can include packaging or a different orientation.

    Duramax Spence for a permanent folding wall station

    The official Duramax Spence product page lists a 48 by 20 inch worktop, an approximate product weight of 28.2 pounds, and a 250 pound capacity. It describes a stained wood top supported by a heavy duty bracket. The format leaves the floor open when folded, which is attractive beside a vehicle or in a narrow utility bay.

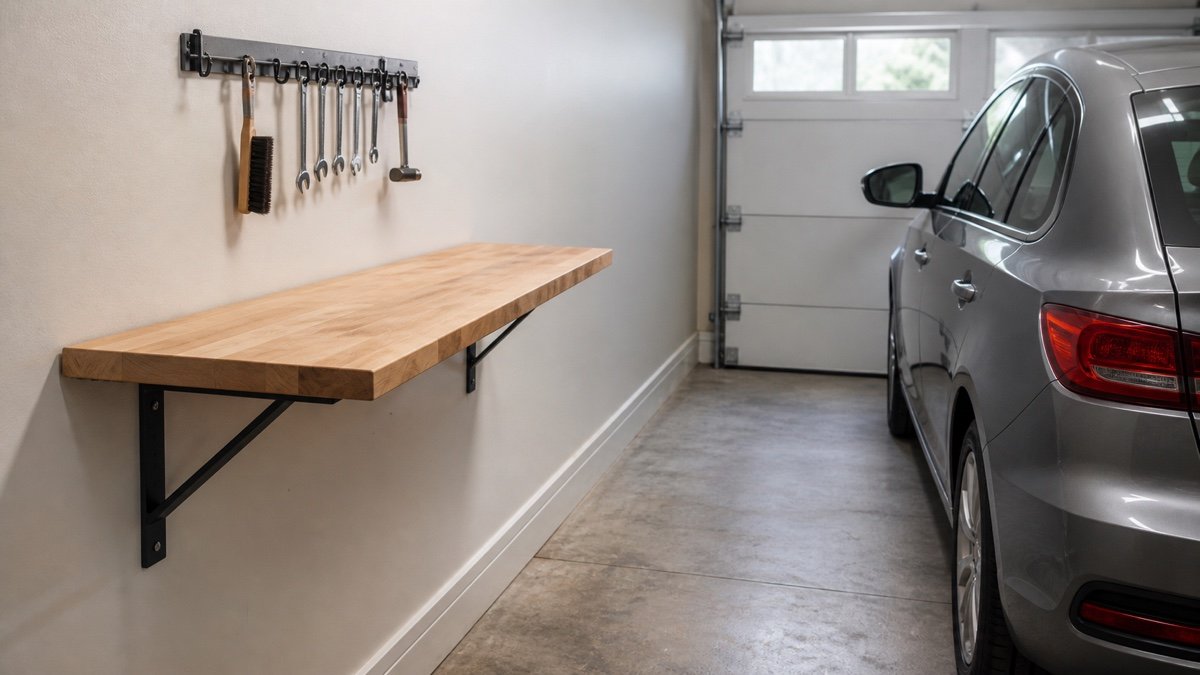
    Wall mounting moves the hard questions into the building. The useful height is set during installation. Fastener type, wall structure, bracket spacing, and obstructions behind the finish all matter. The current page does not publish a folded projection, so measure the bracket and top in person or request that figure before assuming a car door will clear. This is the least portable choice here, but it also avoids caster wobble and does not need a separate floor parking spot. It fits repair, potting, packing, and light assembly better than work that demands integrated clamp jaws.

    WORX Pegasus WX051 for repeat clamping jobs

    The official WORX Pegasus WX051 page publishes both open and folded dimensions: 31 by 25 inches at a 32 inch working height, then 35 by 25 by 5 inches folded. It weighs 30 pounds. WORX states a 300 pound table capacity and a 1,000 pound sawhorse capacity. Those are different modes, so use the number tied to the way the unit is configured.

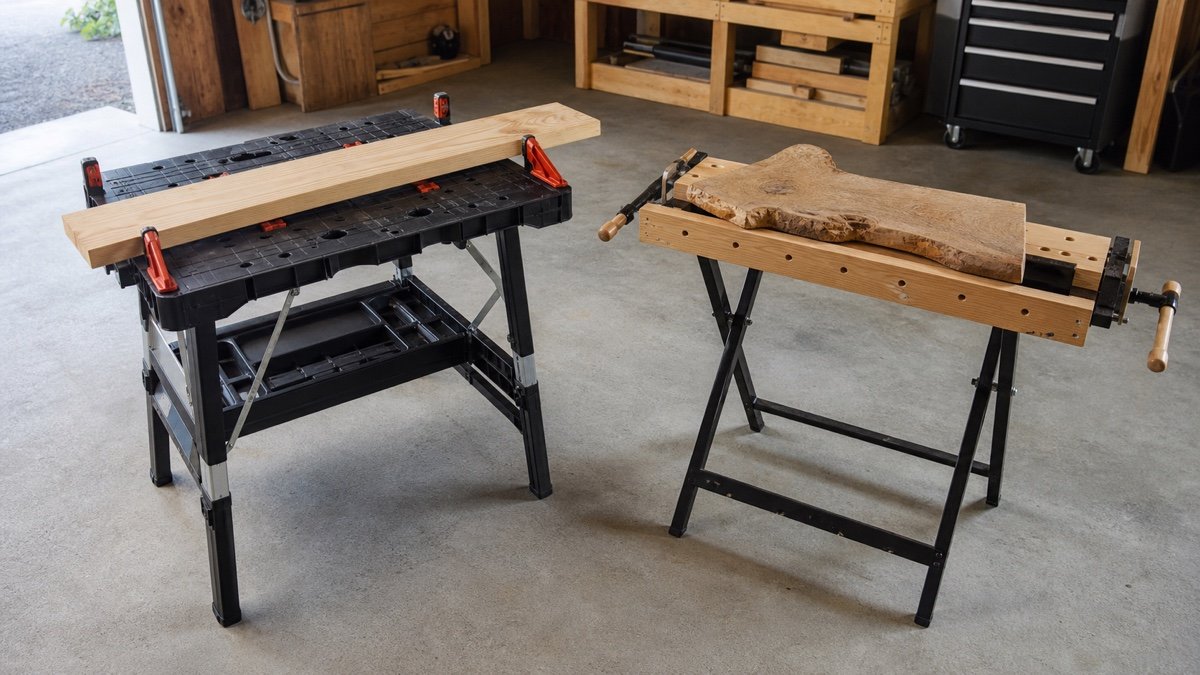
    Two integrated clamps, four clamp dogs, and an 18 inch maximum clamping width make this the most clamping-focused entry on paper. The top is modest, yet the edge and dog arrangement can be more useful than a larger plain table when a door, frame, pipe, or mower part needs to stay still. Its 5 inch folded depth is unusually helpful for planning a wall slot. Thirty pounds remains a real carry, especially when lifting it over stored bins. Reserve a floor level or waist level home rather than balancing it overhead.

    Two portable clamping workbenches open for comparison in a garage
    Integrated jaws and bench dogs can make a compact top more useful than a larger table that cannot hold the work.

    BLACK+DECKER WM425-A when jaw positions matter

    The official BLACK+DECKER WM425-A page describes a one handed clamp, four swivel pegs, vertical clamping to 1 9/16 inches, parallel clamping to 7 1/2 inches, peg clamping to 19 inches, and diagonal clamping to 30 inches. Its specification panel lists 33.6 inches high, 28.7 inches long, 9.5 inches wide, and 40.4 pounds. The page does not clearly label that set as open versus folded dimensions.

    There is also a material contradiction that should stop any load based ranking. The page heading and overview refer to 550 pounds, while a feature bullet says 55 pounds. Until BLACK+DECKER corrects or explains the discrepancy, confirm the current manual or ask support for the applicable working load. The clamping geometry remains the reason to consider this model. It can hold shapes that slide around on a flat table, but at 40.4 pounds it is not the light option. Check whether its stored stance is stable and whether you can carry it without catching the jaw assembly on nearby objects.

    Keter Folding Work Table for a quick-opening temporary station

    The current U.S. Keter product page lists exterior dimensions of 35.8 inches deep, 21.6 inches wide, and 29.7 inches high. It gives a product weight of 24.03 pounds, a 1,000 pound loading capacity, and two adjustable clamps. The page does not label those exterior measurements as open or folded, so they should not be treated as a verified stored envelope.

    The official Keter assembly and use manual adds the rules the headline cannot show. It says not to exceed 1,000 pounds, warns against unbalanced loads, and says not to mount or clamp power tools to the table. Those limits narrow the fit. This is a temporary support and hand clamping surface, not a substitute router table or a base for a benchtop machine. At just over 24 pounds, it still deserves a low, stable storage spot. Verify the folded dimensions before buying it for a tight slot.

    DEWALT Express DWST11556 for rapid setup

    The official DEWALT DWST11556 page says the Express Folding Workbench can be set up and folded in less than three seconds. It describes a large work surface, compatibility with trigger clamps, and metal legs that support up to 1,000 pounds. The plastic top and metal leg combination aims at a portable temporary station rather than a permanent cabinet bench.

    The current page does not publish the full open and folded dimensions in its main specification area. That omission matters more than the setup speed if the bench must slide between a freezer and a wall. Confirm those dimensions through current DEWALT support or a physical measurement before committing the space. Also check which clamps are included versus merely compatible. This format suits users who value a broad surface and quick reset, provided the verified stored size fits and the work does not depend on built in vise jaws.

    Stored size usually matters before capacity

    A folding bench spends more hours stored than open. Measure the exact home first: wall slot width, available height, floor ledges, door trim, outlets, and the swing of anything nearby. Then measure the route to the working location. A handle or clamp that extends only two inches can snag a vehicle mirror or stop the unit passing between shelving.

    Use the room process in how to measure a garage for storage, and mark both rectangles on the floor. The stored rectangle needs retrieval space in front of it. The open rectangle needs a working stance and room for the normal workpiece. Capacity enters after fit. A 1,000 pound statement has little value if the bench blocks the car, is too heavy to move comfortably, or lacks the clamping format the task requires.

    Wall mounted or portable is a behavior choice

    A wall mounted bench is always in the right room and never needs a floor parking place. It also commits one wall, depends on sound mounting, and must be cleared before folding. A portable bench can move outdoors for dusty work and can serve different parts of the garage. In return, someone must unfold it, stabilize it, and put it away. That routine decides whether the space saving feature will actually be used.

    Renters and owners with uncertain wall framing should not treat wall mounting casually. Check lease terms and use the manufacturer’s anchoring instructions. The article on garage wall storage for renters explains why freestanding support can be a safer fit when drilling is restricted. Whichever format you select, keep the closed unit from tipping. Do not lean a narrow folded bench in a traffic path unless the manual identifies that as a safe storage position.

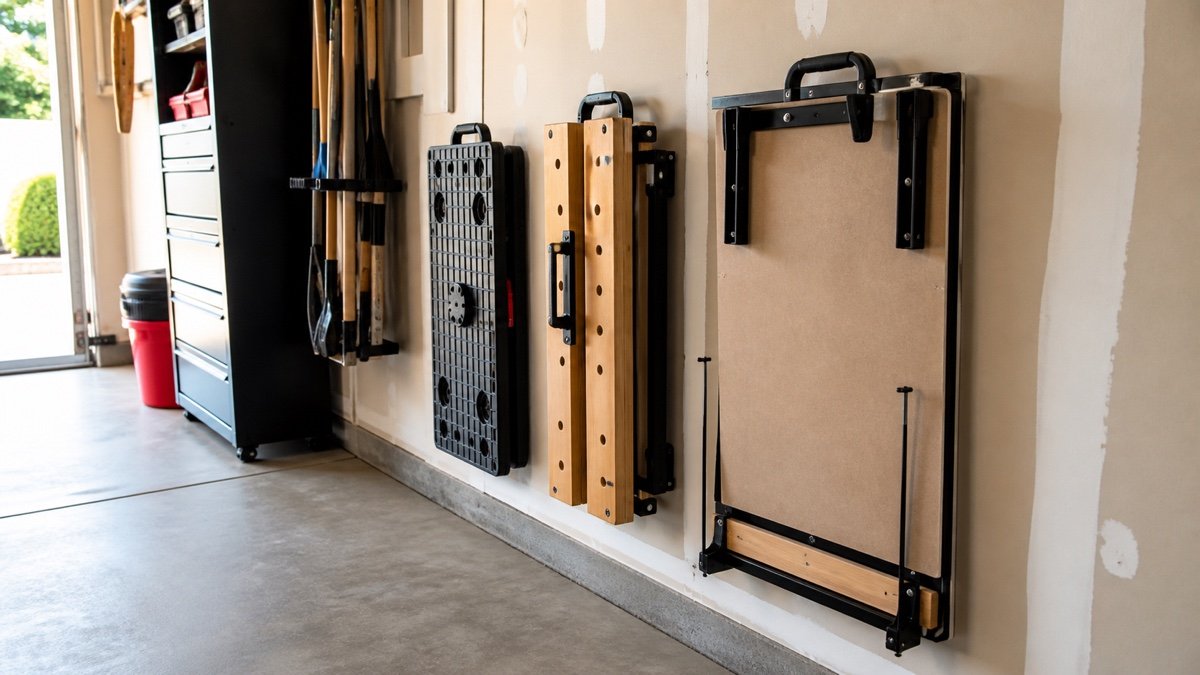
    Folding workbenches stored vertically in dedicated garage wall positions
    Plan a stable stored position with enough hand room to retrieve the bench without shifting other equipment.

    Price the complete working station

    The carton price may omit the pieces that make the bench useful. Count clamps, bench dogs, wall hardware, a vise, task lighting, a sacrificial top, storage hooks, and delivery. A wall unit may require suitable blocking or professional installation. A portable unit may need a dedicated rack so it does not become a trip hazard. Replacement clamps and proprietary parts also affect long term value.

    Enter those additions in the garage storage budget calculator. Compare the total with a simple fixed bench if the garage can spare the footprint. Folding hardware earns its cost only when it restores space you use. The best purchase is often the least complicated model that fits the stored slot, supports the usual work, and can be reset without turning cleanup into another project.

    Choose by the job you repeat

    Pick Duramax when the wall is known, the floor must remain clear, and a plain 48 inch surface is enough. Pick WORX when integrated clamps and a documented 5 inch folded depth solve the real problem. Consider BLACK+DECKER for its jaw range only after resolving the load discrepancy. Keter makes sense for temporary hand work when its 24.03 pound product weight and manual restrictions fit the routine. DEWALT suits rapid table setup once its missing dimensions are verified.

    Before paying, download the current manual for the exact model and confirm dimensions, load conditions, clamp inclusions, storage orientation, warranty, and setup steps. Product pages change, and similar names can hide different revisions. A folding bench should make the garage easier twice: when work begins and when the car comes home.

    Useful products to compare

    These links open current Amazon search results so you can compare dimensions, manuals, ratings, and availability for the exact models on your shortlist.

    Before you buy or install

    Check the current manual for the exact product you are considering. Confirm the assembled dimensions, load rules, mounting requirements, included hardware, clearances, warranty, and any limits that apply to your wall, floor, or garage layout.

    Frequently asked questions

    What is the best folding workbench for a small garage?

    The best model is the one whose verified folded size fits a stable storage spot and whose open format supports your usual job. WORX publishes a useful 5 inch folded depth and integrated clamping. A wall model can save more floor space when the wall structure and installation are suitable.

    Can I mount a power tool on a folding workbench?

    Only if both the tool and bench manufacturers permit that exact use and the mounting method follows their instructions. The cited Keter manual specifically says not to mount or clamp power tools to its table. Do not assume a high static load statement means the surface can handle machine vibration or torque.

    Are folding workbench load ratings comparable?

    Usually not without more context. Brands may state table mode, sawhorse mode, evenly distributed load, or support through the legs. Read the exact wording and manual. BLACK+DECKER currently shows conflicting figures on one page, which demonstrates why a single capacity number should not drive the purchase.

    Should a folding workbench be stored upright?

    Follow the model’s manual and use a stable position that cannot tip into people, pets, or a vehicle. Some folded benches stand securely while others need a wall hook or rack. Check handles, clamps, and latches before lifting, and avoid overhead storage if the weight makes retrieval awkward.

  • Small Garage Workbench Ideas That Protect Parking Space

    Small Garage Workbench Ideas That Protect Parking Space

    Affiliate disclosure: As an Amazon Associate I earn from qualifying purchases. This article may contain affiliate links, and Bay & Bench may earn a commission at no extra cost to you. Read our full Affiliate Disclosure.

    Park the car before evaluating small garage workbench ideas. A catalog cannot show the door swing, freezer lid, electrical panel, or route into your house. Measure the room in its busiest state, including the vehicle, then choose a shallow fixed bench, folding wall surface, mobile island, or cabinet and bench combination. Each format below is tied to a simple footprint and a door check, so you can see whether the idea protects the daily function of the garage.

    Quick answer

    As a planning example for a garage that must park every night, start by testing an 18 to 24 inch deep wall bench or a folding surface that becomes about 4 to 8 inches deep when closed. Mark a 24 inch working stance in front, then test the nearest car door and walking route. A mobile 48 by 24 inch bench can work when the vehicle moves outside during projects. Treat these as mockup dimensions, not universal clearances, and choose the layout that fits both its closed and working states.

    Small garage workbench ideas by layout

    Four formats cover most small garages. The dimensions below are planning examples, not universal rules. Replace them with the assembled dimensions of the exact bench and the footprint of your own vehicle. The critical number is total working depth: bench depth plus the space occupied by you, a stool, clamps, and any workpiece overhang.

    LayoutExample bench sizeSpace when storedSpace while workingBest condition
    Shallow fixed wall bench72 by 20 inches20 inches deepAbout 44 inches with a 24 inch stanceWall remains usable beside parked car
    Folding wall bench48 by 20 inches openAbout 4 to 8 inches deepAbout 44 inches with stanceSurface can close before parking
    Mobile island48 by 24 inches24 inches deep at wallAllow access around active sidesCar moves outside during projects
    Shared cabinet bench60 by 22 inches22 inches deepAbout 46 inches with stanceOne footprint must provide storage and work

    Use the garage storage fit calculator to record the exact widths and depths instead of relying on the rounded examples.

    Measure the parked state before the project state

    Park in the normal position with mirrors, hitch accessories, roof boxes, and charging cable arranged as they are most days. Open the driver door to the width you actually use. If a child seat, mobility need, or grocery unloading requires a wider opening, measure that condition too. Mark the outer edge of the door on the floor with painter’s tape. Repeat for the route to the house, trash bins, bicycles, and any appliance that opens into the bay.

    Now measure wall projections. Foundation ledges, posts, utility meters, outlets, door trim, and garage door tracks quietly reduce useful bench space. Record the narrowest point rather than the longest clean wall. Our step by step guide to measuring a garage for storage provides a room sheet for these obstacles. Keep the numbers visible while shopping, because a seller’s nominal width may exclude vise handles, casters, or a raised back panel.

    Layout one: a shallow fixed bench along the side wall

    Consider a 12 by 22 foot one car garage with a compact vehicle parked slightly toward the opposite wall. A 72 by 20 inch fixed bench may fit on the passenger side if the parked body, mirror, and required walking route remain clear. The bench needs roughly 44 inches from wall to the back of your working stance during use. That active zone may overlap the empty vehicle door zone only when the door is closed and nobody must pass.

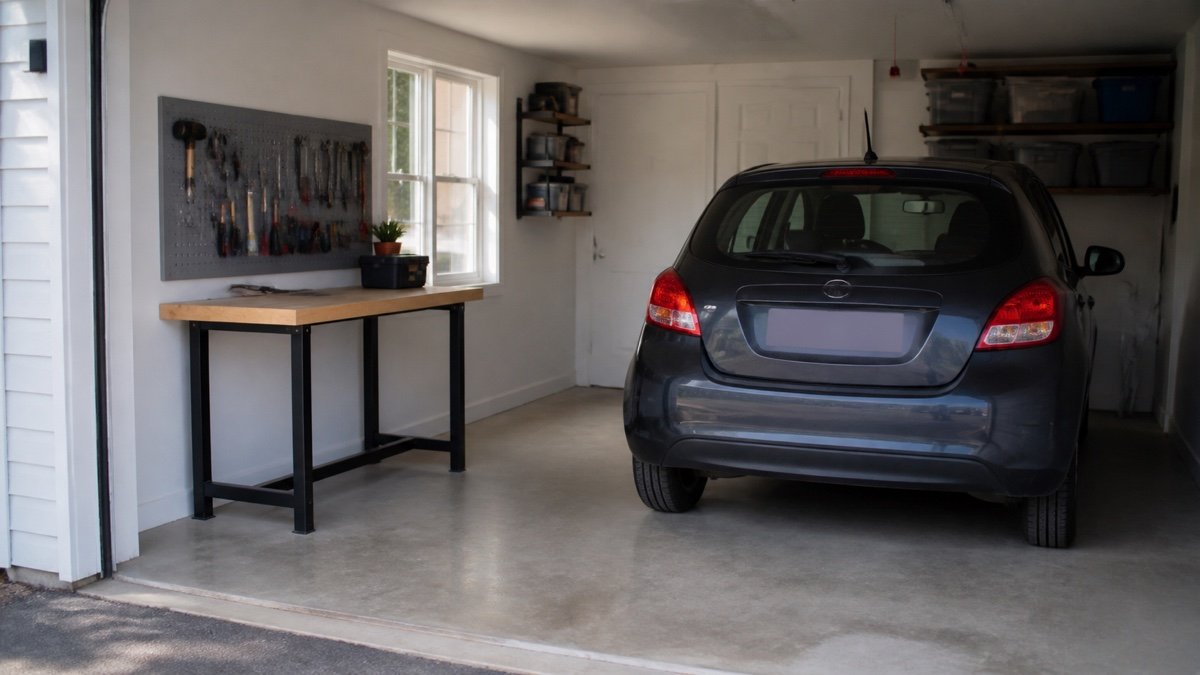
    Twenty inches is enough for tool repair, sharpening, electronics, small assembly, and many household jobs. It becomes frustrating for broad cabinets or large sheet goods. Keep upper storage shallow and place the most used tools between shoulder and bench height. Avoid deep cabinets over the front edge, where your head meets an open door. The photo below shows the main tradeoff: a shallow top saves parking width, while long workpieces still need clear space at both ends.

    Twenty inch deep wall bench next to a parked car in a narrow garage
    Measure from the wall to the parked vehicle at the narrowest point, then add space for the person using the bench.

    Layout two: a folding bench for a strict nightly reset

    A folding bench is convincing only when the stored package, legs, latches, and items above it all fit. Picture a 48 by 20 inch top that folds to a 6 inch wall projection. When open, it still needs the same working stance as a fixed bench. When closed, it can return roughly 14 inches of side clearance. That difference may be enough for a car door or a bicycle route.

    The catch is behavior. The top must be cleared before the car comes in. Give every bench tool a nearby wall or cabinet home, and keep the floor below free of bins that prevent folding. Check whether brackets pinch fingers, whether the open top is level on a sloped floor, and whether the wall structure supports the stated load. Renters should avoid casual anchoring into unknown walls. The guide to garage wall storage for renters offers lower impact ways to create the supporting tool zone without risky holes.

    Layout three: a mobile island that borrows the parking bay

    A 48 by 24 inch rolling bench can live against the front or side wall and move into the center after the vehicle leaves. It suits assembly because you can reach several sides. It also carries tools to the project instead of making you turn repeatedly toward wall storage. This layout works best for households that are willing and able to move the car before every serious session.

    Choose casters for the total loaded weight, not the empty bench. All wheels should roll over slab joints and any threshold on the storage route. At least two effective brakes are helpful, but wheel brakes alone may not stop swivel or frame movement during planing. Leveling feet or retractable casters give a firmer working state. Mark the parked location too. A mobile bench that blocks a freezer or the garage door sensor whenever it is stored has not solved the room.

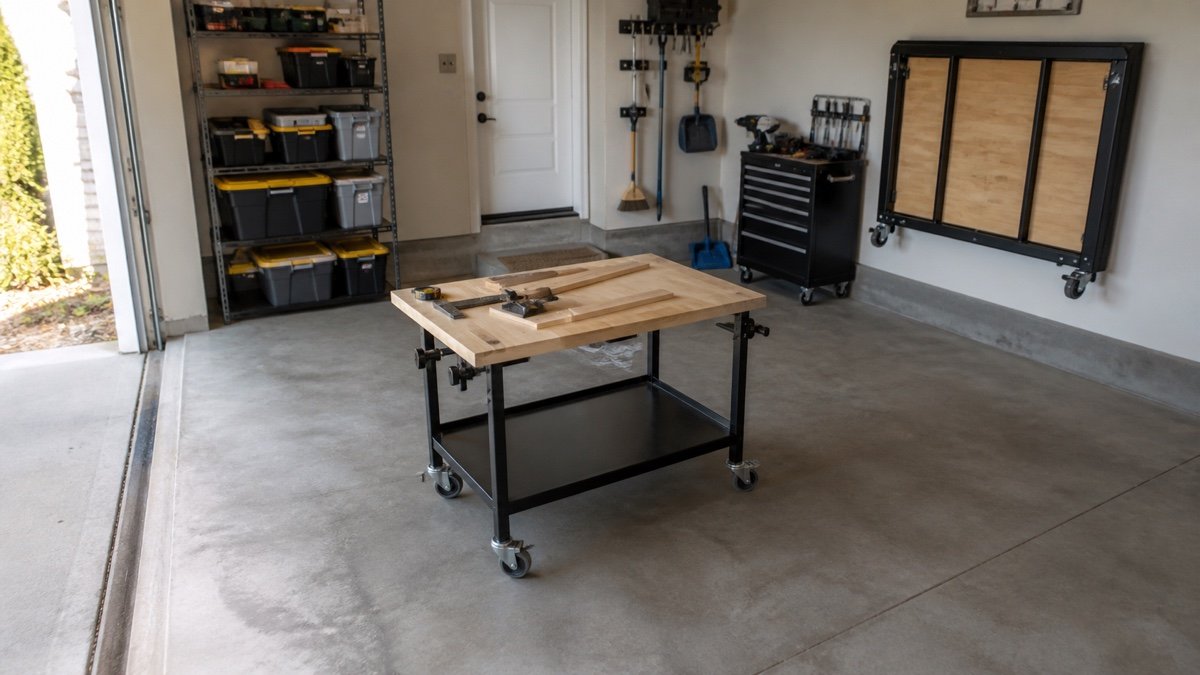
    Compact rolling workbench placed in the center of an open garage bay
    An island bench is useful only when its parked location and rolling route stay clear every day.

    Layout four: combine a base cabinet and work surface

    A 60 by 22 inch counter over drawer cabinets uses one footprint for tools and work. This is often better than placing a freestanding bench in front of separate floor shelves. Drawers hold small tools without forcing a deep reach, while a clear section beneath the top can leave knee space for seated work. Put heavy items low and make sure open drawers do not enter the vehicle or walking path.

    This layout is less flexible for clamping. Cabinet faces and drawer pulls can block clamp jaws. A top overhang of a few inches may help, provided the manufacturer or builder supports it correctly. Compare the storage you gain with the wall and floor alternatives in wall mounted vs freestanding garage shelves. Sometimes a plain bench plus shallow wall shelves stores more useful gear than a cabinet filled with one large open compartment.

    Run four door opening checks

    A paper rectangle cannot reveal every collision. Use tape, cartons, or folding tables to mock up the full bench height and depth. First open the nearest vehicle door with a person standing where they enter. Second open the house entry door through its full swing. Third operate cabinet doors, drawers, freezer lids, and trash bin lids. Fourth run the overhead garage door while watching tracks, handles, cords, and anything stored above the bench.

    Repeat the test with a normal project on the surface. A vise handle may extend beyond the nominal top. Long boards can cross a doorway. A stool may remain behind you. If the path works only when everyone turns sideways and closes three things in a special order, the layout is too tight. Reduce depth, shorten the bench, change door type, or move the station. A few inches recovered at the planning stage are more valuable than an impressive top that makes parking irritating.

    Treat power, light, and dust as part of the footprint

    A compact bench often fails because the outlet is behind a drawer or a cord crosses the only walkway. Locate receptacles before setting the bench height. Keep plugs accessible for inspection and follow electrical rules for the garage. A mounted power strip is not a substitute for adequate permanent wiring. Battery chargers need ventilation and a dry position away from sparks, grinding dust, and flammable finishes.

    Task lighting should cover the work surface as well as the room. A fixture behind your shoulders throws your shadow onto the bench. Place task lighting so the beam reaches the surface without colliding with the open garage door. Dust collection also consumes depth. A shop vacuum tucked below may need hose clearance and room to remove its canister. If the station produces heavy dust or fumes, a tiny indoor location may be the wrong place for that job regardless of how neatly the bench fits.

    Match the bench to jobs that fit a small garage

    List recurring jobs and the largest normal object, then choose the smallest surface that supports them without improvising unsafe extensions. Bicycle service benefits from clear floor space beside the bench. Small engine parts need a washable tray. Hand tool woodworking needs clamp access and stiffness. Electronics work values seating, light, and protected small parts more than a huge load rating.

    The garage workbench buying guide helps compare top, frame, mobility, and storage after the room has set the maximum size. Favor a simple bench that leaves one genuinely clear working zone. Pegboard, track, or shallow shelves can hold daily tools above it. Seasonal bins belong elsewhere, because every oversized item stored underfoot steals the stance that made the bench useful.

    Build a full size tape plan before ordering

    Mark the proposed bench outline on the floor and wall. Add a second tape line for the active working stance, plus outlines for open drawers, vise handles, and the longest normal workpiece. Park the vehicle. Walk every route while carrying a laundry basket, garbage bag, or tool case. Sit on the intended stool. Reach toward the back of the top without leaning into the car.

    Leave the mockup in place for a few days. Daily friction appears quickly: a blocked light switch, a mirror that passes too close, or a folding top that would collect mail and never close. Photograph the successful layout and record final dimensions. When the bench arrives, assemble it according to the manual and check level, fasteners, brakes, and wall anchors before loading it. Planning this way turns a small garage workbench into a repeatable room function rather than a permanent obstacle.

    Useful products to compare

    These links open current Amazon search results so you can compare dimensions, manuals, ratings, and availability for the exact models on your shortlist.

    Before you buy or install

    Check the current manual for the exact product you are considering. Confirm the assembled dimensions, load rules, mounting requirements, included hardware, clearances, warranty, and any limits that apply to your wall, floor, or garage layout.

    Frequently asked questions

    How deep should a workbench be in a small garage?

    Many compact layouts begin around 18 to 24 inches deep, but the correct depth depends on the work and parked vehicle. Add the space needed for your body, clamps, drawers, and workpiece overhang. Test that full working zone with tape rather than choosing by top depth alone.

    Is a folding workbench worth it for a garage?

    It is useful when the stored depth genuinely restores a car door or walking route and when tools have another home. Check wall structure, mounting instructions, open capacity, latch security, leg placement, and the effort required to clear it. A folding surface that stays covered behaves like a fixed bench.

    Can a rolling workbench share a one car garage?

    Yes, if the car can move out during projects and the bench has a clear parked location afterward. Measure the route, threshold, slab joints, caster capacity, and storage projection. Test how the bench is stabilized because ordinary swivel caster brakes may still allow movement under force.

    Where should a small garage workbench go?

    Choose the wall that preserves vehicle doors, the path into the house, garage door hardware, utilities, and storage access. The longest blank wall is not always best. Outlets, task lighting, dust control, clamp clearance, and long workpiece movement should all influence the position.

  • Best Garage Cabinets for Small Garages: A Fit-First Shortlist

    Best Garage Cabinets for Small Garages: A Fit-First Shortlist

    Affiliate disclosure: As an Amazon Associate I earn from qualifying purchases. This article may contain affiliate links, and Bay & Bench may earn a commission at no extra cost to you. Read our full Affiliate Disclosure.

    For a small garage, the best cabinet is usually shallow, tall, and specific to one storage zone. A matched full-wall set can look efficient but may consume the aisle and remove the flexibility a narrow room needs.

    Quick answer

    Prioritize 12-inch wall cabinets, roughly 16–18-inch-deep lockers or bases, narrow tall units, and mobile storage that can leave the parking zone. Select exact products only after tape-testing car doors and walking paths.

    Useful products to compare

    These searches are a practical starting point for comparing current sizes, materials, load ratings, and availability.

    Our fit-first shortlist

    Cabinet formatBest small-garage useMain check
    Shallow wall cabinetChargers and light supplies over a benchReach and wall structure
    Narrow tall lockerMaximum volume on little wall widthTip restraint and door swing
    18-inch-deep lockerBins and tools beside parkingInternal tote fit
    Rolling drawer baseTools that move out for projectsCaster and drawer ratings
    Compact base cabinetFold-down or short work zoneFinished depth and aisle

    Why shallow often beats wide

    When the vehicle already consumes most floor area, cabinet depth affects every trip through the room. NewAge’s current Bold family illustrates shallow choices with up-to-18-inch lockers, 16-inch base cabinets and 12-inch wall cabinets. Those are useful reference points, but verify the exact model and internal dimensions.

    Use height without making storage unsafe

    A narrow tall locker can store far more than a low cabinet on the same wall width. Keep heavy items low, frequent items at comfortable reach, and light seasonal goods high. Do not stack loose objects on top where vibration or door movement can dislodge them.

    Doors and drawers are hidden space consumers

    A cabinet that fits when closed may block the car when open. In a narrow garage, compare double doors, single doors, sliding features where available, and drawer extension. Tape the complete operating envelope and test it with the actual car parked.

    Do not buy a complete set by default

    A full system may force you to accept the wrong mix. One tall cabinet, one wall cabinet and a mobile tool unit can outperform a long symmetrical run. Buy the zone that solves the greatest friction, then observe what remains on the floor.

    Candidate evaluation

    Shortlist products that publish assembled and internal dimensions, shelf ratings, installation instructions, package weight and warranty. Seville Classics currently offers multiple 18-inch-deep UltraHD formats; Suncast publishes reinforced resin options; NewAge publishes modular dimensions and ratings. Availability and exact specifications can change, so treat this as a specification framework rather than a permanent ranking.

    Start with the planning guide, confirm cabinet depth, and use the broader buying guide for final comparison.

    Before you order: the verification pass

    Put the exact model number—not merely the product-family name—at the top of your worksheet. Copy the assembled exterior dimensions, usable interior dimensions, individual shelf or drawer ratings, total cabinet weight, packaged dimensions, adjustable-foot range, and required clearances from the current manufacturer page and manual. Note which accessories are included and which appear only in styled photographs.

    Then return to the garage with painter’s tape. Mark the cabinet case, handles, open doors or extended drawers, and the path needed to load the largest object. Park the vehicle in its normal position and test every door, hatch, step, switch and service panel. Photograph the mock-up from the driver’s seat, house entry and driveway. If a critical measurement is unpublished, ask the manufacturer before placing the order.

    Finally, calculate total delivered cost: cabinet, worktop, shelves, drawer liners, casters or feet, mounting rails, appropriate fasteners, delivery surcharge, assembly help and sales tax. A lower sticker price can become the more expensive installation when essential components are optional.

    Installation-day checklist

    • Inspect packages for damage before assembly and keep model labels and receipts.
    • Read the complete manual before lifting or fastening anything.
    • Confirm the floor is stable and the planned attachment locations are suitable.
    • Use a second capable person whenever the manual or cabinet size calls for one.
    • Level and square the case before aligning doors and loading shelves.
    • Install wall mounting or tip restraints exactly as instructed.
    • Load heavy objects low and distribute weight within every shelf and drawer rating.
    • Recheck fasteners, leveling and door alignment after the cabinet has been loaded.

    Do not improvise around electrical, gas, plumbing, fire-safety or structural conditions. When the required attachment or clearance is uncertain, pause and consult a qualified professional.

    Common mistakes to avoid

    Most disappointing installations trace back to one of five mistakes: measuring only the empty wall; treating total capacity as a per-shelf rating; forgetting doors, drawers and vehicle movement; selecting depth from a catalog image; or filling every wall without reserving adaptable space. A slower specification check is cheaper than returning a pallet-sized cabinet.

    Frequently asked questions

    What cabinet depth is best for a one-car garage?

    Often 18 inches or less, but the correct answer comes from the vehicle-door and aisle mock-up plus the objects you need to store.

    Are wall cabinets enough for a small garage?

    They are excellent for light supplies, but bulky or heavy objects usually need a stable floor-level solution.

    Should I put cabinets on both side walls?

    Only if the measured vehicle and walking envelope remains comfortable. Many narrow garages work better with one primary storage wall.

    Last reviewed: July 2026. Product specifications can change; check the manufacturer’s current documentation before purchase.