Tag: workbench dimensions

  • Garage Workbench Height Guide: Find a Comfortable Working Range

    Garage Workbench Height Guide: Find a Comfortable Working Range

    Affiliate disclosure: As an Amazon Associate I earn from qualifying purchases. This article may contain affiliate links, and Bay & Bench may earn a commission at no extra cost to you. Read our full Affiliate Disclosure.

    A garage workbench height guide starts with your elbow and the work you plan to do. Product listing numbers come later. A surface that feels right for sanding a small part may feel too tall when you lean into a hand plane. The same bench can also feel too high after a benchtop machine, vise, or project platform raises the point where your hands work. Start by measuring your standing elbow height, then compare that measurement with the task. Build a temporary mockup before you buy or cut anything. Ten minutes spent marking, clamping, and applying gentle pressure at a trial height tells you more than a generic chart. This guide gives you a repeatable way to find a useful range while keeping garage clearance, seated work, and other users in the decision.

    Quick answer

    Measure from the floor to the point of your relaxed elbow while wearing your usual shop shoes. For close visual work, test a working point near or slightly above elbow height. For light assembly, start a few inches below it. Forceful work usually needs a lower point so you can use controlled body weight. Measure both the bare bench and the top of the workpiece or tool. Mock up two or three heights and use each for the tasks you actually perform.

    Garage workbench height guide: begin at the elbow

    Stand on the floor where the bench will sit and wear the shoes you normally use in the garage. Let both arms hang loose, then bend one elbow to roughly a right angle without lifting the shoulder. Ask someone to measure from the floor to the point of the elbow. Repeat the measurement twice and use the average if the numbers differ.

    This is a reference point, not the finished bench height. Your hand may work above the bare top because of a thick board, a vise, a cutting mat, or a machine table. Subtract that added height when choosing the bench itself. A 36 inch bench under a 4 inch project can put your hands at a 40 inch working level.

    Measure the floor, too. A sloped slab can make one end of a long bench sit higher relative to your body. If you have not mapped the room, use the garage measuring guide to record floor changes, outlets, doors, and vehicle movement before settling on a location.

    Match the working point to the task

    Ergonomic guidance treats task type as part of the height decision. The Canadian Centre for Occupational Health and Safety places precision work about 2 inches above elbow height, light work about 2 to 4 inches below, and heavy downward work much lower. The UK Health and Safety Executive uses similar task based bands and recommends adjustable surfaces where practical.

    Task at the benchPublished reference relative to elbowWhat to test at home
    Close inspection or fine assemblyAbout 2 inches above in CCOHS guidance; 2 to 4 inches above in HSE guidanceRaise the workpiece until you can see it without lifting your shoulders
    Light assembly or mechanical workAbout 2 to 4 inches below elbow heightCheck for relaxed shoulders and a straight wrist
    Forceful downward workAbout 8 to 16 inches below in CCOHS guidance; up to 10 inches below in HSE guidanceStart conservatively and test the exact motion with light force

    Those ranges come from workplace ergonomics, not a promise that every point in the band will suit a home shop. Use them to choose trial heights, then let your posture and task settle the result.
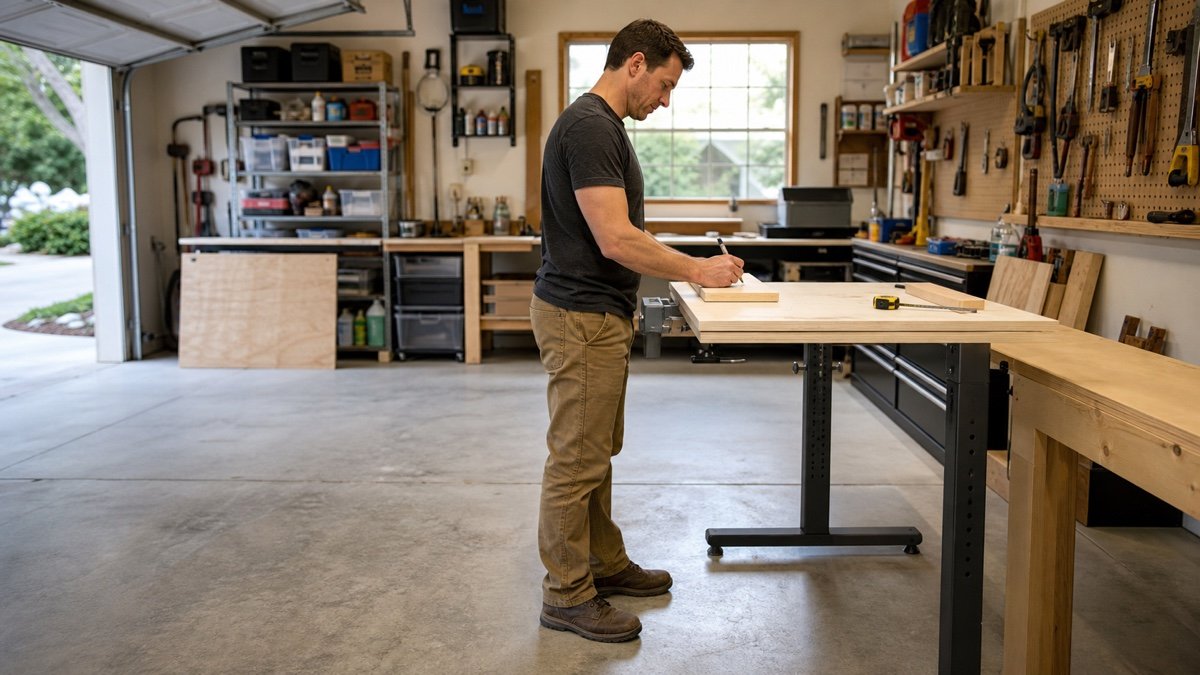
    Standing user testing workbench height while marking a board
    A temporary setup lets you test posture before committing to a fixed bench height.

    Count the workpiece, vise, and machine

    The height that matters is where your hands meet the work. A thick butcher block top is already part of the published bench height, but anything placed on top raises the working point again. A benchtop planer, drill press table, carving platform, machinist vise, or tall assembly can add several inches.

    List the five tasks you do most often. For each one, measure the typical vertical distance between the bench and your hands. If the installed vise jaw and clamped part sit 5 inches above the top, record a 5 inch rise. Subtract that rise from your preferred hand height to estimate the bare bench height for that task.

    One surface will not land perfectly for every job. That is normal. Keep a lower main top for clamping and forceful work, then add a stable removable platform for soldering, model work, sharpening, or close inspection. Follow the platform maker’s instructions or build it so it cannot slide, rack, or tip. A loose stack of scraps is not a working platform.

    Run a temporary height test before buying

    Create trial heights with a sturdy table plus a securely supported sheet of plywood, or use an adjustable bench if one is available. Do not balance the surface on paint cans, loose blocks, or narrow offcuts. Mark three points around your calculated range and test each for ten to fifteen minutes.

    1. Draw layout lines and measure small parts.
    2. Clamp a board and make a few controlled sanding strokes.
    3. Pick up and set down the heaviest normal project without twisting.
    4. Reach for the tools you expect to keep at the back of the top.
    5. Notice whether your shoulders rise, your back folds forward, or your wrists stay bent.

    The workbench height calculator can turn your elbow measurement and task into starting points. Treat its output as a mockup range. Discomfort, an awkward line of sight, or a bad reach is a reason to adjust the test, not something to work through.

    Plan for seated work and shared users

    A bench that serves one standing user is simpler than a bench shared by two people or used from a stool. For seated work, chair height, foot support, thigh clearance, top thickness, and the height of the task all interact. Choose the stool and bench together. A tall stool cannot fix a thick apron that blocks your knees.

    For two standing users with different elbow heights, a fixed surface can favor the task that needs the most force while the shorter user gets a stable platform and the taller user gets a raised project fixture. Any standing platform must support the full foot, resist slipping, and leave a clear step off. General CCOHS guidance for standing work recommends adjustment or a suitable platform when one working level has to serve different bodies.

    If the bench switches between seated and standing work every week, a crank or powered adjustable frame may be worth the cost. Check the adjustment range with the top installed, not the empty frame range alone.

    Fit the chosen height into the garage

    A comfortable bench can still be wrong for its room. Tall tops may cover the lower part of a window or interfere with a wall cabinet. A low bench can leave wall storage within easy reach, but it may invite clutter above the work. Check outlets, light switches, garage door hardware, and the path of a vehicle hatch.

    Use the garage storage fit calculator to test the bench footprint against parked vehicles and walking space. Then open drawers, doors, and the vise within that taped area. Height affects clearance under the top as well. A bench with a deep apron may leave less room for a stool, knees, a rolling cabinet, or a shop vacuum than its outside dimensions suggest.

    Lighting changes with height, too. Raising a reflective workpiece closer to a lamp may create glare, while lowering fine work can leave your head blocking the light. Test the proposed surface under the lights you use at night and again with the garage door open.
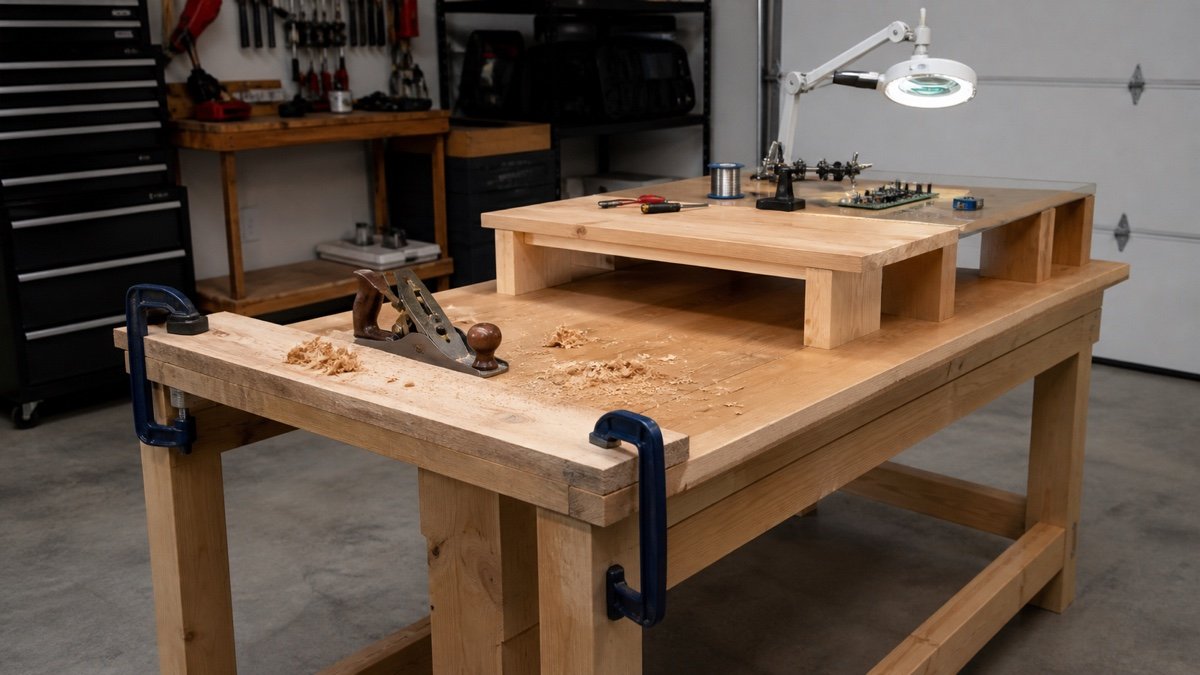
    One workbench arranged at lower and raised working levels for different tasks
    Stable platforms can raise small precision work without making the whole bench taller.

    Fixed and adjustable benches solve different problems

    A fixed bench costs less, has fewer moving parts, and can feel reassuring under a vise. It is a sensible choice when one person does a narrow set of tasks and has already tested the height. Build or buy it around the dominant job, then use fixtures for occasional higher work.

    An adjustable bench helps when users differ, tasks swing between force and precision, or seated work is common. Look at the usable range, adjustment method, cross bracing, top capacity, and what happens to cords and wall clearance as the surface moves. A frame rating may exclude the top, vise, cabinet, or tools you add.

    The garage workbench buying guide covers frame, top, storage, and size choices alongside height. Read the current manual for any adjustable model and confirm whether the stated capacity is static or applies while the bench moves. Never change height while a project can fall, shift, or catch a cord.

    Use posture clues instead of chasing a perfect number

    A good trial height usually lets you stand close to the work with your shoulders down and your elbows near your sides. Your wrists should not spend the whole task sharply bent. You should be able to see the work without holding a deep forward bend, and forceful strokes should not make you shrug.

    There is no posture that stays comfortable forever. The NIOSH review of prolonged standing found that movement and changes in position matter. Leave room for a footrest, a stool, or a short walk between operations. An anti fatigue mat can help on a hard slab, but it should not create a rolling or tripping problem near mobile equipment.

    Recheck the setup after a real project. A height that felt fine during a two minute demonstration may expose a long reach or poor sight line during an hour of assembly. Small changes to the fixture or task position can be more useful than rebuilding the whole bench.

    A practical workbench height checklist

    • Measure standing elbow height in normal shop shoes.
    • Record the thickness of common workpieces, vises, mats, and benchtop tools.
    • Choose trial levels for precision, light assembly, and forceful work.
    • Test each level with real motions and only light force.
    • Check seated knee space if a stool will be used.
    • Confirm vehicle, drawer, outlet, window, and lighting clearance.
    • Read the manual before adding risers, platforms, casters, or a heavier top.

    Write the tested range on your garage plan. If you are choosing a fixed model, buy inside that range rather than assuming a common 36 inch top will work. If two task ranges do not overlap, design a secure raised fixture or choose an adjustable bench. Your final range should still feel comfortable after the mockup, the room check, and a normal work session.

    Useful products to compare

    These links open current Amazon search results so you can compare dimensions, manuals, ratings, and availability for the exact models on your shortlist.

    Before you buy or install

    Check the current manual for the exact product you are considering. Confirm the assembled dimensions, load rules, mounting requirements, included hardware, clearances, warranty, and any limits that apply to your wall, floor, or garage layout.

    Frequently asked questions

    What is the standard height for a garage workbench?

    Many benches are sold around common counter heights, but there is no single standard that fits every user and task. Measure your elbow height, count the workpiece or tool, and test a range before choosing.

    Should a workbench be level with my elbows?

    Elbow height is a reference. Close visual work may sit near or above it, light assembly often feels better a little below it, and forceful downward work generally needs a lower working point.

    Does a vise change the correct bench height?

    Yes. The jaws and the workpiece raise your hands above the bare top. Measure the usual working point in the vise and subtract that rise when you compare bench heights.

    Can I raise a workbench with casters or blocks?

    Only with hardware and a method suited to the bench, load, floor, and manufacturer instructions. Loose blocks can shift. Casters also change stability and the total working height, so test and calculate before installing them.
  • Garage Workbench Buying Guide: Choose the Right Size, Top, and Base

    Garage Workbench Buying Guide: Choose the Right Size, Top, and Base

    Affiliate disclosure: As an Amazon Associate I earn from qualifying purchases. This article may contain affiliate links, and Bay & Bench may earn a commission at no extra cost to you. Read our full Affiliate Disclosure.

    This garage workbench buying guide starts with a less exciting question: what do you build or repair most often? The best bench is not necessarily the heaviest or the longest one that fits against the wall. It is the bench that holds your real projects at a comfortable height, leaves room to move, and stays steady when the work gets awkward.

    Start with tasks and dimensions. Drawers, hardwood, polished steel, and clever accessories come later. A simple bench that fits the room will get used more than an impressive bench that blocks the car door.

    Quick answer

    Choose the workbench after measuring the largest common project, your comfortable working height, and the aisle left with vehicles parked. Fixed benches suit forceful work and permanent stations. Mobile benches suit shared floor space, but need suitable locking casters and a stable frame. Folding benches save space for light tasks. Compare usable top size, total capacity, local point loads, vise support, storage, power access, and the complete assembled footprint.

    Name the work before choosing the bench

    A bench for bicycle maintenance, small engine parts, woodworking, electronics, and household repair will not have the same priorities. Write down the three jobs that happen most often. Add the largest ordinary object placed on the top and the tools that stay there during work.

    Forceful planing, hammering, and vise work reward mass, bracing, and a firm stance. Assembly benefits from open surface area and access around several sides. Detail work needs good light and a height that brings small parts closer without lifting the shoulders. Mobile repair may need drawers more than a perfect woodworking top.

    Skip fantasy projects when sizing the permanent bench. A door or sheet good handled once a year can rest on portable supports. Giving that rare job an eight foot bench every day may cost a parking space.

    Measure the complete work zone

    Bench width is only the beginning. Add vise projection, drawer handles, power strips, pegboard hooks, and any material that extends beyond the top. Mark the assembled footprint on the garage floor with tape. Park the vehicles, open their doors and hatch, then carry a normal project through the remaining route.

    Depth deserves special attention. A deep top offers assembly room but pushes wall storage farther away. The rear few inches can become a permanent row of chargers and cans. In a narrow garage, a shallower bench with a nearby rolling cart may be easier to use.

    Check overhead space as well. Cabinet doors, lights, windows, and garage door hardware can conflict with a tall backsplash or upper shelf. Use the garage storage fit calculator for a first pass, then verify every edge in the room.

    Measure the complete work zone in a practical garage setup
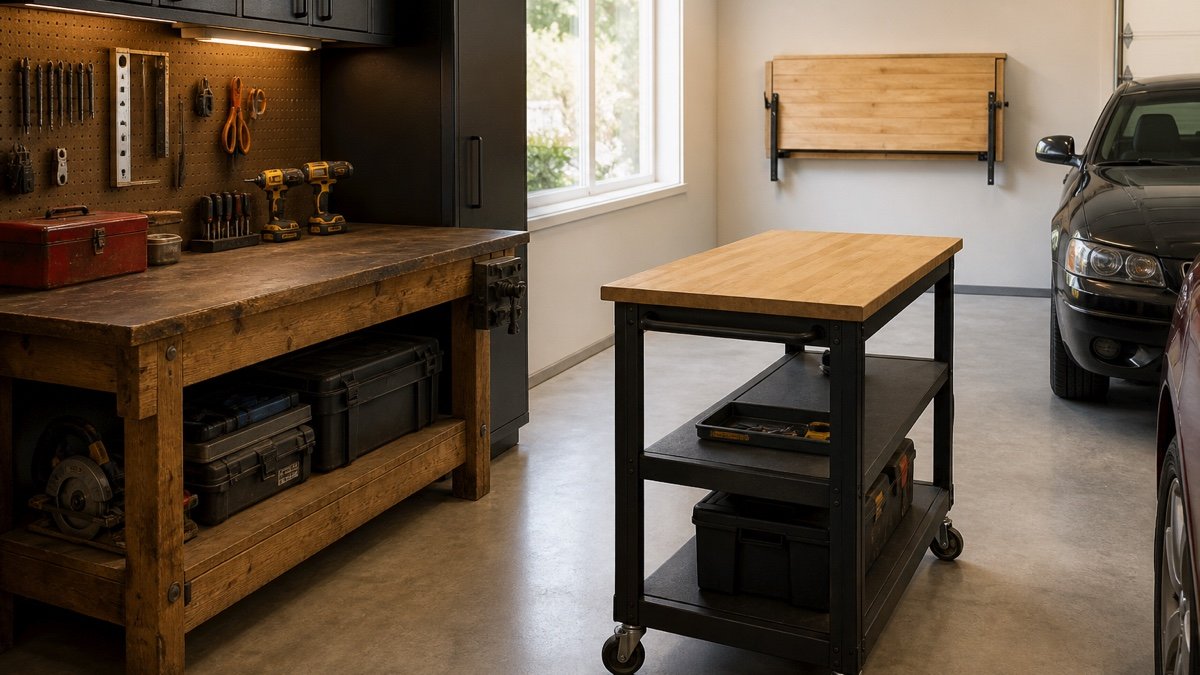
    Measure the complete work zone, shown in a practical garage layout.

    Set height by task and body

    There is no single correct workbench height. Work that needs downward force often feels better on a lower surface. General repair and assembly usually suit a middle position. Fine work can move higher so the user does not bend toward small parts.

    Stand in normal work shoes with shoulders relaxed. Bend the elbows and test several surface heights with stacked plywood or a sturdy temporary platform. Mimic the task. Push a plane, turn a wrench, assemble a small part, or sit on the intended stool. A measurement taken without the work can be misleading.

    Our workbench height calculator provides a planning range based on user height and task. If several people share the bench, an adjustable model or removable platform may be more useful than splitting the difference badly for everyone.

    Compare fixed, mobile, folding, and adjustable benches

    Bench typeBest fitWatch for
    FixedVise work, permanent tools, frequent projectsConsumes floor space and may be hard to move
    MobileShared parking and work zonesCaster rating, wheel locks, frame movement, floor slope
    FoldingLight tasks in a very small garageWall structure, braces, folded depth, reduced storage
    Adjustable heightMultiple users or changing task heightsAdjustment range, mechanism clearance, load at each setting
    ModularGarages expected to change over timeConnection hardware and future part availability

    A rolling bench is not automatically flexible if it is too heavy to steer when loaded. A fixed bench is not automatically stable if the frame racks or the floor rocks beneath one leg. Judge the complete design.

    Choose the top for the mess and the force

    A thick wood top is friendly to clamps, can absorb some noise, and may be repairable after cuts or dents. It can also stain, swell, or burn if the finish and work are poorly matched. Steel resists many impacts and is easy to wipe, but it can be noisy, conductive, and unfriendly to delicate parts. Composite and laminated tops offer a smooth general purpose surface, though edges and moisture resistance vary.

    Check the top’s actual thickness and construction. A thick looking edge may be trim around a thinner core. For a vise, grinder, or bench mounted tool, confirm that the manufacturer permits the installation and that bolts can reach suitable structure. A beautiful surface with no solid mounting area is a poor tool bench.

    Removable sacrificial sheets can protect the main top during painting, glue work, or rough cutting. Use material appropriate to the task and keep it secured so it cannot slide.

    Frame capacity is more than one large number

    Workbench listings often lead with a total weight capacity. Read how the manufacturer defines it. The number may assume an evenly distributed static load, correct assembly, and a particular shelf position. A vise or compact machine can create a concentrated force near one edge that is different from boxes spread across the top.

    Look for cross bracing, leg connections, top support, and adjustable feet. Bolted frames can be strong when assembled correctly, but loose fasteners allow racking. Welded frames remove some joints and can be awkward to move through a narrow door. Wood bases can be stiff and repairable, though construction quality matters more than the material name.

    Add the weight of mounted tools, drawers, shelf contents, and the project. Do not assume that casters, a lower shelf, or an added top inherit the bench’s headline rating.

    Mobile benches need a caster plan

    Calculate the loaded bench weight, then compare it with the complete caster set rating under the conditions stated by the caster and bench manufacturers. Floors are not perfectly smooth. Joints, debris, slopes, and door thresholds increase effort and can stop a small wheel suddenly.

    Four swivel casters make tight turns possible but may let the bench wander while steering. A mix of fixed and swivel wheels tracks more predictably. Locks vary too. Some stop the wheel while leaving the swivel free; others control both. For forceful work, retractable casters or leveling feet may create a firmer stance when the product is designed that way.

    Push only from a safe point with drawers closed and the route clear. Heavy tools should not sit loose on top during a move. A mobile bench is useful because it changes zones, not because it can be rolled while a project is balanced on it.

    Mobile benches need a caster plan in a practical garage setup
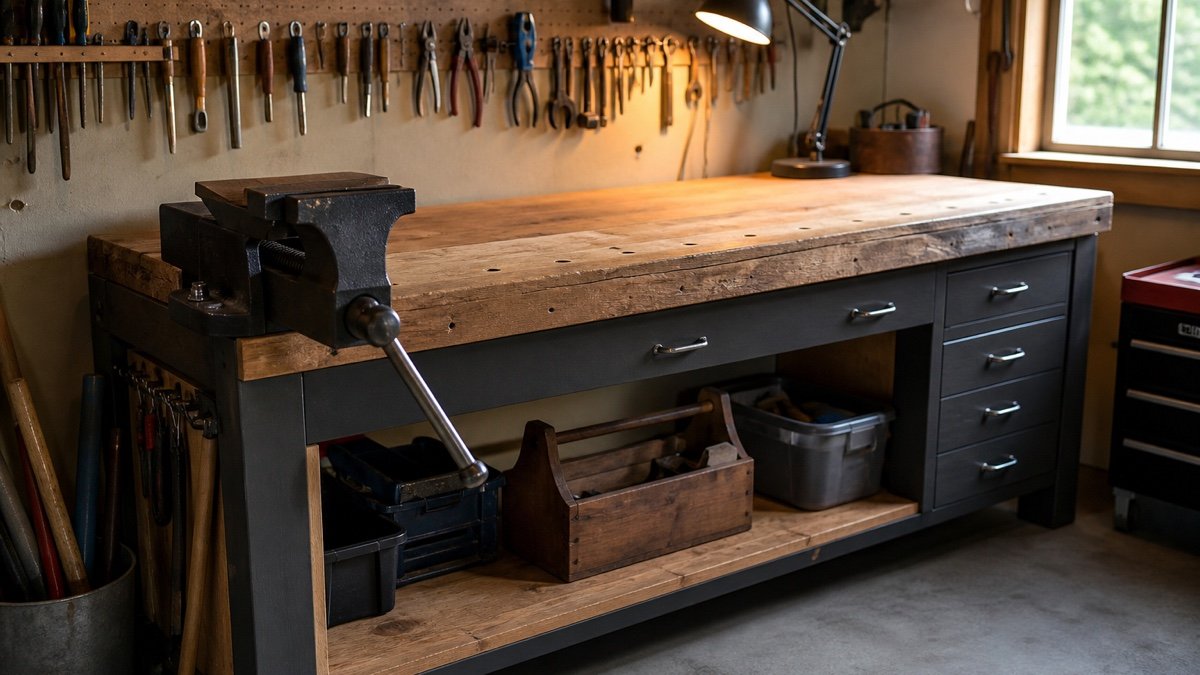
    Mobile benches need a caster plan, with the storage details visible in context.

    Storage can help or steal working room

    Drawers keep measuring tools and hand tools close, but a deep drawer bank can remove knee space for seated work. An open lower shelf holds cases and heavy tools, though it collects dust and may interfere with feet. Cabinets hide clutter and slow down quick access. Pegboard places light tools in sight while consuming the wall directly behind the bench.

    Choose storage for the tools that support bench work. Lawn supplies and seasonal decorations belong elsewhere. When unrelated items colonize the bench base, the daily tools end up on top and the useful surface shrinks.

    Check drawer extension, latch behavior, and clearance around a vise. On a mobile bench, drawers should stay closed during movement according to the product design. If a bench includes locks, treat them as access control for ordinary tools, not automatically as secure hazardous storage.

    Plan vise, clamp, power, and lighting access

    A vise needs more than a corner. Its jaws, handle, mounting bolts, and clamped work all extend into space. Decide whether the user is right or left handed and where long material will project. Confirm that the top and frame support the mounting location.

    Clamping is easier when the top has usable edges and no drawer face directly beneath every inch. Dog holes or accessory tracks help only if they fit the work and do not weaken a top that was not designed for modification.

    Put outlets where cords do not cross the aisle or the work surface. Use electrical products approved for the garage environment and intended load. Lighting should illuminate the hands without putting the user’s head between the fixture and project. A movable task light often solves shadows better than another decorative ceiling fixture.

    Inspect the buying details people skip

    • Assembled width, depth, and height, including handles and backsplash
    • Packaged dimensions and the route from delivery point to garage
    • Top material, thickness, coating, and permitted modifications
    • Published total and component ratings, plus load distribution language
    • Frame joints, braces, feet, and floor adjustment
    • Drawer extension, shelf openings, and knee clearance
    • Caster type and rating on mobile models
    • Vise or tool mounting provisions
    • Replacement parts, warranty, and current assembly manual

    Prices and bundles change, so compare the current complete package. One bench may include a hardwood top and drawers. Another attractive price may cover only the frame. Delivery charges, assembly time, casters, lighting, and a vise can change the real cost.

    A practical final choice

    For a garage that doubles as parking every day, start with the smallest bench that supports the common project. A mobile bench earns its place when there is a clear parking spot for it and a real need to work away from the wall. A fixed bench is the better anchor when vise work, mounted tools, and repeated setup dominate. Folding benches are honest space savers for light tasks, not miniature replacements for every heavy bench.

    Make a cardboard top or tape the dimensions on a folding table. Spend one normal project at that size. Notice where the parts pile up, which edge needs clamps, and whether the car can still open. That short trial tells you more about fit than a page of lifestyle photos.

    Then compare current models and manuals. Buy capacity you can verify and space you will use.

    Useful products to compare

    These links open current Amazon search results so you can compare dimensions, manuals, ratings, and availability for the exact models on your shortlist.

    Before you buy or install

    Check the current manual for the exact product you are considering. Confirm the assembled dimensions, load rules, mounting requirements, included hardware, clearances, warranty, and any limits that apply to your wall, floor, or garage layout.

    Frequently asked questions

    What size workbench is best for a garage?

    Use the smallest top that supports your common projects while preserving vehicle and walking clearance. Measure the complete footprint, including vise, handles, casters, and projecting materials.

    Is a fixed or mobile workbench better?

    Fixed benches usually suit forceful work and mounted tools. Mobile benches suit shared floor space when the frame, casters, locks, floor, and loaded weight all support safe movement.

    What is a good workbench height?

    The useful height depends on the user and task. Lower surfaces often suit downward force, while fine work may feel better higher. Test the task at several temporary heights.

    Is wood or steel better for a workbench top?

    Wood is clamp friendly, quieter, and often repairable. Steel is durable and easy to wipe but can be noisy and conductive. Construction, coating, thickness, and the intended work matter more than the material name alone.