Tag: cabinet dimensions

  • Garage Cabinet Size Guide: Width, Height, and Usable Space

    Garage Cabinet Size Guide: Width, Height, and Usable Space

    Affiliate disclosure: As an Amazon Associate I earn from qualifying purchases. This article may contain affiliate links, and Bay & Bench may earn a commission at no extra cost to you. Read our full Affiliate Disclosure.

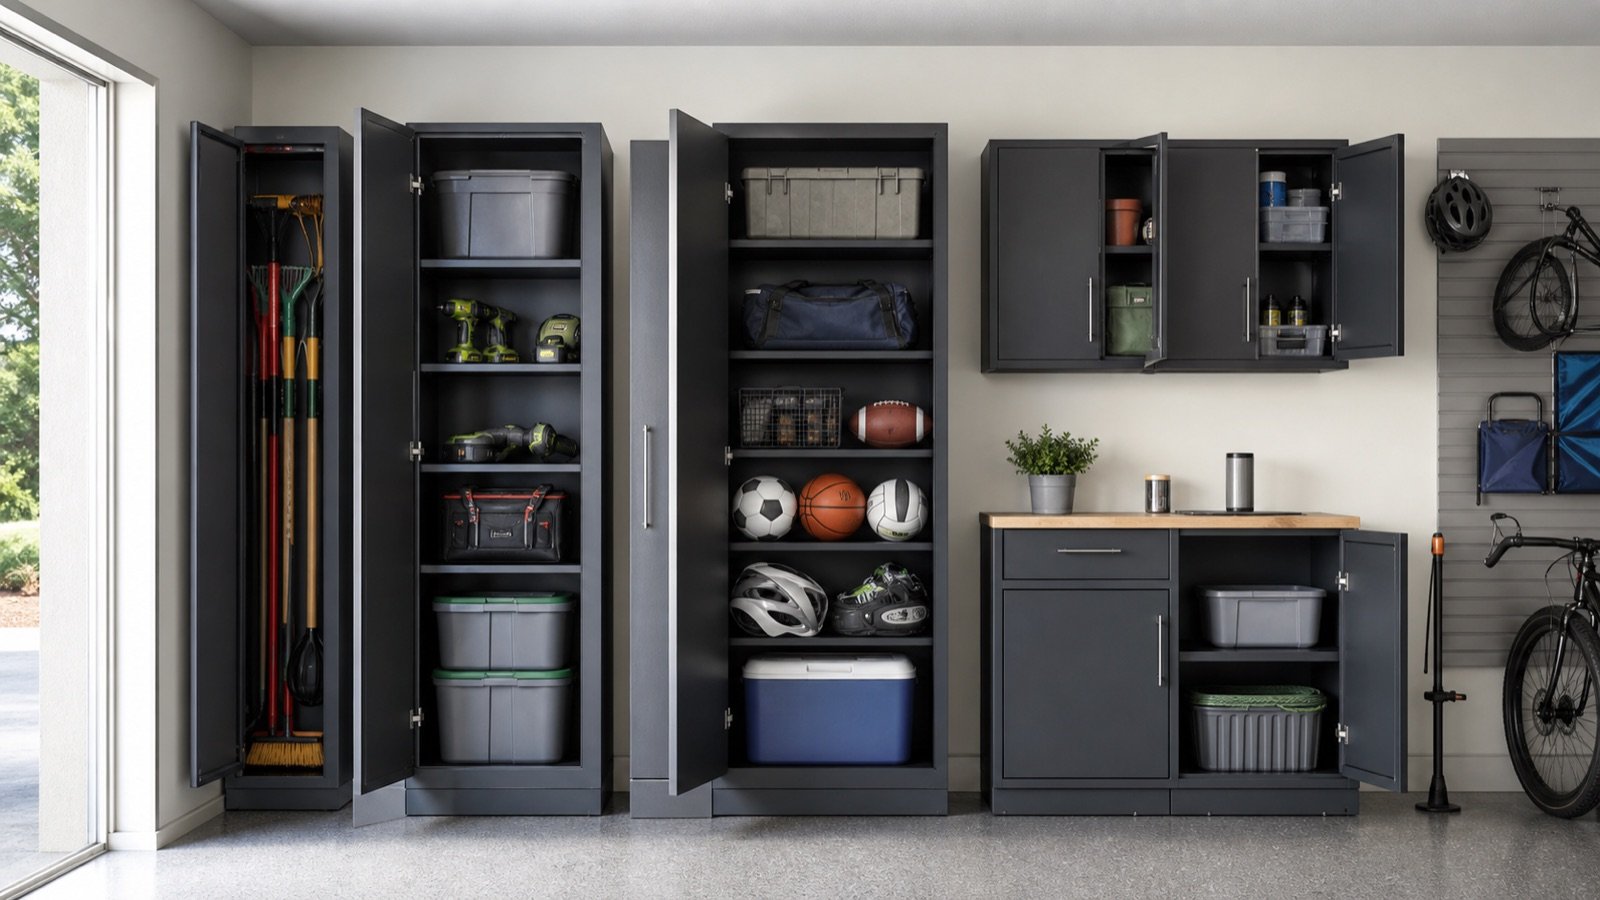
    Garage cabinets do not follow one universal standard. Product families commonly combine tall lockers, base cabinets, wall cabinets, and tool cabinets in multiple widths and depths. Plan with exact model dimensions.

    Quick answer

    Record external size, internal usable size, opening size, adjustable-foot range, handle projection and operating clearance. Select width for the stored object and wall module; select height for safe reach and ceiling conditions; select depth for the aisle.

    Useful products to compare

    These searches are a practical starting point for comparing current sizes, materials, load ratings, and availability.

    Typical cabinet roles

    TypeCommon roleDimension to prioritize
    Tall lockerLong and bulky gearInterior height and depth
    Base cabinetHeavy storage/worktopFinished work height
    Wall cabinetLight accessible storageDepth and mounting height
    Drawer unitTools and partsDrawer interior and extension

    Width: match modules to objects

    Narrow lockers suit long tools and constrained walls. Wider lockers accept totes but need broader door clearance and may have longer shelf spans. Current Bold Series examples include lockers from 30 to 48 inches wide, base cabinets at 24 and 36 inches, and wall cabinets at 24 and 36 inches. Treat these as examples, not standards.

    Height: capacity versus reach

    Tall cabinets use vertical volume efficiently, but the top shelf may require a safe step stool. Include adjustable legs and top cabinets in the total installed height. Check garage-door hardware, ceiling slope and lighting. Keep heavy objects below waist height and daily items in the comfortable reach zone.

    Depth: capacity versus circulation

    Wall cabinets may be around 12 inches deep in some systems; tall and base cabinets frequently run deeper. The choice deserves its own 18 vs 24-inch cabinet guide. A nominal dimension is not the usable interior dimension.

    Worktop and base-cabinet height

    Adjustable feet can change the finished surface height and help level a unit. Add the worktop thickness. Choose the surface height for the actual work—precision assembly, heavy mechanical work and general storage can favor different positions. If several users share the bench, prioritize the main task and consider an adjustable auxiliary surface.

    Build a dimension schedule

    Create a table with model, external W×D×H, internal shelf size, opening, load per shelf, total load, door envelope, weight, package size and foot adjustment. Highlight any measurement not published and ask the manufacturer before buying.

    Use the schedule with the buying guide to compare candidates consistently.

    Before you order: the verification pass

    Put the exact model number—not merely the product-family name—at the top of your worksheet. Copy the assembled exterior dimensions, usable interior dimensions, individual shelf or drawer ratings, total cabinet weight, packaged dimensions, adjustable-foot range, and required clearances from the current manufacturer page and manual. Note which accessories are included and which appear only in styled photographs.

    Then return to the garage with painter’s tape. Mark the cabinet case, handles, open doors or extended drawers, and the path needed to load the largest object. Park the vehicle in its normal position and test every door, hatch, step, switch and service panel. Photograph the mock-up from the driver’s seat, house entry and driveway. If a critical measurement is unpublished, ask the manufacturer before placing the order.

    Finally, calculate total delivered cost: cabinet, worktop, shelves, drawer liners, casters or feet, mounting rails, appropriate fasteners, delivery surcharge, assembly help and sales tax. A lower sticker price can become the more expensive installation when essential components are optional.

    Installation-day checklist

    • Inspect packages for damage before assembly and keep model labels and receipts.
    • Read the complete manual before lifting or fastening anything.
    • Confirm the floor is stable and the planned attachment locations are suitable.
    • Use a second capable person whenever the manual or cabinet size calls for one.
    • Level and square the case before aligning doors and loading shelves.
    • Install wall mounting or tip restraints exactly as instructed.
    • Load heavy objects low and distribute weight within every shelf and drawer rating.
    • Recheck fasteners, leveling and door alignment after the cabinet has been loaded.

    Do not improvise around electrical, gas, plumbing, fire-safety or structural conditions. When the required attachment or clearance is uncertain, pause and consult a qualified professional.

    Common mistakes to avoid

    Most disappointing installations trace back to one of five mistakes: measuring only the empty wall; treating total capacity as a per-shelf rating; forgetting doors, drawers and vehicle movement; selecting depth from a catalog image; or filling every wall without reserving adaptable space. A slower specification check is cheaper than returning a pallet-sized cabinet.

    Frequently asked questions

    What is a standard garage cabinet depth?

    There is no single standard. Wall, base and tall cabinets differ, and even one manufacturer may offer 18- and 24-inch families.

    How tall should a garage cabinet be?

    The best height fits below obstructions, permits installation, and keeps important contents safely reachable. Use the exact product height including feet.

    Should cabinets fill the entire wall?

    Not necessarily. Reserve space for flexible wall storage, future equipment, ventilation and service access.

    Last reviewed: July 2026. Product specifications can change; check the manufacturer’s current documentation before purchase.
  • How to Measure a Garage for Storage Cabinets and Racks

    How to Measure a Garage for Storage Cabinets and Racks

    Affiliate disclosure: As an Amazon Associate I earn from qualifying purchases. This article may contain affiliate links, and Bay & Bench may earn a commission at no extra cost to you. Read our full Affiliate Disclosure.

    A single wall-width measurement is not enough to order garage storage. The installation can be defeated by a curb, sloped floor, bowed wall, outlet, door track, open car door, or a package that cannot reach the room.

    Quick answer

    Measure every relevant wall at multiple heights, map all fixed obstructions, record the floor and ceiling conditions, and test both operating and delivery clearances. Keep the manufacturer’s tolerances and anchoring instructions beside your drawing.

    Useful products to compare

    These searches are a practical starting point for comparing current sizes, materials, load ratings, and availability.

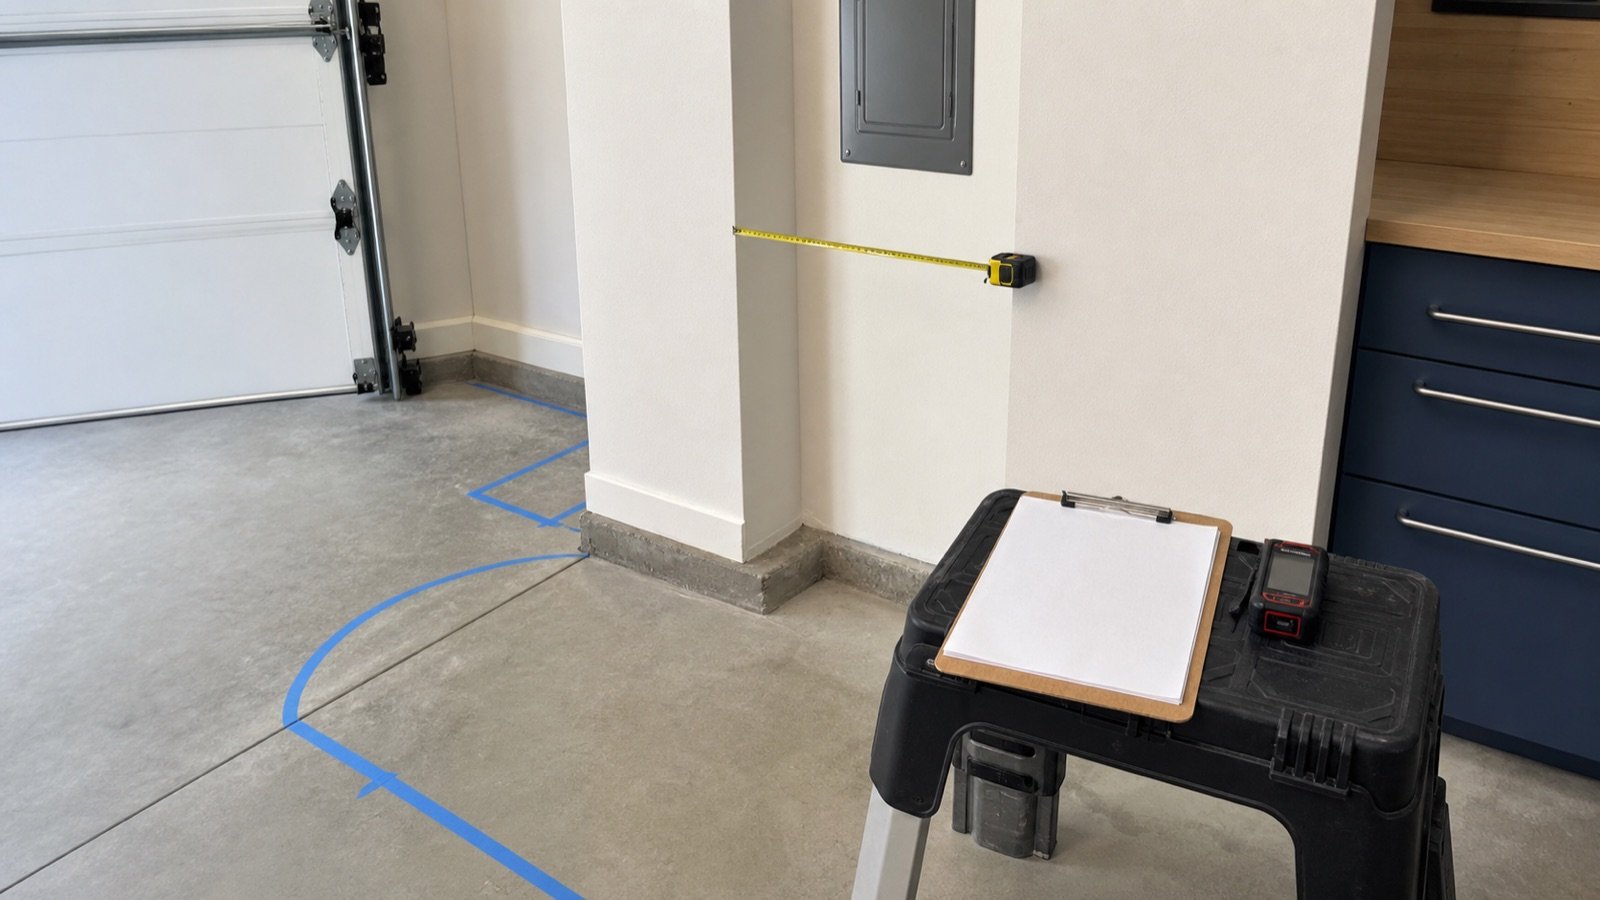
    Tools to bring

    • 25-foot tape measure and laser measure
    • Four- or six-foot level
    • Stud finder appropriate for the wall
    • Painter’s tape, pencil, graph paper and phone camera
    • Cardboard for full-size footprint mockups

    A laser is fast for overall spans, while a tape is better for recesses and object dimensions. Cross-check important measurements with both.

    Create a base drawing

    Sketch the room from above and number each wall. Record length at floor, counter height and near the proposed cabinet top. Measure ceiling height in several places. Garages are rarely perfectly square; note diagonal measurements if a full-wall system must fit tightly.

    Do not round up. Write the observed dimension and later subtract the clearance required by the product and installation method.

    Map every obstruction and service zone

    Locate outlets, switches, electrical panels, plumbing, hose bibs, vents, windows, door trim, foundation curbs, stairs and appliances. Note not only their size but the access they require. A cabinet that covers an outlet may be inconvenient; one that blocks a service panel may be unacceptable.

    Measure moving envelopes

    Open vehicle doors, hatch and tailgate fully. Operate the garage door and observe tracks, springs, opener rail and emergency release. Swing house and exterior doors. Pull out existing drawers. Mark each envelope with tape and photograph it.

    For cabinet doors, use the manufacturer’s opening angle and handle projection where available. A nominal 24-inch-deep cabinet may need considerably more operating space.

    Check floors, walls, and attachment points

    Record the floor slope from wall to aisle and any lip or drain. Check wall plumb and floor level across the cabinet run. Identify the wall construction and suitable attachment locations; do not assume every visible line is a structural stud. The mounting plan must follow the product instructions and local construction conditions.

    Verify delivery and assembly space

    Compare package dimensions—not merely assembled dimensions—with doors, hallways and turns. Preassembled cabinets may be strong and convenient but difficult to move. Ready-to-assemble units require floor area to sort panels and square the case. See modular versus preassembled cabinets before deciding.

    Finish by transferring the measurements to the process in How to Plan Garage Storage.

    Before you order: the verification pass

    Put the exact model number—not merely the product-family name—at the top of your worksheet. Copy the assembled exterior dimensions, usable interior dimensions, individual shelf or drawer ratings, total cabinet weight, packaged dimensions, adjustable-foot range, and required clearances from the current manufacturer page and manual. Note which accessories are included and which appear only in styled photographs.

    Then return to the garage with painter’s tape. Mark the cabinet case, handles, open doors or extended drawers, and the path needed to load the largest object. Park the vehicle in its normal position and test every door, hatch, step, switch and service panel. Photograph the mock-up from the driver’s seat, house entry and driveway. If a critical measurement is unpublished, ask the manufacturer before placing the order.

    Finally, calculate total delivered cost: cabinet, worktop, shelves, drawer liners, casters or feet, mounting rails, appropriate fasteners, delivery surcharge, assembly help and sales tax. A lower sticker price can become the more expensive installation when essential components are optional.

    Installation-day checklist

    • Inspect packages for damage before assembly and keep model labels and receipts.
    • Read the complete manual before lifting or fastening anything.
    • Confirm the floor is stable and the planned attachment locations are suitable.
    • Use a second capable person whenever the manual or cabinet size calls for one.
    • Level and square the case before aligning doors and loading shelves.
    • Install wall mounting or tip restraints exactly as instructed.
    • Load heavy objects low and distribute weight within every shelf and drawer rating.
    • Recheck fasteners, leveling and door alignment after the cabinet has been loaded.

    Do not improvise around electrical, gas, plumbing, fire-safety or structural conditions. When the required attachment or clearance is uncertain, pause and consult a qualified professional.

    Common mistakes to avoid

    Most disappointing installations trace back to one of five mistakes: measuring only the empty wall; treating total capacity as a per-shelf rating; forgetting doors, drawers and vehicle movement; selecting depth from a catalog image; or filling every wall without reserving adaptable space. A slower specification check is cheaper than returning a pallet-sized cabinet.

    Frequently asked questions

    How much extra clearance should I add?

    Use the exact manufacturer requirements for leveling, doors, hardware, ventilation and installation. Do not rely on a universal allowance.

    Should I measure before or after decluttering?

    Do an initial room measure anytime, but clear the planned wall and floor before the final verification.

    What dimensions should I record from a cabinet listing?

    External assembled size, internal usable size, door and drawer operating clearance, adjustable-foot range, package size, weight and anchoring requirements.

    Last reviewed: July 2026. Product specifications can change; check the manufacturer’s current documentation before purchase.