Tag: space planning

  • Garage Workshop Aisle Clearance: Measure the Space You Actually Use

    Garage Workshop Aisle Clearance: Measure the Space You Actually Use

    Affiliate disclosure: As an Amazon Associate I earn from qualifying purchases. This article may contain affiliate links, and Bay & Bench may earn a commission at no extra cost to you. Read our full Affiliate Disclosure.

    Garage workshop aisle clearance changes with the job, so one borrowed gap cannot describe the whole room. Pull a drawer or stand at the bench, and the empty strip gets smaller. Carry a tote, steer a tool cart, open a car door, or feed a long board through a machine, and its shape changes again. A path that feels generous while the room is empty can vanish during an ordinary job. Measure the garage in those active states, at its narrowest points, and with the people and loads that will use it. Any stated tool clearance, local building rule, fire requirement, or accessibility requirement still applies. The method below helps you find your working envelope; it does not replace those instructions.

    Quick answer

    Don’t choose one workshop walkway width for the whole room. Mark each route by purpose: simple passage, working stance, an open drawer or door, material handling, cart movement, vehicle access, and any mobility device. Measure fixed projections first, add the largest moving part, then walk or roll the real task through a taped mockup. Record the narrowest clear point. Keep exit routes and required access separate, and check local rules plus every tool and storage manual before fixing the layout.

    Plan garage workshop aisle clearance by activity

    A floor plan usually shows cabinets and machines as closed rectangles. That view is useful for storage mode and almost nothing else. Give each busy part of the garage its own state: closed, being opened, in use, and moving through the room.

    A passage is the strip used to get from one place to another. A work zone includes the person’s feet, hips, elbows, and the motion of the task. An open state adds drawers, doors, clamp handles, and vehicle panels. A handling route includes the tote, sheet, board, cart, or mobility device being moved. Those envelopes may overlap at different times, but they cannot occupy the same space at the same moment.

    This distinction prevents a common mistake. The measured gap between a bench and a car might be a workable walking path while the bench is closed. It may fail as soon as a drawer opens or someone turns with a storage bin.

    Map fixed faces before drawing the walkway

    Measure between finished, protruding faces rather than walls on an old plan. Cabinet handles, a benchtop overhang, a vise screw, shelf lips, wall mounted tools, a curb, and car mirrors can all become the true edge. Take readings near the floor, at hip height, and higher up. The tight point may change with height.

    Record doors, steps, posts, appliances, electrical panels, garage door tracks, opener parts, pipes, and anything that must remain reachable. The worksheet in our guide to measuring a garage for storage is a practical place to collect those dimensions.

    Then mark uncertainty. A car will not stop on precisely the same line every night. A bowed wall can steal an inch at one end. Treat the smallest measured gap and normal parking variation as real conditions, not rounding errors.

    Use a worksheet instead of borrowing one aisle width

    Build one row for every route or station. The final dimension comes from the task and the user’s trial, not from averaging the rows. This table is meant to be filled with measurements from your garage.

    Route or stationFixed boundaries to measureOpen or moving state to addTest to performResult to record
    Everyday passageNearest handles, shelves, mirrors, and wall edgesNormal parking variation and items left in placeWalk through carrying the usual tote, bag, or tool caseNarrowest usable point and snag locations
    Workbench in useBench face to the opposing fixed or parked objectDeepest drawer, cabinet door, vise handle, and clampsStand, reach, bend, step back, and change toolsFull working envelope for that task
    Mobile cart routeDoorways, corners, parked tools, and thresholdsCart handle, caster swing, cord, and carried loadPush, turn, stop, and park an empty substituteTurn outline plus a marked parking home
    Long material pathMachine, walls, cars, doors, and storage facesLeading end, trailing end, side sweep, and supportsMove a light full length mockup through the planned operationComplete travel path, including setup and removal
    Mobility and exit routeFinished faces, thresholds, door hardware, and door swingDevice, hands, turning approach, and other usersCheck the real user and applicable requirementsProtected route that storage never borrows

    Store the figures beside the layout, not in your head. The garage storage fit calculator can help reconcile room width, storage depth, and the remaining clear strip, but the physical movement test still decides whether that strip works.

    Measure passage with the load in your hands

    Walking through empty handed is the easiest version of an aisle. Try the trip that happens on a wet Tuesday: carrying recycling, a bulky tote, groceries, a compressor hose, or a project box while a vehicle is parked. Watch elbows and knuckles. Note where the load forces the person to turn sideways.

    Long objects need a different check. A ladder or board rotates around the person carrying it, so the ends sweep well beyond shoulder width. A sheet may need two people and room for both sets of hands. Do not count a nearby bench as part of the path if it will hold a project at the same time.

    Separate household traffic from workshop staging where you can. A plan for garage storage zones and routes can keep daily gear near its destination, which reduces the number of wide loads crossing the work area.

    Add the worker’s stance around a bench or machine

    The worker is part of the machine footprint. At a bench, mark where the toes land during close work and where the hips move while planing or filing. Then see how far the person steps back to inspect or lift a project. Repeat the check while reaching into the lowest drawer. A shallow toe recess may help standing posture, but it does not create room for another person to pass behind.

    Machines add controls, guards, fences, dust fittings, cords, supports, and stock. Read the manual for setup and operating restrictions. If the maker specifies a clearance or a safe operating position, use it. Floor tape cannot cancel an instruction.

    Bench depth, top size, vises, drawers, and mobility all change the working envelope. Compare those parts before buying in the garage workbench buying guide. A smaller top is useful only if the work still fits on it.

    Open drawers, doors, hatches, and vises

    Open every moving part to the position you really use. Measure a drawer from the fixed cabinet face to its outermost handle. Swing cabinet doors through their arcs. Extend pullout bins, folding tops, vise screws, and clamp tails. Then check whether the worker can stand where the contents are visible and lift an item out.

    Do the same with the vehicle parked in its normal range. Driver doors, sliding doors, trunks, hatches, charging leads, and fuel access create different shapes. Two open states that are individually acceptable may collide, such as a bench drawer and a car door.

    Some conflicts can be scheduled. You might open the deep bench drawer only after the car leaves. Write that rule down. If the drawer contains daily tools, though, the arrangement will be annoying from the first week.
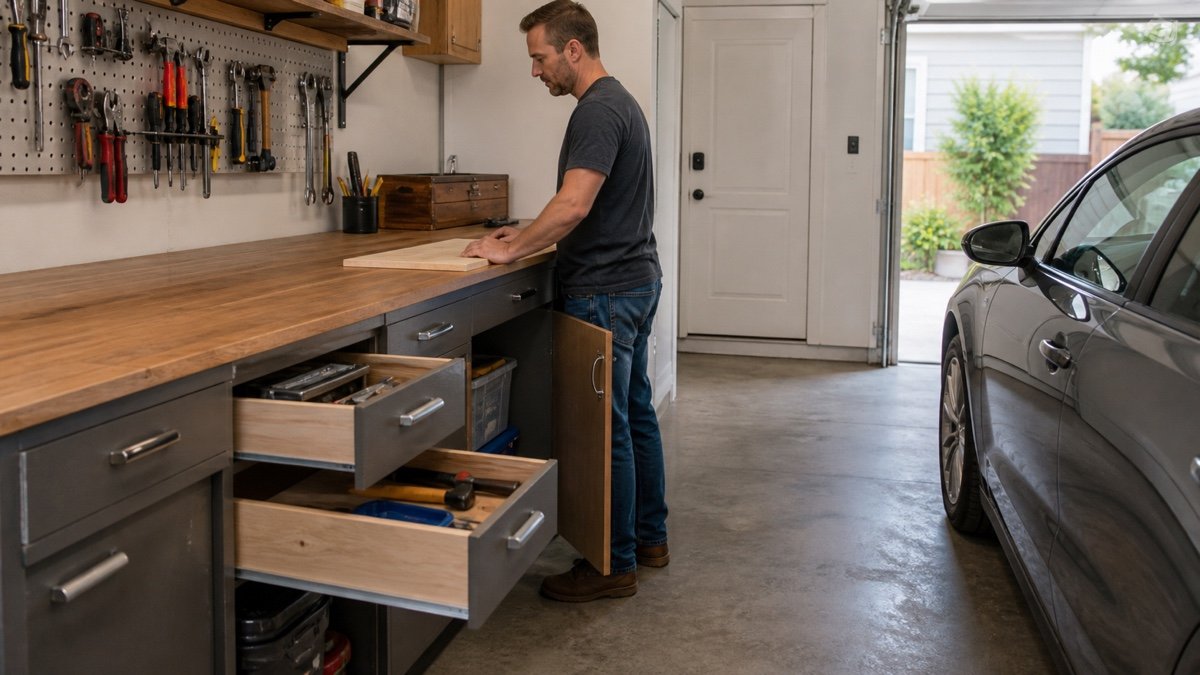
    Man working at a garage bench with several drawers and a cabinet door open beside a parked car
    Open drawers and doors occupy the same floor area that looks like a clear walkway when the storage is closed.

    Trace carts and long material through each turn

    A rolling cabinet does not turn inside its body outline. Swivel casters swing, handles project, and the person pushing it needs a place to stand. Tight corners may require a pull, correction, and second push. Tape the proposed route, then steer an empty cart or a light cardboard mockup from its storage home to its work position.

    Check thresholds, floor cracks, slopes, cords, and door tracks. A cart that crosses them badly may twist toward a car or bench. Follow the caster and cabinet instructions for loading, locking, and use on the floor you have. Do not perform the first route test with a fully loaded tool chest.

    For boards and sheet goods, trace the ends, not just the carrier’s feet. Include infeed, cutting or assembly position, outfeed, and the route back out. Keep that sweep away from people entering through a service door. If a helper is normally involved, give the helper a measured stance too.
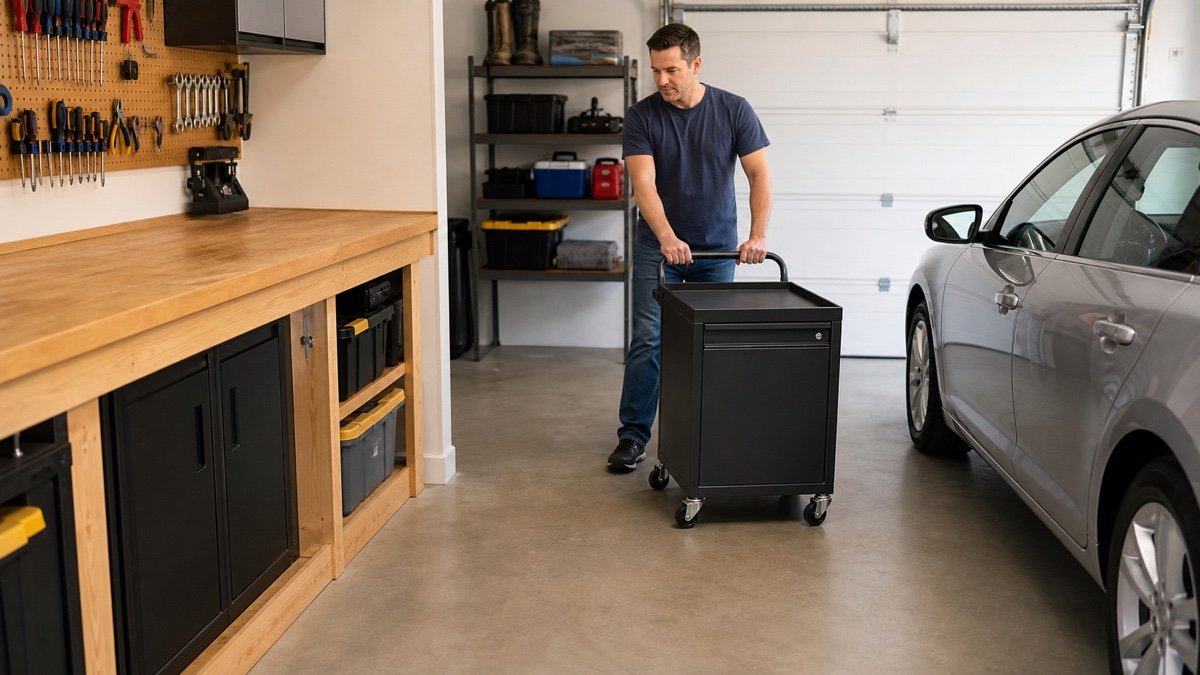
    Man turning a rolling tool cart through the aisle between a garage workbench and a parked car
    A rolling cart needs space for its handle, caster swing, and turning path as well as the cabinet body.

    Protect mobility routes, exit paths, and stated clearances

    A person using a cane, walker, wheelchair, or other mobility device may need more room at a turn, threshold, latch, or transfer point than a standing adult carrying nothing. Measure the device with the user’s hands and normal approach. Involve that person in the mockup if they want to participate and the test can be done safely. Do not infer a personal fit from a generic aisle number.

    Accessibility, building, fire, electrical, and workplace rules depend on the property, location, use, and project. A home shop, shared building, and commercial workspace may face different requirements. Confirm what applies with the local authority or a qualified professional before construction. Keep required access to panels, appliances, controls, and exits clear.

    Treat an exit route as protected space. A movable cart still blocks it while parked there, and an open drawer can narrow it at the worst time. Manuals for tools, cabinets, heaters, chargers, and garage door equipment may add their own access or separation instructions.

    Tape the room and run three ordinary scenarios

    Mark fixed equipment in one tape color and moving edges in another. Use cardboard to give cabinets and handles real height. A line on the floor will not reveal a shoulder level collision with a shelf or mirror.

    Run the room in three states. First, use storage mode with vehicles and mobile tools parked. Second, use setup mode while carts move, stock comes in, and drawers open. Third, use active work mode with the operator, supports, dust hose, and project in place. Add a fourth state if another household member must pass during work.

    Carry familiar loads and wear normal footwear. Reach the house door, open the deepest drawer, turn the cart, and move a light full size material substitute. Never simulate a powered cut. Leave the tape down for several days so ordinary traffic can expose the awkward spots.

    Recover clearance when the layout fails

    Start by reducing projection, not by asking people to squeeze. Move seldom used items above or outside the busy route. Replace deep floor storage with a shallower wall zone where the structure and product instructions allow it. Our guide to garage wall storage systems compares common rail, panel, and pegboard arrangements.

    Next, question the base. Wall mounted and freestanding garage shelves use floor and wall space differently, and either choice can be wrong near a door, curb, or parked car. Compare the full range of garage storage systems before solving every problem with another cabinet.

    Rotate the bench, give a cart a better home, reverse a door where permitted, or split one congested station into two. After each change, repeat the open state and movement checks. Keep the tape marks that matter. They make creeping boxes and temporarily parked tools easy to spot.

    Before you buy or install

    Check the current manual for the exact product you are considering. Confirm the assembled dimensions, load rules, mounting requirements, included hardware, clearances, warranty, and any limits that apply to your wall, floor, or garage layout.

    Frequently asked questions

    How much garage workshop aisle clearance do I need?

    There is no single width for every aisle. A simple passage, a bench work zone, a material path, a mobility route, and a required exit path solve different problems. Measure the narrowest fixed gap, add open doors or drawers, then test the real user and normal load. Follow any applicable code and manufacturer dimensions.

    Does an open drawer count as part of workbench clearance?

    Yes, whenever the drawer can be open while someone works or passes. Measure to the outermost drawer or handle and include the person’s stance for seeing and lifting its contents. If the drawer may open only after a car or cart moves, make that operating rule explicit.

    How should I plan a workshop route for a wheelchair or walker?

    Measure the actual device, hands, turning approach, thresholds, and door operation with the person who will use the route. Protect that envelope from temporary storage. Also check the accessibility and building requirements that apply to the property and project, since a personal movement test does not establish compliance.

    Can the gap beside a parked car double as a workshop aisle?

    It can serve some tasks if the measured car envelope, normal parking variation, door or hatch movement, worker, and carried load all fit at the same time. Test the parked state with the actual vehicle. Keep hard tool edges and material paths away from the paint, and do not borrow a required exit or access route.
  • Small Garage Workbench Ideas That Protect Parking Space

    Small Garage Workbench Ideas That Protect Parking Space

    Affiliate disclosure: As an Amazon Associate I earn from qualifying purchases. This article may contain affiliate links, and Bay & Bench may earn a commission at no extra cost to you. Read our full Affiliate Disclosure.

    Park the car before evaluating small garage workbench ideas. A catalog cannot show the door swing, freezer lid, electrical panel, or route into your house. Measure the room in its busiest state, including the vehicle, then choose a shallow fixed bench, folding wall surface, mobile island, or cabinet and bench combination. Each format below is tied to a simple footprint and a door check, so you can see whether the idea protects the daily function of the garage.

    Quick answer

    As a planning example for a garage that must park every night, start by testing an 18 to 24 inch deep wall bench or a folding surface that becomes about 4 to 8 inches deep when closed. Mark a 24 inch working stance in front, then test the nearest car door and walking route. A mobile 48 by 24 inch bench can work when the vehicle moves outside during projects. Treat these as mockup dimensions, not universal clearances, and choose the layout that fits both its closed and working states.

    Small garage workbench ideas by layout

    Four formats cover most small garages. The dimensions below are planning examples, not universal rules. Replace them with the assembled dimensions of the exact bench and the footprint of your own vehicle. The critical number is total working depth: bench depth plus the space occupied by you, a stool, clamps, and any workpiece overhang.

    LayoutExample bench sizeSpace when storedSpace while workingBest condition
    Shallow fixed wall bench72 by 20 inches20 inches deepAbout 44 inches with a 24 inch stanceWall remains usable beside parked car
    Folding wall bench48 by 20 inches openAbout 4 to 8 inches deepAbout 44 inches with stanceSurface can close before parking
    Mobile island48 by 24 inches24 inches deep at wallAllow access around active sidesCar moves outside during projects
    Shared cabinet bench60 by 22 inches22 inches deepAbout 46 inches with stanceOne footprint must provide storage and work

    Use the garage storage fit calculator to record the exact widths and depths instead of relying on the rounded examples.

    Measure the parked state before the project state

    Park in the normal position with mirrors, hitch accessories, roof boxes, and charging cable arranged as they are most days. Open the driver door to the width you actually use. If a child seat, mobility need, or grocery unloading requires a wider opening, measure that condition too. Mark the outer edge of the door on the floor with painter’s tape. Repeat for the route to the house, trash bins, bicycles, and any appliance that opens into the bay.

    Now measure wall projections. Foundation ledges, posts, utility meters, outlets, door trim, and garage door tracks quietly reduce useful bench space. Record the narrowest point rather than the longest clean wall. Our step by step guide to measuring a garage for storage provides a room sheet for these obstacles. Keep the numbers visible while shopping, because a seller’s nominal width may exclude vise handles, casters, or a raised back panel.

    Layout one: a shallow fixed bench along the side wall

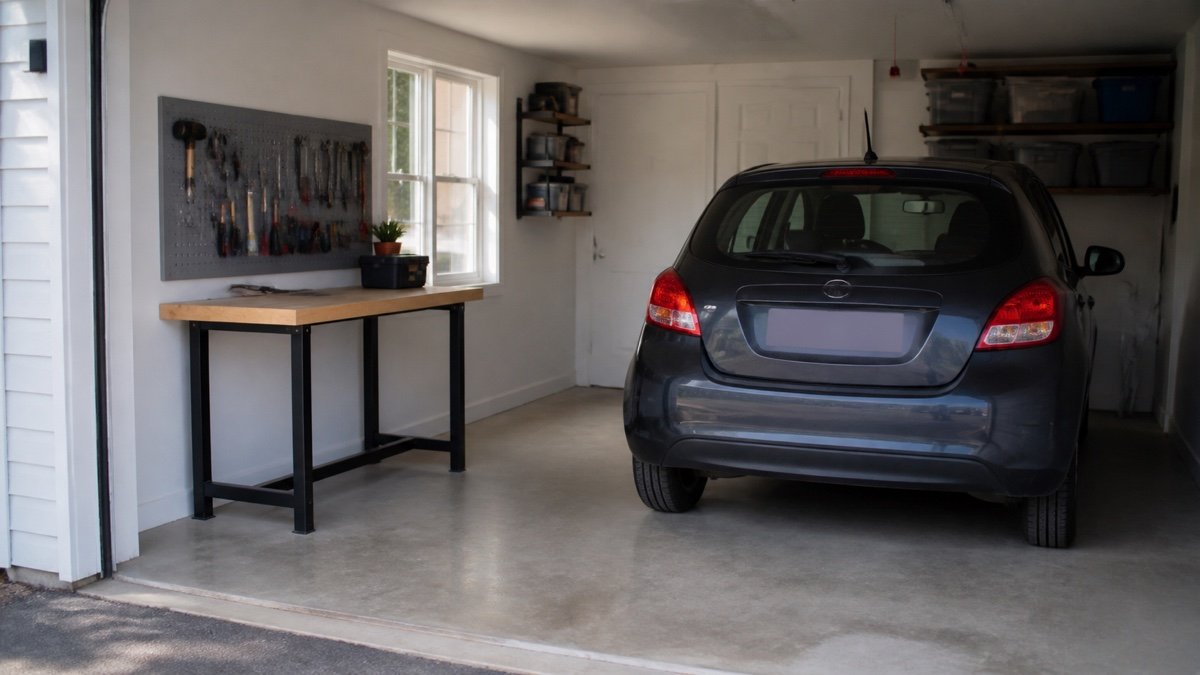
    Consider a 12 by 22 foot one car garage with a compact vehicle parked slightly toward the opposite wall. A 72 by 20 inch fixed bench may fit on the passenger side if the parked body, mirror, and required walking route remain clear. The bench needs roughly 44 inches from wall to the back of your working stance during use. That active zone may overlap the empty vehicle door zone only when the door is closed and nobody must pass.

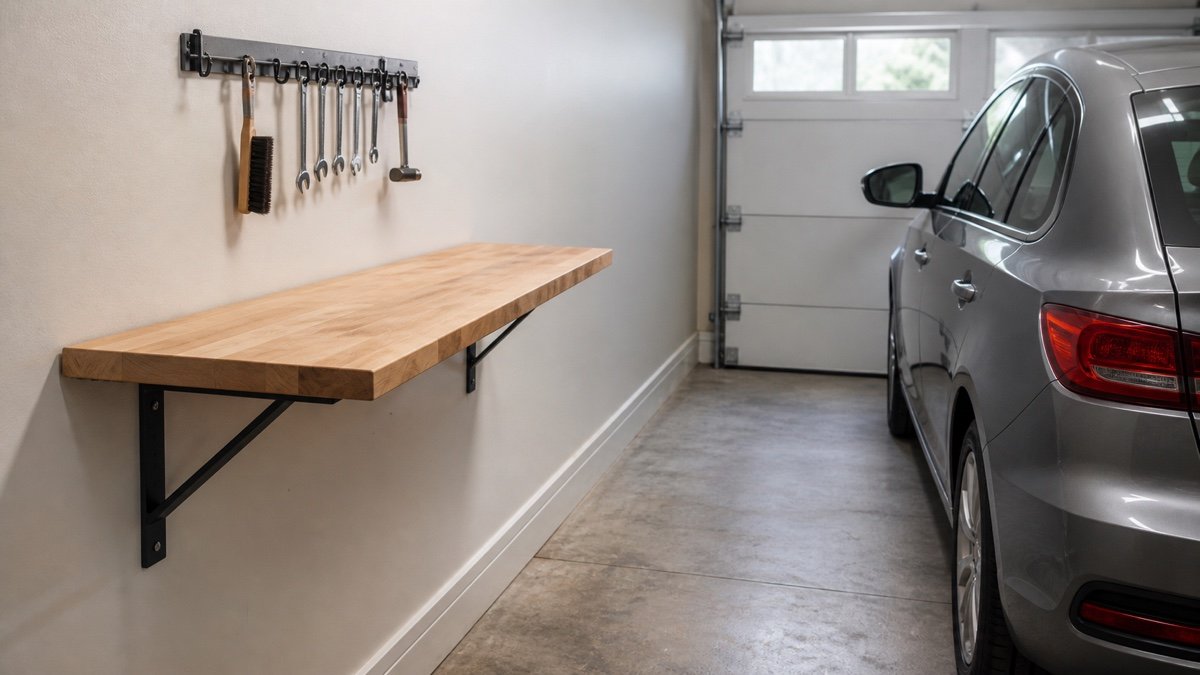
    Twenty inches is enough for tool repair, sharpening, electronics, small assembly, and many household jobs. It becomes frustrating for broad cabinets or large sheet goods. Keep upper storage shallow and place the most used tools between shoulder and bench height. Avoid deep cabinets over the front edge, where your head meets an open door. The photo below shows the main tradeoff: a shallow top saves parking width, while long workpieces still need clear space at both ends.

    Twenty inch deep wall bench next to a parked car in a narrow garage
    Measure from the wall to the parked vehicle at the narrowest point, then add space for the person using the bench.

    Layout two: a folding bench for a strict nightly reset

    A folding bench is convincing only when the stored package, legs, latches, and items above it all fit. Picture a 48 by 20 inch top that folds to a 6 inch wall projection. When open, it still needs the same working stance as a fixed bench. When closed, it can return roughly 14 inches of side clearance. That difference may be enough for a car door or a bicycle route.

    The catch is behavior. The top must be cleared before the car comes in. Give every bench tool a nearby wall or cabinet home, and keep the floor below free of bins that prevent folding. Check whether brackets pinch fingers, whether the open top is level on a sloped floor, and whether the wall structure supports the stated load. Renters should avoid casual anchoring into unknown walls. The guide to garage wall storage for renters offers lower impact ways to create the supporting tool zone without risky holes.

    Layout three: a mobile island that borrows the parking bay

    A 48 by 24 inch rolling bench can live against the front or side wall and move into the center after the vehicle leaves. It suits assembly because you can reach several sides. It also carries tools to the project instead of making you turn repeatedly toward wall storage. This layout works best for households that are willing and able to move the car before every serious session.

    Choose casters for the total loaded weight, not the empty bench. All wheels should roll over slab joints and any threshold on the storage route. At least two effective brakes are helpful, but wheel brakes alone may not stop swivel or frame movement during planing. Leveling feet or retractable casters give a firmer working state. Mark the parked location too. A mobile bench that blocks a freezer or the garage door sensor whenever it is stored has not solved the room.

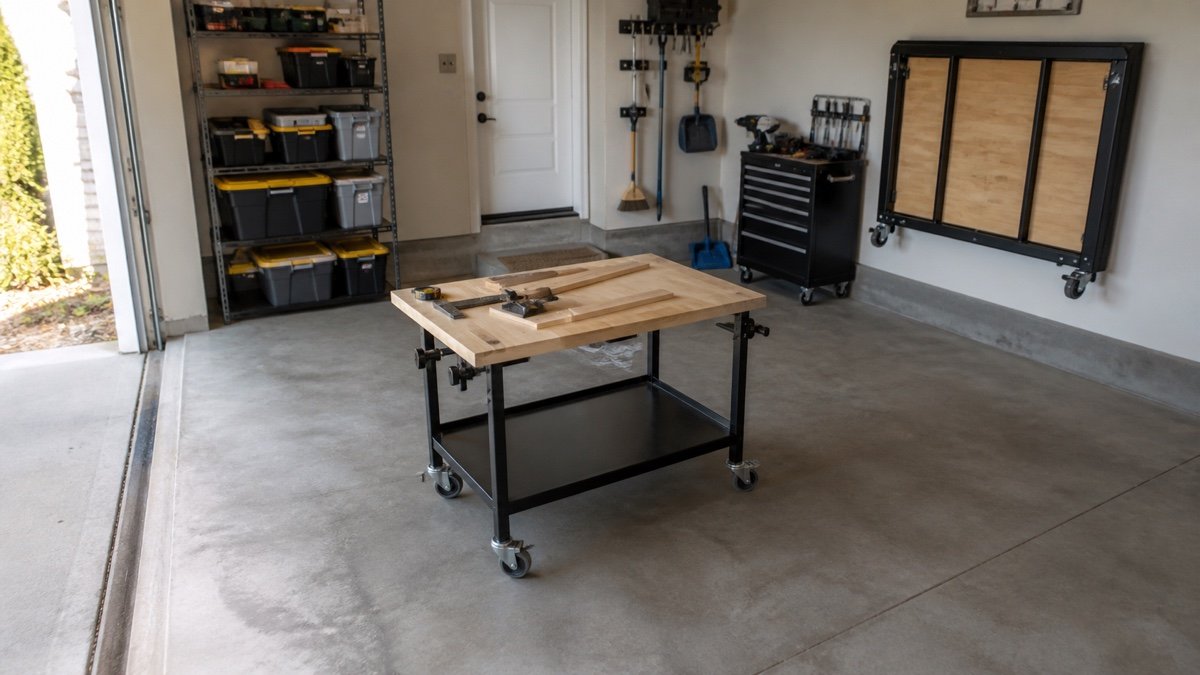
    Compact rolling workbench placed in the center of an open garage bay
    An island bench is useful only when its parked location and rolling route stay clear every day.

    Layout four: combine a base cabinet and work surface

    A 60 by 22 inch counter over drawer cabinets uses one footprint for tools and work. This is often better than placing a freestanding bench in front of separate floor shelves. Drawers hold small tools without forcing a deep reach, while a clear section beneath the top can leave knee space for seated work. Put heavy items low and make sure open drawers do not enter the vehicle or walking path.

    This layout is less flexible for clamping. Cabinet faces and drawer pulls can block clamp jaws. A top overhang of a few inches may help, provided the manufacturer or builder supports it correctly. Compare the storage you gain with the wall and floor alternatives in wall mounted vs freestanding garage shelves. Sometimes a plain bench plus shallow wall shelves stores more useful gear than a cabinet filled with one large open compartment.

    Run four door opening checks

    A paper rectangle cannot reveal every collision. Use tape, cartons, or folding tables to mock up the full bench height and depth. First open the nearest vehicle door with a person standing where they enter. Second open the house entry door through its full swing. Third operate cabinet doors, drawers, freezer lids, and trash bin lids. Fourth run the overhead garage door while watching tracks, handles, cords, and anything stored above the bench.

    Repeat the test with a normal project on the surface. A vise handle may extend beyond the nominal top. Long boards can cross a doorway. A stool may remain behind you. If the path works only when everyone turns sideways and closes three things in a special order, the layout is too tight. Reduce depth, shorten the bench, change door type, or move the station. A few inches recovered at the planning stage are more valuable than an impressive top that makes parking irritating.

    Treat power, light, and dust as part of the footprint

    A compact bench often fails because the outlet is behind a drawer or a cord crosses the only walkway. Locate receptacles before setting the bench height. Keep plugs accessible for inspection and follow electrical rules for the garage. A mounted power strip is not a substitute for adequate permanent wiring. Battery chargers need ventilation and a dry position away from sparks, grinding dust, and flammable finishes.

    Task lighting should cover the work surface as well as the room. A fixture behind your shoulders throws your shadow onto the bench. Place task lighting so the beam reaches the surface without colliding with the open garage door. Dust collection also consumes depth. A shop vacuum tucked below may need hose clearance and room to remove its canister. If the station produces heavy dust or fumes, a tiny indoor location may be the wrong place for that job regardless of how neatly the bench fits.

    Match the bench to jobs that fit a small garage

    List recurring jobs and the largest normal object, then choose the smallest surface that supports them without improvising unsafe extensions. Bicycle service benefits from clear floor space beside the bench. Small engine parts need a washable tray. Hand tool woodworking needs clamp access and stiffness. Electronics work values seating, light, and protected small parts more than a huge load rating.

    The garage workbench buying guide helps compare top, frame, mobility, and storage after the room has set the maximum size. Favor a simple bench that leaves one genuinely clear working zone. Pegboard, track, or shallow shelves can hold daily tools above it. Seasonal bins belong elsewhere, because every oversized item stored underfoot steals the stance that made the bench useful.

    Build a full size tape plan before ordering

    Mark the proposed bench outline on the floor and wall. Add a second tape line for the active working stance, plus outlines for open drawers, vise handles, and the longest normal workpiece. Park the vehicle. Walk every route while carrying a laundry basket, garbage bag, or tool case. Sit on the intended stool. Reach toward the back of the top without leaning into the car.

    Leave the mockup in place for a few days. Daily friction appears quickly: a blocked light switch, a mirror that passes too close, or a folding top that would collect mail and never close. Photograph the successful layout and record final dimensions. When the bench arrives, assemble it according to the manual and check level, fasteners, brakes, and wall anchors before loading it. Planning this way turns a small garage workbench into a repeatable room function rather than a permanent obstacle.

    Useful products to compare

    These links open current Amazon search results so you can compare dimensions, manuals, ratings, and availability for the exact models on your shortlist.

    Before you buy or install

    Check the current manual for the exact product you are considering. Confirm the assembled dimensions, load rules, mounting requirements, included hardware, clearances, warranty, and any limits that apply to your wall, floor, or garage layout.

    Frequently asked questions

    How deep should a workbench be in a small garage?

    Many compact layouts begin around 18 to 24 inches deep, but the correct depth depends on the work and parked vehicle. Add the space needed for your body, clamps, drawers, and workpiece overhang. Test that full working zone with tape rather than choosing by top depth alone.

    Is a folding workbench worth it for a garage?

    It is useful when the stored depth genuinely restores a car door or walking route and when tools have another home. Check wall structure, mounting instructions, open capacity, latch security, leg placement, and the effort required to clear it. A folding surface that stays covered behaves like a fixed bench.

    Can a rolling workbench share a one car garage?

    Yes, if the car can move out during projects and the bench has a clear parked location afterward. Measure the route, threshold, slab joints, caster capacity, and storage projection. Test how the bench is stabilized because ordinary swivel caster brakes may still allow movement under force.

    Where should a small garage workbench go?

    Choose the wall that preserves vehicle doors, the path into the house, garage door hardware, utilities, and storage access. The longest blank wall is not always best. Outlets, task lighting, dust control, clamp clearance, and long workpiece movement should all influence the position.