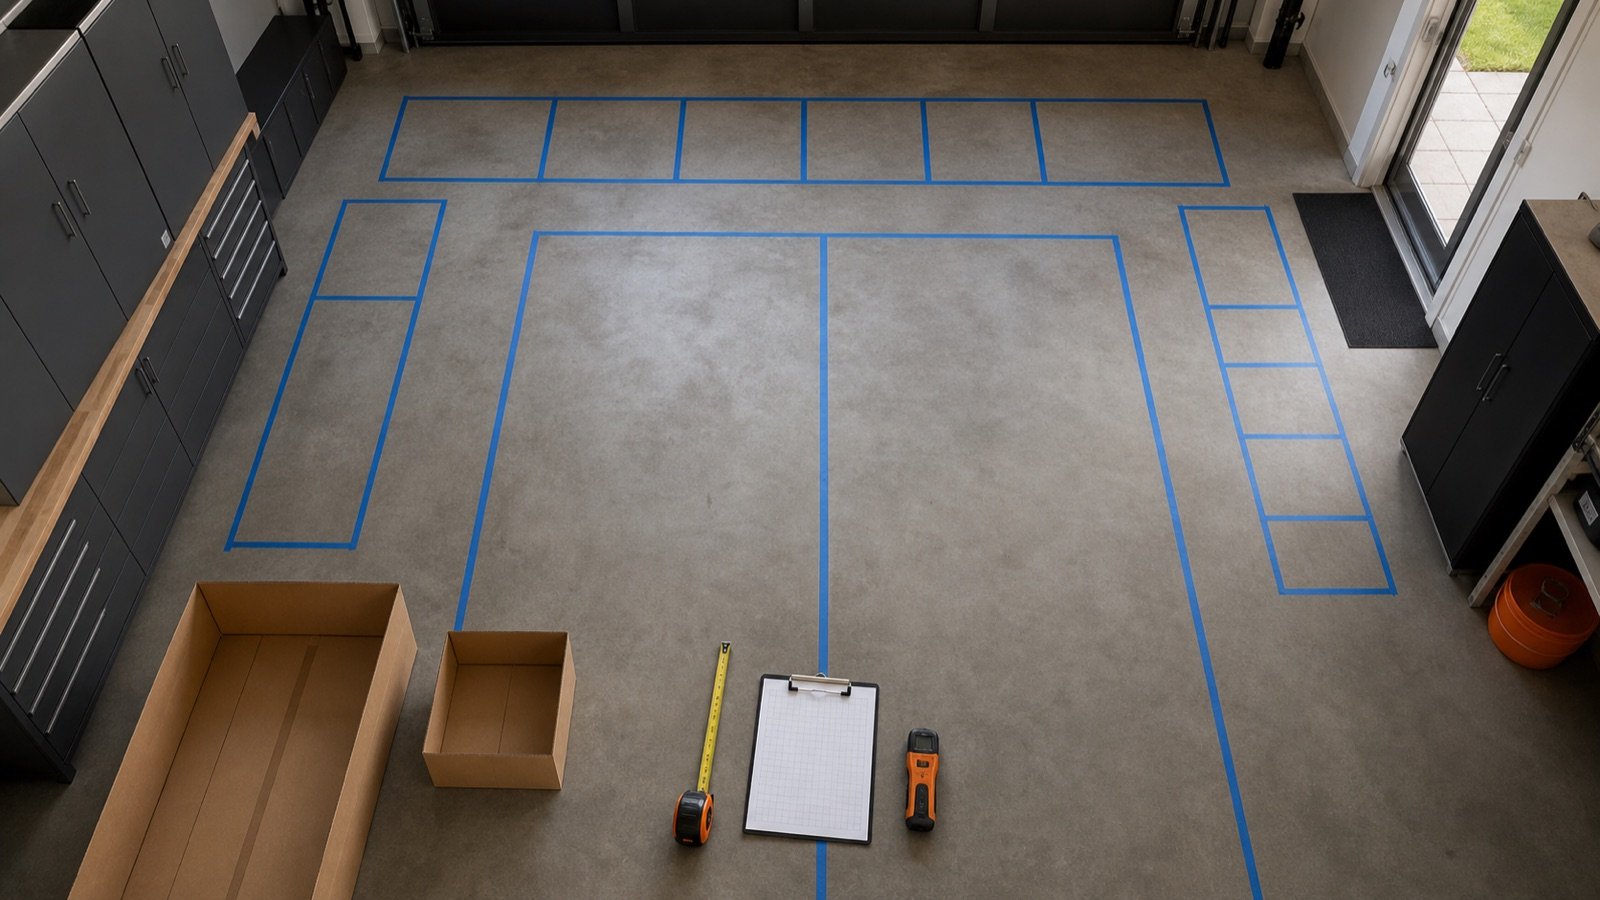
Tag: storage zones

  • How to Plan Garage Storage Before You Buy Anything

    How to Plan Garage Storage Before You Buy Anything

    Affiliate disclosure: As an Amazon Associate I earn from qualifying purchases. This article may contain affiliate links, and Bay & Bench may earn a commission at no extra cost to you. Read our full Affiliate Disclosure.

    The fastest way to waste money on garage storage is to buy containers before deciding what must remain accessible. A reliable plan begins with the room, the vehicles, and the objects—not a cabinet catalog.

    Quick answer

    Create a measured base plan, classify every object by size and frequency, mark fixed no-storage zones, and test proposed footprints with painter’s tape. Only then make a product list.

    Useful products to compare

    These searches are a practical starting point for comparing current sizes, materials, load ratings, and availability.

    Step 1: define what the garage must do

    Write the room’s jobs in order of importance: park one or two vehicles, support woodworking, hold garden equipment, create an entry zone, charge tools, store sports gear, or handle household overflow. A garage cannot optimize every job equally. Ranking them makes tradeoffs explicit.

    Also decide what does not belong. Donations, broken equipment, expired supplies and indoor-only possessions should leave before you calculate capacity.

    Step 2: inventory by frequency, size, and risk

    Create four frequency groups: daily, weekly, seasonal and archive. Add the dimensions of unusually large items and note anything sharp, hazardous, moisture-sensitive or valuable. Daily objects belong between knee and shoulder height near their point of use. Seasonal goods can move higher. Heavy objects should remain low.

    Do not estimate tote dimensions from memory. Measure the widest point, including lids and handles.

    Step 3: draw the fixed room

    Follow the full garage measurement procedure. Draw walls, openings, curbs, steps, columns, utilities, outlets, windows, door tracks and ceiling equipment. Mark every area that must remain accessible. Record floor slope and wall irregularities because they affect cabinet leveling.

    Step 4: reserve movement before storage

    Place the vehicle footprint, then add the real door openings and walking path. Include tailgate or hatch clearance. Test the route from the house door to the driveway while carrying groceries or a large bin. Storage that technically fits but forces people into awkward movements has failed the plan.

    Step 5: assign zones

    Group related objects where they are used: yard tools near the exterior door, car-care supplies near the vehicle, hand tools around the bench, household stock near the interior door. A zone should include both storage and a retrieval path.

    Use vertical walls for frequent tools, closed cabinets for controlled storage, and high zones only for light, infrequent items.

    Step 6: tape, test, and phase the purchase

    Mark cabinet depth and door swings on the floor. Use cardboard to represent tall units where sightlines matter. Live with the outline for several days. Then create a three-phase list: essential infrastructure, high-value storage, and optional finishing pieces.

    Before ordering cabinets, consult the garage cabinet buying guide and compare the exact external and internal dimensions.

    Before you order: the verification pass

    Put the exact model number—not merely the product-family name—at the top of your worksheet. Copy the assembled exterior dimensions, usable interior dimensions, individual shelf or drawer ratings, total cabinet weight, packaged dimensions, adjustable-foot range, and required clearances from the current manufacturer page and manual. Note which accessories are included and which appear only in styled photographs.

    Then return to the garage with painter’s tape. Mark the cabinet case, handles, open doors or extended drawers, and the path needed to load the largest object. Park the vehicle in its normal position and test every door, hatch, step, switch and service panel. Photograph the mock-up from the driver’s seat, house entry and driveway. If a critical measurement is unpublished, ask the manufacturer before placing the order.

    Finally, calculate total delivered cost: cabinet, worktop, shelves, drawer liners, casters or feet, mounting rails, appropriate fasteners, delivery surcharge, assembly help and sales tax. A lower sticker price can become the more expensive installation when essential components are optional.

    Installation-day checklist

    • Inspect packages for damage before assembly and keep model labels and receipts.
    • Read the complete manual before lifting or fastening anything.
    • Confirm the floor is stable and the planned attachment locations are suitable.
    • Use a second capable person whenever the manual or cabinet size calls for one.
    • Level and square the case before aligning doors and loading shelves.
    • Install wall mounting or tip restraints exactly as instructed.
    • Load heavy objects low and distribute weight within every shelf and drawer rating.
    • Recheck fasteners, leveling and door alignment after the cabinet has been loaded.

    Do not improvise around electrical, gas, plumbing, fire-safety or structural conditions. When the required attachment or clearance is uncertain, pause and consult a qualified professional.

    Common mistakes to avoid

    Most disappointing installations trace back to one of five mistakes: measuring only the empty wall; treating total capacity as a per-shelf rating; forgetting doors, drawers and vehicle movement; selecting depth from a catalog image; or filling every wall without reserving adaptable space. A slower specification check is cheaper than returning a pallet-sized cabinet.

    Frequently asked questions

    Should I design around bins or cabinets first?

    Inventory first, then choose a small family of bin sizes and cabinetry that fits them. Starting with random bins often wastes shelf depth.

    Can I plan without design software?

    Yes. A scaled graph-paper drawing plus painter’s tape is often more useful because it tests the actual room.

    What is the most common planning mistake?

    Ignoring movement: car doors, cabinet doors, drawers, steps, garage-door tracks and the path of a person carrying a bulky item.

    Last reviewed: July 2026. Product specifications can change; check the manufacturer’s current documentation before purchase.
  • Garage Storage Systems: How to Build One That Actually Works

    Garage Storage Systems: How to Build One That Actually Works

    Affiliate disclosure: As an Amazon Associate I earn from qualifying purchases. This article may contain affiliate links, and Bay & Bench may earn a commission at no extra cost to you. Read our full Affiliate Disclosure.

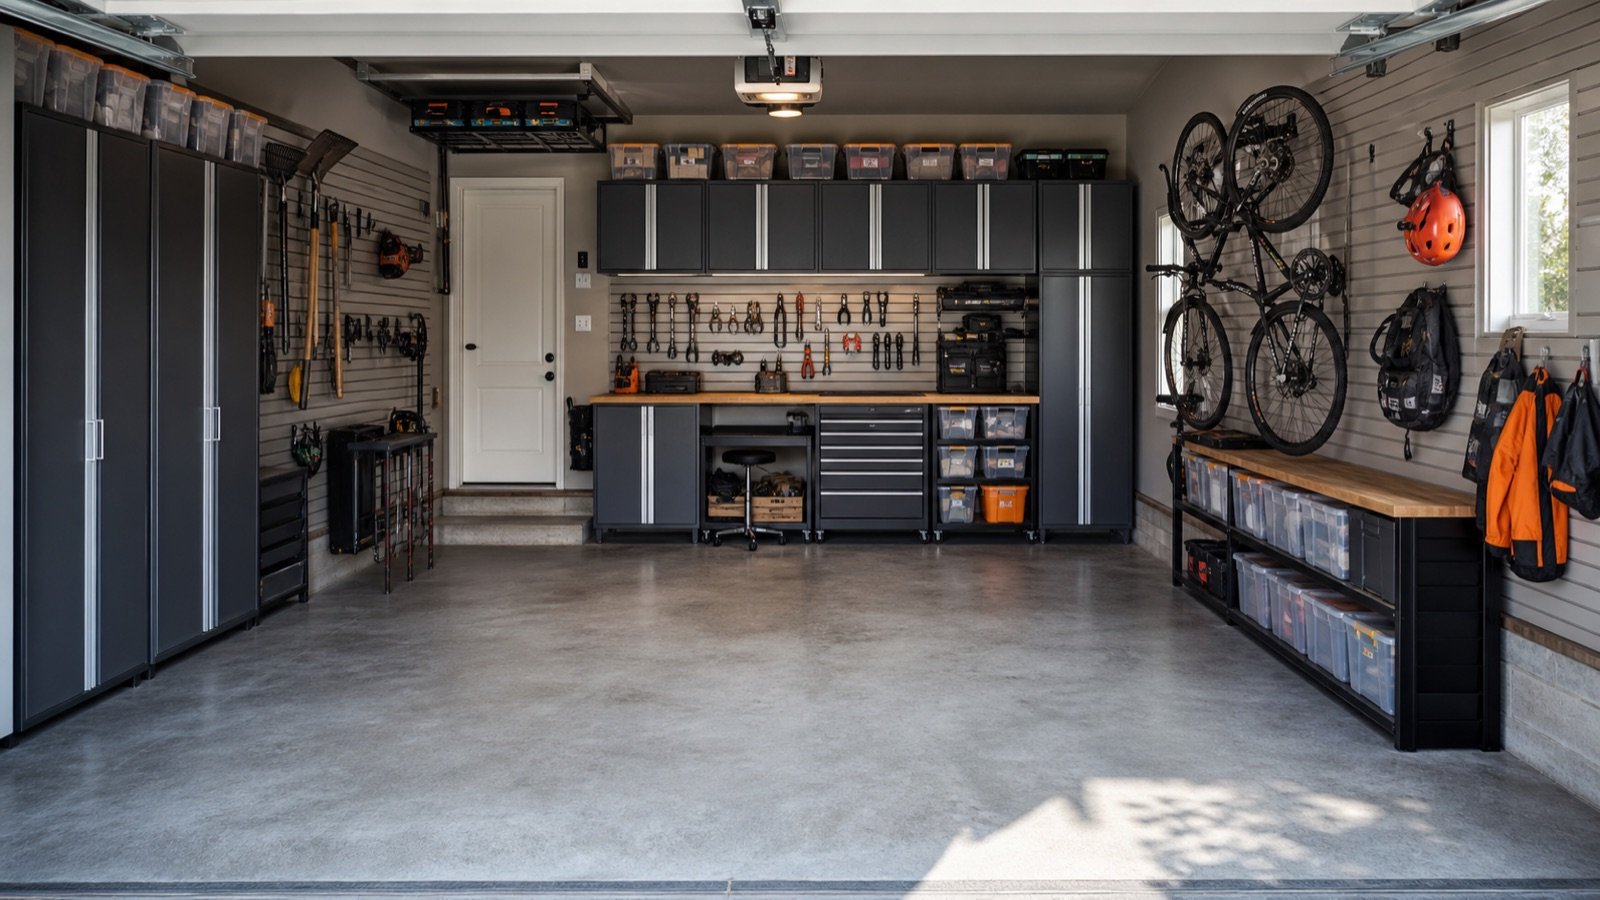
    A useful garage storage system is not the one with the most cabinets. It is the one that keeps the floor clear, puts frequently used gear within reach, protects hazardous items, and still lets every door, drawer, vehicle, and person move safely.

    Quick answer

    Start with zones and clearances, then choose storage hardware. Use closed cabinets for dust control and hazardous supplies, open wall storage for frequently used tools, overhead storage for light seasonal items, and mobile units where the work changes location.

    Useful products to compare

    These searches are a practical starting point for comparing current sizes, materials, load ratings, and availability.

    The five layers of a complete garage storage system

    Think of the room as five connected layers rather than one wall to fill.

    1. Floor and traffic layer: parking footprints, walking routes, door swings, steps and appliance access.
    2. Daily-use layer: items reached weekly—hand tools, chargers, sports gear and cleaning supplies.
    3. Closed-storage layer: dusty, sharp, valuable or visually messy items.
    4. High-storage layer: light seasonal gear that can be retrieved safely.
    5. Work layer: a bench, tool cart, charging point and task lighting.

    When those layers overlap carelessly, a garage feels cramped even when it contains plenty of nominal storage capacity.

    Choose storage by object, not by appearance

    Make an inventory before shopping. Record the largest dimensions and approximate weight of bulky objects, then sort everything by frequency of use. Long-handled garden tools need height; totes need shelf depth; small fasteners need drawers; chemicals need secure storage compatible with their labels; bicycles need a retrieval path, not merely a hook.

    A cabinet advertised with a large total capacity can still be a poor fit if shelf spacing, door opening, or internal depth does not match what you own.

    Cabinets, wall panels, shelves, and overhead racks

    Storage typeBest forMain constraint
    Closed cabinetsTools, supplies, dust controlDepth and door clearance
    Slatwall or pegboardFrequently used toolsVerified wall attachment and rated accessories
    Open shelvingBins and bulky itemsVisual clutter and dust
    Overhead racksLight seasonal goodsCeiling structure, door tracks, safe lifting
    Mobile cartsProject toolsParking space and caster quality

    Plan the system in the right order

    Use the sequence in our garage storage planning guide: measure first, mark no-storage zones, reserve the vehicle envelope, assign activity zones, then select products. The companion measurement checklist covers slopes, curbs, outlets, panels, windows and garage-door hardware that simple width-by-depth measurements miss.

    Mock up every cabinet footprint with painter’s tape. Open the car doors, carry a tote through the aisle, lower the garage door, and stand where you will work. A ten-minute mock-up can prevent a costly dimensional mistake.

    Build in phases

    With a limited budget, begin with the highest-friction zone. That may be an entry drop zone, a tool wall, or one bank of cabinets. Standardize bin sizes and label positions before expanding. A modular approach also reveals what capacity you actually use.

    Leave one section adaptable. Families acquire different sports gear; workshops add machines; vehicles change. A wall packed edge to edge on day one has no room to evolve.

    Safety rules that outrank storage capacity

    Never block an electrical panel, water heater service area, ventilation opening, fire equipment, or an exit. Follow local rules and each product’s installation instructions. Tall freestanding cabinets should be restrained against tip-over when the manufacturer calls for it. Wall cabinets and overhead racks must be attached to suitable structure with the specified hardware.

    Store gasoline, propane, pool chemicals, pesticides, oily rags, batteries, and flammables according to their labels and local fire guidance—not according to where they happen to fit.

    Before you order: the verification pass

    Put the exact model number—not merely the product-family name—at the top of your worksheet. Copy the assembled exterior dimensions, usable interior dimensions, individual shelf or drawer ratings, total cabinet weight, packaged dimensions, adjustable-foot range, and required clearances from the current manufacturer page and manual. Note which accessories are included and which appear only in styled photographs.

    Then return to the garage with painter’s tape. Mark the cabinet case, handles, open doors or extended drawers, and the path needed to load the largest object. Park the vehicle in its normal position and test every door, hatch, step, switch and service panel. Photograph the mock-up from the driver’s seat, house entry and driveway. If a critical measurement is unpublished, ask the manufacturer before placing the order.

    Finally, calculate total delivered cost: cabinet, worktop, shelves, drawer liners, casters or feet, mounting rails, appropriate fasteners, delivery surcharge, assembly help and sales tax. A lower sticker price can become the more expensive installation when essential components are optional.

    Installation-day checklist

    • Inspect packages for damage before assembly and keep model labels and receipts.
    • Read the complete manual before lifting or fastening anything.
    • Confirm the floor is stable and the planned attachment locations are suitable.
    • Use a second capable person whenever the manual or cabinet size calls for one.
    • Level and square the case before aligning doors and loading shelves.
    • Install wall mounting or tip restraints exactly as instructed.
    • Load heavy objects low and distribute weight within every shelf and drawer rating.
    • Recheck fasteners, leveling and door alignment after the cabinet has been loaded.

    Do not improvise around electrical, gas, plumbing, fire-safety or structural conditions. When the required attachment or clearance is uncertain, pause and consult a qualified professional.

    Common mistakes to avoid

    Most disappointing installations trace back to one of five mistakes: measuring only the empty wall; treating total capacity as a per-shelf rating; forgetting doors, drawers and vehicle movement; selecting depth from a catalog image; or filling every wall without reserving adaptable space. A slower specification check is cheaper than returning a pallet-sized cabinet.

    Frequently asked questions

    What should I install first?

    Clear the floor, establish zones, and solve the most frequently used area first. Do not buy a full cabinet set until the measured layout has passed a tape mock-up.

    Are garage cabinets better than open shelves?

    Neither is universally better. Cabinets control dust and visibility; shelves make bulky bins easier to see and access. Most garages benefit from both.

    How much aisle space should I leave?

    There is no single number for every household. Test the planned aisle with the actual vehicle, open doors, carried objects and all moving parts before ordering storage.

    Last reviewed: July 2026. Product specifications can change; check the manufacturer’s current documentation before purchase.