Affiliate disclosure: As an Amazon Associate I earn from qualifying purchases. This article may contain affiliate links, and Bay & Bench may earn a commission at no extra cost to you. Read our full Affiliate Disclosure.
This garage air compressor size guide starts with the number printed on the air tool, not the gallon badge on the tank. A compact compressor can run a brad nailer because the tool uses short bursts and waits between fasteners. The same machine may disappoint with a die grinder or orbital sander that consumes air continuously. Tank volume can soften a brief peak, but it cannot make a small pump replace air as quickly as a demanding tool uses it. Match delivered airflow at the required pressure, then check the duty pattern, electrical supply, noise, footprint, and maintenance access.
Quick answer
Find the required CFM or SCFM and PSI in the manual for every air tool you intend to use. Size around the most demanding tool you plan to run, or add demands only when tools truly operate at the same time. Choose a compressor whose rated delivery at that pressure exceeds the requirement with reasonable breathing room for hose losses and recovery. Then verify duty cycle, voltage, startup current, sound level, tank orientation, drain access, hose size, and the compressor maker’s ventilation clearances.
Garage air compressor size guide: begin with the tool manual
Make a short worksheet before comparing compressors. For each pneumatic tool, record the manufacturer’s airflow requirement, working pressure, inlet size, recommended hose, and expected duty pattern. Note whether the published flow is average use or continuous consumption. The difference matters. An impact wrench may consume air in several short pulls, while a sander can keep asking until the compressor falls behind.
Use current documentation for the exact tool model. Ingersoll Rand’s air-consumption chart, for example, lists typical averages such as 4 CFM for a half-inch impact wrench, 5 CFM for a quarter-inch die grinder, and 10 CFM for an orbital sander. The chart also tells readers to check the tool manufacturer for actual consumption. Treat the examples as a first sort, not a substitute for the manual in your hand.
Add the work pattern in plain English: six lug nuts, fifty brads, ten minutes of sanding, or a quick tire top-up. That description keeps the purchase grounded. A compressor for occasional trim work is a different machine from one expected to sand panels through an afternoon.
Read CFM, PSI, tank volume, and duty as separate facts
| Specification | What it tells you | What it does not tell you | Buying check |
|---|---|---|---|
| CFM or SCFM at a stated PSI | Rated air delivery under the stated test condition | Performance at every pressure or hose setup | Compare at the pressure your tool needs |
| Maximum PSI | Upper pressure limit or storage capability | How much air the pump delivers while working | Do not use max PSI as a power ranking |
| Tank gallons | Stored-air buffer and part of the machine’s footprint | Sustained pump output | Use it to judge cycling and portability after CFM |
| Duty cycle | How long the pump may run within a stated period or condition | Permission to ignore cooling and ventilation | Read the model’s manual, not a generic definition |
| Sound rating | Noise measured under the maker’s stated method | How the garage will amplify vibration | Compare published conditions and placement |
Never compare one compressor’s CFM at 40 PSI with another’s figure at 90 PSI as though they are the same measurement. Look for the delivery rating closest to the tool’s working pressure. Also distinguish pump displacement or intake claims from delivered air. The useful number is the manufacturer’s rated output at a stated downstream pressure.
Tank size deserves attention, just later in the sequence. A larger receiver gives a short tool more reserve and may lengthen the pause between pump starts. Once that reserve drops, the pump still has to replace what the tool consumes. If continuous demand exceeds delivered flow, the pressure will fall or work will pause while the compressor recovers.
Match the hardest real tool cycle
Choose the highest verified airflow demand among tools that run one at a time. Do not add every tool in the cabinet. If two people will operate tools simultaneously, or a pneumatic device runs while another consumes air, add only those overlapping demands and follow the compressor manufacturer’s sizing advice.
Leave practical margin above the documented requirement. Hose length, fittings, regulators, elevation, temperature, and normal wear can reduce what reaches the tool. There is no universal percentage that fits every installation, so avoid turning a convenient buffer into a law. The sound decision is a rated output clearly above the tool’s need at the correct pressure, backed by the manuals for the compressor, tool, and accessories.
Consider how tolerant the job is of waiting. Framing one small wall can survive an occasional recovery pause. Paint finishing, continuous sanding, or production work is less forgiving. If the tool manual specifies a much larger compressor, do not plan to defeat the mismatch with a larger portable tank. Stored air changes timing, not sustained delivery.
Use current compressor examples as brackets, not winners
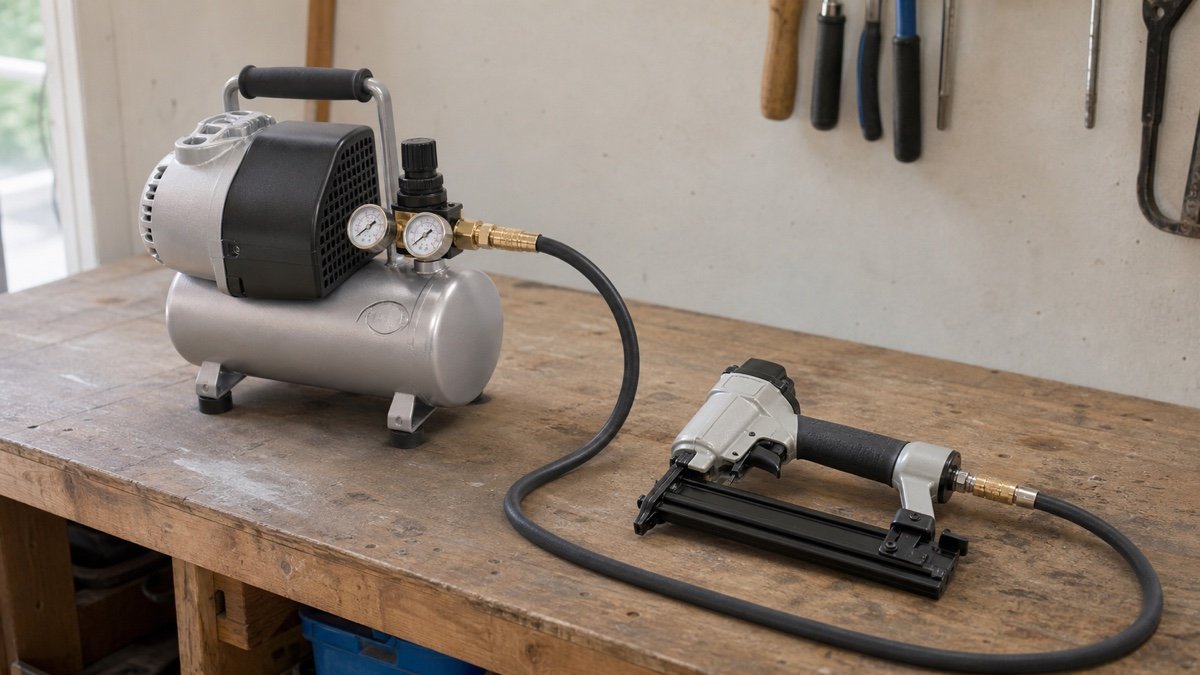
Current manufacturer specifications show how quickly the categories separate. Makita rates the portable MAC210Q at 2.0 CFM at 90 PSI with a 2-gallon tank, 135 PSI maximum pressure, and a stated 60 dB noise level. That profile suits intermittent tasks whose documented demand fits the output. It is not a sensible match for a continuous 5 or 10 CFM tool.
California Air Tools rates its 10020C at 5.30 CFM at 90 PSI with a 10-gallon tank and a stated 70 dB sound level. DeWalt lists 6.2 SCFM at 90 PSI for the current DXCM201 20-gallon model. Those numbers place the machines in different airflow and footprint brackets, but they still do not answer whether a specific sander, spray gun, or grinder is supported.
Compare weight, dimensions, voltage, oil requirements, warranty, duty guidance, and available service along with output. Product pages and model specifications can change, so check the current manual before buying. The right bracket is the one that supports your hardest tool cycle and still fits its assigned spot in the garage.
Let tank size follow the work rhythm
A small tank keeps the compressor lighter and easier to carry. It works well when the tool uses quick bursts and the pump can recover between them. A larger tank adds stored air, reduces how abruptly a brief demand reaches the pump, and may make intermittent work feel calmer. It also adds weight, floor area, and more condensate capacity to manage.
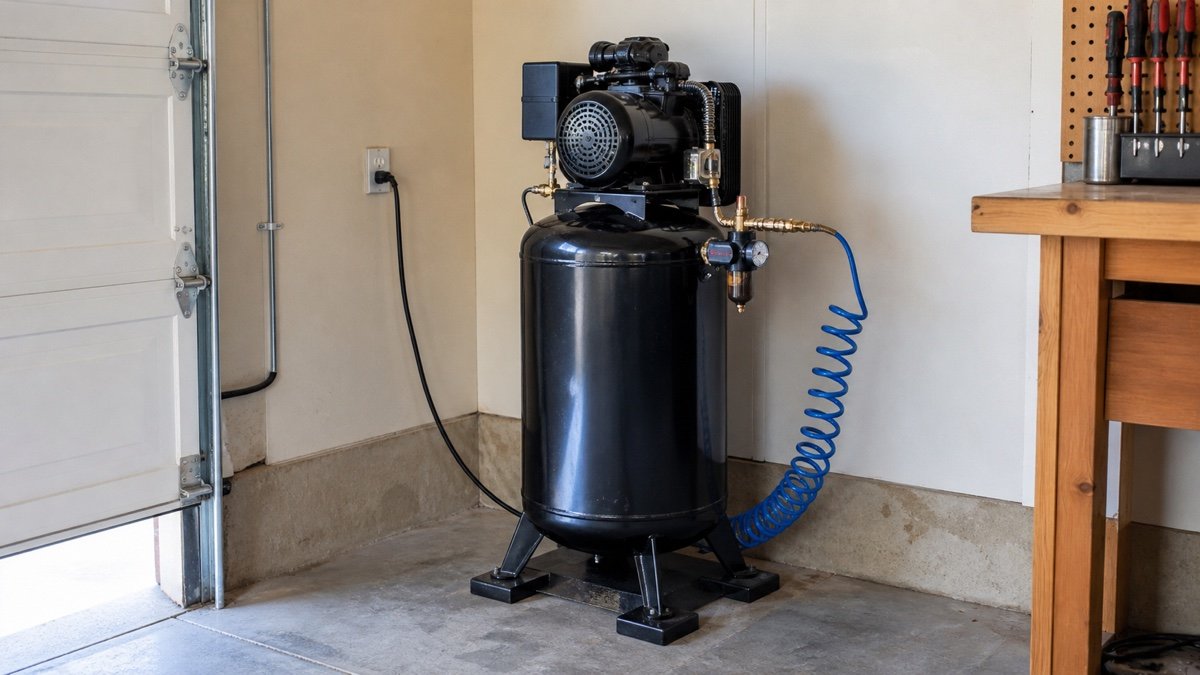
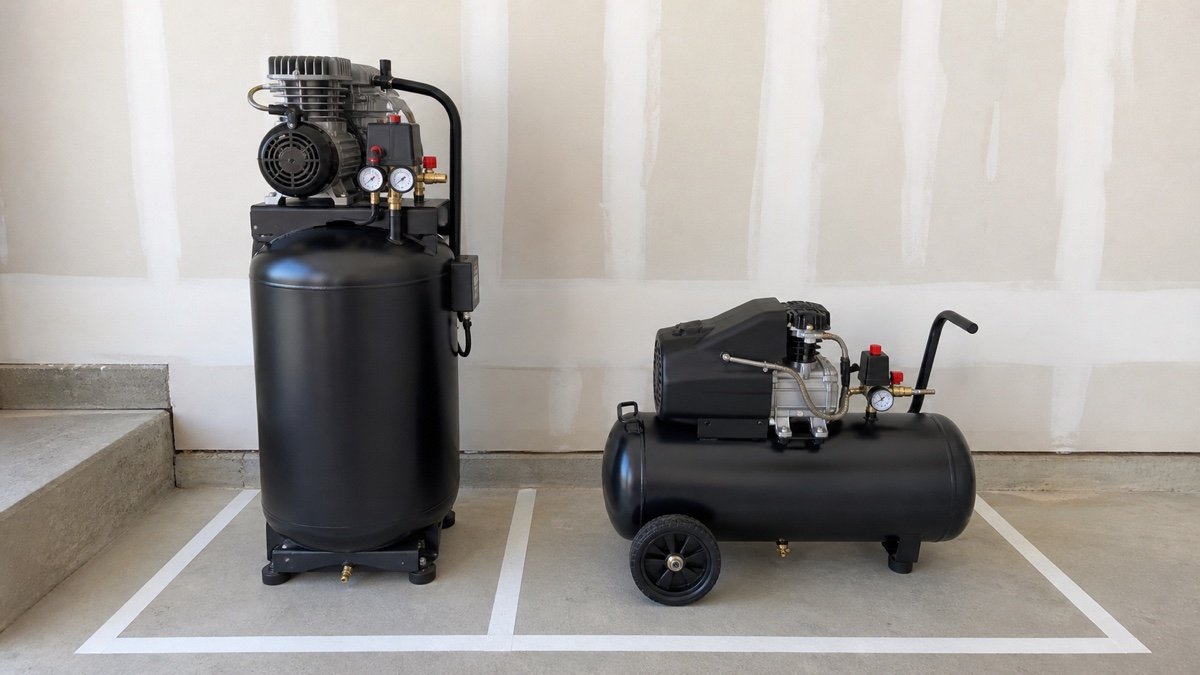
Horizontal tanks often fit under a bench or shelf, while vertical tanks use less floor area but claim height and can be awkward near garage-door tracks. Draw the complete machine in its operating position, including handle, wheels, gauges, hose connection, intake, drain, and access panel. The garage measurement process catches conflicts with the curb, car door, and overhead hardware.
Do not wedge a compressor into the smallest outline it can physically occupy. The motor and pump need the clearances and ventilation stated by the manufacturer. The drain needs access, and a serviceable machine may need to roll straight forward. A two-gallon unit that lives on a shelf can be more useful than a twenty-gallon unit trapped behind lumber.
Check voltage, circuit capacity, and startup behavior
Read the compressor nameplate and manual for voltage, phase, full-load current, cord requirements, and branch-circuit guidance. A label that says 120 volts does not guarantee that the machine can share a circuit with a saw, heater, refrigerator, or dust collector. Motors can draw a substantial starting current even when their normal running current looks manageable.
Map the receptacles and known circuits before assigning a corner. Do not assume two outlets on opposite walls are independent. Repeated breaker trips, hot plugs, damaged cords, or flickering are reasons to stop and have a qualified electrician evaluate the installation. Do not replace a breaker with a larger one to make a compressor run.
The garage workshop layout guide treats power as part of placement rather than an afterthought. Permanent wiring and local code questions belong with a licensed professional and the local authority. Extension cords are not a substitute for a correctly located circuit; if a manual permits one for temporary use, follow its gauge and length requirements exactly.
Place the compressor for air, sound, and safe access
Set the unit on a stable surface in the orientation the maker specifies. Keep intake and cooling openings clear. Avoid an unventilated closet unless the manufacturer specifically approves the enclosure and its ventilation. Heat that cannot leave shortens the usefulness of a quiet-looking cabinet.
Distance and isolation can make the garage more comfortable, but do not place the compressor where you cannot hear an abnormal cycle or reach the controls. Rubber feet supplied or approved for the machine may reduce transmitted vibration. Do not improvise a soft platform that makes a wheeled unit unstable. Keep the unit protected from vehicle contact, water, dust piles, and material handling.
Mark the operating envelope with the same method used in our workshop aisle guide. Include the hose coupling, drain position, oil fill or service cover, and route used to roll the unit out. Sound ratings help compare documented models, but bare walls, a metal door, and a hollow bench can make the perceived result harsher than the number suggests.
Size the hose and fittings as part of the system
A capable compressor can feel weak behind a long, narrow hose and a stack of restrictive quick couplers. Use the tool and compressor guidance for hose inside diameter, maximum practical length, fittings, regulator, lubricator where required, and filtration. Keep the run short enough for the layout, but long enough that it does not pull tight or cross the normal aisle.
Place a readable regulator where the operator can set the tool’s working pressure. Maximum tank pressure is not the pressure every tool should receive. Never exceed the pressure rating of the hose, fitting, accessory, or tool. Inspect for wear, cuts, heat damage, and secure connections before use.
Store the hose on a reel or broad hanger designed for it, outside the vehicle path. A ceiling reel can save floor space only if it clears the garage door and the hanging lead does not become a head-level obstacle. The broader garage storage systems guide helps place reels after doors, utilities, and parking are mapped.
Plan moisture control and drainage before purchase
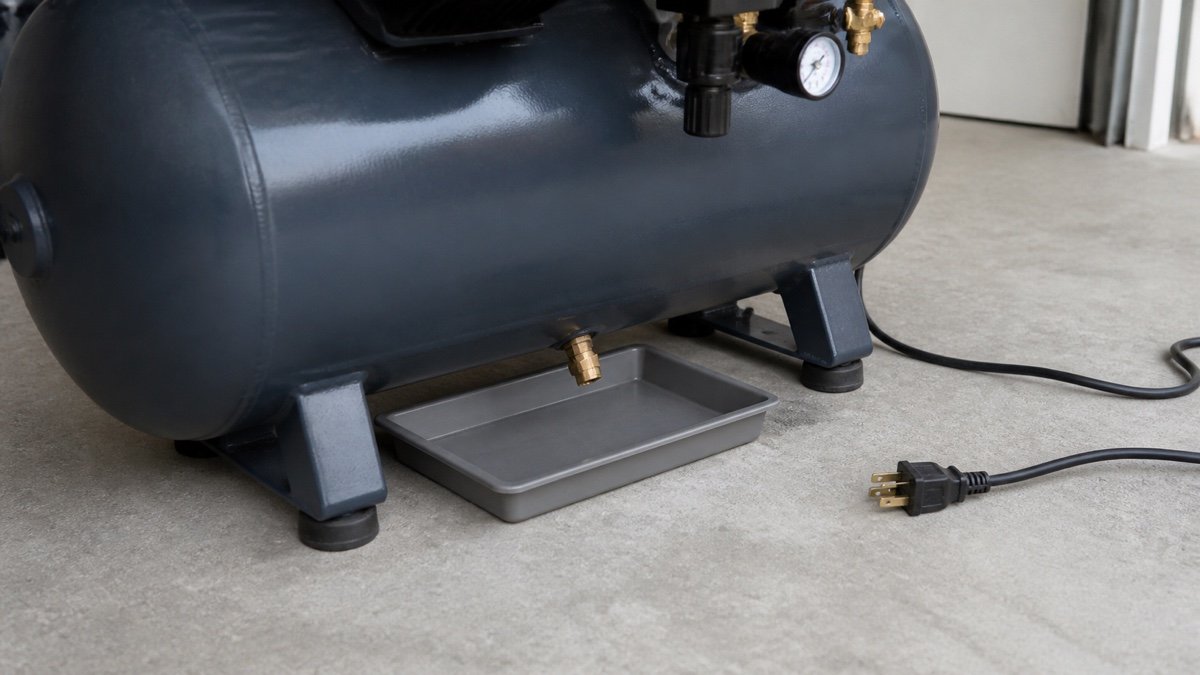
Compressing air produces condensate. How often the receiver needs draining depends on the machine, climate, use, and manufacturer instructions. Choose a location where the drain can be reached without crawling beneath a hot pump or tipping the compressor. Use only the drain arrangement and approved accessories specified for the receiver.
Moisture-sensitive tools and finishing work may need filtration or drying beyond the receiver drain. Select equipment from the downstream air-quality requirement, not from a generic accessory bundle. Keep filters and separators visible enough to inspect and install them within their stated pressure, flow, and orientation limits.
OSHA’s air-receiver rule covers workplaces, not residential compressor selection, but it points to sound habits: receivers need pressure-relief protection, gauges, and a drain at the lowest point. Do not weld, drill, patch, or improvise pressure components. Corrosion, a damaged tank, a questionable relief valve, or an altered receiver needs qualified evaluation rather than a home repair.
Do not use compressed air as a cleanup shortcut
Blowing dust from clothes, skin, benches, or the garage floor creates flying debris and puts captured material back into the breathing zone. OSHA’s compressed-air safety guidance explains that workplace cleaning with compressed air is tightly limited and still requires guarding and personal protection. A home shop should use a suitable vacuum and material-specific controls instead.
Compressed air can drive chips into eyes and skin, damage hearing, and push dust into motors or ignition areas. Never aim an air gun at a person. Use approved nozzles for their intended task, wear the protection specified by the tool and material guidance, and keep bystanders out of the work zone.
For tire inflation, use a rated inflator with a readable gauge and follow the vehicle, tire, and inflator instructions. A large tank or high maximum PSI does not make careless inflation safer. Stand clear of questionable assemblies and seek professional tire service when damage, corrosion, or an improper fit is involved.
Use a final buying and placement checklist
Write down the hardest tool cycle, required CFM or SCFM at PSI, simultaneous demand if any, acceptable recovery pause, compressor delivery at that pressure, duty guidance, tank size, voltage, circuit, dimensions, weight, sound rating, oil type, hose, fittings, regulator, drain access, and service support. Then verify the current manual for every shortlisted model.
Tape the complete footprint on the floor. Roll the largest nearby cart, open the vehicle door, and reach the drain. Confirm that ventilation stays open and the hose reaches the tool without crossing the main walking path. The planning sequence in our garage storage guide is useful because a compressor competes with shelves, cabinets, and parking for the same edges of the room.
Common mistakes are easy to name: buying by gallons alone, comparing airflow at different pressures, trusting peak horsepower language, ignoring duty guidance, undersizing the hose, assuming outlets are separate circuits, hiding the machine in a sealed cabinet, and making the drain unreachable. Avoid those, and the right compressor often becomes obvious. It is the smallest model that comfortably supports the documented job and still fits the room as a machine that needs air, service, power, and respect.
Useful products to compare
These links open current Amazon search results. Check the dimensions, manual, mounting hardware, warranty, and current availability for the exact model before you order.
Before you buy or install
Read the current manual for the exact product you are considering. Confirm its assembled dimensions, rated capacity, mounting requirements, included hardware, working clearances, warranty, and any limits that apply to your wall, floor, electrical circuit, or garage layout.
Frequently asked questions
What size air compressor is enough for a home garage?
There is no single garage size. Use the highest documented airflow demand at the required pressure among tools that will run one at a time. Add overlapping demands only when tools truly run together, then choose rated delivery above that requirement and verify duty, circuit, noise, and footprint.
Is a bigger air-compressor tank always better?
No. A larger tank stores more air and can smooth brief demand, but it adds weight and space. It does not increase the pump’s sustained air delivery. Pick CFM or SCFM at the required PSI first, then choose tank volume for the work rhythm and room.
Can a small compressor run an impact wrench?
Possibly, when the exact wrench’s pressure and airflow needs fit the compressor and the work involves short bursts with recovery time. Check both manuals. Do not assume every half-inch impact has the same consumption or that a large tank badge guarantees performance.
Where should an air compressor sit in a garage?
Use a stable, protected location with the ventilation and clearances required by the manufacturer. Keep controls, intake, drain, and service points accessible. Avoid the vehicle path, water, dust accumulation, sealed unventilated cabinets, and hose routes across the main aisle.
How much extra CFM should I buy?
Choose rated delivery clearly above the tool’s verified requirement to allow for practical losses and recovery, but do not treat one universal percentage as a rule. Hose layout, duty pattern, simultaneous use, and manufacturer sizing guidance determine how much margin is appropriate.