Tag: woodworking garage

  • Lumber Storage in Small Garage Spaces: Keep Stock Straight and Reachable

    Lumber Storage in Small Garage Spaces: Keep Stock Straight and Reachable

    Affiliate disclosure: As an Amazon Associate I earn from qualifying purchases. This article may contain affiliate links, and Bay & Bench may earn a commission at no extra cost to you. Read our full Affiliate Disclosure.

    Lumber storage in small garage spaces becomes difficult for one simple reason: wood arrives in several shapes that do not want to share furniture. Eight-foot boards need support along their length. Full sheets need a broad, stable base. Short offcuts multiply until their bin becomes archaeology. Trying to solve all three with one deep shelf usually wastes wall area and makes the useful piece hard to reach. A better system separates the stock by shape, keeps weight close to sound structure, and reserves a clear route from the garage door to the bench or saw.

    Quick answer

    Store long, dry boards horizontally on a properly rated rack with enough support points to limit sag. Keep full sheet goods low, restrained, and either nearly vertical on a stable cart or flat on a base designed for the load. Use a low divided corral for short pieces. Raise wood off a damp slab, keep rain and direct sun away, and check the rack maker’s capacity and attachment instructions. Leave your longest stock path clear before assigning the wall.

    Lumber storage in small garage spaces starts with an inventory

    Measure the stock you keep, not the idealized stock you imagine buying. Sort it into long boards, short boards, narrow strips, sheet goods, turning blanks, and genuinely useful offcuts. Record the longest length, widest sheet, thickest bundle, and approximate quantity in each group. Then estimate weight from a reliable supplier or material reference. Wet construction lumber can be considerably heavier than the same boards after drying, so do not size a rack from a light sample.

    Measure the room with the same discipline. Our garage measurement guide covers wall width, curb ledges, door tracks, opener hardware, outlets, panels, windows, and vehicle movement. Add the path a full sheet or long board follows from the driveway. A rack can fit perfectly yet fail because a board cannot turn between the garage door and the wall.

    Inventory also reveals what to stop storing. Set a maximum offcut length below which pieces go to a project bin, recycling stream, or disposal route. Small garages are not lumberyards. Keeping twenty nearly identical scraps costs more useful access than it saves in material.

    Match each stock shape to a storage method

    Stock typeCompact storage methodSupport priorityAccess tradeoff
    Long boards and trimHorizontal wall-mounted cantilever rackSeveral level arms under the lengthExcellent visibility, but consumes a long wall
    Short boardsLow vertical corral with front restraintBroad floor base and divided baysFast sorting, limited to pieces that remain stable
    Full plywood or MDFLow sheet cart or rated vertical panel rackWide base, side restraint, suitable castersEasy selection, but heavy to move when full
    Thin strips and moldingNarrow horizontal cubbies or tubes designed for storageContinuous support for flexible piecesCompact, but labels and length sorting help
    Small offcutsShallow open bins near the benchKeep weight low and edges containedConvenient until the bin becomes too deep

    Use this table to divide the wall into smaller jobs. A horizontal rack can sit above a low sheet cart if the loaded projections, lift path, and total wall load all work. A short-stock corral can tuck beneath the lowest rack arm. The pieces may share a wall, but they should not depend on the same restraint.

    The comparison in 18 versus 24 inch garage shelves is helpful for nearby tools and finishes. Lumber itself rarely benefits from a deep general shelf unless the stock is short enough to sit fully supported.

    Keep long boards horizontal and supported

    Horizontal storage is the calmer choice for long stock in a tight room. It puts board ends in view, lets you remove one piece without lifting an entire vertical bundle, and reduces the risk of a tall board sliding into the aisle. The rack arms must share the load and line up so the stock does not twist around a high support.

    Choose support spacing from the rack instructions, stock stiffness, and the quality you need to preserve. Thin trim and flexible molding need closer or nearly continuous support. Thick framing boards tolerate wider spacing, but a visibly sagging board is asking for another arm. Keep the heaviest, thickest stock on lower levels. Put light molding higher, where it is less awkward to lift.

    Do not let ends project into a doorway or the normal head path. If the available wall is shorter than the boards, protect the ends and reconsider the room. The garage wall storage systems guide explains the difference between accessory panels and structural storage. A pegboard hook is not a lumber rack simply because a board rests on it.
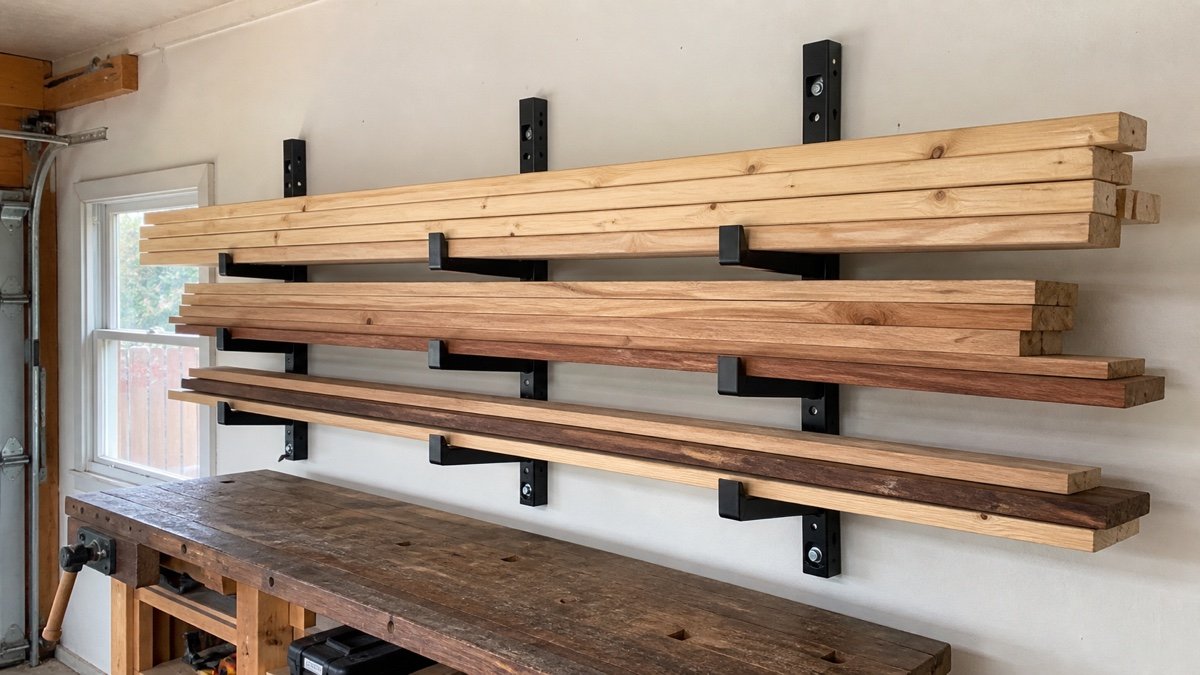
    Long boards supported horizontally on three evenly spaced steel cantilever rack uprights
    Several support points reduce sag and make load sharing easier to inspect than one heroic bracket at each end.

    Treat rack capacity as a complete system

    A capacity statement has meaning only with its span, arm arrangement, fasteners, substrate, and loading instructions. Check whether the manufacturer rates each arm, each level, or the complete rack. Confirm whether the number assumes evenly distributed weight. Concentrating a stack over one arm can overload that point even when the arithmetic for the whole rack looks comfortable.

    Attach the uprights exactly as instructed. Find sound framing or use the specified masonry connection. Account for drywall thickness and any wall irregularity that prevents the upright from sitting flat. Do not hide a questionable connection behind more boards. If the wall structure is uncertain, use a freestanding rack designed for lumber and have the site assessed before adding weight.

    OSHA’s workplace rule on secure material storage is not a residential building code, but its plain principle is worth borrowing: stacked material should remain stable against sliding or collapse. In a home shop, that means front stops where needed, no climbing on racks, and no board pile that must be caught when one piece is removed.

    Store short boards vertically only when they stay controlled

    A low vertical corral turns awkward short stock into a readable library. Divide it by length or material, keep the tallest bay against the wall, and add a front rail high enough to retain the pieces. The base should carry the load; the wall connection prevents tipping. Do not hang the full weight from a decorative cabinet side.

    Set a maximum length for vertical storage based on stability and ceiling access. A long board that leans far into the room has a large sweep when it slips. Move those pieces to the horizontal rack. Avoid a bin so deep that retrieving one strip requires leaning over sharp ends. Several shallow bays are kinder than one crowded chest.

    This is also the moment to be ruthless with offcuts. Keep material you can name a plausible use for, not every rectangle larger than your palm. One bay for hardwood, one for common plywood, and a small tray for test pieces may be enough. Empty the bin on a schedule. If the front rail bows or pieces begin standing in the aisle, the collection has passed its designed capacity.

    Short lumber and narrow offcuts sorted upright in a low divided plywood corral
    A low corral makes short stock visible and restrained without putting long, unstable pieces on end.

    Give sheet goods a broad base and a restraint

    Full panels are heavy, flexible, and hard to steer. Store them close to the floor on a base that supports the bottom edge and cannot tip as one sheet is pulled away. A slight lean toward a solid back can be useful when the rack was designed for it. Do not lean sheets loose against drywall, where the stack can slide or trap moisture along the bottom edge.

    A mobile sheet cart works when the route is level, wide, and clear. Use a broad wheelbase, appropriately rated casters, accessible brakes, and side rails that contain the stack. Park it against a wall so it cannot wander. Before building or buying, tape the loaded footprint and try the turn from the garage door. The cart grows difficult quickly as panels accumulate.

    For a fixed shop, a low vertical rack may feel steadier. Flat storage protects sheet shape well but consumes a large footprint and encourages people to pile unrelated objects on top. Pick based on how often you use full sheets and whether you can safely extract the bottom panel. No layout eliminates the weight; it only changes when you handle it.
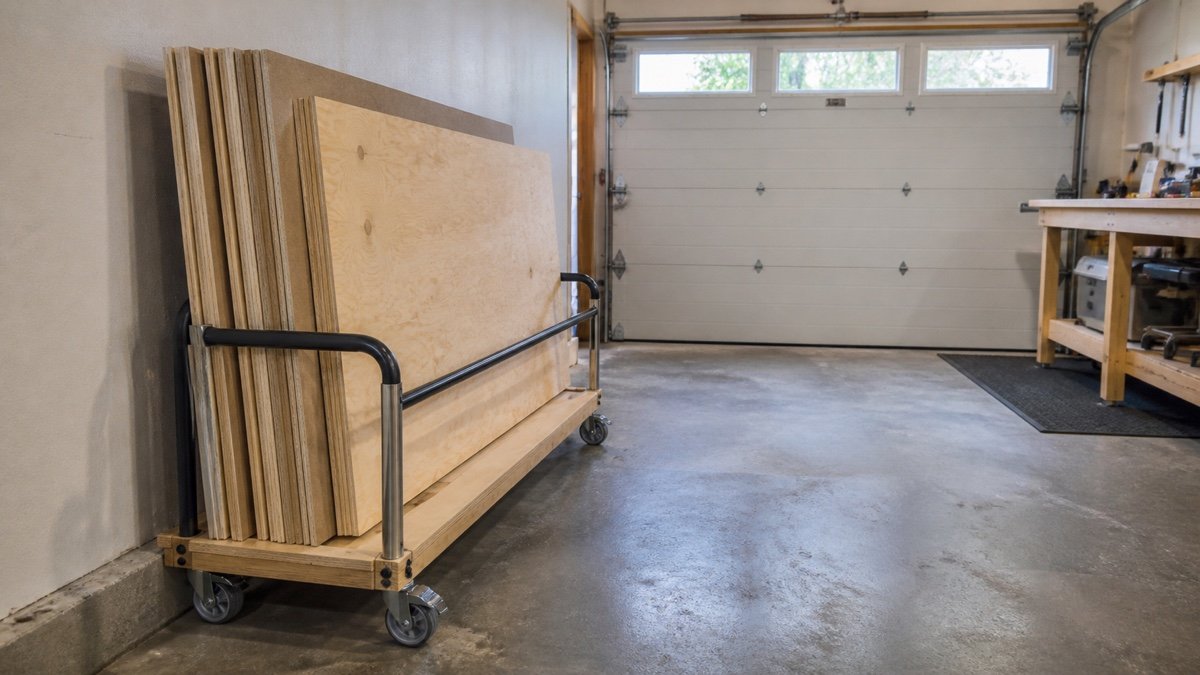
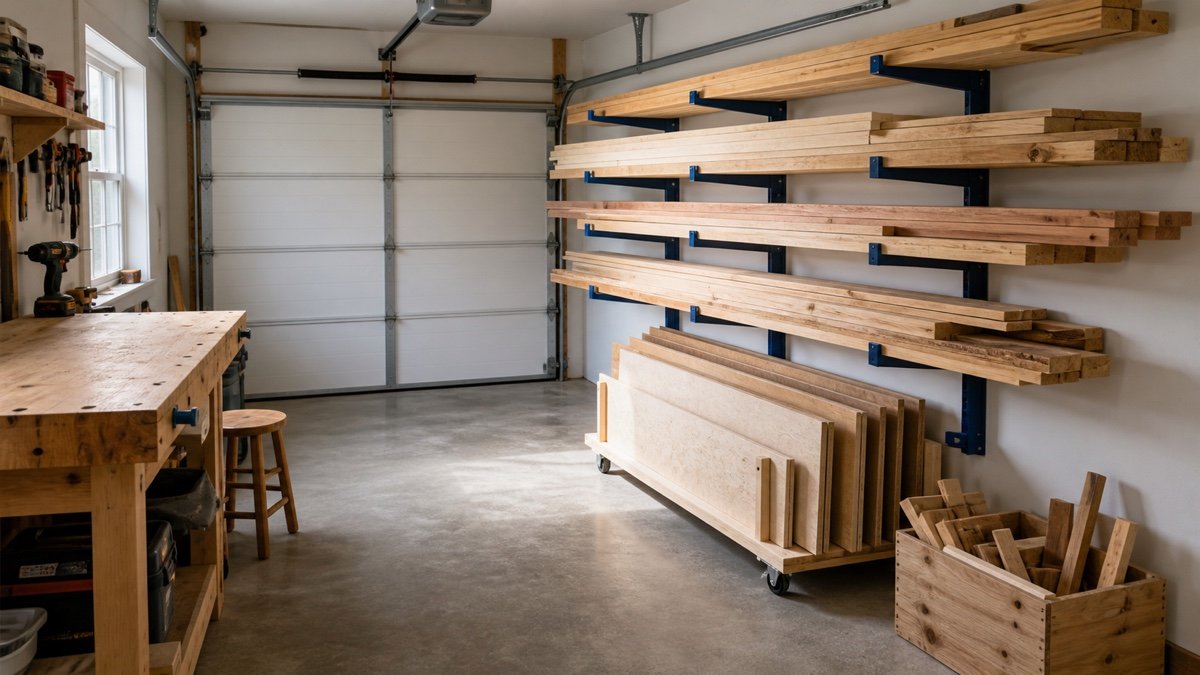
    Full plywood sheets secured on edge in a low rolling cart beside a clear garage route
    A broad base and side restraints matter more than a tiny footprint when several heavy panels travel together.

    Protect wood from slab moisture and weather swings

    Keep lumber away from liquid water and raise it off the concrete. The USDA Forest Products Laboratory’s Wood Handbook chapter on drying and moisture control recommends protecting stock from precipitation and spray. It also explains that storage conditions should reflect the wood’s intended use and moisture requirements.

    Dry framing lumber and plywood may tolerate solid piling in a protected shed under the conditions discussed by the handbook. Green or rewetted stock needs airflow and stickered stacking. Furniture parts, flooring, and machined stock are more sensitive to uncontrolled humidity. In a garage, the practical lesson is to identify what you bought. Do not seal wet lumber into a tight pile and expect it to behave like kiln-dried cabinet stock.

    Use a moisture meter as a comparative tool if the project demands it, and follow the meter instructions for species and temperature correction. Watch exterior walls and garage corners for condensation or leaks. A dehumidifier can help in a reasonably enclosed space, but it is not a substitute for fixing water entry. Leave inspection access around the rack so dampness does not stay hidden.

    Build the lumber path into the workshop layout

    Stand at the garage opening with an imaginary eight-foot board. Trace its trip to storage, then from storage to the saw. Include the turning arc and the length needed beyond the tool. The rack should face the easiest direction of travel. A beautiful rack on the wrong wall makes every project a furniture-moving exercise.

    Our garage workshop layout guide treats tools as stored and operating envelopes. Lumber needs the same treatment. A table saw’s footprint is small compared with the path of a full sheet. A miter saw needs side support beyond its cabinet. Store long pieces close to the tool that uses them most often, while keeping the stock path away from the parked car.

    Protect the daily aisle. The garage workshop aisle clearance guide shows how to test moving carts, open drawers, and carried materials rather than relying on one generic number. If a board has to pass a water heater, electrical panel, or exterior door, do not narrow that access with a permanent rack.

    Use a measured wall plan before buying brackets

    Draw the wall at scale. Mark every stud or suitable masonry location, the curb, outlets, switches, windows, and the maximum safe reach height. Add rectangles for the loaded rack, sheet cart, and short-stock corral. Then draw the longest board at the angle used to remove it. This small exercise catches conflicts that product dimensions do not show.

    Allow hand room between levels and above the top row. A six-inch gap may look efficient until a gloved hand cannot grip the back board. Leave enough vertical room to lift a piece over the front stop without striking the level above. Keep bark edges, splinters, and sharp metal away from the car door path.

    Run the rest of the room through the garage storage planning sequence. Lumber expands to fill kindness. Assign a maximum depth or board count to each bay and leave a visible empty zone. That blank space is not wasted. It is the buffer that receives material for the next project without forcing stock onto the floor.

    A monthly reset keeps the rack useful

    Inspect supports, fasteners, stops, wall surfaces, casters, and the wood itself. Look for sagging arms, loose screws, rust, mold, insects, water staining, or boards that have shifted beyond the end stop. Remove the stock before tightening or repairing a loaded rack. Follow the manufacturer rather than guessing at torque or replacement hardware.

    Return boards to the level that matches their length and weight. Pull pieces you no longer need. Sweep or vacuum settled dust without blowing it into the air. Keep finishes, fuels, and solvents away from lumber and dust-producing work. A wood rack is fuel storage as well as material storage, so give ignition sources their own safe area.

    The common failure is not structural drama. It is slow loss of access. One temporary board leans against the cart, then another blocks a caster, then the useful sheet sits behind both. Reset the path while the problem takes five minutes. Compact storage succeeds when material can leave without unloading the entire garage first.

    Choose the simplest rack that respects the load

    Buy a modular wall rack when you have sound structure, recurring long-stock storage, and a wall long enough to support it. Choose a low freestanding rack when wall attachment is uncertain or the system may move. Add a sheet cart only if its loaded route works. Build a short-stock corral when the offcuts are truly worth keeping.

    Before checkout, compare total capacity, capacity per arm or level, usable arm depth, upright spacing, fastener requirements, end stops, corrosion protection, warranty, and access to a real manual. Ignore claims such as “heavy duty” without numbers and conditions. If you make the rack yourself, design for the actual loads and substrate, and get qualified help when the structural work exceeds your experience.

    The result does not need to resemble a commercial lumber aisle. One long wall, a low panel cart, and a disciplined scrap limit can hold a surprising amount while leaving the garage usable. Straight stock that you can reach is worth more than twice as much wood buried behind a machine.

    Useful products to compare

    These links open current Amazon search results. Check the dimensions, manual, mounting hardware, warranty, and current availability for the exact model before you order.

    Before you buy or install

    Read the current manual for the exact product you are considering. Confirm its assembled dimensions, rated capacity, mounting requirements, included hardware, working clearances, warranty, and any limits that apply to your wall, floor, electrical circuit, or garage layout.

    Frequently asked questions

    Is it better to store lumber vertically or horizontally?

    Long boards are usually easier to keep stable and straight on a horizontal rack with several support points. A low vertical corral works well for shorter pieces when it has a broad base and front restraint. Full sheets need their own stable base and side restraint.

    Can lumber sit directly on a garage floor?

    It is better to raise wood off concrete so small leaks, condensation, and floor washing do not wet the stock. Use supports or a rack designed for the load, keep the area dry, and inspect the bottom layer rather than sealing it out of sight.

    How far apart should lumber rack supports be?

    There is no single spacing for every board. Follow the rack manufacturer’s layout and capacity instructions, then consider the stiffness and quality needs of your stock. Thin trim needs closer support than thick framing lumber. Add support if boards visibly sag.

    How should plywood be stored in a small garage?

    Keep full sheets low on a broad, stable base with restraints that prevent sliding or tipping. A rated vertical panel rack or a well-designed rolling cart can work. Test the loaded route and caster capacity before relying on a mobile cart.
  • Shop Vac vs Dust Collector Small Garage Guide: Choose by Tool Port

    Shop Vac vs Dust Collector Small Garage Guide: Choose by Tool Port

    Affiliate disclosure: As an Amazon Associate I earn from qualifying purchases. This article may contain affiliate links, and Bay & Bench may earn a commission at no extra cost to you. Read our full Affiliate Disclosure.

    The shop vac vs dust collector small garage decision starts with the way each machine moves air. A shop vacuum makes high suction through a narrow hose. A traditional dust collector moves a larger volume of air through a wide hose at lower static pressure. Put either one on the wrong tool and the result can be noisy, awkward, and disappointing. Start with the dust port, the material the tool produces, and the hose route you can fit. Then compare filtration, cleanup, electrical load, and storage.

    Quick answer

    Choose a shop vacuum or certified dust extractor for handheld sanders, routers, track saws, cleanup nozzles, and tools with ports around 1 to 2.5 inches. Choose a traditional dust collector for a stationary planer, jointer, cabinet saw, or other machine designed around a 4-inch or larger port. A small garage often benefits from both: a compact extractor at small-port tools and a mobile collector moved to one chip-producing machine at a time.

    Shop vac vs dust collector small garage: the useful distinction

    Airflow and pressure work together, but the machines trade one for the other. A wet/dry shop vacuum uses a relatively narrow hose and produces substantial pressure to pull through that restriction. A dust collector uses a larger impeller and hose to move more air through a broad machine hood. The names are casual; the fan curve, filter, and complete connected system decide performance.

    Oneida’s Super Dust Deputy documentation draws a practical dividing line. It describes traditional collectors as high-airflow, low-pressure systems, generally above 350 CFM and below 10 inches of water column, while shop vacuums are the opposite, generally below 250 CFM and above 60 inches of water. Those ranges explain why shrinking a 4-inch collector to a tiny sander port does not turn it into a better vacuum.

    Read figures as test points, not guarantees at the tool. Hose length, diameter, corrugation, bends, adapters, filter loading, leaks, and the tool hood reduce delivered performance. Manufacturer numbers from different test methods may not be directly comparable.

    Match the collector to the port and the debris

    Tool or taskUsual port behaviorBetter starting systemReason
    Random-orbit sanderSmall port, fine dust, narrow hoseDust extractor or shop vacuum with suitable filter and bagHigh pressure works through the small passage
    Track saw or compact routerSmall to medium port, intermittent chips and dustTool-triggered extractorShort narrow hose and automatic start are convenient
    Thickness planerLarge port, high chip volumeLarge-hose dust collector sized to the machine manualBulk airflow carries chips before the hose plugs
    Cabinet or contractor sawLower cabinet port, sometimes a second guard portDust collector for the large port, possibly a separate small-port solutionThe base and blade area create different capture problems
    Floor and vehicle cleanupHand nozzle, changing restriction, mixed debrisWet/dry shop vacuumPortable high suction suits the nozzle

    Always begin with the tool manufacturer’s port size and collection recommendation. Do not open, remove, or modify a guard merely to attach a hose. NIOSH found that bottom extraction alone often controlled table-saw dust poorly and that an added local hood over the blade substantially reduced emissions in its test. The NIOSH engineering control page is a useful reminder that capture location matters as much as the collector.

    A shop vacuum handles restriction well

    A shop vacuum is compact, readily available, and useful beyond woodworking. It can pull through a narrow tool port, crevice nozzle, or long small-diameter hose. A bag can keep fine dust out of the tank and make disposal cleaner, while a suitable filter addresses the particles that reach it. Neither item should be assumed from the word “vacuum.” Check the exact configuration.

    Current specifications show how this class behaves. Shop-Vac’s 12-gallon Contractor Series model lists a maximum 105 CFM and 70 inches of sealed pressure. The company also explains that maximum sealed pressure occurs at zero airflow and that a dirty filter, accessories, and system load change actual performance. That caveat matters more than the peak horsepower label, which Shop-Vac says is a consumer comparison term rather than operating horsepower.

    The drawbacks are familiar: loud high-pitched noise, modest tank volume, rapidly loading filters, and limited performance at a large open machine hood. A cyclone separator can keep much bulk debris out of the vacuum filter, but it adds footprint, hose, joints, and another bin to seal.

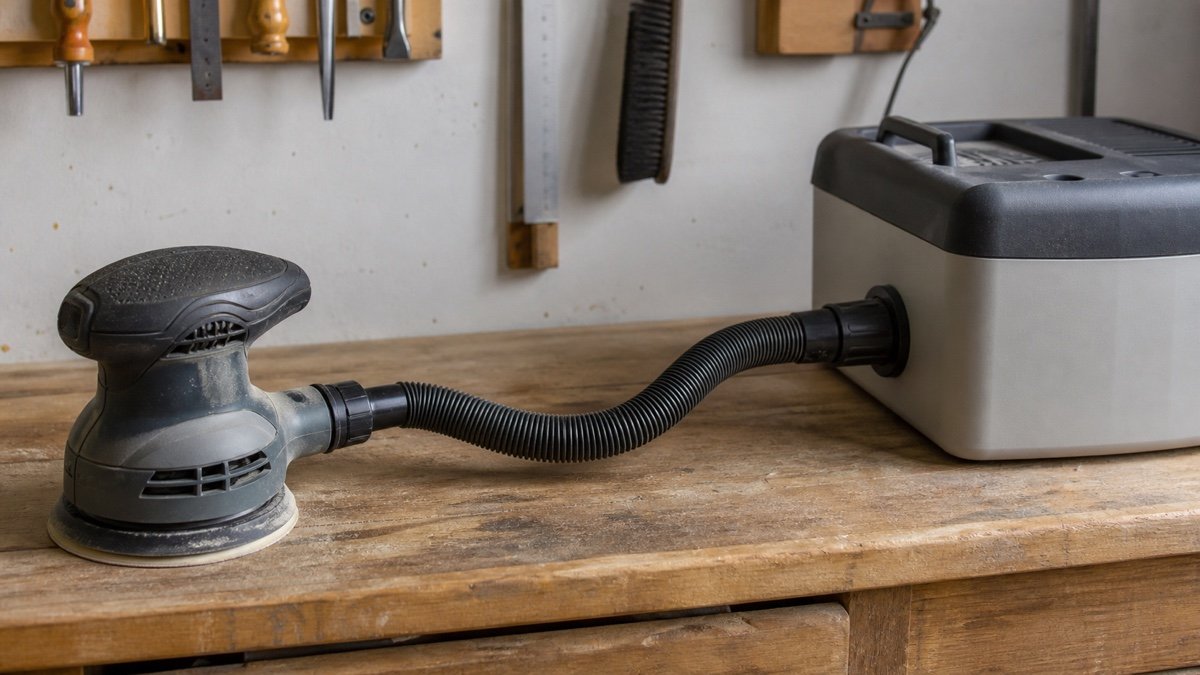
    Unplugged random orbit sander connected to a compact dust extractor with a narrow hose
    Small tool ports and long narrow hoses favor a high-pressure vacuum or dust extractor.

    A certified dust extractor adds control features

    A professional dust extractor is still a high-pressure vacuum, but many models add tool activation, antistatic hose options, automatic filter cleaning, adjustable suction, better bags, and a documented filtration configuration. Those features are useful for sanding and portable tools. They do not make a narrow-hose extractor equivalent to a large-volume collector at every stationary machine.

    DeWalt lists its DWV015 at up to 155 CFM and 73 inches of static water lift, plus automatic filter cleaning. This is a current model example, not a ranking or evidence that it fits your tools. Compare its manual with the port, hose, material, and work pattern in your shop.

    Read certification language carefully. A HEPA filter sold for a machine does not automatically prove that the complete vacuum is certified for every regulated application. Use the exact filter, bag, pre-separator, hose, and operating procedure specified for the material and rule involved. For unknown, toxic, lead, silica, asbestos, or other hazardous dust, stop and use the applicable professional guidance.

    A traditional collector moves chips through a wide hose

    A mobile single-stage collector can be a compact answer for one planer, jointer, saw, or router table at a time. It usually has a 4-inch inlet, a large filter bag or canister, and much more collection volume than a shop vacuum. Keep the hose short and full size until the machine connection. Every unnecessary reducer spends the airflow advantage you bought.

    Grizzly’s current G8027 one-horsepower collector lists 500 CFM, 2.76 inches maximum static pressure, one 4-inch inlet, and a 2.5-micron filter specification. Grizzly describes it as a point-of-use collector for one average machine at a time. That is an honest model for a small garage: roll the unit close, connect one short hose, and avoid pretending a small fan will support a maze of branches.

    A collector that catches chips may still allow fine dust through its filter or around leaks. Look at the filtration specification and complete-system claims, not the size of the bag. A better filter may add resistance, and actual airflow changes as the filter loads. Leave room to remove the lower bag or drum without dismantling the shop.

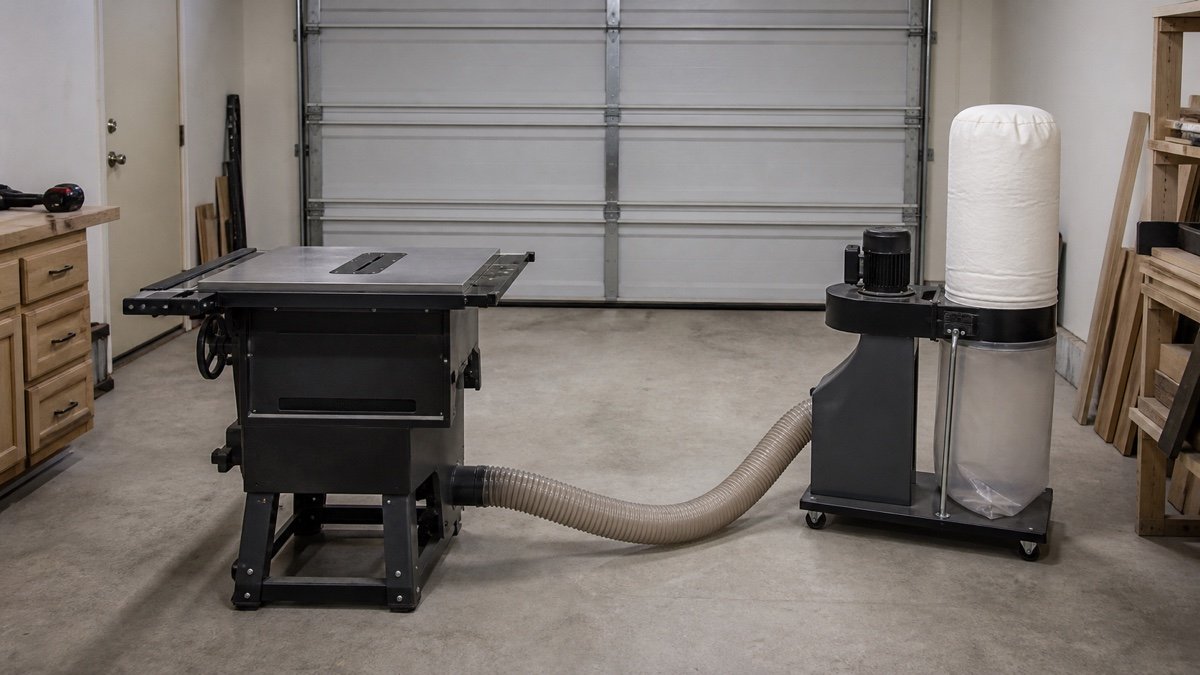
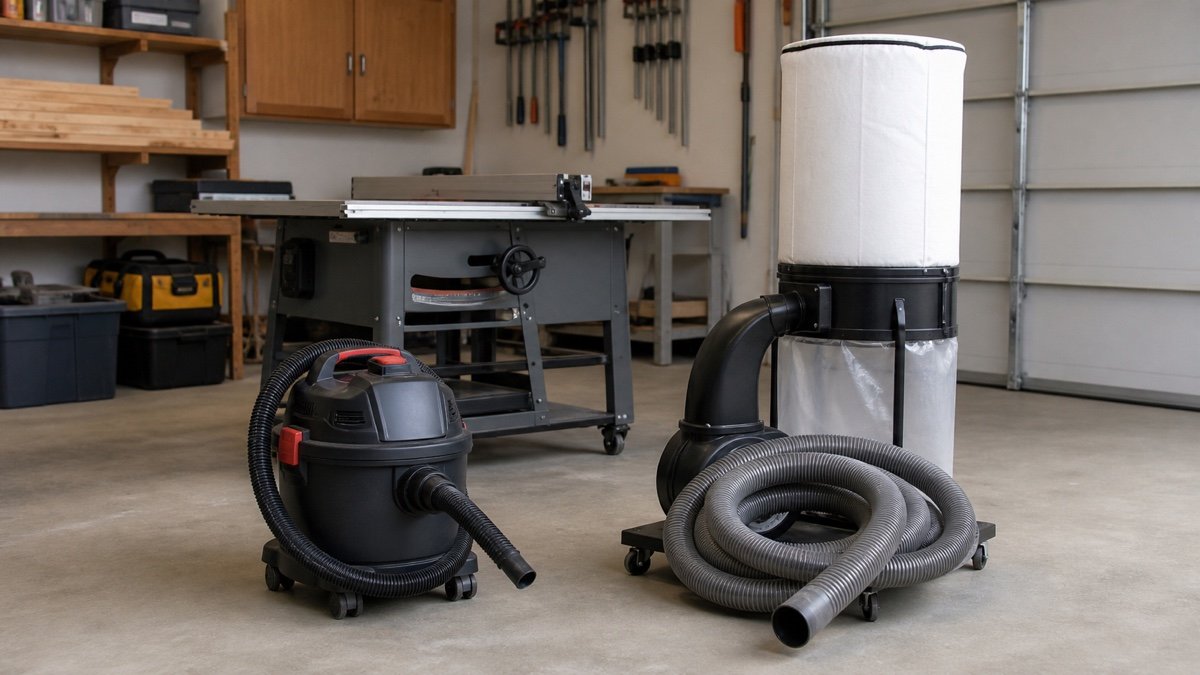
    Table saw cabinet connected to a mobile dust collector by a short four-inch hose
    A short large-diameter hose lets a traditional dust collector move much more air at a stationary machine.

    Hose diameter and fittings can decide the result

    A hose is part of the machine. Long corrugated runs, sharp elbows, undersized adapters, leaky cuffs, and a clogged separator all add resistance. With a shop vacuum, use the tool maker’s recommended hose and keep it as short as the work allows. With a dust collector, preserve the large diameter to the tool and avoid reducing early.

    Do not force a random plumbing fitting onto a dust port and call it sealed. A loose cuff can disconnect, while a fitting that blocks a guard or strain-relieves nothing can create a new hazard. Use compatible adapters and clamps, support hose weight, and keep connections accessible for inspection. If static-control components or grounding are specified by the system manufacturer, follow that design rather than inventing a wire scheme from a forum photo.

    Plan the hose in the room using our garage workshop layout guide. A theoretically efficient run that crosses the only aisle is a poor installation. A mobile collector often wins because it reduces both hose length and permanent obstruction.

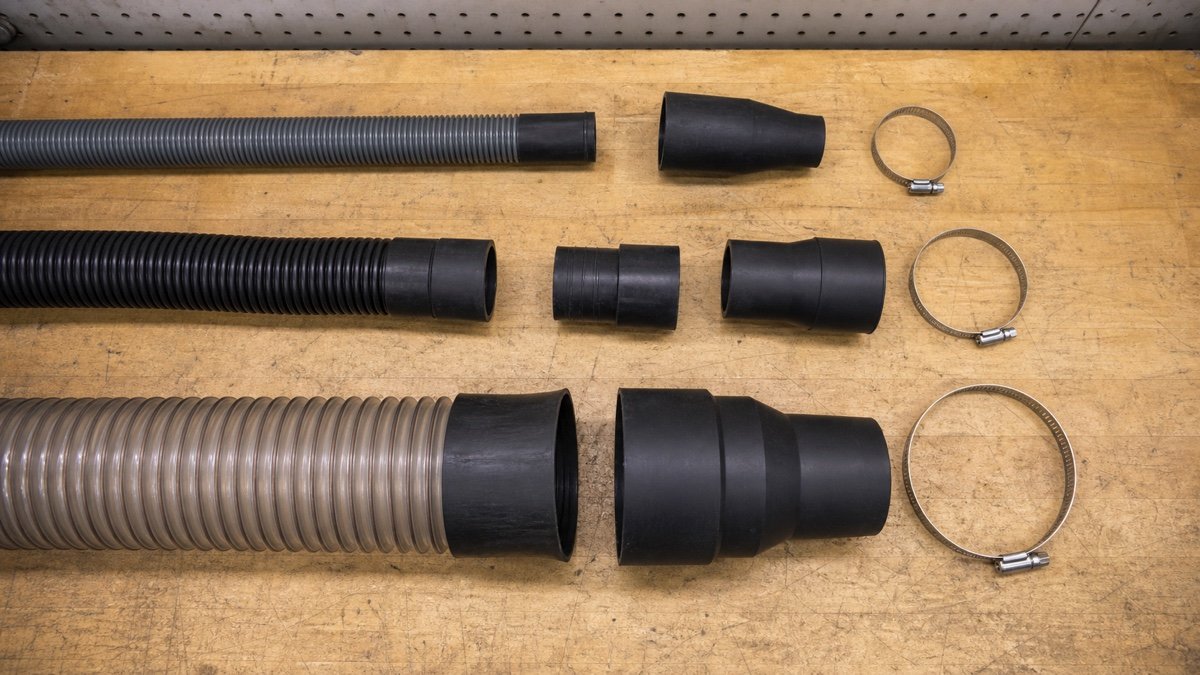
    Three dust hose diameters with matching cuffs, reducers, and clamps on a workbench
    Every reducer and corrugated hose section adds resistance, which is why the complete path matters more than one advertised number.

    Filtration and capture are separate questions

    Capture asks whether dust enters the hood. Filtration asks what happens after the air reaches the collector. Strong suction at a sealed small port can capture well, yet a leaking filter can return fine particles to the room. A fine filter cannot repair a hood that misses the dust plume. Inspect the whole path.

    OSHA’s wood-dust guidance says local exhaust ventilation should remove dust at or near its source and that hoods should sit as close to the emission source as practical. It also calls for system inspection and maintenance. Although OSHA rules address workplaces, source capture is a sound planning principle for a home shop too.

    Do not use a room air cleaner as a substitute for source capture. It may reduce suspended particles that escape, but it cannot pull chips from a planer or stop dust from crossing your breathing zone first. Likewise, a respirator is not a reason to accept a badly connected tool. Use controls in layers and follow current instructions for the material, tool, collector, and personal protective equipment.

    Space, power, and noise matter in a shared garage

    Measure the stored machine, operating footprint, hose coil, filter-cleaning access, and bin-removal path. A tall bag collector may fit the floor yet hit the garage door track. A shop vacuum may slide under the bench until a cyclone doubles its height. Use the method in the small garage workbench guide to protect knee space and avoid burying serviceable equipment behind cabinets.

    Check electrical requirements for both collector and tool. Many tool-triggered extractors limit the connected tool load. A dust collector and planer starting on the same circuit may trip a breaker or exceed the intended setup. Follow both manuals and use a qualified electrician for permanent circuit work. Extension cords are not a substitute for suitable fixed wiring.

    Noise changes behavior. If a screaming vacuum makes you skip collection for a quick cut, the system is failing. Compare published sound data where manufacturers provide it, listen to the machine if possible, and place it without blocking cooling airflow. Hearing protection may still be required for the tool and collector together.

    The best small-garage setup is often a two-machine kit

    For a mixed shop, the most practical arrangement is a compact extractor for sanders, routers, track saws, and cleanup, plus a mobile 4-inch collector for the planer, jointer, and table saw cabinet. Each stays near the tool family it serves. You avoid a permanent duct network and stop asking one fan to work far outside its useful pressure range.

    If the budget only allows one, list the hours spent on each tool and the volume of debris it makes. Mostly sanding and portable-tool work points toward an extractor. Regular planing or jointing points toward the large-hose collector, with a separate strategy for cleanup. Someone making occasional small projects with benchtop tools may begin with a well-filtered vacuum and separator, provided the tool manuals support that connection.

    Start with measured garage dimensions, then test the parked and operating machine against the daily aisle. If a table saw is part of the plan, preserve the full material path described in the table saw clearance guide. Do not buy a tall collector before checking the door path and ceiling hardware. The machine you cannot position near the tool will spend its life parked and disconnected.

    Common buying mistakes

    Peak horsepower is a poor shortcut. So is CFM by itself. Compare airflow and pressure at stated conditions, hose size, filter configuration, bin capacity, sound, electrical load, dimensions, and maintenance access. Be suspicious when a listing gives one heroic number without a manual or test context.

    Another mistake is building too much duct too soon. Small collectors lose useful performance through long branches, tight elbows, reducers, and open gates. Start with one short connection and observe real capture. Add complexity only after the base system works and the manufacturer supports the design.

    Finally, do not treat ordinary wood dust as harmless housekeeping. NIOSH links wood-dust exposure with several adverse health effects and recommends limiting exposure. Capture at the source, maintain the system, clean with a suitable vacuum rather than blowing dust into the air, and deal carefully with unknown or hazardous materials. A clean-looking floor is not proof that the finest particles were controlled.

    Useful products to compare

    These links open current Amazon search results. Check the dimensions, manual, mounting hardware, warranty, and current availability for the exact model before you order.

    Before you buy or install

    Read the current manual for the exact product you are considering. Confirm its assembled dimensions, rated capacity, mounting requirements, included hardware, working clearances, warranty, and any limits that apply to your wall, floor, electrical circuit, or garage layout.

    Frequently asked questions

    Can a shop vacuum replace a dust collector?

    It can serve small-port handheld tools and cleanup very well, but it usually cannot move the air volume expected by a stationary machine designed for a 4-inch port. Match the collector to the tool manufacturer’s requirement rather than adapting by convenience alone.

    Is a dust extractor different from a shop vacuum?

    Both are high-pressure vacuum systems. Many professional extractors add tool activation, automatic filter cleaning, antistatic hose options, documented filter configurations, and better dust bags. The exact features and certifications vary by model, so read the current manual.

    Does a cyclone separator improve filtration?

    A cyclone can remove much of the bulk debris before it reaches the vacuum filter, which can slow filter loading. It does not replace the final filter, prove HEPA performance, or fix leaks. Use a separator designed for the airflow class and hose size of your system.

    Should I use a room air cleaner instead of dust collection?

    No. A room air cleaner may reduce particles that escape, but source capture should collect dust where the tool produces it. Use room filtration only as another layer, not as a replacement for a suitable hood, hose, collector, and work practice.