Affiliate disclosure: As an Amazon Associate I earn from qualifying purchases. This article may contain affiliate links, and Bay & Bench may earn a commission at no extra cost to you. Read our full Affiliate Disclosure.
A garage power tool charging station should make one ordinary task easier: finding a charged battery without hunting through drawers. It also needs to respect heat, cord condition, charger compatibility, and the electrical limits of the space. A handsome plywood shelf is a poor bargain if its chargers are crowded behind sawdust or plugged into a chain of adapters.
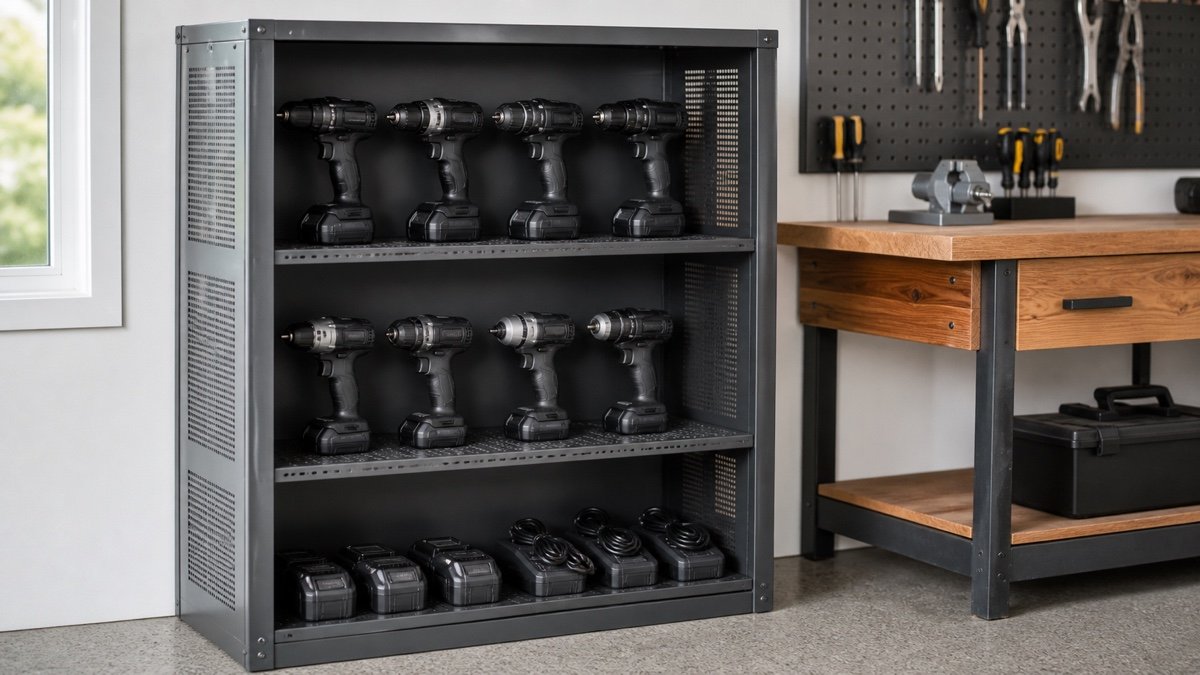
The best station is usually smaller than the first sketch. It holds the chargers you use, provides an honest spot for batteries waiting to charge, and leaves damaged packs out of circulation. You can build one from a wall shelf, a shallow cabinet with an open front, or a ready made organizer. The layout matters more than the format. This guide works through that layout before the first hook or screw goes into the wall.
Quick answer
Place compatible chargers on an open, stable surface within reach of a suitable wall receptacle. Follow each charger manual for mounting, clearance, temperature, and power requirements. Keep cords visible and separate charged packs from packs waiting to charge. Remove damaged or questionable packs from the charging and storage area, do not charge or use them, and follow the maker’s handling guidance and your local battery disposal program. If the circuit, receptacle, or load is uncertain, have a licensed electrician check it.
Garage power tool charging station choices at a glance
A station can be as plain as a shelf above the bench. More structure helps only when it solves a real problem, such as mixed battery platforms, loose cords, or chargers that get buried during a project. Start with the smallest format that gives every charger room to work.
| Format | Best fit | Access | Dust control | Watch for |
|---|---|---|---|---|
| Open wall shelf | Two or three chargers | Excellent | Low | Cord drop and wall attachment |
| Open front cubbies | Several battery families | Good | Moderate | Heat trapped in tight cells |
| Shallow cabinet | Clean storage near dirty work | Good with doors open | Better when idle | Charging with doors closed |
| Mobile cart station | Work that moves around the garage | Excellent | Low | Wheel locks and cord strain |
| Commercial organizer | Fast installation | Varies | Varies | Charger and battery fit |
Do not treat a cabinet door as fire protection. If a maker calls for open airflow, leave the charger in the open while it runs. A door can hide indicator lights and make an unusual smell or sound easier to miss. The station should put charging activity in view, not tuck it away.

Inventory batteries before building a shelf
Gather every battery and charger that still belongs in the garage. Group them by voltage and tool platform, then remove packs that are cracked, swollen, leaking, unusually hot, or already set aside for disposal. Do not test a questionable pack merely to see if it still works. Follow its maker’s instructions and local battery disposal program.
Count charging bays, not charger housings. A dual port unit may charge both packs at once or only one after the other. That difference affects how many batteries can be ready by morning. Note the cord exit, battery insertion path, indicator location, and the space your hand needs to release a pack.
This inventory also exposes tools that no longer deserve prime wall space. The broader garage tool storage guide uses frequency and work zone to decide what stays close. An old platform used twice a year can live on a shelf without joining the daily charging row.
Check charger instructions and circuit demand
Read the nameplate and manual for every charger. Record its input rating, approved operating temperature, mounting position, and clearance instructions. Do not estimate the electrical load from battery voltage. The charger’s input information is the relevant figure for the receptacle and circuit.
The U.S. Fire Administration’s lithium ion battery safety handout advises using the charger supplied by the manufacturer, avoiding overloaded outlets, and having a licensed electrician test a circuit when its suitability is uncertain. That is sound guidance for a garage full of mixed tools. A charging shelf does not increase what one branch circuit can carry.
If lights dim, a plug fits loosely, a receptacle is discolored, or a breaker trips, stop using that setup. Do not solve repeated trips with a larger breaker or a new power strip. An electrician can assess the receptacle, wiring, circuit load, and local requirements without guesswork.
Keep each battery with a compatible charger
Similar looking battery packs are not interchangeable by default. Match the exact charger and battery families named by the tool maker. Avoid improvised adapters, altered housings, and a generic charger that claims broad compatibility without approval from the battery manufacturer.
Use labels when two platforms look alike. A small printed platform name above each bay works better than writing on a charger’s vents. Leave the model and warning label readable. If several people use the garage, the station should make the right pairing obvious without asking anyone to remember plug shape or color.
The federal handout also recommends checking for a recognized testing laboratory mark before purchase. That mark is one screening tool, not permission to ignore the manual. Compatibility, condition, temperature, and correct use still decide whether a given charge cycle belongs on the station.
Leave open air around chargers
Chargers make heat, even when they are operating normally. Keep ventilation slots clear and follow the exact clearances in each manual. Do not use a battery pack as a bookend, pile gloves over a charger, or line a cubby with loose paper. Sawdust should not be allowed to build up around the intake and outlet openings.
A current DeWalt charger instruction manual says its charger may sit upright on a work surface or be wall mounted. For wall mounting, it directs the user to stay near an outlet and away from corners or obstructions that impede airflow. Your charger may differ, so use the instructions packed with its exact model.
An open shelf is forgiving because warm air can leave in several directions. Cubbies need more thought. Make them broad enough for the charger, inserted battery, cord bend, and the hand that removes it. If that creates a bulky box, the shelf format was probably the better choice.
Choose a location away from dirty work
Put the station near the tools it supports but outside the direct spray from grinding, sanding, painting, and vehicle washing. Fine dust settles inside vents. Water and wet hands have no place around charging equipment. A side wall near the assembly bench often works better than the wall directly behind a saw.
Reach matters too. Charger lights should be visible without stooping, and the heaviest battery should come out without an overhead pull. Plan the station within the storage and work areas described in the garage workshop zones guide. Shorter travel makes it more likely that a flat pack lands in the waiting area instead of on the nearest car roof.
Keep the station clear of the main walking line and car door swing. The workshop aisle clearance guide can help when a shallow charging shelf competes with a narrow passage. Include the protruding battery and hanging cord in the measurement.
Lay out the station at full scale
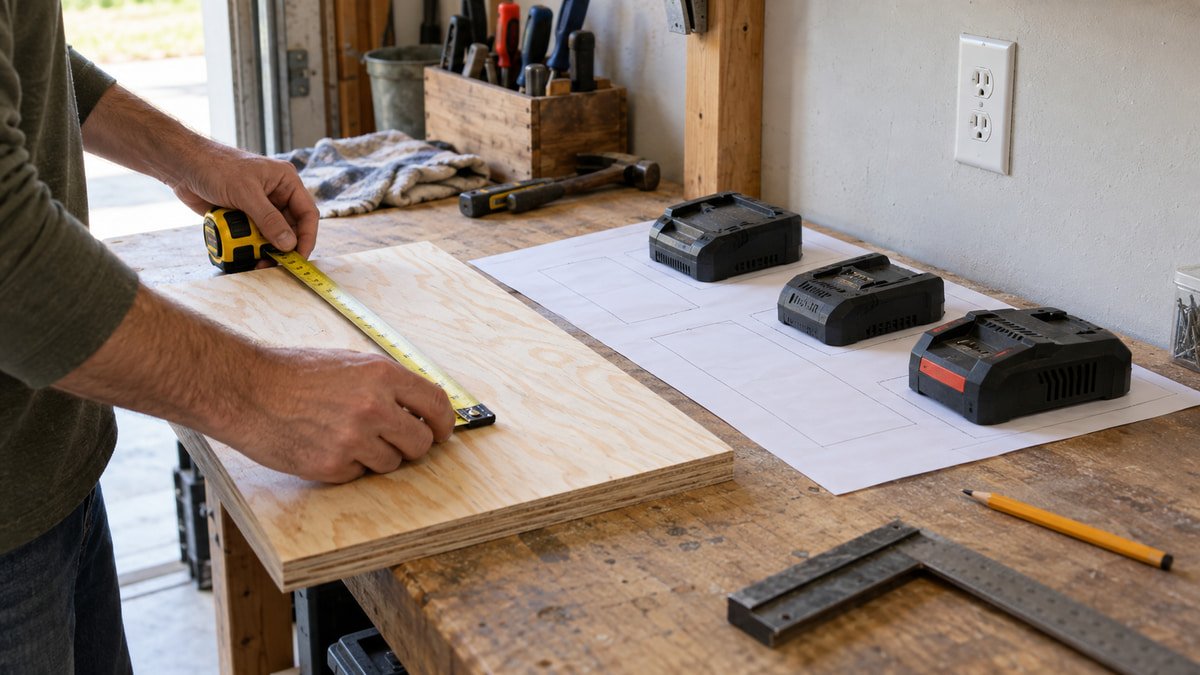
Place the chargers on a sheet of paper or scrap board before building. Insert the largest compatible battery in each one. Mark the charger outline, cord exit, mounting holes, release button, and hand space. Then route pieces of string toward the planned outlet to see where cords want to cross.
This plain rehearsal catches awkward details. A battery may have to slide forward before lifting. A tall pack may block the shelf above it. A cord wrapper can add depth behind the charger. Indicator lamps that look clear on a table can disappear beneath a deep shelf lip.
Use the same measured approach when locating the station near a bench. Our guide on where to put a garage workbench covers movement, door swing, and access to utilities. Charging should fit that plan, not occupy the last open patch of wall by accident.
Mount the charger only as its maker allows
Some chargers have molded mounting slots. Others are meant to stay on a horizontal surface. Never drill a charger housing, bury it in foam, or rely on adhesive strips when the manual calls for screws. Mounting hardware must suit the wall structure as well as the charger.
The Milwaukee four bay sequential charger page lists integrated hanging holes and sequential charging. That is a useful reminder to verify two separate facts: how the charger attaches and how its ports behave. A four slot body is not necessarily four simultaneous charge cycles.
Fasten a shelf or backboard to sound structure with hardware appropriate for the wall and expected load. Chargers, batteries, hooks, and future additions all count. If the framing location is unclear, open wall storage planning in the garage wall storage systems guide can help you choose a system that fits the wall you have.
Route cords without hiding damage
Give each cord a relaxed route to the receptacle. Avoid sharp bends at the charger body, screws pinching insulation, and cords stretched tight across an edge. A removable clip or broad cable loop can guide slack while leaving the full cord visible for inspection.
Do not bury a power strip, adapter, or bundled cord inside a closed compartment. The USFA handout warns against overloaded outlets and charging through extension cords or multiplug adapters. When the station needs more permanent receptacles, the clean answer is an electrician designed installation, not another layer of plugs.
Keep low voltage accessories separate from charger cords so one cable can be removed without disturbing the row. A small channel beside the shelf is easier to clean than a decorative false back. Function wins here. You want to see a scuff, crushed jacket, or loose plug before it becomes ordinary.
Separate waiting and charged packs
Two simple locations prevent most status confusion. One tray holds packs waiting to charge. Another holds charged packs. If a battery acts strangely, is dropped, gets wet, or shows damage, remove it from the charging and storage area. Do not charge or use it. Follow the maker’s handling instructions and your local battery disposal program rather than leaving it on the station for later.
Use dividers or shallow labeled bins rather than stacking healthy packs into a deep basket. Terminals should be protected from loose screws, wire offcuts, and other metal objects. Never toss a battery into the same drawer as drill bits. Follow the maker’s storage and terminal protection instructions.
A pegboard can hold light accessories near the station, but batteries and chargers need support designed for their weight and shape. The garage pegboard layout guide explains reach zones and spacing. Keep charger vents free instead of framing them with hanging gloves and cords.

Respect garage temperature and battery condition
Garages can be much hotter or colder than the house. Charge and store batteries only within the ranges stated by the manufacturer. A pack brought in from a freezing vehicle or hot trunk may need time to reach an approved temperature before charging. Let the charger indicators and manual guide the decision.
Stop using a pack that is swollen, cracked, leaking, unusually hot, smells odd, or has damaged terminals. Do not open it or attempt a home repair. Move people away if a battery is smoking, hissing, or heating rapidly, call emergency services, and follow local emergency guidance. Personal safety matters more than saving the station.
Check current recall information for the exact model you own. Keep purchase records and model numbers in a phone note or drawer near the station. Battery appearance changes slowly, so a quick comparison during each seasonal cleanup can catch damage that daily users have stopped noticing.
Test the routine before adding more storage
Run the station for a week with only the planned chargers, following every maker instruction. Watch how people return packs. Notice whether cords snag, indicator lights vanish, or the waiting tray fills faster than chargers can clear it. Those observations are better than a larger first build based on imagined needs.
Clean with the chargers unplugged and use only the method permitted by each manual. Inspect plugs, cords, housings, mounting screws, shelf joints, and battery terminals. A loose shelf or hot plug calls for stopping, not tightening things while equipment remains powered.
Leave one empty position, but resist covering the wall with speculative cubbies. A good garage battery charging station has a calm, legible routine. Flat packs enter one side, compatible chargers sit in open air, and ready batteries leave from another. When that path works without thought, the station is finished.
Useful products to compare
These links open current Amazon search results. Check the dimensions, manual, mounting hardware, warranty, and current availability for the exact model before you order.
Before you buy or install
Read the current manual for the exact product you are considering. Confirm its assembled dimensions, rated capacity, mounting requirements, included hardware, working clearances, warranty, and any limits that apply to your wall, floor, electrical circuit, or garage layout.
Frequently asked questions
Can power tool chargers be mounted on a wall?
Some can, but only when the manufacturer provides mounting slots and permits that position. Follow the manual for screw size, attachment, airflow, and orientation. Do not drill the charger body or assume that a model designed for a bench can hang vertically.
Can several power tool chargers share one outlet?
That depends on charger input ratings, other loads on the circuit, the receptacle, wiring, and local electrical rules. Do not guess from the battery voltage or add adapters until everything fits. If the total load or circuit condition is uncertain, ask a licensed electrician to assess it.
Should a garage charging station have doors?
Doors can keep dust off equipment when it is unplugged and idle. Charging behind closed doors may trap heat and hide status lights, so follow each charger manual. An open shelf or an open front cabinet is often easier to ventilate, inspect, and keep clean.
Where should spare tool batteries be stored?
Store healthy packs in the temperature range and condition described by the manufacturer, away from water, direct heat, and loose metal that could contact terminals. Separate charged packs from packs waiting to charge. Remove damaged or questionable packs from the station, do not charge or use them, and follow the maker’s handling guidance and your local battery disposal program.
Can I charge a cold battery as soon as I enter the garage?
Use the operating temperature range and indicator guidance in the exact battery and charger manuals. A pack outside that range may need time to warm or cool naturally. Do not force charging or heat a pack with a space heater, heat gun, or other improvised method.