Tag: air compressors

  • Best Retractable Air Hose Reel: 5 Garage Picks

    Best Retractable Air Hose Reel: 5 Garage Picks

    Affiliate disclosure: As an Amazon Associate I earn from qualifying purchases. This article may contain affiliate links, and Bay & Bench may earn a commission at no extra cost to you. Read our full Affiliate Disclosure.

    A loose air hose finds tires, chair legs, and the busiest walking route with uncanny consistency. The best retractable air hose reel keeps a useful length ready, delivers enough air for the tools, locks where expected, and rewinds without whipping a metal fitting through the room.

    Most home garages are well served by a 3/8 inch, 50 foot reel, but that familiar size is not universal. A short 1/4 inch hose feels lighter with brad nailers. A steel dual arm frame handles frequent pulls better than a light enclosed case. An enclosed hybrid hose stays tidy around vehicles and protects the spool from dust. This guide compares five current reel styles and shows what to measure between the compressor, mounting point, and farthest job.

    Quick answer

    The Flexzilla L8250FZ is the easy general pick for an enclosed 3/8 inch by 50 foot garage reel. Choose its self-leveling Pro sibling when even spooling matters, Milton’s enclosed reel for a high pressure hybrid hose and wide swivel, a Milton dual arm reel for heavier service, or a Coxreels spring reel when parts and industrial construction outweigh a closed case. Match the reel rating to the compressor.

    Five best retractable air hose reel formats compared

    The table separates reels by structure and handling. Pressure capacity is a ceiling, not proof of high airflow. Hose inside diameter, coupler size, and total run determine how easily air reaches the tool. Confirm every rating on the current model before connecting it.

    PickHoseFrame or caseMount movementBest fit
    Flexzilla L8250FZ3/8 inch by 50 feetEnclosed polypropyleneSwivel bracketEveryday home garage
    Flexzilla L8251FZP3/8 inch by 50 feetEnclosed with self-leveling spoolWall mountFrequent neat rewinding
    Milton ZE1459NS3/8 inch by 50 feetClosed case180 degree swivelProtected high pressure hose
    Milton industrial EPDM kit3/8 inch by 50 feetSteel dual arm140 degree pivotHeavy routine shop use
    Coxreels spring reelChoose by seriesOpen steel frameFixed or swivel optionsServiceable industrial style

    Look beyond the reel body. Some packages include only a short leader, while others require it separately. Couplers may not match your current plugs. Include the leader hose, shutoff valve, compatible fittings, mounting fasteners, and a whip check where required in the total plan.

    Choose 3/8 inch hose for a broad garage tool mix

    A 3/8 inch inside diameter is the versatile general choice for a 50 foot garage reel. It limits pressure loss better than 1/4 inch hose when an impact wrench, blow gun, or modest spray tool asks for more flow. The larger hose is heavier, and its bulk is unnecessary for a short brad nailer run.

    Hose length should cover the route with slack, not stretch from reel to tool in a straight line. Measure down the wall, around the parked vehicle, and out to the driveway. Add the leader between compressor and reel. Every coupler, swivel, and narrow fitting adds resistance, so a 3/8 inch hose connected through tiny passages can still perform poorly.

    Plot the route with your garage workshop layout. A reel near the middle of the long wall often reaches more jobs than one beside the compressor. The leader can bridge that distance if its size and pressure rating fit the system.
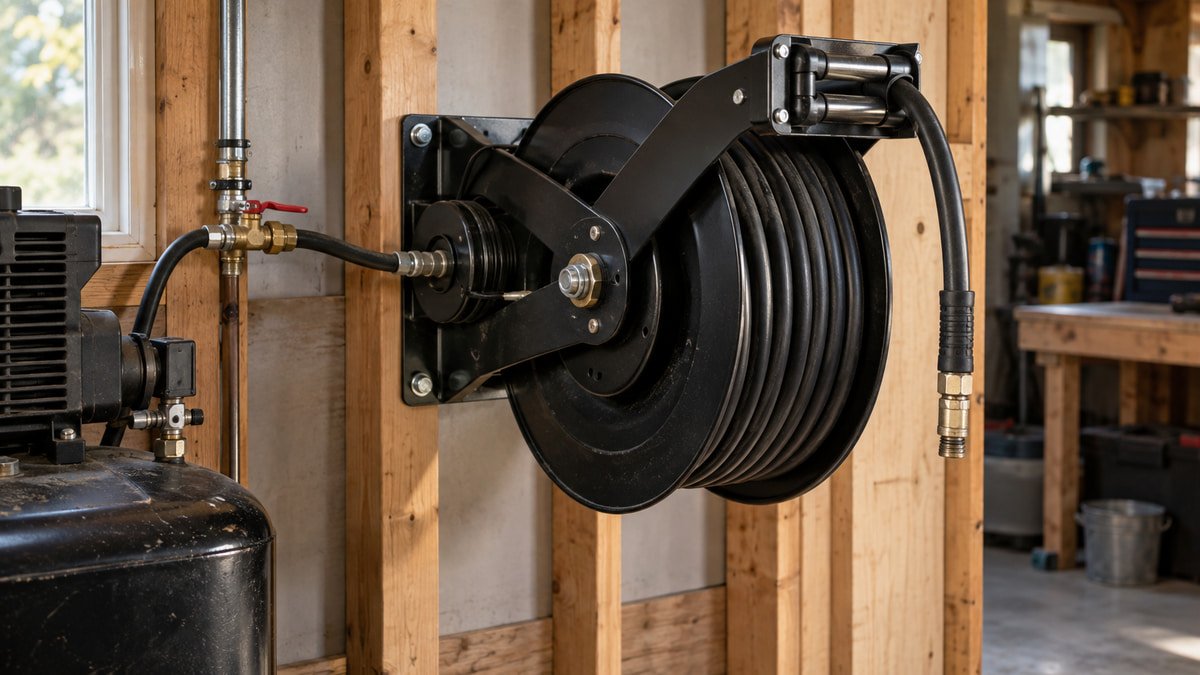
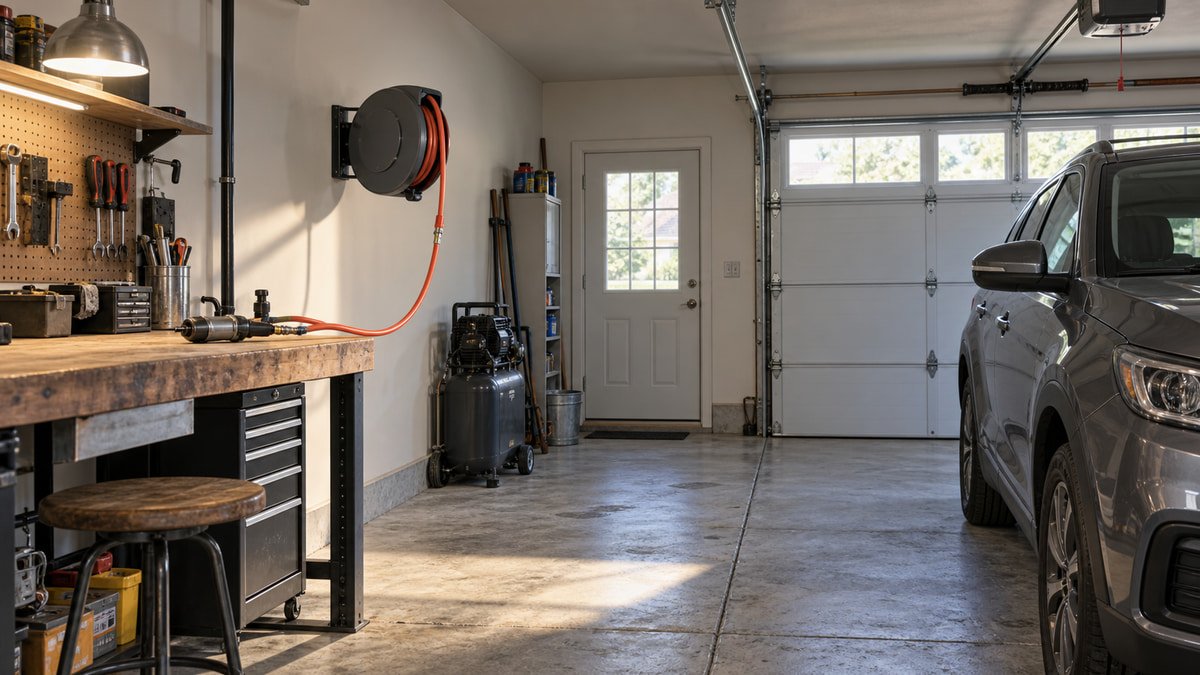
    Steel dual arm air hose reel with leader hose on a framed garage wall
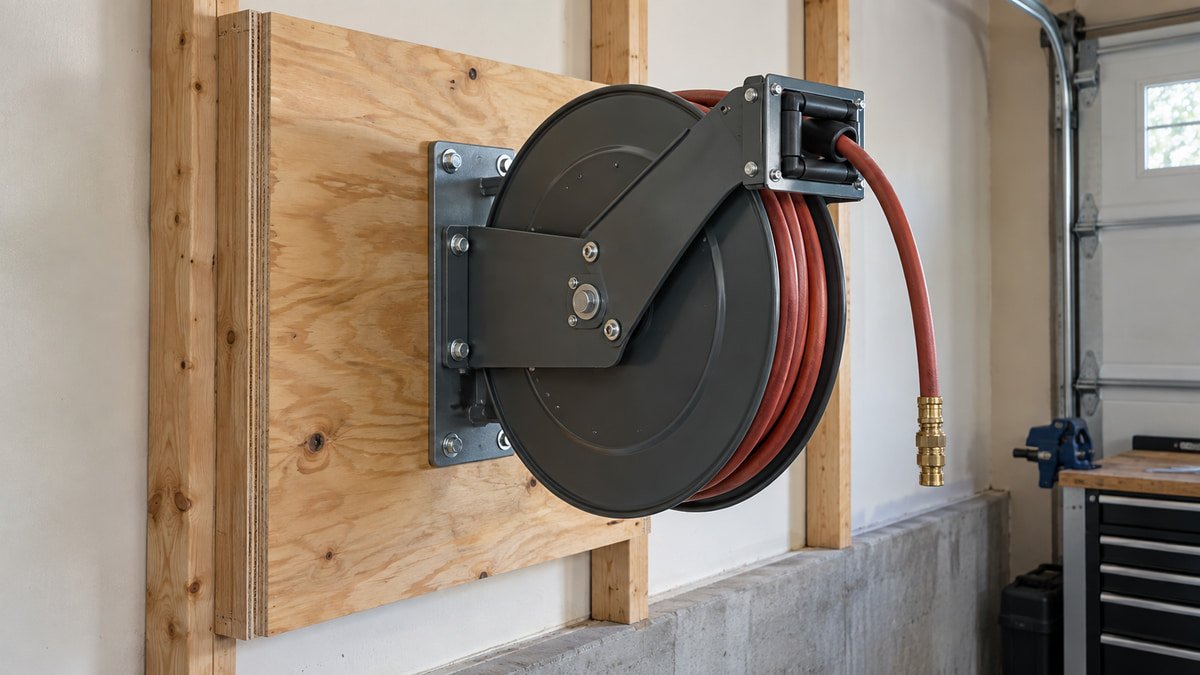
    A rigid dual arm frame suits frequent use when the wall can carry the reel and hose pull.

    Flexzilla L8250FZ for an enclosed everyday reel

    The Flexzilla L8250FZ packages 50 feet of 3/8 inch hybrid hose in an enclosed polypropylene case. Flexzilla says the reel uses an auto retract and latch mechanism and can lock at 18 inch intervals. The case keeps the spool away from grinding dust, leaves, and accidental contact.

    This format works well beside a parked car because the smooth enclosure has fewer exposed edges than an open steel frame. The hose remains flexible in a wide temperature range according to the maker, which helps in an unconditioned garage. The bracket still needs framing that can handle the reel weight and the repeated pull of a long hose.

    The lock interval affects where the stop lands. Pull past the desired length until the latch engages, then ease the hose back. Do not release a pressurized hose and expect the mechanism to absorb the full return. Guide it with one hand as the manual directs.

    Flexzilla L8251FZP for orderly spooling

    The Flexzilla Pro L8251FZP keeps the 3/8 inch by 50 foot format but adds a self-leveling system intended to distribute hose more evenly across the spool. Even layering reduces the pileup that can make a reel bind or leave hose exposed at one side.

    This feature is most useful when the hose comes out at different angles through the day. A central garage reel may feed a tire inflator toward the driveway, a nailer toward the workbench, and a blow gun toward the door. The self-leveling guide helps manage those changes, though the operator still needs to pull and return the hose in a controlled manner.

    Compare the Pro price with the simpler enclosed model. For occasional weekend use, careful hand guidance may be enough. For daily work or a shared garage, the guided spool can remove a small annoyance that otherwise appears every time the hose returns.

    Milton ZE1459NS for a protected high pressure hose

    The closed Milton ZE1459NS includes 50 feet of 3/8 inch hybrid polymer hose. Milton lists a 300 PSI maximum and a bracket that swivels through 180 degrees, with wall, ceiling, or floor mounting options. That wide pivot can serve a workbench inside and a vehicle outside from one location.

    A high pressure rating does not mean the tool receives more CFM. It means the reel components are rated for pressure up to that published limit when installed and used correctly. Set the compressor regulator for the hose, reel, fittings, and tool with the lowest allowed working pressure.

    The closed case suits a dusty garage, but it hides the first wraps of hose. Inspect the accessible length, fitting, and stop regularly. If the retract action changes or the hose develops a damaged spot near the outlet, depressurize the line and follow the service instructions rather than opening a spring case casually.

    Milton dual arm reel for heavier routine use

    Milton’s industrial dual arm kit uses a steel frame, 50 feet of EPDM hose, and a six foot leader. The current listing gives it a 140 degree pivot and pressure capability up to 300 PSI. Two arms support the spool at both sides, which is a reassuring layout for repeated shop use.

    The open frame makes the hose and swivel easier to inspect. It also exposes them to dust, overspray, and impact. Mount this style where a board, mower handle, or car door cannot strike the spool. The steel edges deserve more clearance than a rounded plastic case.

    A six foot leader offers some freedom between compressor and reel, but it may not reach a central wall location. Do not replace it with an undersized hose simply because that hose is available. Keep the supply path at least as generous as the reel path unless the manufacturer specifies otherwise.

    Coxreels for a serviceable industrial style

    Coxreels offers spring driven, hand crank, and motorized reel families with many hose lengths, pressures, and frame arrangements. That catalog breadth suits buyers who know the exact duty and want replaceable components rather than one fixed home garage package.

    The choice takes more homework. Specify hose inside diameter, length, maximum working pressure, inlet and outlet size, reel material, rewind type, and mounting orientation. A compact reel built for a short tool hose is not equivalent to a larger dual pedestal model merely because both accept compressed air.

    The company’s spring reel manual warns users not to exceed the reel pressure rating and not to operate a reel with a malfunctioning spring. That is useful guidance for any brand. A hesitant or uncontrolled rewind is a service signal, not something to defeat with a stronger pull.

    Mount the reel for reach without blocking storage

    Wall mounting at shoulder height keeps the reel accessible and lets the hose feed above bins. Ceiling mounting clears wall space but can make service awkward and may direct the hose across lights or garage door hardware. Floor mounting suits a bench or equipment island but gives up the main benefit of getting the hose off the slab.

    Use the structural mounting pattern and fasteners in the manual. The wall feels more than the static reel weight. A person pulling 50 feet of hose creates leverage at the bracket, and a sudden stop adds a shock load. Drywall anchors by themselves are not an adequate substitute for specified framing.

    Coordinate the swing with garage wall storage. A 180 degree bracket needs open space on both sides. Keep it away from tall cabinet doors, and protect the clear path described in our garage aisle guide.
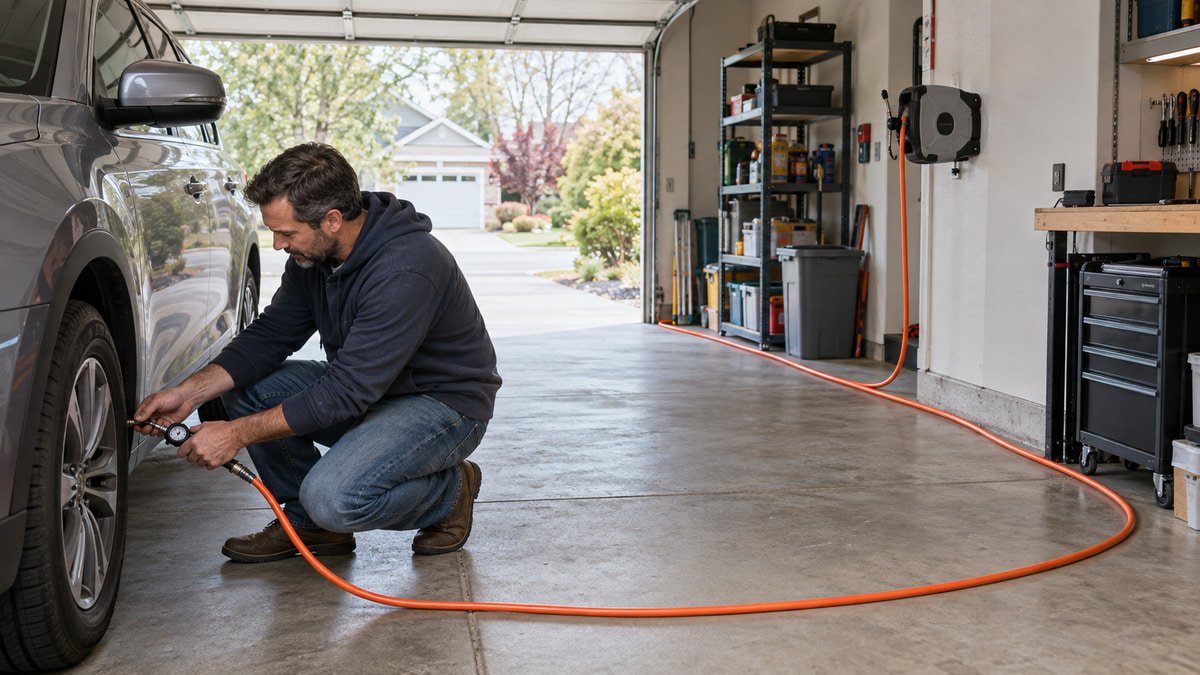
    Air hose routed safely along the side of a garage to a vehicle tire
    The best mounting point reaches the driveway without laying hose across the main path.

    A controlled rewind is a safety feature

    Automatic does not mean unattended. Hold the hose, trigger the release as the manual explains, and walk it back toward the reel. A metal coupler can strike a vehicle, chip a wall, or injure someone if it returns freely. Some reels offer controlled or slowed rewind, but even those deserve guidance at the final few feet.

    Place the stop ball so the fitting remains easy to reach without hanging at eye level. Inspect the bumper, latch, outlet rollers, and first foot of hose because they see the most movement. If the latch stops catching, isolate the air supply before inspection. Spring mechanisms store energy inside the case.

    Keep a manual shutoff valve before the reel where the product instructions allow. Closing it when the garage is idle reduces the amount of hose held under pressure and makes service simpler. Drain compressor moisture and any line trap as directed so water does not sit in the reel.
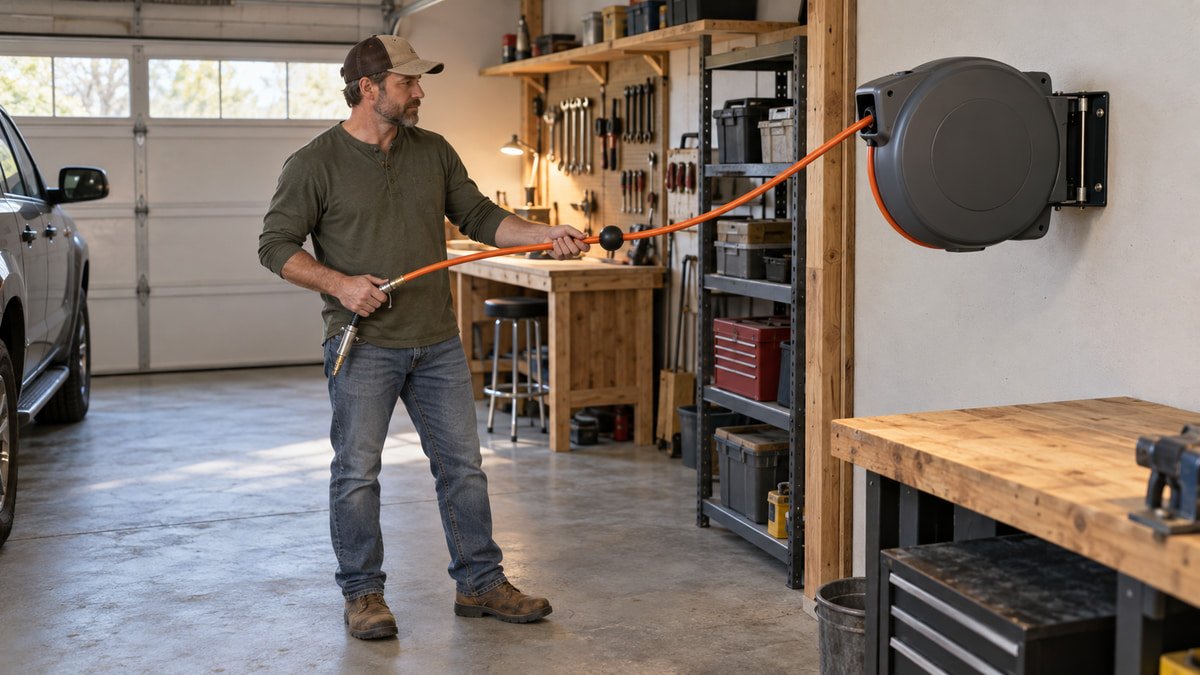
    Homeowner guiding a retractable air hose slowly back toward its reel
    A controlled hand on the hose protects the fitting, case, and anyone standing nearby.

    Match fittings, leader hose, and routine care

    Choose one quick connect profile for the garage and verify that every plug seats fully. A coupler that almost fits can leak or release. Use thread sealant only where specified, keep it away from the air passage, and support the leader so it does not pull sideways on the compressor outlet.

    Route the supply without crowding the workbench or creating a hidden rub point behind a cabinet. Our garage measuring guide is useful for checking the full bracket sweep, case depth, and hose exit against doors and trim.

    Inspect for bubbles at fittings with the approved method, listen for leaks, and replace damaged hose with the correct rated part. Compressed air should never be aimed at skin or used casually to clean clothing. OSHA’s compressed air safety material addresses workplace cleaning limits; home users should still treat the energy seriously and follow the equipment manuals.

    Useful products to compare

    These links open current Amazon search results. Check the dimensions, manual, mounting hardware, warranty, and current availability for the exact model before you order.

    Before you buy or install

    Read the current manual for the exact product you are considering. Confirm its assembled dimensions, rated capacity, mounting requirements, included hardware, working clearances, warranty, and any limits that apply to your wall, floor, electrical circuit, or garage layout.

    Frequently asked questions

    What size air hose is best for a retractable garage reel?

    A 3/8 inch inside diameter is a flexible general choice for a 50 foot reel and common garage tools. A 1/4 inch hose is lighter for nailers but loses more pressure at higher flow. Match the hose, couplers, and leader to the tool demand.

    Can a retractable air hose reel be mounted on the ceiling?

    Many models allow ceiling mounting, but the exact reel manual must approve it. Confirm structural support, fastener type, bracket movement, service access, hose direction, and clearance from garage door tracks and lights before installation.

    Does a 50 foot air hose reduce air pressure?

    Yes, especially when the hose is narrow, airflow is high, or fittings are restrictive. A 3/8 inch hose usually loses less pressure than a 1/4 inch hose at the same flow. Keep couplers full size and avoid unnecessary adapters.

    Should I leave an air hose reel pressurized?

    Follow the reel and compressor manuals. A shutoff valve before the reel makes it easy to isolate the hose when the shop is idle. Depressurize the system before repair, and never open a spring case without the specified service procedure.

    Is an enclosed or open air hose reel better?

    An enclosed case protects the spool and has fewer exposed edges near a vehicle. An open steel reel makes inspection and some repairs easier and can suit heavier service. The better format depends on dust, traffic, mounting room, and use frequency.
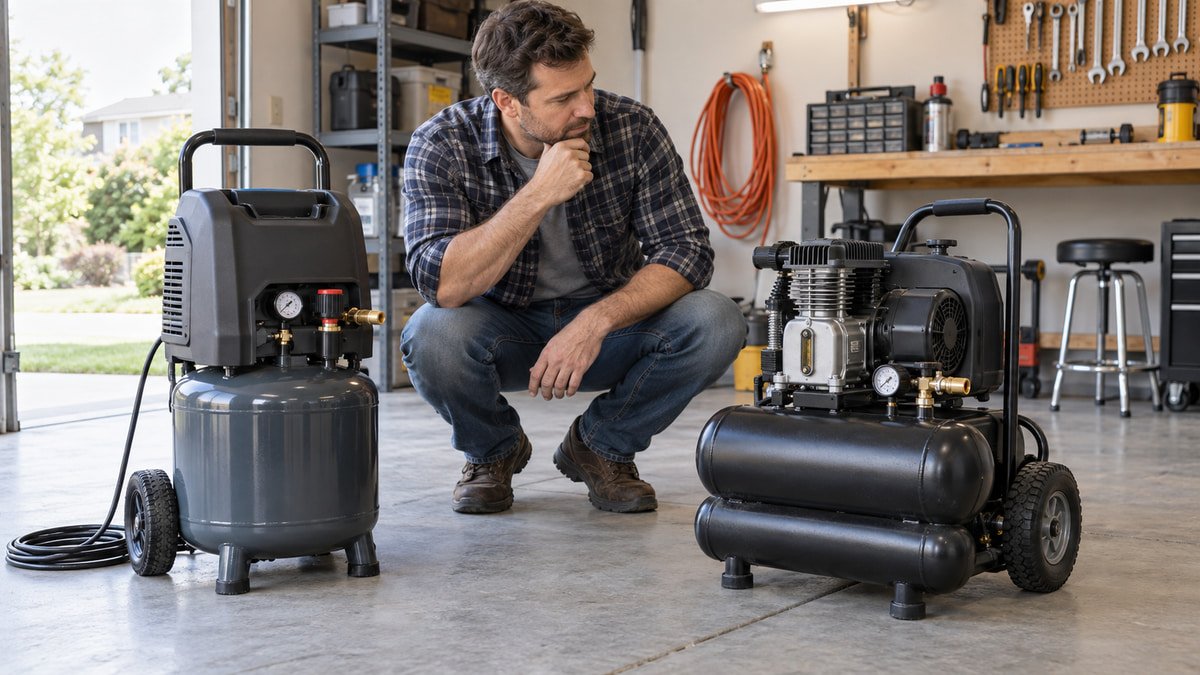
  • Oil free vs oil lubricated air compressor for garage use

    Oil free vs oil lubricated air compressor for garage use

    Affiliate disclosure: As an Amazon Associate I earn from qualifying purchases. This article may contain affiliate links, and Bay & Bench may earn a commission at no extra cost to you. Read our full Affiliate Disclosure.

    An oil free vs oil lubricated air compressor choice is really a maintenance and use pattern decision. Oil free pumps remove the crankcase oil checks and spills that come with a splash lubricated design. Oil lubricated pumps ask for more care but are often built for slower running, repairable service. Neither label guarantees quiet operation, strong airflow, long duty cycles, or a compressor that starts happily on your garage circuit.

    Compare the delivered CFM at the pressure your tools require first. Then look at duty cycle, sound rating, tank size, starting current, weight, orientation limits, parts support, and the maintenance chart. The two current compressor examples below show how different the packages can be. They are reference points, not a claim that every pump in the category behaves alike.

    Quick answer

    Choose an oil free compressor when easy movement, low routine pump care, and cleaner outlet air matter most. Choose an oil lubricated model when you will maintain it faithfully and want a slower running, serviceable pump for frequent work. For occasional inflation, brad nailing, and blow gun use, oil free is usually simpler. For repeated shop duty, compare a quality oil lubricated model, but buy by delivered CFM and duty cycle before pump type.

    Oil free vs oil lubricated air compressor at a glance

    The comparison describes common tendencies, not universal rules. A slow oil free pump can be quieter than a fast lubricated one, and a well designed portable unit can outlast a cheap compressor of either type.

    QuestionOil free pumpOil lubricated pump
    Routine pump oil serviceNo crankcase oil changeOil checks and scheduled changes
    Transport orientationUsually more forgiving, follow manualOften must stay level and upright
    Outlet airNo pump oil carried from crankcaseFiltration may be needed for sensitive work
    Cold weather routineNo thick crankcase oilOil grade and unloaded start may matter
    Typical home useInflation, trim tools, occasional repairsFrequent shop work and service minded owner
    Purchase testDelivered CFM, duty cycle, sound, circuit, tank, parts, and manual

    Use the garage air compressor size guide to total the air demand before comparing pumps.

    What oil free means inside the pump

    An oil free compressor does not use an oil bath to lubricate its pump mechanism. That removes oil level checks and changes from the routine. It does not mean maintenance free. Intake filters, drains, cooling passages, fasteners, hoses, and the receiver still need attention according to the manual.

    The California Air Tools 8010 is a useful current example. Its official product page lists an oil free dual piston pump, 2.20 CFM at 90 PSI, a 70 percent duty cycle, an eight gallon steel tank, and a 48 pound weight. The company also specifies periodic intake filter replacement.

    That package is attractive for a shared garage because it is movable and simple to maintain. Yet 2.20 CFM at 90 PSI still sets a firm limit. It can run tools with modest intermittent demand; it will not become a high air production machine because the pump lacks oil.

    What oil lubricated means in a portable compressor

    An oil lubricated pump carries compressor oil in its crankcase and uses it to reduce friction in moving parts. The owner must maintain the right level, use the specified oil, and change it on schedule. Transport and operation may require the compressor to remain level so the lubrication system works and oil does not migrate where it should not.

    Rolair’s FC2002 shows the format clearly. The manufacturer page lists splash lubrication, 4.1 CFM at 90 PSI, a 4.3 gallon tank, a 3,400 RPM pump, a 79 dBA sound rating, and a 62 pound shipping weight. It also specifies 12 ounces of pump oil.

    The two example pages publish 4.1 CFM at 90 PSI for the Rolair and 2.20 CFM for the California Air Tools unit. California Air Tools lists a 48 pound product weight, while Rolair reports a 62 pound shipping weight, so those weight figures are not measured on the same basis. The differences come from the complete designs, not oil alone.

    Size airflow and duty cycle before choosing lubrication

    Delivered CFM at a stated PSI is the number that connects the compressor to a tool. Read the tool requirement and add reasonable margin. Ignore displaced CFM when a delivered figure is available. Rolair’s official compressor FAQ recommends delivered CFM for sizing because displacement is theoretical.

    Duty cycle tells you how long the pump may run within a time period. A small tank does not lower the tool’s average air demand; it only changes the timing of pump cycles. High demand grinders, sanders, and spray equipment can outrun a portable compressor even when a short test feels successful.

    List the longest continuous task, not the easiest one. Tire inflation and a few brad nails are forgiving. Sustained sanding is not. If the required compressor overwhelms the garage circuit or aisle, reconsider the pneumatic tool rather than buying a pump that barely fits.

    Oil free advantages in a shared home garage

    Oil free pumps remove one messy service task. There is no crankcase oil bottle to store, no sight glass to read, and less concern about keeping the pump level during ordinary transport. That simplicity is persuasive when the compressor moves between a garage, driveway, and house for short jobs.

    Outlet air also avoids oil introduced by a lubricated pump crankcase, although water, dirt, and other contaminants still require control. Sensitive finishing or laboratory applications have stricter air requirements than casual tire work. Use the filtration and drying system specified for the job rather than trusting an oil free label as proof of air purity.

    Many compact quiet models are oil free, but low sound comes from motor speed, pump design, enclosure, vibration control, and cooling choices. Read the published dB test conditions. The category itself does not promise neighbor friendly sound.

    Oil lubricated advantages for frequent service

    A well designed splash lubricated pump can run cooler and wear slowly when the oil film, speed, and cooling system are right. Manufacturers often pair this pump type with cast iron cylinders, replaceable service parts, and lower motor speeds. Owners who inspect equipment regularly may prefer that repairable feel.

    Rolair says its splash lubricated compressors have a longer expected service life than the high speed homeowner oil less models it compares against. Treat that as manufacturer guidance for its designs, not a blanket lifespan promise. Service life depends on temperature, filtration, duty cycle, electrical supply, drainage, and correct operation.

    The maintenance is small but unforgiving. Wrong oil, low oil, operation on a slope, or a skipped change can erase the reason you chose the design. If you know the sight glass will be ignored for years, the simpler pump is the more honest purchase.

    Oil lubricated compressor maintenance starts at the sight glass

    Check oil with the compressor cool, unplugged, depressurized as required, and sitting on a level surface. Follow the exact manual because some pumps use a sight glass while others use a dipstick. The correct level, grade, break in change, and later interval are model specific.

    Keep the fill and drain areas clean. Dirt introduced during a change can be worse than slightly dark oil. Dispose of used oil through a suitable local collection program. Never substitute automotive oil unless the compressor maker permits it.

    Inspect the intake filter, vibration mounts, tubing, and guards at the same time. Store the manual near the machine and record each service date. A ten minute routine is easier than diagnosing a pump that has begun to run hot.

    Homeowner checking the sight glass on an oil lubricated portable compressor
    An oil lubricated pump asks for regular level checks, the specified oil, and service intervals from the exact manual.

    Portability favors the lighter honest fit

    California Air Tools lists the 8010 at a 48 pound product weight, while Rolair gives the FC2002 a 62 pound shipping weight. Those numbers are not directly equivalent, but both confirm that portable still means lifting and rolling real mass. Measure the handle, wheels, gauges, hose connections, and path to the work. If the unit must enter a vehicle, package shape matters more than a wheel kit.

    Oil lubricated compressors commonly need level operation and upright transport. Rolair instructs owners of splash lubricated models to operate level because the connecting rod dipper must remain in the oil bath. Oil free machines avoid that issue, but tanks, gauges, cords, and valves still require careful handling.

    The garage aisle clearance guide helps plan the route. Give the compressor a dry parking home with space around every cooling opening.

    Homeowner rolling a lightweight oil free compressor through a compact garage
    Oil free designs often make portable use simpler because the pump has no crankcase oil level to protect during movement.

    Noise comes from the complete machine

    Do not assume oil lubricated means quiet or oil free means loud. The example California Air Tools 8010 is listed at 60 dB, while Rolair lists the FC2002 at 79 dBA. They have different output, tank, motor, pump, and test context. Compare ratings for complete machines with similar airflow.

    Motor speed often matters, as do intake noise, vibration through the slab, fan sound, and unloader exhaust. Rubber feet need a stable surface, not a soft improvised pad that blocks cooling. Place the machine away from ears and shared walls while keeping controls visible.

    A suitable longer hose may move sound farther from the bench, though pressure drop and trip hazards must be managed. Hearing protection may still be needed for the work.

    Cold starts and clean air need separate checks

    Cold thickens compressor oil and can raise starting effort. Rolair advises an unloaded start and an oil grade suited to temperature for its machines. Use the procedure for your model. Oil free pumps avoid cold crankcase oil, but seals, drains, electrical starting, and condensation still react to low temperature.

    Every receiver collects moisture. An oil lubricated pump may add oil carryover, while an oil free pump removes that source but not water, rust, hose debris, or intake contamination. Painting may need filtration and drying beyond the compressor package. Compressed air is not breathing air unless an engineered, monitored system is built for that purpose.

    For dust cleanup, a vacuum is usually the better first tool. The shop vac and dust collector comparison can help. Never blow compressed air at skin or clothing.

    Both pump types still need tank drainage

    Water condenses in both systems. Drain the receiver at the interval and pressure condition specified by the manufacturer. Wear eye protection, aim discharge safely, and keep hands away from a forceful stream. A cooled, unplugged compressor with controlled residual pressure is easier to service safely when the manual calls for it.

    OSHA’s air receiver rule requires a drain at the lowest point for covered workplace equipment and says receivers should be drained often enough to prevent excessive liquid. Homeowners should follow their compressor manual and never assume a dry outlet means a dry tank.

    Do not repair, weld, drill, or coat a damaged receiver. Rust, dents, leaking seams, or a suspect safety valve deserve manufacturer or qualified service guidance.

    Homeowner draining clear condensation from a cooled portable air compressor tank
    Both pump types still collect tank moisture, so safe draining and receiver inspection remain part of ownership.

    Choose by work pattern rather than a pump slogan

    For occasional inflation, trim nailing, and light repairs, a quiet oil free unit with enough delivered CFM is usually the least fussy choice. It moves easily and does not add an oil schedule to a machine used six weekends a year.

    For frequent pneumatic fastening or repair work, a quality oil lubricated pump may justify its weight and care. Check parts availability, duty rating, and the manual before paying for an imagined lifetime. Spray finishing and sustained air tools can push either portable category beyond comfort.

    The garage workshop zones guide helps place the compressor and hose route away from parking. For a very tight bay, review the one car garage workshop plan. The right answer may be a different tool or rented capacity for a rare job.

    Useful products to compare

    These links open current Amazon search results. Check the dimensions, manual, mounting hardware, warranty, and current availability for the exact model before you order.

    Before you buy or install

    Read the current manual for the exact product you are considering. Confirm its assembled dimensions, rated capacity, mounting requirements, included hardware, working clearances, warranty, and any limits that apply to your wall, floor, electrical circuit, or garage layout.

    Frequently asked questions

    Is an oil lubricated air compressor always quieter?

    No. Pump speed, motor, intake, enclosure, vibration control, output, and test method all affect sound. Compare published dB figures for complete machines with similar airflow. California Air Tools’ oil free example is rated lower than Rolair’s oil lubricated example, though they differ in output and design.

    Does an oil free compressor produce completely clean air?

    It removes pump crankcase oil as one contamination source. Moisture, rust, dust, hose residue, and intake contaminants may remain. Painting and sensitive tools can still need separators, filters, or dryers sized and maintained for the job. Oil free is not the same as breathing air.

    How often does an oil lubricated compressor need an oil change?

    Use the schedule in the exact model manual. Break in oil may have an early change, and later intervals vary by oil type, hours, temperature, and service. Check the level as directed, use only an approved compressor oil, and keep a dated record.

    Can I lay an oil lubricated compressor on its side for transport?

    Assume no unless the manufacturer gives a specific transport procedure. Oil can move into unwanted areas, and a splash lubricated pump usually needs level operation. Keep the compressor upright, secure it against movement, close drains and valves as instructed, and protect gauges and fittings.

    Which pump type lasts longer in a home garage?

    Build quality, speed, heat, duty cycle, electrical supply, maintenance, and parts support matter more than one label. A maintained professional oil lubricated pump may outlast a light homeowner oil free design, but a quality oil free unit can be the better match for intermittent use. Compare specific models and warranties.

  • 1/4 vs 3/8 Air Hose: Which Size Fits Your Garage?

    1/4 vs 3/8 Air Hose: Which Size Fits Your Garage?

    Affiliate disclosure: As an Amazon Associate I earn from qualifying purchases. This article may contain affiliate links, and Bay & Bench may earn a commission at no extra cost to you. Read our full Affiliate Disclosure.

    The practical answer to 1/4 vs 3/8 air hose is tied to airflow, length, and the tool at the far end. A 1/4 inch hose is lighter and easier to manage around a workbench. It works well for nailers, inflators, and short intermittent jobs. A 3/8 inch hose creates less restriction, so it is the safer choice for longer runs, impact tools, grinders, and equipment that consumes more air.

    Tank size does not settle the question. Pressure on the compressor gauge with the trigger released is also a poor guide because the troublesome drop appears while air is moving. This comparison explains where each diameter works, how fittings can spoil a good hose, and how to test the system instead of blaming the compressor first.

    Quick answer

    Use a 1/4 inch air hose for short runs and low demand intermittent tools when low weight matters. Use a 3/8 inch hose for longer runs or tools with higher airflow, including many impact wrenches and grinders. Follow the tool maker’s minimum inside diameter, compare required CFM, and measure pressure at the tool while it is running.

    How 1/4 vs 3/8 air hose sizes compare

    The difference is inside diameter. A 3/8 inch passage has more cross sectional area than a 1/4 inch passage, which reduces flow resistance when length and construction are otherwise similar. The larger hose is also heavier and bulkier.

    Decision point1/4 inch hose3/8 inch hose
    Best useNailers, inflation, short light jobsImpact tools, grinders, longer runs
    HandlingLighter and easier at the toolHeavier with a wider bend
    Flow resistanceHigher as demand and length riseLower for the same demand and length
    Common portable lengthShort workbench or trim hoseMain garage hose and reels
    CouplersMust still pass required flowLarge hose can be limited by small fittings

    These are use patterns, not universal ratings. Read the minimum hose size and air consumption in the tool manual. Start the rest of the system with the garage air compressor size guide, since no hose can supply airflow the pump never produces.

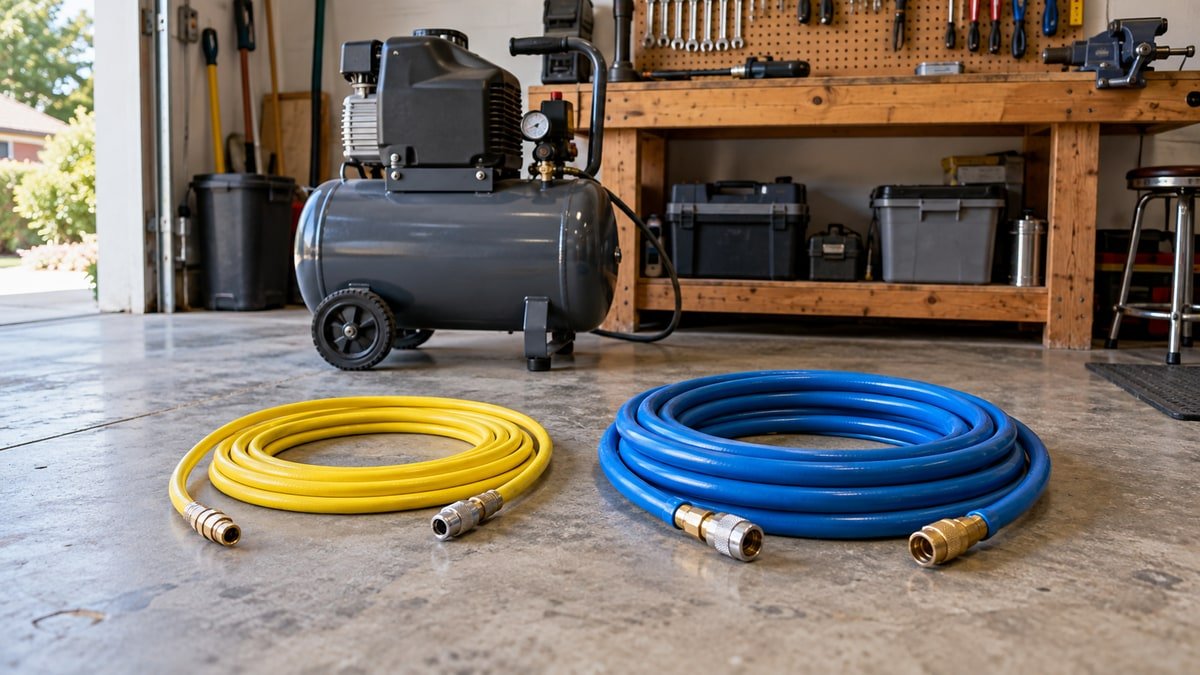
    Two air hose diameters compared with matching unbranded couplers
    Inside diameter affects flow resistance, while a restrictive plug or coupler can narrow either hose at the connection.

    Air hose inside diameter controls restriction

    Inside diameter is the open passage through the hose. Outside diameter includes reinforcement and cover material, so it cannot tell you how much room the air has. Two hoses with the same outside diameter may have different bores. Look for ID, inside diameter, or minimum hose size in the specifications.

    Restriction turns into pressure loss while the tool draws air. More flow, more length, and a smaller bore increase that loss. PORTER CABLE gives a sharp example in its pressure drop support note. At 15 SCFM through 25 feet, its table estimates a 29 PSI drop in a 1/4 inch hose and only 3 PSI in a 3/8 inch hose.

    That is a high demand case, so it should not be applied blindly to a brad nailer. It does show why a small hose can look fine on a static gauge and starve a tool once the trigger stays open.

    A 1/4 inch hose feels right with light tools

    A short 1/4 inch hose is pleasant for finish nailers, pin nailers, staplers, airbrushes, tire chucks, and blow guns used in brief bursts. It bends around table legs with less effort and puts less sideways pull on a small tool. When the compressor moves to the driveway, the lighter coil is easier to carry.

    Intermittent use is the reason it works. A nailer takes a small gulp, then waits while the user positions the next fastener. Tire inflation also pauses often. The hose has time to equalize between demands. A continuous grinder or sander does not give it that break.

    Keep the run short and use couplers whose flow rating suits the tool. A compact hose can be part of a tidy workbench position because it does not sweep as wide across the front edge. If the tool feels weak, test dynamic pressure before replacing the compressor.

    Compact quarter inch air hose connected to a finish nailer in a garage
    A light quarter inch hose feels pleasant with intermittent tools that do not consume much air.

    A 3/8 inch hose handles demanding garage work

    Between these two sizes, a 3/8 inch hose is the more forgiving starting point for many home garage main runs. It gives impact wrenches, ratchets, die grinders, small spray equipment, and other higher consumption tools more flow headroom. The advantage grows as the hose gets longer. Follow any tool manual that calls for 1/2 inch or larger. A 3/8 inch hose also makes sense on many reels because the full path may include a leader hose, swivel, internal reel passage, main hose, coupler, and short whip.

    Larger is not free. A 50 foot 3/8 inch rubber hose can be tiring at the wrist and awkward around a vehicle. A flexible material and sensible routing help. Some users keep a 3/8 inch main hose on the wall, then add a short light whip at the tool. That preserves most of the flow while reducing strain at the inlet.

    Check the tool maker’s recommendation. The Chicago Pneumatic air line guide tells users to follow the specified minimum inside diameter and discusses increasing diameter as hose length grows.

    Three eighths inch air hose supplying an impact wrench in a home workshop
    A three eighths inch hose gives longer runs and higher demand tools more room to breathe under load.

    Length changes the answer quickly

    Every foot adds resistance. A 1/4 inch hose that behaves well at 15 feet may feel different at 50 feet with the same tool. Coiled hose can add more actual length than its compact stored size suggests. Count the leader hose and whip too.

    Use the shortest route that still lets the tool reach the job without stretching. Stretching pulls on fittings, increases trip risk, and encourages the user to drag the compressor into awkward spots. If the garage needs 50 feet to work around two cars and into the driveway, 3/8 inch is usually the more forgiving main hose.

    Map the run through the garage workshop layout. A central drop or wall reel may cut the required length in half. Do not trade pressure loss for a hose that lies across every aisle. Routing and diameter belong in the same decision.

    Match hose size to tool CFM

    Find the tool’s stated air consumption at its required pressure. Some manuals give average consumption, while continuous operation can ask for more. Impact wrenches cycle, so the user’s pace matters. Sanders and grinders draw air for longer stretches and expose a restrictive hose sooner.

    Compare the tool requirement with delivered compressor output at the same pressure. Add the hose, regulator, filter, and fittings after that. A 3/8 inch hose cannot turn a 2 CFM compressor into a 6 CFM compressor. It can keep an already suitable compressor from losing as much performance on the way to the tool.

    Think in complete jobs. Removing four lug nuts is different from running a body shop impact all morning. A hobbyist may tolerate recovery pauses that would be unacceptable in paid work. Buy for the longest regular trigger time, not the most dramatic tool in the drawer.

    Couplers can become the narrowest point

    A wide hose with a small plug, restrictive quick coupler, undersized regulator, or clogged filter still has a bottleneck. The nominal thread size on a fitting does not reveal its internal flow area. Compare the coupler series and published flow data as a matched system.

    Do not mix plug profiles because they happen to click together once. A partial fit can leak, release unexpectedly, or restrict flow. Choose one compatible family for the garage and replace questionable pieces. Apply thread sealant only where the fitting maker permits it, and keep sealant away from the first thread so fragments do not enter the tool.

    Chicago Pneumatic notes in the same guide that each air line accessory creates pressure drop and that incorrect coupling dimensions can cause localized loss. That is why swapping only the hose may fail to fix a weak impact wrench.

    Measure pressure while air is moving

    Static pressure is the gauge reading with no flow. It can look perfect even when the hose is too small. Dynamic pressure is measured while the tool runs. To diagnose a problem, use a suitable gauge at the tool inlet, operate the tool in the manner stated by its maker, and compare the result with the required pressure.

    Start at the compressor outlet, then work downstream. A large drop across the regulator points to a regulator or flow problem. A drop after the hose points toward hose length, diameter, kinks, or fittings. Leaks can confuse every reading, so listen and use an approved leak detection method first.

    Never exceed the pressure rating of the hose, couplers, regulator, reel, or tool to hide a restriction. The lowest rated component sets the limit. Raising pressure can add risk and may damage the tool without correcting the real flow problem.

    Balance hose weight against tool control

    Hose weight is easy to dismiss until a small sander or nailer stays in the hand for an hour. A thick hose can steer the tool, rub paint, and tug at the wrist. A short flexible whip between the main line and tool can improve movement if every fitting and the whip itself meet the airflow and pressure requirements.

    Material changes handling too. Rubber, hybrid polymer, and polyurethane hoses of the same nominal diameter can feel different in cold weather and carry different outside diameters. Bend radius matters near the coupler. A tight kink reduces flow and weakens the hose wall.

    Store the coil on a broad hanger or compatible reel. Small hooks create sharp bends. Put hose accessories with the rest of the garage tool storage system so reducers and plugs do not migrate into unmarked bins.

    Route the hose away from tires and feet

    A hose across the center aisle will be stepped on, rolled over, and pulled around sharp corners. Route the main line along a wall or overhead where allowed, then bring a controlled working length to the job. Keep it clear of vehicle tires, doors, hot exhaust, grinding sparks, and sharp sheet metal.

    The garage workshop aisle clearance guide helps preserve a walking path when the car is parked. If a reel retracts the hose, set the stop so the coupling does not strike the ceiling or reel body. Guide the hose back by hand rather than letting it snap.

    Compressed air hoses store energy. Inspect the cover, end crimps, plugs, and couplers. Remove a damaged hose from service instead of wrapping a soft spot in tape. Depressurize before changing fittings, and follow the equipment manuals for isolation and maintenance.

    Use a two hose setup when the work is mixed

    Many garages do not need to choose one diameter for every task. A 3/8 inch main line can stay on a wall reel for vehicle and bench work. A short 1/4 inch hose can live with the finish nailer or inflator. Connect the light hose only when its tool demand and total length make sense.

    This arrangement reduces the temptation to drag 50 feet of heavy hose across a cabinet project. It also keeps the higher flow route ready for an impact wrench. Mark both coils by diameter at the coupler end, where the user can see the difference before connecting a tool.

    If two tools may run at the same time, size the compressor and distribution for combined demand. The layout in garage workshop zones can help separate a vehicle air station from the clean assembly bench without duplicating every accessory.

    Pick the smallest hose that passes the test

    Read the tool manual, record CFM and pressure, measure the real route, then select a diameter. For a short nailer hose, 1/4 inch is easy to live with. Between these two sizes, 3/8 inch is the better starting point for a 25 to 50 foot garage hose or a demanding tool. Follow a tool manual that requires something larger, and keep the fittings at least as capable as the hose.

    After assembly, check for leaks and measure pressure at the tool under normal flow. If performance is poor, trace the drop instead of buying random parts. A clogged filter, narrow coupler, weak regulator, or undersized compressor may be the culprit.

    For a garage that uses both nailers and high demand tools, keeping two hoses is often the most practical answer. Use the light line where it genuinely works and the larger line where demand rises. That costs a little more than one universal coil, but it gives the nailer a pleasant lead and the impact wrench the airflow it was designed to use.

    Useful products to compare

    These links open current Amazon search results. Check the dimensions, manual, mounting hardware, warranty, and current availability for the exact model before you order.

    Before you buy or install

    Read the current manual for the exact product you are considering. Confirm its assembled dimensions, rated capacity, mounting requirements, included hardware, working clearances, warranty, and any limits that apply to your wall, floor, electrical circuit, or garage layout.

    Frequently asked questions

    Is a 1/4 inch air hose enough for an impact wrench?

    It may handle brief use with some compact impacts, but longer runs and higher demand models can lose substantial pressure through a 1/4 inch hose. Follow the wrench maker minimum inside diameter and CFM guidance. A 3/8 inch hose is usually the more forgiving garage choice for wheel work.

    Does a 3/8 inch air hose use more air?

    The tool determines its air demand. A 3/8 inch hose does not force the tool to consume more simply because it is larger. It reduces restriction, so a tool that was starved by a smaller hose may finally receive the flow and pressure intended by its design.

    Can I put quarter inch fittings on a 3/8 inch hose?

    Thread size, plug profile, and internal flow area are separate details. A fitting may screw onto the hose yet become the narrowest part of the system. Use compatible fittings rated for the required pressure and flow, and keep one coupler family throughout the garage.

    What air hose diameter is best for a 50 foot run?

    A 3/8 inch hose is a sensible starting point for many 50 foot home garage runs because pressure loss grows with length. High consumption tools may need an even larger passage. Check the tool and hose maker data, then verify dynamic pressure at the inlet.

    Why does my air tool feel weak when the gauge reads 90 PSI?

    The gauge may show static pressure with no air moving. The reading can fall when the tool runs because of a narrow hose, long run, restrictive coupler, regulator, dirty filter, leak, or inadequate compressor output. Measure pressure at the tool under flow to find the drop.

  • Rubber vs Hybrid vs Polyurethane Air Hose: Which Fits?

    Rubber vs Hybrid vs Polyurethane Air Hose: Which Fits?

    Affiliate disclosure: As an Amazon Associate I earn from qualifying purchases. This article may contain affiliate links, and Bay & Bench may earn a commission at no extra cost to you. Read our full Affiliate Disclosure.

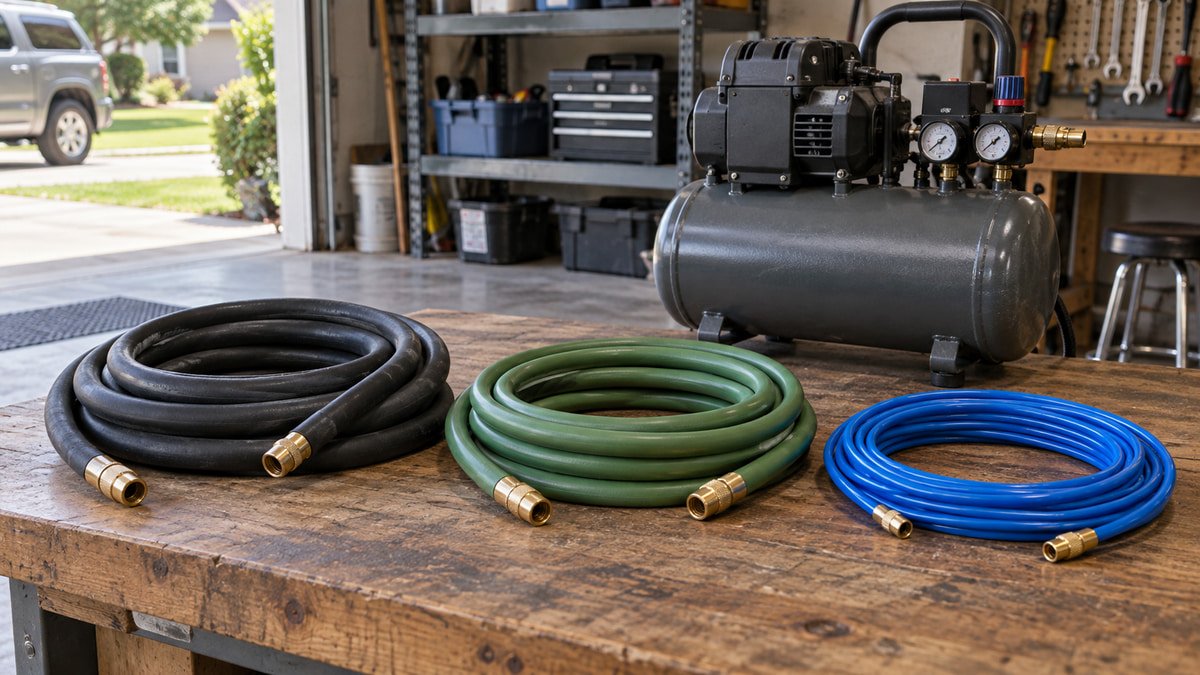
    The rubber vs hybrid vs polyurethane air hose choice is mostly about how the hose behaves between the compressor and your hand. Rubber usually feels substantial and lies flat. Hybrid polymer tends to be lighter while retaining a relaxed, flexible feel. Polyurethane can be noticeably light and compact, which suits trim tools and small work areas, though some versions feel springier underfoot.

    Material alone never tells the whole story. Hose diameter, length, reinforcement, cover compound, pressure rating, fittings, and temperature range vary from one model to another. A well made hose of any of these materials can beat a poorly matched alternative. This guide sorts the practical differences, then turns them into a buying decision for vehicle work, woodworking, inflation, and general garage jobs.

    Quick answer

    Choose rubber when you want a hose that lies flat and tolerates rough floor use, and you do not mind extra weight. Choose hybrid polymer for a lighter general purpose garage hose with easy coiling. Choose polyurethane for small pneumatic tools when low drag and compact storage matter most. Verify the exact pressure, temperature, chemical, and fitting specifications before buying.

    How rubber vs hybrid vs polyurethane air hose materials differ

    There is no automatic winner. The better material is the one that creates the fewest annoyances during the job you repeat. A vehicle bay rewards a hose that stays on the floor. A finish bench rewards low pull at the tool. A cold detached garage exposes stiffness that never appears in a warm store.

    Decision pointRubberHybrid polymerPolyurethane
    Typical feelDense, soft, plantedSupple with moderate weightLight, smooth, compact
    Floor behaviorOften lies flat wellUsually easy to straightenCan feel lively in a long straight run
    Tool dragOften higher; verify the listed hose weightMiddle groundOften lowest
    Cold useDepends heavily on compoundMany garage models target cold flexibilityRating and formulation vary
    StorageNeeds a broad hanger or reelCoils without much effortSmall coil or recoil format
    Good starting useVehicle and floor workOne hose for mixed garage jobsNailers and light bench tools

    Treat that table as a feel guide, not a specification sheet. Parker, for example, lists an EPDM tube, a 300 PSI maximum working pressure, and a range from minus 40 to 212 degrees Fahrenheit for one GST II rubber air hose. Another rubber hose may use a different compound and a much narrower range. The label on the package should win over a broad material rule.

    Begin with the route the hose must travel

    Walk from the compressor to each normal work spot. Measure around the car, not through it, and include the few feet needed to move the tool without stretching the line. A 25 foot hose can be calmer than a 50 foot hose if it reaches everything. Excess length adds weight, tangles, and more cover to drag across edges.

    Notice where the line crosses a doorway, turns around a cabinet, or passes the vehicle tire. Rubber can stay planted at a crossing but feels heavy when pulled around the whole bay. Polyurethane is easier to carry, yet a very light line may follow the tool and form loops in the aisle. Hybrid often lands between those behaviors.

    Plot that path beside the garage workshop layout guide. The route may reveal that a better compressor position or a wall drop removes 20 feet of hose. Material cannot rescue a line that is always stretched across the busiest walking route.

    Rubber stays planted during rough vehicle work

    Rubber earns fans because it feels settled. A broad loop tends to lie where it is placed instead of trying to return to a tight coil. Around a wheel, that can mean less tug on an impact wrench and fewer loops sliding under the user’s feet. Its thick cover also feels at home on ordinary concrete.

    The cost is weight. Fifty feet of substantial rubber follows every trip around the vehicle, and the last ten feet can pull at a compact tool. It also occupies more room on a hook or reel. That does not make rubber outdated. It makes it better suited to a main line that stays near the floor than a tiny hose carried between rooms.

    Vehicle work still depends on enough delivered air. Use the garage air compressor size guide to compare tool demand with compressor output, then check the hose inside diameter. A thick cover can look capable while hiding a bore that is too small for the run.

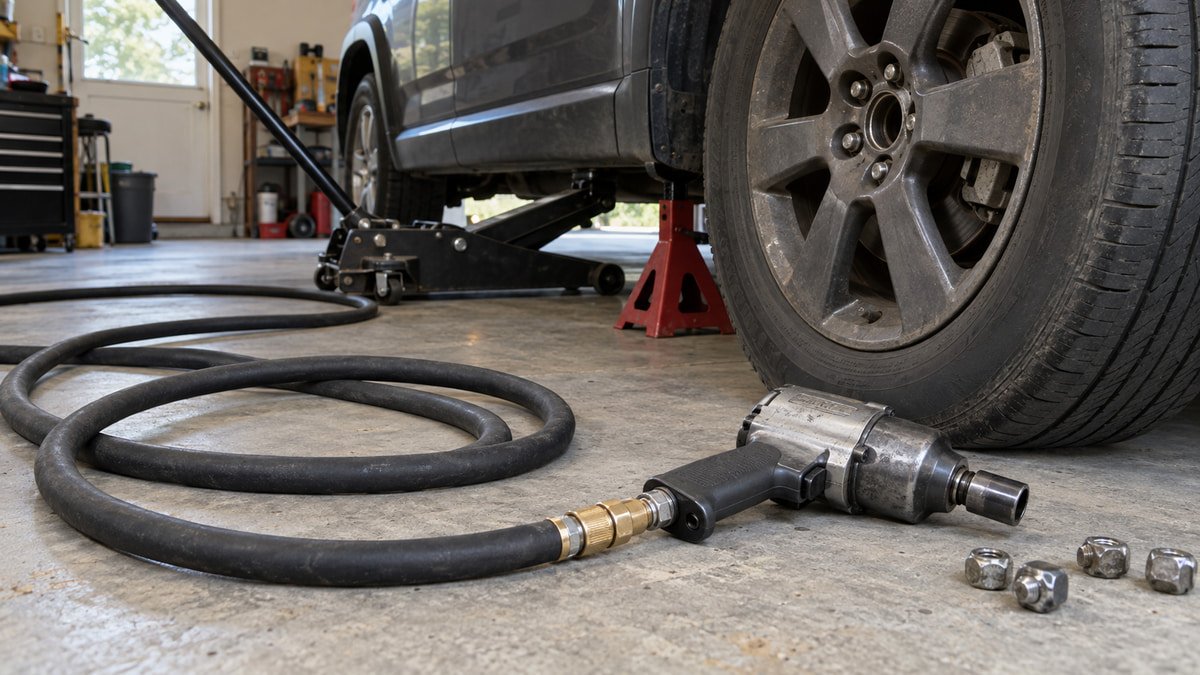
    Heavy black rubber air hose connected to a garage impact wrench
    Rubber feels substantial and tends to stay put during vehicle work, though its weight follows the user around the bay.

    Hybrid polymer is the easy general purpose compromise

    Hybrid polymer hoses are blends, so the name describes a family rather than one recipe. Good examples combine low weight, easy coiling, and a soft feel on the floor. That mix makes sense in a garage where the same hose inflates tires, runs a nailer, and occasionally feeds an impact wrench.

    Do not assume every hybrid hose behaves the same. Wall thickness, reinforcement, outside cover, and fittings can change the experience. Flexzilla lists its SmartFlex hybrid polymer air hose with a 300 PSI working pressure and a stated temperature range from minus 30 to 140 degrees Fahrenheit. Those numbers describe that line, not every green or hybrid hose on a marketplace page.

    Hybrid is my first place to look when one hose must cover mixed home use. It is light enough to move without a fight and usually calm enough for floor work. Still, compare the actual weight and cold rating. A vague claim such as all weather tells less than two published temperatures.

    Flexible green hybrid polymer air hose on a cold garage floor
    A good hybrid hose stays manageable in a cool garage, but the published temperature range still needs checking.

    Polyurethane keeps a small air tool feeling light

    A finish nailer, pin nailer, airbrush, or blow gun does not need a heavy tail. Polyurethane can make that connection feel almost like an electrical cord. It stores in a tight space and works especially well as a short bench hose or tool whip. Recoil versions suit stations where the tool returns to one spot.

    Light weight has another side. A long straight polyurethane line may retain more memory or move when pressure changes, depending on its construction. A tight recoil hose can pull constantly toward its stored shape. That spring force is useful over a bench and tiresome when precise tool placement matters.

    Parker lists its industrial 83FR polyurethane hose with low weight, abrasion resistance, and a compact bend radius. It also publishes model specific pressure and temperature limits. Consumer garage hoses differ, but the bulletin illustrates why polyurethane appears in industrial pneumatic and robotic applications where routing and repeated movement matter.

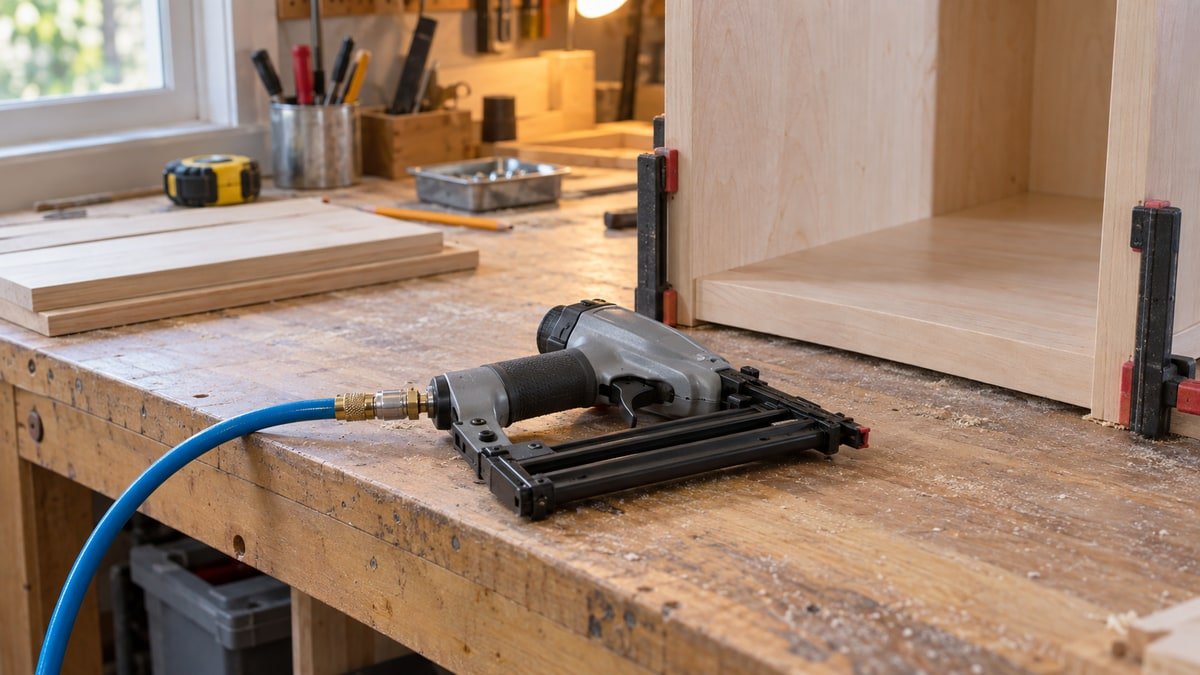
    Light blue polyurethane air hose connected to a finish nailer
    A slim polyurethane hose puts less drag on a small nailer and stores in a compact coil near the bench.

    Cold weather can change the winner by breakfast

    A hose that coils politely at 70 degrees can become a stubborn ring after a winter night. This is where casual material rankings break down. There are cold rated rubber hoses, flexible hybrid formulas, and polyurethane products with broad ranges. There are also cheap versions of each that turn awkward well above their advertised minimum.

    Use the manufacturer’s operating range as the first screen, then read owner reports for handling near your real temperature. A pressure rating may fall as heat rises, and low temperature flexibility is not the same as permission to bend a frozen hose sharply. Bring the line up to a safe working temperature if its manual calls for it.

    Keep the stored coil broad and relaxed. Hanging a cold hose from one small nail creates a sharp bend at the same spot every day. Put the compressor and hose in a zone planned through the garage workshop zones guide, away from the overhead door seal where weather and traffic meet.

    Heat, oil, and chemicals need exact compatibility data

    Air hose on a garage floor may touch motor oil, cleaners, paint residue, sunlight near an open door, and hot metal. A generic material label does not promise resistance to all of them. The inner tube and outer cover can use different compounds, and reinforcement adds another layer that shoppers cannot see.

    Read the media, temperature, and cover resistance information for the exact stock number. A rubber tube may resist oil while its outer cover has another rating. One polyurethane formulation can tolerate abrasion nicely but react poorly to a solvent. Hybrid recipes are proprietary blends, which makes model data more useful than guesses based on color.

    Wipe contamination off soon and inspect the area after cleaning. Swelling, softness, cracking, discoloration, or a sticky surface are reasons to stop using the line. Do not wash an unknown chemical deeper into the hose cover, and do not run the hose across hot exhaust or fresh welding debris.

    Coil memory and drag show up in ordinary jobs

    Shopping pages talk about flexibility. The garage exposes memory. Memory is the hose’s urge to return to the shape it held in storage. A line with strong memory forms loops that catch a caster or rub the car. A heavy line with little memory may lie flat but make the tool feel tethered.

    Think about which end moves. At a fixed tire inflator, a moderate coil is harmless. During cabinet assembly, the tool crosses the workpiece and a light hose matters. While removing wheels, the hose rests mostly on the floor, so planted behavior matters more than compact storage.

    A short whip can separate those needs. Keep a full size main hose for airflow, then add a light, compatible whip near the tool. Every extra joint adds another possible leak and restriction, so match the coupler family and inspect the connections. Store those small fittings with the system described in the garage tool storage guide.

    Diameter and fittings can outweigh the material choice

    Two hoses can share the same outside appearance and deliver very different airflow. Inside diameter creates the passage. Length, couplers, regulator, filter, and reel add resistance. A light polyurethane hose that is too narrow may starve a grinder, while a larger hybrid line supplies it without trouble.

    Start with the tool maker’s required pressure, air consumption, and minimum hose size. Compare those numbers with compressor output at the same pressure. Then look at the full route, including a reel leader and whip. Static gauge pressure with the trigger released does not show the drop that appears while air moves.

    Do not raise regulator pressure beyond any component rating to hide a restriction. Fix the narrow fitting, excessive length, kink, leak, or undersized compressor. Material affects handling; the bore and fittings decide whether enough air gets through.

    A reel changes how every material feels

    A wall reel removes loose coils from the floor, but its drum, swivel, leader hose, and bend radius become part of the system. Thick rubber needs enough drum space and should not be forced into a tight wrap. A very light polyurethane line may wind compactly but can feel springy at full extension. Hybrid is common on garage reels because it balances the two.

    Check whether the reel ships with a hose or accepts a replacement. Some assemblies are designed around one length and outside diameter. Confirm the working pressure of the reel and swivel, not just the hose. Mount the unit where the line pulls mostly straight rather than scraping a cabinet corner.

    Keep the retracting path out of the main garage aisle. Guide a retractable hose back by hand and set the stop so the coupler cannot strike the housing. A reel solves storage only when its location also suits the work.

    Inspect the cover, ends, and any repair fitting

    Before use, look along the full hose. Cuts, exposed reinforcement, bubbles, soft spots, crushed areas, loose crimps, bent plugs, or a changed section near the coupler deserve attention. Depressurize the system before touching a connection. Tape over a damaged cover hides evidence; it does not restore the rated assembly.

    Some hoses are sold as field repairable and use a maker approved fitting. Others rely on factory crimps and should be replaced as an assembly. Follow the instructions for that model. A random barb and worm clamp may fit physically without being suitable for compressed air pressure and impulse.

    The OSHA construction rule for pneumatic tools says manufacturer safe operating pressure for hoses and fittings must not be exceeded. Home garage users are not reading it as a product manual, but the principle is sensible: the lowest rated part sets the ceiling. Inspect the hose, connectors, regulator, and tool as one system.

    A two hose setup can be simpler than one universal hose

    One main 3/8 inch rubber or hybrid hose can cover the floor route and higher demand tools. A short light polyurethane hose can stay at the assembly bench for nailers and a blow gun. That pair often feels better than dragging one 50 foot coil into every task.

    Position the bench before fixing either route. The workbench placement guide accounts for doors, car clearance, outlets, and stock movement. A five foot change in bench location can remove a troublesome hose crossing and may save more frustration than changing material.

    Choose the hose by its main job and weakest condition

    For vehicle service on a concrete floor, start with rubber or a substantial hybrid. Compare weight if the hose must reach the driveway. For mixed garage use, a flexible hybrid is the most sensible first candidate. For trim work and compact bench tools, polyurethane deserves a close look because low drag is easy to feel.

    Then test the weakest condition. That might be January temperature, a 50 foot route, a hungry impact wrench, or repeated contact with a rough threshold. Read the exact pressure and temperature range, check chemical compatibility, confirm fitting profile, and compare the total assembled weight.

    The best air hose material reaches the work, supplies the tool, stores without a fight, and survives the surfaces it touches. Once those facts are clear, the material choice is usually straightforward.

    Useful products to compare

    These links open current Amazon search results. Check the dimensions, manual, mounting hardware, warranty, and current availability for the exact model before you order.

    Before you buy or install

    Read the current manual for the exact product you are considering. Confirm its assembled dimensions, rated capacity, mounting requirements, included hardware, working clearances, warranty, and any limits that apply to your wall, floor, electrical circuit, or garage layout.

    Frequently asked questions

    Is rubber or hybrid air hose better for a home garage?

    Rubber is a good choice when the hose spends most of its time on the floor and low coil memory matters more than weight. Hybrid is easier to carry and store for mixed jobs. Compare the exact cold rating, outside cover, working pressure, and weight because both categories contain very different models.

    Does polyurethane air hose kink more easily?

    It depends on the hose construction, wall thickness, bend radius, and storage shape. Polyurethane can have a compact bend radius and strong abrasion resistance, but a light line may retain coil memory or fold at a sharp corner. Follow the maker bend guidance and do not pull any hose tight around an edge.

    Which air hose material is best in cold weather?

    Use the published minimum operating temperature for the exact model. Many hybrid hoses are sold for cold flexibility, yet cold rated rubber and polyurethane products also exist. Let the line warm if required, avoid sharp bends while it is stiff, and replace a cover that cracks after cold use.

    Can I use a polyurethane hose with an impact wrench?

    Yes, if its inside diameter, length, pressure rating, fittings, and airflow support the wrench. Material does not set flow by itself. Many light polyurethane hoses are narrow and better suited to nailers, so check the tool manual and measure pressure at the inlet while the wrench runs.

    How should an air hose be stored in a garage?

    Depressurize it as directed, wipe it clean, and store it in broad relaxed coils on a suitable hanger or compatible reel. Keep it away from sunlight, heat, sharp edges, oil spills, and vehicle tires. Inspect both ends and the cover before the next use.

  • Where to Mount an Air Hose Reel in a Garage: 5 Checks

    Where to Mount an Air Hose Reel in a Garage: 5 Checks

    Affiliate disclosure: As an Amazon Associate I earn from qualifying purchases. This article may contain affiliate links, and Bay & Bench may earn a commission at no extra cost to you. Read our full Affiliate Disclosure.

    Figuring out where to mount an air hose reel starts with the jobs at the far end of the hose, not with an empty patch of wall. A tidy reel can still fail if the hose rubs a vehicle or reaches the driveway only when stretched tight.

    A good location covers the workbench and vehicle, stays clear of the garage door, connects to sound structure, and gives you a controlled return path. There is no standard mounting height or universal fastener list that works for every reel and every wall. The exact model manual and the building structure decide those details.

    Quick answer

    Mount the reel where a length of hose reaches the farthest regular job with slack, while the reel and hose remain clear of the garage door, vehicle, doors, cabinets, and walking routes. A central side wall often works well. Use only a wall, ceiling, post, or backing assembly approved for the exact reel, follow its mounting pattern, and test the pull and controlled return before settling on the location.

    Begin at the farthest job, then work backward

    List the places that need air during an ordinary month. Common stops include the main workbench, each side of the parked vehicle, the driveway, a mower near the door, and a finishing table. Ignore the one project that might happen someday. A permanent reel should make frequent work easier rather than chase every corner of the property.

    Measure the hose path, not a straight line through cabinets and cars. Walk the route that the hose would take around the front of a vehicle, past a bench leg, and through the open garage door. Add a modest amount of slack so the coupler is not carrying a constant side pull. Then compare that result with the usable tool-side hose length stated for the reel. The bumper position and the wraps that must remain on the drum may reduce usable reach. Do not count the supply-side leader hose toward the tool path.

    This is easier after the room has working zones. The garage workshop zones guide helps separate parking, storage, and project space before a reel claims part of a wall. Mark the farthest regular task on the floor with tape. If two possible reel locations both reach it, choose between them using the next checks rather than buying a longer hose immediately.

    Homeowner testing air hose reach before choosing a permanent reel location
    A temporary mockup and loose hose reveal awkward corners before the first mounting hole is drilled.

    Where to mount an air hose reel in five common garage zones

    Most home garages offer five realistic zones. Each can work, but the tradeoffs are quite different once the door and car start moving.

    Possible locationWhy it can workMain check before drillingBest fit
    Central side wallBalanced reach to bench, car, and drivewayCar door, cabinet, and walking clearanceMixed garage work
    Wall beside workbenchShort tool connection and easy inspectionReach to the far side of the carBench focused projects
    Wall near garage openingEasy access to driveway workDoor track, weather, and vehicle cornerTires and outdoor equipment
    Ceiling or overhead framingOpen wall space and broad pull directionApproved overhead support and service accessOpen center bay
    Structural post or partitionGood central position in a divided shopPost construction and swing clearanceDedicated workshop bay

    A central side wall is the most forgiving starting point in many two car garages. The hose can fan toward the bench, vehicle, and open door without hanging above the car. Still, it only works if the reel body does not crowd a car door or narrow the route into the house. Use the garage workshop layout guide to test the whole room rather than judging one clear photograph.

    Mounting beside the compressor is convenient for the inlet line, but compressor location and reel location solve different problems. The compressor needs ventilation, electrical access, drainage access, and room for service. The reel needs reach and a clean pull. A short leader hose can connect two sensible locations. Do not force them together just to save a few feet of inlet line.

    Wall mounting is usually easier to live with

    A wall mounted reel stays visible. You can inspect the bracket, swivel, hose, and stop without climbing. The user can also guide the hose back while standing on the floor. Those small conveniences matter because a retractable reel works best when it is treated like equipment, not forgotten decoration.

    A fixed wall bracket favors pulls that leave mostly in front of the guide. A swing bracket may cover a wider angle, but it creates a moving envelope of its own. Confirm that the bracket is made for the reel, then swing it through the full arc with nearby drawers, shelves, light switches, and vehicle mirrors in place. The reel should not become a heavy doorstop.

    Workbench placement affects the answer. A reel mounted behind a deep bench may be hard to reach for service, and the hose can drag across workpieces. A location just beyond the bench end often gives a cleaner line. Review where to put a workbench in a garage before committing both fixtures to the same busy wall.

    Ceiling mounting trades wall space for harder service

    A ceiling location can give an even pull across an open bay. It also keeps the reel body away from cabinets. The downside arrives during installation and maintenance. Every mounting point is overhead, the reel is harder to inspect, and the hose end may hang in the same volume used by a raised hatch, roof rack, or garage door.

    Do not assume a reel that can sit on a wall can automatically hang overhead. The manual must allow that orientation, show the correct guide position, and describe the mounting arrangement. Coxreels safety guidance says an overhead reel must not be supported solely by bolts in tension and calls for a safety chain or cable. The exact product manual may add stricter instructions, so follow the document for the reel in front of you.

    Service access belongs in the plan too. If normal inspection requires placing a ladder between a parked car and a freezer, the location will be neglected. A lower wall position may be less visually neat and much more usable. When overhead mounting is still the better fit, have uncertain framing or connections reviewed by a qualified installer.

    Keep the reel outside every garage door path

    The open door is only one position. Panels travel along curved tracks. Rollers move, hinges fold, the opener trolley runs, and the emergency release hangs down. Torsion springs and lift cables need untouched working space. Keep the reel, bracket, leader hose, and pulled hose away from all of it.

    Cycle the door while watching from several angles, following the door maker’s safety directions. Park the tallest expected vehicle and open its hatch. Check roof bars, antennas, mirrors, and the arc of each passenger door. A wall that looks empty with the garage vacant may become the tightest point once the family car comes home.

    Do not attach the reel to door tracks, opener supports, or another system just because the metal looks stout. Those parts have their own job and approved loads. A nearby structural wall section is easier to reason about. If the door hardware leaves no dependable gap, move the reel rather than improvising a shared bracket.

    Make the structure carry the pulling load

    A loaded reel does more than hang. Each pull adds leverage to the bracket, and retraction adds repeated movement. Drywall, thin paneling, and a storage cabinet skin are not a complete load path. The mounting points must transfer the reel forces into structure in the way its maker specifies.

    Use the paper template or dimensional drawing for the exact model. Confirm the hole pattern before adding a backer. A wood board spanning framing can be useful when it is designed and attached for the load, but a random piece of plywood is not proof of capacity. Wall framing, masonry condition, fastener type, edge distance, and bracket shape all affect the result. This is the point to ask a carpenter, contractor, or engineer when the wall is unusual or concealed.

    Reelcraft’s Series RT operating instructions tell installers to use the supplied mounting template for the specific application and to secure that reel with four mounting bolts. That does not make four bolts a rule for every product. It shows why the current manual and its exact pattern come before a shopping list. The structural image here is illustrative rather than a fastener prescription.

    Air hose reel bracket mounted on substantial plywood backing across wall framing
    Illustrative backing layout only; concealed fasteners are not shown. The exact reel manual and verified wall structure must determine the complete load path.

    Treat mounting height as a working variable

    There is no magic eye level number. The reel needs to clear normal traffic, yet remain reachable for inspection and controlled hose return. The guide angle should suit the direction of pull. The stop ball should finish where the user can take the hose without jumping, stretching, or leaving a long tail at face height.

    Test the height with a cardboard outline the size of the reel. Include the bracket and the space needed to swing or remove a cover. Have the shortest regular user reach toward the hose end with both feet on the floor. Then have the tallest person walk underneath. A comfortable compromise is more useful than a tidy line with the top of the cabinets.

    Manufacturer limits still control the final choice. Some manuals state a maximum installation height or restrict a mounting orientation. Others call for the guide arm or bumper stop to be repositioned. Read those instructions before treating a mockup position as approved. Never change spring tension or open a spring housing merely to make a poor location feel better.

    Plan the inlet connection before the bracket

    The supply side is easy to forget because product photos face the hose outlet toward the camera. Behind the reel, the inlet must connect without kinking, rubbing, or forcing the swivel sideways. Leave room for the fittings, the leader hose, and whatever shutoff or filter arrangement the compressor maker calls for.

    The Reelcraft Series RT instructions call for a flexible hose at the input rather than rigid plumbing for that model. A flexible connection can prevent alignment stress, but its size, pressure rating, bend radius, and fittings must match the reel and air system. Do not copy a leader hose from a photograph. Check the reel inlet, compressor outlet, working pressure, and local piping requirements.

    A compressor that barely supplies the tool will not improve because the reel sits closer. Flow depends on compressor delivery, hose inside diameter, length, couplers, and restrictions. Our garage air compressor size guide covers that side of the system. Choose reel placement for movement and reach, then size the air path as one connected system.

    Point the guide along the real pull direction

    A hose lasts longer when it leaves the roller or guide without a sharp sideways bend. Stand at each regular task and look back at the proposed reel. If every pull crosses the edge of the guide, the location or guide orientation needs work. A pivoting bracket can help, though it must remain stable and clear throughout its travel.

    Some enclosed reels allow the guide opening or enclosure to be repositioned for wall, ceiling, or side mounting. Reelcraft explains that process for specific enclosed models in its guide opening adjustment note. Use the instructions for your series. Do not rotate a cover or guide by analogy when the manufacturer has not approved it.

    Test pulls should be slow and unpressurized until the installation is complete and inspected. Extend the hose toward the bench, both sides of the vehicle, and the driveway. Watch the guide, the bracket, and the leader line. If the reel twists, a fitting contacts the wall, or the hose scrapes a corner, stop and correct the setup before connecting the air supply.

    Protect the aisle during use and return

    A reel removes stored coils from the floor, but the hose still crosses the room while a tool is running. Pick a location that keeps the working route near a wall or along the edge of a bay when possible. Crossing the only path to the house turns a quick tire check into a trip hazard for everyone else.

    Think about the return path before the pull. You should be able to walk the hose back without squeezing between a car and shelving. Keep the fitting in hand and allow the reel to retract at a controlled pace. Do not let the end fly toward the guide. That habit protects the coupler, stop, surrounding paint, and anyone who steps into the garage.

    The garage workshop aisle clearance guide can help preserve a usable route around a project. Store blow guns and inflators near the reel without letting them dangle from the coupler. The broader garage tool storage guide offers better homes for those attachments.

    Homeowner guiding an air hose slowly back toward a wall mounted reel
    Walking the hose back under hand control keeps the end fitting from snapping across the garage.

    Use a final location check before installation

    A strong candidate passes five tests. It reaches the farthest regular task with slack. It stays outside door and vehicle movement. Its bracket can connect to verified structure exactly as the manual describes. Its inlet has a suitable route. And the user can pull, latch, inspect, and guide the hose home from a steady stance.

    Confirm the reel pressure rating, hose size, operating temperature, orientation, mounting pattern, fasteners, guide position, stop location, and service clearance from current documentation. Product families change. Instructions for a similar looking model may not apply. Keep the manual with the compressor records so the next owner knows what was installed.

    For many garages, the answer is a central side wall between the workbench and vehicle bay. Sometimes the door, framing, or inlet route makes another position better. Let the mockup and measurements overrule the clean catalog picture. A reel earns its wall space when the hose reaches easily, comes back under control, and disappears from the floor when the job is done.

    Useful products to compare

    These links open current Amazon search results. Check the dimensions, manual, mounting hardware, warranty, and current availability for the exact model before you order.

    Before you buy or install

    Read the current manual for the exact product you are considering. Confirm its assembled dimensions, rated capacity, mounting requirements, included hardware, working clearances, warranty, and any limits that apply to your wall, floor, electrical circuit, or garage layout.

    Frequently asked questions

    Is it better to mount an air hose reel on the wall or ceiling?

    A wall usually makes inspection, hose control, and service easier. A ceiling can give broad reach when wall space is scarce, but it needs an approved overhead orientation, verified structure, door and vehicle clearance, and safe service access. Follow the exact reel manual because mounting choices differ by series.

    How high should an air hose reel be mounted?

    There is no universal height. Place it where the hose end is reachable from the floor, the guide matches the normal pull, the reel clears traffic, and maintenance remains practical. Then check the exact manual for any height or orientation limit. Test a full size cardboard mockup with every regular user.

    Can I mount an air hose reel directly to drywall?

    Drywall alone is not a suitable structural load path for a hose reel. Use the mounting arrangement required by the manufacturer and suited to verified framing or masonry. A backing board can be part of a sound assembly, but its material, span, attachment, and fasteners need to carry the real pulling loads.

    Should the air hose reel be next to the compressor?

    Only if that spot also gives good reach and clearance. The compressor location is chosen for ventilation, service, drainage, power, and noise. The reel location is chosen for hose movement. A correctly sized flexible leader can connect separate locations when the reel and compressor manuals allow it.

    How do I stop a retractable air hose from whipping back?

    Keep control of the hose end and walk it toward the reel while it retracts. Do not release it from across the garage. Stop using a reel that retracts, latches, or guides the hose abnormally. Depressurize the system and follow the manufacturer service instructions rather than opening a spring housing.

  • Garage Air Compressor Size Guide: Match Air Delivery to the Job

    Garage Air Compressor Size Guide: Match Air Delivery to the Job

    Affiliate disclosure: As an Amazon Associate I earn from qualifying purchases. This article may contain affiliate links, and Bay & Bench may earn a commission at no extra cost to you. Read our full Affiliate Disclosure.

    This garage air compressor size guide starts with the number printed on the air tool, not the gallon badge on the tank. A compact compressor can run a brad nailer because the tool uses short bursts and waits between fasteners. The same machine may disappoint with a die grinder or orbital sander that consumes air continuously. Tank volume can soften a brief peak, but it cannot make a small pump replace air as quickly as a demanding tool uses it. Match delivered airflow at the required pressure, then check the duty pattern, electrical supply, noise, footprint, and maintenance access.

    Quick answer

    Find the required CFM or SCFM and PSI in the manual for every air tool you intend to use. Size around the most demanding tool you plan to run, or add demands only when tools truly operate at the same time. Choose a compressor whose rated delivery at that pressure exceeds the requirement with reasonable breathing room for hose losses and recovery. Then verify duty cycle, voltage, startup current, sound level, tank orientation, drain access, hose size, and the compressor maker’s ventilation clearances.

    Garage air compressor size guide: begin with the tool manual

    Make a short worksheet before comparing compressors. For each pneumatic tool, record the manufacturer’s airflow requirement, working pressure, inlet size, recommended hose, and expected duty pattern. Note whether the published flow is average use or continuous consumption. The difference matters. An impact wrench may consume air in several short pulls, while a sander can keep asking until the compressor falls behind.

    Use current documentation for the exact tool model. Ingersoll Rand’s air-consumption chart, for example, lists typical averages such as 4 CFM for a half-inch impact wrench, 5 CFM for a quarter-inch die grinder, and 10 CFM for an orbital sander. The chart also tells readers to check the tool manufacturer for actual consumption. Treat the examples as a first sort, not a substitute for the manual in your hand.

    Add the work pattern in plain English: six lug nuts, fifty brads, ten minutes of sanding, or a quick tire top-up. That description keeps the purchase grounded. A compressor for occasional trim work is a different machine from one expected to sand panels through an afternoon.

    Read CFM, PSI, tank volume, and duty as separate facts

    SpecificationWhat it tells youWhat it does not tell youBuying check
    CFM or SCFM at a stated PSIRated air delivery under the stated test conditionPerformance at every pressure or hose setupCompare at the pressure your tool needs
    Maximum PSIUpper pressure limit or storage capabilityHow much air the pump delivers while workingDo not use max PSI as a power ranking
    Tank gallonsStored-air buffer and part of the machine’s footprintSustained pump outputUse it to judge cycling and portability after CFM
    Duty cycleHow long the pump may run within a stated period or conditionPermission to ignore cooling and ventilationRead the model’s manual, not a generic definition
    Sound ratingNoise measured under the maker’s stated methodHow the garage will amplify vibrationCompare published conditions and placement

    Never compare one compressor’s CFM at 40 PSI with another’s figure at 90 PSI as though they are the same measurement. Look for the delivery rating closest to the tool’s working pressure. Also distinguish pump displacement or intake claims from delivered air. The useful number is the manufacturer’s rated output at a stated downstream pressure.

    Tank size deserves attention, just later in the sequence. A larger receiver gives a short tool more reserve and may lengthen the pause between pump starts. Once that reserve drops, the pump still has to replace what the tool consumes. If continuous demand exceeds delivered flow, the pressure will fall or work will pause while the compressor recovers.

    Match the hardest real tool cycle

    Choose the highest verified airflow demand among tools that run one at a time. Do not add every tool in the cabinet. If two people will operate tools simultaneously, or a pneumatic device runs while another consumes air, add only those overlapping demands and follow the compressor manufacturer’s sizing advice.

    Leave practical margin above the documented requirement. Hose length, fittings, regulators, elevation, temperature, and normal wear can reduce what reaches the tool. There is no universal percentage that fits every installation, so avoid turning a convenient buffer into a law. The sound decision is a rated output clearly above the tool’s need at the correct pressure, backed by the manuals for the compressor, tool, and accessories.

    Consider how tolerant the job is of waiting. Framing one small wall can survive an occasional recovery pause. Paint finishing, continuous sanding, or production work is less forgiving. If the tool manual specifies a much larger compressor, do not plan to defeat the mismatch with a larger portable tank. Stored air changes timing, not sustained delivery.

    Pneumatic impact wrench, brad nailer, tire inflator, and sander arranged beside an air compressor manual
    Air tools that look equally portable can ask for very different flow, pressure, and run time.

    Use current compressor examples as brackets, not winners

    Current manufacturer specifications show how quickly the categories separate. Makita rates the portable MAC210Q at 2.0 CFM at 90 PSI with a 2-gallon tank, 135 PSI maximum pressure, and a stated 60 dB noise level. That profile suits intermittent tasks whose documented demand fits the output. It is not a sensible match for a continuous 5 or 10 CFM tool.

    California Air Tools rates its 10020C at 5.30 CFM at 90 PSI with a 10-gallon tank and a stated 70 dB sound level. DeWalt lists 6.2 SCFM at 90 PSI for the current DXCM201 20-gallon model. Those numbers place the machines in different airflow and footprint brackets, but they still do not answer whether a specific sander, spray gun, or grinder is supported.

    Compare weight, dimensions, voltage, oil requirements, warranty, duty guidance, and available service along with output. Product pages and model specifications can change, so check the current manual before buying. The right bracket is the one that supports your hardest tool cycle and still fits its assigned spot in the garage.

    Let tank size follow the work rhythm

    A small tank keeps the compressor lighter and easier to carry. It works well when the tool uses quick bursts and the pump can recover between them. A larger tank adds stored air, reduces how abruptly a brief demand reaches the pump, and may make intermittent work feel calmer. It also adds weight, floor area, and more condensate capacity to manage.

    Horizontal tanks often fit under a bench or shelf, while vertical tanks use less floor area but claim height and can be awkward near garage-door tracks. Draw the complete machine in its operating position, including handle, wheels, gauges, hose connection, intake, drain, and access panel. The garage measurement process catches conflicts with the curb, car door, and overhead hardware.

    Do not wedge a compressor into the smallest outline it can physically occupy. The motor and pump need the clearances and ventilation stated by the manufacturer. The drain needs access, and a serviceable machine may need to roll straight forward. A two-gallon unit that lives on a shelf can be more useful than a twenty-gallon unit trapped behind lumber.

    Two gallon portable compressor and ten gallon wheeled compressor shown in separate garage floor footprints
    Tank volume changes the buffer and physical footprint, but the pump's rated air delivery determines recovery.

    Check voltage, circuit capacity, and startup behavior

    Read the compressor nameplate and manual for voltage, phase, full-load current, cord requirements, and branch-circuit guidance. A label that says 120 volts does not guarantee that the machine can share a circuit with a saw, heater, refrigerator, or dust collector. Motors can draw a substantial starting current even when their normal running current looks manageable.

    Map the receptacles and known circuits before assigning a corner. Do not assume two outlets on opposite walls are independent. Repeated breaker trips, hot plugs, damaged cords, or flickering are reasons to stop and have a qualified electrician evaluate the installation. Do not replace a breaker with a larger one to make a compressor run.

    The garage workshop layout guide treats power as part of placement rather than an afterthought. Permanent wiring and local code questions belong with a licensed professional and the local authority. Extension cords are not a substitute for a correctly located circuit; if a manual permits one for temporary use, follow its gauge and length requirements exactly.

    Place the compressor for air, sound, and safe access

    Set the unit on a stable surface in the orientation the maker specifies. Keep intake and cooling openings clear. Avoid an unventilated closet unless the manufacturer specifically approves the enclosure and its ventilation. Heat that cannot leave shortens the usefulness of a quiet-looking cabinet.

    Distance and isolation can make the garage more comfortable, but do not place the compressor where you cannot hear an abnormal cycle or reach the controls. Rubber feet supplied or approved for the machine may reduce transmitted vibration. Do not improvise a soft platform that makes a wheeled unit unstable. Keep the unit protected from vehicle contact, water, dust piles, and material handling.

    Mark the operating envelope with the same method used in our workshop aisle guide. Include the hose coupling, drain position, oil fill or service cover, and route used to roll the unit out. Sound ratings help compare documented models, but bare walls, a metal door, and a hollow bench can make the perceived result harsher than the number suggests.

    Size the hose and fittings as part of the system

    A capable compressor can feel weak behind a long, narrow hose and a stack of restrictive quick couplers. Use the tool and compressor guidance for hose inside diameter, maximum practical length, fittings, regulator, lubricator where required, and filtration. Keep the run short enough for the layout, but long enough that it does not pull tight or cross the normal aisle.

    Place a readable regulator where the operator can set the tool’s working pressure. Maximum tank pressure is not the pressure every tool should receive. Never exceed the pressure rating of the hose, fitting, accessory, or tool. Inspect for wear, cuts, heat damage, and secure connections before use.

    Store the hose on a reel or broad hanger designed for it, outside the vehicle path. A ceiling reel can save floor space only if it clears the garage door and the hanging lead does not become a head-level obstacle. The broader garage storage systems guide helps place reels after doors, utilities, and parking are mapped.

    Plan moisture control and drainage before purchase

    Compressing air produces condensate. How often the receiver needs draining depends on the machine, climate, use, and manufacturer instructions. Choose a location where the drain can be reached without crawling beneath a hot pump or tipping the compressor. Use only the drain arrangement and approved accessories specified for the receiver.

    Moisture-sensitive tools and finishing work may need filtration or drying beyond the receiver drain. Select equipment from the downstream air-quality requirement, not from a generic accessory bundle. Keep filters and separators visible enough to inspect and install them within their stated pressure, flow, and orientation limits.

    OSHA’s air-receiver rule covers workplaces, not residential compressor selection, but it points to sound habits: receivers need pressure-relief protection, gauges, and a drain at the lowest point. Do not weld, drill, patch, or improvise pressure components. Corrosion, a damaged tank, a questionable relief valve, or an altered receiver needs qualified evaluation rather than a home repair.

    Unplugged garage air compressor with drain valve accessible above a shallow maintenance tray
    A drain that can be reached without moving half the shop is more likely to receive the routine care its manual requires.

    Do not use compressed air as a cleanup shortcut

    Blowing dust from clothes, skin, benches, or the garage floor creates flying debris and puts captured material back into the breathing zone. OSHA’s compressed-air safety guidance explains that workplace cleaning with compressed air is tightly limited and still requires guarding and personal protection. A home shop should use a suitable vacuum and material-specific controls instead.

    Compressed air can drive chips into eyes and skin, damage hearing, and push dust into motors or ignition areas. Never aim an air gun at a person. Use approved nozzles for their intended task, wear the protection specified by the tool and material guidance, and keep bystanders out of the work zone.

    For tire inflation, use a rated inflator with a readable gauge and follow the vehicle, tire, and inflator instructions. A large tank or high maximum PSI does not make careless inflation safer. Stand clear of questionable assemblies and seek professional tire service when damage, corrosion, or an improper fit is involved.

    Use a final buying and placement checklist

    Write down the hardest tool cycle, required CFM or SCFM at PSI, simultaneous demand if any, acceptable recovery pause, compressor delivery at that pressure, duty guidance, tank size, voltage, circuit, dimensions, weight, sound rating, oil type, hose, fittings, regulator, drain access, and service support. Then verify the current manual for every shortlisted model.

    Tape the complete footprint on the floor. Roll the largest nearby cart, open the vehicle door, and reach the drain. Confirm that ventilation stays open and the hose reaches the tool without crossing the main walking path. The planning sequence in our garage storage guide is useful because a compressor competes with shelves, cabinets, and parking for the same edges of the room.

    Common mistakes are easy to name: buying by gallons alone, comparing airflow at different pressures, trusting peak horsepower language, ignoring duty guidance, undersizing the hose, assuming outlets are separate circuits, hiding the machine in a sealed cabinet, and making the drain unreachable. Avoid those, and the right compressor often becomes obvious. It is the smallest model that comfortably supports the documented job and still fits the room as a machine that needs air, service, power, and respect.

    Useful products to compare

    These links open current Amazon search results. Check the dimensions, manual, mounting hardware, warranty, and current availability for the exact model before you order.

    Before you buy or install

    Read the current manual for the exact product you are considering. Confirm its assembled dimensions, rated capacity, mounting requirements, included hardware, working clearances, warranty, and any limits that apply to your wall, floor, electrical circuit, or garage layout.

    Frequently asked questions

    What size air compressor is enough for a home garage?

    There is no single garage size. Use the highest documented airflow demand at the required pressure among tools that will run one at a time. Add overlapping demands only when tools truly run together, then choose rated delivery above that requirement and verify duty, circuit, noise, and footprint.

    Is a bigger air-compressor tank always better?

    No. A larger tank stores more air and can smooth brief demand, but it adds weight and space. It does not increase the pump’s sustained air delivery. Pick CFM or SCFM at the required PSI first, then choose tank volume for the work rhythm and room.

    Can a small compressor run an impact wrench?

    Possibly, when the exact wrench’s pressure and airflow needs fit the compressor and the work involves short bursts with recovery time. Check both manuals. Do not assume every half-inch impact has the same consumption or that a large tank badge guarantees performance.

    Where should an air compressor sit in a garage?

    Use a stable, protected location with the ventilation and clearances required by the manufacturer. Keep controls, intake, drain, and service points accessible. Avoid the vehicle path, water, dust accumulation, sealed unventilated cabinets, and hose routes across the main aisle.

    How much extra CFM should I buy?

    Choose rated delivery clearly above the tool’s verified requirement to allow for practical losses and recovery, but do not treat one universal percentage as a rule. Hose layout, duty pattern, simultaneous use, and manufacturer sizing guidance determine how much margin is appropriate.