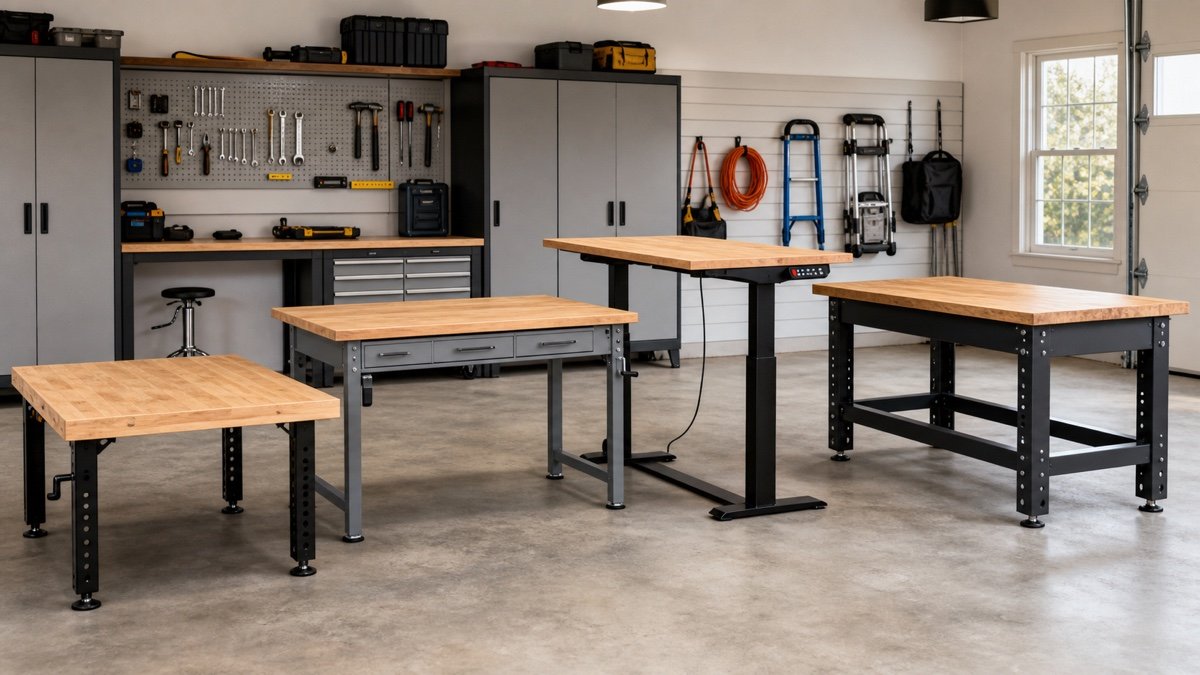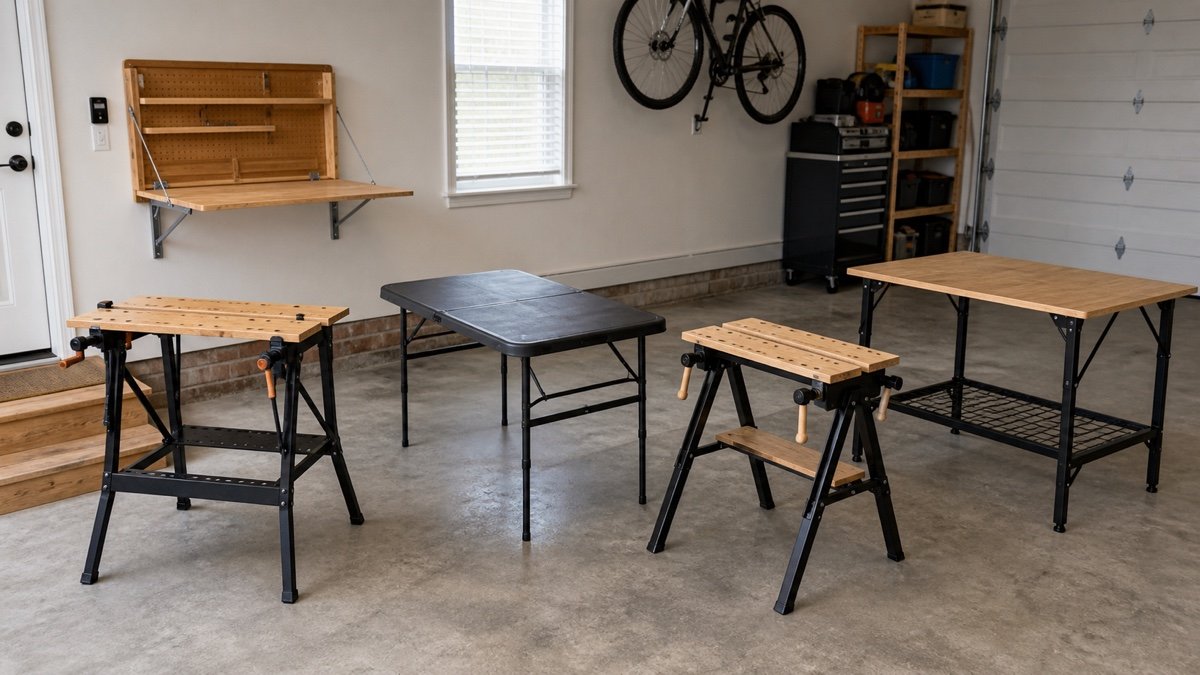
Tag: garage workbench

  • Garage Workshop Aisle Clearance: Measure the Space You Actually Use

    Garage Workshop Aisle Clearance: Measure the Space You Actually Use

    Affiliate disclosure: As an Amazon Associate I earn from qualifying purchases. This article may contain affiliate links, and Bay & Bench may earn a commission at no extra cost to you. Read our full Affiliate Disclosure.

    Garage workshop aisle clearance changes with the job, so one borrowed gap cannot describe the whole room. Pull a drawer or stand at the bench, and the empty strip gets smaller. Carry a tote, steer a tool cart, open a car door, or feed a long board through a machine, and its shape changes again. A path that feels generous while the room is empty can vanish during an ordinary job. Measure the garage in those active states, at its narrowest points, and with the people and loads that will use it. Any stated tool clearance, local building rule, fire requirement, or accessibility requirement still applies. The method below helps you find your working envelope; it does not replace those instructions.

    Quick answer

    Don’t choose one workshop walkway width for the whole room. Mark each route by purpose: simple passage, working stance, an open drawer or door, material handling, cart movement, vehicle access, and any mobility device. Measure fixed projections first, add the largest moving part, then walk or roll the real task through a taped mockup. Record the narrowest clear point. Keep exit routes and required access separate, and check local rules plus every tool and storage manual before fixing the layout.

    Plan garage workshop aisle clearance by activity

    A floor plan usually shows cabinets and machines as closed rectangles. That view is useful for storage mode and almost nothing else. Give each busy part of the garage its own state: closed, being opened, in use, and moving through the room.

    A passage is the strip used to get from one place to another. A work zone includes the person’s feet, hips, elbows, and the motion of the task. An open state adds drawers, doors, clamp handles, and vehicle panels. A handling route includes the tote, sheet, board, cart, or mobility device being moved. Those envelopes may overlap at different times, but they cannot occupy the same space at the same moment.

    This distinction prevents a common mistake. The measured gap between a bench and a car might be a workable walking path while the bench is closed. It may fail as soon as a drawer opens or someone turns with a storage bin.

    Map fixed faces before drawing the walkway

    Measure between finished, protruding faces rather than walls on an old plan. Cabinet handles, a benchtop overhang, a vise screw, shelf lips, wall mounted tools, a curb, and car mirrors can all become the true edge. Take readings near the floor, at hip height, and higher up. The tight point may change with height.

    Record doors, steps, posts, appliances, electrical panels, garage door tracks, opener parts, pipes, and anything that must remain reachable. The worksheet in our guide to measuring a garage for storage is a practical place to collect those dimensions.

    Then mark uncertainty. A car will not stop on precisely the same line every night. A bowed wall can steal an inch at one end. Treat the smallest measured gap and normal parking variation as real conditions, not rounding errors.

    Use a worksheet instead of borrowing one aisle width

    Build one row for every route or station. The final dimension comes from the task and the user’s trial, not from averaging the rows. This table is meant to be filled with measurements from your garage.

    Route or stationFixed boundaries to measureOpen or moving state to addTest to performResult to record
    Everyday passageNearest handles, shelves, mirrors, and wall edgesNormal parking variation and items left in placeWalk through carrying the usual tote, bag, or tool caseNarrowest usable point and snag locations
    Workbench in useBench face to the opposing fixed or parked objectDeepest drawer, cabinet door, vise handle, and clampsStand, reach, bend, step back, and change toolsFull working envelope for that task
    Mobile cart routeDoorways, corners, parked tools, and thresholdsCart handle, caster swing, cord, and carried loadPush, turn, stop, and park an empty substituteTurn outline plus a marked parking home
    Long material pathMachine, walls, cars, doors, and storage facesLeading end, trailing end, side sweep, and supportsMove a light full length mockup through the planned operationComplete travel path, including setup and removal
    Mobility and exit routeFinished faces, thresholds, door hardware, and door swingDevice, hands, turning approach, and other usersCheck the real user and applicable requirementsProtected route that storage never borrows

    Store the figures beside the layout, not in your head. The garage storage fit calculator can help reconcile room width, storage depth, and the remaining clear strip, but the physical movement test still decides whether that strip works.

    Measure passage with the load in your hands

    Walking through empty handed is the easiest version of an aisle. Try the trip that happens on a wet Tuesday: carrying recycling, a bulky tote, groceries, a compressor hose, or a project box while a vehicle is parked. Watch elbows and knuckles. Note where the load forces the person to turn sideways.

    Long objects need a different check. A ladder or board rotates around the person carrying it, so the ends sweep well beyond shoulder width. A sheet may need two people and room for both sets of hands. Do not count a nearby bench as part of the path if it will hold a project at the same time.

    Separate household traffic from workshop staging where you can. A plan for garage storage zones and routes can keep daily gear near its destination, which reduces the number of wide loads crossing the work area.

    Add the worker’s stance around a bench or machine

    The worker is part of the machine footprint. At a bench, mark where the toes land during close work and where the hips move while planing or filing. Then see how far the person steps back to inspect or lift a project. Repeat the check while reaching into the lowest drawer. A shallow toe recess may help standing posture, but it does not create room for another person to pass behind.

    Machines add controls, guards, fences, dust fittings, cords, supports, and stock. Read the manual for setup and operating restrictions. If the maker specifies a clearance or a safe operating position, use it. Floor tape cannot cancel an instruction.

    Bench depth, top size, vises, drawers, and mobility all change the working envelope. Compare those parts before buying in the garage workbench buying guide. A smaller top is useful only if the work still fits on it.

    Open drawers, doors, hatches, and vises

    Open every moving part to the position you really use. Measure a drawer from the fixed cabinet face to its outermost handle. Swing cabinet doors through their arcs. Extend pullout bins, folding tops, vise screws, and clamp tails. Then check whether the worker can stand where the contents are visible and lift an item out.

    Do the same with the vehicle parked in its normal range. Driver doors, sliding doors, trunks, hatches, charging leads, and fuel access create different shapes. Two open states that are individually acceptable may collide, such as a bench drawer and a car door.

    Some conflicts can be scheduled. You might open the deep bench drawer only after the car leaves. Write that rule down. If the drawer contains daily tools, though, the arrangement will be annoying from the first week.
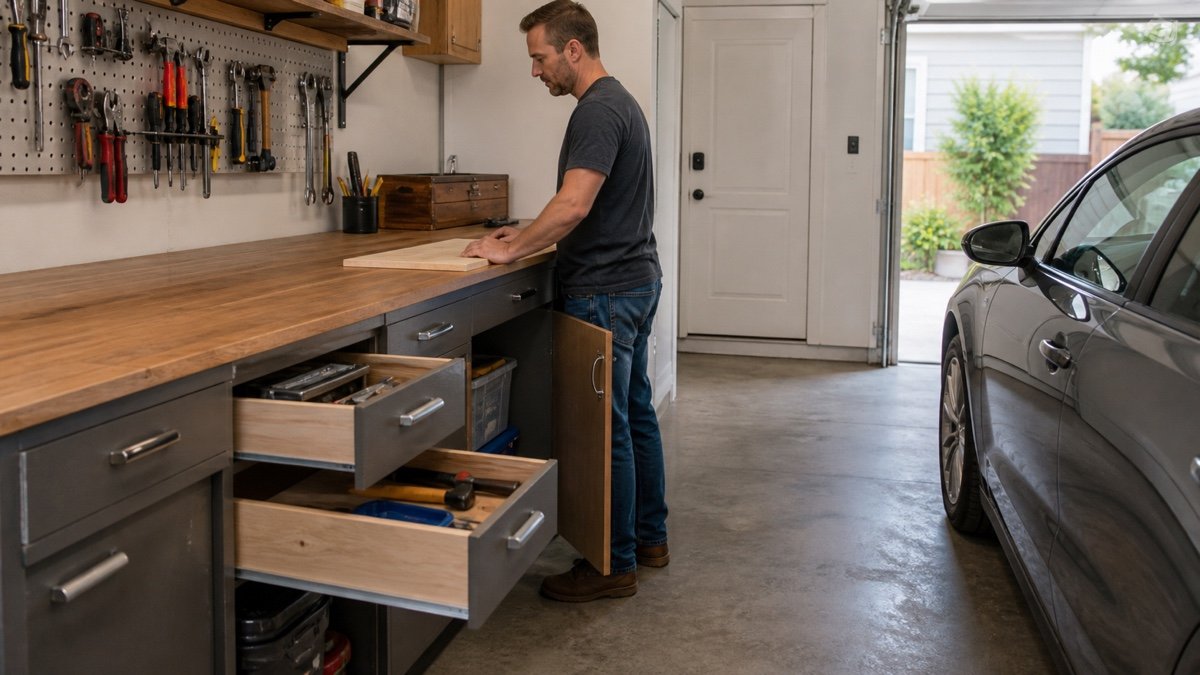
    Man working at a garage bench with several drawers and a cabinet door open beside a parked car
    Open drawers and doors occupy the same floor area that looks like a clear walkway when the storage is closed.

    Trace carts and long material through each turn

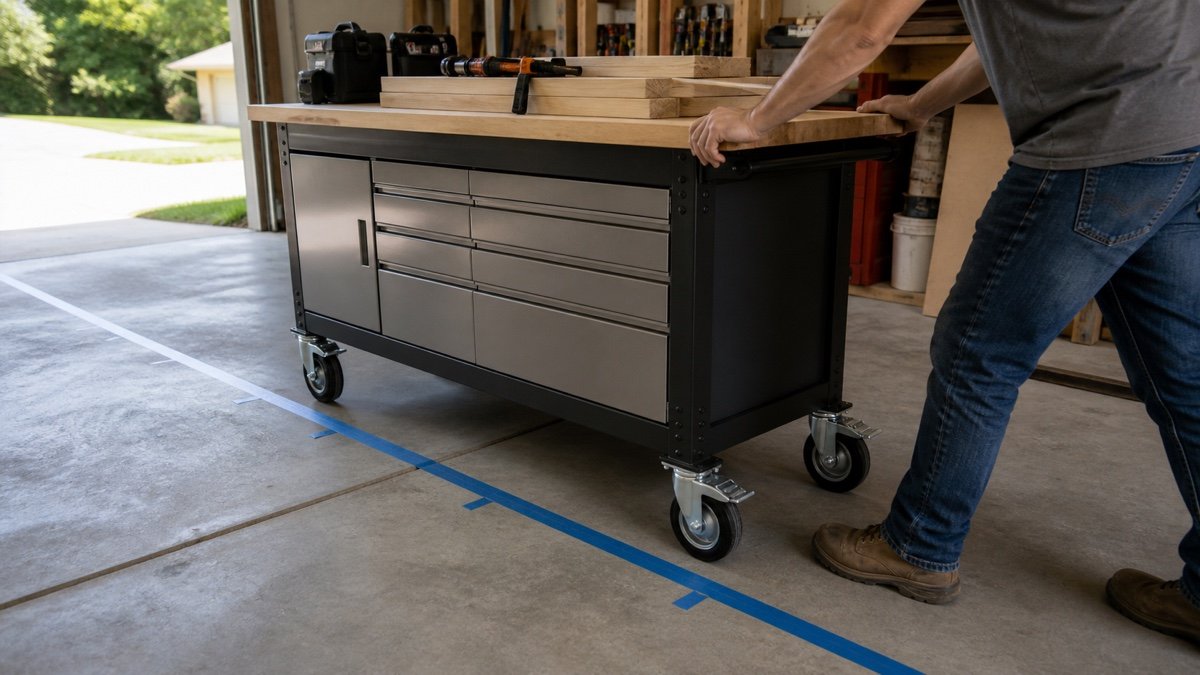
    A rolling cabinet does not turn inside its body outline. Swivel casters swing, handles project, and the person pushing it needs a place to stand. Tight corners may require a pull, correction, and second push. Tape the proposed route, then steer an empty cart or a light cardboard mockup from its storage home to its work position.

    Check thresholds, floor cracks, slopes, cords, and door tracks. A cart that crosses them badly may twist toward a car or bench. Follow the caster and cabinet instructions for loading, locking, and use on the floor you have. Do not perform the first route test with a fully loaded tool chest.

    For boards and sheet goods, trace the ends, not just the carrier’s feet. Include infeed, cutting or assembly position, outfeed, and the route back out. Keep that sweep away from people entering through a service door. If a helper is normally involved, give the helper a measured stance too.
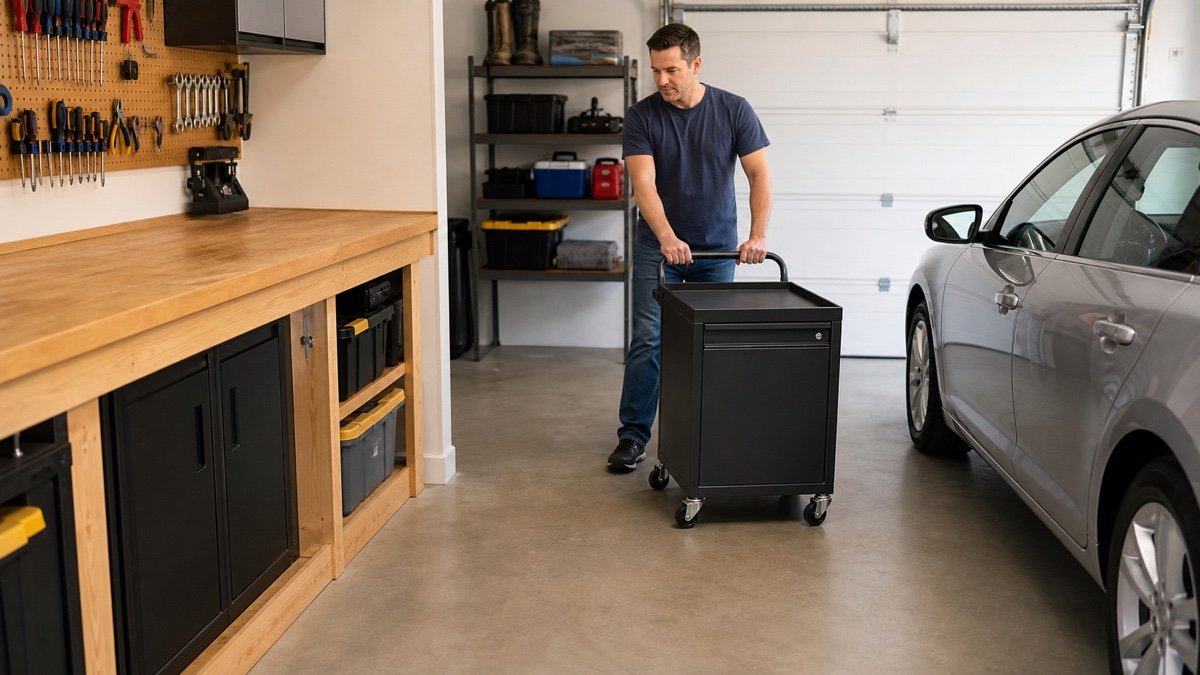
    Man turning a rolling tool cart through the aisle between a garage workbench and a parked car
    A rolling cart needs space for its handle, caster swing, and turning path as well as the cabinet body.

    Protect mobility routes, exit paths, and stated clearances

    A person using a cane, walker, wheelchair, or other mobility device may need more room at a turn, threshold, latch, or transfer point than a standing adult carrying nothing. Measure the device with the user’s hands and normal approach. Involve that person in the mockup if they want to participate and the test can be done safely. Do not infer a personal fit from a generic aisle number.

    Accessibility, building, fire, electrical, and workplace rules depend on the property, location, use, and project. A home shop, shared building, and commercial workspace may face different requirements. Confirm what applies with the local authority or a qualified professional before construction. Keep required access to panels, appliances, controls, and exits clear.

    Treat an exit route as protected space. A movable cart still blocks it while parked there, and an open drawer can narrow it at the worst time. Manuals for tools, cabinets, heaters, chargers, and garage door equipment may add their own access or separation instructions.

    Tape the room and run three ordinary scenarios

    Mark fixed equipment in one tape color and moving edges in another. Use cardboard to give cabinets and handles real height. A line on the floor will not reveal a shoulder level collision with a shelf or mirror.

    Run the room in three states. First, use storage mode with vehicles and mobile tools parked. Second, use setup mode while carts move, stock comes in, and drawers open. Third, use active work mode with the operator, supports, dust hose, and project in place. Add a fourth state if another household member must pass during work.

    Carry familiar loads and wear normal footwear. Reach the house door, open the deepest drawer, turn the cart, and move a light full size material substitute. Never simulate a powered cut. Leave the tape down for several days so ordinary traffic can expose the awkward spots.

    Recover clearance when the layout fails

    Start by reducing projection, not by asking people to squeeze. Move seldom used items above or outside the busy route. Replace deep floor storage with a shallower wall zone where the structure and product instructions allow it. Our guide to garage wall storage systems compares common rail, panel, and pegboard arrangements.

    Next, question the base. Wall mounted and freestanding garage shelves use floor and wall space differently, and either choice can be wrong near a door, curb, or parked car. Compare the full range of garage storage systems before solving every problem with another cabinet.

    Rotate the bench, give a cart a better home, reverse a door where permitted, or split one congested station into two. After each change, repeat the open state and movement checks. Keep the tape marks that matter. They make creeping boxes and temporarily parked tools easy to spot.

    Before you buy or install

    Check the current manual for the exact product you are considering. Confirm the assembled dimensions, load rules, mounting requirements, included hardware, clearances, warranty, and any limits that apply to your wall, floor, or garage layout.

    Frequently asked questions

    How much garage workshop aisle clearance do I need?

    There is no single width for every aisle. A simple passage, a bench work zone, a material path, a mobility route, and a required exit path solve different problems. Measure the narrowest fixed gap, add open doors or drawers, then test the real user and normal load. Follow any applicable code and manufacturer dimensions.

    Does an open drawer count as part of workbench clearance?

    Yes, whenever the drawer can be open while someone works or passes. Measure to the outermost drawer or handle and include the person’s stance for seeing and lifting its contents. If the drawer may open only after a car or cart moves, make that operating rule explicit.

    How should I plan a workshop route for a wheelchair or walker?

    Measure the actual device, hands, turning approach, thresholds, and door operation with the person who will use the route. Protect that envelope from temporary storage. Also check the accessibility and building requirements that apply to the property and project, since a personal movement test does not establish compliance.

    Can the gap beside a parked car double as a workshop aisle?

    It can serve some tasks if the measured car envelope, normal parking variation, door or hatch movement, worker, and carried load all fit at the same time. Test the parked state with the actual vehicle. Keep hard tool edges and material paths away from the paint, and do not borrow a required exit or access route.
  • Half of a Two-Car Garage Workshop Layout: Keep One Bay Usable

    Half of a Two-Car Garage Workshop Layout: Keep One Bay Usable

    Affiliate disclosure: As an Amazon Associate I earn from qualifying purchases. This article may contain affiliate links, and Bay & Bench may earn a commission at no extra cost to you. Read our full Affiliate Disclosure.

    A half of a two car garage workshop layout works only when the parked side remains usable on an ordinary day. A clean floor plan alone cannot prove that. The car needs room for its mirrors, door, hatch, charging cable or fuel door, and the path people use to reach the house. The shop needs a bench, tool access, task light, and operating room for each machine. Those demands meet at the center boundary.

    To show the arithmetic, the worked example uses a measured 21 x 20 foot interior. That is not a standard two car garage size or a recommended minimum. Replace every sample figure with measurements from your room, car, and tools.

    Quick answer

    Reserve the parking envelope first, including the car’s widest point and every open state you use. Mark its inner edge with tape. Keep fixed benches and deep cabinets against the workshop side wall, park mobile equipment fully inside that boundary, and treat rear wall storage as a separate clearance problem. Before buying anything, run the garage door, open the car doors and hatch, pull out bench drawers, and carry a normal project through the remaining path.

    Mark the boundary in half of a two car garage workshop layout

    Start at the finished walls, not at a concrete seam or the visual center of the garage door. Measure the interior width at the floor, workbench height, and mirror height. A foundation curb, bowed wall, center post, or projecting handle can change the useful width at each level. Record the door tracks, opener, sensors, steps, outlets, panels, windows, and service door as well. The room sheet in our guide to measuring a garage for storage catches many of these easy to miss projections.

    Now park the car where it can enter without a fussy correction. Mark its tires and mirror edges. Open the driver door to the position actually needed, lift the hatch, and trace those movements with tape. The workshop boundary belongs outside that complete parking envelope. It may land near the middle of the room, but it does not have to.

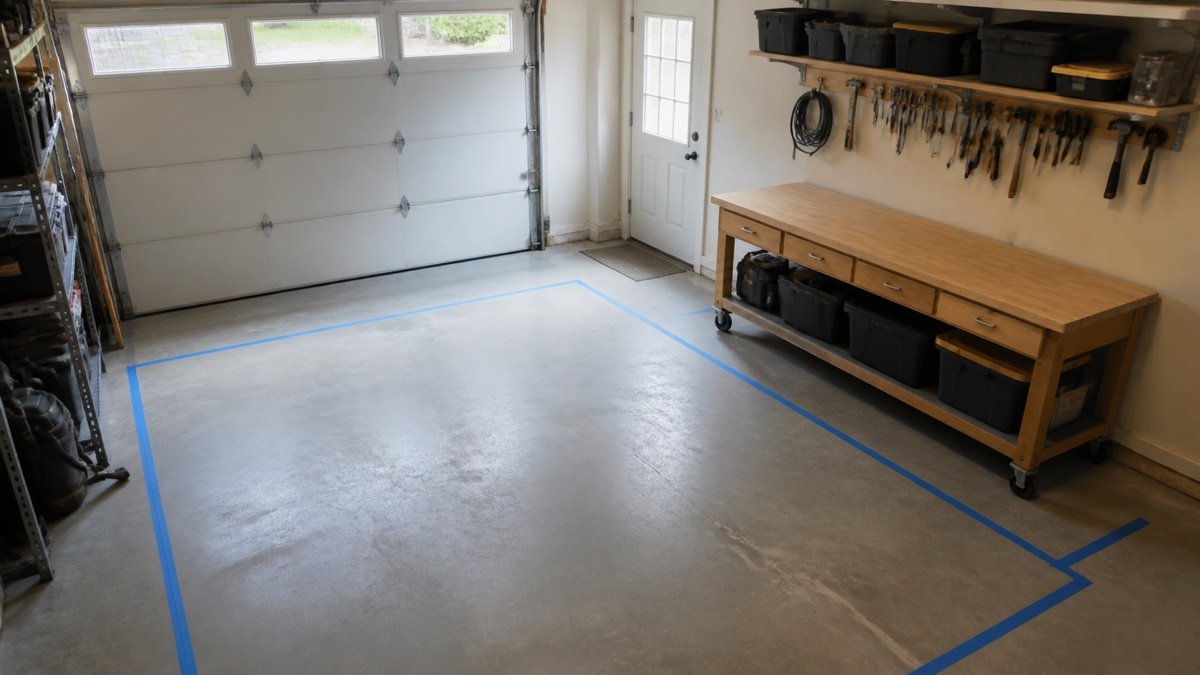
    Use a bright tape color and carry the line from the garage opening to the back wall. The line is not decoration. Any wheel, drawer, cord, clamp, or board that crosses it has borrowed space from the car bay.

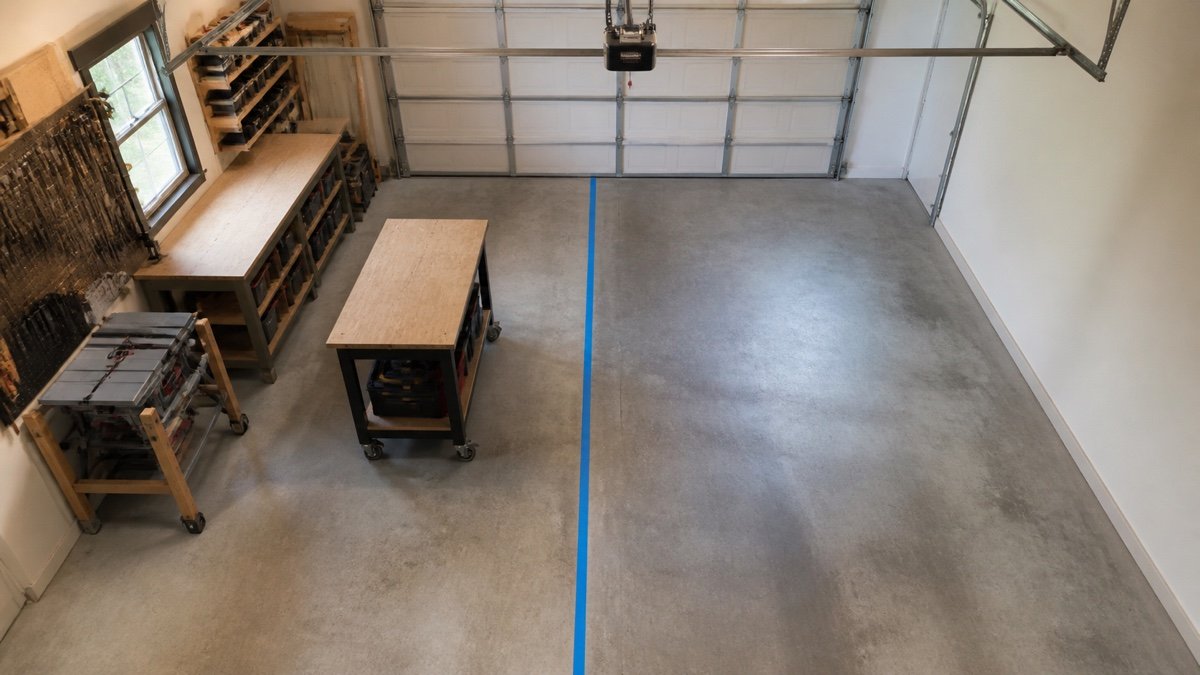
    Overhead view of a taped center boundary with workbenches and rolling tools confined to one garage bay
    Mark the protected parking edge before placing the bench, then keep stored equipment on the workshop side of the tape.

    Work through one measured starting plan

    The sample below shows how the arithmetic can work. It describes a finished 252 x 240 inch interior with the parked car on the left and the shop on the right. The vehicle measures 78 inches at its mirrors and 188 inches bumper to bumper. In this hypothetical example, 12 inches sit between the passenger mirror and outer wall, while 36 inches remain between the driver side mirror and the taped boundary. The sketch assumes that the driver door can open far enough within that space, but the number does not prove it. Park your exact vehicle in its normal position, open the door as people actually use it, and move the boundary if the test fails.

    Item in the sampleMeasured figurePlanning use
    Finished room252 inches wide by 240 inches deepActual inside surfaces, not the nominal building size
    Parking side126 inches wide12 inch wall gap + 78 inch car + 36 inch driver side space
    Workshop side126 inches wideEverything stored here stays inside the taped boundary
    Fixed side bench24 x 96 inchesLeaves 102 inches from bench front to the boundary before people or projects enter
    Rolling assembly cart30 x 60 inchesParks lengthwise under the bench overhang or in a marked rear spot
    Rear cabinet candidate12 inches deepAllowed only where bumper, hatch, service door, and walking checks still pass

    The numbers show relationships, not a clearance rule. Put your own room width, car envelope, and storage projections into the garage storage fit calculator, then confirm the result with tape. A total that works on paper can still fail at a door handle or open drawer.

    Put the fixed bench on the outside edge

    A bench against the workshop side wall gives the center boundary some peace. In the sample plan, the 24 inch deep bench runs only 96 inches, leaving part of the wall free for a tall tool or a turning path. A full length bench would create more surface, but it could trap a mower, crowd a side door, or encourage permanent piles.

    Choose depth from the work you do most often. Add the vise, backsplash, drawer handles, clamp tails, and anything mounted behind the top. The listed cabinet depth rarely equals the largest operating projection. Our garage workbench buying guide explains top size, base styles, storage, and caster details.

    A mobile cart can fill the open floor when the vehicle is away, provided it has a real parking spot afterward. Measure that spot with the cart loaded and its handles attached. If putting it away requires lifting tools, folding stock, and moving three bins, it will eventually live in the center lane.

    Protect the car bay in every open state

    The parked footprint is the smallest version of a car. The usable envelope includes the approach angle, mirrors, the door arc, an open hatch or trunk, and the person carrying bags around it. If a child seat is loaded from the workshop side, trace that wider door position too. A charging lead needs a route that cannot be pinched by a tire or turned into a trip line.

    Repeat the check with the car a little forward and a little rearward. People do not stop on the same inch every night. A wheel stop can improve repeatability if it suits the floor, vehicle, and door operation, but it should be located only after the actual parking position is settled.

    Keep sharp tools and projecting handles away from the inner edge. Even when the car fits, brushing a saw fence while getting out makes the arrangement tiresome. That irritation is useful information. Move the shop boundary before buying more equipment.

    Keep the center boundary deliberately empty

    The center strip attracts temporary objects because it looks like spare floor. Give it one job: separation. Do not park the shop vacuum there, lean sheet goods across it, or let lumber rest on the car side while it feeds through a saw. A narrow strip of clean floor is more useful than another shallow rack.

    Drawers near the boundary should open toward the work area or remain far enough back that a person can use them without stepping beside the car. Caster brakes, floor slope, and bumps matter too. Turn the wheels of stored carts away from the line and lock them as their instructions direct.

    Loose cords are frequent trespassers. Put power at the wall or overhead only where the cord can reach the tool without crossing the vehicle path or garage door travel. Unplug and store temporary leads when workshop mode ends.

    Make rear wall storage earn the word shared

    The back wall often spans both bays, yet it is rarely one continuous storage opportunity. The parked side may need bumper space, hatch travel, or access to a door into the house. The shop side may need room behind a bench tool, a dust collector drum, or long stock. Design each part of the wall around the activity in front of it.

    In the sample, a 12 inch deep cabinet is only a candidate. With a 240 inch room and a 188 inch car, 52 inches remain in the length before the cabinet, front threshold, bumper gaps, and parking variation are deducted. That arithmetic does not prove the cabinet fits. Tape its full depth, park normally several times, and open the hatch.

    Closed cabinets can keep household supplies away from shop dust, while open shelving makes bins faster to reach. Compare those roles in the overview of garage storage systems. Keep the service door, electrical equipment, appliances, vents, and required access clear.

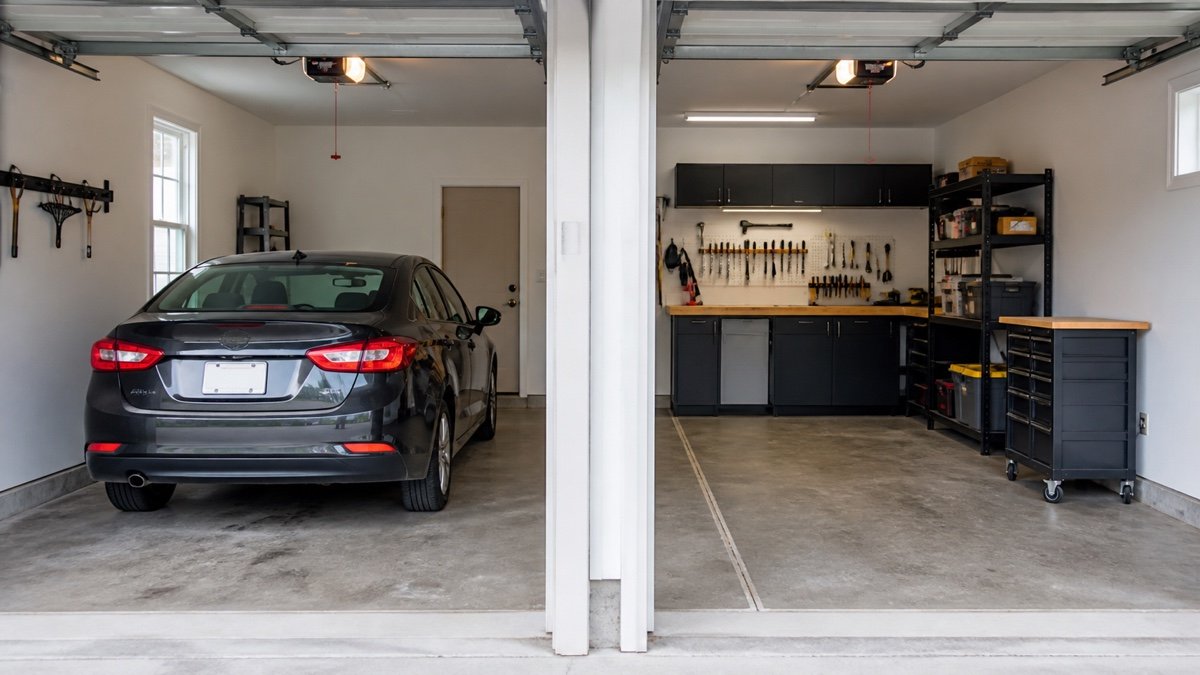
    Shared garage rear wall with storage cabinets between a side workbench and a parked SUV
    Rear storage works as a shared zone only after the parked vehicle, service door, and workshop access are measured together.

    Use shallow wall storage where hands can reach it

    Tool rails, pegboard, and slatwall can keep the workbench clear without filling the floor. Measure the loaded system, not the bare panel. A drill on a hook, a coiled hose, or a shelf lip may project several inches beyond the advertised panel depth.

    Place daily hand tools near the bench and dense cases low. Long handled tools need clips that prevent them from falling toward the car. Avoid hanging anything above the parking side simply because there is open wall; a failed hook should not drop a steel tool onto the vehicle.

    The comparison of garage wall storage systems covers rails, pegboard, and slatwall attachment patterns. Follow the selected product’s mounting instructions and verify what is behind the wall before drilling.

    Draw the garage door hardware in side view

    A floor plan hides tracks, hinges, springs, opener rails, release cords, and door panels as they travel. Measure their lowest points with the door closed, partly open, and fully open. Then add the height of wall cabinets, a raised vehicle hatch, task lights, and anything stored on top of a tall cabinet.

    Do not mount lumber racks or lights where they obstruct service access to the door system. Keep tools and storage away from photo eyes, cables, springs, and tracks. Garage door springs and related parts can carry dangerous tension, so repairs and alterations belong with a qualified professional.

    Use the overhead garage storage clearance guide to make the vertical drawing. Ceiling height alone says little about what the moving door occupies.

    Give workshop mode a closing routine

    A shared garage stays usable because the reset is short. Give the rolling cart one outlined parking spot. Hang the extension lead. Close drawers. Lower the vise handle, clear the boundary, and sweep fasteners from the parking side before the car returns. A magnetic sweeper is useful after drilling or metal work, but a visual floor check still matters.

    Dusty cutting, grinding, finishing, welding, fuel work, and battery charging need precautions beyond layout. Follow tool and product instructions, provide suitable ventilation, separate ignition sources from flammable vapors, and keep the vehicle outside when the job could coat or damage it. Local electrical and fire requirements apply to wiring, storage, and hazardous materials.

    If the reset takes twenty minutes, reduce the number of mobile pieces. One cart that rolls home easily beats a row of machines that must be shuffled in order.

    Rehearse parking and workshop reset for several days

    Tape the bench, cabinet, cart, and parking envelope on the floor. Add cardboard at the proposed bench depth so the projection feels real. Mark open drawers and tool operating zones with a second color. Then leave the mockup in place for several days.

    Park after dark, bring groceries through the house door, remove a bicycle, and wheel the trash bin out. Simulate one common project with empty boxes as workpieces. The plan should survive those dull routines. They expose problems that a carefully staged Saturday afternoon will miss.

    When the room works, build in stages. Install the fixed bench or wall system, check the car again, then add mobile storage. The broader process in how to plan garage storage helps when sports gear, garden tools, and household overflow compete with the shop for the same wall.

    Choose the layout that leaves one honest parking bay

    The strongest layout may look a little underfilled. That open center boundary is what lets a car door move, a person pass, and a rolling tool return home without a nightly puzzle. Keep fixed pieces on the outside wall, make mobile pieces easy to park, and question every object assigned to the shared rear wall.

    Recheck the room whenever the vehicle or a large tool changes. One new mirror width, hatch arc, vise, or cabinet handle can alter the fit. The tape line can move. Heavy cabinets are much less cooperative.

    Before you buy or install

    Check the current manual for the exact product you are considering. Confirm the assembled dimensions, load rules, mounting requirements, included hardware, clearances, warranty, and any limits that apply to your wall, floor, or garage layout.

    Frequently asked questions

    Can I build a workshop in half of any two car garage?

    No layout works in every garage. Measure the finished room, vehicle envelope, door hardware, utilities, service doors, and each tool in stored and operating positions. Some rooms can support a fixed bench in one bay, while others need folding or mobile equipment.

    Should I divide the garage exactly down the middle?

    Only if the measured parking envelope and garage door system support that line. The useful boundary may sit off center because of the driver’s door, wall steps, a center post, or different storage projections.

    How deep should the workbench be beside a parked car?

    Choose the shallowest depth that supports your common work, then add the vise, handles, wall tools, clamps, and operator space. The 24 inch bench in this article is a worked example, not a recommended depth for every room.

    Can storage span the rear wall behind both bays?

    Sometimes. Check bumper position, parking variation, hatch travel, service door access, and the operating space behind workshop tools. A shallow cabinet may fit one section while another section needs to remain open.

  • One-Car Garage Workshop Layout: Three Measured Starting Plans

    One-Car Garage Workshop Layout: Three Measured Starting Plans

    Affiliate disclosure: As an Amazon Associate I earn from qualifying purchases. This article may contain affiliate links, and Bay & Bench may earn a commission at no extra cost to you. Read our full Affiliate Disclosure.

    A one car garage workshop layout has to solve a slightly rude geometry problem: benches need depth, cars need room around them, and tools need space beyond their footprints. A measured layout tied to your room, vehicle, and equipment solves it. The examples that follow use 10 x 20 foot and 12 x 20 foot interiors for planning, not as standard garage sizes. One favors shop work, one keeps overnight parking, and one shares the room. Borrow the logic, then replace every sample number with your own.

    Quick answer

    Start with the parking decision. If a car rarely enters, put a fixed bench on the rear wall, shallow storage on one side, and mobile tools in the center. If parking comes first, use a folding bench and work only with the car outside. For shared use, a measured 12 x 20 example can fit a 20 inch side bench beside a 72 inch vehicle envelope, but only after door swing, walking room, and the opposite wall are included in the arithmetic.

    A one car garage workshop layout begins with hard boundaries

    Measure finished wall to finished wall at the floor, bench height, and shoulder height. Garages are not always square, and a curb or foundation ledge can steal useful depth. Then record the door opening, tracks, opener, steps, service doors, windows, outlets, panels, pipes, and anything that must remain reachable.

    Next, make a vehicle envelope from the actual car. Include mirrors, charging cable or fuel door access, the hatch at full height, and the door opening you use. A 72 inch wide car does not consume only 72 inches when someone has to get out. Our guide to measuring a garage for storage gives you a room sheet for those obstructions.

    Finally, measure equipment twice: once stored and once operating. A table saw may have a compact cabinet yet need several feet in front and behind for stock. A miter saw needs side support. Mark both envelopes, because the operating one decides whether the shop works.

    Three measured starting plans at a glance

    These dimensions are deliberate examples, not recommended minimums. The 10 x 20 and 12 x 20 rooms are measured interior rectangles after wall finishes. Real doors, columns, steps, and utilities reduce them. The vehicle in the parking examples uses a measured 72 x 180 inch envelope that includes its mirrors, but not its open doors.

    Starting planMeasured room exampleFixed work and storageMovable elementSpace rule in this example
    Workshop first10 x 20 feet24 x 96 inch rear bench and 18 x 144 inch side shelving30 x 60 inch center cartThe cart has two 36 inch side passages where it overlaps the shelving
    Parking first10 x 20 feet7 inch deep folded bench that opens to 24 x 72 inches72 x 180 inch vehicle envelopeThe car leaves before the bench opens or tools enter the floor area
    Shared use12 x 20 feet20 x 72 inch side bench with 12 inch deep upper storage24 x 48 inch cart stored under the bench20 inch bench + 36 inch gap + 72 inch car + 16 inch gap = 144 inches

    Run your substituted numbers through the garage storage fit calculator. A plan stops being plausible as soon as one required door, drawer, or path cannot open.

    Plan 1: a workshop first 10 x 20 example

    This plan assumes the garage does not hold a car on a normal night. Put the 24 x 96 inch bench across the rear wall, leaving the ends free where a side door, corner pipe, or long board needs passage. An 18 inch deep, 12 foot shelf run occupies one long wall. On the open floor, a 30 x 60 inch cart provides assembly space and rolls aside for sheet goods or a wheeled machine.

    The width calculation is simple. The 120 inch room loses 18 inches to shelving. Centering a 30 inch cart in the remaining 102 inches leaves 36 inches on either side. That figure applies only along the overlapping section and does not certify a safe aisle. Handles, vises, bowed bins, and a person at the bench can narrow it.

    Choose the rear bench depth after checking the jobs and clamps you own. The garage workbench buying guide covers depth, base style, mobility, and load wording before you commit floor space.

    Plan 2: a parking first 10 x 20 example

    Here, parking is nonnegotiable and workshop mode begins when the car moves to the driveway. A wall bench folds to 7 inches deep and opens to a 24 x 72 inch top. That folded dimension must include brackets, handles, and anything left on the wall behind it. A tool rail on the side wall stays shallow enough to clear the measured mirror and walking path.

    The sample 72 x 180 inch vehicle leaves 60 inches of total room length inside a 20 foot interior before any bench, bumper gap, or door threshold is counted. Divide that remainder according to the actual garage door, nose clearance, and rear access. Do not center the car by habit. Offset it only after the driver’s door, passenger access, and wall equipment have been tried with tape.

    This is a tidy arrangement, but it has a firm rule: the bench never opens over the vehicle. Casters stay locked when mobile storage is parked, and loose tools return to closed cabinets before the car comes in.

    Car parked in a narrow garage with a wall mounted workbench folded flat beside it
    The parking first plan treats the clear vehicle envelope as fixed and changes the workshop around it.

    Plan 3: a shared use 12 x 20 example

    The extra 24 inches of width changes the arithmetic, though it does not create a full machine shop beside a parked car. In this example, a 20 inch deep bench runs 72 inches along the driver’s side wall. The measured car envelope is offset toward the opposite wall. From left to right, the cross section is 20 inches of bench, a 36 inch gap, 72 inches of vehicle, and a 16 inch wall gap. Together they use the full 144 inches.

    The 36 inch strip is a working gap in this particular sketch, not a universal aisle standard. Test whether the driver’s door can open far enough and whether a person can pass without touching a vise or sharp tool. Place the bench away from the widest part of the door swing if the room allows.

    A 24 x 48 inch cart nests below the bench. With the car parked, the room supports quiet hand work at the bench. The car leaves before the cart rolls out, long stock appears, or a tool throws dust and chips into the vehicle.

    Taped car footprint next to a mobile wood workbench and wall tool storage
    The shared use example reserves a measured car footprint before assigning the remaining strip to a bench.

    Treat every moving object as a larger envelope

    Footprints are the easy part. Open states cause most collisions. Draw the garage door and tracks in their lowest position. Lift the vehicle hatch and measure its highest point. Swing service doors through their full arc. Pull every planned drawer out, open cabinet doors, and add the space your hands need at a vise.

    Do the same for tools. Add infeed and outfeed length to a saw, the operator’s standing area at a grinder, and the hose bend behind a dust collector. Two operating envelopes may overlap if those tools are never used together and one can be moved safely. A fixed bench cannot make that promise.

    Ceiling storage deserves its own section drawing. The overhead garage storage clearance guide helps map door travel, opener hardware, lighting, hatch height, and reach. Measure at several door positions rather than trusting a single ceiling height.

    Keep storage out of the work stroke

    A narrow shop gets worse when every wall becomes deep storage. Put frequently used hand tools within one step of the bench, but keep the surface above a saw’s stock path clear. Long handled garden tools belong where they cannot fall into the vehicle lane. Heavy cases sit low, preferably close to the point of use, so they do not have to cross the room.

    Shallow rails, pegboard, or slatwall can turn an awkward wall into useful tool storage. Their hooks and loaded tools project farther than the panel, so measure the finished depth with the bulkiest item attached. Compare attachment options in the garage wall storage systems guide.

    Reserve some empty capacity. A shelf packed on day one pushes the next tool onto the bench or floor. One open bay under the bench and one unassigned wall section give the layout somewhere to absorb change.

    Plan power, light, dust, and hot work as separate layers

    Mark outlets before placing the bench. A cord across the car path or service door is a layout failure, even when the tool fits. Permanent wiring, added circuits, and outlets in a garage may need an electrician and must follow local requirements. Extension cords should follow their product instructions and should not become hidden permanent wiring.

    Task light belongs in front of the worker so the body does not shadow the cut line. Check whether open cabinet doors block it. Dust collection needs room for the hose, drum removal, and filter service, not just the machine body. Route hoses where a vehicle tire cannot crush them.

    Grinding, welding, finishes, fuel, and battery charging need their own precautions. Read the product instructions, separate incompatible activities, and keep ignition sources away from flammable vapors. A shared garage often works best when dusty or hot jobs happen only with the car outside and the nearby storage cleared.

    Mock up the room before buying the heavy pieces

    Use painter’s tape for the car, bench, shelves, and stored machines. Add a second tape line for each open door or operating tool. Cardboard boxes make convincing cabinets because you can feel how a 12 or 18 inch projection changes the room. Leave the mockup in place for several normal days.

    Park using the usual approach, carry groceries through the service door, take out the mower, and reach the electrical panel. Then simulate a project with empty boxes standing in for workpieces. Awkward turns show up quickly. So do wall sections that looked free on paper but sit behind an open car door.

    Photograph the tape and write the measurements on the image. That record is useful when comparing products, since a listed overall dimension may include feet, handles, hinges, or a top that overhangs the frame.

    Let the parking routine choose the plan

    Pick workshop first when the center floor supports projects more often than parking. Pick parking first when the car must come inside every night and you can accept a setup ritual. Choose shared use when light bench work needs to remain available with the car present, and when your measured width supports that arrangement.

    None of the three plans is permanent. Start with the fixed boundaries, buy the least movable item last, and keep rolling pieces genuinely easy to relocate. If tools, sports gear, and household supplies also compete for the room, use the broader process in how to plan garage storage before assigning the last open wall.

    Useful products to compare

    These links open current Amazon search results so you can compare dimensions, manuals, ratings, and availability for the exact models on your shortlist.

    Before you buy or install

    Check the current manual for the exact product you are considering. Confirm the assembled dimensions, load rules, mounting requirements, included hardware, clearances, warranty, and any limits that apply to your wall, floor, or garage layout.

    Frequently asked questions

    Can a one car garage hold both a workshop and a parked car?

    Sometimes. Measure the finished room, the vehicle with mirrors, door and hatch movement, and the open depth of the bench. A folding bench supports parking first use. A wider room may allow light bench work beside the car, while machines and long stock still require the car to move outside.

    Is 10 x 20 feet a standard one car garage size?

    No. It is only a planning example in this article. Actual garages vary, and nominal building dimensions may not match the finished interior. Measure at several heights and account for curbs, steps, framing, utilities, and the garage door system.

    How deep should a workbench be in a narrow garage?

    Use the shallowest depth that supports your regular workpieces, clamps, and tools. The examples use 20 and 24 inch tops, but those are not universal targets. Tape the proposed depth on the floor, open the car door, and test your reach before choosing.

    Should the workbench go on the side wall or rear wall?

    A rear bench suits a workshop first room because it leaves both long walls available for shallow storage. A side bench can suit shared use if the measured car envelope and door swing leave a workable gap. Garage doors, service doors, windows, and utilities may settle the choice.

  • Best Adjustable-Height Workbenches for a Garage: Choose by Range and Task

    Best Adjustable-Height Workbenches for a Garage: Choose by Range and Task

    Affiliate disclosure: As an Amazon Associate I earn from qualifying purchases. This article may contain affiliate links, and Bay & Bench may earn a commission at no extra cost to you. Read our full Affiliate Disclosure.

    The best adjustable height workbenches serve very different jobs. A bolted four-leg bench can hold a large static load but may take two people and an upside-down top to reset. A crank model moves more easily. An electric model can change height several times in one session, although its rated load may be much lower. This shortlist comes from current manufacturer product pages and manuals. The comparison keeps the maker’s load wording intact, separates stationary and caster ranges, and flags missing knee-clearance dimensions so a big capacity number does not hide an awkward daily fit.

    Quick answer

    For a compact, stationary garage station, the Seville Classics UltraHD 48-inch manual bench has a broad 28.5 to 42 inch range and a 1,000 lb evenly distributed rating. Choose the Husky 52-inch crank model when one person will switch between seated and standing heights. The Global Industrial 72-inch hand-crank bench offers the widest documented range here, 28 to 48 inches, with a deeper maple top. Pick the Seville electric model for frequent push-button changes and lighter work. Borroughs suits a heavy bench that will be set once for a task or user. Measure your stool, knees, crossbars, cords, and clamp path before ordering.

    Best adjustable height workbenches at a glance

    The ranges below are finished work-surface heights, not bare leg lengths. Load descriptions stay as the manufacturers publish them because a total rating and an evenly distributed rating are not interchangeable. Seated clearance is reported only where the maker gives a useful dimension or construction detail.

    Model and best useSurface heightAdjustmentTopPublished load wordingSeated clearanceWarranty and caveat
    Seville Classics UltraHD UHD20288B
    Compact general work
    28.5 to 42 in, 1 in settingsFour locking knobs on telescoping legs48 x 24 x 1.5 in, polyurethane-coated solid wood1,000 lb evenly distributed37.875 x 22.75 in inner dimensions; knee height not stated1 year limited; indoor use only
    Husky HOLT52XDB12
    Manual sit and stand changes
    26 to 39 in on levelers; 29 to 42 in on castersSynchronized hand crank52 x 24 x 1.2 in, coated parawood or rubberwood300 lb load capacityNo drawer; required support rail can mount at center or rear; knee box not stated3 years limited; original consumer and normal use
    Global Industrial 338345BK
    Wide, deep crank bench
    28 to 48 inHand crank, telescoping legs72 x 30 x 1.75 in, maple butcher block500 lb weight capacityOpen front with frame crossbar; no knee dimensions stated1 year limited
    Seville Classics UltraHD UHD20200B
    Frequent powered changes
    28 to 42 inDual motor, digital control, 3 memories48 x 24 x 1.5 in, polyurethane-coated solid wood264 lb total; family page describes the electric rating as evenly distributedOpen front; underframe and cord path present; knee box not stated1 year limited; indoor use only
    Borroughs E1-WB4830HW-A
    Heavy stationary work
    32.375 to 38.375 in on current product page, 1 in settingsBolted telescoping legs48 x 30 x 1.75 in, solid hardwood2,000 lb evenly distributedFront is open, but minimum height favors a shop stool; exact knee box not statedLimited lifetime; original purchaser and authorized channel
    Gladiator GAWB06HWEG
    Stock watch, not a current first choice
    27.5 to 40.8 inFour bolted, hole-indexed legs adjusted with bench upside down72 x 25 in, UV-coated solid hardwood; thickness not stated3,000 lb max distributedRear panel; no exact knee dimensions statedLifetime limited legs, 1 year top; direct listing is out of stock

    How the shortlist was built

    Each pick needed a current manufacturer listing with a surface range, top specification, adjustment method, and load rating. Manuals filled gaps on setup and warranty. A capacity number was never treated as proof that the bench can withstand hammering, vise torque, or machine vibration. Those forces differ from an evenly spread static load.

    The Seville Classics workbench family page, for example, says its one-year coverage applies to defects under normal home or office use and requires proof of purchase. For size and bench type, start with the garage workbench buying guide.

    Adjustment method decides how often the height will change

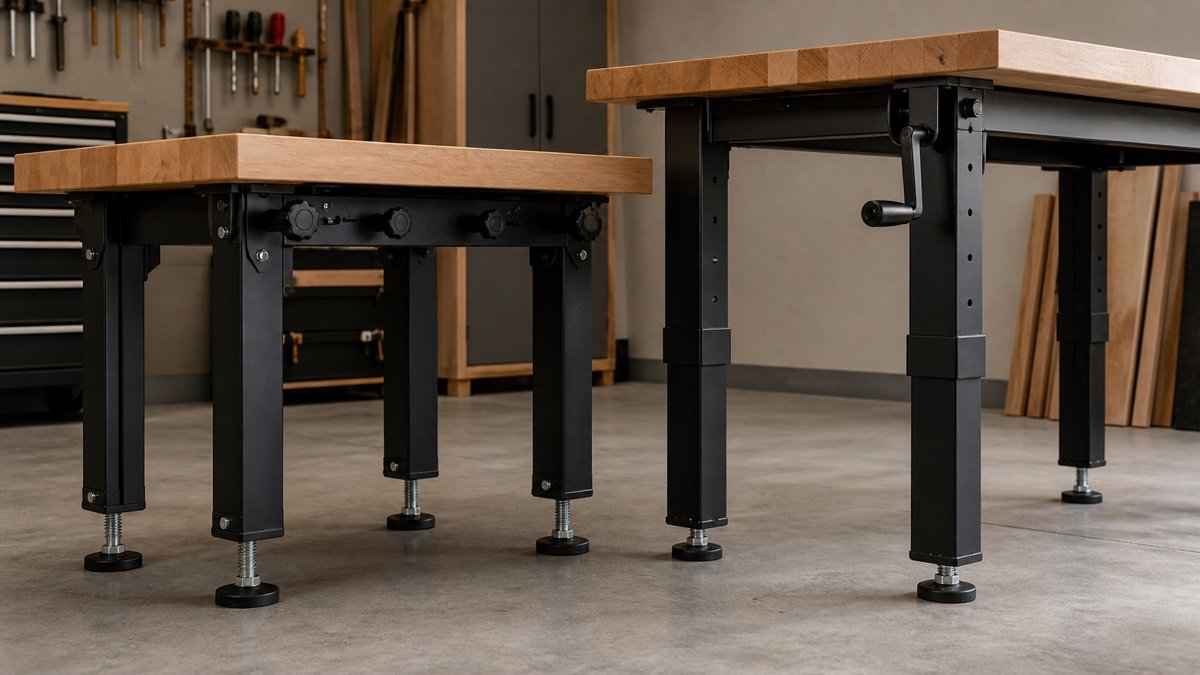
    Four locking knobs suit occasional changes, provided the cleared top can be supported while each leg moves. Bolted legs may stay at one height for months. A synchronized crank is better for regular changes because both sides rise together. Electric motors make sense when a button will be used often.

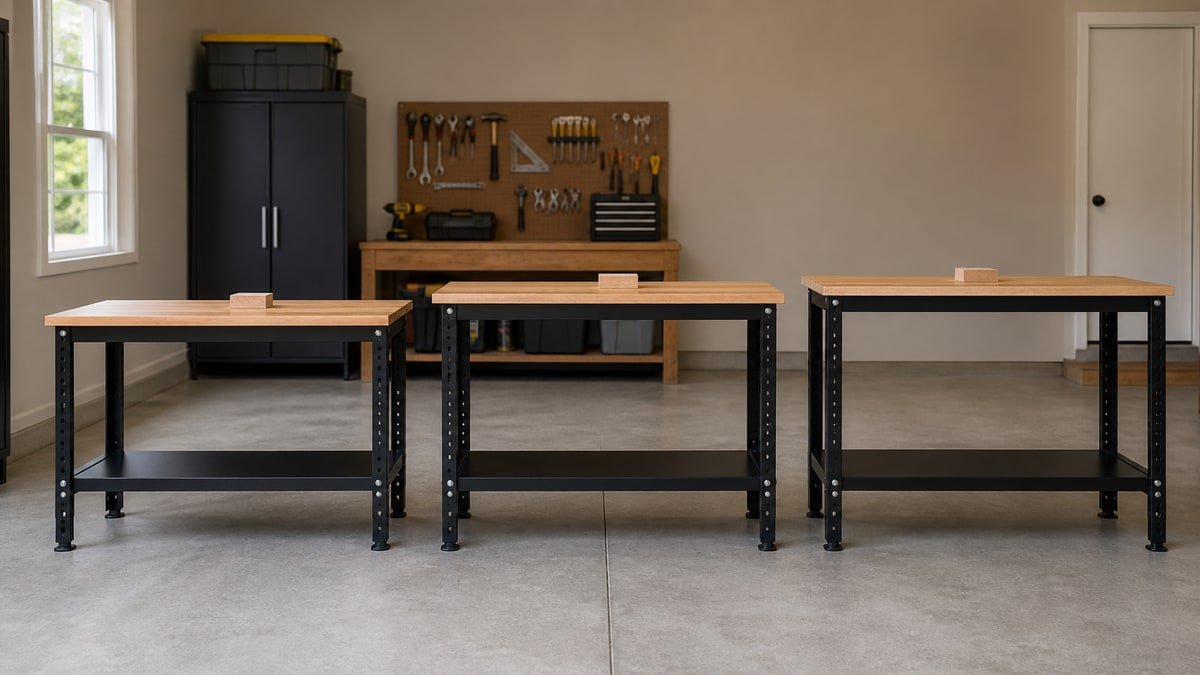
    Threaded feet level a bench on a sloped slab; they do not replace working range. Casters may shift the whole range upward. Enter your measurements in the workbench height calculator, then confirm the bench reaches the result on the feet you will install.

    Close view of locking knob and hand crank adjustable bench frames on leveling feet
    A locking leg is suited to occasional resets; a linked crank is far more convenient when the same bench changes jobs regularly.

    Best compact manual bench: Seville Classics UltraHD 48 inch

    The UltraHD manual model suits a compact garage where height changes are occasional. It has a 48 by 24 inch, 1.5 inch coated solid wood top, four locking knobs, and a 28.5 to 42 inch range in 1 inch steps. Its 1,000 lb rating is expressly evenly distributed, so it should not be read as a vise rating.

    The 37.875 inch inner width helps with a first stool or cabinet check, though Seville does not publish a knee-height rectangle. It is an indoor bench. Optional 3 inch wheels may change working height and behavior.

    Best manual sit and stand bench: Husky 52 inch crank model

    Husky’s crank moves a 52 by 24 inch coated wood top through 26 to 39 inches on levelers or 29 to 42 inches on casters. That three-inch shift can make the caster version too high for a seated target.

    The Husky use and care guide identifies parawood, also called rubberwood, and shows a rod linking the legs. The required support rail can mount at center or rear. Rear placement preserves legroom, but no knee box is published. Capacity is 300 lb. The three-year warranty excludes finish wear, misuse, modification, and improper setup.

    Best wide range hand crank bench: Global Industrial 72 inch

    Global Industrial pairs a wide 28 to 48 inch range with a 72 by 30 inch, 1.75 inch maple butcher block top and a 500 lb capacity. The listing specifies a rounded safety edge; verify how it feels and clears your work. The deep top supports broad assemblies but consumes more aisle space.

    Its manual crank frame guide says to remove items and inspect rather than force a stuck adjustment. The listing gives a one-year limited warranty without detailed terms. Measure the crossbar and stool because no knee box is published.

    Best electric bench for repeated changes: Seville UltraHD 48 inch

    The electric UltraHD fits repair, electronics, and assembly sessions with several height changes. Dual motors cover 28 to 42 inches, and the controller stores three positions. Its 48 by 24 inch top is 1.5 inch coated solid wood. A removable tool rack and built-in power strip keep light tools close.

    The tradeoff is a 264 lb total rating, which Seville’s family page describes as evenly distributed. Do not treat it as a point-load or vise rating. The frame also needs an indoor outlet, a safe cord route, and a real knee and thigh test.

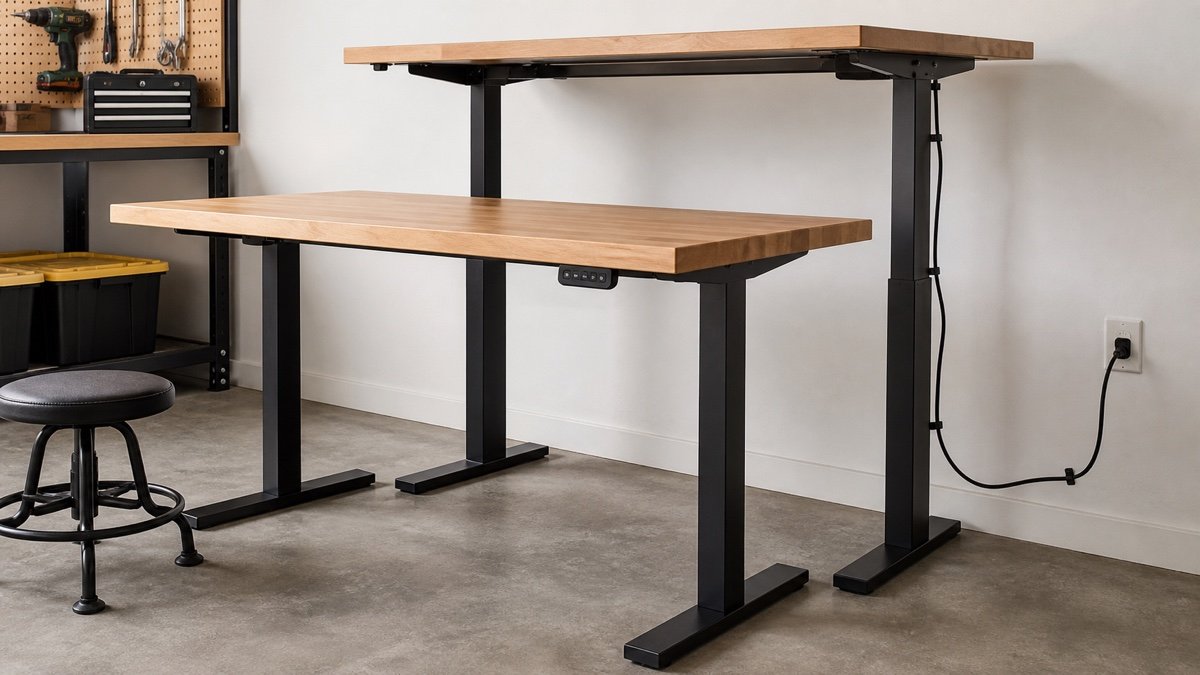
    Electric adjustable wood workbench lowered for a garage stool with a second bench raised behind it
    Memory controls are useful when seated and standing positions repeat, provided the cord stays clear and the task fits the lower load rating.

    Best heavy stationary bench: Borroughs 48 inch hardwood

    Borroughs gives this model a 32.375 to 38.375 inch range, a 48 by 30 by 1.75 inch solid hardwood top, and a 2,000 lb evenly distributed capacity. Bolted legs move in 1 inch steps, so this bench favors one user or a repeatable task.

    The Borroughs assembly manual lists 32.25 to 38.25 inches, one eighth inch below the model page at both ends. Plan from the model page, then confirm the supplied hardware. The limited lifetime warranty covers the original purchaser through Borroughs or an authorized distributor and excludes misuse, modification, and installation damage.

    Gladiator 6 foot has strong specifications, but check stock

    Gladiator’s 6 foot bench has a 72 by 25 inch top, a 27.5 to 40.8 inch range, and a 3,000 lb max distributed rating. Adjustment is slow. The Gladiator and Whirlpool manual puts the bench upside down while four hole-indexed legs are secured with bolts and wingnuts. It also warns that casters can create a tipping hazard.

    Gladiator’s current adjustable workbench collection lists all three sizes as out of stock for direct purchase. Treat this as a stock watch. Warranty coverage is lifetime limited on the legs and one year on the top.

    Seated clearance is a separate measurement

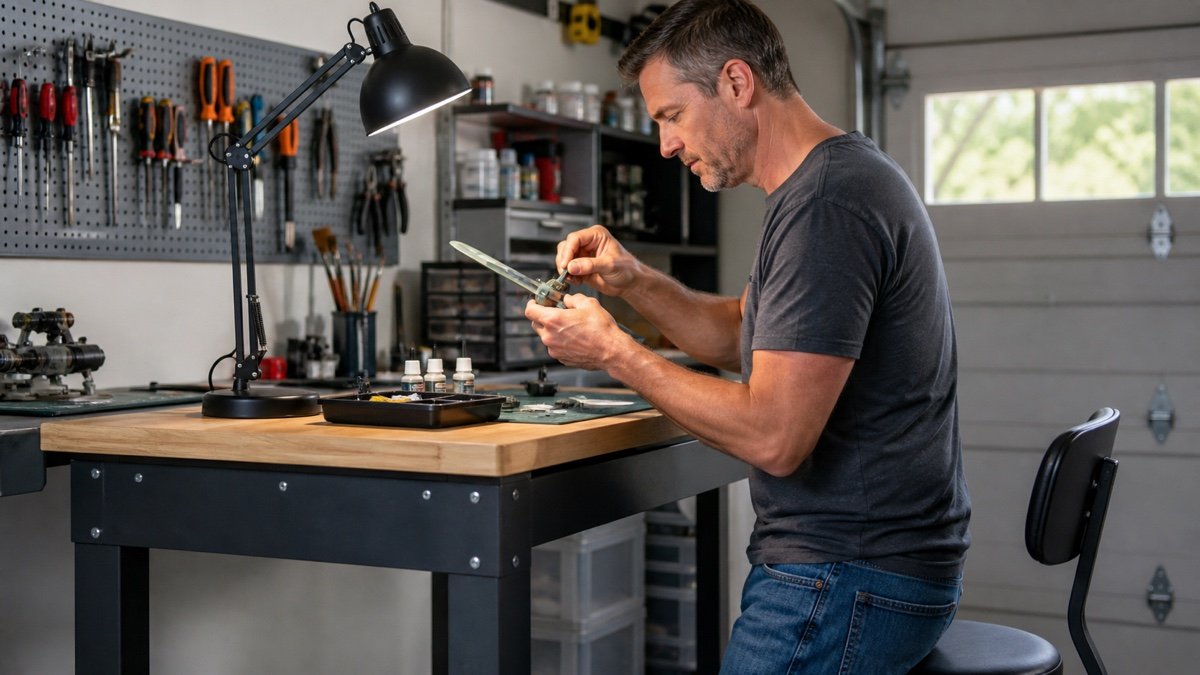
    A 28 inch surface does not guarantee knee room. Subtract top thickness and underframe depth, then check the rail, crank shaft, motor housing, drawer, and stool foot ring. Sit at a temporary top in your garage shoes. Your thighs should enter cleanly and your feet need stable support.

    Because few makers publish a complete knee box, tape the bench and stool footprints on the slab. The garage storage fit calculator compares stored and working depth. The guide to measuring a garage for storage catches doors, cars, ledges, and outlets.

    Choose the range by task, then check clamping and load

    Lower settings suit seated electronics and close inspection. Middle heights work for many assembly jobs. A higher top can reduce bending during detailed standing work, while forceful planing may feel better below elbow level. A benchtop machine raises the real working surface above the wood.

    Next inspect the edge. A vise needs enough overhang, thickness, and support; clamp jaws need a path past rails and controls. A distributed rating does not describe vise torque, hammer blows, or machine vibration. Ask the manufacturer about unusual loads.

    A five step decision before ordering

    Record one seated target and two standing task heights. Reject benches that miss them on the feet you will use. Decide how often the height will change, then mock up the top, stool, cords, clamps, and longest workpiece. Read the current manual and warranty for the exact model.

    Price delivery, power, casters, stool, vise, and lighting with the garage storage budget calculator. Place the station beside cabinets and parking in a garage storage plan. Choose the range and mechanism that fit your common jobs.

    Useful products to compare

    These links open current Amazon search results so you can compare dimensions, manuals, ratings, and availability for the exact models on your shortlist.

    Before you buy or install

    Check the current manual for the exact product you are considering. Confirm the assembled dimensions, load rules, mounting requirements, included hardware, clearances, warranty, and any limits that apply to your wall, floor, or garage layout.

    Frequently asked questions

    What height range should an adjustable garage workbench have?

    Choose a range that includes your measured seated position and the working heights of your recurring tasks. A range beginning around 28 or 29 inches can suit many seated setups, while a top near 40 to 42 inches can support close standing work. Body size, stool height, shoes, tool thickness, and task force can shift those targets. Mock up each position before relying on a catalog range.

    Can I adjust a workbench while tools are on it?

    Clear the top unless the exact manual permits adjustment under load and states a moving-load limit. Even a large static rating may not describe what the crank or motor can lift. If a crank binds, stop rather than forcing it. Check for an uneven load, obstruction, loose connection, or leg that is out of sync.

    Is an electric adjustable workbench strong enough for woodworking?

    It can suit layout, sanding, light assembly, carving, and other work within its stated limits. Capacity alone does not cover sideways planing force, hammering, vise torque, or machine vibration. Check frame stiffness, top attachment, clamp path, motor housing, and the manufacturer’s allowed use before mounting a vise or heavy machine.

    Do casters change an adjustable workbench height or capacity?

    Often, yes. The Husky model in this guide moves from a 26 to 39 inch range on levelers to 29 to 42 inches on casters. Borroughs also publishes different heights and lower load ratings for some mobile configurations. Use the rating and range for the exact wheel kit, support layout, and working state rather than adding generic casters to stationary specifications.

  • Best Folding Workbenches for Garage Use: A Fit First Shortlist

    Best Folding Workbenches for Garage Use: A Fit First Shortlist

    Affiliate disclosure: As an Amazon Associate I earn from qualifying purchases. This article may contain affiliate links, and Bay & Bench may earn a commission at no extra cost to you. Read our full Affiliate Disclosure.

    The best folding workbenches for garage projects fall into several distinct formats. A wall mounted shelf, a clamping platform, a compact resin table, and a larger portable surface behave differently. This shortlist compares current manufacturer documentation checked on August 21, 2026. It looks beyond the largest load number to open size, stored size, clamping method, setup, restrictions, and missing specifications. Those details matter when the car must return after the project.

    Quick answer

    The WORX Pegasus is the clearest documented all-around clamping model, while the Duramax Spence makes sense when a clear wall can support a permanent folding surface. The current U.S. Keter table weighs 24.03 pounds, includes two adjustable clamps, and carries a 1,000 pound stated load with important manual restrictions. DEWALT emphasizes rapid setup and a large stated support load. BLACK+DECKER offers versatile clamping, yet its current page contains conflicting load figures, so capacity alone should not decide the purchase.

    Best folding workbenches for garage: normalized comparison

    This table keeps manufacturer wording visible instead of forcing unlike claims into one ranking. Dimensions describe what the cited page actually labels. A missing folded measurement is marked as missing, not estimated from a photograph. Stated loads are not directly comparable because the brands use different modes, surfaces, and wording.

    Model and formatDocumented working sizeDocumented folded sizePublished load wordingHolding formatBest fit
    Duramax Spence, wall mounted48 by 20 inch topNot stated on current page250 lbPlain wood surfacePermanent wall station
    WORX Pegasus WX051, portable clamping31 by 25 inches, 32 inches high35 by 25 by 5 inches300 lb table, 1,000 lb sawhorseTwo clamps, four dogsGeneral repair and clamping
    BLACK+DECKER WM425-A, clamping centerNot labeled; overall panel lists 33.6 high by 28.7 long by 9.5 wideNot separately labeledPage conflicts between 550 lb and 55 lbOne handed clamp and four jaw positionsIrregular workpieces
    Keter Folding Work Table, resin portableNot labeled; U.S. page lists exterior dimensions of 35.8 deep by 21.6 wide by 29.7 highNot stated on current pageUp to 1,000 lb, with balanced load rulesTwo adjustable clampsTemporary support and hand clamping
    DEWALT Express DWST11556, portable tableNot stated on current pageNot stated on current pageMetal legs support up to 1,000 lbCompatible with trigger clampsFast temporary setup

    Once a format looks plausible, compare its full station requirements with the garage workbench buying guide. A folded table still needs a safe storage position, and a wall bench still needs open floor space for the person using it.

    How this documentation based shortlist was built

    Each model fills a distinct role and has a current official page with enough information to discuss honestly. The shortlist rewards transparent dimensions, a clear folding method, useful holding features, and a believable place in a residential garage. It does not claim that the benches were tested side by side. Manufacturer capacity statements are reported as statements, not independently verified performance.

    Before ordering, draw the open footprint and the stored footprint. Include clamps, handles, legs, wall brackets, and the working stance. The garage storage fit calculator helps keep those two states separate. If the exact product page omits a folded dimension, ask the manufacturer or measure a local display. Do not invent the number from shipping dimensions, which can include packaging or a different orientation.

    Duramax Spence for a permanent folding wall station

    The official Duramax Spence product page lists a 48 by 20 inch worktop, an approximate product weight of 28.2 pounds, and a 250 pound capacity. It describes a stained wood top supported by a heavy duty bracket. The format leaves the floor open when folded, which is attractive beside a vehicle or in a narrow utility bay.

    Wall mounting moves the hard questions into the building. The useful height is set during installation. Fastener type, wall structure, bracket spacing, and obstructions behind the finish all matter. The current page does not publish a folded projection, so measure the bracket and top in person or request that figure before assuming a car door will clear. This is the least portable choice here, but it also avoids caster wobble and does not need a separate floor parking spot. It fits repair, potting, packing, and light assembly better than work that demands integrated clamp jaws.

    WORX Pegasus WX051 for repeat clamping jobs

    The official WORX Pegasus WX051 page publishes both open and folded dimensions: 31 by 25 inches at a 32 inch working height, then 35 by 25 by 5 inches folded. It weighs 30 pounds. WORX states a 300 pound table capacity and a 1,000 pound sawhorse capacity. Those are different modes, so use the number tied to the way the unit is configured.

    Two integrated clamps, four clamp dogs, and an 18 inch maximum clamping width make this the most clamping-focused entry on paper. The top is modest, yet the edge and dog arrangement can be more useful than a larger plain table when a door, frame, pipe, or mower part needs to stay still. Its 5 inch folded depth is unusually helpful for planning a wall slot. Thirty pounds remains a real carry, especially when lifting it over stored bins. Reserve a floor level or waist level home rather than balancing it overhead.

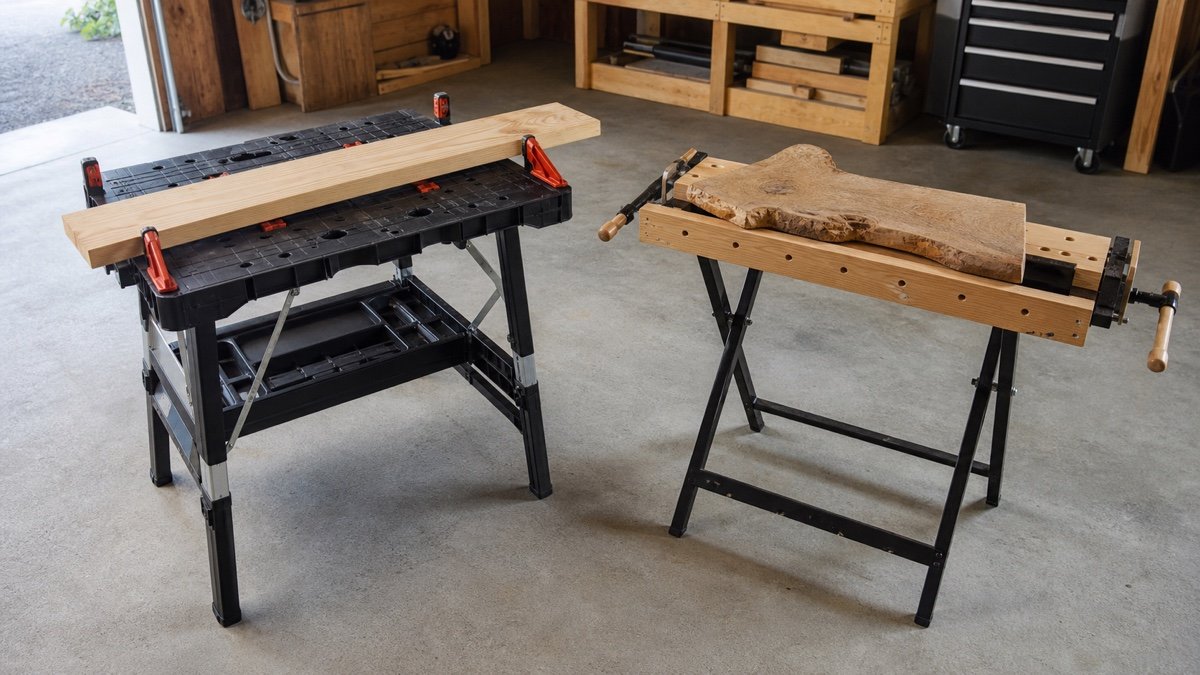
    Two portable clamping workbenches open for comparison in a garage
    Integrated jaws and bench dogs can make a compact top more useful than a larger table that cannot hold the work.

    BLACK+DECKER WM425-A when jaw positions matter

    The official BLACK+DECKER WM425-A page describes a one handed clamp, four swivel pegs, vertical clamping to 1 9/16 inches, parallel clamping to 7 1/2 inches, peg clamping to 19 inches, and diagonal clamping to 30 inches. Its specification panel lists 33.6 inches high, 28.7 inches long, 9.5 inches wide, and 40.4 pounds. The page does not clearly label that set as open versus folded dimensions.

    There is also a material contradiction that should stop any load based ranking. The page heading and overview refer to 550 pounds, while a feature bullet says 55 pounds. Until BLACK+DECKER corrects or explains the discrepancy, confirm the current manual or ask support for the applicable working load. The clamping geometry remains the reason to consider this model. It can hold shapes that slide around on a flat table, but at 40.4 pounds it is not the light option. Check whether its stored stance is stable and whether you can carry it without catching the jaw assembly on nearby objects.

    Keter Folding Work Table for a quick-opening temporary station

    The current U.S. Keter product page lists exterior dimensions of 35.8 inches deep, 21.6 inches wide, and 29.7 inches high. It gives a product weight of 24.03 pounds, a 1,000 pound loading capacity, and two adjustable clamps. The page does not label those exterior measurements as open or folded, so they should not be treated as a verified stored envelope.

    The official Keter assembly and use manual adds the rules the headline cannot show. It says not to exceed 1,000 pounds, warns against unbalanced loads, and says not to mount or clamp power tools to the table. Those limits narrow the fit. This is a temporary support and hand clamping surface, not a substitute router table or a base for a benchtop machine. At just over 24 pounds, it still deserves a low, stable storage spot. Verify the folded dimensions before buying it for a tight slot.

    DEWALT Express DWST11556 for rapid setup

    The official DEWALT DWST11556 page says the Express Folding Workbench can be set up and folded in less than three seconds. It describes a large work surface, compatibility with trigger clamps, and metal legs that support up to 1,000 pounds. The plastic top and metal leg combination aims at a portable temporary station rather than a permanent cabinet bench.

    The current page does not publish the full open and folded dimensions in its main specification area. That omission matters more than the setup speed if the bench must slide between a freezer and a wall. Confirm those dimensions through current DEWALT support or a physical measurement before committing the space. Also check which clamps are included versus merely compatible. This format suits users who value a broad surface and quick reset, provided the verified stored size fits and the work does not depend on built in vise jaws.

    Stored size usually matters before capacity

    A folding bench spends more hours stored than open. Measure the exact home first: wall slot width, available height, floor ledges, door trim, outlets, and the swing of anything nearby. Then measure the route to the working location. A handle or clamp that extends only two inches can snag a vehicle mirror or stop the unit passing between shelving.

    Use the room process in how to measure a garage for storage, and mark both rectangles on the floor. The stored rectangle needs retrieval space in front of it. The open rectangle needs a working stance and room for the normal workpiece. Capacity enters after fit. A 1,000 pound statement has little value if the bench blocks the car, is too heavy to move comfortably, or lacks the clamping format the task requires.

    Wall mounted or portable is a behavior choice

    A wall mounted bench is always in the right room and never needs a floor parking place. It also commits one wall, depends on sound mounting, and must be cleared before folding. A portable bench can move outdoors for dusty work and can serve different parts of the garage. In return, someone must unfold it, stabilize it, and put it away. That routine decides whether the space saving feature will actually be used.

    Renters and owners with uncertain wall framing should not treat wall mounting casually. Check lease terms and use the manufacturer’s anchoring instructions. The article on garage wall storage for renters explains why freestanding support can be a safer fit when drilling is restricted. Whichever format you select, keep the closed unit from tipping. Do not lean a narrow folded bench in a traffic path unless the manual identifies that as a safe storage position.

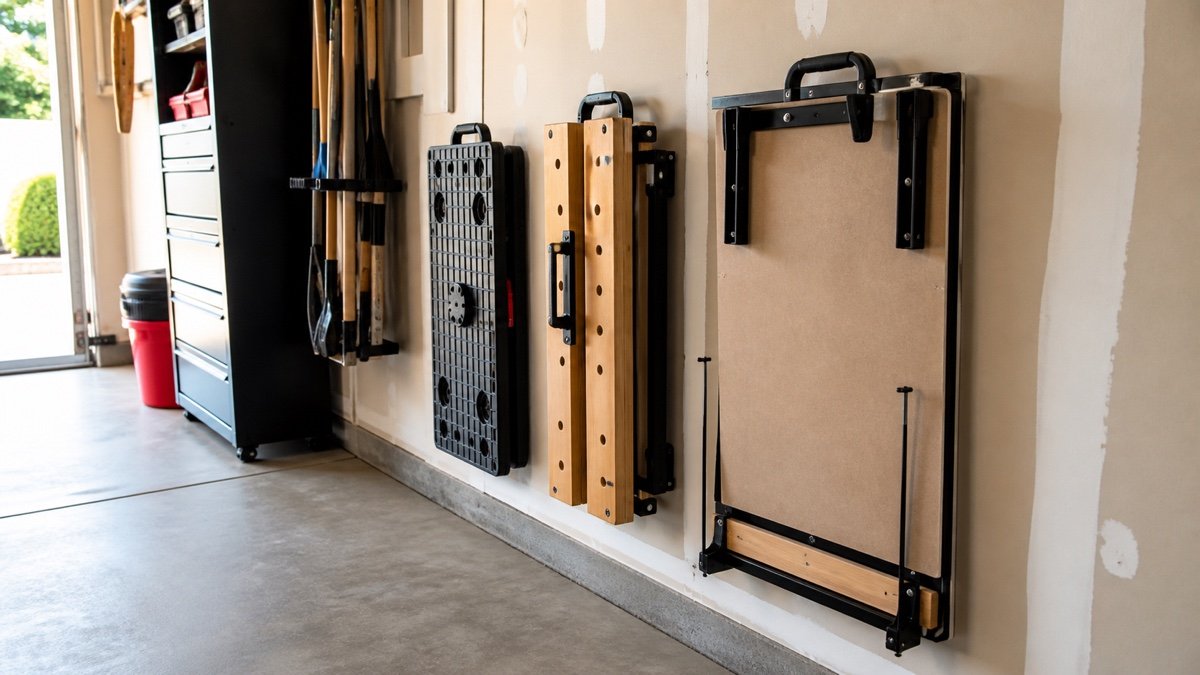
    Folding workbenches stored vertically in dedicated garage wall positions
    Plan a stable stored position with enough hand room to retrieve the bench without shifting other equipment.

    Price the complete working station

    The carton price may omit the pieces that make the bench useful. Count clamps, bench dogs, wall hardware, a vise, task lighting, a sacrificial top, storage hooks, and delivery. A wall unit may require suitable blocking or professional installation. A portable unit may need a dedicated rack so it does not become a trip hazard. Replacement clamps and proprietary parts also affect long term value.

    Enter those additions in the garage storage budget calculator. Compare the total with a simple fixed bench if the garage can spare the footprint. Folding hardware earns its cost only when it restores space you use. The best purchase is often the least complicated model that fits the stored slot, supports the usual work, and can be reset without turning cleanup into another project.

    Choose by the job you repeat

    Pick Duramax when the wall is known, the floor must remain clear, and a plain 48 inch surface is enough. Pick WORX when integrated clamps and a documented 5 inch folded depth solve the real problem. Consider BLACK+DECKER for its jaw range only after resolving the load discrepancy. Keter makes sense for temporary hand work when its 24.03 pound product weight and manual restrictions fit the routine. DEWALT suits rapid table setup once its missing dimensions are verified.

    Before paying, download the current manual for the exact model and confirm dimensions, load conditions, clamp inclusions, storage orientation, warranty, and setup steps. Product pages change, and similar names can hide different revisions. A folding bench should make the garage easier twice: when work begins and when the car comes home.

    Useful products to compare

    These links open current Amazon search results so you can compare dimensions, manuals, ratings, and availability for the exact models on your shortlist.

    Before you buy or install

    Check the current manual for the exact product you are considering. Confirm the assembled dimensions, load rules, mounting requirements, included hardware, clearances, warranty, and any limits that apply to your wall, floor, or garage layout.

    Frequently asked questions

    What is the best folding workbench for a small garage?

    The best model is the one whose verified folded size fits a stable storage spot and whose open format supports your usual job. WORX publishes a useful 5 inch folded depth and integrated clamping. A wall model can save more floor space when the wall structure and installation are suitable.

    Can I mount a power tool on a folding workbench?

    Only if both the tool and bench manufacturers permit that exact use and the mounting method follows their instructions. The cited Keter manual specifically says not to mount or clamp power tools to its table. Do not assume a high static load statement means the surface can handle machine vibration or torque.

    Are folding workbench load ratings comparable?

    Usually not without more context. Brands may state table mode, sawhorse mode, evenly distributed load, or support through the legs. Read the exact wording and manual. BLACK+DECKER currently shows conflicting figures on one page, which demonstrates why a single capacity number should not drive the purchase.

    Should a folding workbench be stored upright?

    Follow the model’s manual and use a stable position that cannot tip into people, pets, or a vehicle. Some folded benches stand securely while others need a wall hook or rack. Check handles, clamps, and latches before lifting, and avoid overhead storage if the weight makes retrieval awkward.

  • Mobile vs Fixed Workbench: Which Setup Fits Your Garage?

    Mobile vs Fixed Workbench: Which Setup Fits Your Garage?

    Affiliate disclosure: As an Amazon Associate I earn from qualifying purchases. This article may contain affiliate links, and Bay & Bench may earn a commission at no extra cost to you. Read our full Affiliate Disclosure.

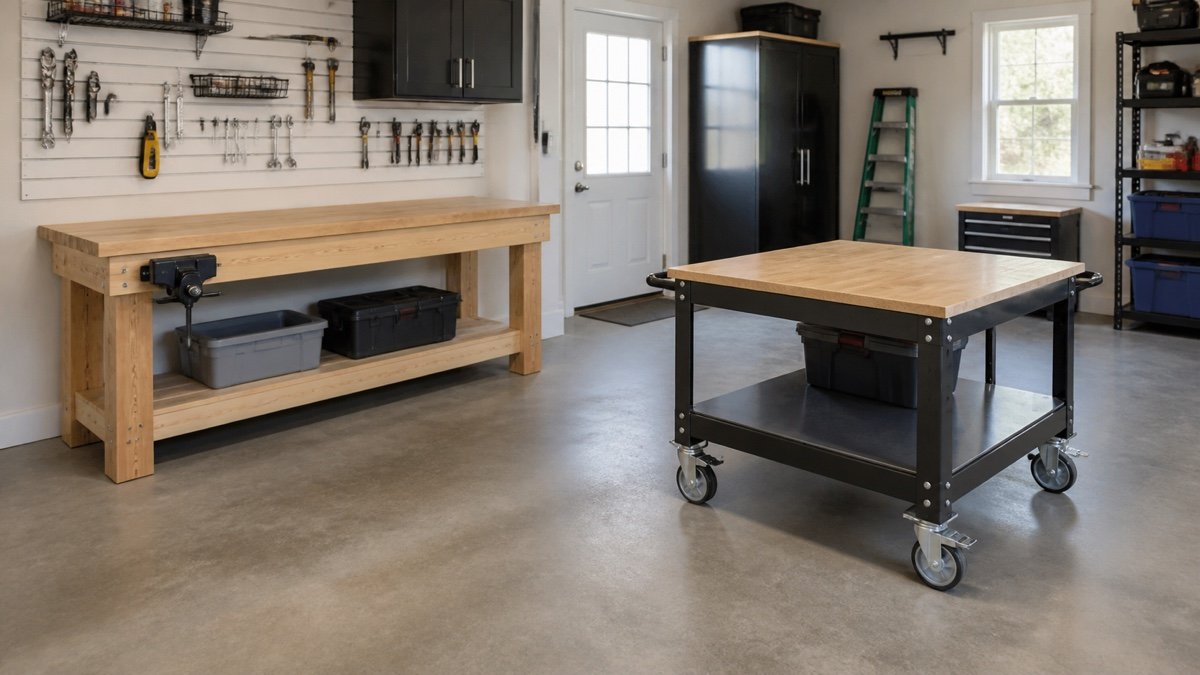
    The mobile vs fixed workbench choice depends on how often your garage changes jobs. The wheels are only part of it. A rolling bench can move into open space for assembly, then return to the wall before the car comes home. A fixed bench is ready without a setup ritual and gives a vise or mounted tool a steady home. Mobility loses its appeal when the loaded bench is difficult to start, the slab has joints and slopes, or every move requires clearing cords and loose tools. Fixed placement becomes frustrating when a long project needs access from all sides or when the same floor area must serve parking. Compare the two formats with the bench fully loaded, the vehicle parked, and the normal work route open. Loaded movement across your own floor is the test that matters.

    Quick answer

    Choose a fixed workbench when stability, a permanently mounted vise or tool, immediate readiness, and wall services matter most. Choose a mobile workbench when shared parking space, access around wide projects, and layout changes are routine. Test a secured representative load across ordinary floor joints, follow the caster instructions, and stop before any unsafe slope. A hybrid setup often works well: one fixed wall bench for forceful work and a smaller rolling table for assembly or temporary support.

    Mobile vs fixed workbench decision matrix

    Decision pointMobile workbenchFixed workbench
    Access around a projectCan move into open space when the route is clearUsually limited to front and side access
    Forceful workDepends on caster locks, leveling feet, frame stiffness, and floorCan use fixed feet and approved wall or floor restraint
    Parking conversionCan leave the bay, but needs a storage positionAlways consumes its assigned footprint
    Mounted toolsCords, top weight, vibration, and movement need planningStable service location is easier to maintain
    Setup timeRoute clearing, wheel locking, and leveling may repeatReady at the same position
    Floor sensitivityJoints, slope, debris, and thresholds affect movementLeveling and anchoring matter, but daily rolling does not

    Neither format wins every row. Circle the two rows that affect your weekly work, then test those conditions in the actual garage.

    A fixed bench stays ready for repeat work

    A fixed workbench stays connected to its light, power, dust hose, wall storage, and vise. You can begin a ten minute repair without rolling, locking, leveling, or reconnecting anything. That lack of setup is easy to undervalue.

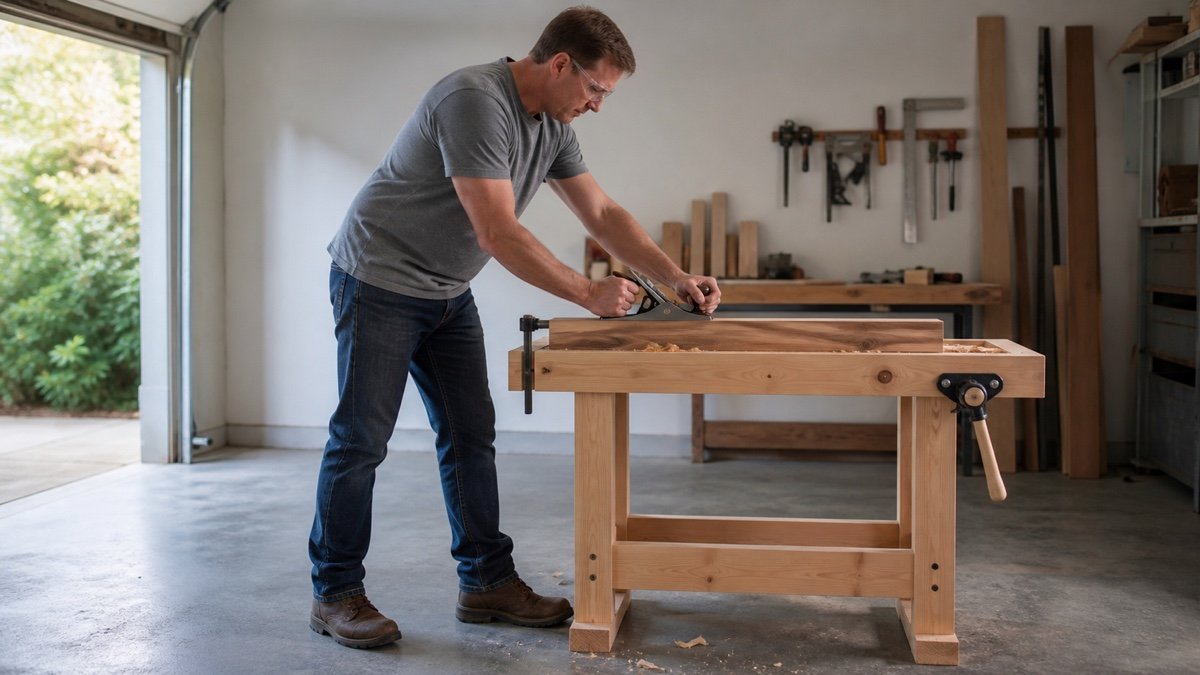
    Fixed feet also give the frame a direct path to the floor. If the bench and building structure allow approved restraint, the setup can resist racking during planing, filing, or vise work better than a casual rolling cart. Follow the bench and anchor instructions. A wall finish alone does not prove that a fastening point is suitable.

    The cost is permanent space. Measure the full working envelope, including the cabinet, vise handle, clamped board, open drawer, stool, and your body. Each part can project into the aisle. Use the garage workbench buying guide to compare top, frame, storage, and mounting after the basic format is chosen.

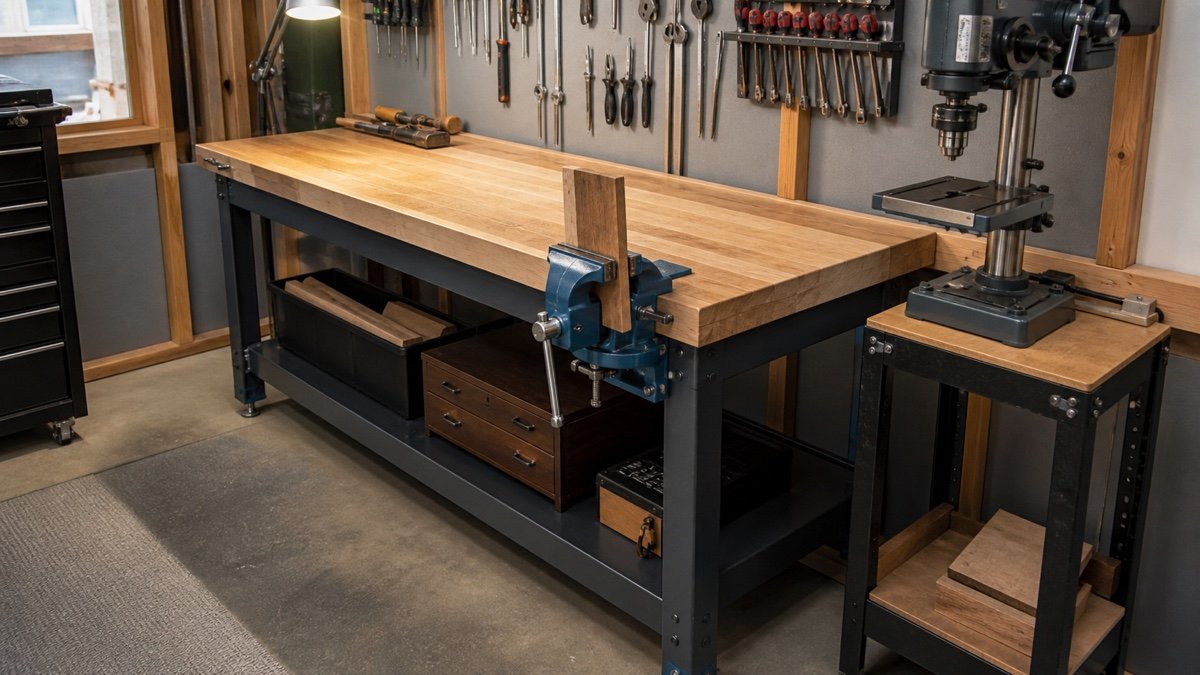
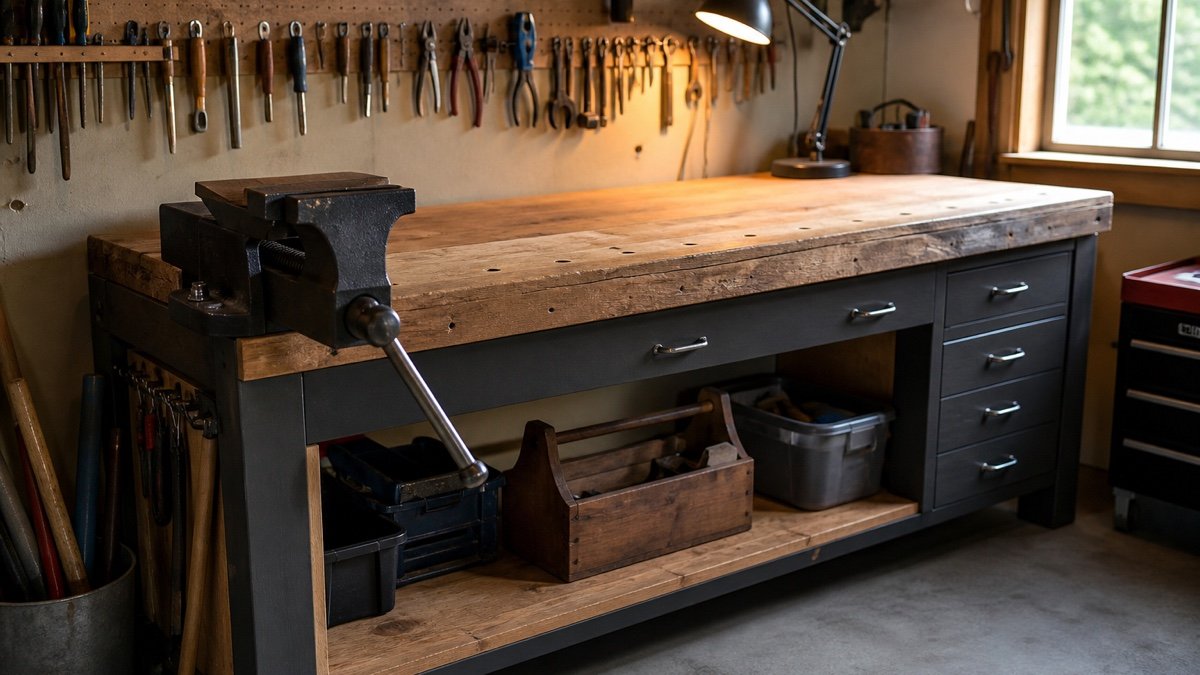
    Fixed garage workbench with vise and mounted drill press station
    A fixed bench keeps a vise and dense tools ready without a moving setup step.

    A mobile bench has to move well when loaded

    A mobile bench makes sense when it moves often enough to justify its compromises. It can become an island for a cabinet door, support long stock near another tool, or clear a parking bay. Access from four sides can make a moderate top feel more useful than a deeper wall bench.

    The bench must still have a destination. Mark both its working position and its parked position. Then draw the route between them. Door tracks, car mirrors, floor joints, shelving feet, and stored bins can turn a short move into a slow shuffle.

    Wheel diameter, tread, bearing, total load, and floor condition affect how easily the bench starts and rolls. Hamilton Caster’s selection guidance notes that larger wheels generally roll more easily and that uneven floors, shock loads, moisture, and debris change the application. Use the caster maker’s data for the exact load and conditions rather than judging by wheel appearance.

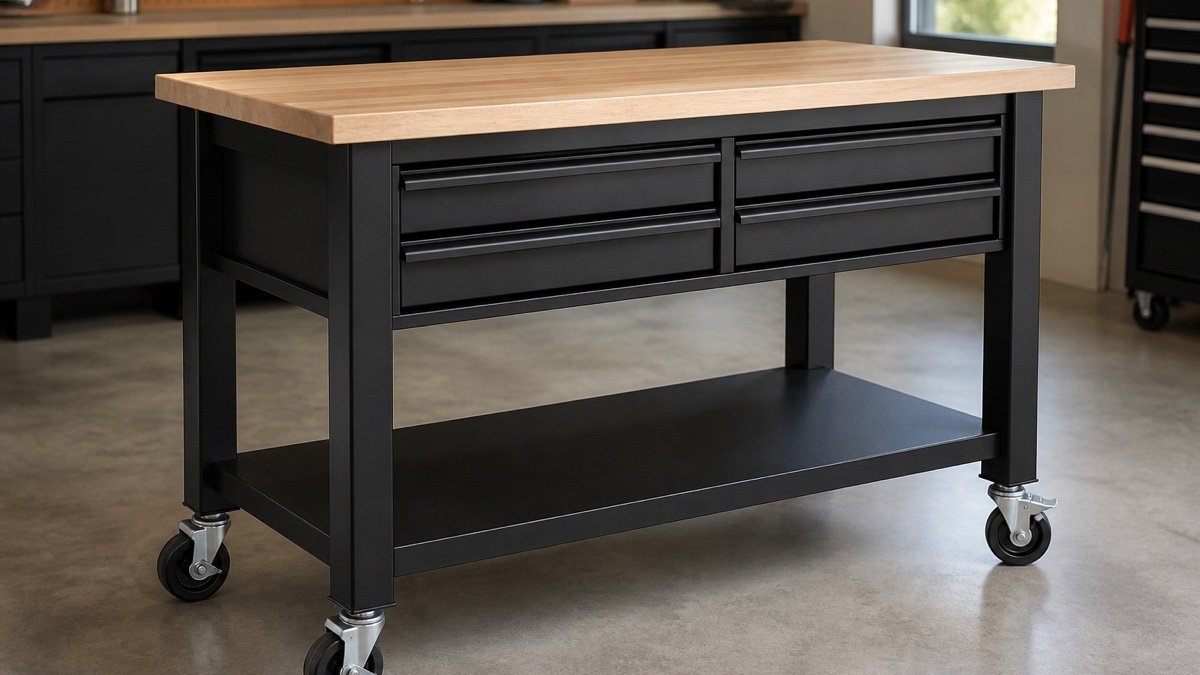
    Loaded mobile workbench crossing a marked route on locking casters
    A mobility test should use the real route and a realistic secured load.

    Stability has several weak links

    Locking the wheels leaves several other sources of movement. Some brakes stop wheel rotation but allow the swivel to pivot. Some total locks secure both motions. Frame flex, wheel play, mounting plate movement, top overhang, floor slope, and a high center of gravity can still produce movement.

    Test the same direction of force the work will create. A vise on the corner loads the bench differently from sanding near the center. Press lightly at the front, side, and diagonal while the bench is empty, then repeat with a secured representative load. Stop if a caster lifts, the frame racks, or hardware shifts.

    Leveling casters or retractable wheel systems can place the bench on feet during work and on wheels during movement. They add cost, height, and hardware that needs inspection. Confirm their combined rating and installation requirements. Do not improvise a lift mechanism around a bench that was not designed for it.

    The garage floor can settle the question

    Walk the proposed route slowly and inspect every joint, crack, drain, threshold, patch, and slope. Sweep it, then test again after normal garage use. A wheel that rolls well on clean polished concrete may catch when the floor carries sawdust or a small screw.

    Sloped garage slabs can make an unlocked bench move and can shift weight toward fewer casters. Brakes are parking devices, not permission to work on an unsafe incline. Check the caster and bench instructions for slope limits, brake use, and required leveling.

    A fixed bench avoids daily travel but still needs a stable bearing surface. Check each foot, use the approved leveling method, and keep water away from materials that cannot tolerate it. The garage measuring guide includes floor and obstruction checks that apply to either setup.

    Parking and project space need separate drawings

    A rolling bench saves parking space only if its parked location does not block something else. Tape the working footprint, the parked footprint, and the entire route. Park the vehicle, open its doors and hatch, then move a box along the normal path to the house.

    Use the garage storage fit calculator to compare the main rectangles, but add moving envelopes by hand. A swiveling caster can swing beyond the frame. A vise handle and a long workpiece can turn a compact cart into a wide object. Keep required access clear around doors, utilities, and electrical equipment.

    A fixed bench asks for only one permanent zone, although the user and project still need space in front. If that zone never conflicts with parking, mobility may add work without solving a problem. If every fixed location blocks a recurring task, wheels may be worth the routine.

    Mounted tools favor predictable support

    A heavy vise, grinder, drill press, or other benchtop machine changes the center of gravity and the force entering the frame. Read both manuals. Confirm top thickness, bolt pattern, edge distance, support, capacity, and whether the bench must be secured. A strong tool does not make a light cart suitable.

    Fixed placement simplifies cords, task lights, and dust connections. Route them so they do not cross a walking path or contact moving parts. A mobile station needs a deliberate disconnect and storage routine. Never roll the bench with a live cord trailing behind it.

    Mobile mounting can still work when the tool and bench are designed for it. Keep loose accessories in closed storage, lower the table or head if the manual calls for it, and secure anything that can shift. Move slowly from a position where you can see the route. If a machine has its own stand requirements, those instructions govern.

    Run a loaded mobility test

    1. Estimate or weigh the empty bench, drawers, tools, mounted equipment, and normal project.
    2. Secure the load and close every drawer and door.
    3. Clear the route and remove cords, hoses, scraps, and floor debris.
    4. Unlock the correct wheel and swivel controls.
    5. Push slowly from the frame, not from a drawer pull or project.
    6. Cross each joint in both directions and make the tightest normal turn.
    7. Park, lock, level if required, and check movement at the work surface.

    If the bench needs a hard shove, catches at a joint, or cannot turn without striking storage, it is not practically mobile for that load and route. Reducing the load may help. A smaller assembly cart may be a better companion to a fixed bench than one very heavy rolling station.

    Hybrid layouts often waste less effort

    A fixed wall bench can hold the vise, dense tools, chargers, and task light. A lighter rolling table can handle assembly, outfeed support, or temporary projects in open space. Each unit does the job that suits its format.

    The garage storage planning guide helps place daily work, mobile equipment, and stored gear into separate zones. The broader garage storage systems guide can keep the rolling route free instead of letting totes and sports gear creep into it.

    Before buying either style, compare the complete dimensions, loaded capacity wording, top attachment, wheel or foot hardware, brake type, drawer latches, handle position, and warranty. A mobile bench should remain easy to move after it is useful. A fixed bench should earn the floor it occupies by being stable and ready. If neither statement is true in the mockup, revise the layout first.

    Useful products to compare

    These links open current Amazon search results so you can compare dimensions, manuals, ratings, and availability for the exact models on your shortlist.

    Before you buy or install

    Check the current manual for the exact product you are considering. Confirm the assembled dimensions, load rules, mounting requirements, included hardware, clearances, warranty, and any limits that apply to your wall, floor, or garage layout.

    Frequently asked questions

    Is a mobile workbench stable enough for a vise?

    Some are, but the frame, top, caster system, floor, vise position, and manufacturer instructions all matter. Test controlled force in every direction and stop if the bench racks or a wheel lifts.

    Do locking casters make a workbench stationary?

    They reduce movement, but lock designs differ. A wheel brake may not stop swivel motion, and play can remain in the frame or mounting. Leveling feet or a retractable system may feel steadier when approved.

    When is a fixed workbench better?

    A fixed bench is usually better when forceful work, mounted tools, wall services, and immediate readiness matter more than changing the layout.

    Can one garage use both bench types?

    Yes. A fixed bench can hold the vise and dense tools, while a lighter rolling table handles assembly or temporary support. Keep a clear route and a defined parking place for the mobile unit.

  • 34 vs 36 vs 38-Inch Workbench Height: Which Feels Right?

    34 vs 36 vs 38-Inch Workbench Height: Which Feels Right?

    Affiliate disclosure: As an Amazon Associate I earn from qualifying purchases. This article may contain affiliate links, and Bay & Bench may earn a commission at no extra cost to you. Read our full Affiliate Disclosure.

    The 34 vs 36 vs 38 inch workbench height choice looks like a two inch step between three ordinary numbers. At the bench, each step is noticeable. A 34 inch surface can give a taller user room to lean into planing or assembly. A 38 inch top can bring detail closer to the eyes and reduce bending for a shorter user. The familiar 36 inch option often lands between those jobs, although comfort still depends on the user and task. Compare each height with your measured elbow level, then add the thickness of the workpiece, vise, mat, or machine. A top that is 36 inches from the floor may create a 40 inch hand position once the project is clamped. The tables and tests below turn the three labels into working differences you can feel before you buy.

    Quick answer

    Choose among 34, 36, and 38 inches by measuring your standing elbow height and subtracting each bench height from it. A surface several inches below the elbow often suits general or forceful work, while a surface near the elbow may suit close visual tasks. Count anything placed on the top. If the result is still uncertain, tape or build three stable mockups and spend ten minutes doing the same task at each one.

    34 vs 36 vs 38 inch workbench height in measured terms

    Start with your elbow height rather than your total height. Two people who are the same height can have different arm and torso proportions. Stand naturally, bend the elbow, and measure from the floor. Then calculate the difference between that number and each candidate bench.

    Measured standing elbow height34 inch bench36 inch bench38 inch bench
    36 inches2 inches below elbowAt elbow2 inches above elbow
    38 inches4 inches below elbow2 inches below elbowAt elbow
    40 inches6 inches below elbow4 inches below elbow2 inches below elbow
    42 inches8 inches below elbow6 inches below elbow4 inches below elbow

    This table is arithmetic, not a fit prescription. Add the workpiece height next. If a project lifts your hands by 3 inches, a 36 inch bench acts like a 39 inch working point for that operation. The workbench height calculator helps organize those inputs.

    What the task changes

    Published ergonomic guidance explains why one surface cannot be best for every job. The CCOHS standing workstation guide places precision work above elbow height, light work a little below, and heavy downward work farther below. The HSE posture guide follows the same general order and recommends adjustment where possible.

    For garage work, think in motions. Marking, wiring, model assembly, and close inspection reward a clear view. Sanding, light mechanical assembly, and general repair need a neutral wrist and relaxed shoulders. Hand planing, chiseling, or pressing on a stubborn part may benefit from a lower working point, provided the user can stay controlled and the work is secure.

    Do not use the lowest number as permission to bend through the back. If a 34 inch top makes you fold forward during every light task, it is too low for that use even if it feels powerful for a few planing strokes.

    When a 34 inch workbench makes sense

    A 34 inch surface can suit forceful work, taller users, and thick projects. It also leaves room for a large vise or a benchtop machine without pushing the operating point near shoulder level. Woodworkers who use hand planes often prefer space to place controlled body weight over the tool.

    The drawback shows up during detail work. A user with a 40 inch elbow height has a 6 inch drop to the bare top, and a thin project may require noticeable bending. Raise small work with a secure fixture or use a task light that does not force your head closer. Deep shelves or drawers under a low bench can also limit knee room for a stool.

    Before choosing 34 inches, try writing measurements, fitting a small fastener, and sanding for ten minutes at that level. If your back stays flexed during the easy tasks, plan a raised fixture. If the bench will hold a vise, include the jaw height in the test rather than judging the empty top.

    Person using a lower workbench for controlled hand planing
    A lower working point can make controlled downward force easier for some users and tasks.

    Why 36 inches is common but not universal

    A 36 inch workbench often fits general garage tasks because it sits near familiar counter height and leaves a moderate drop below the elbows for many adults. It can work for assembly, repairs, packing, and occasional woodworking without making any one task extreme.

    That convenience has limits. A shorter user doing close work may find a thick project too high, while a tall user handling small parts may still bend. If the installed vise jaw and typical part sit 4 inches above a 36 inch top, the hands work near 40 inches. Mounted tools deserve their own operating height calculation.

    Use the garage workbench buying guide to compare the top, apron, storage, and frame along with height. Two benches both listed at 36 inches can feel different because one has a rounded thin edge and open knee space while the other has a deep drawer bank that keeps you farther away.

    When a 38 inch workbench feels better

    A 38 inch surface brings a small project closer to the eyes. It can suit shorter users, fine assembly, electronics, sharpening, model work, or tasks where the hands should stay near elbow level. The higher top may also create more useful storage height below, although drawers and braces still have to leave room for knees if you sit.

    The tradeoff is leverage. A taller user may like 38 inches for detail but feel crowded when pressing down on a plane or holding a heavy assembly. A bench top tool can raise controls and the work even farther. Check the machine manual for its required support and operating position rather than using the bench as a generic stand.

    A high bench needs the same stability checks as a lower one, especially if it is narrow or mounted on casters. Raising the center of gravity can make movement more noticeable. Load the mockup with a realistic project and press gently from different working positions before deciding.

    Person doing close detail work at a taller garage workbench
    A taller working point can bring fine work closer without a deep forward bend.

    Tool thickness can reverse the result

    The bare bench number is only part of the stack. Add the top of a vise jaw, a sacrificial board, a cutting mat, a router table insert, or the base of a project fixture. A 34 inch bench plus a measured 6 inch jaw-and-part rise can put the work higher than a 38 inch bench holding a thin board flat on its top.

    Make a simple task stack for each recurring job:

    Example taskBare benchAdded heightResulting hand level
    Flat sanding36 inches1 inch board37 inches
    Part held in vise34 inches5 inch measured jaw-and-part rise39 inches
    Fine assembly on riser36 inches3 inch platform39 inches
    Benchtop tool34 inches8 inch operating table42 inches

    These are example calculations, not product dimensions. Measure your equipment. The result often shows that one lower base plus stable fixtures covers more tasks than a permanently tall top.

    Seated use changes more than the height

    If you plan to sit, bring the actual stool into the mockup. Your feet need support, your thighs need clearance, and you need to get close enough that the top edge does not force a long reach. A thick apron or center drawer can make a good standing height poor for seated work.

    A 38 inch bench may pair easily with a tall shop stool for some users, but it can leave the feet dangling without a ring or separate footrest. A 34 inch bench may accept a lower stool, yet the vise or project can still be high. Adjust the seat and working point together.

    The OSHA desk guidance is written for office stations, but its basic concern about leg clearance and getting close to the work still applies. For garage tasks, also consider sharp edges, chips, hot work, and the need to move away safely. Do not use an office chair where the task, debris, or floor makes it unsuitable.

    Build a three height mockup in the actual bay

    Mark the proposed bench footprint with tape after parking the vehicle. Use a stable adjustable table or secure supports to create 34, 36, and 38 inch trials. Place the normal top thickness, vise, mat, or tool on each trial. Then repeat the same short task at every height.

    Score five things from one to five: shoulder relaxation, wrist position, back angle, visibility, and ability to apply the needed force. Use the same task and project so the comparison stays fair. A difference that sounds small on paper often appears immediately when you repeat a motion.

    Run the footprint through the garage storage fit calculator, then open the car door, bench drawers, and nearby cabinet doors. Height can influence where your upper body leans into the aisle. The garage measuring guide helps catch wall controls and door hardware before the bench becomes difficult to move.

    Choose a range, then check the exact model

    If one height wins every test, the decision is easy. More often, two heights work for different jobs. Pick the one that supports the dominant task and solve the secondary task with a secure fixture, stool, or adjustable frame.

    Before ordering, confirm whether the listed dimension reaches the bare frame, the installed top, or an adjustable range. Count caster height and leveling feet. Check top thickness, leg and drawer clearance, vise compatibility, capacity wording, and how the bench must be anchored or stabilized. A product photo is not enough to settle those details.

    Do not cut legs or add risers until you know what the change does to bracing, warranty, and load. If you are building the bench, leave a modest adjustment path. Removable feet or a replaceable lower rail are easier to revise than a cabinet base built tightly between the floor and top.

    Useful products to compare

    These links open current Amazon search results so you can compare dimensions, manuals, ratings, and availability for the exact models on your shortlist.

    Before you buy or install

    Check the current manual for the exact product you are considering. Confirm the assembled dimensions, load rules, mounting requirements, included hardware, clearances, warranty, and any limits that apply to your wall, floor, or garage layout.

    Frequently asked questions

    Is a 34 inch workbench too low?

    It depends on your elbow height, task, and workpiece. It may suit forceful work or a tall fixture, but it can cause bending during detail work. Test it with the real task before deciding.

    Is 36 inches the best all purpose workbench height?

    It is a useful middle option for many garages, but it is not universal. The workpiece, vise, user, and dominant task can make 34 or 38 inches a better fit.

    Who should consider a 38 inch workbench?

    A shorter user or someone doing close visual work may prefer it. Check mounted tool height and forceful tasks, since a high working point can reduce leverage or raise the shoulders.

    How can I use one bench for different task heights?

    Choose the base height for the dominant or most forceful task, then use a stable removable platform for small precision work. An adjustable frame is another option when the task or user changes often.

  • Garage Workbench Buying Guide: Choose the Right Size, Top, and Base

    Garage Workbench Buying Guide: Choose the Right Size, Top, and Base

    Affiliate disclosure: As an Amazon Associate I earn from qualifying purchases. This article may contain affiliate links, and Bay & Bench may earn a commission at no extra cost to you. Read our full Affiliate Disclosure.

    This garage workbench buying guide starts with a less exciting question: what do you build or repair most often? The best bench is not necessarily the heaviest or the longest one that fits against the wall. It is the bench that holds your real projects at a comfortable height, leaves room to move, and stays steady when the work gets awkward.

    Start with tasks and dimensions. Drawers, hardwood, polished steel, and clever accessories come later. A simple bench that fits the room will get used more than an impressive bench that blocks the car door.

    Quick answer

    Choose the workbench after measuring the largest common project, your comfortable working height, and the aisle left with vehicles parked. Fixed benches suit forceful work and permanent stations. Mobile benches suit shared floor space, but need suitable locking casters and a stable frame. Folding benches save space for light tasks. Compare usable top size, total capacity, local point loads, vise support, storage, power access, and the complete assembled footprint.

    Name the work before choosing the bench

    A bench for bicycle maintenance, small engine parts, woodworking, electronics, and household repair will not have the same priorities. Write down the three jobs that happen most often. Add the largest ordinary object placed on the top and the tools that stay there during work.

    Forceful planing, hammering, and vise work reward mass, bracing, and a firm stance. Assembly benefits from open surface area and access around several sides. Detail work needs good light and a height that brings small parts closer without lifting the shoulders. Mobile repair may need drawers more than a perfect woodworking top.

    Skip fantasy projects when sizing the permanent bench. A door or sheet good handled once a year can rest on portable supports. Giving that rare job an eight foot bench every day may cost a parking space.

    Measure the complete work zone

    Bench width is only the beginning. Add vise projection, drawer handles, power strips, pegboard hooks, and any material that extends beyond the top. Mark the assembled footprint on the garage floor with tape. Park the vehicles, open their doors and hatch, then carry a normal project through the remaining route.

    Depth deserves special attention. A deep top offers assembly room but pushes wall storage farther away. The rear few inches can become a permanent row of chargers and cans. In a narrow garage, a shallower bench with a nearby rolling cart may be easier to use.

    Check overhead space as well. Cabinet doors, lights, windows, and garage door hardware can conflict with a tall backsplash or upper shelf. Use the garage storage fit calculator for a first pass, then verify every edge in the room.

    Measure the complete work zone in a practical garage setup
    Measure the complete work zone, shown in a practical garage layout.

    Set height by task and body

    There is no single correct workbench height. Work that needs downward force often feels better on a lower surface. General repair and assembly usually suit a middle position. Fine work can move higher so the user does not bend toward small parts.

    Stand in normal work shoes with shoulders relaxed. Bend the elbows and test several surface heights with stacked plywood or a sturdy temporary platform. Mimic the task. Push a plane, turn a wrench, assemble a small part, or sit on the intended stool. A measurement taken without the work can be misleading.

    Our workbench height calculator provides a planning range based on user height and task. If several people share the bench, an adjustable model or removable platform may be more useful than splitting the difference badly for everyone.

    Compare fixed, mobile, folding, and adjustable benches

    Bench typeBest fitWatch for
    FixedVise work, permanent tools, frequent projectsConsumes floor space and may be hard to move
    MobileShared parking and work zonesCaster rating, wheel locks, frame movement, floor slope
    FoldingLight tasks in a very small garageWall structure, braces, folded depth, reduced storage
    Adjustable heightMultiple users or changing task heightsAdjustment range, mechanism clearance, load at each setting
    ModularGarages expected to change over timeConnection hardware and future part availability

    A rolling bench is not automatically flexible if it is too heavy to steer when loaded. A fixed bench is not automatically stable if the frame racks or the floor rocks beneath one leg. Judge the complete design.

    Choose the top for the mess and the force

    A thick wood top is friendly to clamps, can absorb some noise, and may be repairable after cuts or dents. It can also stain, swell, or burn if the finish and work are poorly matched. Steel resists many impacts and is easy to wipe, but it can be noisy, conductive, and unfriendly to delicate parts. Composite and laminated tops offer a smooth general purpose surface, though edges and moisture resistance vary.

    Check the top’s actual thickness and construction. A thick looking edge may be trim around a thinner core. For a vise, grinder, or bench mounted tool, confirm that the manufacturer permits the installation and that bolts can reach suitable structure. A beautiful surface with no solid mounting area is a poor tool bench.

    Removable sacrificial sheets can protect the main top during painting, glue work, or rough cutting. Use material appropriate to the task and keep it secured so it cannot slide.

    Frame capacity is more than one large number

    Workbench listings often lead with a total weight capacity. Read how the manufacturer defines it. The number may assume an evenly distributed static load, correct assembly, and a particular shelf position. A vise or compact machine can create a concentrated force near one edge that is different from boxes spread across the top.

    Look for cross bracing, leg connections, top support, and adjustable feet. Bolted frames can be strong when assembled correctly, but loose fasteners allow racking. Welded frames remove some joints and can be awkward to move through a narrow door. Wood bases can be stiff and repairable, though construction quality matters more than the material name.

    Add the weight of mounted tools, drawers, shelf contents, and the project. Do not assume that casters, a lower shelf, or an added top inherit the bench’s headline rating.

    Mobile benches need a caster plan

    Calculate the loaded bench weight, then compare it with the complete caster set rating under the conditions stated by the caster and bench manufacturers. Floors are not perfectly smooth. Joints, debris, slopes, and door thresholds increase effort and can stop a small wheel suddenly.

    Four swivel casters make tight turns possible but may let the bench wander while steering. A mix of fixed and swivel wheels tracks more predictably. Locks vary too. Some stop the wheel while leaving the swivel free; others control both. For forceful work, retractable casters or leveling feet may create a firmer stance when the product is designed that way.

    Push only from a safe point with drawers closed and the route clear. Heavy tools should not sit loose on top during a move. A mobile bench is useful because it changes zones, not because it can be rolled while a project is balanced on it.

    Mobile benches need a caster plan in a practical garage setup
    Mobile benches need a caster plan, with the storage details visible in context.

    Storage can help or steal working room

    Drawers keep measuring tools and hand tools close, but a deep drawer bank can remove knee space for seated work. An open lower shelf holds cases and heavy tools, though it collects dust and may interfere with feet. Cabinets hide clutter and slow down quick access. Pegboard places light tools in sight while consuming the wall directly behind the bench.

    Choose storage for the tools that support bench work. Lawn supplies and seasonal decorations belong elsewhere. When unrelated items colonize the bench base, the daily tools end up on top and the useful surface shrinks.

    Check drawer extension, latch behavior, and clearance around a vise. On a mobile bench, drawers should stay closed during movement according to the product design. If a bench includes locks, treat them as access control for ordinary tools, not automatically as secure hazardous storage.

    Plan vise, clamp, power, and lighting access

    A vise needs more than a corner. Its jaws, handle, mounting bolts, and clamped work all extend into space. Decide whether the user is right or left handed and where long material will project. Confirm that the top and frame support the mounting location.

    Clamping is easier when the top has usable edges and no drawer face directly beneath every inch. Dog holes or accessory tracks help only if they fit the work and do not weaken a top that was not designed for modification.

    Put outlets where cords do not cross the aisle or the work surface. Use electrical products approved for the garage environment and intended load. Lighting should illuminate the hands without putting the user’s head between the fixture and project. A movable task light often solves shadows better than another decorative ceiling fixture.

    Inspect the buying details people skip

    • Assembled width, depth, and height, including handles and backsplash
    • Packaged dimensions and the route from delivery point to garage
    • Top material, thickness, coating, and permitted modifications
    • Published total and component ratings, plus load distribution language
    • Frame joints, braces, feet, and floor adjustment
    • Drawer extension, shelf openings, and knee clearance
    • Caster type and rating on mobile models
    • Vise or tool mounting provisions
    • Replacement parts, warranty, and current assembly manual

    Prices and bundles change, so compare the current complete package. One bench may include a hardwood top and drawers. Another attractive price may cover only the frame. Delivery charges, assembly time, casters, lighting, and a vise can change the real cost.

    A practical final choice

    For a garage that doubles as parking every day, start with the smallest bench that supports the common project. A mobile bench earns its place when there is a clear parking spot for it and a real need to work away from the wall. A fixed bench is the better anchor when vise work, mounted tools, and repeated setup dominate. Folding benches are honest space savers for light tasks, not miniature replacements for every heavy bench.

    Make a cardboard top or tape the dimensions on a folding table. Spend one normal project at that size. Notice where the parts pile up, which edge needs clamps, and whether the car can still open. That short trial tells you more about fit than a page of lifestyle photos.

    Then compare current models and manuals. Buy capacity you can verify and space you will use.

    Useful products to compare

    These links open current Amazon search results so you can compare dimensions, manuals, ratings, and availability for the exact models on your shortlist.

    Before you buy or install

    Check the current manual for the exact product you are considering. Confirm the assembled dimensions, load rules, mounting requirements, included hardware, clearances, warranty, and any limits that apply to your wall, floor, or garage layout.

    Frequently asked questions

    What size workbench is best for a garage?

    Use the smallest top that supports your common projects while preserving vehicle and walking clearance. Measure the complete footprint, including vise, handles, casters, and projecting materials.

    Is a fixed or mobile workbench better?

    Fixed benches usually suit forceful work and mounted tools. Mobile benches suit shared floor space when the frame, casters, locks, floor, and loaded weight all support safe movement.

    What is a good workbench height?

    The useful height depends on the user and task. Lower surfaces often suit downward force, while fine work may feel better higher. Test the task at several temporary heights.

    Is wood or steel better for a workbench top?

    Wood is clamp friendly, quieter, and often repairable. Steel is durable and easy to wipe but can be noisy and conductive. Construction, coating, thickness, and the intended work matter more than the material name alone.