Tag: two car garage

  • Two-Car Garage Workshop and Parking Layout: Make Both Jobs Fit

    Two-Car Garage Workshop and Parking Layout: Make Both Jobs Fit

    Affiliate disclosure: As an Amazon Associate I earn from qualifying purchases. This article may contain affiliate links, and Bay & Bench may earn a commission at no extra cost to you. Read our full Affiliate Disclosure.

    A two car garage workshop and parking layout can behave like three rooms across a typical week. In parking mode, both vehicles come inside and the movable shop disappears to the perimeter. With one car out, its bay becomes a practical assembly zone. When both cars leave, longer tool and material paths can open across the floor. The trick is giving every cart, cord, and workpiece a measured place in each version. The worked room below measures 264 x 252 inches inside. It is not a standard garage size, a clearance recommendation, or proof that the same arrangement will fit another room.

    Quick answer

    Measure both vehicle envelopes first, including mirrors, doors, hatches, charging or fuel access, and normal parking variation. Keep fixed benches and storage shallow at the walls. Put a folding or rolling island in a marked storage spot when both cars are home, move it into the vacant bay for one car work, and center it only when both vehicles are outside. Store a bench upright only when its manufacturer expressly approves that position and provides instructions for stable restraint. Tape all three modes on the floor before buying equipment, then check garage door travel, retrieval routes, open drawers, cords, and the reset sequence.

    Build the two car garage workshop and parking layout around three modes

    Decide what the room must do on a weekday morning, halfway through a project, and at night. Those moments produce three plans: both cars parked, one car beside a flex bay, and both cars outside. Draw each one. A cart that works in shop mode is still a problem if it has nowhere to go when the second car returns.

    Give parking mode priority because it has the least forgiving geometry. Cars stop slightly off their marks, doors move, and people carry bags toward the house. Once those envelopes work, assign the leftover perimeter to a closed bench or shallow storage. The center is shared territory.

    Write one rule for each movable piece. The sample assumes an island that its manufacturer approves for upright storage with the specified restraint. It returns to a marked rear-left position, rolls into the empty left bay, then moves to room center in full shop mode. If the maker does not approve upright storage, plan around the documented folded or parked footprint instead.

    Measure the room, cars, and every moving edge

    Measure between finished surfaces at the floor, mirror height, bench height, and near the ceiling. A curb, bowed wall, column, or cabinet handle can change the useful width. Record the garage opening, tracks, opener rail, sensors, service doors, steps, outlets, panels, pipes, lights, and appliances. The worksheet in our guide to measuring a garage for storage keeps those obstructions on the drawing.

    For each car, note length, body width, mirror width, and where people enter. Trace the driver door at the opening people need, plus the hatch, charging lead, or fuel door. Include normal forward and rearward parking variation. Two cars rarely need equal strips.

    Measure tools stored and operating. Include handles, drawers, vise screws, clamp tails, hoses, cords, and stock passing through a machine. The working outline often matters more than the cabinet beneath it.

    Work through one measured three mode example

    This hypothetical example uses a 264 x 252 inch finished room. Car A is 76 inches across its mirrors and 184 inches long. Car B is 80 inches across its mirrors and 193 inches long. The side bench is 18 x 84 inches. For the arithmetic only, the example assigns a 10 x 60 inch stored envelope to a 30 x 60 inch folding table. Do not use that position or dimension unless the exact table’s manufacturer approves upright storage, documents the stored size, and specifies a restraint that prevents tipping or rolling. All three configurations are examples, not minimums or targets.

    Example modeMeasured placementArithmeticCheck in the actual room
    Both cars parkedBench closed; approved and restrained island at rear left18 inch bench + 22 inch strip + 76 inch Car A + 32 inch center strip + 80 inch Car B + 36 inch outer strip = 264 inchesDocumented storage position, restraint, door arcs, walking posture, mirrors, and house route
    One car flex modeCar B stays right; 30 inch wide island enters the left bayFrom bench face: 30 inches to island + 30 inch island + 70 inches to Car B mirror = 130 inchesWorker, drawers, cords, and project size
    Both cars outside30 x 60 inch island sits at room center99 inches from bench face to island, 117 inches to the opposite wall, and 96 inches at each endTool zones, material paths, dust control, and door movement

    The rectangles reconcile, but they do not certify the layout. Substitute your numbers in the garage storage fit calculator, then use tape to check every open state.

    Parking mode should feel almost uneventful

    With both cars home, the shop is mostly storage. The island returns to its outline, its casters are secured as directed, and nothing remains on top. Use the upright position only if the exact product’s manufacturer approves it, then apply the specified stabilizing or wall restraint. Otherwise, store it in its approved folded position and redo the depth calculation. Drawers close. The vise handle turns inward. Cords and clamps leave the floor.

    In the sample, Car A starts 24 inches inside the threshold and uses 184 inches. A 34 inch rear gap plus the island’s assumed 10 inch stored projection completes the 252 inch depth. Car B uses the same front position, its 193 inch length, and a 35 inch rear gap. Those are arithmetic examples. Bumpers, hatches, steps, and thresholds may change them.

    The strip between mirrors is not a shelf. It carries people and perhaps an open driver door. Keep hard tool edges away from it.
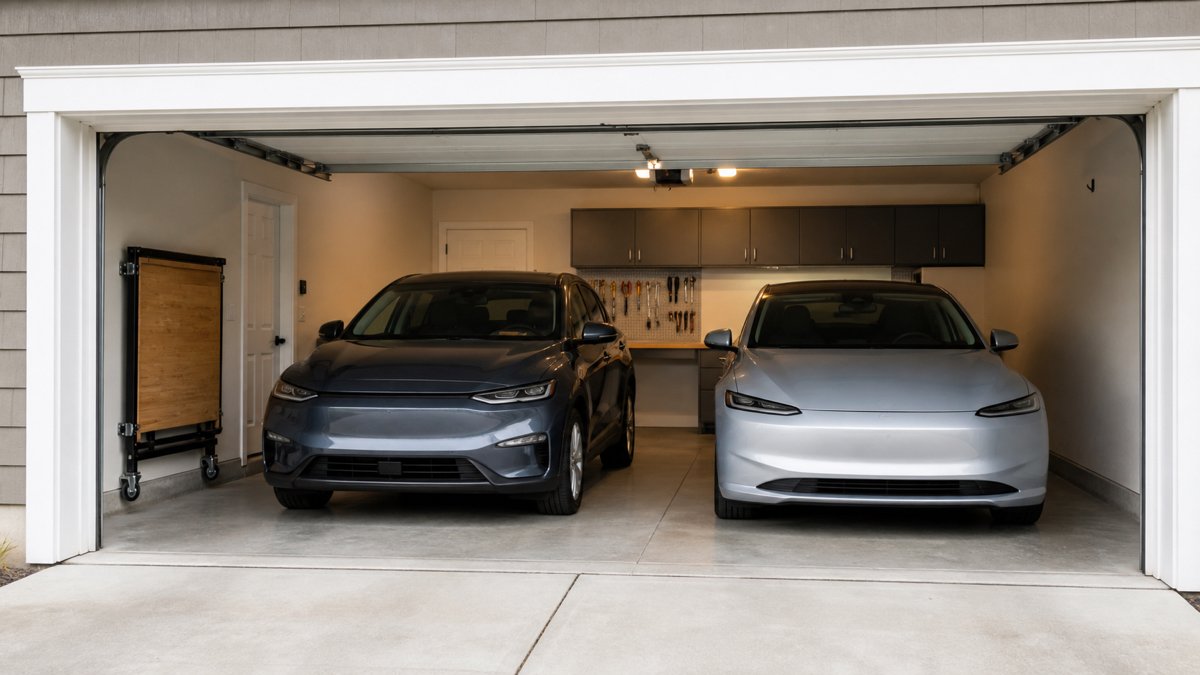
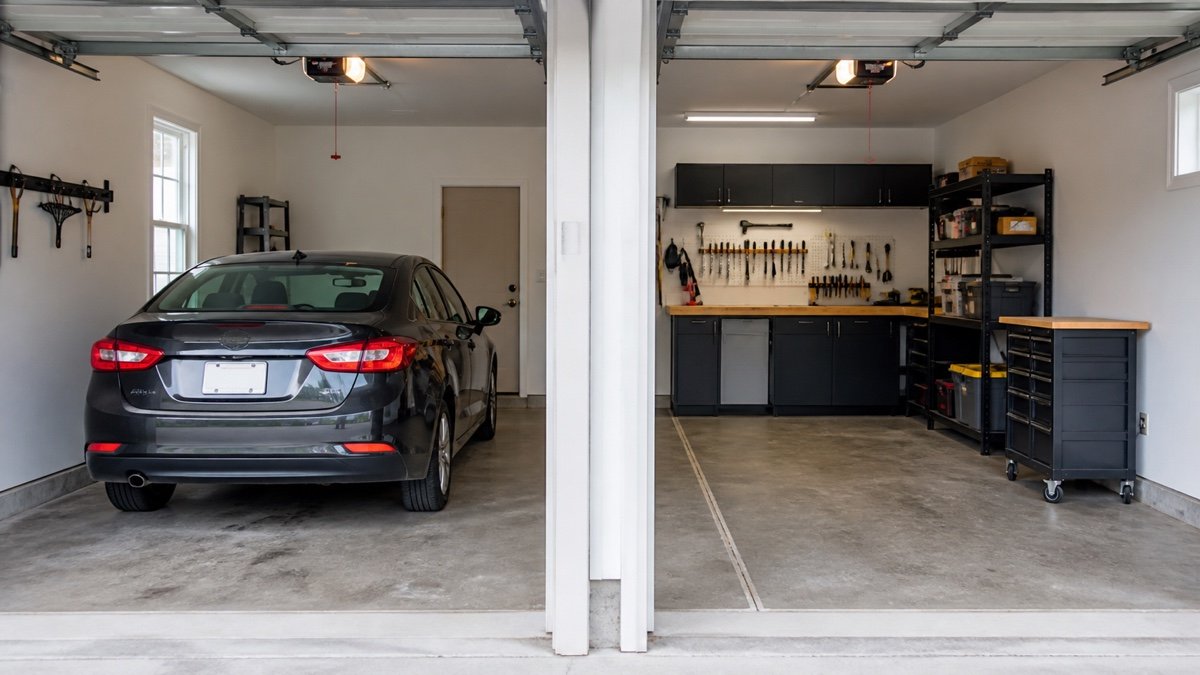
    Two cars in parking mode beside an upright folding workbench and shallow rear tool storage
    Upright storage is only a planning option when the bench maker approves it and specifies a stable restraint. Otherwise, use its approved folded footprint.

    One car mode turns the vacant bay into a flex zone

    This may be the most useful version. One car moves outside while the other keeps its full envelope. The island rolls into the empty bay, away from the center gap. Hands, clamps, and drawers can move without leaning over paintwork.

    The sample island is 30 inches wide and 60 inches long. Its mark leaves 30 inches to the fixed bench and 70 inches to Car B’s mirror. Neither number is a recommended aisle. Stand at the bench, pull a drawer, carry the usual workpiece, and open the parked car’s door in the mockup.

    Keep the island parallel to the vehicle for assembly. Rotate it only after the car leaves if a board or machine path would point toward the paint. Its stored size matters as much as its open top. Our garage workbench buying guide covers top dimensions, bases, drawers, and casters.
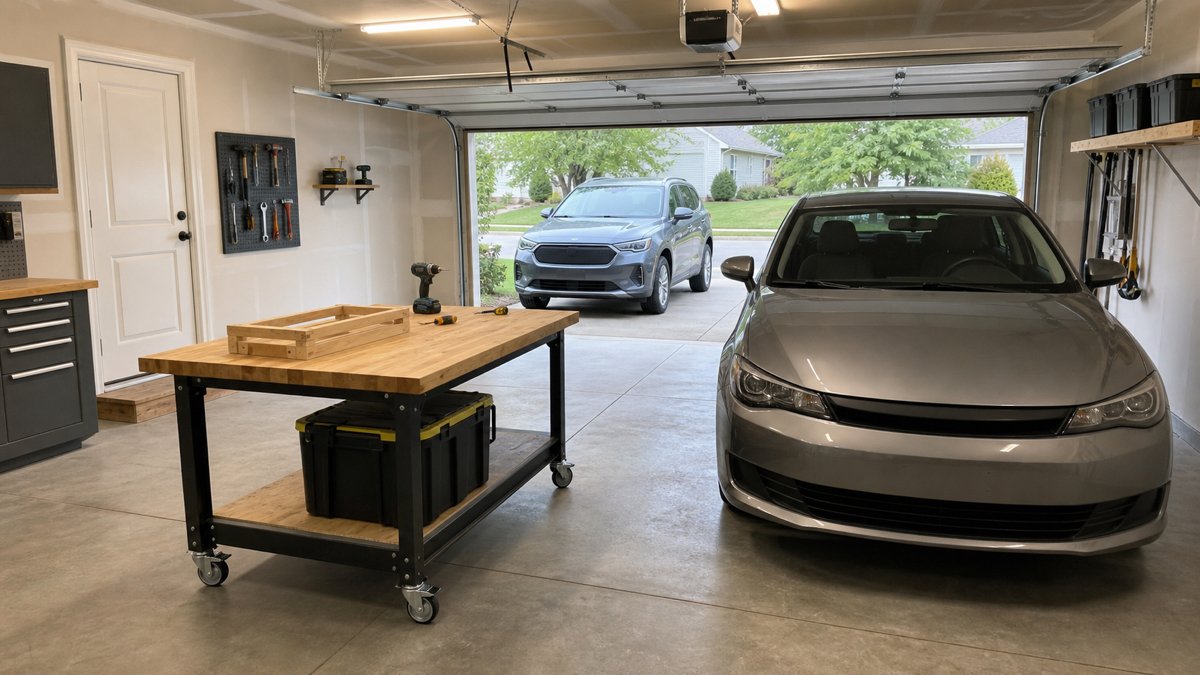
    Mobile workbench open in the vacant left garage bay beside a parked silver sedan
    The vacant bay holds the mobile workbench while the remaining sedan keeps a separate parking and door envelope.

    Full shop mode opens the long material paths

    With both cars outside, move the island to its center mark and put mobile machines in their setup outlines. A saw needs stock space before and after the blade. A miter station needs side support. An assembly top needs room for clamps and a person walking around it.

    Mark operating zones in a second tape color. They may overlap when only one tool runs at a time and the idle tool has a stable home. A stock path should never point through a service door someone may open.

    Leave enough room and energy to put every piece away. If one machine blocks the island’s storage spot, the sequence needs work.

    Keep perimeter storage shallow and retrieval paths deliberate

    Deep cabinets look harmless when the cars are outside. Park both first. A 24 inch cabinet may erase a door strip, while a shallow rail can hold daily tools above the bench. Compare cabinets, shelves, rails, and ceiling options in the overview of garage storage systems.

    Measure wall storage loaded. A drill on a hook or a coiled hose projects past the bare panel. Keep daily hand tools near the bench, dense cases low, and long tools in retainers that stop them falling toward a car. Our garage wall storage systems guide compares tracks, slatwall, and pegboard.

    Plan retrieval with both cars home. Supplies, recycling, sports gear, and the house door need routes that avoid paintwork. The sample’s 32 inch strip between mirrors is only a proposal. Carry the normal bag or bin through the taped room before accepting it. Move anything that requires unfolding the workshop for access.

    Check the vertical layout, power, and messy work

    A floor plan hides door panels moving overhead, an open hatch rising into a cabinet, and a ladder beside a track. Draw a side view with the door closed, partly open, and fully open. Include the opener rail, release cord, lights, hatches, cabinets, and tallest tool. Our overhead garage storage clearance guide organizes that check.

    Place power so leads avoid tires, service doors, and the route between cars. Permanent wiring must follow local requirements and may need a qualified electrician. Follow the manuals, and do not use an extension lead as hidden permanent wiring.

    Sawdust, sparks, vapors, welding, fuel work, and battery charging need more than a floor plan. Move vehicles outside for work that could coat or damage them. Use the ventilation and separation required for the process, and keep flammables away from ignition sources.

    Make the reset sequence short and visible

    Mark a home outline for the island, mobile cabinet, shop vacuum, and each wheeled machine. It may seem fussy until the second car arrives in the rain. Then the outline answers one question: where does this go?

    Reset from the outside inward. Store long stock and machines before folding the island. Empty its top, hang clamps and cords, close drawers, and sweep the parking lanes. After drilling or metal work, look for sharp fragments and use the cleanup tool suited to the debris.

    If reset resembles a precise puzzle, remove one piece. One rolling table with storage may earn its place better than carts that trap each other. Keep brakes, folding hardware, and wall restraints accessible and follow their manuals.

    Rehearse each operating mode before buying equipment

    Tape both cars, the closed bench, open island, and proposed cabinets. Add cardboard at cabinet depth and a strip for handles. Mark door arcs and drawers in another color. Leave the mockup down while the household parks, unloads groceries, reaches the service door, and retrieves common gear.

    Run the garage door only after people and loose objects are clear. Open each car door and hatch. Carry a typical project box around the island. Roll empty substitutes through machine paths before moving heavy tools. A plan that fails on a dull Tuesday will be worse during a project.

    Install in stages. Start with the wall system or bench, repeat the parking check, then add one mobile piece. Our guide on how to plan garage storage helps place household items before the workshop absorbs every surface. Choose the layout that returns to parking mode without negotiation.

    Before you buy or install

    Check the current manual for the exact product you are considering. Confirm the assembled dimensions, load rules, mounting requirements, included hardware, clearances, warranty, and any limits that apply to your wall, floor, or garage layout.

    Frequently asked questions

    Can a two car garage hold two cars and a workshop?

    Sometimes. Both measured vehicle envelopes must fit with their door, hatch, charging or fuel access, and the household’s walking routes. Fixed storage then has to stay at the perimeter, while the island and mobile tools need marked storage positions for two car parking mode.

    Where should the workbench go in a two car garage?

    A shallow side or rear wall position often preserves the open bays, but doors, steps, utilities, and vehicle length may rule out either wall. Measure the bench with its vise, handles, drawers, and user space. A folding or rolling bench can work when its closed position is genuinely compact.

    How wide should the path between two parked cars be?

    There is no universal figure for every garage, car, or user. Start with the actual mirror positions, then open the needed doors and carry the items that use the route. Check applicable building, access, and equipment requirements rather than treating the 32 inch example in this article as a rule.

    Can a rolling workbench stay between the cars?

    It is usually a poor storage spot because it occupies door and retrieval space and puts hard edges near both vehicles. Give the bench a marked wall or rear storage position for parking mode. Use the center only after the cars leave and the bench’s operating clearance has been checked.
  • Half of a Two-Car Garage Workshop Layout: Keep One Bay Usable

    Half of a Two-Car Garage Workshop Layout: Keep One Bay Usable

    Affiliate disclosure: As an Amazon Associate I earn from qualifying purchases. This article may contain affiliate links, and Bay & Bench may earn a commission at no extra cost to you. Read our full Affiliate Disclosure.

    A half of a two car garage workshop layout works only when the parked side remains usable on an ordinary day. A clean floor plan alone cannot prove that. The car needs room for its mirrors, door, hatch, charging cable or fuel door, and the path people use to reach the house. The shop needs a bench, tool access, task light, and operating room for each machine. Those demands meet at the center boundary.

    To show the arithmetic, the worked example uses a measured 21 x 20 foot interior. That is not a standard two car garage size or a recommended minimum. Replace every sample figure with measurements from your room, car, and tools.

    Quick answer

    Reserve the parking envelope first, including the car’s widest point and every open state you use. Mark its inner edge with tape. Keep fixed benches and deep cabinets against the workshop side wall, park mobile equipment fully inside that boundary, and treat rear wall storage as a separate clearance problem. Before buying anything, run the garage door, open the car doors and hatch, pull out bench drawers, and carry a normal project through the remaining path.

    Mark the boundary in half of a two car garage workshop layout

    Start at the finished walls, not at a concrete seam or the visual center of the garage door. Measure the interior width at the floor, workbench height, and mirror height. A foundation curb, bowed wall, center post, or projecting handle can change the useful width at each level. Record the door tracks, opener, sensors, steps, outlets, panels, windows, and service door as well. The room sheet in our guide to measuring a garage for storage catches many of these easy to miss projections.

    Now park the car where it can enter without a fussy correction. Mark its tires and mirror edges. Open the driver door to the position actually needed, lift the hatch, and trace those movements with tape. The workshop boundary belongs outside that complete parking envelope. It may land near the middle of the room, but it does not have to.

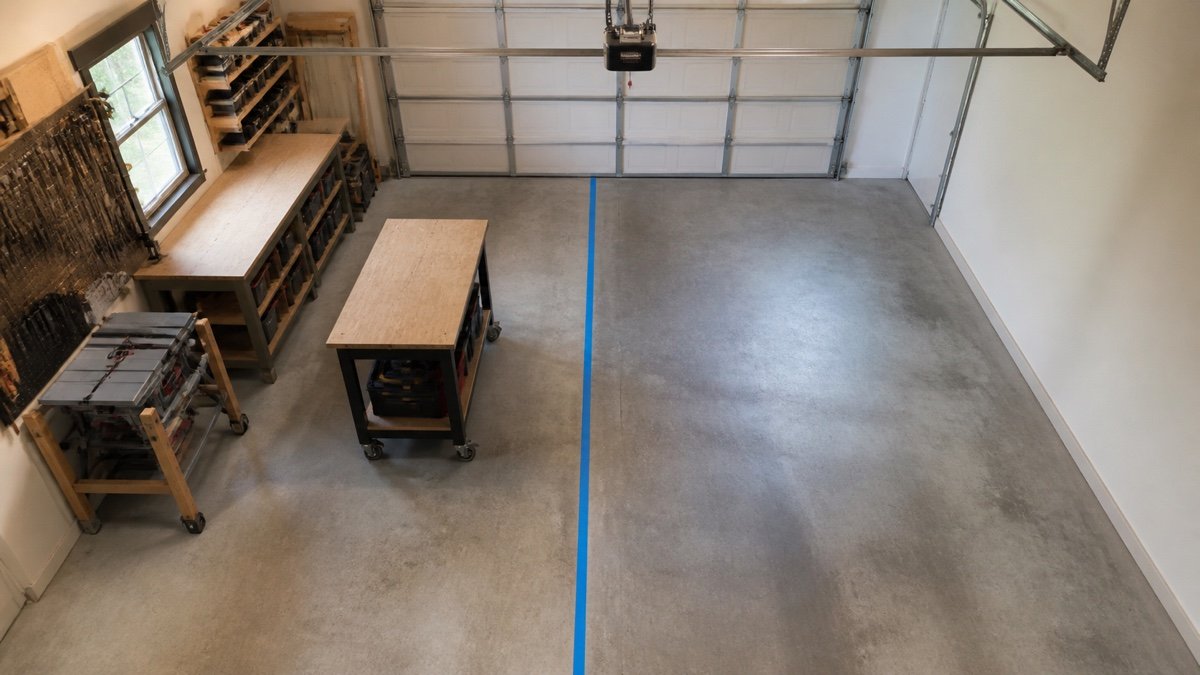
    Use a bright tape color and carry the line from the garage opening to the back wall. The line is not decoration. Any wheel, drawer, cord, clamp, or board that crosses it has borrowed space from the car bay.

    Overhead view of a taped center boundary with workbenches and rolling tools confined to one garage bay
    Mark the protected parking edge before placing the bench, then keep stored equipment on the workshop side of the tape.

    Work through one measured starting plan

    The sample below shows how the arithmetic can work. It describes a finished 252 x 240 inch interior with the parked car on the left and the shop on the right. The vehicle measures 78 inches at its mirrors and 188 inches bumper to bumper. In this hypothetical example, 12 inches sit between the passenger mirror and outer wall, while 36 inches remain between the driver side mirror and the taped boundary. The sketch assumes that the driver door can open far enough within that space, but the number does not prove it. Park your exact vehicle in its normal position, open the door as people actually use it, and move the boundary if the test fails.

    Item in the sampleMeasured figurePlanning use
    Finished room252 inches wide by 240 inches deepActual inside surfaces, not the nominal building size
    Parking side126 inches wide12 inch wall gap + 78 inch car + 36 inch driver side space
    Workshop side126 inches wideEverything stored here stays inside the taped boundary
    Fixed side bench24 x 96 inchesLeaves 102 inches from bench front to the boundary before people or projects enter
    Rolling assembly cart30 x 60 inchesParks lengthwise under the bench overhang or in a marked rear spot
    Rear cabinet candidate12 inches deepAllowed only where bumper, hatch, service door, and walking checks still pass

    The numbers show relationships, not a clearance rule. Put your own room width, car envelope, and storage projections into the garage storage fit calculator, then confirm the result with tape. A total that works on paper can still fail at a door handle or open drawer.

    Put the fixed bench on the outside edge

    A bench against the workshop side wall gives the center boundary some peace. In the sample plan, the 24 inch deep bench runs only 96 inches, leaving part of the wall free for a tall tool or a turning path. A full length bench would create more surface, but it could trap a mower, crowd a side door, or encourage permanent piles.

    Choose depth from the work you do most often. Add the vise, backsplash, drawer handles, clamp tails, and anything mounted behind the top. The listed cabinet depth rarely equals the largest operating projection. Our garage workbench buying guide explains top size, base styles, storage, and caster details.

    A mobile cart can fill the open floor when the vehicle is away, provided it has a real parking spot afterward. Measure that spot with the cart loaded and its handles attached. If putting it away requires lifting tools, folding stock, and moving three bins, it will eventually live in the center lane.

    Protect the car bay in every open state

    The parked footprint is the smallest version of a car. The usable envelope includes the approach angle, mirrors, the door arc, an open hatch or trunk, and the person carrying bags around it. If a child seat is loaded from the workshop side, trace that wider door position too. A charging lead needs a route that cannot be pinched by a tire or turned into a trip line.

    Repeat the check with the car a little forward and a little rearward. People do not stop on the same inch every night. A wheel stop can improve repeatability if it suits the floor, vehicle, and door operation, but it should be located only after the actual parking position is settled.

    Keep sharp tools and projecting handles away from the inner edge. Even when the car fits, brushing a saw fence while getting out makes the arrangement tiresome. That irritation is useful information. Move the shop boundary before buying more equipment.

    Keep the center boundary deliberately empty

    The center strip attracts temporary objects because it looks like spare floor. Give it one job: separation. Do not park the shop vacuum there, lean sheet goods across it, or let lumber rest on the car side while it feeds through a saw. A narrow strip of clean floor is more useful than another shallow rack.

    Drawers near the boundary should open toward the work area or remain far enough back that a person can use them without stepping beside the car. Caster brakes, floor slope, and bumps matter too. Turn the wheels of stored carts away from the line and lock them as their instructions direct.

    Loose cords are frequent trespassers. Put power at the wall or overhead only where the cord can reach the tool without crossing the vehicle path or garage door travel. Unplug and store temporary leads when workshop mode ends.

    Make rear wall storage earn the word shared

    The back wall often spans both bays, yet it is rarely one continuous storage opportunity. The parked side may need bumper space, hatch travel, or access to a door into the house. The shop side may need room behind a bench tool, a dust collector drum, or long stock. Design each part of the wall around the activity in front of it.

    In the sample, a 12 inch deep cabinet is only a candidate. With a 240 inch room and a 188 inch car, 52 inches remain in the length before the cabinet, front threshold, bumper gaps, and parking variation are deducted. That arithmetic does not prove the cabinet fits. Tape its full depth, park normally several times, and open the hatch.

    Closed cabinets can keep household supplies away from shop dust, while open shelving makes bins faster to reach. Compare those roles in the overview of garage storage systems. Keep the service door, electrical equipment, appliances, vents, and required access clear.

    Shared garage rear wall with storage cabinets between a side workbench and a parked SUV
    Rear storage works as a shared zone only after the parked vehicle, service door, and workshop access are measured together.

    Use shallow wall storage where hands can reach it

    Tool rails, pegboard, and slatwall can keep the workbench clear without filling the floor. Measure the loaded system, not the bare panel. A drill on a hook, a coiled hose, or a shelf lip may project several inches beyond the advertised panel depth.

    Place daily hand tools near the bench and dense cases low. Long handled tools need clips that prevent them from falling toward the car. Avoid hanging anything above the parking side simply because there is open wall; a failed hook should not drop a steel tool onto the vehicle.

    The comparison of garage wall storage systems covers rails, pegboard, and slatwall attachment patterns. Follow the selected product’s mounting instructions and verify what is behind the wall before drilling.

    Draw the garage door hardware in side view

    A floor plan hides tracks, hinges, springs, opener rails, release cords, and door panels as they travel. Measure their lowest points with the door closed, partly open, and fully open. Then add the height of wall cabinets, a raised vehicle hatch, task lights, and anything stored on top of a tall cabinet.

    Do not mount lumber racks or lights where they obstruct service access to the door system. Keep tools and storage away from photo eyes, cables, springs, and tracks. Garage door springs and related parts can carry dangerous tension, so repairs and alterations belong with a qualified professional.

    Use the overhead garage storage clearance guide to make the vertical drawing. Ceiling height alone says little about what the moving door occupies.

    Give workshop mode a closing routine

    A shared garage stays usable because the reset is short. Give the rolling cart one outlined parking spot. Hang the extension lead. Close drawers. Lower the vise handle, clear the boundary, and sweep fasteners from the parking side before the car returns. A magnetic sweeper is useful after drilling or metal work, but a visual floor check still matters.

    Dusty cutting, grinding, finishing, welding, fuel work, and battery charging need precautions beyond layout. Follow tool and product instructions, provide suitable ventilation, separate ignition sources from flammable vapors, and keep the vehicle outside when the job could coat or damage it. Local electrical and fire requirements apply to wiring, storage, and hazardous materials.

    If the reset takes twenty minutes, reduce the number of mobile pieces. One cart that rolls home easily beats a row of machines that must be shuffled in order.

    Rehearse parking and workshop reset for several days

    Tape the bench, cabinet, cart, and parking envelope on the floor. Add cardboard at the proposed bench depth so the projection feels real. Mark open drawers and tool operating zones with a second color. Then leave the mockup in place for several days.

    Park after dark, bring groceries through the house door, remove a bicycle, and wheel the trash bin out. Simulate one common project with empty boxes as workpieces. The plan should survive those dull routines. They expose problems that a carefully staged Saturday afternoon will miss.

    When the room works, build in stages. Install the fixed bench or wall system, check the car again, then add mobile storage. The broader process in how to plan garage storage helps when sports gear, garden tools, and household overflow compete with the shop for the same wall.

    Choose the layout that leaves one honest parking bay

    The strongest layout may look a little underfilled. That open center boundary is what lets a car door move, a person pass, and a rolling tool return home without a nightly puzzle. Keep fixed pieces on the outside wall, make mobile pieces easy to park, and question every object assigned to the shared rear wall.

    Recheck the room whenever the vehicle or a large tool changes. One new mirror width, hatch arc, vise, or cabinet handle can alter the fit. The tape line can move. Heavy cabinets are much less cooperative.

    Before you buy or install

    Check the current manual for the exact product you are considering. Confirm the assembled dimensions, load rules, mounting requirements, included hardware, clearances, warranty, and any limits that apply to your wall, floor, or garage layout.

    Frequently asked questions

    Can I build a workshop in half of any two car garage?

    No layout works in every garage. Measure the finished room, vehicle envelope, door hardware, utilities, service doors, and each tool in stored and operating positions. Some rooms can support a fixed bench in one bay, while others need folding or mobile equipment.

    Should I divide the garage exactly down the middle?

    Only if the measured parking envelope and garage door system support that line. The useful boundary may sit off center because of the driver’s door, wall steps, a center post, or different storage projections.

    How deep should the workbench be beside a parked car?

    Choose the shallowest depth that supports your common work, then add the vise, handles, wall tools, clamps, and operator space. The 24 inch bench in this article is a worked example, not a recommended depth for every room.

    Can storage span the rear wall behind both bays?

    Sometimes. Check bumper position, parking variation, hatch travel, service door access, and the operating space behind workshop tools. A shallow cabinet may fit one section while another section needs to remain open.