Tag: garage storage

  • Tool Chest vs Tool Cabinet: Choose by Access, Weight, and Space

    Tool Chest vs Tool Cabinet: Choose by Access, Weight, and Space

    Affiliate disclosure: As an Amazon Associate I earn from qualifying purchases. This article may contain affiliate links, and Bay & Bench may earn a commission at no extra cost to you. Read our full Affiliate Disclosure.

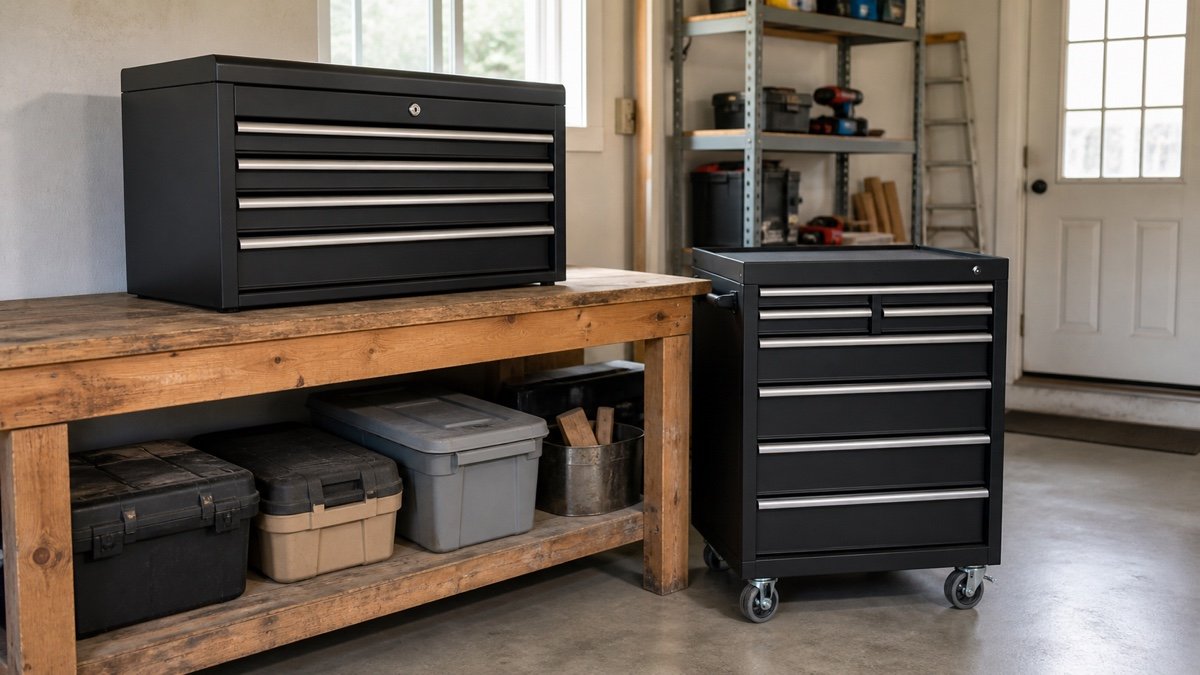
    The tool chest vs tool cabinet choice gets muddled because stores use the words loosely. In mechanic-style storage, a tool chest is usually the drawer box that sits on a bench or compatible rolling base. A rolling tool cabinet is the lower wheeled unit that carries heavier tools and may support a matching chest. A tall two-door garage cabinet is a third category entirely. This guide compares the first two formats by reach, load, footprint, mobility, work surface, and the awkward reality of getting several hundred pounds of steel into a garage.

    Quick answer

    Choose a top tool chest when you already have a strong compatible base or bench and want many shallow drawers without using more floor area. Choose a rolling tool cabinet when you need the foundation of the system, deeper lower drawers, mobility, and a useful top surface. Most growing mechanic collections are better served by a rolling cabinet first. Add only the matching chest when the upper drawer height remains comfortable and the manufacturer approves the combination.

    Tool chest vs tool cabinet in one table

    The comparison assumes a mechanic’s top chest and a drawer-style rolling cabinet. If you are considering a tall door cabinet for drills, chemicals, or bulky cases, use the garage cabinets buying guide instead.

    QuestionTop tool chestRolling tool cabinet
    Floor spaceUses a bench or compatible base footprintNeeds its own full footprint
    Typical drawer mixMore shallow drawers near eye levelShallow top drawers plus deeper lower drawers
    MobilityNot safely mobile by itself when loadedDesigned around casters and a push handle
    Work surfaceTop usually unavailable once stackedTop can be a landing surface when no chest is added
    Best first purchaseExisting compatible base is already ownedStarting a serious drawer system
    Main mistakeStack becomes too tall or mismatchedCabinet is too deep, heavy, or awkward for route

    Both can organize hand tools well. The room and the load decide which one earns its space.

    Clear up the naming before comparing models

    Retail listings sometimes call a wheeled cabinet a rolling tool chest, and a combined upper and lower stack may be sold as a chest and cabinet set. Read the product type, dimensions, caster information, and installation manual instead of relying on the title. A top chest generally has no push handle or floor casters. It must rest on a surface that the manufacturer allows.

    That distinction matters for safety and fit. A top chest may be heavy before the first socket goes in. It can shift, overload a bench, or create a top-heavy stack when paired with an unrelated base. A rolling cabinet is engineered as the lower foundation, but its rating still assumes the load distribution and operating conditions stated in the manual.

    A top chest buys drawers without another footprint

    A top chest uses vertical space efficiently. Shallow full-extension drawers put sockets, wrenches, pliers, and precision tools close to eye level. A hinged top compartment, when present, holds taller items. This layout suits a collection with many small hand tools and few bulky power tools.

    The price is reach. Every added drawer raises the top rows, especially when the chest sits on a tall rolling base. Stand beside the proposed stack and mark each drawer height on the wall. The upper drawer should open where you can see and lift its contents without reaching above your comfortable range. A matching chest can also remove the cabinet top as a work surface. If the garage needs every landing area, that loss is real.
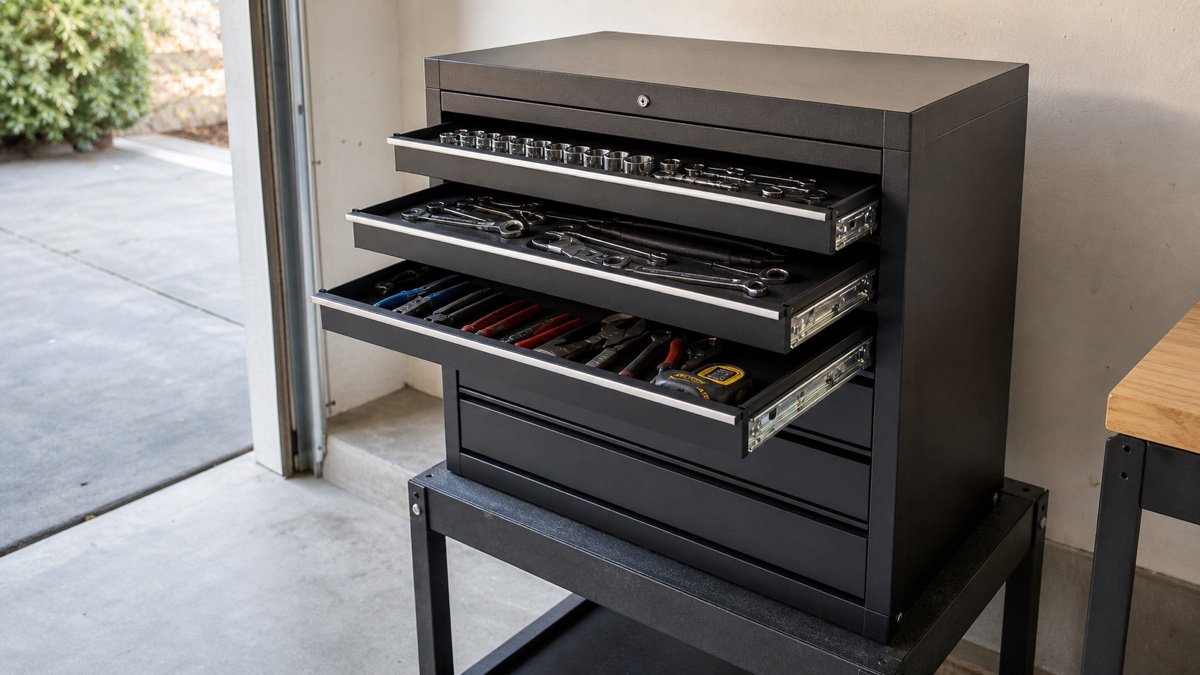
    Open shallow drawers in a top tool chest showing organized hand tools
    Top chests favor visible, shallow storage, though the upper drawers become harder to reach as the stack grows.

    A rolling cabinet is the working foundation

    A rolling cabinet stores dense tools low, supports mobility, and provides a stable base for a compatible chest. The wide top drawer often holds sockets and wrenches, while deeper lower drawers accept cordless tools, pullers, and cases. Large casters roll more easily over slab joints, although a loaded cabinet should move only on the route and in the manner the manual permits.

    Current products show how much ratings vary. Milwaukee lists its 46-inch 8-drawer steel cabinet with 100-pound soft-close drawer slides, an 1,800-pound overall capacity, and 5-inch casters on the manufacturer page. Those numbers apply to that cabinet, not every 46-inch box and not every drawer loading pattern.
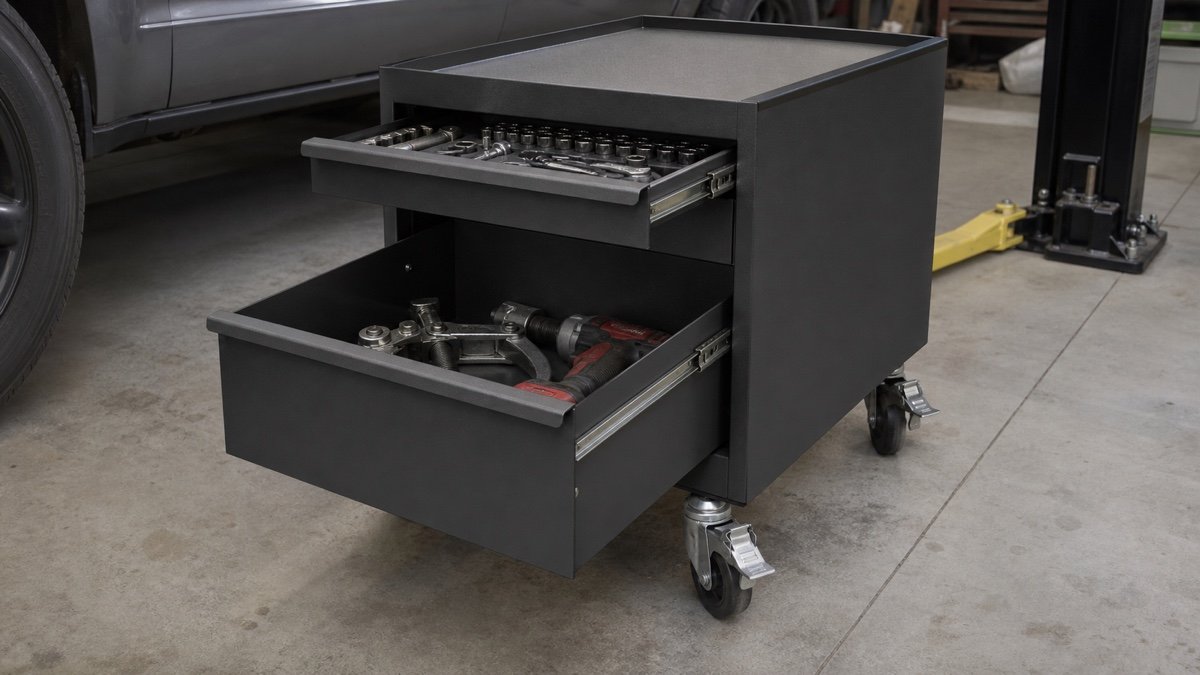
    Rolling steel tool cabinet with deep lower drawers and locked casters
    A rolling cabinet handles dense tools low and can move for service, provided the route and floor cooperate.

    Compare the drawer layout with actual tools

    Lay your tool groups in single layers and measure them. Top chests often win for small tools because shallow drawers prevent stacking. Rolling cabinets win when the lower drawer depth matches bulky tools. Neither format helps if the wrench drawer is too short or the cordless saw must lie diagonally and block the latch.

    Check internal drawer width, depth, and height. Exterior width includes walls, slides, trim, and handles. Count the weight of organizers too. Foam and rails consume height; socket sets become surprisingly dense. Use the process in the garage storage measuring guide for both the tool box and the room around it.

    Read ratings in context

    A cabinet’s total working load and a drawer slide rating describe different limits. Harbor Freight lists the U.S. General Series 3 42-inch roll cabinet at 2,600 pounds overall and 120 pounds per pair of drawer slides. The current product page also identifies the caster arrangement and cabinet dimensions. Follow its manual for distribution, movement, assembly, and stacking.

    Do not multiply a slide rating by drawer count and assume the result is a safe cabinet load. Cabinet structure, casters, floor, and load distribution still matter. Put dense tools in lower drawers, keep loads within every applicable limit, and avoid opening several loaded drawers at once. The lock secures drawers against casual access; it does not correct an unstable setup.

    Mobility is useful only with a measured route

    Measure the cabinet body, side handle, bumpers, casters, and the space needed to steer. Then inspect the route from delivery point to final location. Door thresholds, steps, narrow gates, sloped driveways, and slab joints can turn a mobile cabinet into an immovable object. A 22-inch cabinet depth may work beside a car but not through an interior doorway once the handle is attached.

    Mark the parked footprint and drawer-open footprint with tape. Compare both with the garage workshop aisle clearance guide. Casters should be locked during use, yet some swivel movement may remain. Do not use the cabinet as a step, seat, vehicle dolly, or support for work that the manufacturer has not approved.

    Work surface value changes the answer

    A bare rolling cabinet top can hold a parts tray, laptop, or repair manual. Some mobile workstations add a wood top specifically for light bench work. Once a top chest is installed, that surface disappears. You gain drawers but may end up buying another bench.

    If work surface is scarce, a cabinet with a protected top may beat a chest stack. Craftsman describes its S2000 52-inch mobile workstation with a butcher block top and 100-pound drawer slides on the official page. Treat the worktop and overall cabinet as the manual describes. A wood top does not make the cabinet suitable for hammering, clamping, or hot work by default.
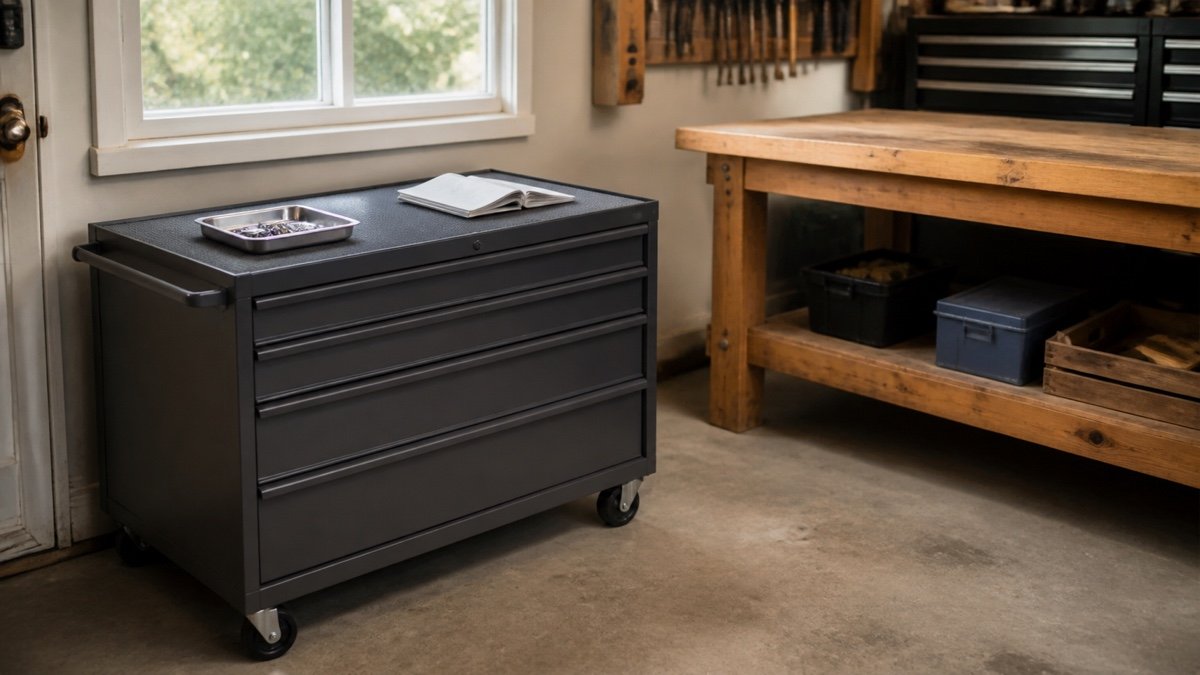
    Low rolling tool cabinet used as a work surface beside a garage workbench
    A cabinet with a protected top can add a landing surface, while a stacked chest usually gives that surface back to storage.

    Stack only approved components

    A chest and cabinet that share a color and width are not necessarily compatible. Confirm model family, attachment hardware, maximum upper load, and the exact stacking instructions. Install the chest before loading it when the manual calls for that sequence. Use enough people or lifting equipment for the empty unit weight; do not improvise a lift from open drawers.

    After assembly, load from the bottom upward. Check that drawers latch, the cabinet sits level, and the casters or leveling feet contact the floor correctly. Recheck the stack after it has been moved. A mismatch saved at purchase can become a permanent wobble that no drawer liner fixes.

    Security and power are secondary filters

    Integrated locks are useful for casual security and child access, but thin steel storage is not a vault. Confirm whether one lock secures every drawer and whether replacement keys are available. Keep an inventory and consider the garage door and building security as part of the system.

    Built-in power strips can charge batteries and devices, yet they add cord routing and heat considerations. Keep the supply cord protected and use the electrical arrangement only as instructed. Do not run a cabinet across the garage while it remains plugged in. If charging is the main goal, a fixed, clean, ventilated station may work better than routing power through mobile furniture.

    Which one should you buy first?

    Start with a rolling cabinet if you are building from scratch, own several dense or bulky tools, or value a movable landing surface. Start with a top chest only when you already have a compatible rated base and the extra height stays reachable. A small collection may need neither. A compact drawer unit and the right garage wall storage system can cost less floor space.

    Make the decision with a paper tool map, a taped floor footprint, and the published empty weight. Then plan delivery before ordering. The best storage is the one you can place safely, open fully, and use without moving the car for every socket.

    Useful products to compare

    These links open current Amazon search results. Check the dimensions, manual, mounting hardware, warranty, and current availability for the exact model before you order.

    Before you buy or install

    Read the current manual for the exact product you are considering. Confirm its assembled dimensions, rated capacity, mounting requirements, included hardware, working clearances, warranty, and any limits that apply to your wall, floor, electrical circuit, or garage layout.

    Frequently asked questions

    Is a tool chest the same as a rolling tool cabinet?

    Usually not. In mechanic storage, a chest is the upper drawer box that rests on a compatible base or bench. A rolling cabinet is the lower wheeled unit. Retail names vary, so confirm casters, handles, dimensions, product type, and the installation manual.

    Can any tool chest sit on any cabinet?

    No. Match the approved model family, width, attachment hardware, base capacity, and stacking instructions. Similar dimensions do not prove compatibility. An unsupported or unsecured top chest can damage the cabinet and make the stack unstable.

    Which has more useful storage?

    A top chest usually concentrates shallow drawers for hand tools. A rolling cabinet often combines shallow upper drawers with deeper lower drawers for bulky tools. Measure your tools in groups. Cubic-inch totals cannot show whether the drawer heights fit them.

    Can I use a rolling tool cabinet as a workbench?

    Use its top only for the tasks and loads the manufacturer allows. A protective mat or wood surface makes a convenient landing area, but it does not prove the cabinet is suitable for hammering, vise loads, clamping, welding, or standing. Follow the exact manual.
  • Garage Workshop Layout Guide: Plan Zones Before Tools

    Garage Workshop Layout Guide: Plan Zones Before Tools

    Affiliate disclosure: As an Amazon Associate I earn from qualifying purchases. This article may contain affiliate links, and Bay & Bench may earn a commission at no extra cost to you. Read our full Affiliate Disclosure.

    Start this garage workshop layout guide with the room. Save the shopping list for later. A workbench can fit against a wall yet block a car door. A compact saw can demand a long feed path. Ceiling storage can collide with the garage door. Map the fixed shell, then divide the room into zones for dirty work, clean assembly, tools, materials, and parking. Add exits, power, light, dust control, and overhead hardware as separate constraints. The result is a measured plan showing what can share space, what must stay apart, and what has to move before work begins.

    Quick answer

    Measure the finished garage and every fixed obstruction. Draw it to scale, then make cutouts for the stored and operating size of the car, bench, machines, cabinets, and material. Place parking and exits first. Keep cutting, grinding, and sanding away from clean assembly. Give material a direct route to storage, breakdown, and the bench. On separate overlays, map power, task lights, dust hoses, and overhead hardware. Tape the leading plan on the floor and rehearse a project before buying heavy equipment.

    Garage workshop layout guide: mark fixed limits first

    Measure finished wall to finished wall at floor level, bench height, and shoulder height. Record curbs, ledges, columns, steps, doors, windows, pipes, outlets, panels, and shutoffs. Walls that look parallel may differ, so check both ends instead of trusting a real estate floor plan.

    Draw every moving part open. Include service door arcs, garage door tracks, opener arms, cabinet doors, drawers, a raised vehicle hatch, and the space behind a tilting machine. Our guide to measuring a garage for storage provides a room sheet. These measurements are inputs, not suggested clearances. Required access around a panel, appliance, or exit should come from the applicable local authority.

    Build a measured paper layout in seven passes

    A paper plan is fast enough to encourage bad ideas, which is useful. You can reject a layout before anchoring shelves. The numbers below are one worked example, not a standard garage size or clearance recommendation.

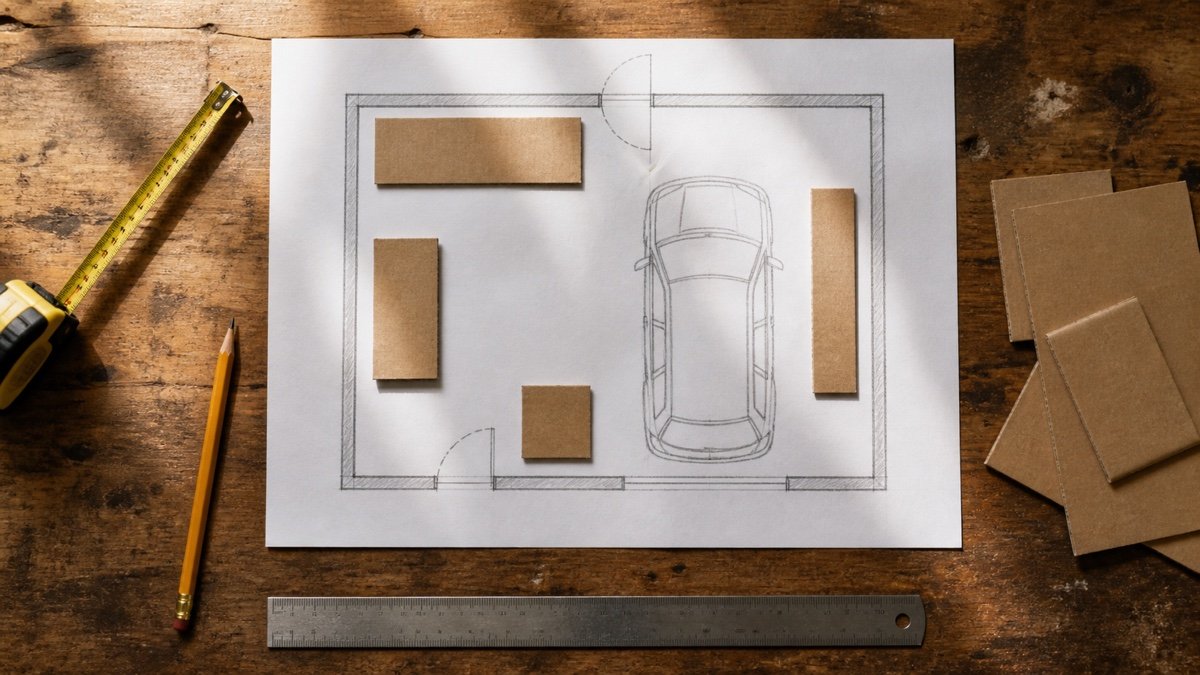
    1. Choose a scale. At one half inch on paper for one foot in the room, a measured 20 by 22 foot interior becomes a 10 by 11 inch rectangle.
    2. Draw the shell. Mark exact doors, tracks, steps, windows, utilities, ledges, and fixed cabinets.
    3. Cut out closed footprints. In this example, a 24 by 72 inch bench becomes a 1 by 3 inch card. An 18 by 72 inch rack becomes a 0.75 by 3 inch card.
    4. Add a second cutout or dashed operating envelope. Include open drawers, clamps, machine tables, the operator, and actual stock length.
    5. Place the measured vehicle and required exit paths before workshop pieces.
    6. Move zone groups, not lone tools. A saw needs its material queue, collection hose, power route, and output destination nearby.
    7. Copy the best plan onto utility and overhead sheets, then transfer it to the floor with removable tape.

    The garage storage fit calculator can check closed and open depths after you replace the examples with your measurements.

    Paper garage plan with car sketch and movable cardboard rectangles for workshop equipment
    Use one cutout for stored size and another outline for the space a tool, car, or cabinet occupies in use.

    Use an adjacency map before choosing a wall

    Adjacency records what should sit close together and what should not. It prevents a tidy floor plan from creating extra carrying, dusty parts, or a blocked doorway. This map describes relationships, not universal distances.

    ZoneKeep nearbyKeep separateEnvelope to draw
    Dirty cutting and sandingMaterial staging, dust pickup, tool storageClean assembly, parked vehicle, finish suppliesMachine, operator, stock feed, hose, and chip spread
    Clean assemblyHand tools, hardware, task lightGrinding sparks, sanding dust, vehicle trafficBench, clamps, open project, and chair or stool
    Material storageEntry route and first cutting stationExit doors, electrical access, damp floor areasRack plus loading and removal path for the longest piece
    Mobile machinesShared power and dust connection pointsPermanent parking position and door arcsStored footprint plus every planned working position
    Vehicle parkingGarage door and any charging pointHot work, loose stock, dusty processesCar, mirrors, doors, hatch, cable, and walking route
    Tool storageThe zone that uses each tool most oftenStock feed lines and exposed sharp workCabinet or panel with drawers, doors, hooks, and handles open

    Draw lines between zones with frequent travel. If they repeatedly cross the car or an exit, move the zones before refining tool positions.

    Contain dirty work instead of scattering it

    Group sawing, routing, sanding, grinding, and other chip or spark producing jobs according to your actual work. One dirty area shortens hose runs and cleanup. It also creates a rule for workshop mode: the nearby car, clean project, flammable product, or household gear leaves before that process starts.

    The machine body is only the center. Draw the longest material, operator position, offcut area, hose bend, collection unit, and service space. A mobile machine can borrow open floor, but its operating rectangle must exist on the plan. Mobility does not create room.

    Protect a clean assembly zone

    Clean assembly needs a stable surface, even light, nearby hand tools, and somewhere to set parts without grit. It may share a bench with repair or layout work, but not the same moment with nearby sanding or grinding. A curtain can catch debris, but it does not replace the controls required by a tool or finish.

    Draw the project at its largest stage. Add projecting clamp bars, cabinet doors under the top, a stool, and a hardware cart. If a fixed bench anchors this zone, choose its depth and base with the garage workbench buying guide. A deep top is not automatically more useful.

    Make material flow a route through the room

    Trace one project from arrival to finished work. A board or sheet enters, waits, moves to breakdown, reaches a machine, lands at assembly, and leaves. Every turn asks for room. Long stock can sweep through a light, car, doorway, or rack before the tool comes close.

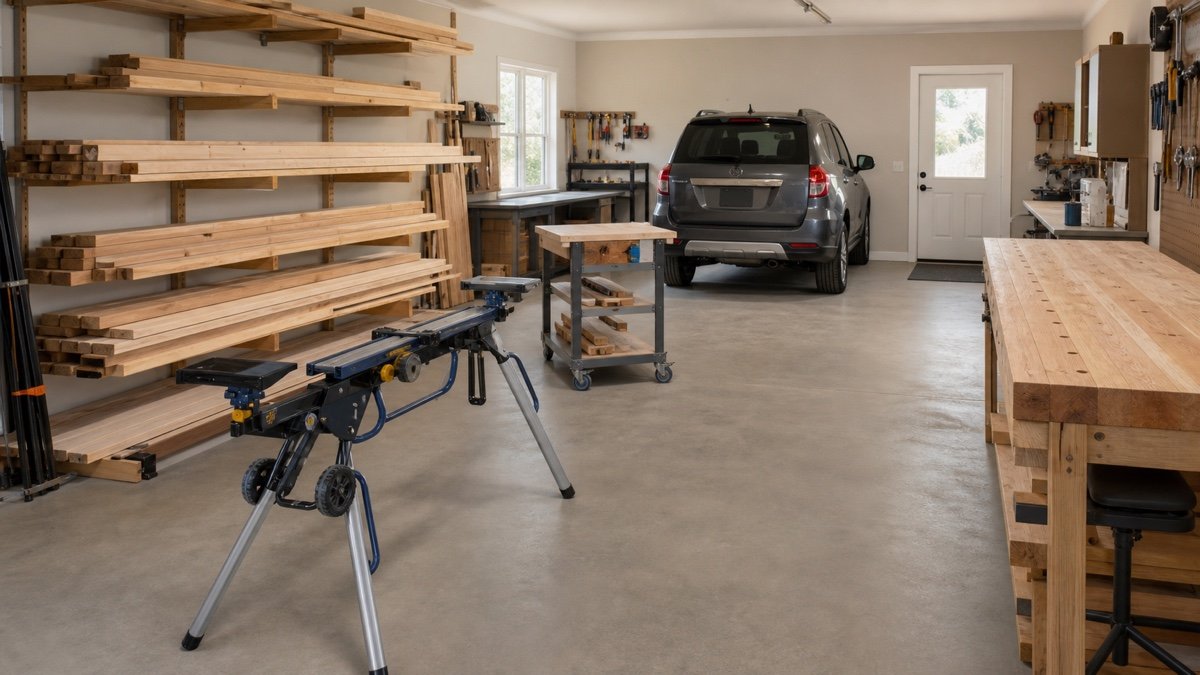
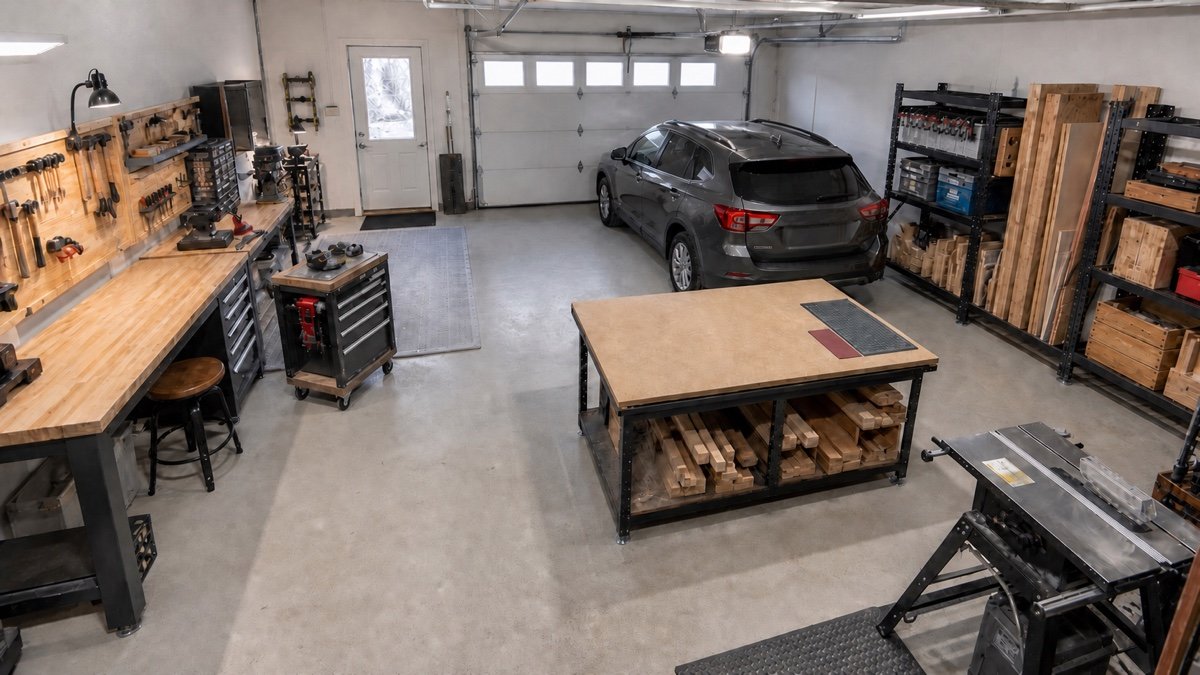
    Store material near the door or first cutting step when the room supports it. Keep heavy items low and remove pieces without crossing an exit. Give scrap a destination. In the second workshop image, lumber racks, a portable saw, a rolling cart, and the bench form a readable route while the center stays open. That relationship matters more than the pictured positions.

    Garage layout with long lumber racks, portable saw stand, rolling material cart, parked car, and side workbench
    Map the trip a long board takes through storage, cutting, and assembly, then test that route with the car and doors in their real positions.

    Overlay power, light, and dust as three systems

    For power, mark each existing outlet, the tool that may use it, and the cord in working position. A tool fits poorly if its cord crosses a walking, parking, or material route. Fixed wiring, new receptacles, and circuit capacity must follow local requirements and the equipment instructions. Ask a qualified electrician when the planned loads or alterations call for one.

    For light, draw where your head and shoulders will be. General ceiling light can leave the cut line in shadow, while a task light placed in front or to the side of the work often gives a clearer view. Check whether an open cabinet door, raised hood, or overhead rack blocks it.

    For dust, map the full hose route, bends, blast gates if used, collection unit, filter access, and the space required to empty the container. Shorter routes are convenient, but the manufacturer’s instructions and the hazards of the material being collected govern the setup. Keep hoses and cords out of tire paths and exits.

    Treat parking as an operating envelope

    Measure the actual vehicle with mirrors, not a generic car rectangle. Park it as you normally would, then record the nose and tail positions, driver and passenger door arcs, hatch height, charging cable or fuel access, and the route people use to reach the house. Repeat with any second vehicle that regularly uses the bay.

    Decide which workshop activities are allowed with the car inside. Quiet hand work may coexist with parking in a measured layout. Long stock, rolling machines, dusty work, or hot work may require the car outside. Write that changeover rule on the plan. Then use the broader process in how to plan garage storage to account for household items that also compete for the parking strip.

    Keep exits and service access unowned

    An exit path is not spare floor for a shop vacuum, offcuts, or a rolling cabinet. Draw the garage opening and each service door, then shade the routes that must remain usable in both storage and workshop modes. Do the same for electrical panels, shutoffs, appliances, fire equipment, and any other access point governed by local rules or manufacturer instructions.

    Do not invent a path width from a photo or another garage. Confirm the requirements that apply to the building and equipment. During the full size mockup, carry a bulky but light empty box through each route, open every door fully, and try the path with the car parked. Anything that depends on remembering to move clutter is not truly clear.

    Draw overhead hardware in a side view

    A floor plan cannot show the garage door descending through a rack, an opener above a tall project, or a light hidden behind stored lumber. Make at least one wall elevation and one side section. Mark the lowest point of tracks and open door panels, the opener rail and arm, torsion or extension hardware, lights, ducts, pipes, storage racks, vehicle hatch, and the highest position of mobile equipment.

    Measure the door at several positions because the moving panels occupy different space during travel. Keep workshop attachments out of the door system and its service area. The overhead garage storage clearance guide explains how to build this vertical map without treating ceiling height as usable storage height.

    Attach storage to the zone it supports

    Hand tools used at the bench should be reachable there. Abrasives belong near sanding, measuring tools near layout, and machine accessories near their machine. This sounds obvious until a blank wall tempts you to install one large storage system far from the work. Organize by trip frequency first, then by appearance.

    Loaded hooks and open bins project farther than the bare panel. Draw that finished depth and keep it outside feed paths, car doors, and face level walking routes. Compare cabinets, shelves, rails, panels, and mobile units in the overview of garage storage systems. For shallow wall options, see the garage wall storage systems guide. Leave one section unassigned so the next tool does not land permanently on the bench.

    Mock up the plan and commit in stages

    Transfer the paper plan to the slab with removable tape. Use boxes or folding tables for cabinet and bench volume. Mark a second outline for every drawer, machine, workpiece, and vehicle part in motion. Leave the mockup for several ordinary days so parking, deliveries, bins, and trips to the house expose conflicts.

    Rehearse one common project with empty boxes as material. Walk from storage to the first tool, on to assembly, and out. Pull the dust container for service. Reach the panel. Open the hatch and every door. If activities compete, write which one moves and where it waits.

    Install the least reversible pieces last. Place fixed boundaries and necessary zones first, then use mobile pieces while the workflow settles. A useful layout works in stored and active states. It also preserves empty floor for the next large project.

    Useful products to compare

    These links open current Amazon search results so you can compare dimensions, manuals, ratings, and availability for the exact models on your shortlist.

    Before you buy or install

    Check the current manual for the exact product you are considering. Confirm the assembled dimensions, load rules, mounting requirements, included hardware, clearances, warranty, and any limits that apply to your wall, floor, or garage layout.

    Frequently asked questions

    What is the best layout for a garage workshop?

    The best layout matches your measured room and normal work. Put parking and exits on the plan first, group dirty work near its material and dust routes, and protect a separate clean assembly surface. Draw every tool in stored and operating positions. A layout that works for woodworking may be wrong for vehicle repair, metalwork, or light household projects.

    How do I plan a garage workshop on paper?

    Measure the finished room and draw it to a consistent scale. Add fixed obstacles, doors, the vehicle, and required access. Make movable card shapes for benches, storage, and tools, with separate outlines for open or operating size. Arrange zones, trace material movement, then use separate overlays for power, lighting, dust, and overhead hardware.

    Should a workbench face the wall or the center of the garage?

    A wall bench keeps the center open and puts tool storage within reach. An island bench allows access around a large assembly but consumes space on every side. Test both with the largest project, clamp overhang, parking position, and exit routes shown. The right orientation comes from the work envelope, not a general rule.

    Can workshop zones overlap in a small garage?

    Yes, when the activities happen at different times and every movable item has a safe stored position. A central floor might hold a car at night and a mobile saw during workshop mode. Dirty work and clean assembly should not run together in that shared area. Write the changeover sequence and test it at full size.

  • Garage Cabinets Buying Guide: Choose by Space, Load, and Use

    Garage Cabinets Buying Guide: Choose by Space, Load, and Use

    Affiliate disclosure: As an Amazon Associate I earn from qualifying purchases. This article may contain affiliate links, and Bay & Bench may earn a commission at no extra cost to you. Read our full Affiliate Disclosure.

    The best garage cabinet is not automatically the heaviest or deepest. It is the cabinet whose usable interior, shelf ratings, door movement, installation method, and expansion options match a measured garage.

    Quick answer

    Shortlist by format and dimensions first. Then compare per-shelf capacity, construction, hardware, anchoring, warranty, replacement parts, delivery format, and total installed cost.

    Useful products to compare

    These searches are a practical starting point for comparing current sizes, materials, load ratings, and availability.

    Pick the cabinet format

    FormatBest useWatch for
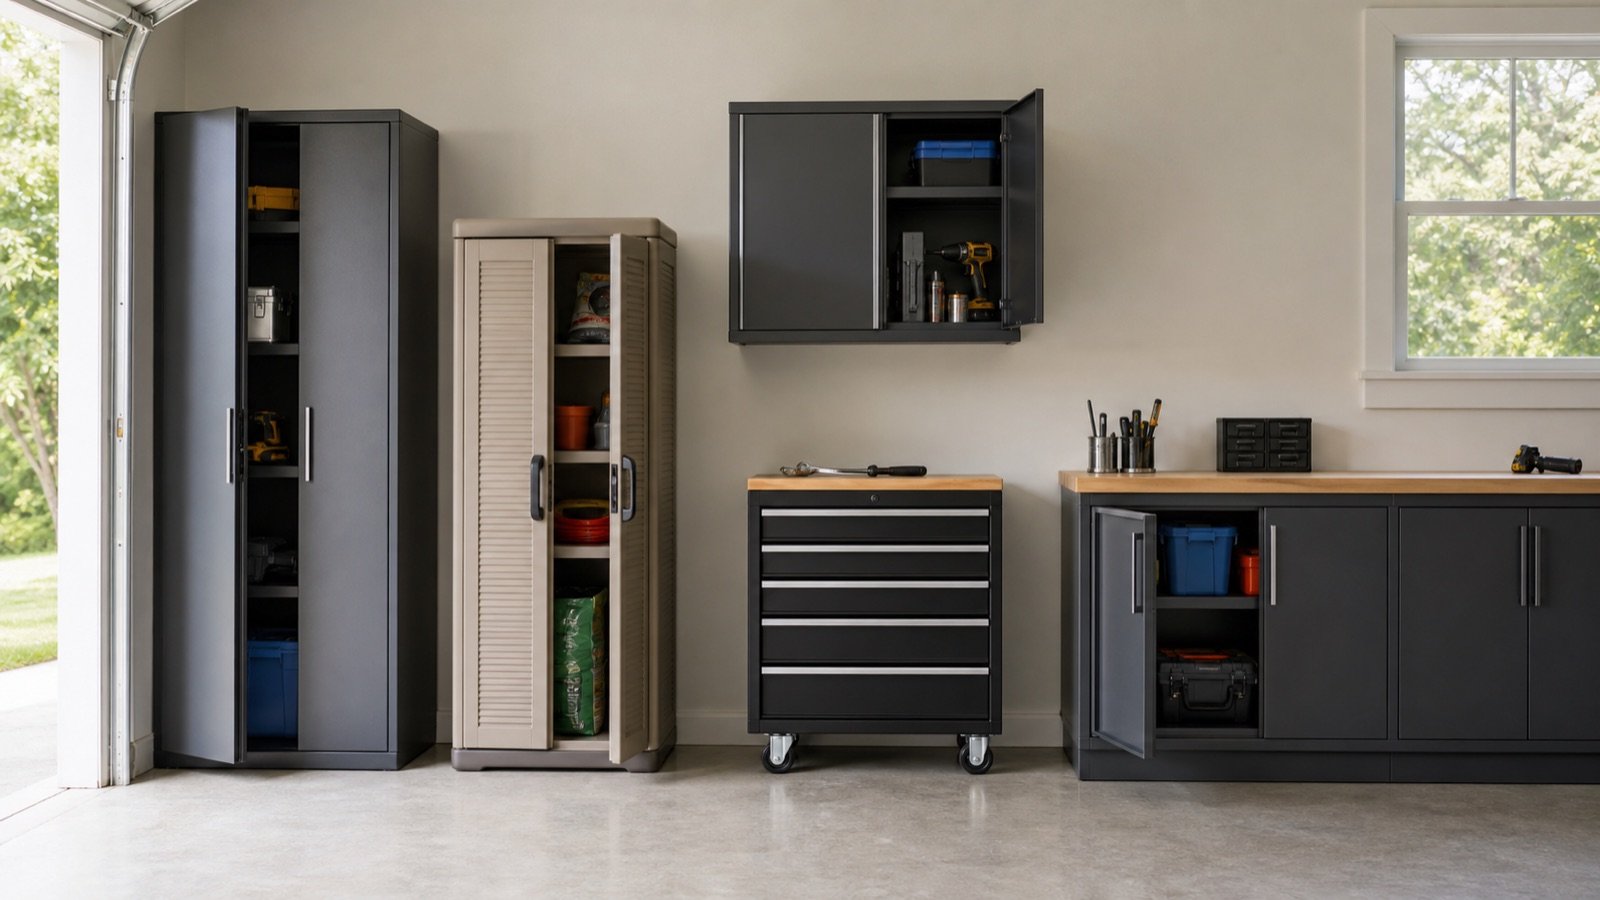
    Tall lockerBulky and long objectsTip restraint, ceiling height
    Base cabinetWorkbench support and heavy toolsToe space, worktop height
    Wall cabinetFloor-free storageStructure and reach height
    Drawer cabinetSmall tools and hardwareDrawer rating and extension
    Mobile cabinetWork that changes locationCaster rating and brakes

    Compare material honestly

    Powder-coated steel offers high structural potential and a workshop look, but gauge, folds, welds and shelf design matter more than the word “steel.” Resin resists rust and dents and is easy to clean, but shelf span and temperature conditions matter. Wood-based cabinetry can provide a refined work area but needs appropriate protection from moisture and impact.

    Our detailed metal versus plastic cabinet comparison explains the tradeoffs.

    Read load ratings correctly

    Separate total cabinet capacity from individual shelf and drawer capacity. Confirm whether figures assume evenly distributed loads, leveling, wall attachment, or a fixed installation. A high total number does not permit one shelf to carry that number.

    For perspective, current official examples vary widely: NewAge lists different capacities for lockers, base cabinets and wall cabinets; Seville Classics publishes model-specific shelf and total ratings; Suncast publishes ratings for its reinforced resin shelves. Compare like with like.

    Dimensions that matter

    Use external assembled dimensions for room fit and internal dimensions for object fit. Include handles, hinges, feet and worktop overhang. Cabinet depth is a major choice: see the 18-inch versus 24-inch guide. The cabinet size guide covers width and height.

    Assembly, installation, and expansion

    Ready-to-assemble units can enter tight spaces and may cost less to ship, but require time and careful squaring. Preassembled or welded cases reduce assembly but can be heavy. Check whether shelves, casters, worktops, locks and wall hardware are included or optional.

    A coherent product family can simplify future expansion, but only if accessories and individual cabinets remain available.

    Make a final scorecard

    Score each candidate from 1 to 5 for fit, usable capacity, shelf/drawer ratings, installation, hardware, expandability, warranty/support and total delivered cost. Weight “fit” twice. Eliminate any option that fails a safety, clearance or object-size requirement regardless of its average score.

    Before you order: the verification pass

    Put the exact model number—not merely the product-family name—at the top of your worksheet. Copy the assembled exterior dimensions, usable interior dimensions, individual shelf or drawer ratings, total cabinet weight, packaged dimensions, adjustable-foot range, and required clearances from the current manufacturer page and manual. Note which accessories are included and which appear only in styled photographs.

    Then return to the garage with painter’s tape. Mark the cabinet case, handles, open doors or extended drawers, and the path needed to load the largest object. Park the vehicle in its normal position and test every door, hatch, step, switch and service panel. Photograph the mock-up from the driver’s seat, house entry and driveway. If a critical measurement is unpublished, ask the manufacturer before placing the order.

    Finally, calculate total delivered cost: cabinet, worktop, shelves, drawer liners, casters or feet, mounting rails, appropriate fasteners, delivery surcharge, assembly help and sales tax. A lower sticker price can become the more expensive installation when essential components are optional.

    Installation-day checklist

    • Inspect packages for damage before assembly and keep model labels and receipts.
    • Read the complete manual before lifting or fastening anything.
    • Confirm the floor is stable and the planned attachment locations are suitable.
    • Use a second capable person whenever the manual or cabinet size calls for one.
    • Level and square the case before aligning doors and loading shelves.
    • Install wall mounting or tip restraints exactly as instructed.
    • Load heavy objects low and distribute weight within every shelf and drawer rating.
    • Recheck fasteners, leveling and door alignment after the cabinet has been loaded.

    Do not improvise around electrical, gas, plumbing, fire-safety or structural conditions. When the required attachment or clearance is uncertain, pause and consult a qualified professional.

    Common mistakes to avoid

    Most disappointing installations trace back to one of five mistakes: measuring only the empty wall; treating total capacity as a per-shelf rating; forgetting doors, drawers and vehicle movement; selecting depth from a catalog image; or filling every wall without reserving adaptable space. A slower specification check is cheaper than returning a pallet-sized cabinet.

    Frequently asked questions

    How much should garage cabinets cost?

    Prices change constantly and full systems include different components. Compare the delivered and installed cost per usable zone, not only the advertised cabinet price.

    Are deeper cabinets always better?

    No. Extra depth helps bulky totes but can reduce aisles and hide small items. Choose depth from stored-object dimensions and vehicle clearance.

    Do garage cabinets need to be anchored?

    Follow the exact manufacturer instructions. Tall cabinets commonly require tip restraint, and wall units require attachment to suitable structure.

    Last reviewed: July 2026. Product specifications can change; check the manufacturer’s current documentation before purchase.

  • Garage Storage Systems: How to Build One That Actually Works

    Garage Storage Systems: How to Build One That Actually Works

    Affiliate disclosure: As an Amazon Associate I earn from qualifying purchases. This article may contain affiliate links, and Bay & Bench may earn a commission at no extra cost to you. Read our full Affiliate Disclosure.

    A useful garage storage system is not the one with the most cabinets. It is the one that keeps the floor clear, puts frequently used gear within reach, protects hazardous items, and still lets every door, drawer, vehicle, and person move safely.

    Quick answer

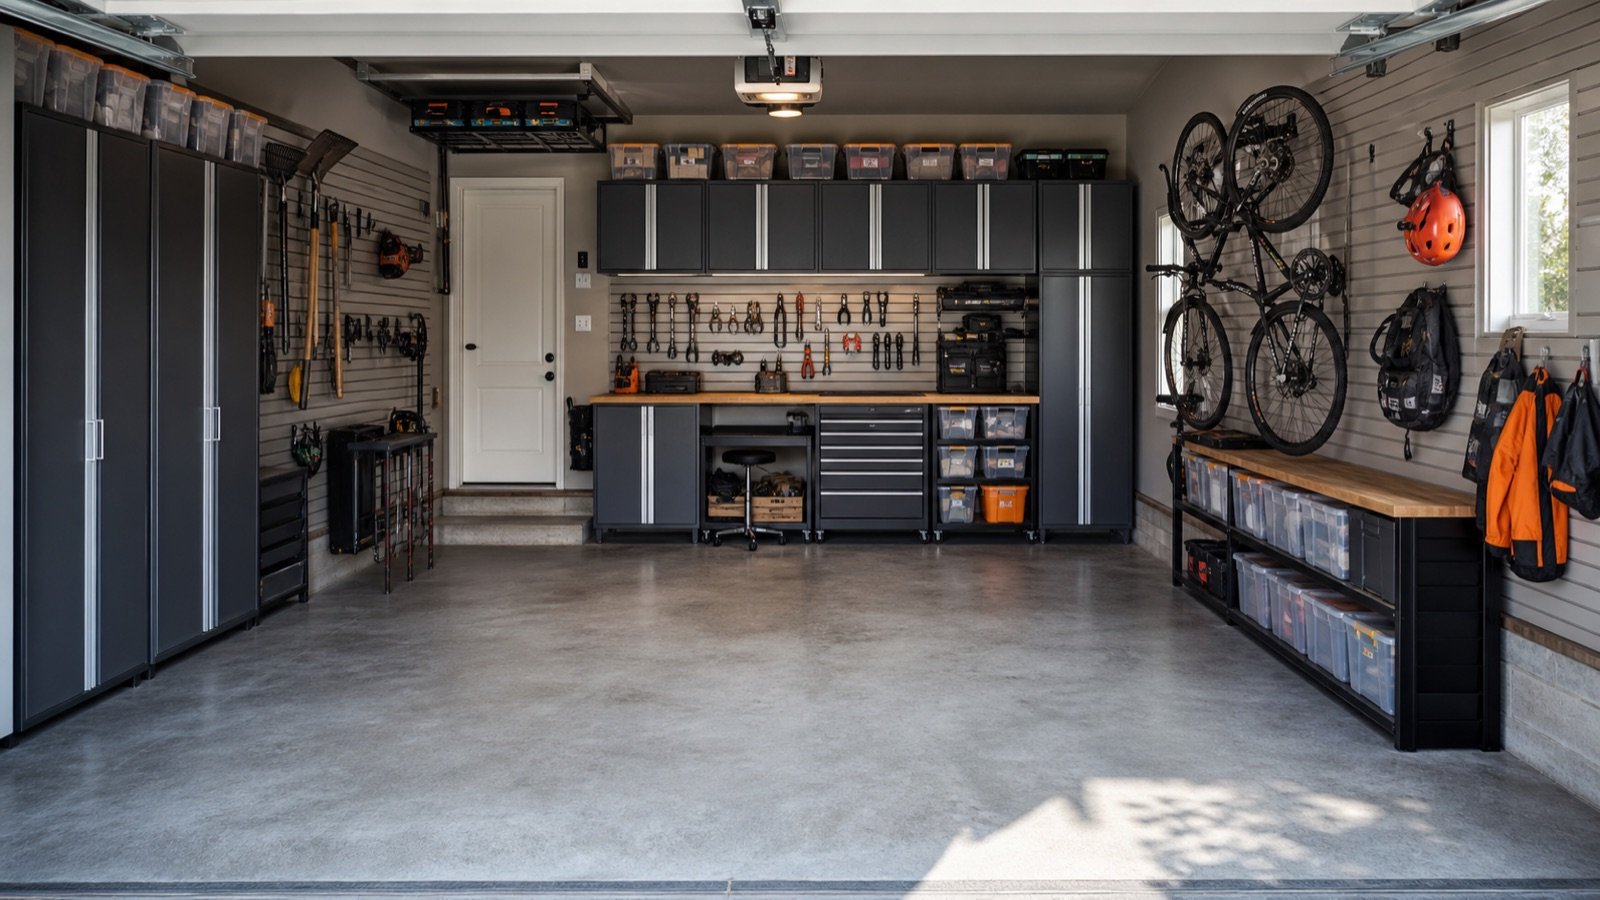
    Start with zones and clearances, then choose storage hardware. Use closed cabinets for dust control and hazardous supplies, open wall storage for frequently used tools, overhead storage for light seasonal items, and mobile units where the work changes location.

    Useful products to compare

    These searches are a practical starting point for comparing current sizes, materials, load ratings, and availability.

    The five layers of a complete garage storage system

    Think of the room as five connected layers rather than one wall to fill.

    1. Floor and traffic layer: parking footprints, walking routes, door swings, steps and appliance access.
    2. Daily-use layer: items reached weekly—hand tools, chargers, sports gear and cleaning supplies.
    3. Closed-storage layer: dusty, sharp, valuable or visually messy items.
    4. High-storage layer: light seasonal gear that can be retrieved safely.
    5. Work layer: a bench, tool cart, charging point and task lighting.

    When those layers overlap carelessly, a garage feels cramped even when it contains plenty of nominal storage capacity.

    Choose storage by object, not by appearance

    Make an inventory before shopping. Record the largest dimensions and approximate weight of bulky objects, then sort everything by frequency of use. Long-handled garden tools need height; totes need shelf depth; small fasteners need drawers; chemicals need secure storage compatible with their labels; bicycles need a retrieval path, not merely a hook.

    A cabinet advertised with a large total capacity can still be a poor fit if shelf spacing, door opening, or internal depth does not match what you own.

    Cabinets, wall panels, shelves, and overhead racks

    Storage typeBest forMain constraint
    Closed cabinetsTools, supplies, dust controlDepth and door clearance
    Slatwall or pegboardFrequently used toolsVerified wall attachment and rated accessories
    Open shelvingBins and bulky itemsVisual clutter and dust
    Overhead racksLight seasonal goodsCeiling structure, door tracks, safe lifting
    Mobile cartsProject toolsParking space and caster quality

    Plan the system in the right order

    Use the sequence in our garage storage planning guide: measure first, mark no-storage zones, reserve the vehicle envelope, assign activity zones, then select products. The companion measurement checklist covers slopes, curbs, outlets, panels, windows and garage-door hardware that simple width-by-depth measurements miss.

    Mock up every cabinet footprint with painter’s tape. Open the car doors, carry a tote through the aisle, lower the garage door, and stand where you will work. A ten-minute mock-up can prevent a costly dimensional mistake.

    Build in phases

    With a limited budget, begin with the highest-friction zone. That may be an entry drop zone, a tool wall, or one bank of cabinets. Standardize bin sizes and label positions before expanding. A modular approach also reveals what capacity you actually use.

    Leave one section adaptable. Families acquire different sports gear; workshops add machines; vehicles change. A wall packed edge to edge on day one has no room to evolve.

    Safety rules that outrank storage capacity

    Never block an electrical panel, water heater service area, ventilation opening, fire equipment, or an exit. Follow local rules and each product’s installation instructions. Tall freestanding cabinets should be restrained against tip-over when the manufacturer calls for it. Wall cabinets and overhead racks must be attached to suitable structure with the specified hardware.

    Store gasoline, propane, pool chemicals, pesticides, oily rags, batteries, and flammables according to their labels and local fire guidance—not according to where they happen to fit.

    Before you order: the verification pass

    Put the exact model number—not merely the product-family name—at the top of your worksheet. Copy the assembled exterior dimensions, usable interior dimensions, individual shelf or drawer ratings, total cabinet weight, packaged dimensions, adjustable-foot range, and required clearances from the current manufacturer page and manual. Note which accessories are included and which appear only in styled photographs.

    Then return to the garage with painter’s tape. Mark the cabinet case, handles, open doors or extended drawers, and the path needed to load the largest object. Park the vehicle in its normal position and test every door, hatch, step, switch and service panel. Photograph the mock-up from the driver’s seat, house entry and driveway. If a critical measurement is unpublished, ask the manufacturer before placing the order.

    Finally, calculate total delivered cost: cabinet, worktop, shelves, drawer liners, casters or feet, mounting rails, appropriate fasteners, delivery surcharge, assembly help and sales tax. A lower sticker price can become the more expensive installation when essential components are optional.

    Installation-day checklist

    • Inspect packages for damage before assembly and keep model labels and receipts.
    • Read the complete manual before lifting or fastening anything.
    • Confirm the floor is stable and the planned attachment locations are suitable.
    • Use a second capable person whenever the manual or cabinet size calls for one.
    • Level and square the case before aligning doors and loading shelves.
    • Install wall mounting or tip restraints exactly as instructed.
    • Load heavy objects low and distribute weight within every shelf and drawer rating.
    • Recheck fasteners, leveling and door alignment after the cabinet has been loaded.

    Do not improvise around electrical, gas, plumbing, fire-safety or structural conditions. When the required attachment or clearance is uncertain, pause and consult a qualified professional.

    Common mistakes to avoid

    Most disappointing installations trace back to one of five mistakes: measuring only the empty wall; treating total capacity as a per-shelf rating; forgetting doors, drawers and vehicle movement; selecting depth from a catalog image; or filling every wall without reserving adaptable space. A slower specification check is cheaper than returning a pallet-sized cabinet.

    Frequently asked questions

    What should I install first?

    Clear the floor, establish zones, and solve the most frequently used area first. Do not buy a full cabinet set until the measured layout has passed a tape mock-up.

    Are garage cabinets better than open shelves?

    Neither is universally better. Cabinets control dust and visibility; shelves make bulky bins easier to see and access. Most garages benefit from both.

    How much aisle space should I leave?

    There is no single number for every household. Test the planned aisle with the actual vehicle, open doors, carried objects and all moving parts before ordering storage.

    Last reviewed: July 2026. Product specifications can change; check the manufacturer’s current documentation before purchase.