Tag: tool storage

  • Garage Tool Storage Guide: Put Every Tool Near Its Work

    Garage Tool Storage Guide: Put Every Tool Near Its Work

    Affiliate disclosure: As an Amazon Associate I earn from qualifying purchases. This article may contain affiliate links, and Bay & Bench may earn a commission at no extra cost to you. Read our full Affiliate Disclosure.

    A garage tool storage guide should begin with the work, not a wall full of matching bins. Put the tools for tire service near the parking bay. Keep measuring and marking tools at the bench. Give portable kits a clear landing place when they come home. This approach may look less showroom-perfect, but it saves steps and makes missing tools obvious. The plan below sorts hand tools, power tools, hardware, batteries, long tools, and mobile cases by frequency, weight, and the route each one takes during a normal project.

    Quick answer

    Sort tools into daily, monthly, and occasional use. Store daily hand tools between knee and shoulder height near their work zone. Put dense tools low in drawers, portable kits on shelves that fit their cases, and long tools on rated wall hardware away from doors and vehicles. Measure the tallest and widest tool before buying drawers. Keep batteries dry and clean, follow each battery manual, and do not treat a charging cabinet as fire protection unless the manufacturer explicitly designed it for that purpose.

    Garage tool storage guide by tool type

    No single container handles a whole workshop well. Drawers are excellent for shallow, dense tools. Open wall storage keeps familiar hand tools visible. Cases protect tools that leave the garage. Cabinets keep dust off items used less often. Start with this division, then adjust for children, moisture, theft concerns, and the jobs you repeat.

    Tool groupBest first homePlacementMain check
    Sockets, wrenches, pliersShallow labeled drawersBeside mechanical workOpen drawer clears car and stool
    Measuring and marking toolsProtected shallow drawer or cabinetAt the clean benchNo abrasive dust or loose pile
    Cordless toolsDrawer, shelf, or fitted caseNear charging areaTool fits with battery removed if required
    Fasteners and small partsSmall bins or drawer organizersEye level near assemblyLabels visible and bins cannot spill
    Long toolsRated hooks or floor rackNear outdoor doorHead, vehicle, and door clearance
    Jobsite casesMeasured shelf or mobile stackNear exit routeHandles and latches remain reachable

    The broader garage storage systems guide helps place these tool homes beside household and seasonal storage.

    Map the project route before buying organizers

    Choose three recurring jobs. For example: bicycle service, household repair, and vehicle maintenance. Walk each job from setup to cleanup and note where tools accumulate. If sockets always land on a rolling cart next to the car, a chest across the garage creates needless travel. If drills leave in a portable case, unpacking them onto a decorative wall wastes time.

    Draw a simple floor plan using the method in how to plan garage storage. Mark the bench, parking envelope, doors, outlets, and the place where a mobile cart rests. Tool storage belongs on that map. Leave working surfaces deliberately empty. A bench covered with permanent organizers has become a shelf, and every project will begin by moving someone else’s project.

    Use retrieval frequency, not matching colors

    Daily tools deserve the easiest reach. Monthly tools can occupy lower drawers or the second row of wall storage. Once-a-year pullers, specialty sockets, and spare jigs can live in labeled cases higher or farther away. Frequency changes, so write labels that can move rather than printing a permanent museum map on day one.

    There is a useful exception. Hazardous, sharp, or expensive tools may need locked storage even when used often. Security and child access outrank convenience. Put the key or combination where authorized adults can use it without leaving the cabinet unlocked. Store personal protective equipment near the task that needs it, but keep clean respiratory and eye protection away from dust and overspray.

    Choose drawers from tool dimensions

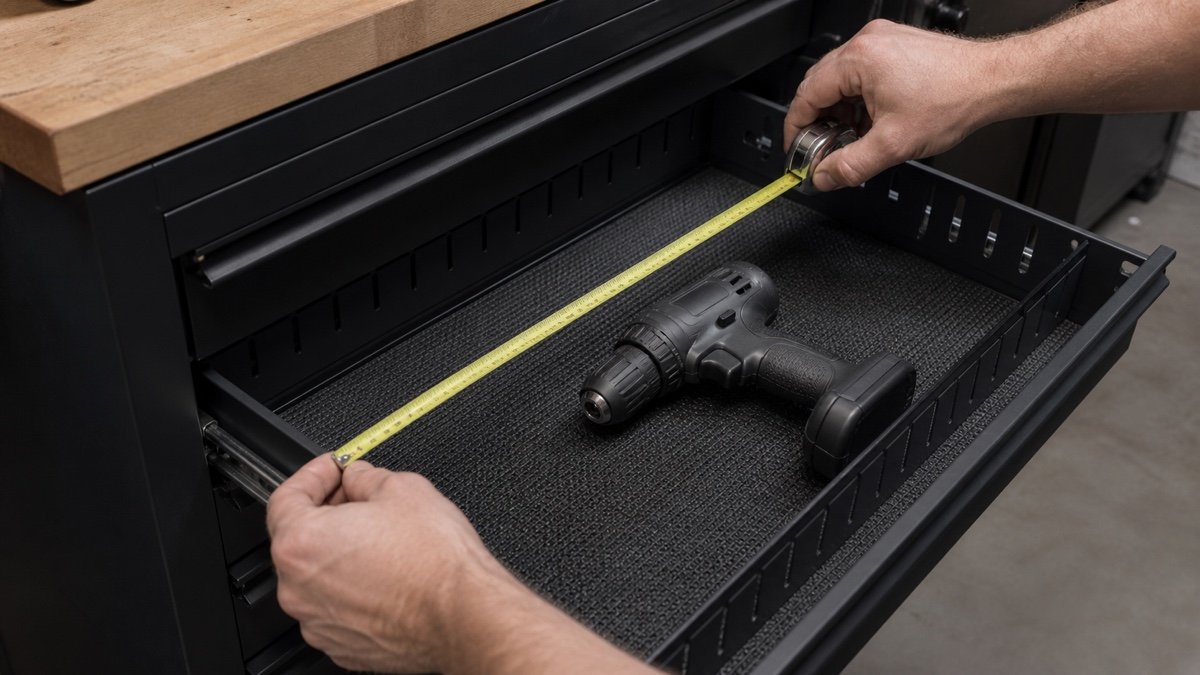
    Count drawers only after measuring the tools. A chest with many shallow drawers is excellent for sockets and pliers but hopeless for a tall cordless saw. Lay each tool group on the floor in a single layer and measure the required width, depth, and height. Add room for dividers and your fingers. Then compare those numbers with the manufacturer’s internal drawer dimensions, not the cabinet’s outside width.

    Dense tools should sit low. Divide them into modest groups so one drawer does not consume its full rating before the rest of the cabinet is loaded. A nonslip liner reduces movement but does not raise capacity. If you need help choosing the furniture around those drawers, compare the storage and work surface in the garage workbench buying guide.

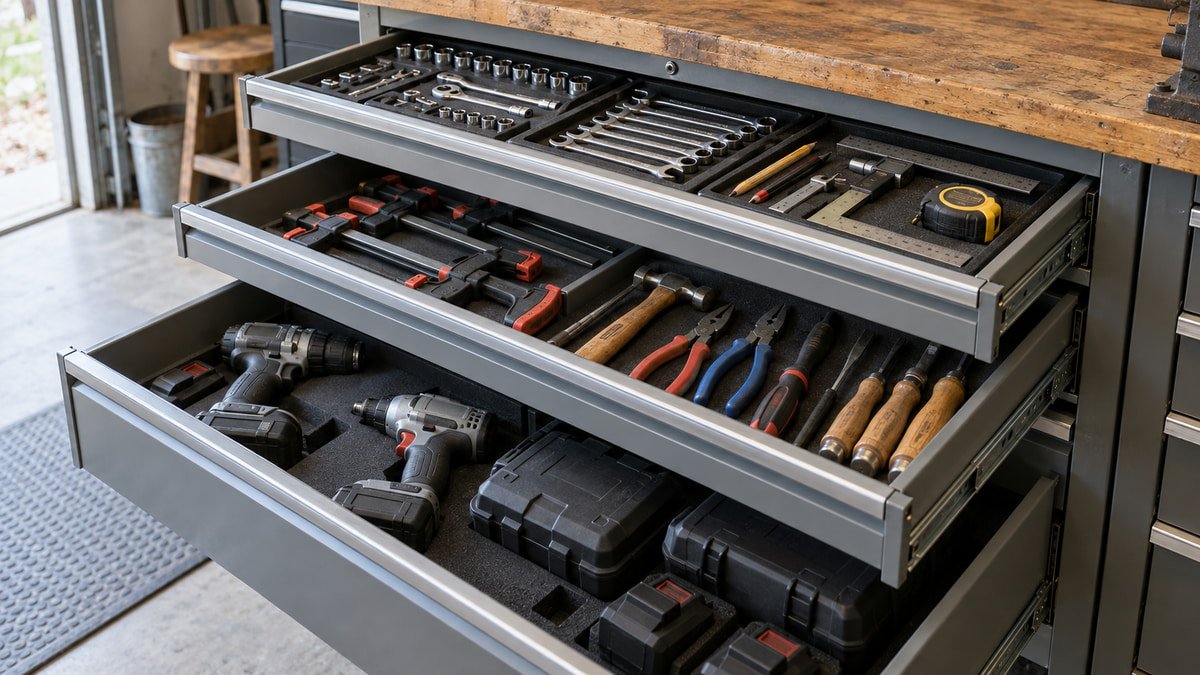
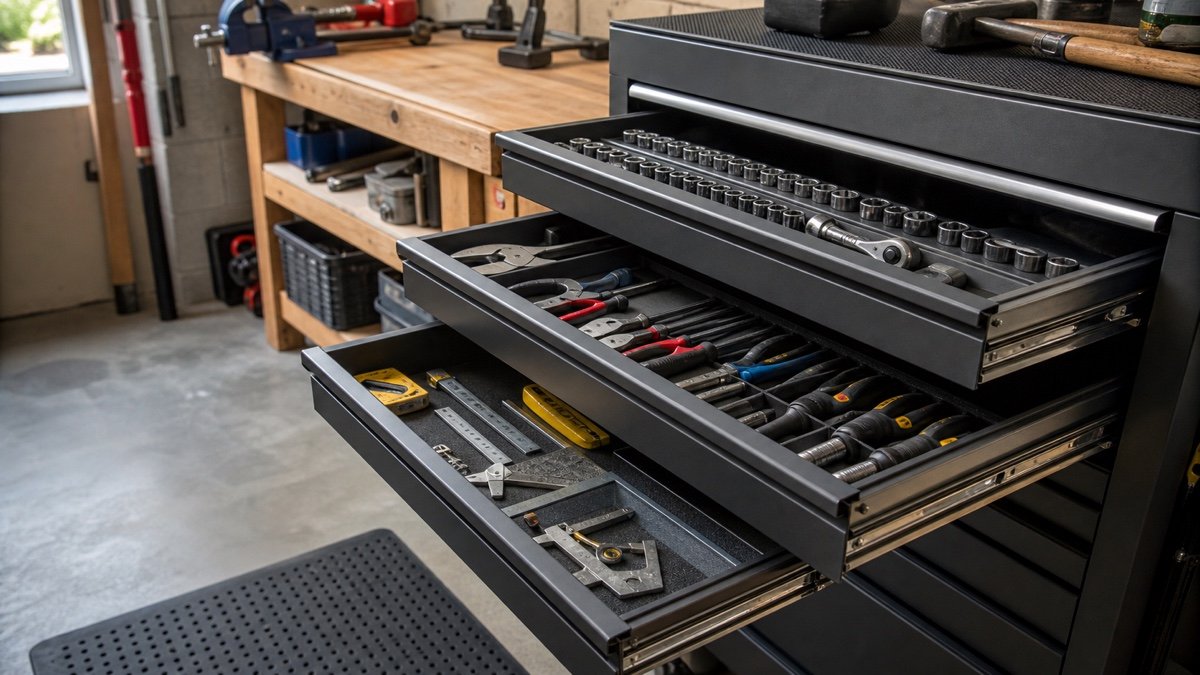
    Shallow tool drawers organized by task with sockets, pliers, and measuring tools
    Shallow drawers let you see small tools without piling them into a deep box.

    Build wall storage around structure and published capacity

    Wall systems keep daily tools visible, but the mounting surface and fasteners carry the load. Milwaukee lists its PACKOUT Compact Wall Plate at 50 pounds in a shop, while the Large Wall Plate is listed at 150 pounds. The manufacturer page and the exact installation manual matter because plate size, substrate, fasteners, and mounting context change the rating.

    Do not transfer a capacity from one plate or hook to another. Include the organizer, case, tool, and attachments in the load. Place heavy cases low enough to lift with control, and keep protruding hooks outside walking and vehicle paths. The existing garage wall storage systems guide compares pegboard, slatwall, and track hardware once you know what the wall needs to hold.

    Give power tools a clean landing place

    A cordless drill can stand on a shelf, hang from a tool-specific holder, sit in a drawer, or stay in its transport case. The right choice depends on dust, frequency, and whether the tool leaves the garage. Remove loose bits before hanging a tool overhead. Check that the holder supports the tool body without pressing a trigger or damaging a battery interface.

    Deep modular drawers can keep kits together, but published capacities vary widely. DEWALT lists the TOUGHSYSTEM 2.0 DXL Deep Drawer Unit at 27.5 pounds per drawer and 55 pounds total. See the official product page for the current configuration. Those numbers are a reminder to weigh the actual kit rather than assuming every large plastic drawer can hold a dense pile of metal tools.

    Treat batteries and charging as their own zone

    Keep batteries and chargers dry, clean, and easy to inspect. Follow the temperature, ventilation, and storage instructions for each battery platform. Do not bury an operating charger in a closed drawer unless the manufacturer specifically approves that arrangement. Keep the charging area away from grinding sparks, oily rags, flammable finishes, and a bench where metal offcuts can bridge contacts.

    Mounting a power strip inside a cabinet does not make the cabinet a listed charging enclosure or fireproof box. Use intact chargers and cords, avoid improvised adapters, and give heat somewhere to go. If an electrical outlet is damaged, loose, or badly placed, solve that problem rather than building an extension-cord maze around it.

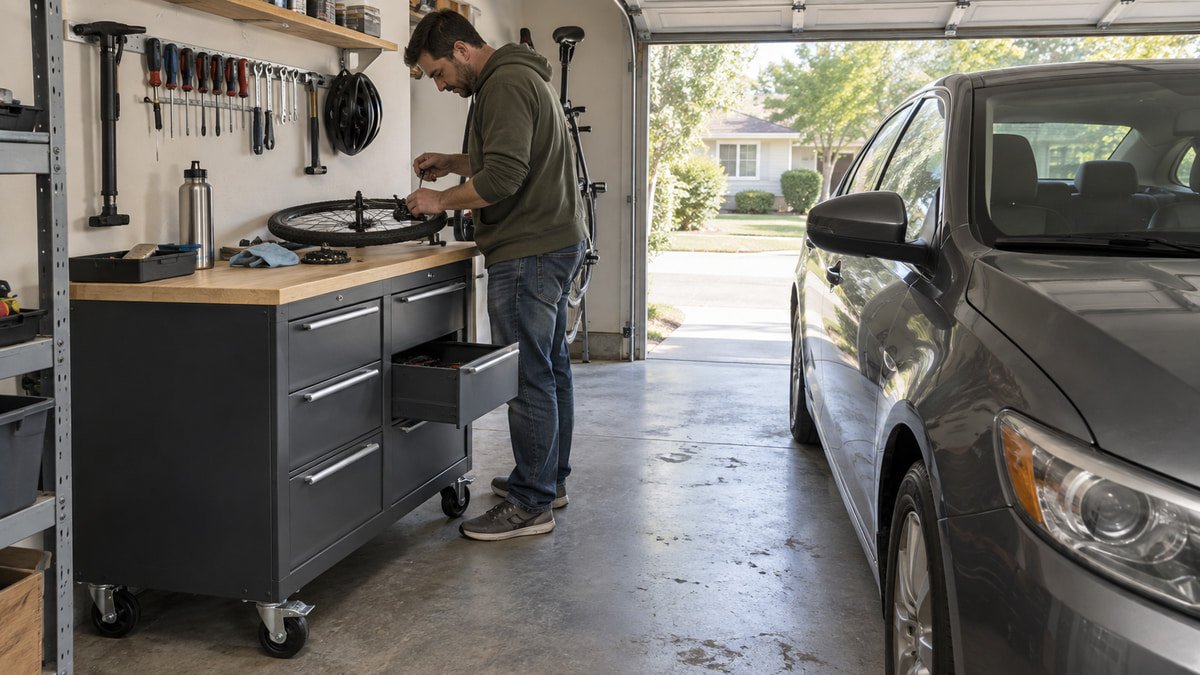
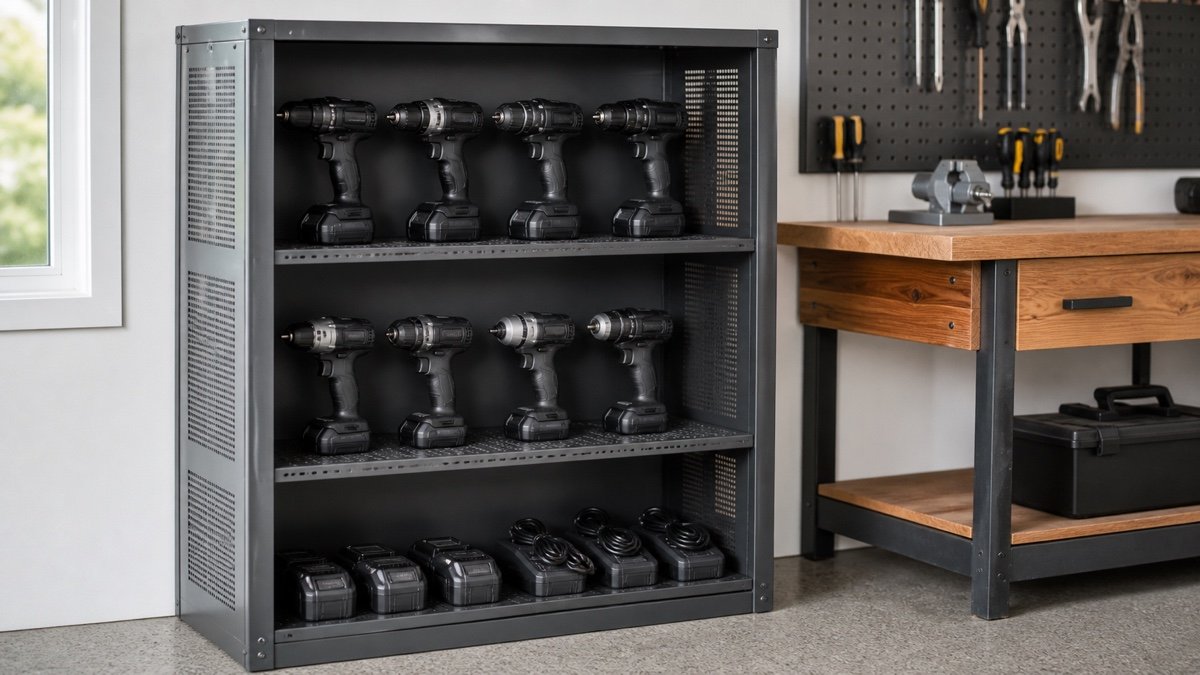
    Cordless drills and batteries stored in a ventilated garage cabinet beside a workbench
    Battery storage should be dry, easy to inspect, and separated from grinding dust and hot work.

    Separate small parts by decision, not by appearance

    Fasteners become useful when the label answers the question you ask during a repair. Sort common screws by diameter and length, electrical terminals by type and wire range, and anchors by the wall material they are approved for. Mixing every shiny metal fastener into one bin saves space and wastes the next Saturday afternoon.

    Use lidded organizers for parts that travel. Open bins work for high-use items at a fixed assembly station, provided they cannot be knocked into a car path. Keep an intake bin for loose hardware discovered during cleanup. Empty it weekly. This prevents every drawer from developing a mysterious layer of one-off washers and unidentified clips.

    Store long tools where their movement makes sense

    Rakes, shovels, levels, clamps, and extension poles need more than a hook that carries their static weight. Measure the full sweep as you lift each item on and off. A secure rake can still scratch a vehicle when its handle rotates. Put outdoor tools near the exterior door and shop clamps near the bench, even if that breaks a symmetrical wall display.

    Use two support points for long or awkward items when one hook lets them twist. Keep sharp ends covered or turned away from the aisle. Floor racks are often better for tools used by someone who cannot comfortably lift overhead. Recheck fasteners after the first loaded week and at regular cleanups.

    Make portable cases part of the garage system

    A case needs a home that accepts it without removing the handle, opening a latch, or unloading the stack. Measure the case at its widest projection. Leave enough shelf height to grasp it safely, and put the most frequently carried module between knee and chest height. Heavy boxes belong low.

    Modular wall plates and rolling stacks are handy, but confirm every connection in the exact orientation. Milwaukee’s PACKOUT mounting plate manual, for instance, publishes different limits for plate models and mounting contexts. A case that locks to a floor plate may not be approved on a wall in the same arrangement. Follow the manual instead of reasoning from the shape of the cleats.

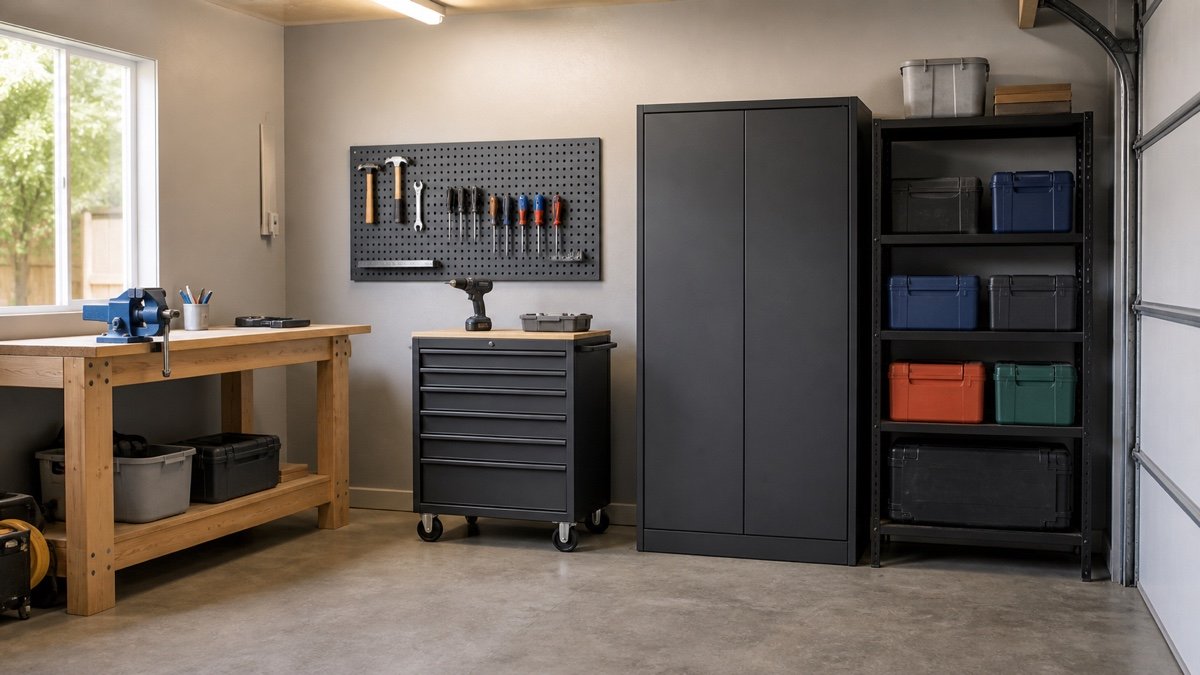
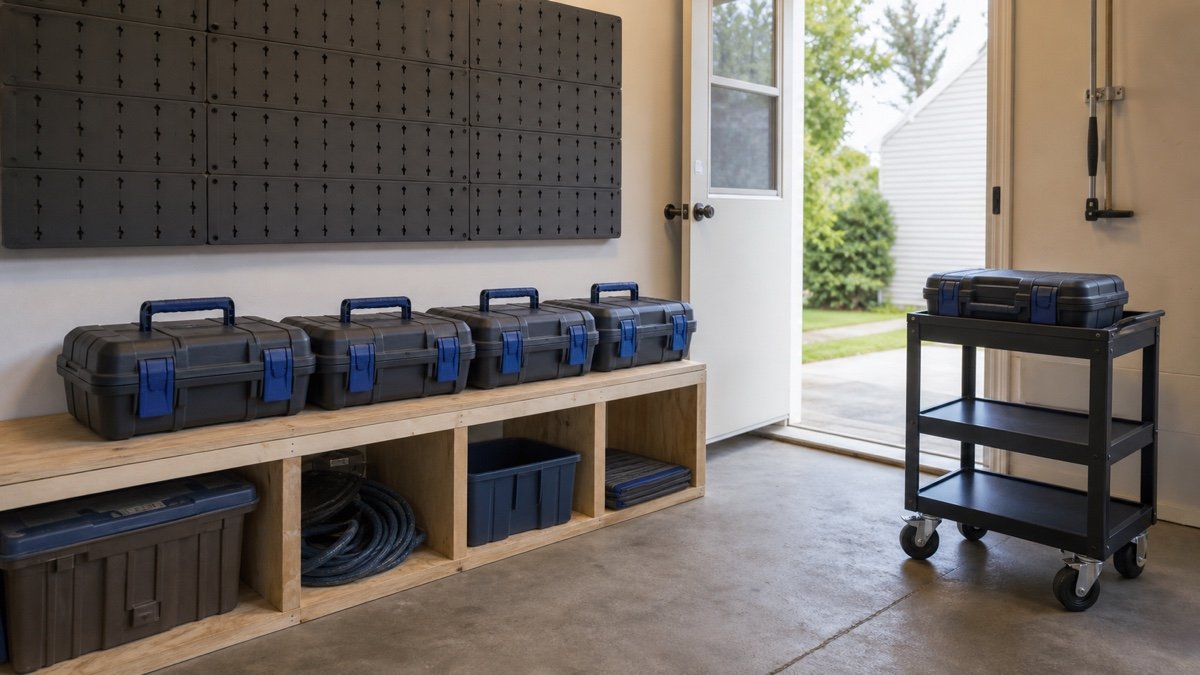
    Portable tool cases staged beneath a wall storage panel in a garage workshop
    Portable cases work best when the shelf, cart, and project route all use the same modules.

    Reset one zone at a time

    Do not empty the whole garage unless you can finish the job. Start with one bench drawer or one four-foot wall section. Remove duplicates and broken tools, group what remains by task, then mock up the new home with cartons and tape. Work from the zone for a week before buying inserts for every drawer.

    Take a photo of the successful arrangement. Label only after it proves useful. At the monthly reset, return wandering tools, inspect wall hardware, clean drawer slides, and update the odd-items bin. A tool system earns its floor and wall space by making work easier. If an organizer creates more steps, move it.

    Useful products to compare

    These links open current Amazon search results. Check the dimensions, manual, mounting hardware, warranty, and current availability for the exact model before you order.

    Before you buy or install

    Read the current manual for the exact product you are considering. Confirm its assembled dimensions, rated capacity, mounting requirements, included hardware, working clearances, warranty, and any limits that apply to your wall, floor, electrical circuit, or garage layout.

    Frequently asked questions

    What tools should stay visible on a garage wall?

    Keep frequently used hand tools visible when quick access outweighs dust and security concerns. Measuring tools, high-cost tools, and items sensitive to grit often belong in a drawer or cabinet. Heavy tools should not hang high merely to complete a wall display.

    Are deep drawers better for power tools?

    They are useful when the tool, battery, and accessories fit without stacking into a loose pile. Measure internal height and depth, then compare the full loaded weight with the drawer rating. Shallow drawers are usually better for sockets and pliers because every item remains visible.

    Can I charge tool batteries inside a cabinet?

    Only if the charger and cabinet arrangement follow the manufacturers’ instructions and the space provides the required conditions. Do not assume a metal cabinet is a fire-rated charging enclosure. Keep chargers clean, dry, ventilated, and away from sparks, flammables, and loose conductive debris.

    How often should I reorganize garage tools?

    Use a quick monthly reset and a deeper review when projects or tool ownership change. If a tool repeatedly lands somewhere other than its assigned home, the home is probably wrong. Move the storage closer to the work rather than relying on perfect habits.

  • How to Choose a Rolling Tool Chest Without Buying Too Much Box

    How to Choose a Rolling Tool Chest Without Buying Too Much Box

    Affiliate disclosure: As an Amazon Associate I earn from qualifying purchases. This article may contain affiliate links, and Bay & Bench may earn a commission at no extra cost to you. Read our full Affiliate Disclosure.

    Learning how to choose a rolling tool chest is mostly an exercise in resisting oversized specifications. A huge capacity number looks reassuring until the cabinet blocks a car door, the shallow drawers do not fit your cordless tools, or the loaded box cannot cross a slab joint. Start with a drawer map and loaded footprint. Then judge capacity wording, casters, stability, worktop, power, locks, and expansion. The comparison uses current manufacturer specifications to show how differently similar-looking cabinets can be rated, so treat it as a fit guide rather than a shop test.

    Quick answer

    Measure your tool groups in one layer, then choose drawer widths and heights that fit them with room for organizers and fingers. A 26 to 42 inch cabinet often suits a home collection better than a 56 or 72 inch unit, but the tool map decides. Put dense drawers low, compare per-drawer and overall ratings separately, and plan the fully assembled footprint. Check empty weight, caster diameter, threshold route, drawer-open clearance, power cord, compatible top pieces, and delivery before ordering.

    How to choose a rolling tool chest in ten checks

    Use this list in order. Later features cannot rescue the wrong footprint or drawer layout.

    CheckWhat to recordFailure it prevents
    Tool mapGrouped tool dimensions and weightWide cabinet with useless drawers
    Cabinet footprintBody, handle, bumpers, caster sweepBlocked vehicle or door
    Drawer mapInternal width, depth, heightStacked tools and jammed latches
    RatingsDrawer, cabinet, top, accessory limitsOverloaded slides or base
    StabilityDrawer latches, load order, floor levelTip or uncontrolled opening
    CastersDiameter, width, locks, floor jointsCabinet that cannot move
    WorktopSurface material and allowed tasksDamaged top or lost landing area
    PowerCord exit, outlets, ventilationSnagged cord or hot charging zone
    ExpansionApproved chest, locker, side cabinetMismatched unstable stack
    DeliveryPackaged size, weight, threshold routeCrated cabinet stuck outside

    Plot the two-dimensional footprint with the garage storage fit calculator before comparing paint colors.

    Inventory by drawer, not by total tool count

    Lay sockets, wrenches, pliers, measuring tools, cordless tools, and specialty equipment in separate groups. Arrange each group as you would like to see it in a drawer. Measure the rectangle, the tallest item, and the rough weight. Leave room for a hand to lift the tool and for an organizer to hold it.

    This exercise often points to fewer, better-shaped drawers. Ten shallow drawers are wasteful when half the collection consists of drills and large pullers. Four deep drawers are miserable when every socket hides below another. Photograph the layouts and carry the numbers while shopping. A cabinet width tells you little about usable drawer width.

    Pick width after the parking test

    A 26-inch single-bank cabinet is easy to place and steer. A 41 or 42-inch double-bank cabinet opens a broad top drawer and holds a mature home collection. Wider 52, 56, and 72-inch boxes provide volume and work surface, but their depth, weight, and turning radius become serious room-planning issues.

    Tape the cabinet body and side handle on the floor. Add the deepest open drawer. Park the vehicle and walk past it carrying a case. If the layout works only with the handle removed or the cabinet rolled out for every use, choose a smaller width. The garage workshop aisle clearance guide helps test the active space rather than the closed rectangle.

    Read drawer and overall ratings separately

    The cabinet rating, drawer slide rating, caster rating, and worktop rating are not interchangeable. Craftsman lists its S2000 41-inch 9-drawer cabinet with 100-pound soft-close drawer slides and a 2,000-pound overall weight capacity. The manufacturer page also identifies 6 by 2 inch casters and steel gauge range.

    A high overall number does not mean one drawer can hold that load. Nor should you multiply the drawer ratings and ignore the cabinet limit. Check how the manual defines evenly distributed loads and accessory limits. Weigh dense drawers with a bathroom or shipping scale when the estimate is close.

    Build a stable load from the bottom up

    Put jacks, large sockets, pullers, and other dense tools in the lowest suitable drawers. Light hand tools can sit higher. Open one loaded drawer at a time and close it before moving the cabinet. Full-width latches are useful because they reduce accidental opening, but you still need to verify that every drawer is fully shut.

    Harbor Freight publishes a 2,600-pound overall rating and 120-pound capacity per pair of drawer slides for the U.S. General Series 3 42-inch roll cabinet. See the current official listing and manual for the exact loading language. Use the ratings only for that model. Another cabinet of the same width may be built very differently.

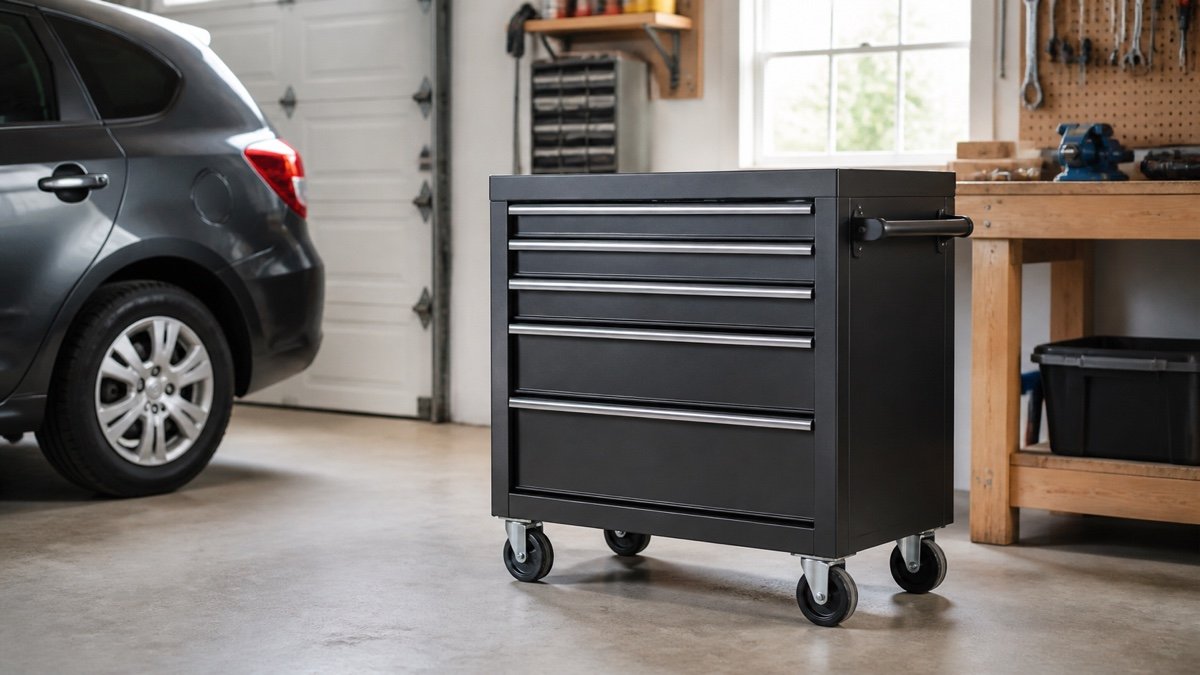
    Mechanic measuring a cordless tool and an open tool chest drawer
    Internal drawer dimensions decide whether bulky tools fit without wasteful stacking.

    Caster size has to match the floor

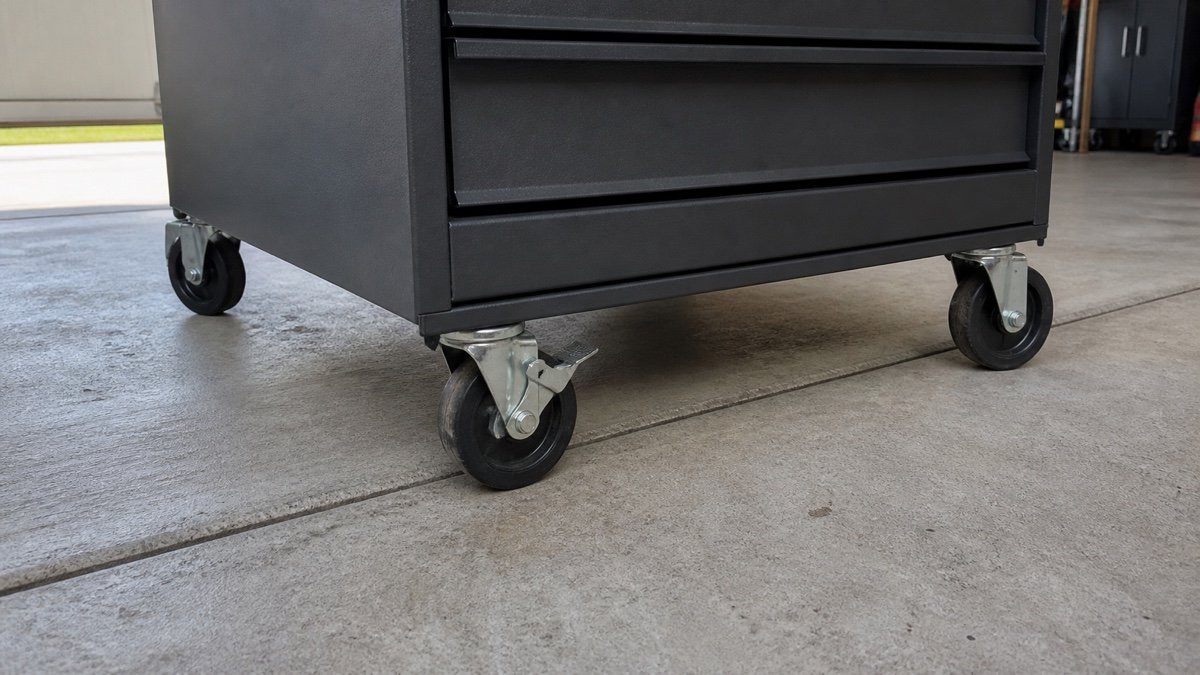
    Large-diameter, wider casters cross small joints and debris more easily than tiny hard wheels. The arrangement matters too. Two fixed and two swiveling casters track predictably in a straight move, but they need room to turn. Four swivel casters maneuver in tighter spaces and can feel less settled while steering a heavy box.

    Inspect the slab for control joints, spalls, slope, mats, and the lip at the garage door. A caster brake may stop rolling while allowing swivel. Park the cabinet on level concrete and use any leveling system as instructed. Do not test mobility for the first time after filling every drawer.

    Large casters on a loaded rolling tool chest crossing a concrete garage joint
    Caster diameter, floor joints, and steering room determine whether a cabinet is truly mobile.

    Decide whether the top is storage or work space

    A rubber-matted steel top makes a convenient staging area. A wood top can support light assembly and protects tools from a hard surface. Adding a matching top chest converts that same area into more drawers. Choose the final role before buying either component.

    If you need a real bench for clamping and forceful work, keep it separate. The garage workbench buying guide covers frame stiffness, overhang, vise access, and surface choice. A mobile tool cabinet is storage first. Do not infer hammering, vise, welding, or standing capacity from the overall tool-load number.

    Treat built-in power with ordinary caution

    Integrated outlets can keep chargers and diagnostic tools ready, but they require a clean cord route and accessible plug. Confirm outlet type, total rating, cord length, and how the cord exits with drawers open. Keep it away from caster paths and do not move the cabinet while it is plugged in.

    Charging inside a drawer may be a listed feature on a specific cabinet, yet charger and battery instructions still apply. Keep contacts free of metal debris. Do not assume a powered drawer is fireproof or appropriate for damaged batteries. If the cabinet sits near grinding or finishing, a separate clean charging station is usually easier to manage.

    Plan compatible expansion before you need it

    Ask which matching top chests, side lockers, end cabinets, and hutches the manufacturer currently supports. Record how they attach and how each accessory changes total width, height, load, caster behavior, and wall clearance. A side cabinet can add leverage to a base that is not approved for it.

    Milwaukee lists the 46-inch 8-drawer steel cabinet at an 1,800-pound overall capacity with 100-pound soft-close slides on its official product page. That is a good example of why you should compare a whole model family rather than assuming the specifications of a familiar competitor carry across.

    Delivery deserves its own measurement sheet

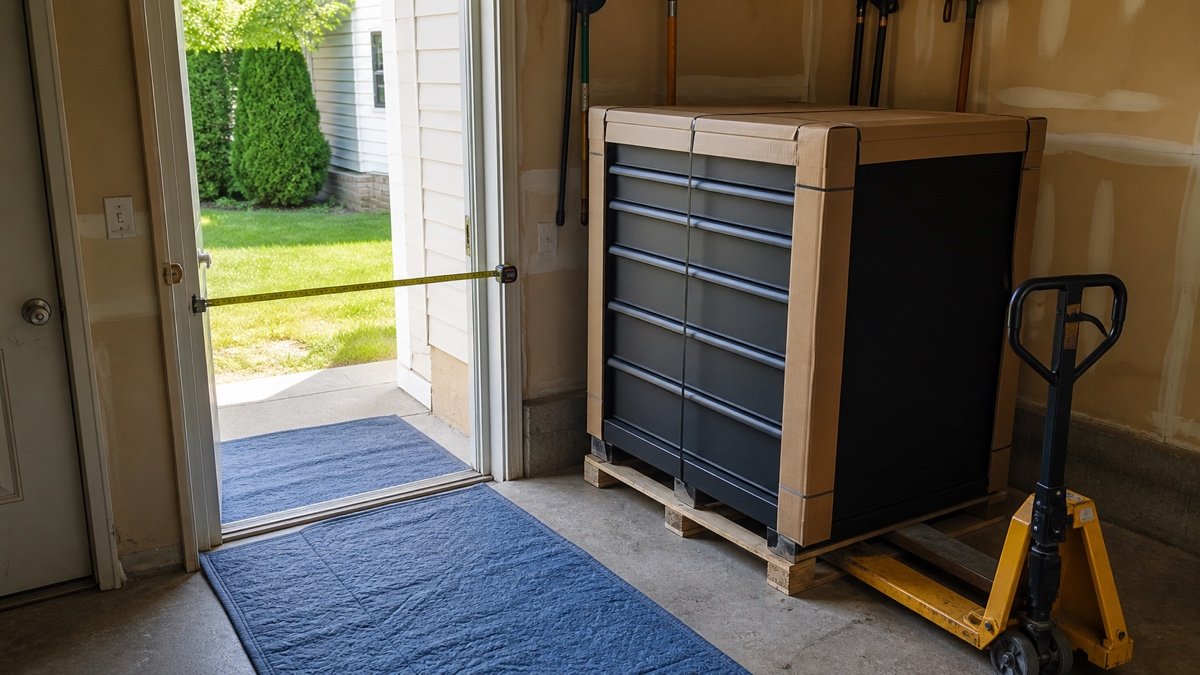
    Find the packaged dimensions and shipping weight. Measure gates, driveway turns, thresholds, door openings, and any step. Decide where the pallet or carton can be opened and how the cabinet will be controlled during the move. Remove drawers only if the manual allows it and explains the procedure.

    Large cabinets may need lift-gate service, a pallet jack, several capable adults, or professional delivery into place. Do not use drawers as lifting handles. Assemble near the final location, then inspect fasteners, caster attachment, drawer action, brakes, and locks before loading. Our garage measuring guide includes fixed obstacles, but the delivery path must extend beyond the room.

    Rolling tool chest delivery path measured through a residential garage doorway
    The shipping weight and narrowest doorway belong in the buying decision.

    Check parts support and warranty details

    A rolling cabinet lives a hard life even in a home garage. Drawer clips, locks, keys, liners, caster hardware, slides, and power components may need service long before the steel shell is worn out. Look for a current parts diagram, a reachable support channel, and warranty terms that explain what the manufacturer will provide in practice. A long headline warranty is less useful when routine wear parts cannot be identified.

    Save the model, serial information, receipt, manual, and key code before the cabinet is loaded. Photograph the label. If replacement casters are offered, match the exact mounting plate and rating rather than installing a similar wheel that changes cabinet height or load distribution. Availability changes, so confirm service information at purchase instead of assuming a familiar brand keeps every part forever.

    A right-sized cabinet beats an empty giant

    Buy enough room for the collection you can reasonably expect, not every tool you might own. Twenty percent spare drawer area is pleasant. Half an empty 72-inch cabinet is an expensive way to lose a wall. A smaller box also keeps categories from spreading until each drawer contains three unrelated things.

    Choose only after the taped footprint, drawer map, rating check, and delivery plan all work. Then load slowly and revise the drawer arrangement after several projects. A rolling tool chest should shorten a job. Its size and polish are secondary.

    Useful products to compare

    These links open current Amazon search results. Check the dimensions, manual, mounting hardware, warranty, and current availability for the exact model before you order.

    Before you buy or install

    Read the current manual for the exact product you are considering. Confirm its assembled dimensions, rated capacity, mounting requirements, included hardware, working clearances, warranty, and any limits that apply to your wall, floor, electrical circuit, or garage layout.

    Frequently asked questions

    What size rolling tool chest is best for a home garage?

    Many home collections fit a 26 to 42 inch cabinet, but width alone is a poor selector. Map the tools into measured drawer groups and tape the body, handle, and open-drawer footprint beside the parked vehicle. Choose the smallest cabinet that fits those groups with modest room to grow.

    How much spare drawer space should I buy?

    Around 15 to 25 percent spare usable area is a reasonable planning cushion for a stable hobby. More may make sense for an expanding trade collection. Do not buy a huge cabinet solely for hypothetical tools if it compromises parking, work surface, or delivery.

    Are bigger casters always better?

    Larger wheels generally cross joints and debris more easily, but cabinet height, caster width, steering arrangement, locks, and floor slope still matter. Compare the full system and test the unloaded cabinet first. Keep the rolling route clear.

    Can I add any top chest later?

    No. Use only a chest and attachment method approved for the exact cabinet. Confirm the model family, combined height, load limits, installation sequence, and access to upper drawers. Similar width and color do not establish compatibility.

  • Gladiator GearTrack vs Rubbermaid FastTrack: Which Rail Fits Your Garage?

    Gladiator GearTrack vs Rubbermaid FastTrack: Which Rail Fits Your Garage?

    Affiliate disclosure: As an Amazon Associate I earn from qualifying purchases. This article may contain affiliate links, and Bay & Bench may earn a commission at no extra cost to you. Read our full Affiliate Disclosure.

    Gladiator GearTrack vs Rubbermaid FastTrack is mostly a choice between two rail shapes and their accessory families. Both move bulky garage gear onto a horizontal rail, but the hardware differs. GearTrack is a broad PVC composite channel that resembles a short strip of slatwall. FastTrack is a slim steel rail with clip on accessories. That difference shapes the appearance, installation, and expansion options.

    Quick answer

    Choose GearTrack for a wide finished channel and Gladiator’s matching hooks, baskets, shelves, and compatible cabinet hardware. Choose FastTrack for a low profile steel rail and an accessory family centered on hooks plus rail and upright storage. Do not compare their headline capacities directly. The companies state those figures on different bases, and each accessory has its own limit.

    What is being compared

    This comparison covers the horizontal rails. Gladiator also sells full height GearWall panels. Rubbermaid sells FastTrack wall panels and a separate rail plus upright shelving system. Those products are not the same as the basic rails discussed here.

    The common Gladiator rail is the 4 foot GearTrack channel, model GAWC042PZY in light gray. Gladiator lists it at 6 inches high by 48 inches long and sells it as a two pack. The official installation manual also covers smoke model GAWC4S2PLM.

    Rubbermaid’s 48 inch FastTrack Garage Hang Rail is model 1784415. Rubbermaid lists it at 0.63 by 2.31 by 48 inches and offers an 84 inch size on the same page. A 32 inch rail appears in starter kits. Check the exact model because rail length and included hardware vary.

    The rail designs feel different on the wall

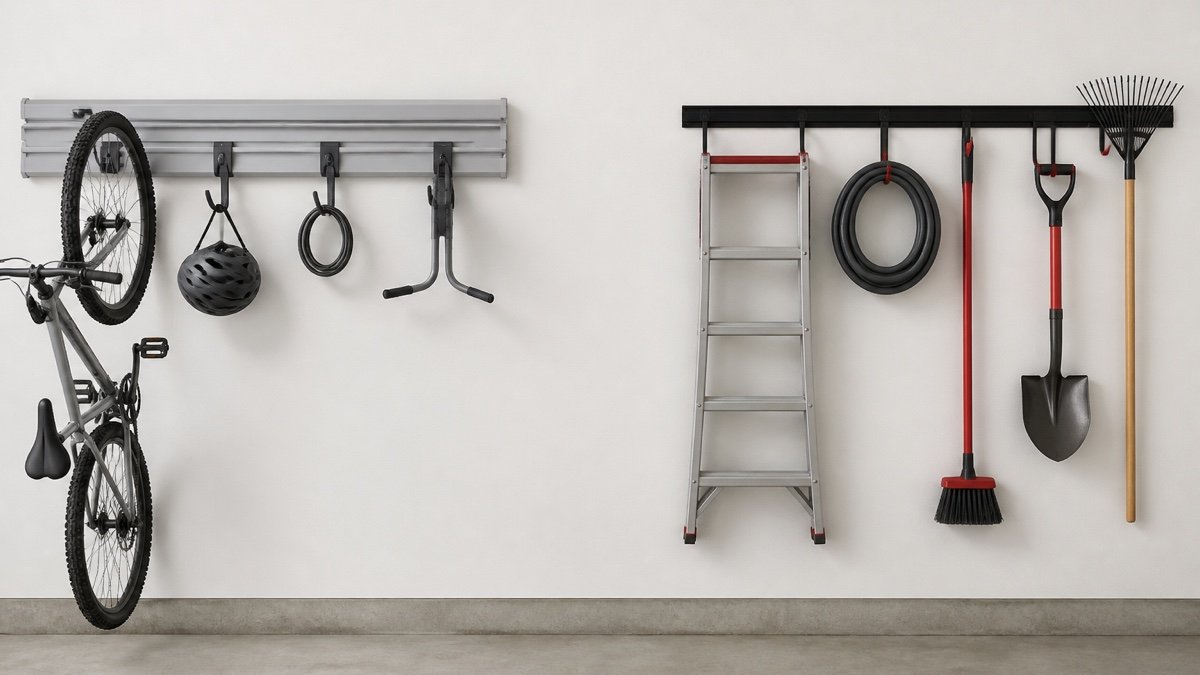
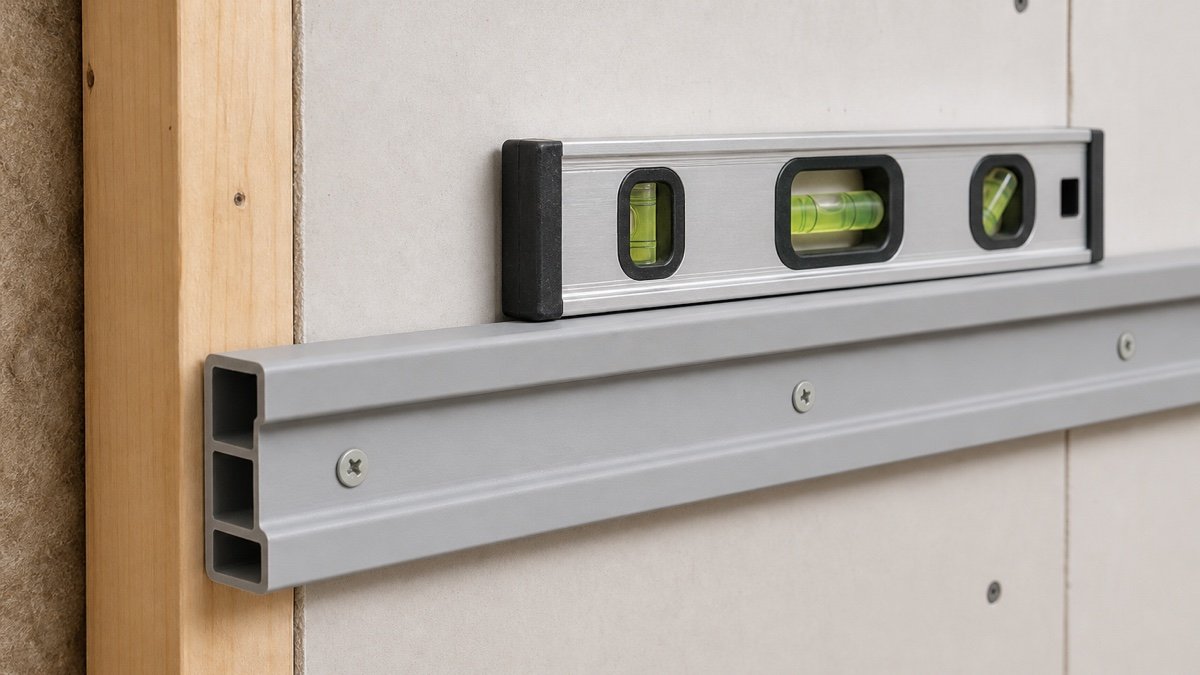
    GearTrack covers a six inch tall strip. Hooks engage its horizontal channels, and the broad face hides much of the mounting area. It looks closer to slatwall, especially when several rails are installed one above another. Light gray and smoke options can blend with cabinets or make a deliberate contrast.

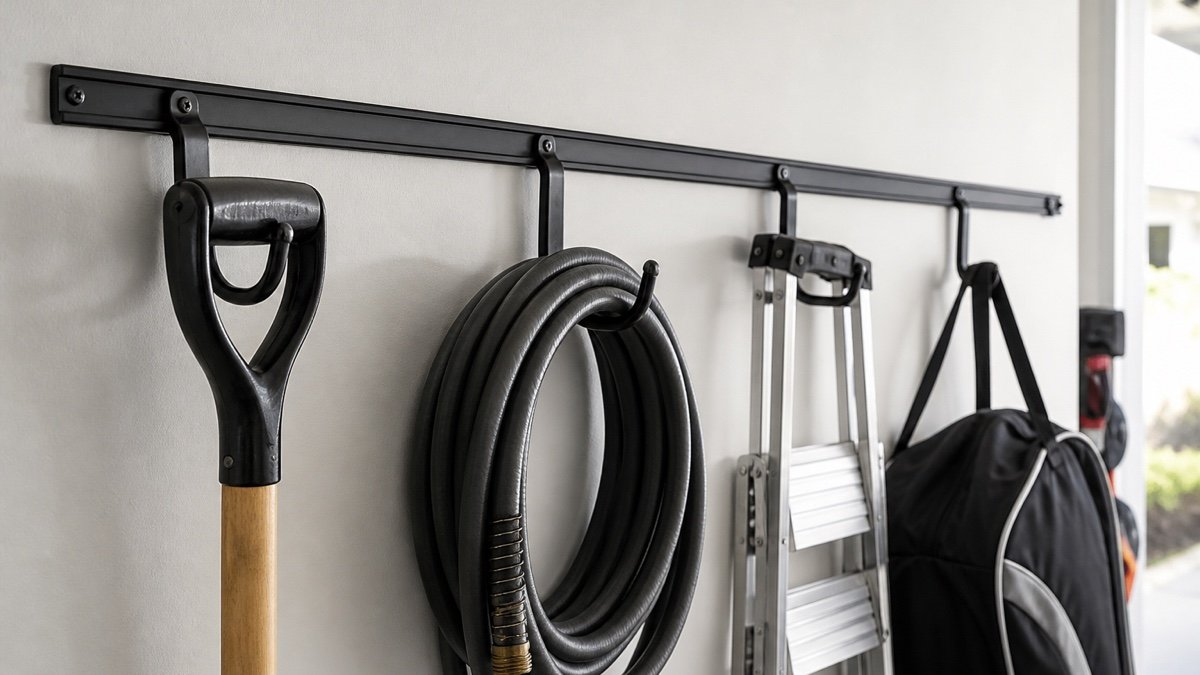
    FastTrack exposes far more of the wall. Its steel rail is only a little over two inches high, with hooks and accessories hanging below it. The result is visually lighter and makes it easy to paint or clean the drywall around the rail. Mounting screws remain part of the industrial look, depending on the cover and package.

    Neither approach is universally cleaner. GearTrack can look substantial over a bench or beneath wall cabinets. FastTrack is less dominant on a multipurpose garage wall. Use painter’s tape in the real dimensions before choosing. The difference is obvious once a six inch strip and a roughly two inch strip are marked side by side.

    Published specifications side by side

    SpecificationGladiator GearTrack channelRubbermaid FastTrack rail
    Common rail in this comparisonGAWC042PZY, sold as two 4 foot channels1784415, 48 inch rail
    Listed constructionPVC compositeSteel
    Listed size6 inches high by 48 inches long0.63 by 2.31 by 48 inches
    Published rail ratingUp to 75 pounds per linear footUp to 1,750 pounds per rail
    Common wall layoutBare wood studs, drywall over wood studs, or masonry using the specified methodDesigned around standard 16 or 24 inch stud spacing
    Rail only hardwareColor matched screws sold separately on the two pack pageHardware pack 1784975 sold separately
    Listed rail warranty10 year limited warrantyLimited lifetime warranty

    The capacity row needs context. The brands state their ratings on different bases. It is not a valid head to head score, and it does not make every accessory capable of carrying the rail’s maximum. Use the lowest limit among the rail, hook or shelf, fasteners, installation, and wall structure.

    GearTrack installation in practical terms

    Gladiator’s current GearTrack installation instructions cover masonry or poured concrete, bare wood studs, and drywall over wood studs of specified thicknesses. The fastener type and preparation change with the wall. The manual calls for common layout tools and provides different screw guidance for wood and masonry.

    The broad channel can be cut and drilled with ordinary woodworking equipment according to Gladiator’s product guidance, which helps on a short wall. A clean square cut still matters because the end cap and adjacent channel make a crooked edge easy to see.

    The two pack product page says color matched screws are sold separately. Some GearTrack kits include channels, hooks, end caps, screws, and a driver bit, so do not order hardware until you know which package you are buying. A starter kit can remove guesswork for the first rail, while bare channels make sense when you already own compatible accessories.

    Because the channel is wide, mark outlets, cabinet brackets, and wall seams before drilling. It is tempting to place it at a visually convenient height. Hang the longest intended object from a temporary mark first. A correctly installed channel is still in the wrong place if the shovel hits the floor or the bike blocks a switch.

    GearTrack installation in practical terms in a practical garage setup
    GearTrack installation in practical terms, shown in a practical garage layout.

    FastTrack installation in practical terms

    Rubbermaid says the 48 inch FastTrack rail mounts to standard 16 or 24 inch stud spacing. The official rail page lists hardware as separate and calls for hardware pack 1784975. That pack contains eleven screws, one push pin, and three drywall anchors, though Rubbermaid notes that more than one pack may be required for a chosen installation.

    The slim rail makes height changes visually subtle, but it also concentrates the system into a narrow band. Find the studs first, then place the rail where both the fastener layout and stored object clearance work. Do not choose a location solely because the rail ends align with a cabinet.

    Rubbermaid offers starter kits with a shorter rail and a small selection of hooks. They are useful for learning how the clips feel before expanding across the garage. Check what is in the current package. Some kits include hardware while a bare rail does not.

    The manufacturer describes accessories as easy to relocate. That is handy for seasonal gear, but a hook should still be fully seated and checked after moving. A rail that stays fixed for years can collect paint, drywall dust, or debris at the engagement point.

    FastTrack installation in practical terms in a practical garage setup
    FastTrack installation in practical terms, with the storage details visible in context.

    Capacity figures are not comparable trophies

    Gladiator states that the 4 foot GearTrack channel holds up to 75 pounds per linear foot. Rubbermaid states that its 48 inch FastTrack rail holds up to 1,750 pounds. The claims use different units and depend on each company’s required installation.

    Do not turn those numbers into a winner without complete test conditions. The accessory is often the lower limit. Gladiator’s GearTrack hooks have ratings that vary by design. Rubbermaid’s starter kit guidance says locking hooks can hold up to 50 pounds while nonlocking hooks support up to 25 pounds. Other accessories carry their own claims.

    A bicycle, ladder, or wheelbarrow creates leverage and movement. Use the hook made for that object, stay within its rating, and mount the rail as directed. A rail rating cannot certify damaged studs, weak masonry, or improvised fasteners.

    Accessory ecosystems and lock in

    Gladiator offers matching hooks, baskets, bins, shelves, and products designed to hang selected wall cabinets on GearTrack or GearWall. That makes GearTrack attractive when the long term plan includes a coordinated cabinet wall. Verify the exact cabinet and bracket combination because not every cabinet mounts in the same way.

    Rubbermaid’s FastTrack family includes hooks, bins, baskets, and a rail plus upright shelving setup. Its 48 inch wire shelf system uses uprights and brackets in addition to the horizontal rail. That can be useful when you want hanging tools and adjustable shelf rows on the same wall.

    Do not treat the two brands as cross compatible. A hook can appear to catch another rail while failing to lock as designed. Unless a manufacturer explicitly approves the combination, keep GearTrack accessories on GearTrack and FastTrack accessories on FastTrack.

    Before choosing, write down the five accessories you need now and three you may need later. Check that each is available in the selected system and read its rating. Rail price alone can be misleading when most of the budget will go into bike hooks, baskets, and shelves.

    Which system fits which garage?

    GearTrack is the more natural fit for someone who wants the rail to look like a finished wall component. Its broad channel works well beneath Gladiator cabinets, around a coordinated tool zone, or in multiple rows that mimic partial slatwall. It also makes sense if you already own Gladiator hooks and want to stay in that ecosystem.

    FastTrack suits a garage where the rail should visually disappear. It uses little wall height and handles a row of long tools or bulky objects without covering the drywall. The rail plus upright shelving path is worth considering when adjustable shelves are part of the same plan.

    For a small installation, the decision may come down to one hook. Look at the bicycle, ladder, or hose accessory you need most. Compare how it holds the object, its rating, its projection from the wall, and whether it can move without tools. Then choose the rail that supports that accessory.

    If neither system covers enough wall for many small tools, add pegboard above the bench instead of forcing tiny holders onto a long rail. Read our wall storage system comparison for that broader choice.

    A careful buying checklist

    • Confirm the exact rail model and length in the package.
    • Check whether mounting hardware, end caps, and a driver bit are included.
    • Read the current manual for the real wall type and stud spacing.
    • List each hook, basket, shelf, or cabinet bracket separately.
    • Use the lowest published rating in the complete setup.
    • Measure object projection into parking and walking space.
    • Check current warranty terms and authorized seller requirements.
    • Do not buy accessories from the other system based on appearance alone.

    GearTrack and FastTrack are both capable garage rails when treated as complete systems. GearTrack offers the broader finished channel. FastTrack offers the slimmer steel rail. The useful winner is the one whose accessories fit your objects and whose installation instructions fit your wall.

    Map the rail and hook positions with our wall layout planner before placing an order.

    Useful products to compare

    These links open current Amazon search results so you can compare dimensions, manuals, ratings, and availability for the exact models on your shortlist.

    Before you buy or install

    Check the current manual for the exact product you are considering. Confirm the assembled dimensions, load rules, mounting requirements, included hardware, clearances, warranty, and any limits that apply to your wall, floor, or garage layout.

    Frequently asked questions

    Are Gladiator GearTrack and Rubbermaid FastTrack accessories interchangeable?

    Do not assume they are. The rail profiles and locking methods differ. Use accessories approved by the manufacturer for the exact rail unless both companies explicitly document compatibility.

    Does GearTrack include mounting screws?

    The rail only two pack lists color matched screws as sold separately, while some GearTrack kits include screws and a driver bit. Check the exact package contents before ordering.

    Does a Rubbermaid FastTrack rail include hardware?

    The 48 inch rail model 1784415 lists hardware as sold separately and identifies hardware pack 1784975. Some starter kits include installation hardware, so verify the package.

    Which rail holds more weight?

    The published claims use different bases and should not be treated as a simple contest. The rail, accessory, fasteners, installation, and wall structure each have limits. The lowest applicable limit controls the setup.

    Which system is better for a bicycle?

    Compare the matching bike hooks rather than the bare rails. Check bike weight, wheel or frame contact, wall projection, hook rating, and the installation required by that system.