Tag: wall storage

  • Garage Bike Storage Guide: Fit the Rack to the Bike and Rider

    Garage Bike Storage Guide: Fit the Rack to the Bike and Rider

    Affiliate disclosure: As an Amazon Associate I earn from qualifying purchases. This article may contain affiliate links, and Bay & Bench may earn a commission at no extra cost to you. Read our full Affiliate Disclosure.

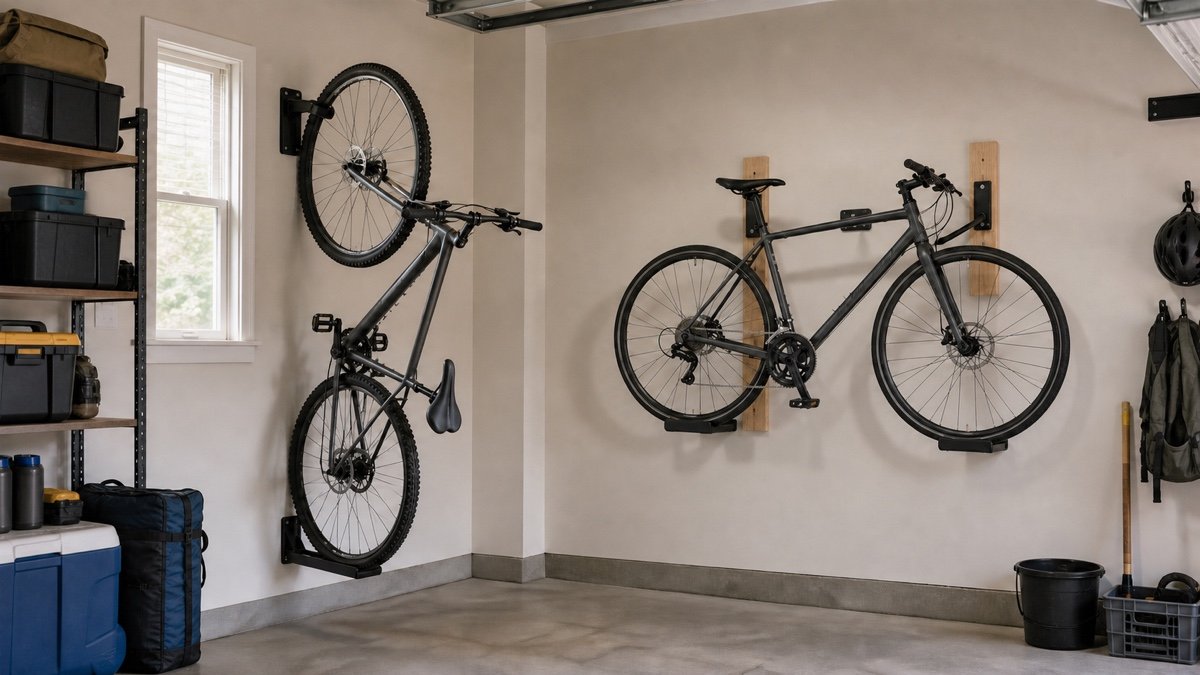
    A garage bike storage guide has to account for more than the number of bicycles. A light road bike, a long trail bike, a child’s bike, and a 65-pound electric bike ask different things of the rack and the rider. Tires, fenders, frame shape, handlebar width, brake cables, and lifting ability all affect fit. Start by measuring each bike and watching how it enters the garage. Then choose floor, vertical, pivoting, horizontal, or ceiling storage for that exact routine.

    Quick answer

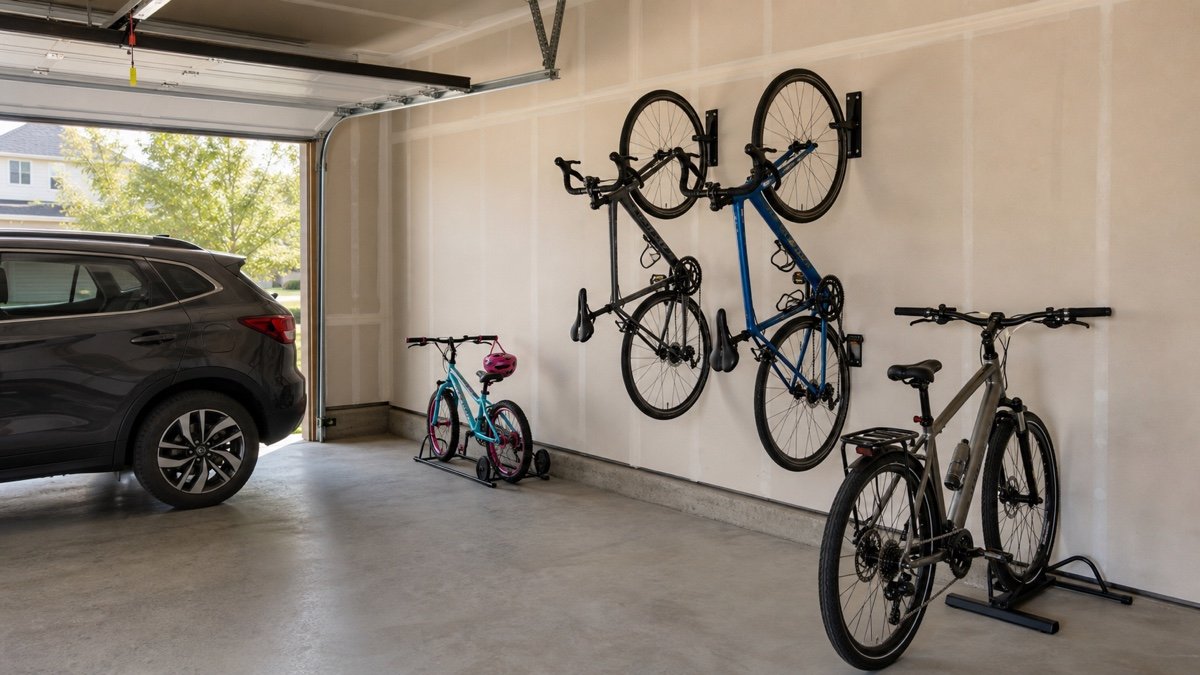
    Use floor stands for heavy bikes, children’s bikes, and anything ridden daily by someone who cannot lift it comfortably. Vertical wheel racks save wall width and work well for several bikes when heights are staggered. Pivoting vertical racks reduce aisle projection after loading. Horizontal frame cradles suit one or two display-worthy bikes and avoid wheel hooks, but they consume a long wall. Verify bike weight, tire width, wheel diameter, fenders, frame contact, mounting structure, and the clear loading lane before buying.

    Garage bike storage guide by rack style

    Every style trades floor area, wall width, lifting, and access differently. Use the table as a first filter, not a substitute for the product fit chart.

    Storage styleBest useSpace tradeoffFit check
    Floor standHeavy, daily, children’s, or rental bikesUses floor depth, little liftingTire width, rotor and derailleur clearance
    Fixed vertical hookSeveral light to medium bikesSaves wall width, projects bike lengthWheel and tire fit, lift height, solid mounting
    Pivoting vertical rackDense row with side pivotCan fold bikes toward wallHandlebar overlap, pivot sweep, weight
    Horizontal frame cradleOne or two bikes at reachable heightConsumes roughly a bike-length wallFrame shape, bar width, cradle contact
    Ceiling systemRarely used light bikesClears floor, hardest accessRated structure, door envelope, safe operation

    Map the bike zone inside the garage storage plan so the rack does not inherit a wall needed by tools or parking.

    Measure every bicycle in its normal setup

    Record overall length, handlebar width, total weight, wheel diameter, inflated tire width, and the highest point. Note fenders, front baskets, child seats, mirrors, kickstands, and cables. A printed tire size is a starting point; measure the real inflated width when the rack manufacturer tells you to.

    Photograph the frame from the side. Horizontal cradles may struggle with low step-through tubes, compact full-suspension shapes, or cables routed where the cradle touches. Wheel racks need clearance around rims, tires, fenders, and the frame near the front wheel. Do not remove a safety accessory merely to force a bike into an unsuitable rack.

    Give each rider a rack they can use

    A storage system fails when one person cannot load it. Ask each rider to lift the bike into the proposed orientation. Use a wall mark or an empty hook mockup rather than holding a bicycle overhead near a car. If the motion is awkward when rested and the bike is clean, it will be worse after a wet ride.

    Children’s bikes usually belong low or on the floor. A heavy electric bike may fit a wall rack’s published capacity yet remain a poor daily choice because lifting it risks the rider, wall, or bike. Put the most frequently used bikes closest to the exit and leave enough room to roll them out without moving two others.

    Use vertical racks when wall width is scarce

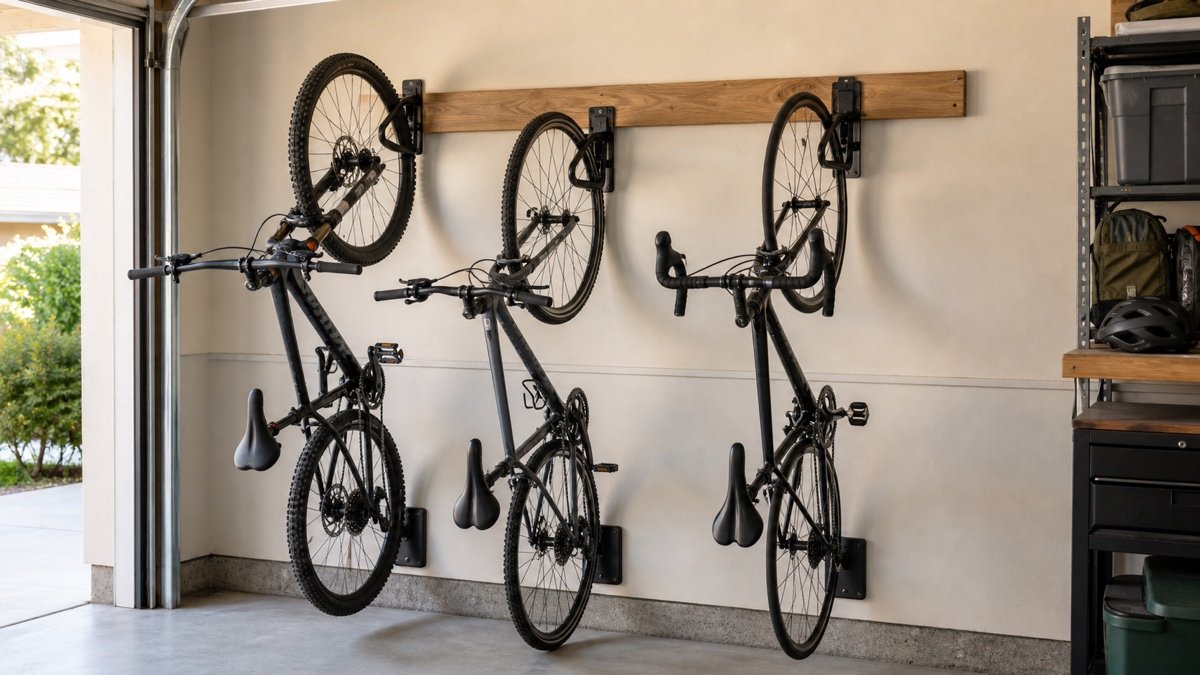
    Vertical storage turns a bike’s length into wall projection. Several bikes can occupy a shorter wall if the handlebars overlap. Feedback Sports recommends roughly 16 to 24 inches between Velo Hinge hooks depending on stud spacing and staggered heights. Its current Velo Hinge 2.0 FAQ explains a practical mockup: lay bikes near each other to see how handlebars nest, then transfer the height difference to the wall.

    That spacing is product guidance, not a universal rule. Wide mountain-bike bars, baskets, and brake levers demand more. Mark the full wheel and handlebar envelope, then protect the adjacent car door and the person loading the bike.

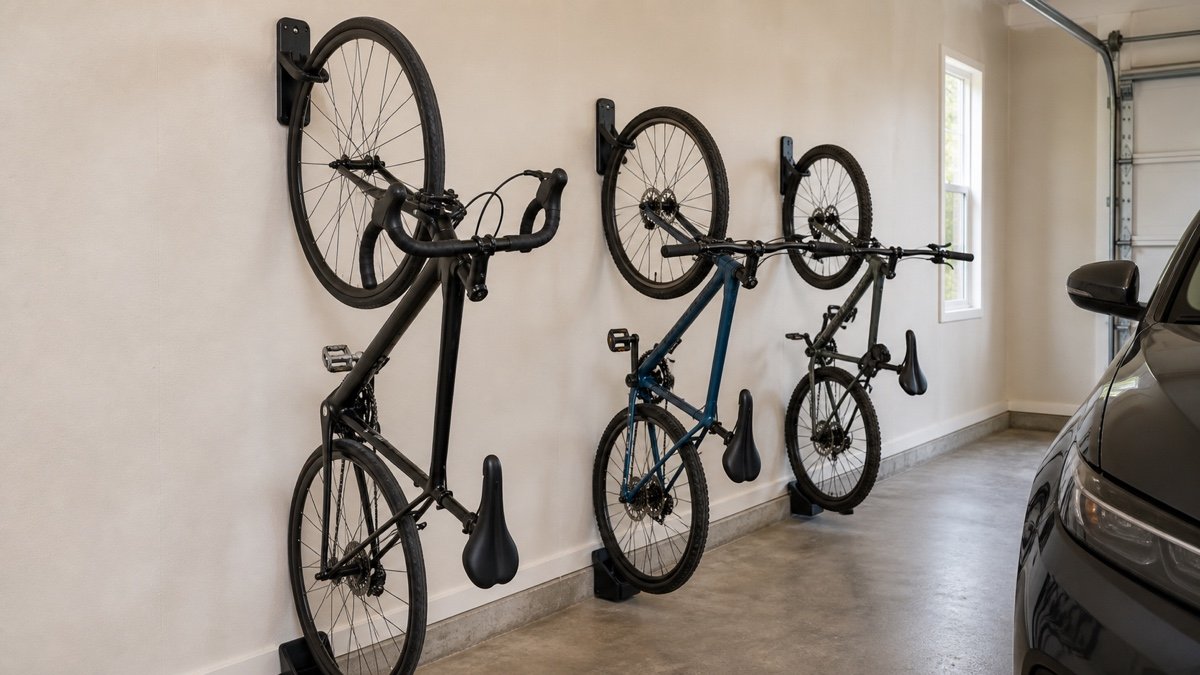
    Mountain bikes on staggered vertical wall racks beside an open garage bay
    Staggering vertical racks helps handlebars overlap, but each bicycle still needs a clear loading lane.

    Pivoting racks can recover the aisle after loading

    A pivoting rack holds the bike vertically, then swings it toward the wall. This can reduce how far the row occupies the aisle when stored. Feedback Sports lists the Velo Hinge 2.0 for up to 50 pounds when properly mounted to a wall stud, with a 4-inch hook opening and published compatibility from 700C by 23 mm through 29 by 3.0 inch combinations. See the manufacturer page for the exact fit diagram and instructions.

    Include the pivot sweep in the layout. Pedals and handlebars move sideways as the bike folds. A neighboring cabinet, car mirror, or second bike can stop the hinge before it reaches the useful angle.

    Horizontal cradles favor easy access and a long wall

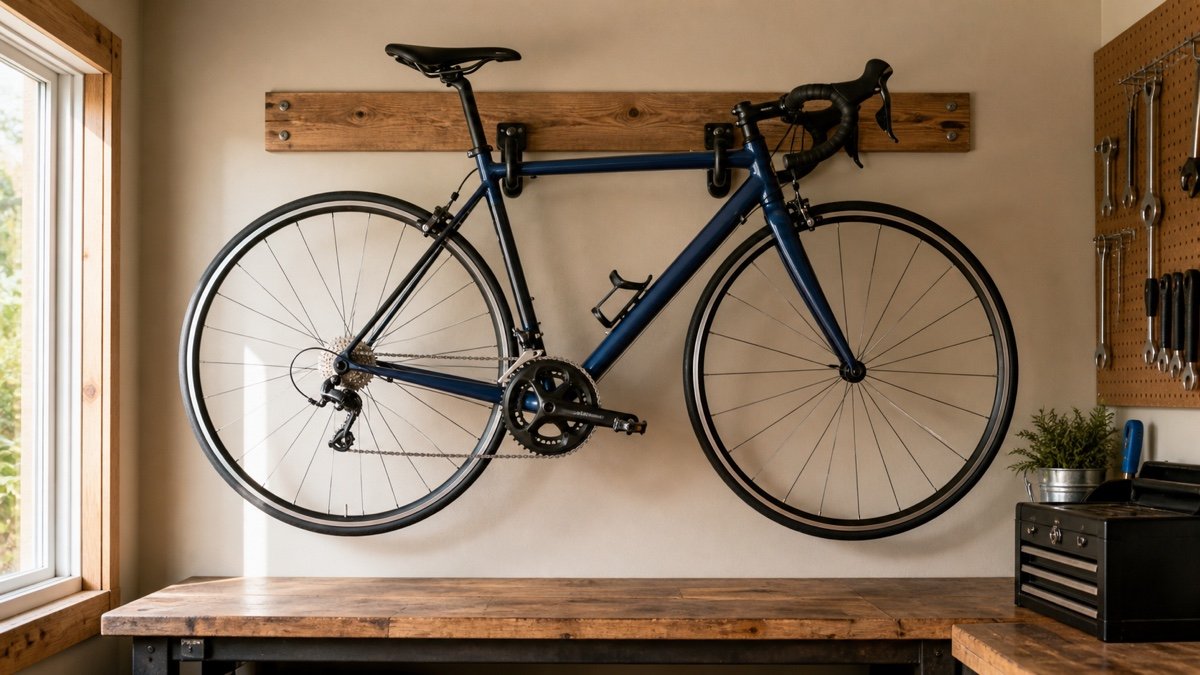
    Horizontal racks support the frame on padded arms. The bike stays closer to normal carrying height and becomes easy to inspect before a ride. This format works nicely above a low cabinet or along a wall with no door, although the full wheelbase and handlebars occupy considerable width.

    Feedback Sports lists its Velo Wall Rack 2D at a 50-pound maximum, with cradle projection adjustable from 8 to 12 inches and vertical arm adjustment. The official product page warns that very wide handlebars, long wheelbases, and fat bikes may not suit it. Frame contact matters. Confirm that both cradles support strong tube locations without pressing cables or delicate finishes.

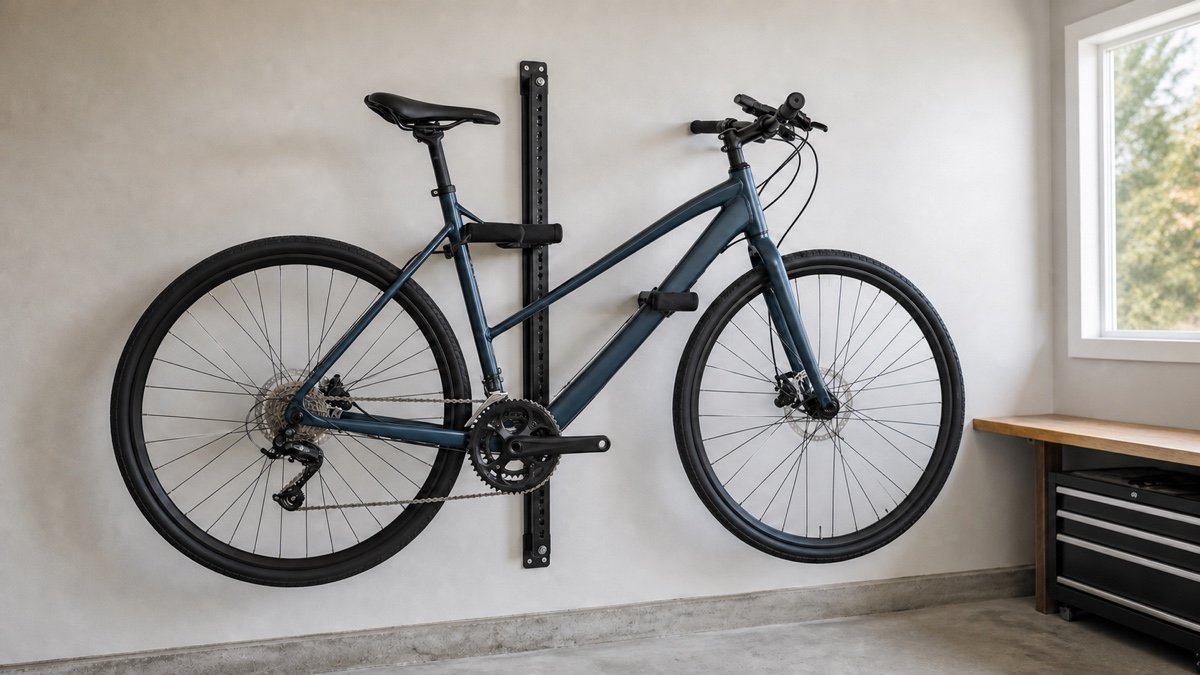
    Road bicycle held horizontally on padded frame cradles in a garage
    Horizontal cradles keep a favorite bike low and visible while consuming a long stretch of wall.

    Simple hooks still require a structural decision

    A vinyl-coated hook can be a sensible low-cost answer for a standard bike. Park Tool lists its 451 wood-thread hook at a 115-pound hook limit when securely screwed into solid material, while making the user responsible for the mounting material. Read the manufacturer page closely. The large hook rating does not turn thin drywall into structure.

    Confirm tire and rim fit, thread engagement, and the direction of loading. Use the fastener and substrate called for by the manufacturer. If you do not know what is inside the wall, find out before drilling or choose a supported floor rack.

    Keep bicycles outside the parking and door envelopes

    A vertically stored bike projects about its length from the wall until it pivots. A horizontal bike projects by its handlebar and pedal width while stretching along the wall. Tape both shapes on the floor and wall. Open the vehicle doors, house door, garage door, cabinets, and freezer. Then walk the normal path with grocery bags or a trash bin.

    Compare the remaining route with the garage workshop aisle clearance guide. A handlebar end at face height deserves extra space. Place a rear-wheel bumper or wall protector where the system expects one, and keep oily chains away from clothing paths and painted car panels.

    Store electric bikes for weight, heat, and cables

    The motor does not harm a rack, but the added weight changes lifting and mounting. Use the complete bike weight with battery and accessories when comparing rack capacity. Follow the bicycle and battery manufacturers’ storage and charging instructions. Do not assume removing the battery is optional or required; platform guidance varies.

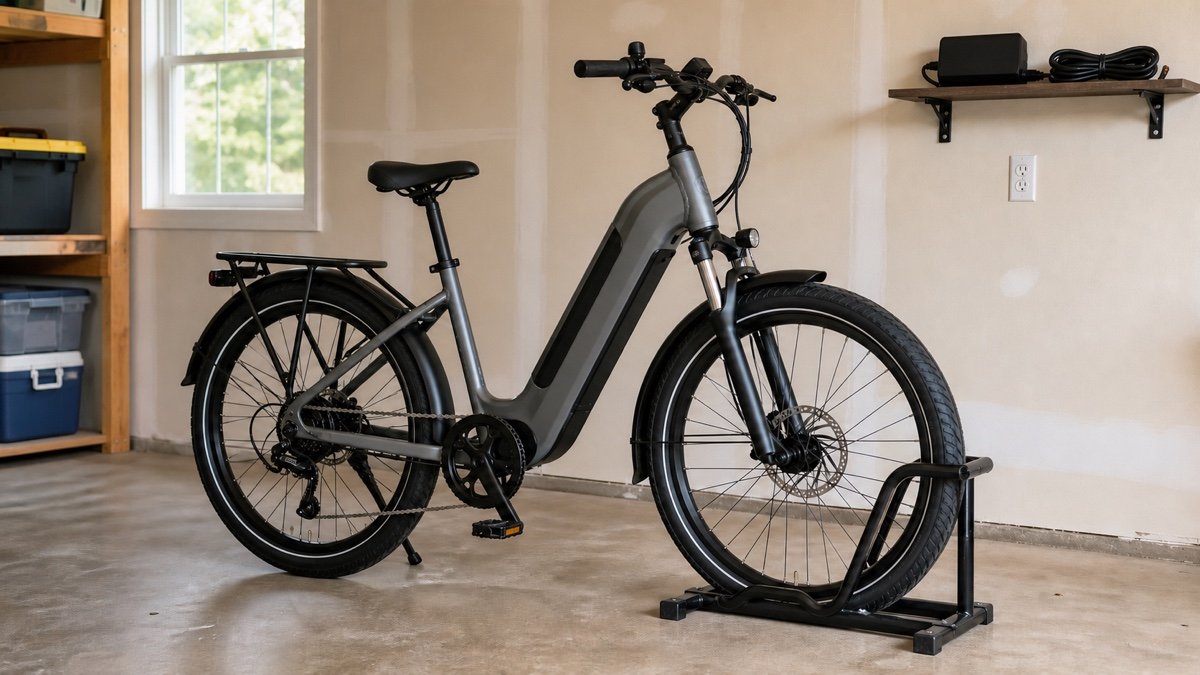
    A floor rack is often the honest solution. It lets a rider roll the bike into place and keeps a heavy frame low. Give the kickstand, pedals, and handlebars room, and keep charging cords out of tire and walking paths. Check whether a front-wheel stand clears the brake rotor and fender, and whether the tire stays stable at normal pressure. A plain arrangement that works after a tiring ride will beat an overhead system that everyone avoids.

    Heavy electric bicycle parked in a floor rack near a garage outlet
    A floor rack is often the better answer when lifting a heavy electric bike would discourage daily use.

    Be cautious with ceiling storage

    Ceiling hoists and overhead cradles free wall and floor space, but they add lifting, rope management, and a falling-object concern. They also compete with the open garage door, tracks, opener, lights, and overhead racks. Use them only for bicycles light enough to handle safely and ridden rarely enough that the access penalty is acceptable.

    Verify the structure, fasteners, hardware capacity, locking method, and clear operating route from the exact manual. Never hang a bicycle where a partial release could reach a person or vehicle. If the ceiling location requires standing on another ladder while controlling the bike, choose a different storage method.

    Mock up the row before drilling

    Cut cardboard rectangles for the rack bodies and tape outlines for wheels, bars, and pedals. Mark stud locations. Bring every bicycle into position one at a time and rehearse the loading motion. Stagger heights only as much as each rider can manage.

    Leave the mockup for several days. If it blocks the route or requires moving another bike, revise it. Check the garage wall storage options for renters when permanent anchors are not permitted. A freestanding rack may consume more floor area, but it avoids unsafe guesses about an unfamiliar wall. If bikes must share the same surface with tools, compare the hardware and working heights in the garage wall storage systems guide before committing the studs.

    Write each rider’s name on the temporary position and try a normal weekday reset. Helmets, locks, pumps, and child seats need homes too. Watch which bike gets left in the aisle when someone returns tired or in a hurry. That abandoned bike usually exposes a hook set too high, a blocked loading lane, or an accessory that catches the neighboring handlebars. Fix the awkward step before drilling.

    Useful products to compare

    These links open current Amazon search results. Check the dimensions, manual, mounting hardware, warranty, and current availability for the exact model before you order.

    Before you buy or install

    Read the current manual for the exact product you are considering. Confirm its assembled dimensions, rated capacity, mounting requirements, included hardware, working clearances, warranty, and any limits that apply to your wall, floor, electrical circuit, or garage layout.

    Frequently asked questions

    Is it safe to hang a bike by one wheel?

    Use a rack designed for wheel storage and confirm the wheel, tire, bike weight, mounting surface, and hardware meet the manufacturer’s requirements. Do not force a fat tire, deep rim, fender, or incompatible wheel into a basic hook. Inspect the rack and contact point regularly.

    How far apart should vertical bike racks be?

    Spacing depends on handlebar width, bike size, stud locations, and whether heights are staggered. Feedback Sports suggests roughly 16 to 24 inches for its Velo Hinge setup as a starting point. Mock up the actual bikes and follow the exact rack instructions.

    What is the easiest storage for a heavy electric bike?

    A compatible floor stand is usually easiest because the bike can roll into place. A wall rack may carry the published weight but still require an uncomfortable lift. Consider the shortest and least strong regular rider, battery guidance, tire fit, and charging-cord route.

    Can a bike rack mount only to drywall?

    Use only the substrate and fasteners specified by the rack manufacturer. Many wall racks require a wood stud, masonry, or another solid support. Drywall by itself is not a safe default. If the wall structure is uncertain, choose a freestanding system or get qualified installation help.

  • Vertical vs Horizontal Bike Storage: Which Wall Layout Fits?

    Vertical vs Horizontal Bike Storage: Which Wall Layout Fits?

    Affiliate disclosure: As an Amazon Associate I earn from qualifying purchases. This article may contain affiliate links, and Bay & Bench may earn a commission at no extra cost to you. Read our full Affiliate Disclosure.

    The vertical vs horizontal bike storage decision comes down to which dimension your garage can spare. Vertical racks use less wall width per bicycle but push the bike farther into the room and usually require a higher lift. Horizontal cradles use a long wall section and tend to keep the bike at a friendlier height. Neither orientation is automatically safer for a rim or frame. Fit depends on the exact rack, bicycle, mounting structure, and the person loading it.

    Quick answer

    Choose vertical storage for three or more light to medium bikes when wall width is limited and riders can lift the front wheel comfortably. Stagger rack heights so handlebars overlap. Choose horizontal storage for one or two bikes, frequent access, and riders who prefer a lower lift. It works best on a long clear wall and with frame geometry that sits securely on padded cradles. Heavy electric bikes often belong on the floor even when a wall rack lists enough capacity.

    Vertical vs horizontal bike storage at a glance

    DecisionVertical storageHorizontal storage
    Wall widthLower per bike, especially when staggeredRoughly a bike-length wall per bike
    Projection into roomBike length unless rack pivotsHandlebar, pedal, and rack projection
    LiftingFront wheel rises highWhole bike lifts to cradle height
    Bike contactUsually tire or rim at front wheelUsually frame tubes on padded arms
    Multiple bikesDense rows are practicalRows require substantial wall length
    Daily accessGood when each bike has a clear loading laneVery good for one bike at waist to chest height
    Common mismatchTire, fender, weight, or liftFrame shape, wide bars, or short wall

    The garage storage systems overview helps decide whether bicycles should share a wall with tools or claim a separate zone.

    Compare wall width and floor projection together

    A vertical bike may need only a modest strip of wall, but its wheels can project five to six feet into the garage during loading and storage. A pivoting rack reduces that projection after the bike is hung, though pedals and bars still occupy depth. A horizontal bike stretches along most of its wheelbase while the bars and pedals define room depth.

    Measure the complete bicycle, not a generic diagram. Mark both the wall outline and the floor shadow. Open the nearest car door. A vertical system may win on paper yet block the driver’s shoulder path, while a horizontal bike above a low cabinet may use otherwise dead wall space.

    Vertical bike rack spacing depends on handlebars

    Feedback Sports recommends roughly 16 to 24 inches between its Velo Hinge 2.0 hooks, depending on stud spacing and staggered heights. The manufacturer FAQ suggests laying bikes together to see how the handlebars fit into neighboring frame triangles, then carrying the height difference to the wall.

    This is a useful mockup technique, not a universal spacing rule. A modern mountain bike with broad bars may require more room than a drop-bar road bike. Baskets, mirrors, brake levers, and child seats can prevent the intended overlap. Stagger only as high as the regular rider can comfortably load.

    Three bicycles staggered on vertical wall hooks in a narrow garage
    A staggered vertical row lets handlebars overlap, but the bike bodies project into the room.

    Horizontal racks depend on frame geometry

    Horizontal racks usually support the top tube or other frame tubes on two padded cradles. A level traditional diamond frame is easy to picture. Step-through, compact, full-suspension, and small children’s frames may require independently adjustable arms or a different storage style.

    The Feedback Sports Velo Wall Rack 2D allows horizontal and vertical arm adjustment, with cradles 8 to 12 inches from the wall and a 50-pound maximum load. Its official product page notes possible limitations with 780 mm and wider handlebars, long wheelbases, and fat bikes. Check cable routing and frame finish at both support points before trusting the fit.

    Single bicycle supported horizontally on adjustable padded wall arms
    Adjustable arms can level an unusual frame, provided the contact points and handlebar depth fit.

    Lifting style may decide before space does

    To load a vertical hook, you usually roll the bike onto the rear wheel and raise the front. To load a horizontal cradle, you lift most of the bike and place it onto two arms. One motion is not easier for everyone. Bicycle weight, handlebar shape, rider height, shoulder mobility, and balance all matter.

    Rehearse with the real bike away from vehicles. If the rider twists, strains, or loses control, lower the rack or choose floor storage. Capacity is only the hardware limit. It does not measure whether a parent, child, or tired commuter can make the required movement safely every day.

    Tire and wheel fit control vertical storage

    A vertical rack may contact the front tire, rim, or wheel at several points. Read the allowed wheel diameter, tire width, rim depth, fender clearance, and bike weight. Feedback Sports lists its Velo Hinge 2.0 for 700C by 23 mm through 29 by 3.0 inch combinations and up to 50 pounds with proper stud mounting. The product page provides the current fit details.

    Do not squeeze a fat tire into a narrow hook or let a hook press a fender. Deep carbon rims and unusual wheel systems deserve explicit manufacturer confirmation. A basic hook may carry plenty of weight but still be the wrong shape for the wheel.

    Frame contact controls horizontal storage

    Padded cradles protect paint only when the bike rests at stable, approved points. Dirt trapped under a pad can abrade a finish. Brake hoses, shift cables, and electronic wires should not carry the load. Inspect the support after the first few uses and periodically afterward.

    Some adjustable racks can angle their arms to accommodate a sloping tube. That does not guarantee every suspension layout or carbon frame is suitable. Ask the bicycle and rack manufacturers when the frame has delicate aerodynamic shapes, integrated storage, or unusual routing. If contact remains uncertain, tire-supported floor storage is the conservative choice.

    A pivot changes the vertical footprint

    Pivoting vertical racks let a stored bike swing toward the wall, which can recover aisle space. Steadyrack’s Classic range illustrates how fit is split by wheel diameter and tire width: its road, mountain, and fat-bike racks use different tire ranges. The current comparison page also publishes maximum weights and fender compatibility for each model.

    Measure the entire sweep. The handlebar arcs sideways and the pedal may approach the wall. Bikes must still separate enough to retrieve one without scraping its neighbor. Pivoting helps a dense row, but it does not erase the physical width of bars and bodies.

    Heavy electric bikes favor the floor

    An electric bike can fall below a wall rack’s published weight limit and still be impractical to lift. A stable floor stand avoids the high movement and makes daily access easier. It also accommodates many step-through frames without cradle questions.

    If wall storage remains attractive, weigh the complete bicycle as stored and follow both the bike and rack instructions. Consider the battery, front fender, wheel size, and where the motor mass sits. Keep charging cords outside the walking and rolling path. Do not use the rack as a charging-cable anchor.

    Test the orientation against the whole garage

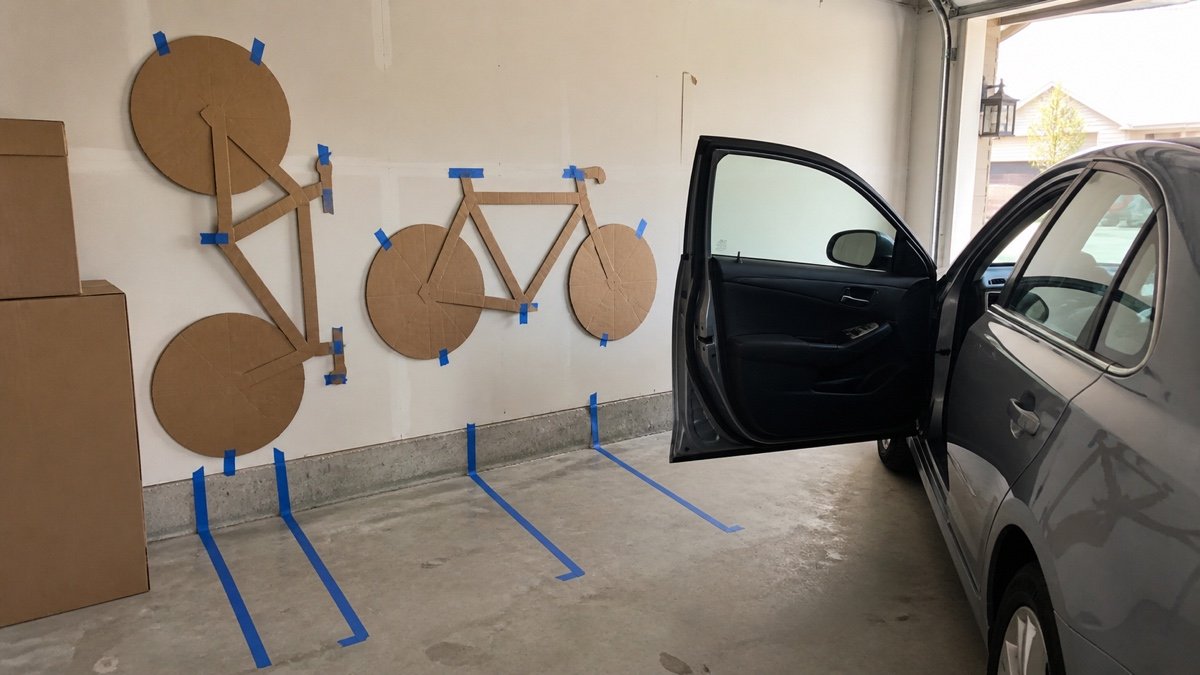
    Tape full-size bike outlines on the wall and floor. Include a loading lane. Park the vehicle, open every door, run the garage door, and move trash bins or lawn equipment through their normal route. Compare the active space with the garage workshop aisle clearance guide.

    The test should include the shortest rider and the heaviest bike. Use cartons to represent nearby cabinets so handles and pedals cannot hide in a flat drawing. A few days of living with the tape usually settles the vertical vs horizontal argument faster than another product review.

    Cardboard bike outlines taped on a garage wall beside a parked car
    A full-size wall and floor mockup reveals collisions before the first mounting hole.

    One bike and a family row need different answers

    For one frequently ridden bicycle, horizontal storage can be wonderfully simple. Put the cradles at a height the rider can reach, leave space for the bars, and the bike comes down in one motion. The long wall footprint is less troublesome because no neighboring bikes need to overlap. A single vertical hook wins when the available wall is narrow, but make sure its loading lane does not cross the car.

    A family row changes the math. Vertical racks usually pack more bikes into a reasonable width, especially when road and mountain-bike handlebar heights alternate. Keep children’s bikes low or on the floor and reserve the highest position for a light bicycle handled by a capable adult. Use the garage storage planning guide to assign each rider a route. Test with every bicycle present. Product photos often make the row look easier by leaving one bike out.

    Choose the orientation that stays easy

    Vertical storage is the strong choice for a family row on a short wall, particularly when bikes are light enough to tip and lift. Horizontal storage is better for one or two bikes on a long wall and for riders who want a more direct lift. A mix is often best: daily heavy bikes on the floor, light adult bikes vertical, and one high-cost bike on an adjustable horizontal cradle.

    Renters and anyone unsure about wall structure should review garage wall storage for renters. A freestanding rack can be less compact, but it is better than an anchor chosen by guesswork.

    Useful products to compare

    These links open current Amazon search results. Check the dimensions, manual, mounting hardware, warranty, and current availability for the exact model before you order.

    Before you buy or install

    Read the current manual for the exact product you are considering. Confirm its assembled dimensions, rated capacity, mounting requirements, included hardware, working clearances, warranty, and any limits that apply to your wall, floor, electrical circuit, or garage layout.

    Frequently asked questions

    Does vertical bike storage damage wheels?

    A compatible wheel-support rack used within its fit and weight limits should support the bike as designed. Confirm tire width, rim depth, wheel diameter, fenders, and contact points. Do not force an incompatible wheel into a hook, and inspect both rack and wheel regularly.

    Which orientation saves more garage space?

    Vertical storage usually saves wall width per bike. Horizontal storage may use dead space above a low cabinet and can project less than a fixed vertical bike. Measure both the wall outline and floor projection with the car and doors in place.

    Is horizontal storage easier to load?

    It often keeps the bike at a lower final height, but you lift most of the bicycle at once. Vertical loading raises the front wheel while the rear stays on the floor for part of the motion. Test both movements with the real bike and regular rider.

    Can I mix vertical and horizontal racks?

    Yes. Many garages work better with daily heavy bikes on floor stands, lighter bikes in a vertical row, and one frequently maintained bike on a horizontal cradle. Keep every loading lane and rack sweep clear.

  • Garage Tire Storage Rack Guide: Fit the Rack to Your Wheels

    Garage Tire Storage Rack Guide: Fit the Rack to Your Wheels

    Affiliate disclosure: As an Amazon Associate I earn from qualifying purchases. This article may contain affiliate links, and Bay & Bench may earn a commission at no extra cost to you. Read our full Affiliate Disclosure.

    A garage tire storage rack guide should begin with the wheels in front of you, not with a product photo. Four mounted SUV wheels can be much heavier and wider than four bare passenger tires. A rack that looks generous online may crowd the garage door track, put the top tire beyond a comfortable lift, or miss every useful wall stud. This guide works from the set outward: identify whether the tires are mounted, measure the bundle, calculate the actual load, inspect the wall, and then choose a rack style. That order is less exciting than clicking “buy,” but it prevents most expensive mistakes.

    Quick answer

    For one seasonal set, a properly installed wall rack saves the most floor area when the wall structure and lifting height are suitable. A rolling rack is kinder to your back and easier to relocate, but it consumes floor space. Mounted wheels may be stacked or hung according to the tire maker’s guidance; unmounted tires should generally stand upright rather than hang or sit in a long stack. In every case, keep tires cool, dry, clean, shaded, and away from ozone-producing electrical equipment.

    Garage tire storage rack guide: start with the set you own

    Write down five facts before comparing racks: tire quantity, mounted or unmounted condition, maximum overall diameter, maximum section width, and weight of the heaviest tire or wheel assembly. Do not assume four matching wheels weigh the same after repairs, aftermarket wheel changes, or staggered fitments. If you cannot find a trustworthy wheel-and-tire weight, use a bathroom scale with a safe lifting method or ask the tire shop to weigh one assembly.

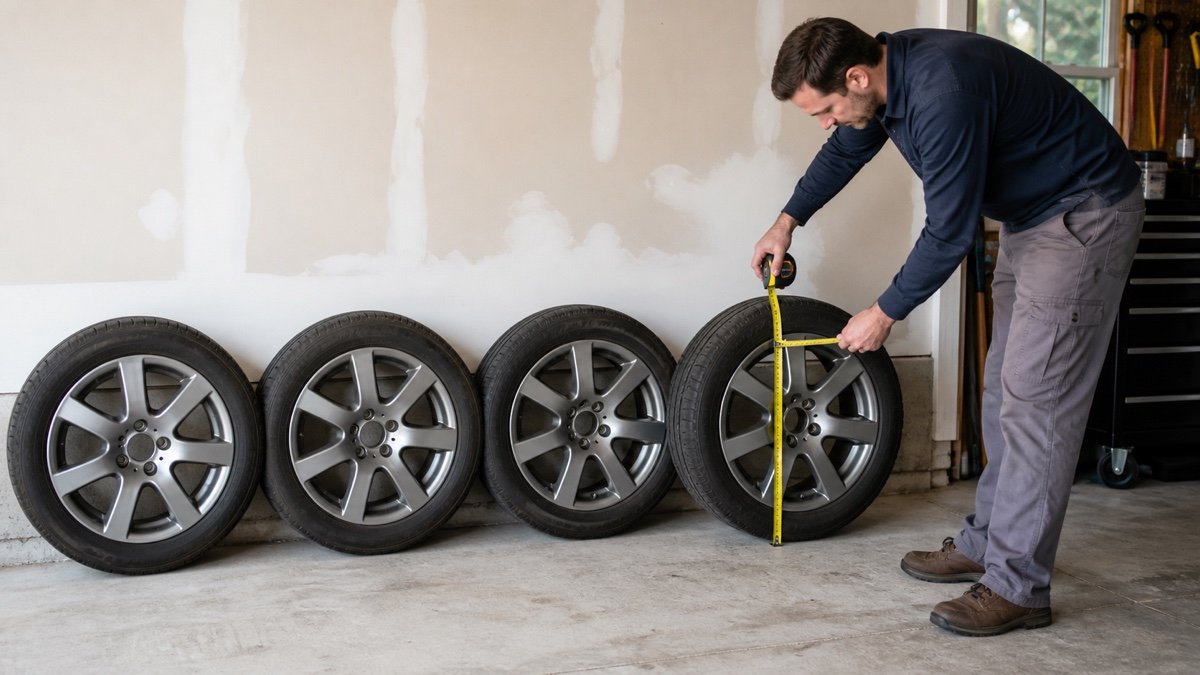
    Measure the set as it will sit. For an upright wall rack, line the wheels together and measure the total row width. Add room for your hands and for the rack’s end brackets. Measure the deepest projection from the wall, including the wheel face. Then use the process in our garage measurement guide to record door tracks, opener rails, windows, switches, steps, and the vehicle envelope.

    A rack is not a magic box. Its published width may describe the frame, the adjustable span, or usable tire space. Read the dimension drawing and installation manual for the exact model. If the page has no drawing, no load rating, and no anchoring instructions, keep shopping.

    Homeowner measuring the height and width of four mounted wheels before selecting a tire rack
    Measure the actual set, including the widest sidewall and wheel face, instead of buying from tire size alone.

    Mounted and unmounted tires need different support

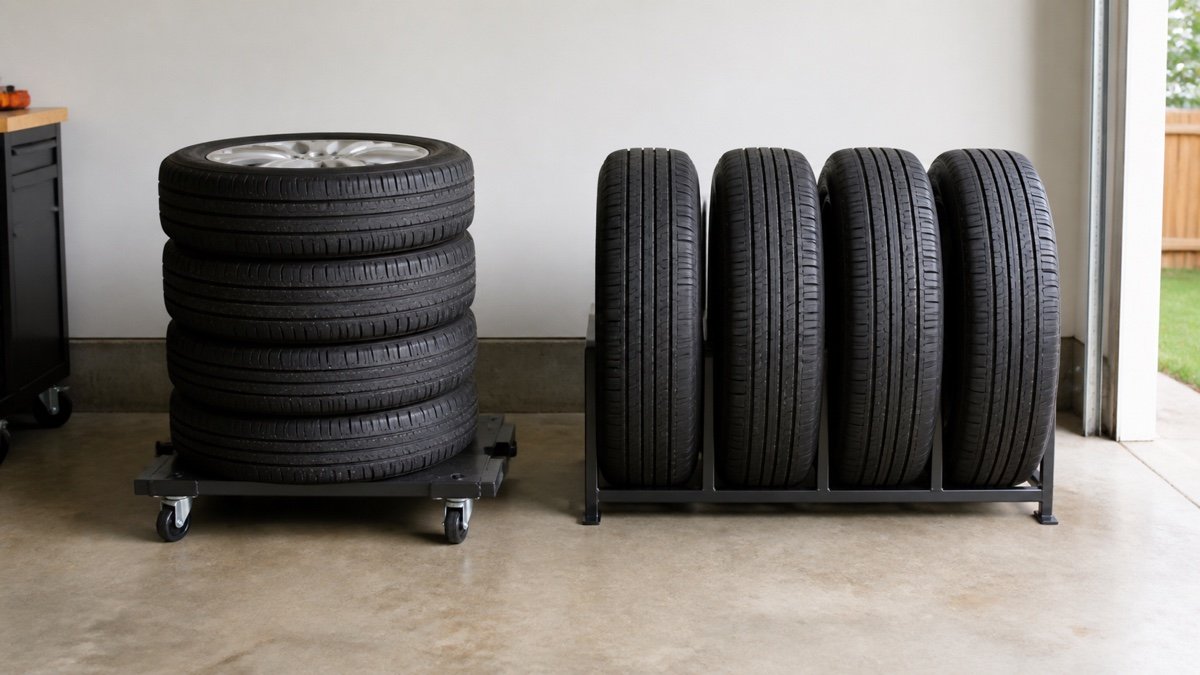
    The storage orientation matters because the wheel changes how the tire carries its own shape. Michelin’s current consumer tire storage guidance says mounted tires can be hung or stacked, while tires without rims should stand upright and should not be hung or stacked. Follow the guidance for your tire brand if it differs.

    What you are storingSensible rack stylesMain fit checkHandling concern
    Four tires mounted on wheelsWall cradle, low floor rack, wheel tree, rolling rack, or stable stackTotal weight and wheel-face clearanceEach assembly may be awkward to lift
    Four unmounted tiresUpright floor rack or upright wall cradleSide support without pinching the sidewallsKeep the row stable and rotate tires periodically if the maker advises it
    Two staggered pairsAdjustable-width wall or floor rackWidest pair plus separatorsLabel positions before storage
    Multiple seasonal setsRolling two-level rack or several low racksTotal room, rated load, and caster capacityAvoid repeated lifting above shoulder height

    The table is a starting point, not permission to improvise. A shelf intended for boxes may have a wire spacing or edge shape that treats rubber poorly. A wheel hook must support the wheel in the manner its maker describes. Use a product designed for the load and orientation you own.

    Mounted wheels stacked flat beside unmounted tires stored upright on a low rack
    Mounted and unmounted tires need different storage orientations, so the first decision is what will be on the rack.

    Calculate the load without optimistic arithmetic

    Add the weight of every stored assembly, then compare that total with the rack’s stated capacity. Do not divide a 400-pound rating by four and assume each position is independently rated to 100 pounds. The rating applies to the complete installed product under the maker’s test and fastening conditions. Uneven loading, a missed stud, damaged masonry, or an extended adjustable frame can change the situation.

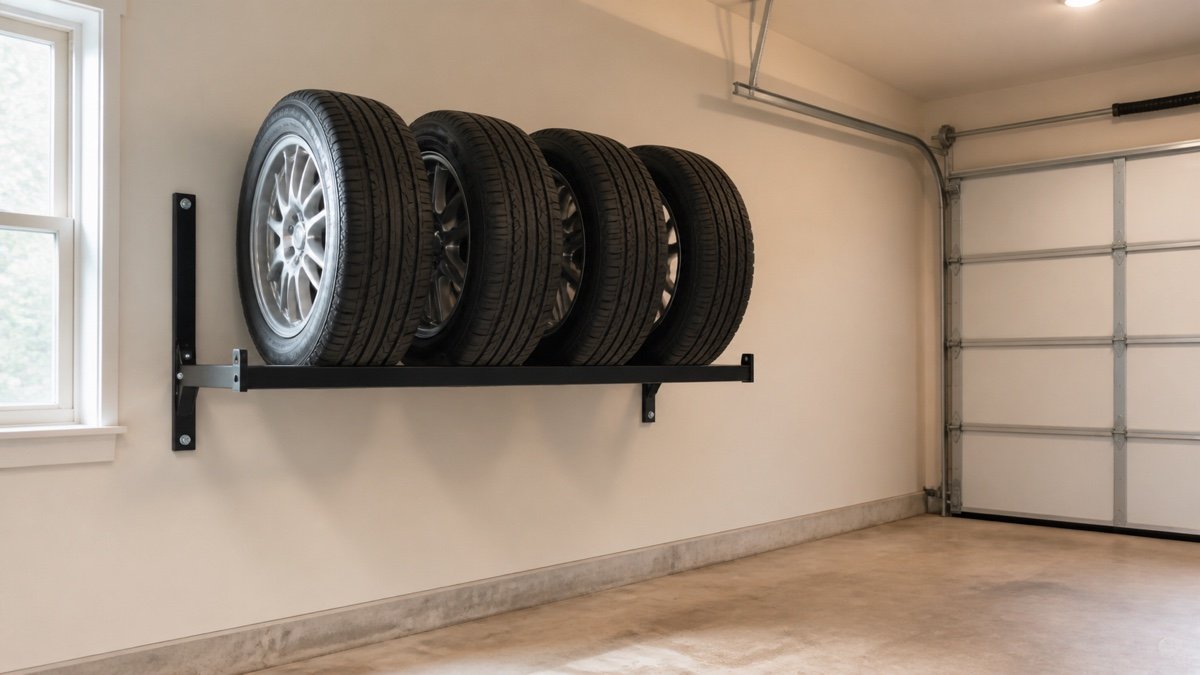
    As a useful reference point, Tire Rack’s current wall-mounted tire rack lists a 400-pound capacity, an inner width adjustable up to 52 inches, and a total width of 66 inches. Those figures describe that product, not all wall racks. Its page also says the unit attaches to wall studs. A lighter-looking rack from another maker may use different geometry and instructions.

    Leave a practical margin rather than shopping right at your calculated load. That margin does not repair weak framing or replace correct installation. It simply keeps normal uncertainty, such as a future wheel change or a mistaken weight estimate, from consuming the whole rating on day one. If the wall condition is uncertain, move the set to a floor rack and ask a qualified person to assess the mounting surface.

    Choose a location that works with the garage in motion

    Stand where the rack might go and move everything around it. Open the garage door through its full travel. Raise the vehicle hatch. Swing the service door. Pull the nearby cabinet drawer out. A wall can look vacant while the room is still, then become a collision zone during a normal Saturday.

    Keep the rack outside the car’s parking envelope and away from the path used to carry a wheel to the driveway. The overhead clearance guide explains how to map door hardware and vehicle height before placing anything high. Tire storage should also stay away from direct sun, hot pipes, generators, electric motors, and chemicals that can affect rubber. Michelin specifically calls for a cool, dry, clean indoor location away from sunlight, heat, and ozone sources.

    Height deserves honest judgment. A shelf above head level may clear the car yet force you to lift a heavy wheel with bent wrists while standing beside a fender. I would rather give up a strip of wall at chest height than save that strip and dread every seasonal changeover. If another adult cannot assist and the assemblies are heavy, a low rack or rolling cart is usually the better answer.

    A wall rack is only as good as the wall connection

    Find the framing or evaluate the masonry before buying. Stud spacing, wall finish thickness, concrete condition, and utilities behind the wall all affect installation. Do not substitute random anchors because the included hardware looks inconvenient. Follow the rack maker’s instructions for fastener type, quantity, spacing, pilot holes, and substrate. When the instructions require a ledger or specific structural attachment, treat that as part of the rack rather than an optional upgrade.

    Adjustable racks add another dimension: some change width at the crossbar while others move the tire support rails. Confirm that the chosen setting still lets every bracket land where the manual requires. The broader garage wall storage systems guide helps compare structural attachment and finished projection across rail, slatwall, and dedicated rack products.

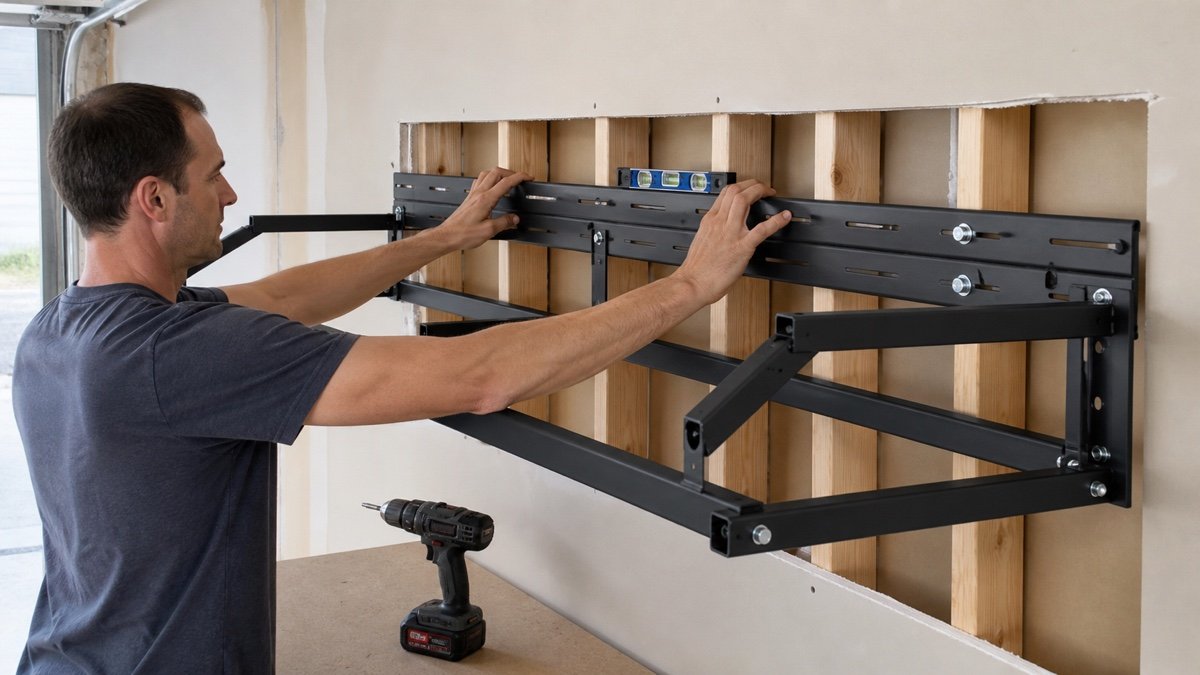
    Install the empty frame, check it for level and square, then inspect every connection before loading. Add one wheel at a time. Watch for movement, wall crushing, loose hardware, or a rail that twists under the first load. Stop if anything changes. A rack full of wheels is not the moment to discover that one bracket never reached framing.

    Empty adjustable tire rack positioned against exposed wall studs during installation
    An empty rack is the right time to verify stud positions, level, fastener instructions, and installation clearance.

    Floor and rolling racks trade wall work for footprint

    A low floor rack avoids structural wall questions and keeps lifting close to the body. It is a strong choice for renters, garages with questionable masonry, and large wheel assemblies. The cost is floor space. Measure the rack with tires loaded, including the handle or caster sweep.

    A rolling rack makes sense when the set must move between a storage corner and the driveway. Tire Rack’s current rolling rack, for example, lists room for up to eight passenger or light-truck/SUV tires and publishes a 77 by 61.5 by 19.25 inch overall size. Those dimensions show why a rolling design needs a real parking address. It cannot live indefinitely in the aisle.

    Check the capacity of the rack, each shelf, and the casters. Look for wheel locks that can be reached after loading. Roll the empty unit across expansion joints and the garage threshold before trusting it with wheels. A tall loaded cart should move slowly on a clear, level route. If the route slopes or crosses a rough lip, a stationary low rack may be the calmer choice.

    Prepare the tires before they disappear for a season

    Clean off road salt, grit, brake residue, and moisture, then let the tires dry. Mark each tire’s vehicle position using a removable method that will not damage the wheel finish or tire. Keep the record with the car’s maintenance notes so the next rotation does not depend on memory.

    Michelin advises sealed plastic bags when possible and maintaining correct inflation for mounted tires during storage. Use clean, dry bags made for the purpose, remove as much trapped air as practical, and follow the tire maker’s instructions. Do not wrap a damp wheel and create a private humid chamber around its finish.

    Inspect tread, sidewalls, beads, valves, and wheels as you handle the set. Storage does not heal damage. If you see cuts, bulges, cracking, bent rims, persistent pressure loss, or anything else concerning, have a tire professional inspect the assembly before it returns to service. Also record the tire identification and manufacture information while it is easy to read. The rack keeps tires organized; it does not decide whether they remain fit for use.

    Mock up the rack at its loaded size

    Use painter’s tape to mark total width, top height, and loaded projection. A cardboard rectangle at the furthest point helps you feel how far the wheel faces enter the room. Park the car, open its doors, carry a laundry basket through the aisle, and operate the garage door. Leave the mockup up for a few days.

    Then rehearse the lift with a harmless object of similar weight and size, held close to your body. Do not climb while carrying a wheel. Do not stand on a rolling stool or the car sill. If the rack requires a ladder for loading, reconsider the height. A tire rack should reduce awkward handling, not turn a twice-yearly chore into a balancing act.

    Feed the measured dimensions into the planning sequence in how to plan garage storage. That exercise forces the tire set to compete honestly with bicycles, lawn equipment, doors, and parking. Seasonal items often win a premium wall simply because they arrived first. A mockup shows whether the same space would work harder for daily gear.

    Compare rack listings with one short worksheet

    For each candidate, record usable width, overall width, loaded depth, rack weight, rated load, required mounting surface, included hardware, adjustment range, warranty, and access to instructions. Add the height at which the bottom support will sit in your garage. These fields make vague listings obvious.

    Look closely at how the tires touch the rack. Broad, smooth supports are easier to understand than sharp edges or widely spaced wires. Check whether end stops retain the outside tires and whether the frame can fold when empty. A folding rack still needs room to unfold without hitting a cabinet or vehicle.

    Do the same comparison for floor options using our wall-mounted versus freestanding storage framework. The exact products differ, but the trade is familiar: wall storage saves floor space and demands trustworthy attachment; freestanding storage occupies the slab and is easier to relocate. Pick the drawback you can manage, not the product with the most dramatic capacity number.

    Mistakes that make a tire rack annoying or unsafe

    The first mistake is buying from tire diameter alone. Section width, wheel offset, overall row length, and total mass decide the fit. The second is mounting high because floor space is scarce. If you cannot load the top position with controlled movement, the space is not truly available.

    Other failures are quieter. Owners place tires beside a generator or electric motor, load damp wheels into sealed covers, hide the electrical panel, or let a rolling rack become a permanent aisle obstacle. Some use a generic shelf whose capacity is not documented for the span and installation. Others mix loose tires and mounted wheels in an orientation that conflicts with tire-maker guidance.

    Finally, avoid permanent assumptions. A future vehicle may use larger wheels. Keep the measurements and product manual, inspect fasteners when the rack is unloaded, and stop using components that bend, crack, corrode, or loosen. The best rack is not invisible. It is easy to load, easy to inspect, and boringly stable every time the seasons change.

    Useful products to compare

    These links open current Amazon search results. Check the dimensions, manual, mounting hardware, warranty, and current availability for the exact model before you order.

    Before you buy or install

    Read the current manual for the exact product you are considering. Confirm its assembled dimensions, rated capacity, mounting requirements, included hardware, working clearances, warranty, and any limits that apply to your wall, floor, electrical circuit, or garage layout.

    Frequently asked questions

    Should tires be stored vertically or horizontally?

    It depends on whether the tires are mounted on wheels. Michelin says mounted tires may be hung or stacked, while unmounted tires should stand upright and should not be hung or stacked. Check the current guidance from your tire manufacturer and use a rack designed for that orientation.

    How much weight should a garage tire rack hold?

    Add the verified weight of every tire or wheel assembly you will store, then choose a rack whose documented capacity exceeds that total under your planned installation conditions. Do not invent a capacity from the rack’s appearance. Follow the exact model’s mounting instructions.

    Can I mount a tire rack into drywall anchors?

    Drywall itself is not structural support for a loaded tire rack. Many products require attachment to wood studs or suitable masonry with specified fasteners. Follow the manufacturer’s instructions. If you cannot confirm the wall structure, use a floor rack or ask a qualified installer.

    Where should tires be stored in a garage?

    Choose a cool, dry, clean indoor area away from direct sunlight, heat, chemicals, and ozone-producing equipment such as some motors or generators. Keep the set outside door travel, the vehicle envelope, electrical access, and normal walking routes.