Affiliate disclosure: As an Amazon Associate I earn from qualifying purchases. This article may contain affiliate links, and Bay & Bench may earn a commission at no extra cost to you. Read our full Affiliate Disclosure.
An overhead rack earns its space only when the garage door still moves freely, the totes fit, and you can load them without an awkward climb. Start with the room. Product size comes later.
Quick answer
Measure the lowest obstruction, trace the full garage door path, choose the tote height, and decide how you will reach the platform. Then compare rack size, drop range, mounting layout, and the manufacturer’s published ratings.
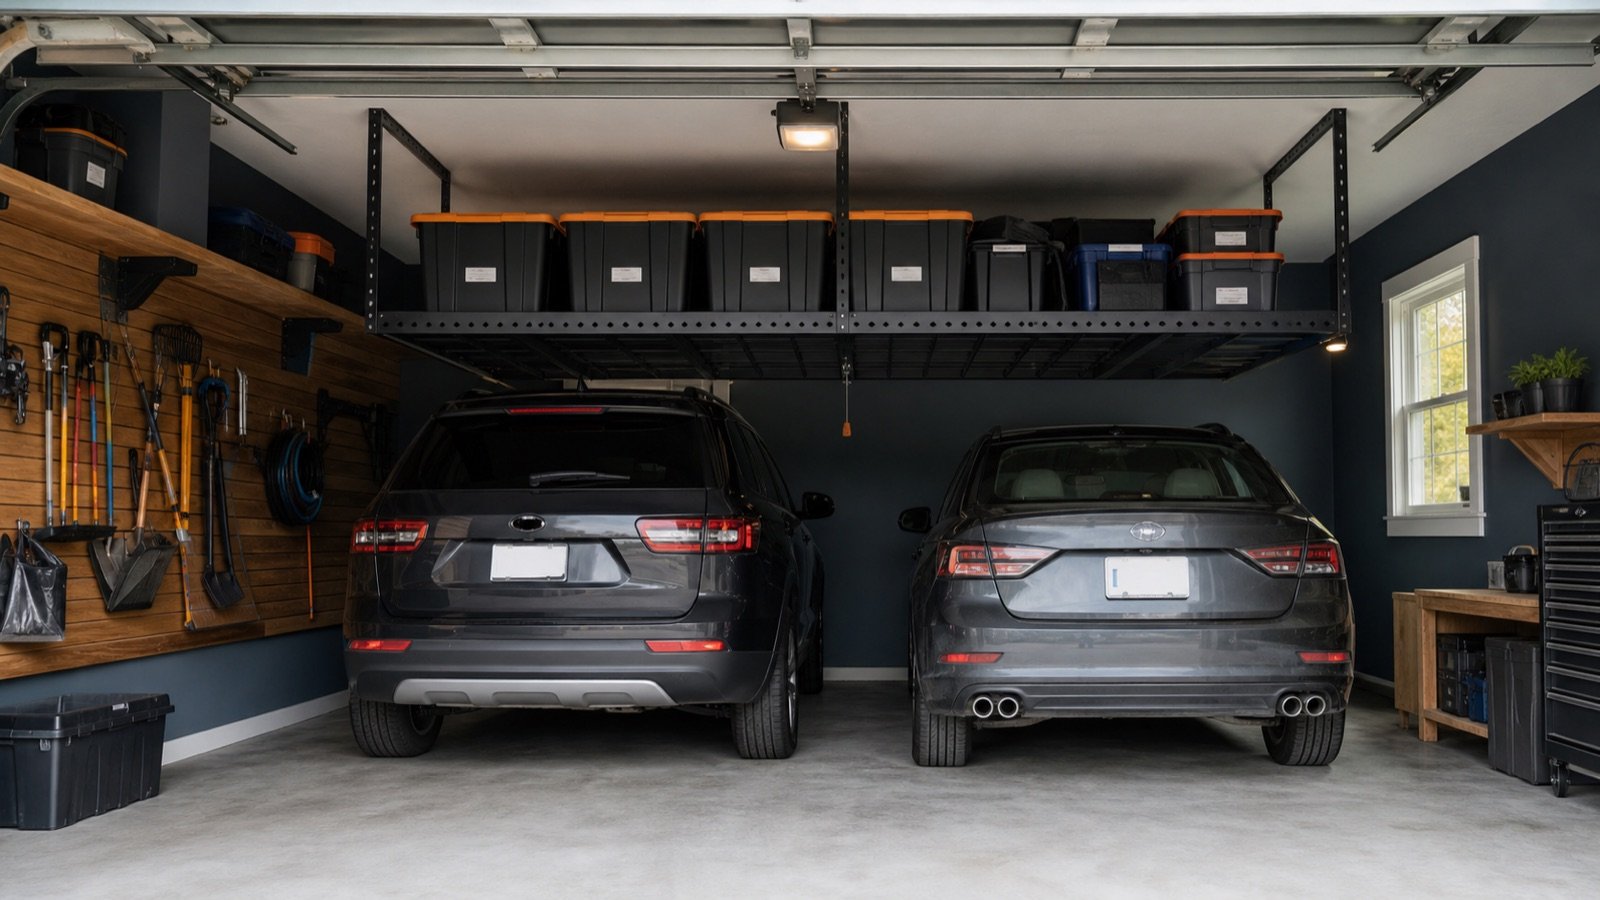
Begin with the moving garage door
The ceiling may look empty while the door is closed. That changes as the panels rise, curve through the tracks, and settle overhead. Measure the door at several points in its travel. Include tracks, springs, opener rail, emergency release, lighting, and any low beam.
Use our overhead rack clearance calculator for the first geometry check. The result is a planning aid, so verify it against the current rack manual and the real moving door.
Choose platform size by tote count
A 2 by 4 foot rack is easier to place in a broken ceiling area and usually easier to access from one side. A 4 by 8 platform holds far more, but its center can be difficult to reach. Large platforms also demand a clean mounting layout.
Place the actual totes on the floor inside a taped rectangle. If you cannot arrange them without stacking lids against one another, the ceiling will not fix the problem. Read our 2×4 vs 4×8 rack comparison before choosing.
Treat the drop as working space
Rack drop controls two things at once: the height available above the deck and the clearance below it. Adjustable posts can help fit a sloped ceiling or different tote heights, but extra adjustment holes do not make every setting compatible with the installation instructions.
Leave room for fingers, lids, and the angle used to place a tote. A bin that matches the opening exactly will be unpleasant to load.
Compare ratings without mixing them
Do not treat the headline capacity as permission to fill every tote with dense hardware. Check whether the number is for the complete rack, one section, or an evenly distributed load. The ceiling structure and fasteners are separate limits.
The weight capacity guide explains the rating chain. When the structure or mounting location is uncertain, ask a qualified professional rather than guessing.
Access matters more than maximum volume
Overhead storage is best for light seasonal objects: camping textiles, holiday decor, empty coolers, and rarely used sports gear. Dense tools and liquids are poor candidates. The retrieval route needs a stable ladder position that is not squeezed between a vehicle and a cabinet.
Label the short face of every tote. Better yet, keep a simple phone inventory so you do not climb just to find out what is inside.
A short buying checklist
| Check | What to record |
|---|---|
| Ceiling geometry | Lowest obstruction and usable mounting zone |
| Door movement | Clearance through the complete travel path |
| Platform | Outside size, deck type, sections, edge lip |
| Drop | Allowed adjustment range and installed height |
| Mounting | Required structure, spacing, hardware, instructions |
| Capacity | Rack rating and distribution conditions |
Deck style affects daily use
Wire decks make it easy to see a tote from below and keep the platform visually lighter. Closely spaced bars support more bin shapes than a coarse grid, but the manual still controls what may sit on the deck. Solid panels stop small objects from dropping through, though they can hide leaks and collect dust.
Check the platform edge as well. A raised lip can help contain a bin, but it also increases the height needed to lift that bin onto the rack. Try the motion at floor level with a board representing the lip.
Plan the first year, not a fantasy garage
Write a short inventory before choosing capacity. Six holiday totes, two empty coolers, and camping bedding make a real plan. “Future storage” does not. Undefined capacity tends to fill with objects nobody wants to lift down.
Photograph the loaded platform from below and keep the photo with the model number, manual, tote weights, and installation date. That record makes later changes easier to judge.
Useful products to compare
Use these searches to compare current dimensions, ratings, manuals, and availability. Check the exact model before buying.
Before you buy or install
Download the current manual for the exact model. Confirm assembled and packaged dimensions, individual and total load ratings, required clearances, mounting structure, included hardware, warranty, and inspection instructions. Product listings and specifications can change.
Mark the footprint or platform edges in the garage. Operate the vehicle doors and garage door, carry the intended bin through the access route, and check service panels and utilities. Do not improvise around electrical, gas, fire, or structural conditions.
Frequently asked questions
Can a rack go above the garage door?
Sometimes. The answer depends on the full door path, opener, tracks, rack drop, tote height, and the mounting instructions.
Is a larger rack always better?
No. A smaller rack may fit the structure and retrieval route better, and its center is easier to reach.
What should go overhead?
Light, stable, infrequently used items are the best candidates. Keep heavy, hazardous, or heat-sensitive products elsewhere.
Last reviewed: July 2026. Verify current product specifications and installation requirements before purchase.
Leave a Reply