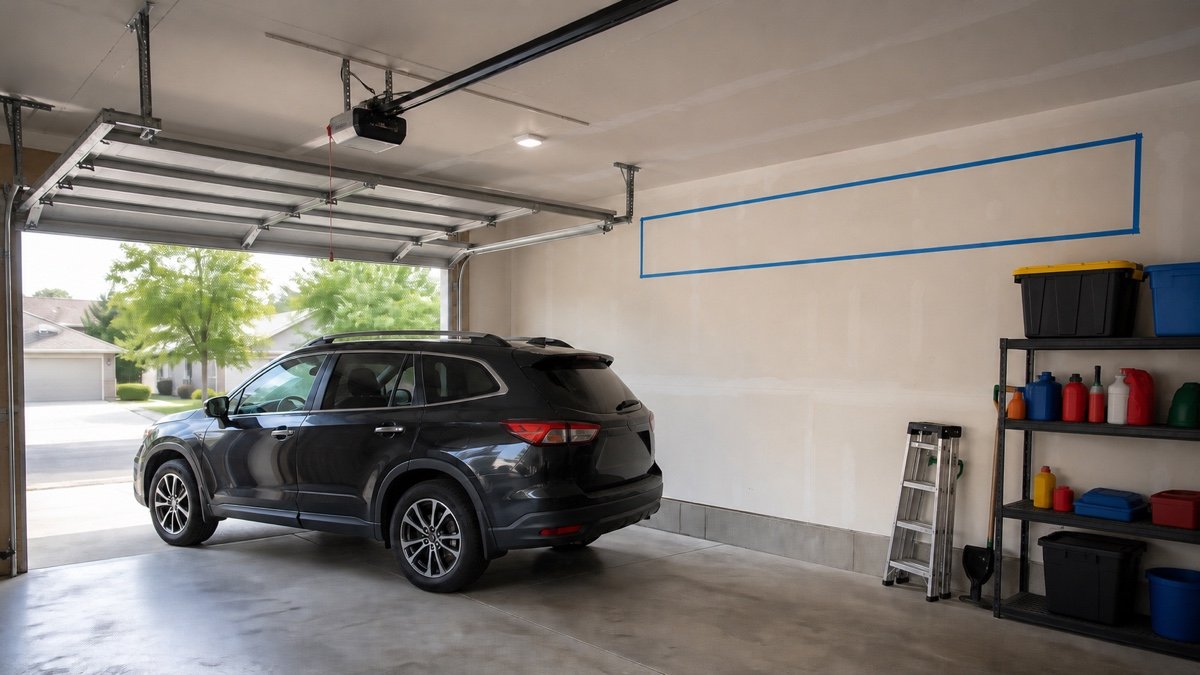
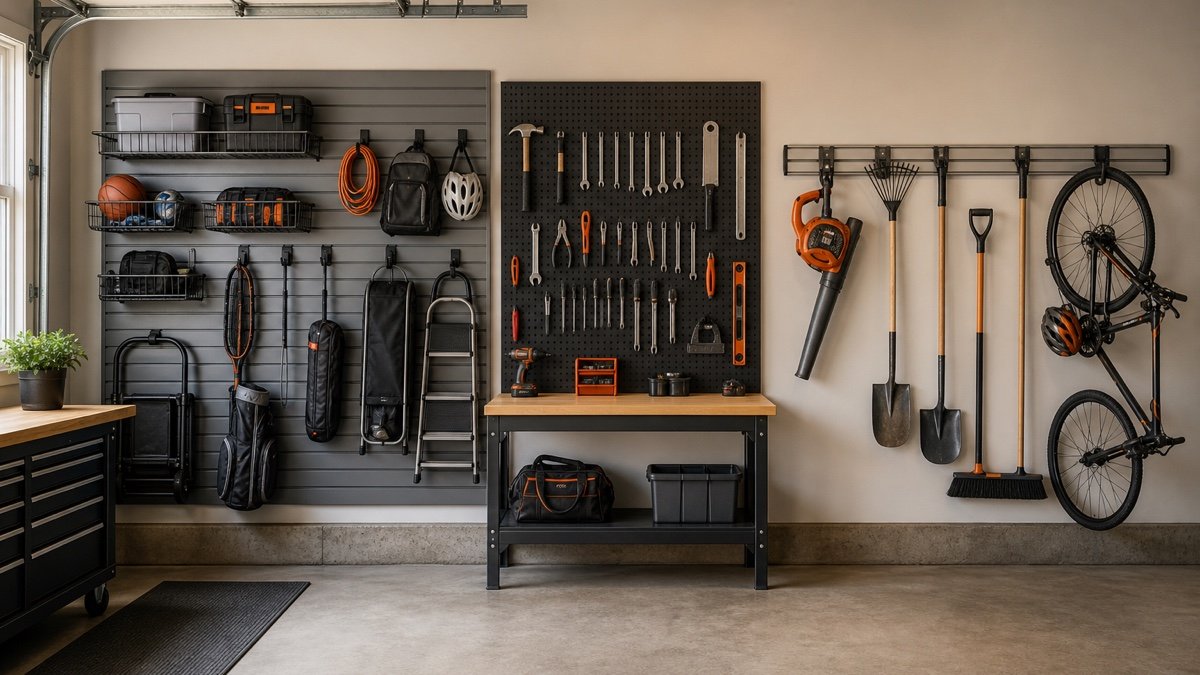
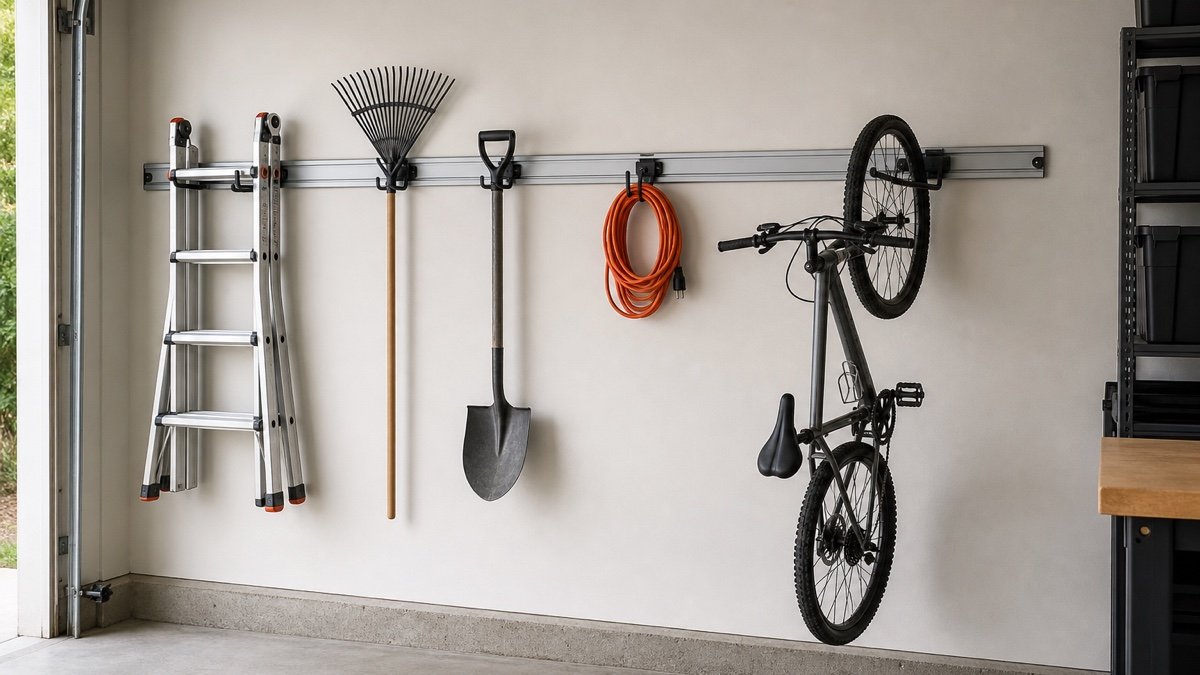
Tag: garage organization

  • Garage Tool Storage Guide: Put Every Tool Near Its Work

    Garage Tool Storage Guide: Put Every Tool Near Its Work

    Affiliate disclosure: As an Amazon Associate I earn from qualifying purchases. This article may contain affiliate links, and Bay & Bench may earn a commission at no extra cost to you. Read our full Affiliate Disclosure.

    A garage tool storage guide should begin with the work, not a wall full of matching bins. Put the tools for tire service near the parking bay. Keep measuring and marking tools at the bench. Give portable kits a clear landing place when they come home. This approach may look less showroom-perfect, but it saves steps and makes missing tools obvious. The plan below sorts hand tools, power tools, hardware, batteries, long tools, and mobile cases by frequency, weight, and the route each one takes during a normal project.

    Quick answer

    Sort tools into daily, monthly, and occasional use. Store daily hand tools between knee and shoulder height near their work zone. Put dense tools low in drawers, portable kits on shelves that fit their cases, and long tools on rated wall hardware away from doors and vehicles. Measure the tallest and widest tool before buying drawers. Keep batteries dry and clean, follow each battery manual, and do not treat a charging cabinet as fire protection unless the manufacturer explicitly designed it for that purpose.

    Garage tool storage guide by tool type

    No single container handles a whole workshop well. Drawers are excellent for shallow, dense tools. Open wall storage keeps familiar hand tools visible. Cases protect tools that leave the garage. Cabinets keep dust off items used less often. Start with this division, then adjust for children, moisture, theft concerns, and the jobs you repeat.

    Tool groupBest first homePlacementMain check
    Sockets, wrenches, pliersShallow labeled drawersBeside mechanical workOpen drawer clears car and stool
    Measuring and marking toolsProtected shallow drawer or cabinetAt the clean benchNo abrasive dust or loose pile
    Cordless toolsDrawer, shelf, or fitted caseNear charging areaTool fits with battery removed if required
    Fasteners and small partsSmall bins or drawer organizersEye level near assemblyLabels visible and bins cannot spill
    Long toolsRated hooks or floor rackNear outdoor doorHead, vehicle, and door clearance
    Jobsite casesMeasured shelf or mobile stackNear exit routeHandles and latches remain reachable

    The broader garage storage systems guide helps place these tool homes beside household and seasonal storage.

    Map the project route before buying organizers

    Choose three recurring jobs. For example: bicycle service, household repair, and vehicle maintenance. Walk each job from setup to cleanup and note where tools accumulate. If sockets always land on a rolling cart next to the car, a chest across the garage creates needless travel. If drills leave in a portable case, unpacking them onto a decorative wall wastes time.

    Draw a simple floor plan using the method in how to plan garage storage. Mark the bench, parking envelope, doors, outlets, and the place where a mobile cart rests. Tool storage belongs on that map. Leave working surfaces deliberately empty. A bench covered with permanent organizers has become a shelf, and every project will begin by moving someone else’s project.

    Use retrieval frequency, not matching colors

    Daily tools deserve the easiest reach. Monthly tools can occupy lower drawers or the second row of wall storage. Once-a-year pullers, specialty sockets, and spare jigs can live in labeled cases higher or farther away. Frequency changes, so write labels that can move rather than printing a permanent museum map on day one.

    There is a useful exception. Hazardous, sharp, or expensive tools may need locked storage even when used often. Security and child access outrank convenience. Put the key or combination where authorized adults can use it without leaving the cabinet unlocked. Store personal protective equipment near the task that needs it, but keep clean respiratory and eye protection away from dust and overspray.

    Choose drawers from tool dimensions

    Count drawers only after measuring the tools. A chest with many shallow drawers is excellent for sockets and pliers but hopeless for a tall cordless saw. Lay each tool group on the floor in a single layer and measure the required width, depth, and height. Add room for dividers and your fingers. Then compare those numbers with the manufacturer’s internal drawer dimensions, not the cabinet’s outside width.

    Dense tools should sit low. Divide them into modest groups so one drawer does not consume its full rating before the rest of the cabinet is loaded. A nonslip liner reduces movement but does not raise capacity. If you need help choosing the furniture around those drawers, compare the storage and work surface in the garage workbench buying guide.

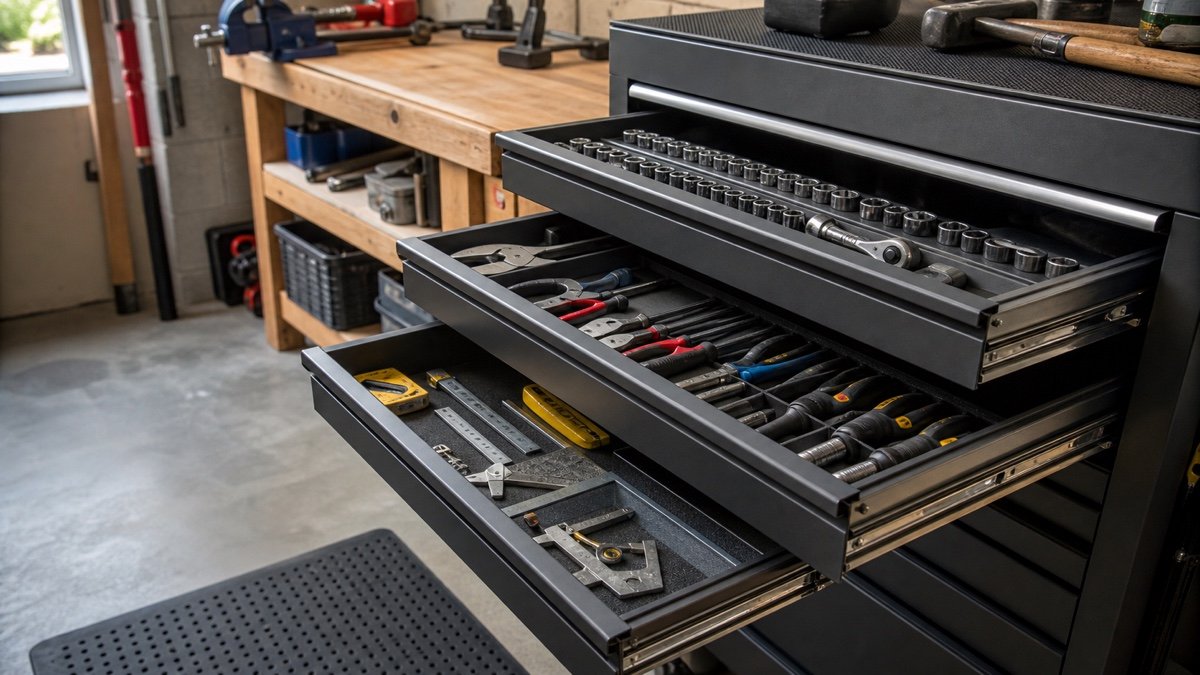
    Shallow tool drawers organized by task with sockets, pliers, and measuring tools
    Shallow drawers let you see small tools without piling them into a deep box.

    Build wall storage around structure and published capacity

    Wall systems keep daily tools visible, but the mounting surface and fasteners carry the load. Milwaukee lists its PACKOUT Compact Wall Plate at 50 pounds in a shop, while the Large Wall Plate is listed at 150 pounds. The manufacturer page and the exact installation manual matter because plate size, substrate, fasteners, and mounting context change the rating.

    Do not transfer a capacity from one plate or hook to another. Include the organizer, case, tool, and attachments in the load. Place heavy cases low enough to lift with control, and keep protruding hooks outside walking and vehicle paths. The existing garage wall storage systems guide compares pegboard, slatwall, and track hardware once you know what the wall needs to hold.

    Give power tools a clean landing place

    A cordless drill can stand on a shelf, hang from a tool-specific holder, sit in a drawer, or stay in its transport case. The right choice depends on dust, frequency, and whether the tool leaves the garage. Remove loose bits before hanging a tool overhead. Check that the holder supports the tool body without pressing a trigger or damaging a battery interface.

    Deep modular drawers can keep kits together, but published capacities vary widely. DEWALT lists the TOUGHSYSTEM 2.0 DXL Deep Drawer Unit at 27.5 pounds per drawer and 55 pounds total. See the official product page for the current configuration. Those numbers are a reminder to weigh the actual kit rather than assuming every large plastic drawer can hold a dense pile of metal tools.

    Treat batteries and charging as their own zone

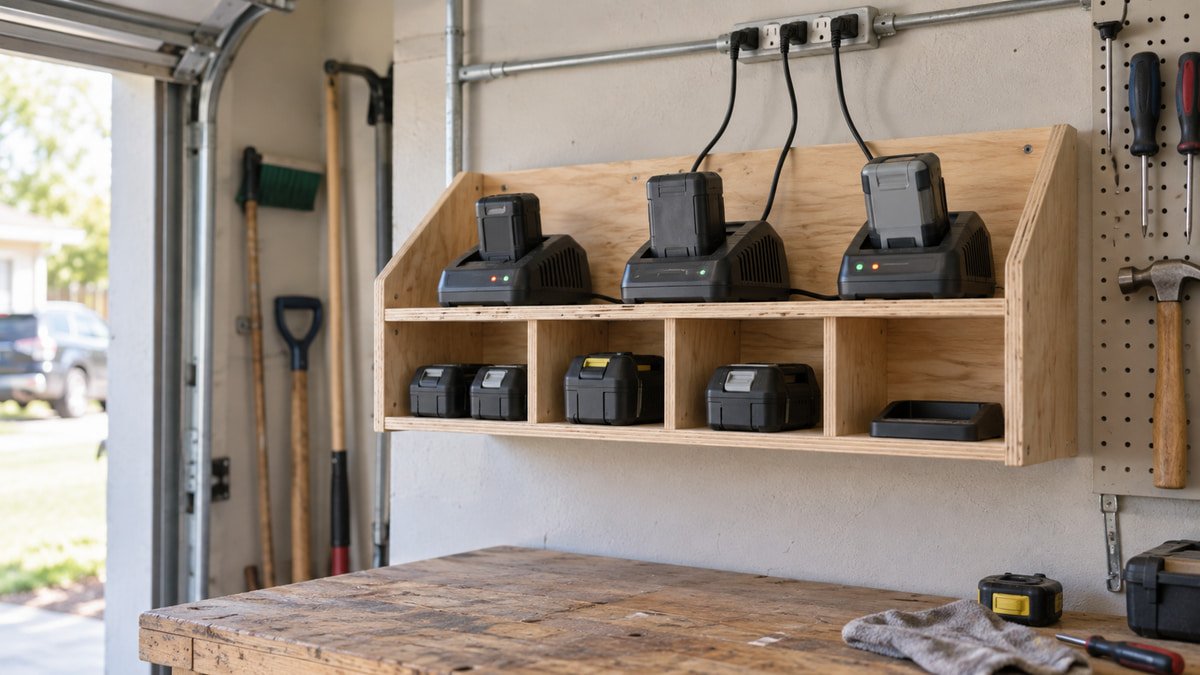
    Keep batteries and chargers dry, clean, and easy to inspect. Follow the temperature, ventilation, and storage instructions for each battery platform. Do not bury an operating charger in a closed drawer unless the manufacturer specifically approves that arrangement. Keep the charging area away from grinding sparks, oily rags, flammable finishes, and a bench where metal offcuts can bridge contacts.

    Mounting a power strip inside a cabinet does not make the cabinet a listed charging enclosure or fireproof box. Use intact chargers and cords, avoid improvised adapters, and give heat somewhere to go. If an electrical outlet is damaged, loose, or badly placed, solve that problem rather than building an extension-cord maze around it.

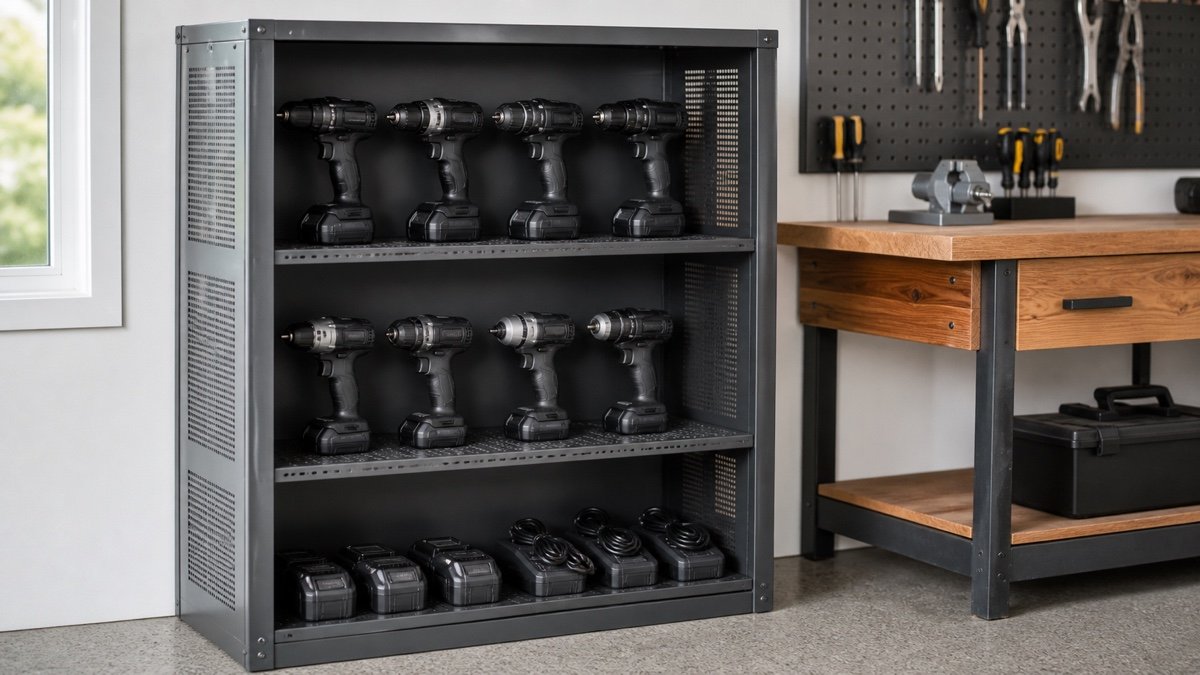
    Cordless drills and batteries stored in a ventilated garage cabinet beside a workbench
    Battery storage should be dry, easy to inspect, and separated from grinding dust and hot work.

    Separate small parts by decision, not by appearance

    Fasteners become useful when the label answers the question you ask during a repair. Sort common screws by diameter and length, electrical terminals by type and wire range, and anchors by the wall material they are approved for. Mixing every shiny metal fastener into one bin saves space and wastes the next Saturday afternoon.

    Use lidded organizers for parts that travel. Open bins work for high-use items at a fixed assembly station, provided they cannot be knocked into a car path. Keep an intake bin for loose hardware discovered during cleanup. Empty it weekly. This prevents every drawer from developing a mysterious layer of one-off washers and unidentified clips.

    Store long tools where their movement makes sense

    Rakes, shovels, levels, clamps, and extension poles need more than a hook that carries their static weight. Measure the full sweep as you lift each item on and off. A secure rake can still scratch a vehicle when its handle rotates. Put outdoor tools near the exterior door and shop clamps near the bench, even if that breaks a symmetrical wall display.

    Use two support points for long or awkward items when one hook lets them twist. Keep sharp ends covered or turned away from the aisle. Floor racks are often better for tools used by someone who cannot comfortably lift overhead. Recheck fasteners after the first loaded week and at regular cleanups.

    Make portable cases part of the garage system

    A case needs a home that accepts it without removing the handle, opening a latch, or unloading the stack. Measure the case at its widest projection. Leave enough shelf height to grasp it safely, and put the most frequently carried module between knee and chest height. Heavy boxes belong low.

    Modular wall plates and rolling stacks are handy, but confirm every connection in the exact orientation. Milwaukee’s PACKOUT mounting plate manual, for instance, publishes different limits for plate models and mounting contexts. A case that locks to a floor plate may not be approved on a wall in the same arrangement. Follow the manual instead of reasoning from the shape of the cleats.

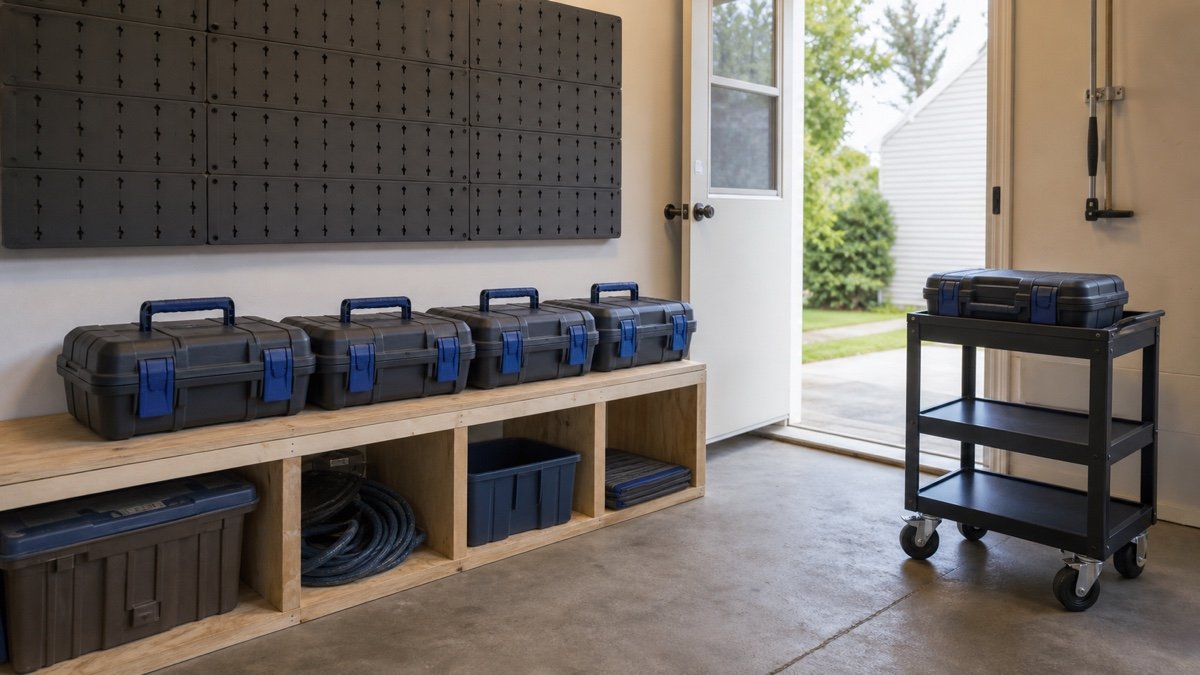
    Portable tool cases staged beneath a wall storage panel in a garage workshop
    Portable cases work best when the shelf, cart, and project route all use the same modules.

    Reset one zone at a time

    Do not empty the whole garage unless you can finish the job. Start with one bench drawer or one four-foot wall section. Remove duplicates and broken tools, group what remains by task, then mock up the new home with cartons and tape. Work from the zone for a week before buying inserts for every drawer.

    Take a photo of the successful arrangement. Label only after it proves useful. At the monthly reset, return wandering tools, inspect wall hardware, clean drawer slides, and update the odd-items bin. A tool system earns its floor and wall space by making work easier. If an organizer creates more steps, move it.

    Useful products to compare

    These links open current Amazon search results. Check the dimensions, manual, mounting hardware, warranty, and current availability for the exact model before you order.

    Before you buy or install

    Read the current manual for the exact product you are considering. Confirm its assembled dimensions, rated capacity, mounting requirements, included hardware, working clearances, warranty, and any limits that apply to your wall, floor, electrical circuit, or garage layout.

    Frequently asked questions

    What tools should stay visible on a garage wall?

    Keep frequently used hand tools visible when quick access outweighs dust and security concerns. Measuring tools, high-cost tools, and items sensitive to grit often belong in a drawer or cabinet. Heavy tools should not hang high merely to complete a wall display.

    Are deep drawers better for power tools?

    They are useful when the tool, battery, and accessories fit without stacking into a loose pile. Measure internal height and depth, then compare the full loaded weight with the drawer rating. Shallow drawers are usually better for sockets and pliers because every item remains visible.

    Can I charge tool batteries inside a cabinet?

    Only if the charger and cabinet arrangement follow the manufacturers’ instructions and the space provides the required conditions. Do not assume a metal cabinet is a fire-rated charging enclosure. Keep chargers clean, dry, ventilated, and away from sparks, flammables, and loose conductive debris.

    How often should I reorganize garage tools?

    Use a quick monthly reset and a deeper review when projects or tool ownership change. If a tool repeatedly lands somewhere other than its assigned home, the home is probably wrong. Move the storage closer to the work rather than relying on perfect habits.

  • How to Choose a Rolling Tool Chest Without Buying Too Much Box

    How to Choose a Rolling Tool Chest Without Buying Too Much Box

    Affiliate disclosure: As an Amazon Associate I earn from qualifying purchases. This article may contain affiliate links, and Bay & Bench may earn a commission at no extra cost to you. Read our full Affiliate Disclosure.

    Learning how to choose a rolling tool chest is mostly an exercise in resisting oversized specifications. A huge capacity number looks reassuring until the cabinet blocks a car door, the shallow drawers do not fit your cordless tools, or the loaded box cannot cross a slab joint. Start with a drawer map and loaded footprint. Then judge capacity wording, casters, stability, worktop, power, locks, and expansion. The comparison uses current manufacturer specifications to show how differently similar-looking cabinets can be rated, so treat it as a fit guide rather than a shop test.

    Quick answer

    Measure your tool groups in one layer, then choose drawer widths and heights that fit them with room for organizers and fingers. A 26 to 42 inch cabinet often suits a home collection better than a 56 or 72 inch unit, but the tool map decides. Put dense drawers low, compare per-drawer and overall ratings separately, and plan the fully assembled footprint. Check empty weight, caster diameter, threshold route, drawer-open clearance, power cord, compatible top pieces, and delivery before ordering.

    How to choose a rolling tool chest in ten checks

    Use this list in order. Later features cannot rescue the wrong footprint or drawer layout.

    CheckWhat to recordFailure it prevents
    Tool mapGrouped tool dimensions and weightWide cabinet with useless drawers
    Cabinet footprintBody, handle, bumpers, caster sweepBlocked vehicle or door
    Drawer mapInternal width, depth, heightStacked tools and jammed latches
    RatingsDrawer, cabinet, top, accessory limitsOverloaded slides or base
    StabilityDrawer latches, load order, floor levelTip or uncontrolled opening
    CastersDiameter, width, locks, floor jointsCabinet that cannot move
    WorktopSurface material and allowed tasksDamaged top or lost landing area
    PowerCord exit, outlets, ventilationSnagged cord or hot charging zone
    ExpansionApproved chest, locker, side cabinetMismatched unstable stack
    DeliveryPackaged size, weight, threshold routeCrated cabinet stuck outside

    Plot the two-dimensional footprint with the garage storage fit calculator before comparing paint colors.

    Inventory by drawer, not by total tool count

    Lay sockets, wrenches, pliers, measuring tools, cordless tools, and specialty equipment in separate groups. Arrange each group as you would like to see it in a drawer. Measure the rectangle, the tallest item, and the rough weight. Leave room for a hand to lift the tool and for an organizer to hold it.

    This exercise often points to fewer, better-shaped drawers. Ten shallow drawers are wasteful when half the collection consists of drills and large pullers. Four deep drawers are miserable when every socket hides below another. Photograph the layouts and carry the numbers while shopping. A cabinet width tells you little about usable drawer width.

    Pick width after the parking test

    A 26-inch single-bank cabinet is easy to place and steer. A 41 or 42-inch double-bank cabinet opens a broad top drawer and holds a mature home collection. Wider 52, 56, and 72-inch boxes provide volume and work surface, but their depth, weight, and turning radius become serious room-planning issues.

    Tape the cabinet body and side handle on the floor. Add the deepest open drawer. Park the vehicle and walk past it carrying a case. If the layout works only with the handle removed or the cabinet rolled out for every use, choose a smaller width. The garage workshop aisle clearance guide helps test the active space rather than the closed rectangle.

    Read drawer and overall ratings separately

    The cabinet rating, drawer slide rating, caster rating, and worktop rating are not interchangeable. Craftsman lists its S2000 41-inch 9-drawer cabinet with 100-pound soft-close drawer slides and a 2,000-pound overall weight capacity. The manufacturer page also identifies 6 by 2 inch casters and steel gauge range.

    A high overall number does not mean one drawer can hold that load. Nor should you multiply the drawer ratings and ignore the cabinet limit. Check how the manual defines evenly distributed loads and accessory limits. Weigh dense drawers with a bathroom or shipping scale when the estimate is close.

    Build a stable load from the bottom up

    Put jacks, large sockets, pullers, and other dense tools in the lowest suitable drawers. Light hand tools can sit higher. Open one loaded drawer at a time and close it before moving the cabinet. Full-width latches are useful because they reduce accidental opening, but you still need to verify that every drawer is fully shut.

    Harbor Freight publishes a 2,600-pound overall rating and 120-pound capacity per pair of drawer slides for the U.S. General Series 3 42-inch roll cabinet. See the current official listing and manual for the exact loading language. Use the ratings only for that model. Another cabinet of the same width may be built very differently.

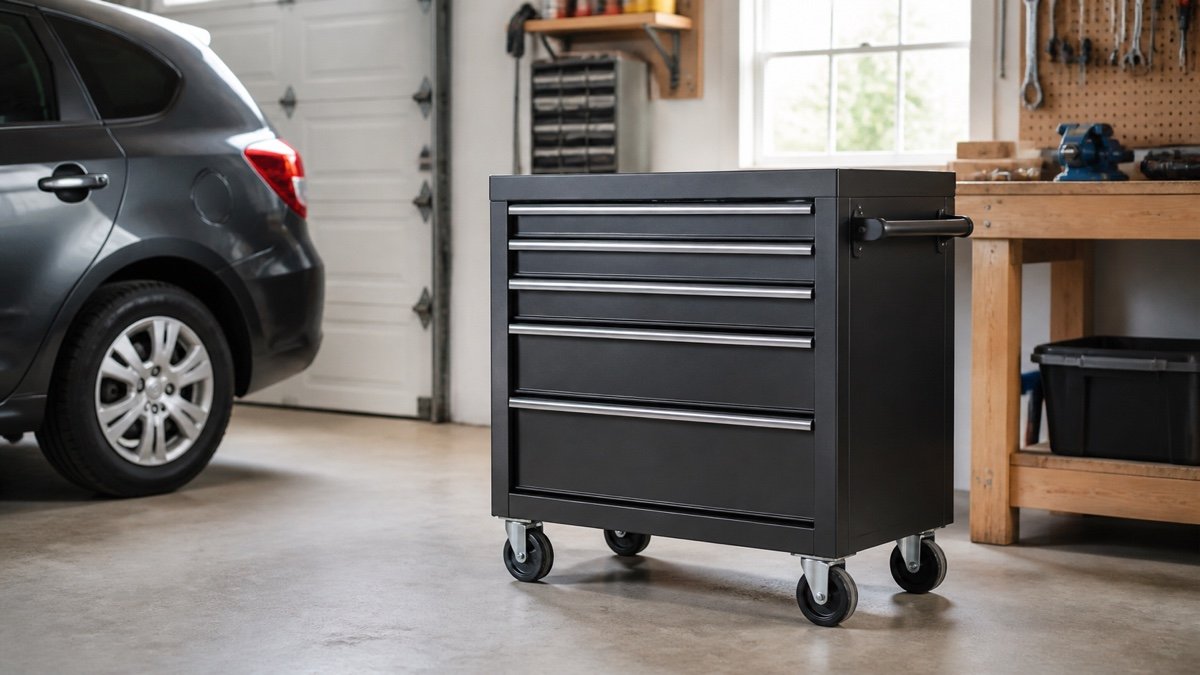
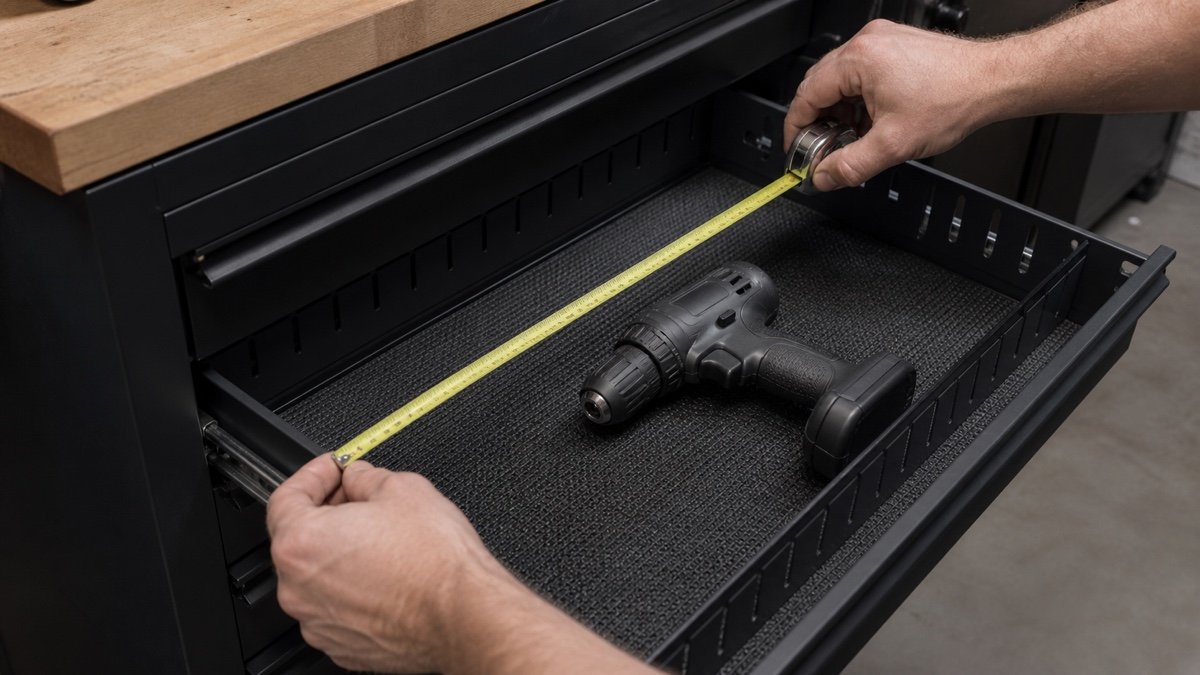
    Mechanic measuring a cordless tool and an open tool chest drawer
    Internal drawer dimensions decide whether bulky tools fit without wasteful stacking.

    Caster size has to match the floor

    Large-diameter, wider casters cross small joints and debris more easily than tiny hard wheels. The arrangement matters too. Two fixed and two swiveling casters track predictably in a straight move, but they need room to turn. Four swivel casters maneuver in tighter spaces and can feel less settled while steering a heavy box.

    Inspect the slab for control joints, spalls, slope, mats, and the lip at the garage door. A caster brake may stop rolling while allowing swivel. Park the cabinet on level concrete and use any leveling system as instructed. Do not test mobility for the first time after filling every drawer.

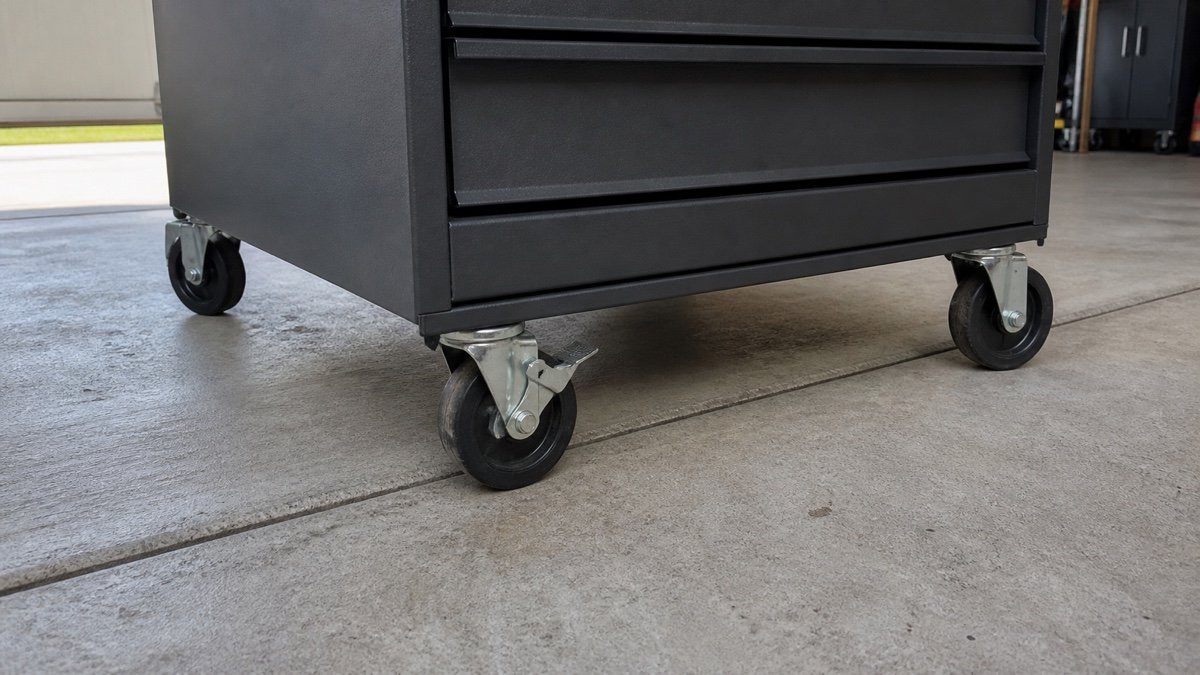
    Large casters on a loaded rolling tool chest crossing a concrete garage joint
    Caster diameter, floor joints, and steering room determine whether a cabinet is truly mobile.

    Decide whether the top is storage or work space

    A rubber-matted steel top makes a convenient staging area. A wood top can support light assembly and protects tools from a hard surface. Adding a matching top chest converts that same area into more drawers. Choose the final role before buying either component.

    If you need a real bench for clamping and forceful work, keep it separate. The garage workbench buying guide covers frame stiffness, overhang, vise access, and surface choice. A mobile tool cabinet is storage first. Do not infer hammering, vise, welding, or standing capacity from the overall tool-load number.

    Treat built-in power with ordinary caution

    Integrated outlets can keep chargers and diagnostic tools ready, but they require a clean cord route and accessible plug. Confirm outlet type, total rating, cord length, and how the cord exits with drawers open. Keep it away from caster paths and do not move the cabinet while it is plugged in.

    Charging inside a drawer may be a listed feature on a specific cabinet, yet charger and battery instructions still apply. Keep contacts free of metal debris. Do not assume a powered drawer is fireproof or appropriate for damaged batteries. If the cabinet sits near grinding or finishing, a separate clean charging station is usually easier to manage.

    Plan compatible expansion before you need it

    Ask which matching top chests, side lockers, end cabinets, and hutches the manufacturer currently supports. Record how they attach and how each accessory changes total width, height, load, caster behavior, and wall clearance. A side cabinet can add leverage to a base that is not approved for it.

    Milwaukee lists the 46-inch 8-drawer steel cabinet at an 1,800-pound overall capacity with 100-pound soft-close slides on its official product page. That is a good example of why you should compare a whole model family rather than assuming the specifications of a familiar competitor carry across.

    Delivery deserves its own measurement sheet

    Find the packaged dimensions and shipping weight. Measure gates, driveway turns, thresholds, door openings, and any step. Decide where the pallet or carton can be opened and how the cabinet will be controlled during the move. Remove drawers only if the manual allows it and explains the procedure.

    Large cabinets may need lift-gate service, a pallet jack, several capable adults, or professional delivery into place. Do not use drawers as lifting handles. Assemble near the final location, then inspect fasteners, caster attachment, drawer action, brakes, and locks before loading. Our garage measuring guide includes fixed obstacles, but the delivery path must extend beyond the room.

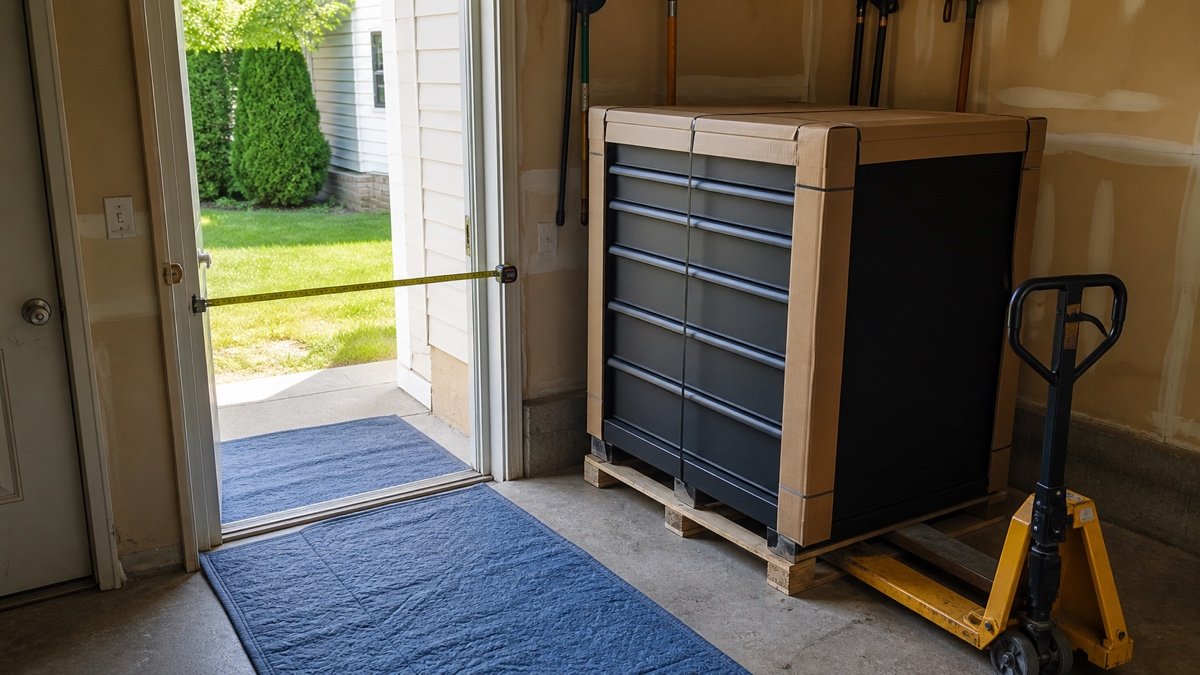
    Rolling tool chest delivery path measured through a residential garage doorway
    The shipping weight and narrowest doorway belong in the buying decision.

    Check parts support and warranty details

    A rolling cabinet lives a hard life even in a home garage. Drawer clips, locks, keys, liners, caster hardware, slides, and power components may need service long before the steel shell is worn out. Look for a current parts diagram, a reachable support channel, and warranty terms that explain what the manufacturer will provide in practice. A long headline warranty is less useful when routine wear parts cannot be identified.

    Save the model, serial information, receipt, manual, and key code before the cabinet is loaded. Photograph the label. If replacement casters are offered, match the exact mounting plate and rating rather than installing a similar wheel that changes cabinet height or load distribution. Availability changes, so confirm service information at purchase instead of assuming a familiar brand keeps every part forever.

    A right-sized cabinet beats an empty giant

    Buy enough room for the collection you can reasonably expect, not every tool you might own. Twenty percent spare drawer area is pleasant. Half an empty 72-inch cabinet is an expensive way to lose a wall. A smaller box also keeps categories from spreading until each drawer contains three unrelated things.

    Choose only after the taped footprint, drawer map, rating check, and delivery plan all work. Then load slowly and revise the drawer arrangement after several projects. A rolling tool chest should shorten a job. Its size and polish are secondary.

    Useful products to compare

    These links open current Amazon search results. Check the dimensions, manual, mounting hardware, warranty, and current availability for the exact model before you order.

    Before you buy or install

    Read the current manual for the exact product you are considering. Confirm its assembled dimensions, rated capacity, mounting requirements, included hardware, working clearances, warranty, and any limits that apply to your wall, floor, electrical circuit, or garage layout.

    Frequently asked questions

    What size rolling tool chest is best for a home garage?

    Many home collections fit a 26 to 42 inch cabinet, but width alone is a poor selector. Map the tools into measured drawer groups and tape the body, handle, and open-drawer footprint beside the parked vehicle. Choose the smallest cabinet that fits those groups with modest room to grow.

    How much spare drawer space should I buy?

    Around 15 to 25 percent spare usable area is a reasonable planning cushion for a stable hobby. More may make sense for an expanding trade collection. Do not buy a huge cabinet solely for hypothetical tools if it compromises parking, work surface, or delivery.

    Are bigger casters always better?

    Larger wheels generally cross joints and debris more easily, but cabinet height, caster width, steering arrangement, locks, and floor slope still matter. Compare the full system and test the unloaded cabinet first. Keep the rolling route clear.

    Can I add any top chest later?

    No. Use only a chest and attachment method approved for the exact cabinet. Confirm the model family, combined height, load limits, installation sequence, and access to upper drawers. Similar width and color do not establish compatibility.

  • Garage Bike Storage Guide: Fit the Rack to the Bike and Rider

    Garage Bike Storage Guide: Fit the Rack to the Bike and Rider

    Affiliate disclosure: As an Amazon Associate I earn from qualifying purchases. This article may contain affiliate links, and Bay & Bench may earn a commission at no extra cost to you. Read our full Affiliate Disclosure.

    A garage bike storage guide has to account for more than the number of bicycles. A light road bike, a long trail bike, a child’s bike, and a 65-pound electric bike ask different things of the rack and the rider. Tires, fenders, frame shape, handlebar width, brake cables, and lifting ability all affect fit. Start by measuring each bike and watching how it enters the garage. Then choose floor, vertical, pivoting, horizontal, or ceiling storage for that exact routine.

    Quick answer

    Use floor stands for heavy bikes, children’s bikes, and anything ridden daily by someone who cannot lift it comfortably. Vertical wheel racks save wall width and work well for several bikes when heights are staggered. Pivoting vertical racks reduce aisle projection after loading. Horizontal frame cradles suit one or two display-worthy bikes and avoid wheel hooks, but they consume a long wall. Verify bike weight, tire width, wheel diameter, fenders, frame contact, mounting structure, and the clear loading lane before buying.

    Garage bike storage guide by rack style

    Every style trades floor area, wall width, lifting, and access differently. Use the table as a first filter, not a substitute for the product fit chart.

    Storage styleBest useSpace tradeoffFit check
    Floor standHeavy, daily, children’s, or rental bikesUses floor depth, little liftingTire width, rotor and derailleur clearance
    Fixed vertical hookSeveral light to medium bikesSaves wall width, projects bike lengthWheel and tire fit, lift height, solid mounting
    Pivoting vertical rackDense row with side pivotCan fold bikes toward wallHandlebar overlap, pivot sweep, weight
    Horizontal frame cradleOne or two bikes at reachable heightConsumes roughly a bike-length wallFrame shape, bar width, cradle contact
    Ceiling systemRarely used light bikesClears floor, hardest accessRated structure, door envelope, safe operation

    Map the bike zone inside the garage storage plan so the rack does not inherit a wall needed by tools or parking.

    Measure every bicycle in its normal setup

    Record overall length, handlebar width, total weight, wheel diameter, inflated tire width, and the highest point. Note fenders, front baskets, child seats, mirrors, kickstands, and cables. A printed tire size is a starting point; measure the real inflated width when the rack manufacturer tells you to.

    Photograph the frame from the side. Horizontal cradles may struggle with low step-through tubes, compact full-suspension shapes, or cables routed where the cradle touches. Wheel racks need clearance around rims, tires, fenders, and the frame near the front wheel. Do not remove a safety accessory merely to force a bike into an unsuitable rack.

    Give each rider a rack they can use

    A storage system fails when one person cannot load it. Ask each rider to lift the bike into the proposed orientation. Use a wall mark or an empty hook mockup rather than holding a bicycle overhead near a car. If the motion is awkward when rested and the bike is clean, it will be worse after a wet ride.

    Children’s bikes usually belong low or on the floor. A heavy electric bike may fit a wall rack’s published capacity yet remain a poor daily choice because lifting it risks the rider, wall, or bike. Put the most frequently used bikes closest to the exit and leave enough room to roll them out without moving two others.

    Use vertical racks when wall width is scarce

    Vertical storage turns a bike’s length into wall projection. Several bikes can occupy a shorter wall if the handlebars overlap. Feedback Sports recommends roughly 16 to 24 inches between Velo Hinge hooks depending on stud spacing and staggered heights. Its current Velo Hinge 2.0 FAQ explains a practical mockup: lay bikes near each other to see how handlebars nest, then transfer the height difference to the wall.

    That spacing is product guidance, not a universal rule. Wide mountain-bike bars, baskets, and brake levers demand more. Mark the full wheel and handlebar envelope, then protect the adjacent car door and the person loading the bike.

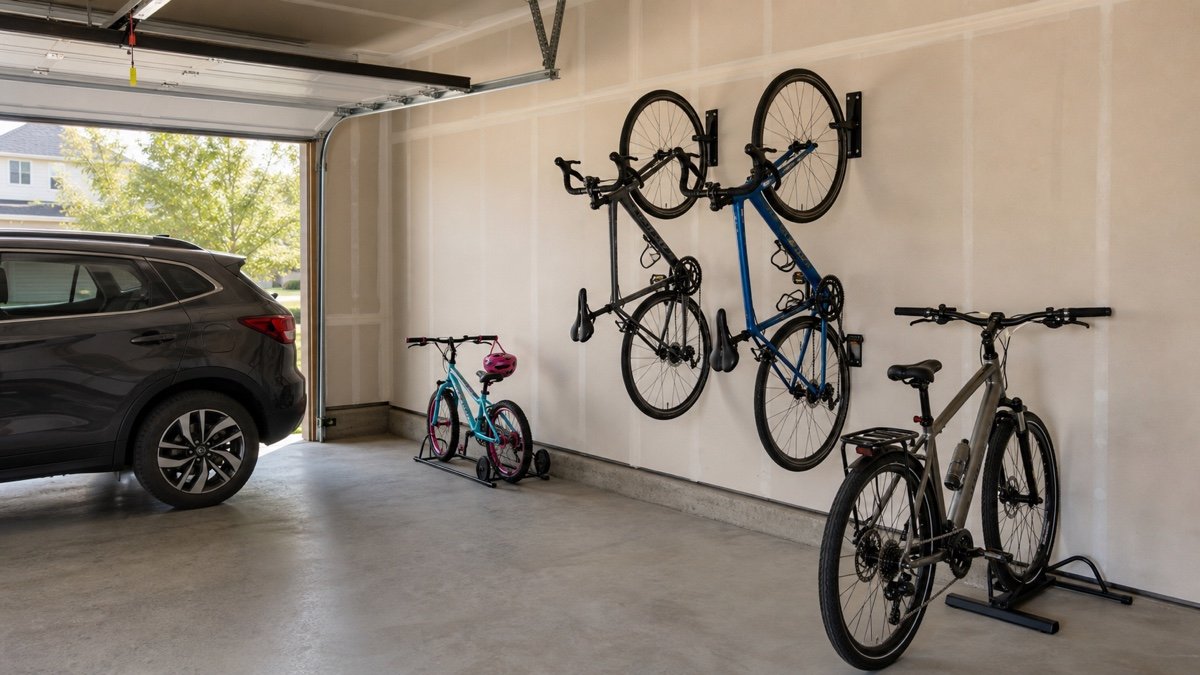
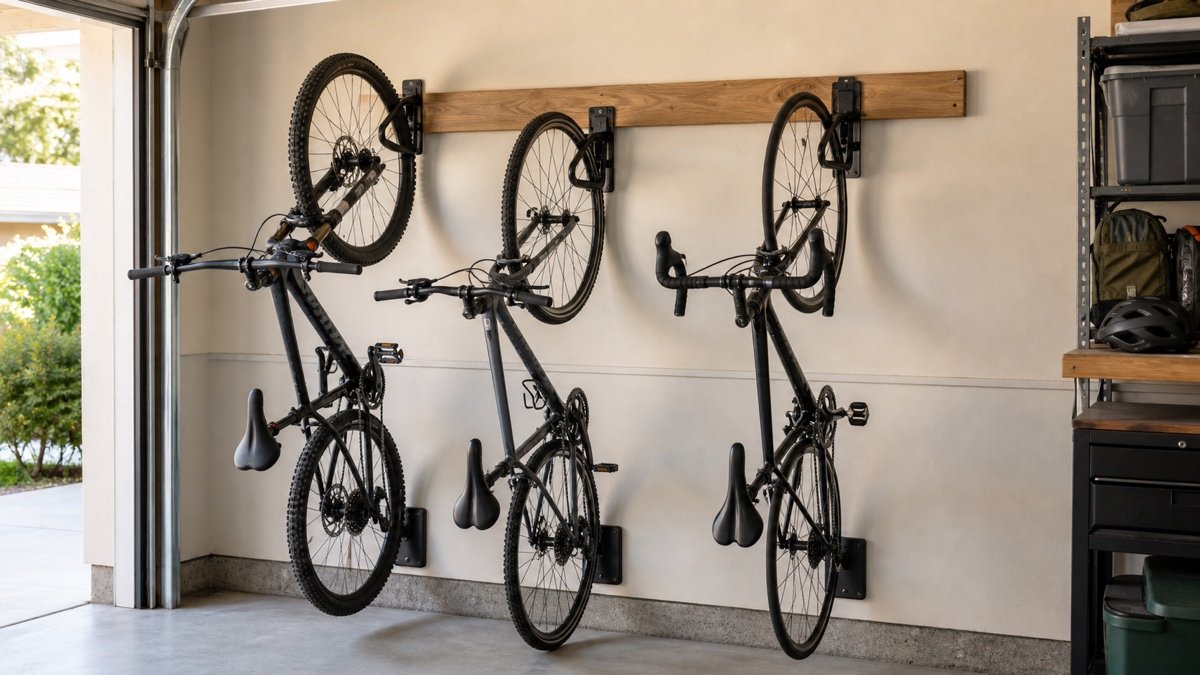
    Mountain bikes on staggered vertical wall racks beside an open garage bay
    Staggering vertical racks helps handlebars overlap, but each bicycle still needs a clear loading lane.

    Pivoting racks can recover the aisle after loading

    A pivoting rack holds the bike vertically, then swings it toward the wall. This can reduce how far the row occupies the aisle when stored. Feedback Sports lists the Velo Hinge 2.0 for up to 50 pounds when properly mounted to a wall stud, with a 4-inch hook opening and published compatibility from 700C by 23 mm through 29 by 3.0 inch combinations. See the manufacturer page for the exact fit diagram and instructions.

    Include the pivot sweep in the layout. Pedals and handlebars move sideways as the bike folds. A neighboring cabinet, car mirror, or second bike can stop the hinge before it reaches the useful angle.

    Horizontal cradles favor easy access and a long wall

    Horizontal racks support the frame on padded arms. The bike stays closer to normal carrying height and becomes easy to inspect before a ride. This format works nicely above a low cabinet or along a wall with no door, although the full wheelbase and handlebars occupy considerable width.

    Feedback Sports lists its Velo Wall Rack 2D at a 50-pound maximum, with cradle projection adjustable from 8 to 12 inches and vertical arm adjustment. The official product page warns that very wide handlebars, long wheelbases, and fat bikes may not suit it. Frame contact matters. Confirm that both cradles support strong tube locations without pressing cables or delicate finishes.

    Road bicycle held horizontally on padded frame cradles in a garage
    Horizontal cradles keep a favorite bike low and visible while consuming a long stretch of wall.

    Simple hooks still require a structural decision

    A vinyl-coated hook can be a sensible low-cost answer for a standard bike. Park Tool lists its 451 wood-thread hook at a 115-pound hook limit when securely screwed into solid material, while making the user responsible for the mounting material. Read the manufacturer page closely. The large hook rating does not turn thin drywall into structure.

    Confirm tire and rim fit, thread engagement, and the direction of loading. Use the fastener and substrate called for by the manufacturer. If you do not know what is inside the wall, find out before drilling or choose a supported floor rack.

    Keep bicycles outside the parking and door envelopes

    A vertically stored bike projects about its length from the wall until it pivots. A horizontal bike projects by its handlebar and pedal width while stretching along the wall. Tape both shapes on the floor and wall. Open the vehicle doors, house door, garage door, cabinets, and freezer. Then walk the normal path with grocery bags or a trash bin.

    Compare the remaining route with the garage workshop aisle clearance guide. A handlebar end at face height deserves extra space. Place a rear-wheel bumper or wall protector where the system expects one, and keep oily chains away from clothing paths and painted car panels.

    Store electric bikes for weight, heat, and cables

    The motor does not harm a rack, but the added weight changes lifting and mounting. Use the complete bike weight with battery and accessories when comparing rack capacity. Follow the bicycle and battery manufacturers’ storage and charging instructions. Do not assume removing the battery is optional or required; platform guidance varies.

    A floor rack is often the honest solution. It lets a rider roll the bike into place and keeps a heavy frame low. Give the kickstand, pedals, and handlebars room, and keep charging cords out of tire and walking paths. Check whether a front-wheel stand clears the brake rotor and fender, and whether the tire stays stable at normal pressure. A plain arrangement that works after a tiring ride will beat an overhead system that everyone avoids.

    Heavy electric bicycle parked in a floor rack near a garage outlet
    A floor rack is often the better answer when lifting a heavy electric bike would discourage daily use.

    Be cautious with ceiling storage

    Ceiling hoists and overhead cradles free wall and floor space, but they add lifting, rope management, and a falling-object concern. They also compete with the open garage door, tracks, opener, lights, and overhead racks. Use them only for bicycles light enough to handle safely and ridden rarely enough that the access penalty is acceptable.

    Verify the structure, fasteners, hardware capacity, locking method, and clear operating route from the exact manual. Never hang a bicycle where a partial release could reach a person or vehicle. If the ceiling location requires standing on another ladder while controlling the bike, choose a different storage method.

    Mock up the row before drilling

    Cut cardboard rectangles for the rack bodies and tape outlines for wheels, bars, and pedals. Mark stud locations. Bring every bicycle into position one at a time and rehearse the loading motion. Stagger heights only as much as each rider can manage.

    Leave the mockup for several days. If it blocks the route or requires moving another bike, revise it. Check the garage wall storage options for renters when permanent anchors are not permitted. A freestanding rack may consume more floor area, but it avoids unsafe guesses about an unfamiliar wall. If bikes must share the same surface with tools, compare the hardware and working heights in the garage wall storage systems guide before committing the studs.

    Write each rider’s name on the temporary position and try a normal weekday reset. Helmets, locks, pumps, and child seats need homes too. Watch which bike gets left in the aisle when someone returns tired or in a hurry. That abandoned bike usually exposes a hook set too high, a blocked loading lane, or an accessory that catches the neighboring handlebars. Fix the awkward step before drilling.

    Useful products to compare

    These links open current Amazon search results. Check the dimensions, manual, mounting hardware, warranty, and current availability for the exact model before you order.

    Before you buy or install

    Read the current manual for the exact product you are considering. Confirm its assembled dimensions, rated capacity, mounting requirements, included hardware, working clearances, warranty, and any limits that apply to your wall, floor, electrical circuit, or garage layout.

    Frequently asked questions

    Is it safe to hang a bike by one wheel?

    Use a rack designed for wheel storage and confirm the wheel, tire, bike weight, mounting surface, and hardware meet the manufacturer’s requirements. Do not force a fat tire, deep rim, fender, or incompatible wheel into a basic hook. Inspect the rack and contact point regularly.

    How far apart should vertical bike racks be?

    Spacing depends on handlebar width, bike size, stud locations, and whether heights are staggered. Feedback Sports suggests roughly 16 to 24 inches for its Velo Hinge setup as a starting point. Mock up the actual bikes and follow the exact rack instructions.

    What is the easiest storage for a heavy electric bike?

    A compatible floor stand is usually easiest because the bike can roll into place. A wall rack may carry the published weight but still require an uncomfortable lift. Consider the shortest and least strong regular rider, battery guidance, tire fit, and charging-cord route.

    Can a bike rack mount only to drywall?

    Use only the substrate and fasteners specified by the rack manufacturer. Many wall racks require a wood stud, masonry, or another solid support. Drywall by itself is not a safe default. If the wall structure is uncertain, choose a freestanding system or get qualified installation help.

  • Garage Ladder Storage Ideas That Keep the Rails Supported

    Garage Ladder Storage Ideas That Keep the Rails Supported

    Affiliate disclosure: As an Amazon Associate I earn from qualifying purchases. This article may contain affiliate links, and Bay & Bench may earn a commission at no extra cost to you. Read our full Affiliate Disclosure.

    The most useful garage ladder storage ideas support both rails, keep the ladder dry and inspectable, and let you remove it without climbing on something else. A light stepladder can hang low on a rated hook. A long extension ladder usually benefits from two horizontal supports or a secured vertical corner. Ceiling storage is possible, but the access and falling-object consequences are less forgiving. Measure the ladder’s folded size and weight, then map the garage door, vehicle, electrical equipment, and carrying route.

    Quick answer

    Store a long extension ladder horizontally on two or more rated supports spaced to prevent sag and movement, or vertically with a lower cradle plus a positive upper restraint. Keep a daily stepladder on a low wall hook or floor stand. Use ceiling storage only when the manufacturer approves the hardware and you can load it from the floor with full control. Do not hang ladders from rungs alone if the rack instructions call for rail support. Keep labels, feet, locks, ropes, rails, and rungs accessible for inspection.

    Garage ladder storage ideas compared

    Storage methodGood fitMain advantageMain check
    Low horizontal wall hooksStep or short multipurpose ladderEasy daily accessTwo-point support and door clearance
    High horizontal bracketsLong extension ladder used occasionallyKeeps floor clearControlled lifting and structure
    Secured vertical cornerLong ladder with narrow wall availableUses little wall widthBottom cradle and upper restraint
    Ceiling rackLight, rarely used ladderPreserves wall and floorDoor envelope and safe loading
    Freestanding floor slotHeavy or frequently used ladderNo overhead liftTip restraint and dry floor

    Place the ladder after mapping the larger garage storage system. Its removal path may be longer than the stored footprint.

    Measure folded size, weight, and moving shape

    Record total length, rail width, folded thickness, weight, and the location of ropes, locks, hinges, wheels, and stabilizers. A multipurpose ladder can be compact but dense. An extension ladder may be light enough to lift yet too long to turn between a parked vehicle and the garage door track.

    Carry the ladder through its real route with a spotter. Watch both ends. Mark the turning arc on the floor and wall. The storage location should let you grasp the ladder near balance without first sliding it across a car or electrical panel.

    Low wall hooks suit the ladder used every week

    Hang a stepladder where its center is roughly between knee and shoulder height for the regular user. Two hooks or a purpose-made ladder hook control the rails better than a single narrow point. Rubbermaid lists its FastTrack Ladder Hook at 50 pounds and allows it on the FastTrack rail or upright. The manufacturer page gives the exact model dimensions and installation context.

    Do not transfer that 50-pound number to a homemade screw hook or unrelated rail. Include the complete ladder and any attached accessories. Keep hook ends padded where the product provides it, and make sure the ladder cannot bounce free when a door slams.

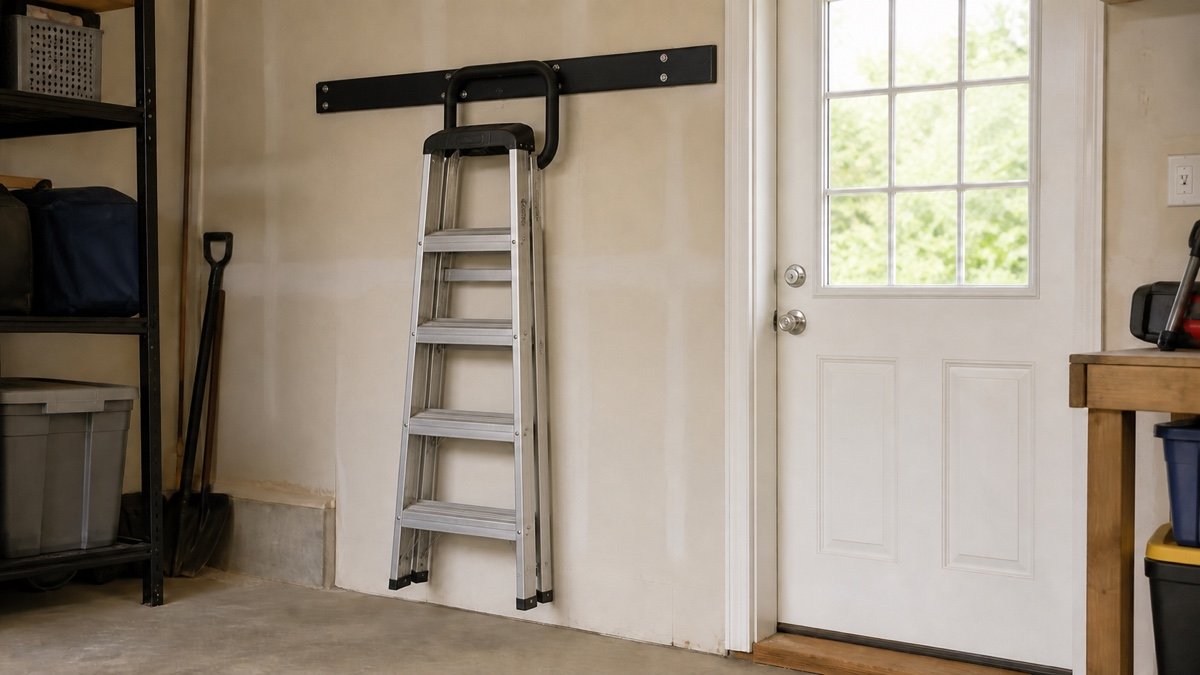
    Folded stepladder hanging low on a rated wall hook near a garage side door
    A frequently used stepladder belongs low enough to remove without climbing or twisting.

    Support long ladders at more than one point

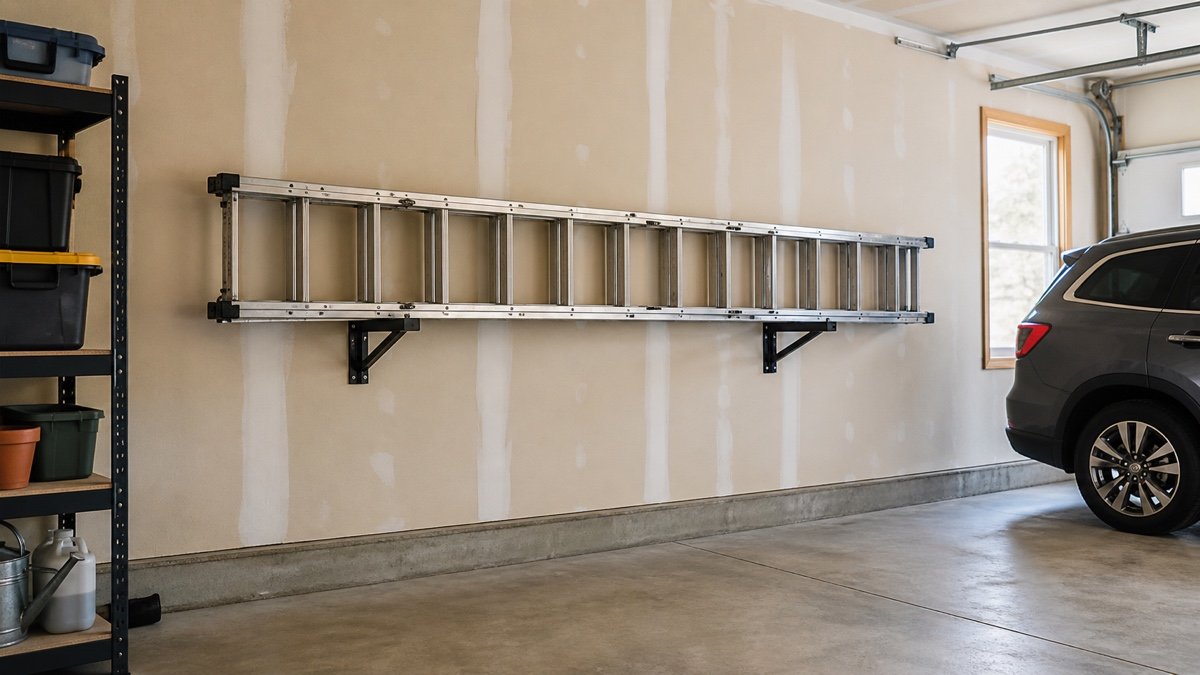
    A long ladder stored horizontally should not hang from one rung at its center. Use purpose-made supports placed according to the ladder and rack instructions so both rails remain controlled. The support spacing should prevent obvious sag while leaving feet, locks, rope, rails, and rungs visible.

    Mount the brackets into the structure and with the fasteners named by the hardware manufacturer. Drywall is a finish, not a default structural answer. Locate utilities before drilling. After loading, verify that the ladder cannot slide sideways or rotate off the brackets when lightly bumped.

    Vertical storage needs a bottom cradle and restraint

    A vertical extension ladder consumes little wall width. Place the feet in a stable lower cradle or floor stop so they cannot walk out. Add an upper strap, hook, or bracket that prevents the ladder from tipping into the room. The restraint should be easy to release while you remain balanced on the floor.

    Keep the ladder away from a corner that stays wet or collects road salt. Do not bury the lower feet behind bins. If you must move several items before reaching the restraint, the setup will become frustrating and may invite an uncontrolled pull.

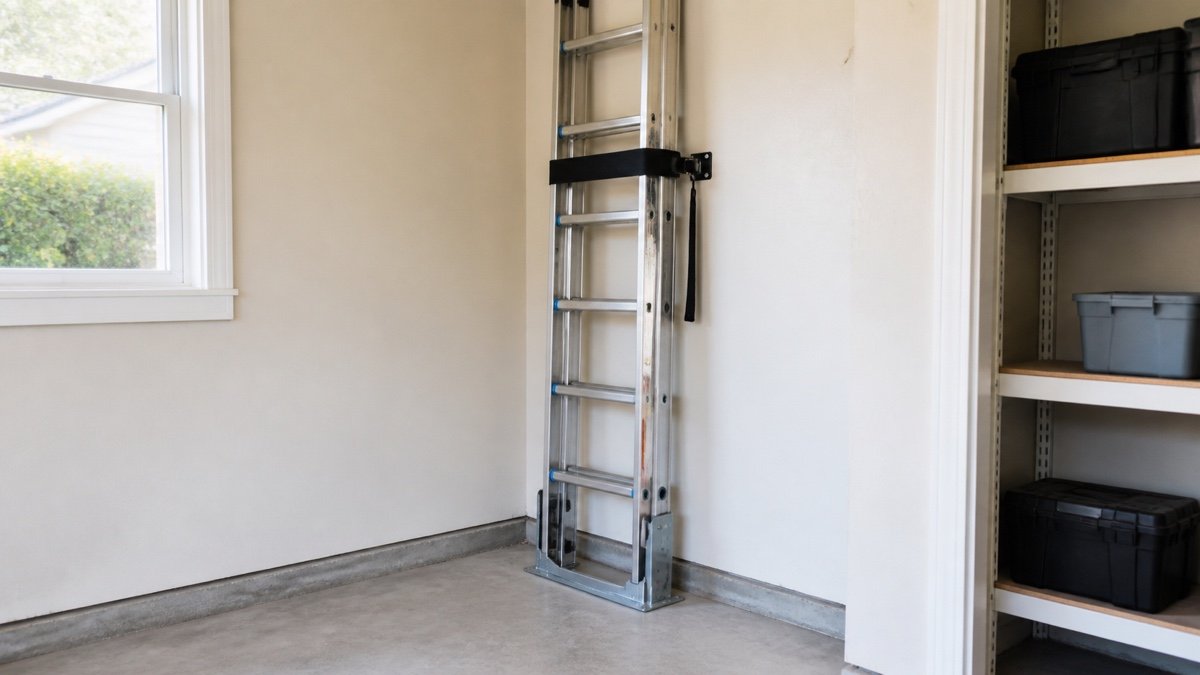
    Long extension ladder stored vertically in a secured garage corner
    Vertical storage uses little wall width but needs a positive restraint against sliding or tipping.

    Ceiling storage has the highest access cost

    A ceiling rack can hold a light, seldom-used ladder above an inactive zone. It also places a long object over people or property and may require lifting at shoulder height or above. Use hardware specifically rated for the ladder and mounting structure. Follow the manual for every fastener, stop, strap, and loading direction.

    Operate the garage door through a full cycle before installation. Include tracks, springs, opener arm, emergency release, lights, ceiling racks, roof accessories, and the tallest vehicle. The overhead garage storage clearance guide provides a measured way to protect that moving envelope.

    Do not block electrical and emergency access

    Keep the stored ladder and its removal route away from electrical panels, service equipment, outlets, furnace or water-heater access, fire equipment, and the path out of the house. A metal ladder is a long conductive object. Plan its carrying path so it cannot contact exposed energized equipment.

    The storage rack itself should not hide labels or force the ladder through a low light fixture. If the only open wall is occupied by required service clearance, find another location. Storage convenience does not override access requirements that apply at the property.

    Keep the ladder ready for inspection

    OSHA’s workplace rule is not a home-storage code, but its defect list is a useful inspection prompt. It calls for visible-defect checks and removing ladders with broken or missing rungs, damaged rails, loose fastenings, or other structural defects from service. See the current OSHA ladder standard for the workplace language.

    At home, follow the ladder manufacturer’s inspection and care instructions. Do not paint or wrap rails in a way that hides damage. Store ropes untangled, keep feet clean, and leave the duty labels readable. Mark a defective ladder clearly and keep it out of use until the manufacturer-approved remedy is complete.

    Avoid pressure on locks, ropes, and fragile parts

    Support the ladder where its manufacturer permits. A wall hook should not carry the entire weight through a rope, spreader, plastic tray, hinge knob, or rung if that component was not intended as the storage point. Fold and lock multipurpose ladders as directed before lifting them into place.

    Do not cinch a strap so tightly that it bends a rail. The restraint should prevent movement, not reshape the ladder. Check rubber feet and plastic end caps for prolonged contact with oils, solvents, heat, or sharp bracket edges.

    Keep storage dry and away from damaging work

    Choose a clean, dry section of the garage. Repeated road spray, standing water, fertilizer dust, pool chemicals, battery residue, and grinding debris can attack hardware or hide defects. Do not place a ladder where a vehicle tire throws salty slush against the feet each winter. Keep it away from heat sources and any finishing area where overspray could coat labels, locks, or rung surfaces.

    Wood ladders need the care stated by their manufacturer, while aluminum and fiberglass models have their own inspection concerns. Do not invent a protective coating. A glossy paint layer can conceal cracks or deterioration, and solvents may affect plastics or labels. Clean with the approved method, let the ladder dry, and return it to supports that do not trap moisture against one rail.

    Label the storage location without hiding the ladder label

    Keep the manufacturer label and duty rating visible. A small wall label beside the rack can identify the ladder’s normal location and remind household members to secure the upper restraint. It can also show which ladder belongs there when the garage contains a short step ladder and a long extension ladder.

    Do not add tape, paint, or a home-made instruction panel over warnings or inspection points. Save the manual in a garage file and photograph the model information. If the ladder is loaned out, inspect it again when it returns. A dropped ladder can look almost normal while a rail, foot, rope, or lock has changed.

    Test the removal path with the garage full

    Park the vehicle and put bins, bikes, and carts in their normal positions. Remove the ladder from the mockup, turn it, and carry it outside. Repeat the return. If one end passes near a windshield, opener, hanging light, or person-height hook, adjust the location.

    Compare the route with garage workshop aisle clearance. A clear daily aisle can still fail a 16-foot ladder turn. The route should not require climbing, reversing blindly, or resting the ladder on the vehicle.

    Garage door fully open below a ladder storage mockup taped near the ceiling
    Test the open door, tracks, opener, vehicle roof, and removal path before choosing a high location.

    Choose access over a perfectly empty floor

    A low wall hook is often better than a ceiling rack because the ladder gets used without drama. A secured vertical slot may beat horizontal brackets when the wall is short. A freestanding floor position is reasonable for a heavy ladder if it remains dry, restrained, and outside the walkway.

    Use the garage measuring guide to document the location, then install the rack exactly as instructed. Recheck fasteners after the first few removals and during routine garage cleanups. The ladder should feel boring to retrieve. That is a compliment.

    Useful products to compare

    These links open current Amazon search results. Check the dimensions, manual, mounting hardware, warranty, and current availability for the exact model before you order.

    Before you buy or install

    Read the current manual for the exact product you are considering. Confirm its assembled dimensions, rated capacity, mounting requirements, included hardware, working clearances, warranty, and any limits that apply to your wall, floor, electrical circuit, or garage layout.

    Frequently asked questions

    Is it better to store an extension ladder horizontally or vertically?

    Horizontal storage on two or more suitable supports controls a long ladder well and makes inspection easy. Vertical storage uses less wall width but needs a stable bottom cradle and positive upper restraint. Choose the method with the safer loading and removal path.

    Can I hang a ladder from one rung?

    Use only the support points and orientation allowed by the ladder and rack instructions. A single rung or hook may allow a long ladder to rotate, slide, or sag. Two purpose-made supports under appropriate rail locations are usually easier to control.

    How high should a ladder rack be?

    Put frequently used ladders low enough to load and remove while standing securely on the floor. High storage may suit a light, rarely used ladder if the structure, rack, and access method are approved. Test the full garage door and vehicle envelope first.

    Should I lock a stored ladder?

    A strap or retaining device can prevent the ladder from bouncing or tipping. Security may also matter if the garage is accessible. The restraint must not damage rails, ropes, hinges, or locks, and an authorized user should be able to release it from a stable position.

  • Slatwall vs Pegboard vs Track System for Garage Storage

    Slatwall vs Pegboard vs Track System for Garage Storage

    Affiliate disclosure: As an Amazon Associate I earn from qualifying purchases. This article may contain affiliate links, and Bay & Bench may earn a commission at no extra cost to you. Read our full Affiliate Disclosure.

    The slatwall vs pegboard vs track system decision sounds simple until you list what needs to hang. A garage wall can look organized in a product photo and still be irritating to use. The usual mistake is choosing the organizer first, then trying to make every rake, drill, extension cord, and box fit it. These three formats solve different storage problems. None is the automatic winner. The better choice depends on object size, how often the layout changes, and how much wall you want to cover.

    Quick answer

    Pegboard is usually the most efficient choice above a workbench where many small hand tools need fixed positions. A horizontal track is a good fit for long handled tools, bikes, ladders, hoses, and other bulky objects that need a few strong hooks. Garage rated slatwall makes sense when you want broad wall coverage and expect to mix hooks, baskets, shelves, and bins. Many garages work better with two systems than with one system stretched beyond its strengths.

    Start with the objects, not the wall system

    Make a rough inventory before comparing panels and rails. Put objects into four groups: small hand tools, long or awkward gear, items that need a basket or shelf, and things that should stay inside a closed cabinet. This takes twenty minutes and prevents a surprisingly expensive wall full of unused hooks.

    Pegboard earns its keep when the wall needs many close attachment points. Think screwdrivers, pliers, layout tools, sanding accessories, and small bins above a bench. A track does the opposite. It gives a small number of attachment points along a narrow horizontal rail, which is often enough for a shovel, bicycle, hose, or ladder. Slatwall sits between them. It covers more wall and accepts a wider mix of accessories, though the exact selection depends on the system.

    Measure the stored object as well as the wall. A bicycle hook needs room for the wheel and handlebars. A deep basket may project into a car door path. Run the first layout through our pegboard and slatwall layout planner, then mark the real footprint with painter’s tape.

    The practical differences at a glance

    FactorPegboardSlatwallHorizontal track
    Best everyday useSmall tools in dense layoutsMixed tools, bins, and display storageBulky gear on spaced hooks
    Wall coverageFull panel or selected areaUsually broad panel coverageNarrow rail across the wall
    RearrangingFast, but loose hooks may need retainersFast within the matching accessory systemVery fast along the rail
    Small item storageExcellent with bins and tool holdersGood with matching bins and shelvesLimited unless the system offers bins
    Large item storagePossible only within panel and hook ratingsGood when the system is rated for the loadOften the cleanest choice
    Accessory lock inHole size and board thickness matterProfiles are commonly proprietaryRails and hooks are commonly proprietary

    The table describes common formats, not a load chart. Published ratings vary by product, fastener pattern, wall construction, and accessory. Check the manual for the exact panel or rail you are considering.

    When pegboard is the sensible answer

    Pegboard is hard to beat above a working bench. The hole grid lets you place a short hook beside a long one, tuck a driver holder into a narrow gap, and change the layout without drilling another hole in the wall. You can see missing tools at a glance. That matters more during a project than a perfectly symmetrical display.

    The weak point is often the accessory fit, not the board. Pegboard comes in different materials, thicknesses, hole sizes, and hole spacing. Hooks advertised as universal may sit loosely or fail to engage a thicker panel. Buy a small accessory pack first and test it before ordering dozens. Retaining clips can keep frequently grabbed hooks from coming off with the tool.

    Leave a gap behind the panel so hook ends have room to pass through. Some metal panels form their own standoff, while wood or fiber panels usually need a frame or spacers. Mount the support into appropriate structure rather than asking the thin face of drywall to carry the layout.

    Pegboard becomes less pleasant with deep objects. A hedge trimmer, folded ladder, or heavy bicycle reaches farther from the wall and applies more leverage. Even when a specialty pegboard system publishes a suitable rating, the crowded hole pattern can make a large item feel wedged among small tools. Give bulky gear its own zone.

    When pegboard is the sensible answer in a practical garage setup
    When pegboard is the sensible answer, shown in a practical garage layout.

    Why people choose garage slatwall

    Slatwall gives the wall a finished, continuous surface. Horizontal channels run across the panel, so hooks and baskets can move sideways without leaving a patchwork of old screw holes. It is a good visual fit when the same wall needs to hold sports equipment, hand tools, cords, helmets, and a few containers.

    The word slatwall is broad. Retail display panels, wood based shop panels, PVC composite garage panels, and metal systems can look similar while carrying very different ratings. A hook that fits one channel profile may not seat correctly in another. Treat the panel and accessories as a matched system unless both manufacturers explicitly say otherwise.

    Full wall coverage costs more than one narrow track, and it takes more work to cut around outlets, switches, corners, and wall cabinets. That cost buys flexibility. You do not have to know the final hook location while installing the panels. If the garage changes from children’s bikes to lawn equipment a few years later, the wall can change with it.

    Slatwall also gives you places for baskets and short shelves without making the wall look improvised. Still, it should not replace proper shelving for every tote. Deep shelves hung high on a panel can make contents awkward to reach and place more force away from the wall. Use the system’s own load rules and keep dense storage low.

    Where a track system works best

    A horizontal garage track uses little wall area. Once the rail is mounted, hooks can usually slide or clip into new positions. That makes a track appealing for an unfinished garage or a wall that may receive cabinets later. The open drywall around it stays accessible.

    Tracks are particularly good for objects with odd outlines: long handled garden tools, folded chairs, hoses, ladders, strollers, and bicycles. Each item gets breathing room. You can move one hook instead of reorganizing a whole panel.

    The limitation shows up with small objects. Filling a track with tiny hooks and cups often wastes rail length, and the result can be less stable than a dense pegboard arrangement. Keep the track for gear that genuinely benefits from a substantial hook. Put drill bits, driver handles, and measuring tools closer to the bench.

    Rail shape and locking details differ among brands. Do not assume a hook will work because it appears to hang on the lip. A partially engaged hook can look fine while empty and shift when loaded. Buy accessories made for the selected system, observe each accessory rating, and follow the mounting instructions for the wall type.

    Where a track system works best in a practical garage setup
    Where a track system works best, with the storage details visible in context.

    Installation changes the comparison

    The best organizer on paper can be the wrong one for a particular wall. Find studs, wiring, plumbing, masonry joints, and existing damage before choosing a panel size. Measure stud spacing instead of assuming it. An outlet in the center of a proposed slatwall area creates more cutting work than it would with a single track.

    Pegboard usually needs support around its perimeter and often across the middle. Full slatwall installations may need repeated fasteners across every panel. A track has fewer square feet of material, but its fasteners carry concentrated loads. None of these systems should be fastened according to a generic online diagram when the product includes its own instructions.

    Wall flatness matters too. A bowed wall can twist a rigid panel. An uneven masonry surface may keep a rail from sitting flat. Correct the mounting surface in the way the manufacturer permits. Do not force the organizer against a hump and hope the screws pull it straight.

    Plan height with the object attached, not just the empty hook. A rake handle can hit the ceiling. A bicycle may hang low enough to meet a car hood. Our broader garage measuring guide covers door travel, parking clearances, and work zones.

    A hybrid wall is often better

    One useful layout is a pegboard centered over the workbench, a track near the garage door for yard tools, and a short slatwall section for sports gear that changes with the season. This looks less uniform than a single showroom system, but it usually works better.

    Keep frequently used tools between comfortable shoulder and waist height. Place long tools where they can lift off the hook without striking a shelf. Reserve upper positions for light items. A wall mounted cabinet can handle chemicals, sharp items, and anything that should be kept away from children.

    Leave empty space. Filling every hole and channel on installation day gives you nowhere to put the next tool. A quarter of the wall can remain open without being wasted. That spare capacity will matter later.

    If the garage is still in the planning stage, begin with the garage storage planning guide. It helps separate parking, work, household, and outdoor equipment zones before hardware starts going up.

    Buying checklist

    • List the exact objects that will hang in the first six months.
    • Measure their weight, depth, and removal path.
    • Confirm panel material, rail profile, hole size, and accessory compatibility.
    • Read separate ratings for the wall system and each hook, basket, or shelf.
    • Check the required wall construction, fastener pattern, and hardware.
    • Price a usable setup, including hooks, bins, trim, screws, and spacers.
    • Verify that additional accessories are readily available before committing to a proprietary system.
    • Leave clear wall space for future changes.

    For a bench focused tool wall, pegboard is the simple starting point. For a flexible finished wall, slatwall is easier to expand. For large hanging objects, a track is tidy and efficient. The choice gets much easier once each wall zone has one job.

    Useful products to compare

    These links open current Amazon search results so you can compare dimensions, manuals, ratings, and availability for the exact models on your shortlist.

    Before you buy or install

    Check the current manual for the exact product you are considering. Confirm the assembled dimensions, load rules, mounting requirements, included hardware, clearances, warranty, and any limits that apply to your wall, floor, or garage layout.

    Frequently asked questions

    Is slatwall stronger than pegboard?

    Material alone does not answer that. Compare the published rating for the exact panel, its mounting method, and the specific hook or shelf. A garage rated pegboard can outperform a light display panel, and the reverse can also be true.

    Can pegboard hooks fit slatwall or track rails?

    Usually not. The attachment shapes are different, and even similar looking rail systems may use incompatible profiles. Use accessories approved for the exact system.

    Which system is best for bikes?

    A rated track or garage slatwall system with a matching bicycle hook is often easier to position than basic pegboard. Check the bicycle weight, wheel or frame contact, wall mounting, and the hook rating.

    Do I need to cover the whole garage wall?

    No. Selected zones are usually more economical. Cover the workbench area with pegboard or slatwall and use shorter tracks where bulky gear needs to hang.

  • Wall-Mounted vs Freestanding Garage Shelves: Which Fits Better?

    Wall-Mounted vs Freestanding Garage Shelves: Which Fits Better?

    Affiliate disclosure: As an Amazon Associate I earn from qualifying purchases. This article may contain affiliate links, and Bay & Bench may earn a commission at no extra cost to you. Read our full Affiliate Disclosure.

    The wall-mounted vs freestanding garage shelves decision sounds simple until you put both options in a real room. A shelf can be strong, well made, and still be wrong for the garage. Wall-mounted shelving clears the floor and can span awkward equipment below. Freestanding shelving is easier to place, easier to move, and less dependent on the wall. The better choice comes down to what you store, what the wall can support, and how the garage changes through the year. Those practical limits matter more than whether one format looks cleaner.

    Quick answer

    Choose wall-mounted garage shelves when you have a verified mounting structure, need open floor space below, and are comfortable with a fixed layout. Choose freestanding shelves when the walls are unsuitable, the layout may change, or you want simpler assembly. A mixed setup often works best: fixed wall shelves above equipment, plus a freestanding rack for heavy bins that need to stay low.

    Start with the room, not the shelf

    Stand in the garage with both vehicles parked where they normally sit. Open every car door, lift the hatch, move the mower, and walk the route from the house to the driveway. The empty rectangle on a product page doesn’t show any of that.

    Wall-mounted shelves work well where the floor needs to stay open. A mower, snow blower, rolling cart, or shop vacuum can live underneath. Freestanding racks claim floor space from the first day, but they can cover a wall that isn’t suitable for structural mounting. They can also move when a workbench grows or a second vehicle arrives.

    Measure the usable wall width, available depth, and clear aisle before comparing products. Our garage measuring guide covers doors, outlets, controls, and vehicle movement that are easy to miss. If shelf depth is the main problem, the 18 vs 24 inch shelf comparison gives that decision its own treatment.

    Where wall-mounted shelves earn their place

    The obvious benefit is a clear floor. That matters in a garage because dirt, leaves, and water collect around anything that sits permanently at ground level. Open space is easier to sweep, and it leaves room for equipment with an irregular footprint.

    Wall shelving can also start above a work surface or above the hood line of a parked mower. You choose the vertical position rather than accepting the lowest shelf height built into a rack. A long run may feel less bulky because there are no front posts breaking up the view.

    There is a tradeoff. The layout becomes tied to the wall and to the manufacturer’s approved mounting points. Stud position, masonry condition, shelf depth, bracket spacing, fasteners, and the stored load all matter. Drywall is a finish, not proof of support. Find out what is behind it before buying a system, and use the exact installation instructions for that model.

    Wall-mounted shelves are a sensible match for totes, garden supplies, detailing gear, and other items that fit the published shelf depth. Keep the heaviest objects within comfortable reach and avoid loading a high shelf with something you can barely lift on the floor.

    Where wall-mounted shelves earn their place in a practical garage setup
    Where wall-mounted shelves earn their place, shown in a practical garage layout.

    Why freestanding shelves are easier to live with

    A freestanding rack asks less of the wall. Assemble it on a suitable floor, level it as the instructions require, and you can start organizing without opening drywall or drilling masonry. That makes it useful for renters, unfinished block walls, and garages crowded with plumbing or electrical runs.

    Adjustable shelf levels are another practical advantage. If the camping cooler is replaced by a taller model, the opening can often be changed without relocating the entire unit. A rack can also move to the opposite wall during a garage redesign, although a loaded rack should be emptied before it moves.

    The front posts cost a little access width, and the feet occupy floor area. A sloped, cracked, or uneven slab may need approved leveling provisions. Tall racks may also require restraint against tipping according to the maker’s directions. Being called freestanding does not automatically mean a unit should remain unattached in every situation.

    Put dense tool cases and other heavy objects on lower shelves. Lighter totes can go higher. This lowers the center of gravity and makes everyday lifting less awkward. Still, the rack’s published rating and distribution rules set the limit. A tidy arrangement isn’t a substitute for those numbers.

    Why freestanding shelves are easier to live with in a practical garage setup
    Why freestanding shelves are easier to live with, with the storage details visible in context.

    Wall-mounted and freestanding shelves compared

    Decision pointWall-mounted shelvesFreestanding shelves
    Floor accessFloor can remain open below the shelf runPosts and feet stay on the slab
    Wall requirementNeeds a suitable, verified mounting structureLess dependent on the wall, though restraint may still be required
    Layout changesRelocation means removing and reinstalling hardwareCan be repositioned after it is fully unloaded
    Uneven surfacesWall condition and alignment affect installationFloor slope and approved leveling method affect stability
    AccessNo front posts, but brackets may limit some placementsFront posts reduce the clear loading width
    Best fitFixed zones above equipment or a work surfaceHeavy bins, changing inventories, and unsuitable walls

    Neither column tells you which product can carry more. Capacity varies by design, size, mounting, and load distribution. Compare the manuals for the exact models on your shortlist.

    Wall and floor conditions can settle the decision

    A finished wall can hide studs, blocking, pipes, and wiring. A masonry wall can have hollow areas, weak joints, or a surface that needs a specific anchor. If you cannot identify a suitable structure and match it to the shelf instructions, don’t guess. A qualified installer can assess a questionable wall.

    Freestanding racks shift the question to the slab. Check for a strong slope, broken edges, drains, curbs, and places where water regularly pools. Follow the maker’s directions for leveling, foot placement, anchoring, and wall restraint. Don’t stack scrap wood under one leg as a permanent fix.

    Also look upward. Garage door tracks, opener hardware, windows, overhead lights, and an open vehicle hatch may occupy space above either shelf style. Mark the proposed shelf outline with painter’s tape, then operate the door and vehicle hatch while someone watches from a safe position.

    Capacity is a chain, not one headline number

    Product listings often lead with a large capacity figure. Read the smaller wording. The number may apply per shelf, per complete unit, or only when the load is spread evenly. Accessories and added shelf spans can have different limits.

    For a wall system, the shelf deck, brackets, rails, fasteners, mounting pattern, and building structure all take part. The weakest verified limit governs the setup. For a freestanding rack, shelf beams, deck panels, posts, connectors, feet, floor condition, and any required restraint matter in the same way.

    Weigh loaded totes if the contents are dense. A bin of shop towels and a matching bin of metal hardware look identical from the aisle, but they don’t behave alike. Place concentrated loads over supported areas as the instructions allow, and stop using a unit if you notice movement, bent parts, loose hardware, or damage around mounting points.

    Depth and access matter every day

    Deep shelves hold more front to back, but capacity isn’t useful if the rear tote disappears behind the front one. In a narrow garage, extra depth also steals door clearance and walking space. A shallow wall shelf may be perfect for car care bottles and small bins, while a deeper freestanding rack handles large totes at the end wall.

    Run the intended tote layout through the garage shelving planner. Measure the loaded tote, including handles and a lid that bows upward. Leave enough opening height to lift the rim over the shelf edge without scraping your knuckles.

    Think about retrieval, too. Items used every week belong between knee and shoulder height when practical. Seasonal items can sit higher. Store heavy objects low, and don’t plan around repeated twisting from a ladder.

    A mixed layout often feels less forced

    You don’t have to choose one format for the whole garage. A wall-mounted run above lawn equipment keeps an awkward floor zone useful. A sturdy freestanding rack at the back wall can hold bulky bins and tool cases. Closed cabinets can take chemicals or items that need controlled access, subject to their labels and local requirements.

    Before ordering, compare the complete dimensions, shelf adjustment method, deck material, replacement parts, installation instructions, and warranty. The garage shelving buying guide turns those checks into a broader shopping process. Our steel vs resin guide helps once you have settled on the basic format.

    The most useful system is the one that leaves the garage easy to move through after everything is loaded. Tape both footprints into the room, place the actual bins inside those boundaries, and live with the mock layout for a day. Annoying clearances show up quickly.

    Useful products to compare

    These links open current Amazon search results so you can compare dimensions, manuals, ratings, and availability for the exact models on your shortlist.

    Before you buy or install

    Check the current manual for the exact product you are considering. Confirm the assembled dimensions, load rules, mounting requirements, included hardware, clearances, warranty, and any limits that apply to your wall, floor, or garage layout.

    Frequently asked questions

    Are wall-mounted garage shelves stronger than freestanding shelves?

    Not automatically. Strength depends on the exact shelf design, span, brackets or frame, fasteners, installation, building structure, and load distribution. Compare published ratings and instructions for the specific models.

    Do freestanding garage shelves need to be anchored?

    Some do. Height, depth, floor condition, location, and the manufacturer’s instructions affect restraint requirements. Follow the manual rather than relying on the word freestanding.

    Which shelf type works better in a small garage?

    Wall-mounted shelves can preserve floor space, while a shallow freestanding rack may work where the wall cannot be drilled. Vehicle and door clearance usually decide the better fit.

    Can I combine both shelf types?

    Yes. Wall shelves are useful above equipment, while a freestanding rack can carry bulky bins at a convenient height. Keep each system within its own installation and loading rules.

  • Garage Shelving Buying Guide: Depth, Load, and Layout

    Garage Shelving Buying Guide: Depth, Load, and Layout

    Affiliate disclosure: As an Amazon Associate I earn from qualifying purchases. This article may contain affiliate links, and Bay & Bench may earn a commission at no extra cost to you. Read our full Affiliate Disclosure.

    Garage shelving works when the shelf matches the objects, not when the box carries the largest capacity number. Depth, clear opening, shelf surface, and the way you retrieve a bin matter every week.

    Quick answer

    Measure the largest tote and the parking aisle. Compare usable shelf dimensions, per shelf ratings, upright spacing, surface material, leveling, restraint instructions, and whether replacement shelves or add-on bays are available.

    Garage Shelving Buying Guide: Depth, Load, and Layout
    Planning example for garage shelving buying guide: depth, load, and layout.

    Start with the objects

    List the widest, deepest, tallest, and heaviest objects intended for the rack. Measure totes at the lid and handles. A shelf can be wide enough overall while the clear opening between uprights is too narrow.

    Keep dense tools low. Reserve eye-level shelves for frequently used bins and supplies.

    Depth changes the aisle

    Eighteen inch shelves keep contents visible and preserve six inches compared with a 24 inch unit. Deeper shelves handle larger totes, but small objects disappear behind one another.

    Use the garage shelving planner and read the depth comparison before buying.

    Read load ratings carefully

    Check the rating for each shelf and the whole unit. Look for conditions such as evenly distributed load and required wall restraint. Shelf capacity does not override floor condition, assembly errors, or instability from a tall narrow frame.

    Do not use the rack as a ladder.

    Choose a shelf surface

    Wire permits airflow and lets dust fall through, but small parts and spills need trays. Solid steel, resin, or composite decks support little objects and wipe clean differently. Moisture matters, especially with unfinished particleboard.

    The wire vs solid guide looks at the daily tradeoffs.

    Material and environment

    Steel handles dense loads well when the complete design and finish suit the environment. Resin avoids rust and is easy to wash, but heat, shelf span, and product rating still matter. Compare the exact models in our steel vs resin shelving guide.

    Specification sheet

    SpecificationWhy it matters
    Outside W x D x HRoom and aisle fit
    Clear shelf openingActual object access
    Adjustable spacingTall bins and changing use
    Per shelf ratingLocal load limit
    Total ratingComplete unit limit
    Surface materialSpills, small parts, moisture
    Restraint instructionsStability and installation

    Shelf spacing sets usable capacity

    Count shelf levels only after assigning bin heights. Five closely spaced decks may hold less useful gear than four well-spaced shelves. Include the thickness of beams and decks when calculating the clear opening.

    Put the tallest object in the lowest practical zone. Raising it above shoulder height makes both loading and inspection harder.

    Test the floor and the feet

    Garage floors slope toward the door and may have joints, curbs, or drains. Small adjustable feet can help with minor variation when the product allows it, but they are not a cure for a poor location. Check whether feet, casters, or base plates concentrate load on a fragile surface.

    Assemble and level the empty rack before adding weight. Recheck it after the first full loading.

    Useful products to compare

    Use these searches to compare current dimensions, ratings, manuals, and availability. Check the exact model before buying.

    Before you buy or install

    Download the current manual for the exact model. Confirm assembled and packaged dimensions, individual and total load ratings, required clearances, mounting structure, included hardware, warranty, and inspection instructions. Product listings and specifications can change.

    Mark the footprint or platform edges in the garage. Operate the vehicle doors and garage door, carry the intended bin through the access route, and check service panels and utilities. Do not improvise around electrical, gas, fire, or structural conditions.

    Frequently asked questions

    How deep should garage shelves be?

    Use the shallowest shelf that fits the largest intended bin while preserving the aisle.

    Do high load ratings mean the rack is stable?

    No. Stability also depends on assembly, floor, proportions, restraint, placement, and correct loading.

    Are adjustable shelves worth it?

    Usually, if the adjustment range matches your bins and the hardware is easy to reposition safely.

    Last reviewed: July 2026. Verify current product specifications and installation requirements before purchase.

  • Overhead Garage Storage Buying Guide: Fit, Access, and Load

    Overhead Garage Storage Buying Guide: Fit, Access, and Load

    Affiliate disclosure: As an Amazon Associate I earn from qualifying purchases. This article may contain affiliate links, and Bay & Bench may earn a commission at no extra cost to you. Read our full Affiliate Disclosure.

    An overhead rack earns its space only when the garage door still moves freely, the totes fit, and you can load them without an awkward climb. Start with the room. Product size comes later.

    Quick answer

    Measure the lowest obstruction, trace the full garage door path, choose the tote height, and decide how you will reach the platform. Then compare rack size, drop range, mounting layout, and the manufacturer’s published ratings.

    Overhead Garage Storage Buying Guide: Fit, Access, and Load
    Planning example for overhead garage storage buying guide: fit, access, and load.

    Begin with the moving garage door

    The ceiling may look empty while the door is closed. That changes as the panels rise, curve through the tracks, and settle overhead. Measure the door at several points in its travel. Include tracks, springs, opener rail, emergency release, lighting, and any low beam.

    Use our overhead rack clearance calculator for the first geometry check. The result is a planning aid, so verify it against the current rack manual and the real moving door.

    Choose platform size by tote count

    A 2 by 4 foot rack is easier to place in a broken ceiling area and usually easier to access from one side. A 4 by 8 platform holds far more, but its center can be difficult to reach. Large platforms also demand a clean mounting layout.

    Place the actual totes on the floor inside a taped rectangle. If you cannot arrange them without stacking lids against one another, the ceiling will not fix the problem. Read our 2×4 vs 4×8 rack comparison before choosing.

    Treat the drop as working space

    Rack drop controls two things at once: the height available above the deck and the clearance below it. Adjustable posts can help fit a sloped ceiling or different tote heights, but extra adjustment holes do not make every setting compatible with the installation instructions.

    Leave room for fingers, lids, and the angle used to place a tote. A bin that matches the opening exactly will be unpleasant to load.

    Compare ratings without mixing them

    Do not treat the headline capacity as permission to fill every tote with dense hardware. Check whether the number is for the complete rack, one section, or an evenly distributed load. The ceiling structure and fasteners are separate limits.

    The weight capacity guide explains the rating chain. When the structure or mounting location is uncertain, ask a qualified professional rather than guessing.

    Access matters more than maximum volume

    Overhead storage is best for light seasonal objects: camping textiles, holiday decor, empty coolers, and rarely used sports gear. Dense tools and liquids are poor candidates. The retrieval route needs a stable ladder position that is not squeezed between a vehicle and a cabinet.

    Label the short face of every tote. Better yet, keep a simple phone inventory so you do not climb just to find out what is inside.

    A short buying checklist

    CheckWhat to record
    Ceiling geometryLowest obstruction and usable mounting zone
    Door movementClearance through the complete travel path
    PlatformOutside size, deck type, sections, edge lip
    DropAllowed adjustment range and installed height
    MountingRequired structure, spacing, hardware, instructions
    CapacityRack rating and distribution conditions

    Deck style affects daily use

    Wire decks make it easy to see a tote from below and keep the platform visually lighter. Closely spaced bars support more bin shapes than a coarse grid, but the manual still controls what may sit on the deck. Solid panels stop small objects from dropping through, though they can hide leaks and collect dust.

    Check the platform edge as well. A raised lip can help contain a bin, but it also increases the height needed to lift that bin onto the rack. Try the motion at floor level with a board representing the lip.

    Plan the first year, not a fantasy garage

    Write a short inventory before choosing capacity. Six holiday totes, two empty coolers, and camping bedding make a real plan. “Future storage” does not. Undefined capacity tends to fill with objects nobody wants to lift down.

    Photograph the loaded platform from below and keep the photo with the model number, manual, tote weights, and installation date. That record makes later changes easier to judge.

    Useful products to compare

    Use these searches to compare current dimensions, ratings, manuals, and availability. Check the exact model before buying.

    Before you buy or install

    Download the current manual for the exact model. Confirm assembled and packaged dimensions, individual and total load ratings, required clearances, mounting structure, included hardware, warranty, and inspection instructions. Product listings and specifications can change.

    Mark the footprint or platform edges in the garage. Operate the vehicle doors and garage door, carry the intended bin through the access route, and check service panels and utilities. Do not improvise around electrical, gas, fire, or structural conditions.

    Frequently asked questions

    Can a rack go above the garage door?

    Sometimes. The answer depends on the full door path, opener, tracks, rack drop, tote height, and the mounting instructions.

    Is a larger rack always better?

    No. A smaller rack may fit the structure and retrieval route better, and its center is easier to reach.

    What should go overhead?

    Light, stable, infrequently used items are the best candidates. Keep heavy, hazardous, or heat-sensitive products elsewhere.

    Last reviewed: July 2026. Verify current product specifications and installation requirements before purchase.

  • How to Plan Garage Storage Before You Buy Anything

    How to Plan Garage Storage Before You Buy Anything

    Affiliate disclosure: As an Amazon Associate I earn from qualifying purchases. This article may contain affiliate links, and Bay & Bench may earn a commission at no extra cost to you. Read our full Affiliate Disclosure.

    The fastest way to waste money on garage storage is to buy containers before deciding what must remain accessible. A reliable plan begins with the room, the vehicles, and the objects—not a cabinet catalog.

    Quick answer

    Create a measured base plan, classify every object by size and frequency, mark fixed no-storage zones, and test proposed footprints with painter’s tape. Only then make a product list.
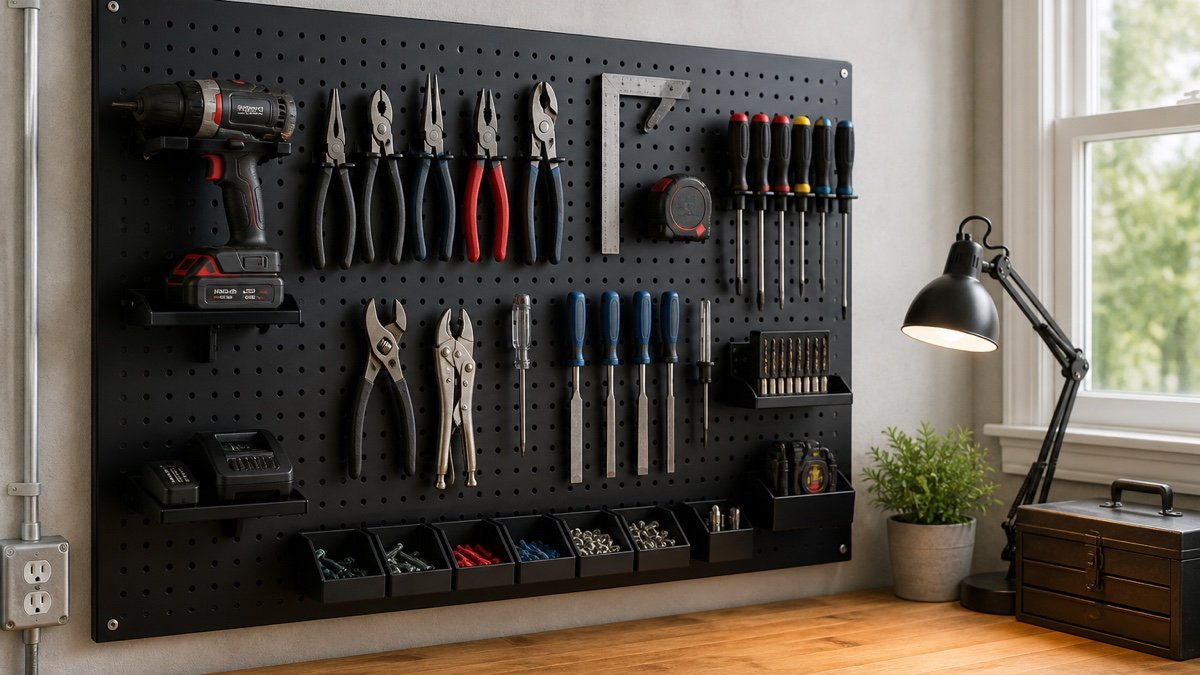
    Useful products to compare

    These searches are a practical starting point for comparing current sizes, materials, load ratings, and availability.

    Step 1: define what the garage must do

    Write the room’s jobs in order of importance: park one or two vehicles, support woodworking, hold garden equipment, create an entry zone, charge tools, store sports gear, or handle household overflow. A garage cannot optimize every job equally. Ranking them makes tradeoffs explicit.

    Also decide what does not belong. Donations, broken equipment, expired supplies and indoor-only possessions should leave before you calculate capacity.

    Step 2: inventory by frequency, size, and risk

    Create four frequency groups: daily, weekly, seasonal and archive. Add the dimensions of unusually large items and note anything sharp, hazardous, moisture-sensitive or valuable. Daily objects belong between knee and shoulder height near their point of use. Seasonal goods can move higher. Heavy objects should remain low.

    Do not estimate tote dimensions from memory. Measure the widest point, including lids and handles.

    Step 3: draw the fixed room

    Follow the full garage measurement procedure. Draw walls, openings, curbs, steps, columns, utilities, outlets, windows, door tracks and ceiling equipment. Mark every area that must remain accessible. Record floor slope and wall irregularities because they affect cabinet leveling.

    Step 4: reserve movement before storage

    Place the vehicle footprint, then add the real door openings and walking path. Include tailgate or hatch clearance. Test the route from the house door to the driveway while carrying groceries or a large bin. Storage that technically fits but forces people into awkward movements has failed the plan.

    Step 5: assign zones

    Group related objects where they are used: yard tools near the exterior door, car-care supplies near the vehicle, hand tools around the bench, household stock near the interior door. A zone should include both storage and a retrieval path.

    Use vertical walls for frequent tools, closed cabinets for controlled storage, and high zones only for light, infrequent items.

    Step 6: tape, test, and phase the purchase

    Mark cabinet depth and door swings on the floor. Use cardboard to represent tall units where sightlines matter. Live with the outline for several days. Then create a three-phase list: essential infrastructure, high-value storage, and optional finishing pieces.

    Before ordering cabinets, consult the garage cabinet buying guide and compare the exact external and internal dimensions.

    Before you order: the verification pass

    Put the exact model number—not merely the product-family name—at the top of your worksheet. Copy the assembled exterior dimensions, usable interior dimensions, individual shelf or drawer ratings, total cabinet weight, packaged dimensions, adjustable-foot range, and required clearances from the current manufacturer page and manual. Note which accessories are included and which appear only in styled photographs.

    Then return to the garage with painter’s tape. Mark the cabinet case, handles, open doors or extended drawers, and the path needed to load the largest object. Park the vehicle in its normal position and test every door, hatch, step, switch and service panel. Photograph the mock-up from the driver’s seat, house entry and driveway. If a critical measurement is unpublished, ask the manufacturer before placing the order.

    Finally, calculate total delivered cost: cabinet, worktop, shelves, drawer liners, casters or feet, mounting rails, appropriate fasteners, delivery surcharge, assembly help and sales tax. A lower sticker price can become the more expensive installation when essential components are optional.

    Installation-day checklist

    • Inspect packages for damage before assembly and keep model labels and receipts.
    • Read the complete manual before lifting or fastening anything.
    • Confirm the floor is stable and the planned attachment locations are suitable.
    • Use a second capable person whenever the manual or cabinet size calls for one.
    • Level and square the case before aligning doors and loading shelves.
    • Install wall mounting or tip restraints exactly as instructed.
    • Load heavy objects low and distribute weight within every shelf and drawer rating.
    • Recheck fasteners, leveling and door alignment after the cabinet has been loaded.

    Do not improvise around electrical, gas, plumbing, fire-safety or structural conditions. When the required attachment or clearance is uncertain, pause and consult a qualified professional.

    Common mistakes to avoid

    Most disappointing installations trace back to one of five mistakes: measuring only the empty wall; treating total capacity as a per-shelf rating; forgetting doors, drawers and vehicle movement; selecting depth from a catalog image; or filling every wall without reserving adaptable space. A slower specification check is cheaper than returning a pallet-sized cabinet.

    Frequently asked questions

    Should I design around bins or cabinets first?

    Inventory first, then choose a small family of bin sizes and cabinetry that fits them. Starting with random bins often wastes shelf depth.

    Can I plan without design software?

    Yes. A scaled graph-paper drawing plus painter’s tape is often more useful because it tests the actual room.

    What is the most common planning mistake?

    Ignoring movement: car doors, cabinet doors, drawers, steps, garage-door tracks and the path of a person carrying a bulky item.

    Last reviewed: July 2026. Product specifications can change; check the manufacturer’s current documentation before purchase.

  • Garage Storage Systems: How to Build One That Actually Works

    Garage Storage Systems: How to Build One That Actually Works

    Affiliate disclosure: As an Amazon Associate I earn from qualifying purchases. This article may contain affiliate links, and Bay & Bench may earn a commission at no extra cost to you. Read our full Affiliate Disclosure.

    A useful garage storage system is not the one with the most cabinets. It is the one that keeps the floor clear, puts frequently used gear within reach, protects hazardous items, and still lets every door, drawer, vehicle, and person move safely.

    Quick answer

    Start with zones and clearances, then choose storage hardware. Use closed cabinets for dust control and hazardous supplies, open wall storage for frequently used tools, overhead storage for light seasonal items, and mobile units where the work changes location.

    Useful products to compare

    These searches are a practical starting point for comparing current sizes, materials, load ratings, and availability.

    The five layers of a complete garage storage system

    Think of the room as five connected layers rather than one wall to fill.

    1. Floor and traffic layer: parking footprints, walking routes, door swings, steps and appliance access.
    2. Daily-use layer: items reached weekly—hand tools, chargers, sports gear and cleaning supplies.
    3. Closed-storage layer: dusty, sharp, valuable or visually messy items.
    4. High-storage layer: light seasonal gear that can be retrieved safely.
    5. Work layer: a bench, tool cart, charging point and task lighting.

    When those layers overlap carelessly, a garage feels cramped even when it contains plenty of nominal storage capacity.

    Choose storage by object, not by appearance

    Make an inventory before shopping. Record the largest dimensions and approximate weight of bulky objects, then sort everything by frequency of use. Long-handled garden tools need height; totes need shelf depth; small fasteners need drawers; chemicals need secure storage compatible with their labels; bicycles need a retrieval path, not merely a hook.

    A cabinet advertised with a large total capacity can still be a poor fit if shelf spacing, door opening, or internal depth does not match what you own.

    Cabinets, wall panels, shelves, and overhead racks

    Storage typeBest forMain constraint
    Closed cabinetsTools, supplies, dust controlDepth and door clearance
    Slatwall or pegboardFrequently used toolsVerified wall attachment and rated accessories
    Open shelvingBins and bulky itemsVisual clutter and dust
    Overhead racksLight seasonal goodsCeiling structure, door tracks, safe lifting
    Mobile cartsProject toolsParking space and caster quality

    Plan the system in the right order

    Use the sequence in our garage storage planning guide: measure first, mark no-storage zones, reserve the vehicle envelope, assign activity zones, then select products. The companion measurement checklist covers slopes, curbs, outlets, panels, windows and garage-door hardware that simple width-by-depth measurements miss.

    Mock up every cabinet footprint with painter’s tape. Open the car doors, carry a tote through the aisle, lower the garage door, and stand where you will work. A ten-minute mock-up can prevent a costly dimensional mistake.

    Build in phases

    With a limited budget, begin with the highest-friction zone. That may be an entry drop zone, a tool wall, or one bank of cabinets. Standardize bin sizes and label positions before expanding. A modular approach also reveals what capacity you actually use.

    Leave one section adaptable. Families acquire different sports gear; workshops add machines; vehicles change. A wall packed edge to edge on day one has no room to evolve.

    Safety rules that outrank storage capacity

    Never block an electrical panel, water heater service area, ventilation opening, fire equipment, or an exit. Follow local rules and each product’s installation instructions. Tall freestanding cabinets should be restrained against tip-over when the manufacturer calls for it. Wall cabinets and overhead racks must be attached to suitable structure with the specified hardware.

    Store gasoline, propane, pool chemicals, pesticides, oily rags, batteries, and flammables according to their labels and local fire guidance—not according to where they happen to fit.

    Before you order: the verification pass

    Put the exact model number—not merely the product-family name—at the top of your worksheet. Copy the assembled exterior dimensions, usable interior dimensions, individual shelf or drawer ratings, total cabinet weight, packaged dimensions, adjustable-foot range, and required clearances from the current manufacturer page and manual. Note which accessories are included and which appear only in styled photographs.

    Then return to the garage with painter’s tape. Mark the cabinet case, handles, open doors or extended drawers, and the path needed to load the largest object. Park the vehicle in its normal position and test every door, hatch, step, switch and service panel. Photograph the mock-up from the driver’s seat, house entry and driveway. If a critical measurement is unpublished, ask the manufacturer before placing the order.

    Finally, calculate total delivered cost: cabinet, worktop, shelves, drawer liners, casters or feet, mounting rails, appropriate fasteners, delivery surcharge, assembly help and sales tax. A lower sticker price can become the more expensive installation when essential components are optional.

    Installation-day checklist

    • Inspect packages for damage before assembly and keep model labels and receipts.
    • Read the complete manual before lifting or fastening anything.
    • Confirm the floor is stable and the planned attachment locations are suitable.
    • Use a second capable person whenever the manual or cabinet size calls for one.
    • Level and square the case before aligning doors and loading shelves.
    • Install wall mounting or tip restraints exactly as instructed.
    • Load heavy objects low and distribute weight within every shelf and drawer rating.
    • Recheck fasteners, leveling and door alignment after the cabinet has been loaded.

    Do not improvise around electrical, gas, plumbing, fire-safety or structural conditions. When the required attachment or clearance is uncertain, pause and consult a qualified professional.

    Common mistakes to avoid

    Most disappointing installations trace back to one of five mistakes: measuring only the empty wall; treating total capacity as a per-shelf rating; forgetting doors, drawers and vehicle movement; selecting depth from a catalog image; or filling every wall without reserving adaptable space. A slower specification check is cheaper than returning a pallet-sized cabinet.

    Frequently asked questions

    What should I install first?

    Clear the floor, establish zones, and solve the most frequently used area first. Do not buy a full cabinet set until the measured layout has passed a tape mock-up.

    Are garage cabinets better than open shelves?

    Neither is universally better. Cabinets control dust and visibility; shelves make bulky bins easier to see and access. Most garages benefit from both.

    How much aisle space should I leave?

    There is no single number for every household. Test the planned aisle with the actual vehicle, open doors, carried objects and all moving parts before ordering storage.

    Last reviewed: July 2026. Product specifications can change; check the manufacturer’s current documentation before purchase.