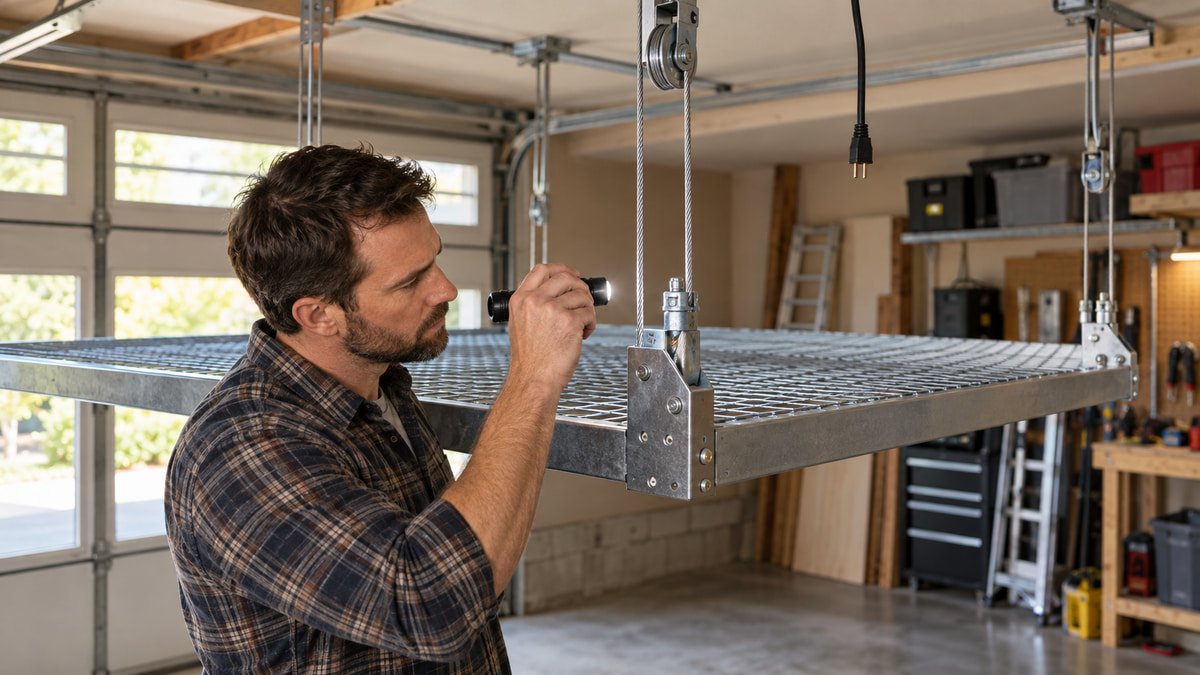
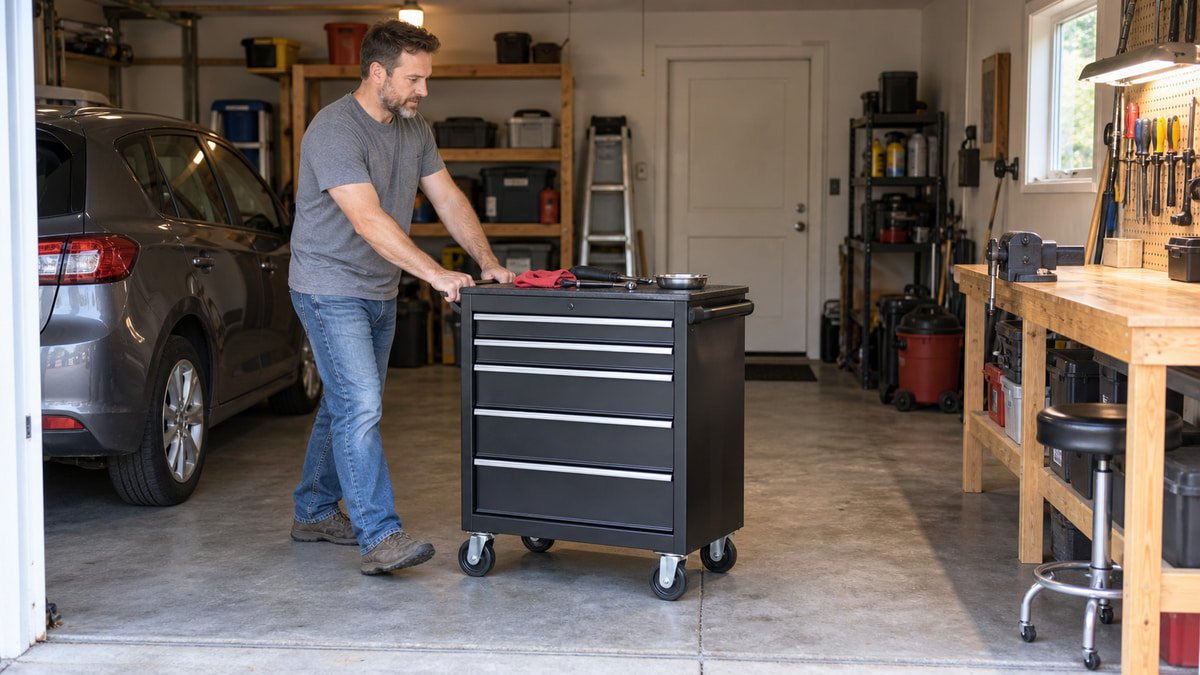
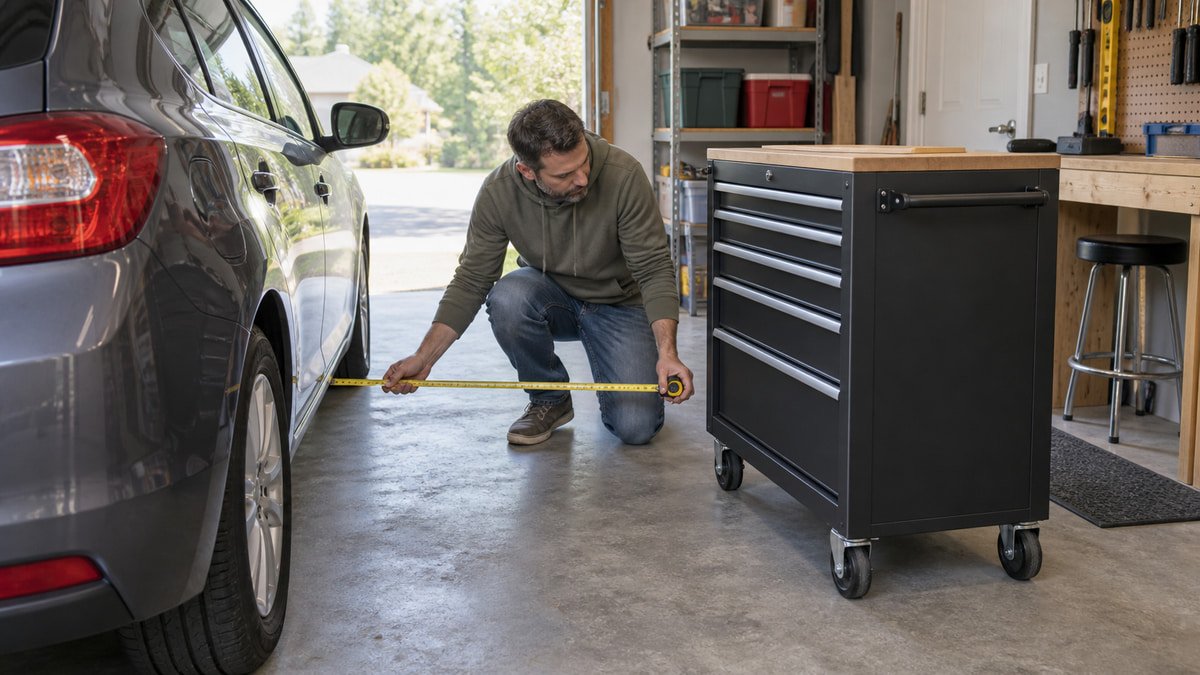
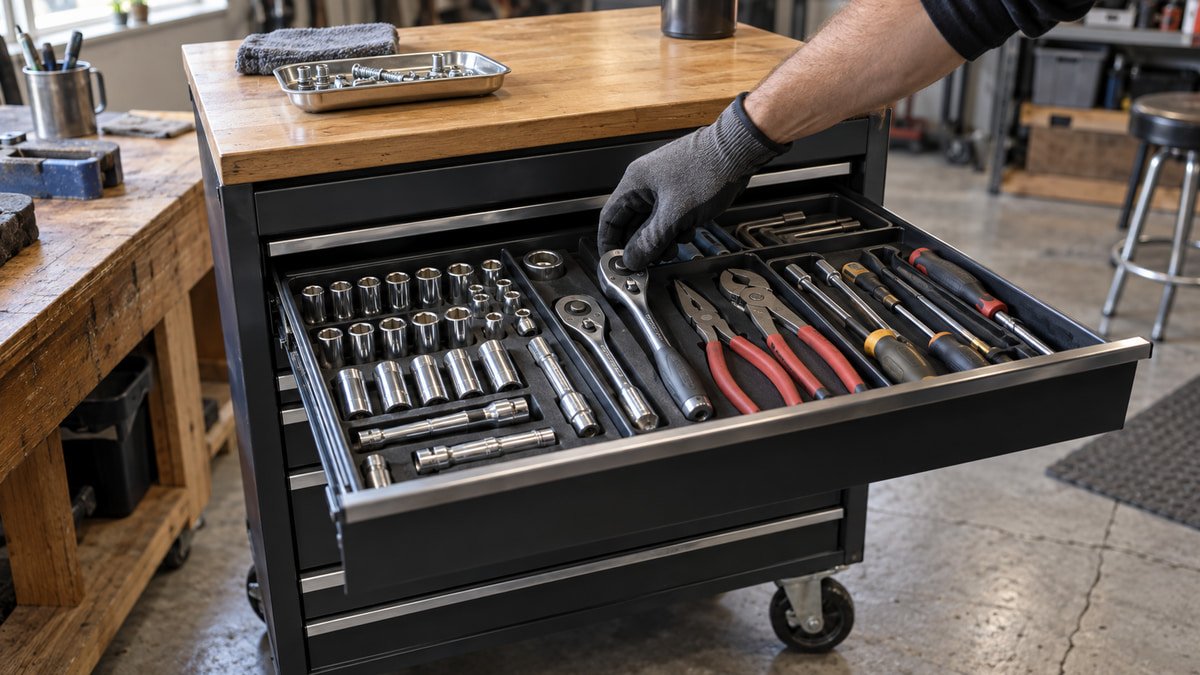
Author: Jeremy Moon

  • Best LED Shop Lights for Garage: Five Fixtures Compared by Fit

    Best LED Shop Lights for Garage: Five Fixtures Compared by Fit

    Affiliate disclosure: As an Amazon Associate I earn from qualifying purchases. This article may contain affiliate links, and Bay & Bench may earn a commission at no extra cost to you. Read our full Affiliate Disclosure.

    The best LED shop lights for garage use are the ones that put usable light on the bench, floor, and machine surfaces without turning every polished tool into a glare source. That sounds obvious, yet lumen numbers make it easy to buy one fierce fixture and leave the corners dim. This comparison uses current manufacturer data and official retailer specifications, so treat it as a fit shortlist rather than a lab ranking. It covers five current U.S. fixtures, then shows how to judge quantity, mounting, linking, color, and controls in your own room.

    Quick answer

    For an ordinary residential garage, begin with several diffused 4-foot fixtures in two rows rather than one bright line. The Feit SHOP/4/840/MM is a practical control-focused option with 5,000 lumens, 4000K light, motion sensing, and linkability. The Braun 59506 is a simpler 5,500-lumen hanging light, while the Braun 56780 supplies 10,000 lumens where a higher ceiling or demanding task warrants it. Pick the layout first. Then confirm fixture rating, mounting method, cord route, switching, and the manufacturer’s linking limit.

    Best LED shop lights for garage use at a glance

    These are not ranked as universal winners. Each solves a different garage problem, and the published output does not describe beam distribution or glare by itself. Current specifications can change, so use the linked product page and manual as the final reference.

    FixturePublished outputColorMounting and controlsBest fit
    Feit SHOP/4/840/MM5,000 lumens, 55 W4000KPlug-in, hang or flush mount, motion sensor and remoteEveryday garage with automatic entry lighting
    Braun 595065,500 lumens, 55 WCheck current listingHanging chains, pull chain, linkableSimple budget-minded rows
    Braun 5678010,000 lumens, 100 W5000KHanging chains, pull chain, linkableTaller bay or concentrated high-output zone
    Commercial Electric 545911425,500 lumens, 60 W4000KSurface or suspended, pull chain, linkableWider fixture body and general work light
    Lithonia 1290L3,300 lumensCheck exact configuration4-foot integrated shop lightLow-output layer, small bay, or supplemental row

    Before laying out fixtures, map the active stations in the garage workshop layout guide. A light directly over an empty aisle does less work than one positioned beside a bench or machine.

    How this shortlist was built

    We looked for current fixtures with an accessible manufacturer page or official retailer listing, published lumen output, and enough installation information to compare them honestly. The shortlist deliberately includes modest and high-output choices. A 10,000-lumen fixture is not automatically better than a 3,300-lumen one. It may create a hot stripe, pull more power, or feel harsh below a low ceiling.

    We also favored ordinary linear shapes. Four-foot fixtures are easier to place in rows, beside garage door tracks, and across a bench than multi-panel screw-in lamps with intense point sources. The models below are examples of useful configurations, not a claim that their LEDs last exactly as long as a laboratory rating in every hot, cold, dusty, or frequently switched garage. Read the environmental rating and warranty terms for the exact SKU.

    Feit SHOP/4/840/MM for useful controls without an app

    Feit lists the SHOP/4/840/MM at 5,000 lumens, 4000K, 55 watts, and 80 CRI. It can hang or flush mount, and its motion sensor offers several detection and timer settings. A remote gives you manual control without reaching a pull chain. The official Feit product page also describes it as damp-location rated and linkable, with up to six fixtures in the specified arrangement.

    This is the most balanced choice here for a garage that doubles as a passage into the house. The sensor can bring up the room while your hands are full, yet 4000K light is less stark than the daylight cast many people associate with basic shop fixtures. Still, motion control can be annoying over a quiet seated task if the timer is set too short. Confirm that the sensor sees the entry path, and keep a convenient manual option.

    Four-foot LED shop lights mounted over a garage workbench and tool wall
    A broad fixture over the bench reduces the hard shadows created by a single ceiling bulb.

    Braun 59506 for a straightforward hanging row

    The Braun 59506 is a light, narrow 4-foot hanging fixture. Harbor Freight publishes 5,500 lumens from 55 watts, a 5-foot power cord, included chains and S-hooks, and a limit of eight linked fixtures. The current official Braun listing states a 30,000-hour LED life and ETL certification.

    Its appeal is simplicity. Hang a pair over a bench line or create two parallel rows across a garage, then use the pull chain only where it remains reachable. The narrow body leaves more ceiling space around tracks and openers. It also concentrates the luminous surface, so position it where you cannot stare directly into the LEDs while working under a car hood. If you need a fixed wall switch or flush appearance, another fixture may be cleaner.

    Braun 56780 when 10,000 lumens genuinely help

    The Braun 56780 doubles the nominal output to 10,000 lumens at 100 watts. Its official product page lists 5000K light, a wider 7.43-inch body, included 24-inch chains, and a maximum link of four fixtures. That combination fits a tall bay, a detailed mechanical zone, or a room where one row must cover a broad working area.

    Do not buy four merely because they link. At a low residential ceiling, 10,000 lumens concentrated over a polished workbench can feel brutal. Start with a layout calculation, separate general and task lighting when possible, and use the table saw clearance guide to keep suspended fixtures and cords away from the full material path. The heavier fixture also deserves careful mounting into the structure named in its manual.

    Linkable hanging LED fixtures arranged in two rows above an open garage bay
    Two modest rows usually distribute light more evenly than a high-output strip down the centerline.

    Commercial Electric 54591142 for a broader 4000K source

    The Commercial Electric 54591142 is listed at 5,500 lumens, 60 watts, and 4000K. Its wider 10-inch housing can soften the visual impression compared with a bare narrow strip. The official retailer page describes surface and suspended mounting, included chains and cord, damp-location suitability, and linkability up to the stated limit.

    This model makes sense above a fixed bench where a broader luminous surface matters more than a minimal body. Check the actual mounting kit before choosing its exact ceiling position. A 10-inch housing can conflict with a garage door support or storage rack where a slim strip would pass. If the fixture sits above open drawers or the edge of a wall cabinet, stand at the work position and look up before drilling. That quick sightline test catches a surprising amount of glare.

    Lithonia 1290L for a smaller or layered lighting plan

    Lithonia lists the 4-foot 1290L at 3,300 lumens. The manufacturer page is sparse, so the exact SKU documentation should settle color, input, cord, mounting parts, and environmental limits before purchase. Its lower output can be useful in a one-car bay, over a secondary bench, or as one of several closely spaced fixtures.

    A lower-output light is often easier to live with when the ceiling is low and the walls are pale. More fixtures also let you reduce shadows at the sides of a vehicle or machine. The tradeoff is more mounting points and a more complicated power route. If you are replacing an existing fluorescent body, do not assume a shop light can reuse the old wiring. A plug-in fixture and a hardwired fixture are different installations.
    Plan total light, then split it across the room

    Multiply room length by width to get square feet, then use a starting target appropriate to the work. The number is only a planning estimate because wall color, fixture distribution, mounting height, and shadows change what reaches the surface. A 22 by 22 foot garage is 484 square feet. Four 5,000-lumen fixtures provide 20,000 initial lumens, or about 41 lumens per square foot before losses. That may feel comfortable for general work in one room and weak in another.

    Place the total in two rows and add task lighting at the bench rather than chasing one huge center fixture. Run the positions through the garage workshop aisle clearance guide; you should be able to move a tall project, ladder, or sheet good without striking a low hanging chain. Paint and clean surfaces matter too. A dusty dark ceiling swallows more light than a clean pale one.

    Check linking, cords, and switching as one system

    A published linking limit is not a suggestion to fill every socket. It is the maximum arrangement for that exact model under its instructions. Never mix a manufacturer’s linking cords with unrelated fixtures. Add the input watts of the planned run, follow the manual, and keep cords away from door hardware, sharp edges, hot surfaces, vehicle roofs, and any place they can be snagged.

    Decide what should turn on together. General rows may share a wall control, while a bench light benefits from its own switch. Motion sensing works well for entry light but may switch off during careful stationary work. Smart controls add scheduling, yet an app should not be the only practical way to light a dark garage. Permanent electrical work belongs with a qualified electrician and the requirements that apply at the property.

    Close view of a diffused LED shop light above detailed mechanical work
    A frosted lens and thoughtful angle can be easier on the eyes during close work.

    Look beyond lumens before ordering

    Confirm color temperature, CRI, damp or dry location rating, operating temperature, dimming compatibility, warranty, and whether the LEDs or driver can be serviced. Look at the fixture dimensions rather than the familiar “4-foot” label. Width and hanging depth determine whether it clears an open garage door, ceiling rack, or tall cabinet. If the manufacturer supplies photometric files, they are more useful than a marketing photo for a serious layout.

    Then check the room at night. Tape the proposed fixture centerlines to the ceiling and stand at the bench, vehicle hood, and floor work area. Note where your head and hands cast shadows. A small movable work light can reveal whether the fixed layout needs another row. Lighting should support the garage storage system, not disappear behind open cabinet doors or illuminate the tops of bins.

    The sensible pick for each garage

    Choose the Feit motion model if automatic entry lighting and 4000K color suit the room. Choose the Braun 59506 when you want a simple, light, linkable hanging row. The Braun 56780 earns its place where mounting height and demanding work can use 10,000 lumens without glare. Commercial Electric’s broader body suits a fixed bench, while the Lithonia 1290L makes more sense as a modest layer than a brute-force centerpiece.

    Whichever you choose, order one fixture first when returns are practical. Temporarily hang it at the intended height, inspect shadows and glare, then copy the successful spacing. That small test tells you more than a lumen race and avoids covering the ceiling with a layout you dislike.

    Useful products to compare

    These links open current Amazon search results. Check the dimensions, manual, mounting hardware, warranty, and current availability for the exact model before you order.

    Before you buy or install

    Read the current manual for the exact product you are considering. Confirm its assembled dimensions, rated capacity, mounting requirements, included hardware, working clearances, warranty, and any limits that apply to your wall, floor, electrical circuit, or garage layout.

    Frequently asked questions

    How many LED shop lights does a two-car garage need?

    There is no fixed count. Multiply the room area by a reasonable starting lumen target for your work, then divide that total across several fixtures. Check ceiling height, wall color, beam spread, shadows, and task lighting. A mockup with one temporary fixture is more reliable than choosing by floor area alone.

    Is 4000K or 5000K better for a garage?

    4000K usually feels neutral and comfortable for a mixed-use garage. 5000K looks cooler and can make detail feel crisp, but some people find it stark at night. Color temperature does not measure brightness or color accuracy. Compare both if the room is also a laundry, entry, or hobby space.

    Can I link different brands of LED shop lights?

    Do not assume so. Use only the linking cord, connector, and arrangement approved for the exact fixture. Stay within the manufacturer’s unit and electrical limits. A matching plug shape does not prove electrical or mechanical compatibility.

    Should garage shop lights hang or mount flush?

    Hanging lights are easier to lower over a bench and can avoid an uneven ceiling. Flush fixtures preserve headroom and reduce movement near doors and stored items. Check the exact fixture instructions, structure, cord path, open garage door envelope, and every overhead storage location.

  • 4000K vs 5000K garage lighting: choose by comfort and task

    4000K vs 5000K garage lighting: choose by comfort and task

    Affiliate disclosure: As an Amazon Associate I earn from qualifying purchases. This article may contain affiliate links, and Bay & Bench may earn a commission at no extra cost to you. Read our full Affiliate Disclosure.

    The choice between 4000K vs 5000K garage lighting is mostly about the character of the white light, not how much light you get. A 5000K fixture is not automatically brighter than a 4000K fixture. Lumens, distribution, glare control, and surface reflectance decide visibility. Color fidelity decides whether wood, paint, wires, and skin look believable.

    For a garage shared with vehicles and household storage, 4000K is the safer neutral default. A well-made 5000K source can feel crisp at a detail bench or in a dedicated workshop, but it can also feel stark late at night. The best decision comes from comparing actual fixtures with similar output and color quality in your room.

    Quick answer

    Choose 4000K for a balanced, neutral garage that serves parking, storage, repairs, and general projects. Choose 5000K if you genuinely prefer cooler white light and the garage functions mainly as a workshop. Neither CCT guarantees better visibility. Match lumens, beam distribution, CRI or other color-quality data, flicker performance, and diffusion before comparing the Kelvin value. When uncertain, install one 4000K sample and one 5000K sample temporarily and view familiar materials at night.

    4000K vs 5000K garage lighting at a glance

    Question4000K5000K
    Visual characterNeutral whiteCooler, daylight-like white
    Shared garage comfortUsually the easier defaultCan feel stark to some people
    Detail-work impressionClear without a strongly cool castMay feel crisp when the fixture is well diffused
    BrightnessDepends on lumens and distributionDepends on lumens and distribution
    Color fidelityDepends on the product, not CCT aloneDepends on the product, not CCT alone
    Best buying methodCompare samples with similar output, optics, and color quality

    If the room still lacks enough general output, calculate that separately with the garage lighting calculator. Changing from 4000K to 5000K does not repair a poor lumen budget.

    CCT describes appearance, not brightness

    Correlated color temperature, or CCT, is expressed in kelvins. Lower values generally look warmer; higher values look cooler. The U.S. Department of Energy’s color and spectrum guidance explains that CCT is only one part of how a light source appears.

    Two fixtures can both claim 5000K while one produces 4,000 lumens and another produces 8,000. Their optics may send that output in completely different directions. A brighter-looking wall may come from wider distribution or lighter paint, not the cooler color.

    Shop by lumens and photometrics for quantity and placement. Shop by CCT for the white-light character. Then evaluate color quality, glare, dimming, flicker, temperature range, and warranty. Keeping those questions separate prevents the Kelvin number from carrying jobs it cannot do.

    Why 4000K works in a mixed-use garage

    A 4000K garage usually reads as clean and neutral without feeling aggressively blue. That makes it comfortable for unloading a car, finding storage, maintaining bicycles, repairing household items, and working at a bench. It also transitions more gently to typical indoor lighting when the garage connects directly to the house.

    Wood tones and warm paint colors often feel more natural under a good 4000K source than under a strongly cool one. That is a preference, not a universal performance fact. A low-quality 4000K fixture can still render colors poorly or show an unpleasant green tint.

    Use 4000K as the default when several household members use the garage or when the lights stay on for long evening sessions. Pair it with broad diffusion and local task lighting. Comfort comes from the whole system, not the nominal CCT alone.

    Wood and painted metal samples under neutral 4000K garage lighting
    A good 4000K fixture often feels balanced in a garage shared by tools, storage, and household tasks.

    When 5000K makes sense at a workbench

    Some people prefer the cooler appearance of 5000K for mechanical work, cleaning, sorting hardware, or detailed assembly. It can give the room a crisp visual character, especially when surfaces are pale and the fixture has good diffusion. That preference is legitimate if you have seen the light in person.

    Cooler light can also feel clinical or tiring at night, particularly when bare diodes sit in the field of view. Do not assume a warehouse-like appearance creates better detail. Shadows, glare, and poor color rendering can hide information even when the room feels intensely white.

    A dedicated 5000K task fixture over one bench is a reasonable compromise when the rest of the garage is 4000K. Keep the zones deliberate and view a workpiece at their boundary before committing. Random alternating fixtures often create a patchy ceiling and inconsistent surface color.

    Detailed workbench under crisp 5000K garage task lighting
    5000K can feel crisp at a detail bench, but distribution and color quality still determine what the hands can see.

    Compare color quality after matching CCT

    Color rendering index, or CRI, gives familiar information about color fidelity, but it is not the complete story. DOE’s LED basics notes that lighting performance includes several color and spectral qualities. Newer evaluation methods such as IES TM-30 can add detail when manufacturers publish them.

    For ordinary parking and storage, a credible interior fixture with common color quality may be adequate. When you match stains, paint panels, wire colors, or finishes, look for stronger documentation and sample the light on the real material. An advertised high CRI from an unknown model is less reassuring than a traceable specification from a manufacturer that identifies the exact fixture.

    Also check consistency. Six lights should not vary visibly from greenish to pinkish. Color stability between fixtures and over time can matter more than choosing 4000K or 5000K on paper.

    Do not mistake a cooler source for clearer vision

    Visibility depends on contrast, size, glare, adaptation, age, and where the light lands. A cooler source may feel subjectively brighter at the same nominal output, but that sensation does not guarantee better inspection. A dark pencil line under a body shadow remains dark.

    Match two sample fixtures as closely as possible for lumens, beam pattern, diffuser, mounting height, and color quality. Switch between them after your eyes adapt. Read a small label, inspect a scratch, sort colored wire, and look at the same wood offcut. Avoid judging from a phone camera, which changes white balance automatically.

    Give each sample ten or fifteen minutes at night. The first cool impression can seem energetic, while long-session comfort tells a different story. Ask other regular users, since a garage shared by a household should not be optimized around one quick glance.

    Glare can dominate the CCT decision

    An exposed high-output LED source can be uncomfortable at either 4000K or 5000K. Look from the parked driver’s seat, the house entry, the bench, and a seated repair position. If bright points remain in the normal line of sight, choose a better diffuser, reposition the fixture, or reduce contrast.

    Cooler light may make harsh glare feel more obvious to some users, but fixture design is the larger issue. Deep optics, broad lenses, indirect reflection, and multiple lower-output sources can produce a calmer room than one intense lamp.

    Glossy floors and polished car paint reflect source images. Check them before buying the remaining fixtures. A sample that looks fine against bare concrete may become distracting after an epoxy floor or white worktop is installed.

    Keep the ceiling consistent and zone the exceptions

    A consistent CCT across the ambient ceiling makes the garage feel coherent. If 4000K handles general use, keep that base and add 5000K only where a cooler task source has a clear purpose. Put it on a separate switch. The reverse approach can work in a dedicated cool-white workshop with a warmer inspection area.

    Do not alternate 4000K and 5000K fixtures in the same row. The floor may show visible bands, and workpieces can change appearance as they move. Mixing different manufacturers at the same nominal CCT can also create mismatch because CCT tolerances and spectra vary.

    Plan fixture positions after choosing the bench and machine zones in the garage workshop layout guide. A well-zoned light should support the task without spilling an abrupt color boundary across the main surface.

    Read credible labels and documentation

    ENERGY STAR’s downlight criteria recognize nominal CCT values including 4000K and 5000K and pair color requirements with other performance criteria. Your garage fixture may be another product type, but the useful lesson is that CCT belongs inside a broader specification.

    Look for exact model number, delivered lumens, CCT tolerance, CRI or richer color data, efficacy, operating temperature, location rating, dimming compatibility, expected lifetime, and warranty. Confirm safety listing and installation conditions. Marketing phrases such as daylight, crystal white, or ultra bright are not substitutes for numbers.

    Run a two-fixture sample test

    1. Choose one 4000K and one 5000K fixture with similar lumens, optics, color quality, and size.
    2. Mount or support them safely at the intended height according to instructions.
    3. Test at night with vehicles, shelves, and the garage door in normal positions.
    4. View the bench, floor, storage labels, car paint, wood, wires, and skin.
    5. Check standing, seated, and driver sight lines for glare.
    6. Use each sample for a normal 20-minute task.
    7. Ask every regular user which feels easier, not merely brighter.

    Do not energize an improvised hardwired setup. Use approved temporary arrangements or have a qualified electrician handle wiring. Once you choose, buy the same model and specification together where practical so the ceiling has consistent color.

    Two sample LED fixtures being compared in a finished garage
    Sample one fixture of each CCT at night before ordering a ceiling full of lights.

    Choose from the room you have

    Pick 4000K when the garage is a household transition space, storage room, parking bay, and occasional shop. Pick 5000K when you have sampled it, prefer the cooler appearance, and spend most garage time on focused work. If opinions are split, a 4000K ambient system with separately controlled task lighting is the least risky compromise.

    Check the garage workshop aisle guide while placing fixtures so walking routes stay visible without direct glare. For a compact room, the one-car workshop layout helps account for the open garage door and vehicle shadows.

    Finally, remember the hierarchy: enough lumens, useful distribution, controlled glare, good color quality, then preferred CCT. Get the first four wrong and neither Kelvin choice will feel right. Get them right and both can produce an excellent garage.

    Useful products to compare

    These links open current Amazon search results. Check the dimensions, manual, mounting hardware, warranty, and current availability for the exact model before you order.

    Before you buy or install

    Read the current manual for the exact product you are considering. Confirm its assembled dimensions, rated capacity, mounting requirements, included hardware, working clearances, warranty, and any limits that apply to your wall, floor, electrical circuit, or garage layout.

    Frequently asked questions

    Is 5000K brighter than 4000K in a garage?

    No. Brightness depends on lumen output, distribution, room surfaces, and where the light lands. 5000K looks cooler and may seem crisper, but a 4000K fixture can produce more usable light.

    Is 4000K warm white?

    4000K is generally described as neutral white rather than traditional warm white. It looks cooler than common 2700K or 3000K household lamps but warmer than 5000K.

    Can I mix 4000K and 5000K lights in one garage?

    Yes, but use deliberate zones and separate controls. Keep the ambient ceiling consistent, then add a different CCT only where a task benefits and the color boundary does not cross the work surface.

    What is the best color temperature for a woodworking garage?

    A good 4000K fixture is a comfortable general choice for wood and long sessions. More important, choose strong color fidelity and low glare, then inspect stains and finishes under the light used for the final judgment.

  • Garage Tool Storage Guide: Put Every Tool Near Its Work

    Garage Tool Storage Guide: Put Every Tool Near Its Work

    Affiliate disclosure: As an Amazon Associate I earn from qualifying purchases. This article may contain affiliate links, and Bay & Bench may earn a commission at no extra cost to you. Read our full Affiliate Disclosure.

    A garage tool storage guide should begin with the work, not a wall full of matching bins. Put the tools for tire service near the parking bay. Keep measuring and marking tools at the bench. Give portable kits a clear landing place when they come home. This approach may look less showroom-perfect, but it saves steps and makes missing tools obvious. The plan below sorts hand tools, power tools, hardware, batteries, long tools, and mobile cases by frequency, weight, and the route each one takes during a normal project.

    Quick answer

    Sort tools into daily, monthly, and occasional use. Store daily hand tools between knee and shoulder height near their work zone. Put dense tools low in drawers, portable kits on shelves that fit their cases, and long tools on rated wall hardware away from doors and vehicles. Measure the tallest and widest tool before buying drawers. Keep batteries dry and clean, follow each battery manual, and do not treat a charging cabinet as fire protection unless the manufacturer explicitly designed it for that purpose.

    Garage tool storage guide by tool type

    No single container handles a whole workshop well. Drawers are excellent for shallow, dense tools. Open wall storage keeps familiar hand tools visible. Cases protect tools that leave the garage. Cabinets keep dust off items used less often. Start with this division, then adjust for children, moisture, theft concerns, and the jobs you repeat.

    Tool groupBest first homePlacementMain check
    Sockets, wrenches, pliersShallow labeled drawersBeside mechanical workOpen drawer clears car and stool
    Measuring and marking toolsProtected shallow drawer or cabinetAt the clean benchNo abrasive dust or loose pile
    Cordless toolsDrawer, shelf, or fitted caseNear charging areaTool fits with battery removed if required
    Fasteners and small partsSmall bins or drawer organizersEye level near assemblyLabels visible and bins cannot spill
    Long toolsRated hooks or floor rackNear outdoor doorHead, vehicle, and door clearance
    Jobsite casesMeasured shelf or mobile stackNear exit routeHandles and latches remain reachable

    The broader garage storage systems guide helps place these tool homes beside household and seasonal storage.

    Map the project route before buying organizers

    Choose three recurring jobs. For example: bicycle service, household repair, and vehicle maintenance. Walk each job from setup to cleanup and note where tools accumulate. If sockets always land on a rolling cart next to the car, a chest across the garage creates needless travel. If drills leave in a portable case, unpacking them onto a decorative wall wastes time.

    Draw a simple floor plan using the method in how to plan garage storage. Mark the bench, parking envelope, doors, outlets, and the place where a mobile cart rests. Tool storage belongs on that map. Leave working surfaces deliberately empty. A bench covered with permanent organizers has become a shelf, and every project will begin by moving someone else’s project.

    Use retrieval frequency, not matching colors

    Daily tools deserve the easiest reach. Monthly tools can occupy lower drawers or the second row of wall storage. Once-a-year pullers, specialty sockets, and spare jigs can live in labeled cases higher or farther away. Frequency changes, so write labels that can move rather than printing a permanent museum map on day one.

    There is a useful exception. Hazardous, sharp, or expensive tools may need locked storage even when used often. Security and child access outrank convenience. Put the key or combination where authorized adults can use it without leaving the cabinet unlocked. Store personal protective equipment near the task that needs it, but keep clean respiratory and eye protection away from dust and overspray.

    Choose drawers from tool dimensions

    Count drawers only after measuring the tools. A chest with many shallow drawers is excellent for sockets and pliers but hopeless for a tall cordless saw. Lay each tool group on the floor in a single layer and measure the required width, depth, and height. Add room for dividers and your fingers. Then compare those numbers with the manufacturer’s internal drawer dimensions, not the cabinet’s outside width.

    Dense tools should sit low. Divide them into modest groups so one drawer does not consume its full rating before the rest of the cabinet is loaded. A nonslip liner reduces movement but does not raise capacity. If you need help choosing the furniture around those drawers, compare the storage and work surface in the garage workbench buying guide.

    Shallow tool drawers organized by task with sockets, pliers, and measuring tools
    Shallow drawers let you see small tools without piling them into a deep box.

    Build wall storage around structure and published capacity

    Wall systems keep daily tools visible, but the mounting surface and fasteners carry the load. Milwaukee lists its PACKOUT Compact Wall Plate at 50 pounds in a shop, while the Large Wall Plate is listed at 150 pounds. The manufacturer page and the exact installation manual matter because plate size, substrate, fasteners, and mounting context change the rating.

    Do not transfer a capacity from one plate or hook to another. Include the organizer, case, tool, and attachments in the load. Place heavy cases low enough to lift with control, and keep protruding hooks outside walking and vehicle paths. The existing garage wall storage systems guide compares pegboard, slatwall, and track hardware once you know what the wall needs to hold.

    Give power tools a clean landing place

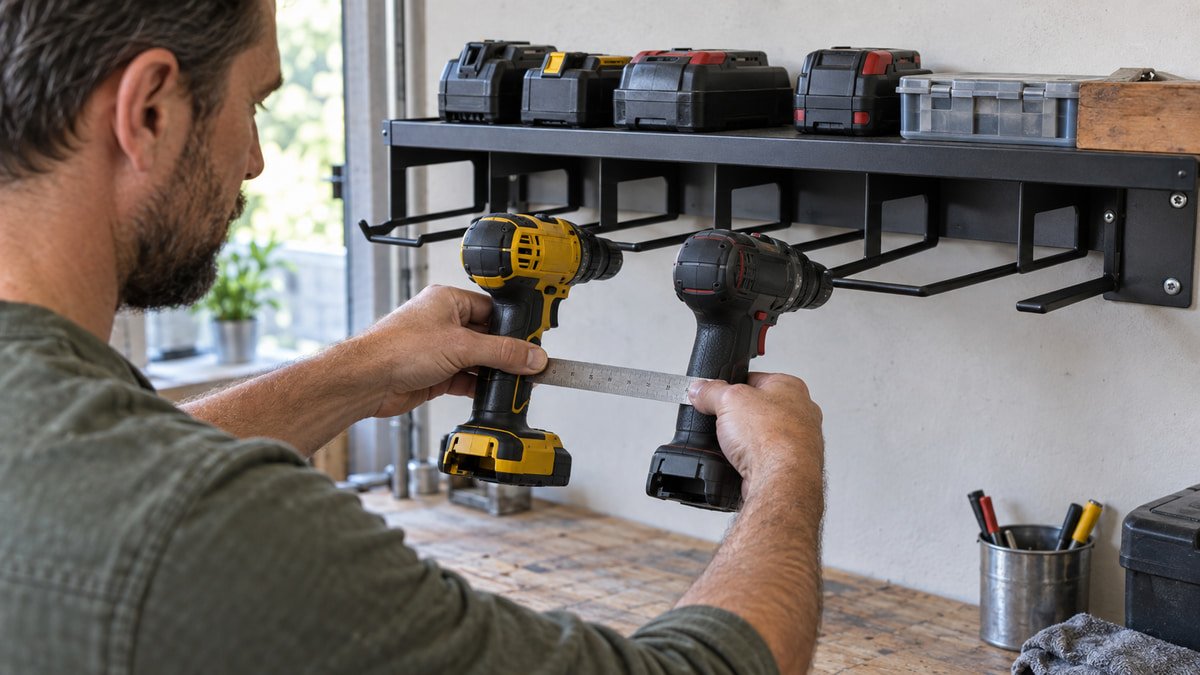
    A cordless drill can stand on a shelf, hang from a tool-specific holder, sit in a drawer, or stay in its transport case. The right choice depends on dust, frequency, and whether the tool leaves the garage. Remove loose bits before hanging a tool overhead. Check that the holder supports the tool body without pressing a trigger or damaging a battery interface.

    Deep modular drawers can keep kits together, but published capacities vary widely. DEWALT lists the TOUGHSYSTEM 2.0 DXL Deep Drawer Unit at 27.5 pounds per drawer and 55 pounds total. See the official product page for the current configuration. Those numbers are a reminder to weigh the actual kit rather than assuming every large plastic drawer can hold a dense pile of metal tools.

    Treat batteries and charging as their own zone

    Keep batteries and chargers dry, clean, and easy to inspect. Follow the temperature, ventilation, and storage instructions for each battery platform. Do not bury an operating charger in a closed drawer unless the manufacturer specifically approves that arrangement. Keep the charging area away from grinding sparks, oily rags, flammable finishes, and a bench where metal offcuts can bridge contacts.

    Mounting a power strip inside a cabinet does not make the cabinet a listed charging enclosure or fireproof box. Use intact chargers and cords, avoid improvised adapters, and give heat somewhere to go. If an electrical outlet is damaged, loose, or badly placed, solve that problem rather than building an extension-cord maze around it.

    Cordless drills and batteries stored in a ventilated garage cabinet beside a workbench
    Battery storage should be dry, easy to inspect, and separated from grinding dust and hot work.

    Separate small parts by decision, not by appearance

    Fasteners become useful when the label answers the question you ask during a repair. Sort common screws by diameter and length, electrical terminals by type and wire range, and anchors by the wall material they are approved for. Mixing every shiny metal fastener into one bin saves space and wastes the next Saturday afternoon.

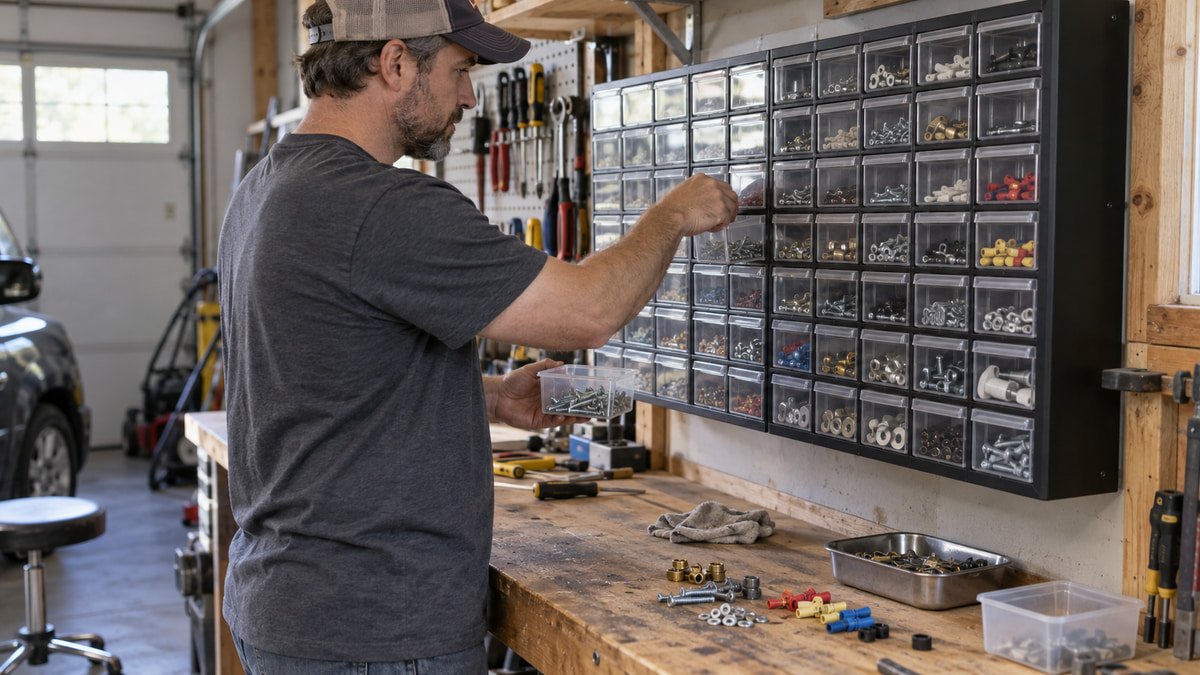
    Use lidded organizers for parts that travel. Open bins work for high-use items at a fixed assembly station, provided they cannot be knocked into a car path. Keep an intake bin for loose hardware discovered during cleanup. Empty it weekly. This prevents every drawer from developing a mysterious layer of one-off washers and unidentified clips.

    Store long tools where their movement makes sense

    Rakes, shovels, levels, clamps, and extension poles need more than a hook that carries their static weight. Measure the full sweep as you lift each item on and off. A secure rake can still scratch a vehicle when its handle rotates. Put outdoor tools near the exterior door and shop clamps near the bench, even if that breaks a symmetrical wall display.

    Use two support points for long or awkward items when one hook lets them twist. Keep sharp ends covered or turned away from the aisle. Floor racks are often better for tools used by someone who cannot comfortably lift overhead. Recheck fasteners after the first loaded week and at regular cleanups.

    Make portable cases part of the garage system

    A case needs a home that accepts it without removing the handle, opening a latch, or unloading the stack. Measure the case at its widest projection. Leave enough shelf height to grasp it safely, and put the most frequently carried module between knee and chest height. Heavy boxes belong low.

    Modular wall plates and rolling stacks are handy, but confirm every connection in the exact orientation. Milwaukee’s PACKOUT mounting plate manual, for instance, publishes different limits for plate models and mounting contexts. A case that locks to a floor plate may not be approved on a wall in the same arrangement. Follow the manual instead of reasoning from the shape of the cleats.

    Portable tool cases staged beneath a wall storage panel in a garage workshop
    Portable cases work best when the shelf, cart, and project route all use the same modules.

    Reset one zone at a time

    Do not empty the whole garage unless you can finish the job. Start with one bench drawer or one four-foot wall section. Remove duplicates and broken tools, group what remains by task, then mock up the new home with cartons and tape. Work from the zone for a week before buying inserts for every drawer.

    Take a photo of the successful arrangement. Label only after it proves useful. At the monthly reset, return wandering tools, inspect wall hardware, clean drawer slides, and update the odd-items bin. A tool system earns its floor and wall space by making work easier. If an organizer creates more steps, move it.

    Useful products to compare

    These links open current Amazon search results. Check the dimensions, manual, mounting hardware, warranty, and current availability for the exact model before you order.

    Before you buy or install

    Read the current manual for the exact product you are considering. Confirm its assembled dimensions, rated capacity, mounting requirements, included hardware, working clearances, warranty, and any limits that apply to your wall, floor, electrical circuit, or garage layout.

    Frequently asked questions

    What tools should stay visible on a garage wall?

    Keep frequently used hand tools visible when quick access outweighs dust and security concerns. Measuring tools, high-cost tools, and items sensitive to grit often belong in a drawer or cabinet. Heavy tools should not hang high merely to complete a wall display.

    Are deep drawers better for power tools?

    They are useful when the tool, battery, and accessories fit without stacking into a loose pile. Measure internal height and depth, then compare the full loaded weight with the drawer rating. Shallow drawers are usually better for sockets and pliers because every item remains visible.

    Can I charge tool batteries inside a cabinet?

    Only if the charger and cabinet arrangement follow the manufacturers’ instructions and the space provides the required conditions. Do not assume a metal cabinet is a fire-rated charging enclosure. Keep chargers clean, dry, ventilated, and away from sparks, flammables, and loose conductive debris.

    How often should I reorganize garage tools?

    Use a quick monthly reset and a deeper review when projects or tool ownership change. If a tool repeatedly lands somewhere other than its assigned home, the home is probably wrong. Move the storage closer to the work rather than relying on perfect habits.

  • Tool Chest vs Tool Cabinet: Choose by Access, Weight, and Space

    Tool Chest vs Tool Cabinet: Choose by Access, Weight, and Space

    Affiliate disclosure: As an Amazon Associate I earn from qualifying purchases. This article may contain affiliate links, and Bay & Bench may earn a commission at no extra cost to you. Read our full Affiliate Disclosure.

    The tool chest vs tool cabinet choice gets muddled because stores use the words loosely. In mechanic-style storage, a tool chest is usually the drawer box that sits on a bench or compatible rolling base. A rolling tool cabinet is the lower wheeled unit that carries heavier tools and may support a matching chest. A tall two-door garage cabinet is a third category entirely. This guide compares the first two formats by reach, load, footprint, mobility, work surface, and the awkward reality of getting several hundred pounds of steel into a garage.

    Quick answer

    Choose a top tool chest when you already have a strong compatible base or bench and want many shallow drawers without using more floor area. Choose a rolling tool cabinet when you need the foundation of the system, deeper lower drawers, mobility, and a useful top surface. Most growing mechanic collections are better served by a rolling cabinet first. Add only the matching chest when the upper drawer height remains comfortable and the manufacturer approves the combination.

    Tool chest vs tool cabinet in one table

    The comparison assumes a mechanic’s top chest and a drawer-style rolling cabinet. If you are considering a tall door cabinet for drills, chemicals, or bulky cases, use the garage cabinets buying guide instead.

    QuestionTop tool chestRolling tool cabinet
    Floor spaceUses a bench or compatible base footprintNeeds its own full footprint
    Typical drawer mixMore shallow drawers near eye levelShallow top drawers plus deeper lower drawers
    MobilityNot safely mobile by itself when loadedDesigned around casters and a push handle
    Work surfaceTop usually unavailable once stackedTop can be a landing surface when no chest is added
    Best first purchaseExisting compatible base is already ownedStarting a serious drawer system
    Main mistakeStack becomes too tall or mismatchedCabinet is too deep, heavy, or awkward for route

    Both can organize hand tools well. The room and the load decide which one earns its space.

    Clear up the naming before comparing models

    Retail listings sometimes call a wheeled cabinet a rolling tool chest, and a combined upper and lower stack may be sold as a chest and cabinet set. Read the product type, dimensions, caster information, and installation manual instead of relying on the title. A top chest generally has no push handle or floor casters. It must rest on a surface that the manufacturer allows.

    That distinction matters for safety and fit. A top chest may be heavy before the first socket goes in. It can shift, overload a bench, or create a top-heavy stack when paired with an unrelated base. A rolling cabinet is engineered as the lower foundation, but its rating still assumes the load distribution and operating conditions stated in the manual.

    A top chest buys drawers without another footprint

    A top chest uses vertical space efficiently. Shallow full-extension drawers put sockets, wrenches, pliers, and precision tools close to eye level. A hinged top compartment, when present, holds taller items. This layout suits a collection with many small hand tools and few bulky power tools.

    The price is reach. Every added drawer raises the top rows, especially when the chest sits on a tall rolling base. Stand beside the proposed stack and mark each drawer height on the wall. The upper drawer should open where you can see and lift its contents without reaching above your comfortable range. A matching chest can also remove the cabinet top as a work surface. If the garage needs every landing area, that loss is real.

    Open shallow drawers in a top tool chest showing organized hand tools
    Top chests favor visible, shallow storage, though the upper drawers become harder to reach as the stack grows.

    A rolling cabinet is the working foundation

    A rolling cabinet stores dense tools low, supports mobility, and provides a stable base for a compatible chest. The wide top drawer often holds sockets and wrenches, while deeper lower drawers accept cordless tools, pullers, and cases. Large casters roll more easily over slab joints, although a loaded cabinet should move only on the route and in the manner the manual permits.

    Current products show how much ratings vary. Milwaukee lists its 46-inch 8-drawer steel cabinet with 100-pound soft-close drawer slides, an 1,800-pound overall capacity, and 5-inch casters on the manufacturer page. Those numbers apply to that cabinet, not every 46-inch box and not every drawer loading pattern.

    Rolling steel tool cabinet with deep lower drawers and locked casters
    A rolling cabinet handles dense tools low and can move for service, provided the route and floor cooperate.

    Compare the drawer layout with actual tools

    Lay your tool groups in single layers and measure them. Top chests often win for small tools because shallow drawers prevent stacking. Rolling cabinets win when the lower drawer depth matches bulky tools. Neither format helps if the wrench drawer is too short or the cordless saw must lie diagonally and block the latch.

    Check internal drawer width, depth, and height. Exterior width includes walls, slides, trim, and handles. Count the weight of organizers too. Foam and rails consume height; socket sets become surprisingly dense. Use the process in the garage storage measuring guide for both the tool box and the room around it.

    Read ratings in context

    A cabinet’s total working load and a drawer slide rating describe different limits. Harbor Freight lists the U.S. General Series 3 42-inch roll cabinet at 2,600 pounds overall and 120 pounds per pair of drawer slides. The current product page also identifies the caster arrangement and cabinet dimensions. Follow its manual for distribution, movement, assembly, and stacking.

    Do not multiply a slide rating by drawer count and assume the result is a safe cabinet load. Cabinet structure, casters, floor, and load distribution still matter. Put dense tools in lower drawers, keep loads within every applicable limit, and avoid opening several loaded drawers at once. The lock secures drawers against casual access; it does not correct an unstable setup.

    Mobility is useful only with a measured route

    Measure the cabinet body, side handle, bumpers, casters, and the space needed to steer. Then inspect the route from delivery point to final location. Door thresholds, steps, narrow gates, sloped driveways, and slab joints can turn a mobile cabinet into an immovable object. A 22-inch cabinet depth may work beside a car but not through an interior doorway once the handle is attached.

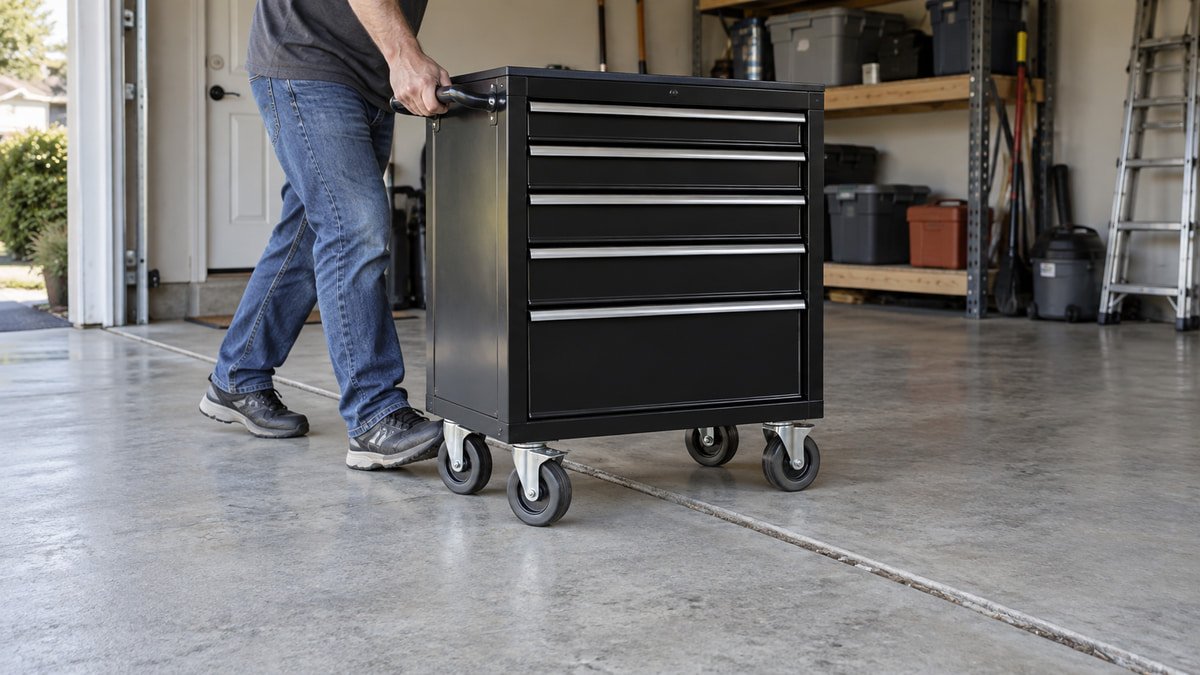
    Mark the parked footprint and drawer-open footprint with tape. Compare both with the garage workshop aisle clearance guide. Casters should be locked during use, yet some swivel movement may remain. Do not use the cabinet as a step, seat, vehicle dolly, or support for work that the manufacturer has not approved.

    Work surface value changes the answer

    A bare rolling cabinet top can hold a parts tray, laptop, or repair manual. Some mobile workstations add a wood top specifically for light bench work. Once a top chest is installed, that surface disappears. You gain drawers but may end up buying another bench.

    If work surface is scarce, a cabinet with a protected top may beat a chest stack. Craftsman describes its S2000 52-inch mobile workstation with a butcher block top and 100-pound drawer slides on the official page. Treat the worktop and overall cabinet as the manual describes. A wood top does not make the cabinet suitable for hammering, clamping, or hot work by default.

    Low rolling tool cabinet used as a work surface beside a garage workbench
    A cabinet with a protected top can add a landing surface, while a stacked chest usually gives that surface back to storage.

    Stack only approved components

    A chest and cabinet that share a color and width are not necessarily compatible. Confirm model family, attachment hardware, maximum upper load, and the exact stacking instructions. Install the chest before loading it when the manual calls for that sequence. Use enough people or lifting equipment for the empty unit weight; do not improvise a lift from open drawers.

    After assembly, load from the bottom upward. Check that drawers latch, the cabinet sits level, and the casters or leveling feet contact the floor correctly. Recheck the stack after it has been moved. A mismatch saved at purchase can become a permanent wobble that no drawer liner fixes.

    Security and power are secondary filters

    Integrated locks are useful for casual security and child access, but thin steel storage is not a vault. Confirm whether one lock secures every drawer and whether replacement keys are available. Keep an inventory and consider the garage door and building security as part of the system.

    Built-in power strips can charge batteries and devices, yet they add cord routing and heat considerations. Keep the supply cord protected and use the electrical arrangement only as instructed. Do not run a cabinet across the garage while it remains plugged in. If charging is the main goal, a fixed, clean, ventilated station may work better than routing power through mobile furniture.

    Which one should you buy first?

    Start with a rolling cabinet if you are building from scratch, own several dense or bulky tools, or value a movable landing surface. Start with a top chest only when you already have a compatible rated base and the extra height stays reachable. A small collection may need neither. A compact drawer unit and the right garage wall storage system can cost less floor space.

    Make the decision with a paper tool map, a taped floor footprint, and the published empty weight. Then plan delivery before ordering. The best storage is the one you can place safely, open fully, and use without moving the car for every socket.

    Useful products to compare

    These links open current Amazon search results. Check the dimensions, manual, mounting hardware, warranty, and current availability for the exact model before you order.

    Before you buy or install

    Read the current manual for the exact product you are considering. Confirm its assembled dimensions, rated capacity, mounting requirements, included hardware, working clearances, warranty, and any limits that apply to your wall, floor, electrical circuit, or garage layout.

    Frequently asked questions

    Is a tool chest the same as a rolling tool cabinet?

    Usually not. In mechanic storage, a chest is the upper drawer box that rests on a compatible base or bench. A rolling cabinet is the lower wheeled unit. Retail names vary, so confirm casters, handles, dimensions, product type, and the installation manual.

    Can any tool chest sit on any cabinet?

    No. Match the approved model family, width, attachment hardware, base capacity, and stacking instructions. Similar dimensions do not prove compatibility. An unsupported or unsecured top chest can damage the cabinet and make the stack unstable.

    Which has more useful storage?

    A top chest usually concentrates shallow drawers for hand tools. A rolling cabinet often combines shallow upper drawers with deeper lower drawers for bulky tools. Measure your tools in groups. Cubic-inch totals cannot show whether the drawer heights fit them.

    Can I use a rolling tool cabinet as a workbench?

    Use its top only for the tasks and loads the manufacturer allows. A protective mat or wood surface makes a convenient landing area, but it does not prove the cabinet is suitable for hammering, vise loads, clamping, welding, or standing. Follow the exact manual.

  • How to Choose a Rolling Tool Chest Without Buying Too Much Box

    How to Choose a Rolling Tool Chest Without Buying Too Much Box

    Affiliate disclosure: As an Amazon Associate I earn from qualifying purchases. This article may contain affiliate links, and Bay & Bench may earn a commission at no extra cost to you. Read our full Affiliate Disclosure.

    Learning how to choose a rolling tool chest is mostly an exercise in resisting oversized specifications. A huge capacity number looks reassuring until the cabinet blocks a car door, the shallow drawers do not fit your cordless tools, or the loaded box cannot cross a slab joint. Start with a drawer map and loaded footprint. Then judge capacity wording, casters, stability, worktop, power, locks, and expansion. The comparison uses current manufacturer specifications to show how differently similar-looking cabinets can be rated, so treat it as a fit guide rather than a shop test.

    Quick answer

    Measure your tool groups in one layer, then choose drawer widths and heights that fit them with room for organizers and fingers. A 26 to 42 inch cabinet often suits a home collection better than a 56 or 72 inch unit, but the tool map decides. Put dense drawers low, compare per-drawer and overall ratings separately, and plan the fully assembled footprint. Check empty weight, caster diameter, threshold route, drawer-open clearance, power cord, compatible top pieces, and delivery before ordering.

    How to choose a rolling tool chest in ten checks

    Use this list in order. Later features cannot rescue the wrong footprint or drawer layout.

    CheckWhat to recordFailure it prevents
    Tool mapGrouped tool dimensions and weightWide cabinet with useless drawers
    Cabinet footprintBody, handle, bumpers, caster sweepBlocked vehicle or door
    Drawer mapInternal width, depth, heightStacked tools and jammed latches
    RatingsDrawer, cabinet, top, accessory limitsOverloaded slides or base
    StabilityDrawer latches, load order, floor levelTip or uncontrolled opening
    CastersDiameter, width, locks, floor jointsCabinet that cannot move
    WorktopSurface material and allowed tasksDamaged top or lost landing area
    PowerCord exit, outlets, ventilationSnagged cord or hot charging zone
    ExpansionApproved chest, locker, side cabinetMismatched unstable stack
    DeliveryPackaged size, weight, threshold routeCrated cabinet stuck outside

    Plot the two-dimensional footprint with the garage storage fit calculator before comparing paint colors.

    Inventory by drawer, not by total tool count

    Lay sockets, wrenches, pliers, measuring tools, cordless tools, and specialty equipment in separate groups. Arrange each group as you would like to see it in a drawer. Measure the rectangle, the tallest item, and the rough weight. Leave room for a hand to lift the tool and for an organizer to hold it.

    This exercise often points to fewer, better-shaped drawers. Ten shallow drawers are wasteful when half the collection consists of drills and large pullers. Four deep drawers are miserable when every socket hides below another. Photograph the layouts and carry the numbers while shopping. A cabinet width tells you little about usable drawer width.

    Pick width after the parking test

    A 26-inch single-bank cabinet is easy to place and steer. A 41 or 42-inch double-bank cabinet opens a broad top drawer and holds a mature home collection. Wider 52, 56, and 72-inch boxes provide volume and work surface, but their depth, weight, and turning radius become serious room-planning issues.

    Tape the cabinet body and side handle on the floor. Add the deepest open drawer. Park the vehicle and walk past it carrying a case. If the layout works only with the handle removed or the cabinet rolled out for every use, choose a smaller width. The garage workshop aisle clearance guide helps test the active space rather than the closed rectangle.

    Read drawer and overall ratings separately

    The cabinet rating, drawer slide rating, caster rating, and worktop rating are not interchangeable. Craftsman lists its S2000 41-inch 9-drawer cabinet with 100-pound soft-close drawer slides and a 2,000-pound overall weight capacity. The manufacturer page also identifies 6 by 2 inch casters and steel gauge range.

    A high overall number does not mean one drawer can hold that load. Nor should you multiply the drawer ratings and ignore the cabinet limit. Check how the manual defines evenly distributed loads and accessory limits. Weigh dense drawers with a bathroom or shipping scale when the estimate is close.

    Build a stable load from the bottom up

    Put jacks, large sockets, pullers, and other dense tools in the lowest suitable drawers. Light hand tools can sit higher. Open one loaded drawer at a time and close it before moving the cabinet. Full-width latches are useful because they reduce accidental opening, but you still need to verify that every drawer is fully shut.

    Harbor Freight publishes a 2,600-pound overall rating and 120-pound capacity per pair of drawer slides for the U.S. General Series 3 42-inch roll cabinet. See the current official listing and manual for the exact loading language. Use the ratings only for that model. Another cabinet of the same width may be built very differently.

    Mechanic measuring a cordless tool and an open tool chest drawer
    Internal drawer dimensions decide whether bulky tools fit without wasteful stacking.

    Caster size has to match the floor

    Large-diameter, wider casters cross small joints and debris more easily than tiny hard wheels. The arrangement matters too. Two fixed and two swiveling casters track predictably in a straight move, but they need room to turn. Four swivel casters maneuver in tighter spaces and can feel less settled while steering a heavy box.

    Inspect the slab for control joints, spalls, slope, mats, and the lip at the garage door. A caster brake may stop rolling while allowing swivel. Park the cabinet on level concrete and use any leveling system as instructed. Do not test mobility for the first time after filling every drawer.

    Large casters on a loaded rolling tool chest crossing a concrete garage joint
    Caster diameter, floor joints, and steering room determine whether a cabinet is truly mobile.

    Decide whether the top is storage or work space

    A rubber-matted steel top makes a convenient staging area. A wood top can support light assembly and protects tools from a hard surface. Adding a matching top chest converts that same area into more drawers. Choose the final role before buying either component.

    If you need a real bench for clamping and forceful work, keep it separate. The garage workbench buying guide covers frame stiffness, overhang, vise access, and surface choice. A mobile tool cabinet is storage first. Do not infer hammering, vise, welding, or standing capacity from the overall tool-load number.

    Treat built-in power with ordinary caution

    Integrated outlets can keep chargers and diagnostic tools ready, but they require a clean cord route and accessible plug. Confirm outlet type, total rating, cord length, and how the cord exits with drawers open. Keep it away from caster paths and do not move the cabinet while it is plugged in.

    Charging inside a drawer may be a listed feature on a specific cabinet, yet charger and battery instructions still apply. Keep contacts free of metal debris. Do not assume a powered drawer is fireproof or appropriate for damaged batteries. If the cabinet sits near grinding or finishing, a separate clean charging station is usually easier to manage.

    Plan compatible expansion before you need it

    Ask which matching top chests, side lockers, end cabinets, and hutches the manufacturer currently supports. Record how they attach and how each accessory changes total width, height, load, caster behavior, and wall clearance. A side cabinet can add leverage to a base that is not approved for it.

    Milwaukee lists the 46-inch 8-drawer steel cabinet at an 1,800-pound overall capacity with 100-pound soft-close slides on its official product page. That is a good example of why you should compare a whole model family rather than assuming the specifications of a familiar competitor carry across.

    Delivery deserves its own measurement sheet

    Find the packaged dimensions and shipping weight. Measure gates, driveway turns, thresholds, door openings, and any step. Decide where the pallet or carton can be opened and how the cabinet will be controlled during the move. Remove drawers only if the manual allows it and explains the procedure.

    Large cabinets may need lift-gate service, a pallet jack, several capable adults, or professional delivery into place. Do not use drawers as lifting handles. Assemble near the final location, then inspect fasteners, caster attachment, drawer action, brakes, and locks before loading. Our garage measuring guide includes fixed obstacles, but the delivery path must extend beyond the room.

    Rolling tool chest delivery path measured through a residential garage doorway
    The shipping weight and narrowest doorway belong in the buying decision.

    Check parts support and warranty details

    A rolling cabinet lives a hard life even in a home garage. Drawer clips, locks, keys, liners, caster hardware, slides, and power components may need service long before the steel shell is worn out. Look for a current parts diagram, a reachable support channel, and warranty terms that explain what the manufacturer will provide in practice. A long headline warranty is less useful when routine wear parts cannot be identified.

    Save the model, serial information, receipt, manual, and key code before the cabinet is loaded. Photograph the label. If replacement casters are offered, match the exact mounting plate and rating rather than installing a similar wheel that changes cabinet height or load distribution. Availability changes, so confirm service information at purchase instead of assuming a familiar brand keeps every part forever.

    A right-sized cabinet beats an empty giant

    Buy enough room for the collection you can reasonably expect, not every tool you might own. Twenty percent spare drawer area is pleasant. Half an empty 72-inch cabinet is an expensive way to lose a wall. A smaller box also keeps categories from spreading until each drawer contains three unrelated things.

    Choose only after the taped footprint, drawer map, rating check, and delivery plan all work. Then load slowly and revise the drawer arrangement after several projects. A rolling tool chest should shorten a job. Its size and polish are secondary.

    Useful products to compare

    These links open current Amazon search results. Check the dimensions, manual, mounting hardware, warranty, and current availability for the exact model before you order.

    Before you buy or install

    Read the current manual for the exact product you are considering. Confirm its assembled dimensions, rated capacity, mounting requirements, included hardware, working clearances, warranty, and any limits that apply to your wall, floor, electrical circuit, or garage layout.

    Frequently asked questions

    What size rolling tool chest is best for a home garage?

    Many home collections fit a 26 to 42 inch cabinet, but width alone is a poor selector. Map the tools into measured drawer groups and tape the body, handle, and open-drawer footprint beside the parked vehicle. Choose the smallest cabinet that fits those groups with modest room to grow.

    How much spare drawer space should I buy?

    Around 15 to 25 percent spare usable area is a reasonable planning cushion for a stable hobby. More may make sense for an expanding trade collection. Do not buy a huge cabinet solely for hypothetical tools if it compromises parking, work surface, or delivery.

    Are bigger casters always better?

    Larger wheels generally cross joints and debris more easily, but cabinet height, caster width, steering arrangement, locks, and floor slope still matter. Compare the full system and test the unloaded cabinet first. Keep the rolling route clear.

    Can I add any top chest later?

    No. Use only a chest and attachment method approved for the exact cabinet. Confirm the model family, combined height, load limits, installation sequence, and access to upper drawers. Similar width and color do not establish compatibility.

  • Garage Bike Storage Guide: Fit the Rack to the Bike and Rider

    Garage Bike Storage Guide: Fit the Rack to the Bike and Rider

    Affiliate disclosure: As an Amazon Associate I earn from qualifying purchases. This article may contain affiliate links, and Bay & Bench may earn a commission at no extra cost to you. Read our full Affiliate Disclosure.

    A garage bike storage guide has to account for more than the number of bicycles. A light road bike, a long trail bike, a child’s bike, and a 65-pound electric bike ask different things of the rack and the rider. Tires, fenders, frame shape, handlebar width, brake cables, and lifting ability all affect fit. Start by measuring each bike and watching how it enters the garage. Then choose floor, vertical, pivoting, horizontal, or ceiling storage for that exact routine.

    Quick answer

    Use floor stands for heavy bikes, children’s bikes, and anything ridden daily by someone who cannot lift it comfortably. Vertical wheel racks save wall width and work well for several bikes when heights are staggered. Pivoting vertical racks reduce aisle projection after loading. Horizontal frame cradles suit one or two display-worthy bikes and avoid wheel hooks, but they consume a long wall. Verify bike weight, tire width, wheel diameter, fenders, frame contact, mounting structure, and the clear loading lane before buying.

    Garage bike storage guide by rack style

    Every style trades floor area, wall width, lifting, and access differently. Use the table as a first filter, not a substitute for the product fit chart.

    Storage styleBest useSpace tradeoffFit check
    Floor standHeavy, daily, children’s, or rental bikesUses floor depth, little liftingTire width, rotor and derailleur clearance
    Fixed vertical hookSeveral light to medium bikesSaves wall width, projects bike lengthWheel and tire fit, lift height, solid mounting
    Pivoting vertical rackDense row with side pivotCan fold bikes toward wallHandlebar overlap, pivot sweep, weight
    Horizontal frame cradleOne or two bikes at reachable heightConsumes roughly a bike-length wallFrame shape, bar width, cradle contact
    Ceiling systemRarely used light bikesClears floor, hardest accessRated structure, door envelope, safe operation

    Map the bike zone inside the garage storage plan so the rack does not inherit a wall needed by tools or parking.

    Measure every bicycle in its normal setup

    Record overall length, handlebar width, total weight, wheel diameter, inflated tire width, and the highest point. Note fenders, front baskets, child seats, mirrors, kickstands, and cables. A printed tire size is a starting point; measure the real inflated width when the rack manufacturer tells you to.

    Photograph the frame from the side. Horizontal cradles may struggle with low step-through tubes, compact full-suspension shapes, or cables routed where the cradle touches. Wheel racks need clearance around rims, tires, fenders, and the frame near the front wheel. Do not remove a safety accessory merely to force a bike into an unsuitable rack.

    Give each rider a rack they can use

    A storage system fails when one person cannot load it. Ask each rider to lift the bike into the proposed orientation. Use a wall mark or an empty hook mockup rather than holding a bicycle overhead near a car. If the motion is awkward when rested and the bike is clean, it will be worse after a wet ride.

    Children’s bikes usually belong low or on the floor. A heavy electric bike may fit a wall rack’s published capacity yet remain a poor daily choice because lifting it risks the rider, wall, or bike. Put the most frequently used bikes closest to the exit and leave enough room to roll them out without moving two others.

    Use vertical racks when wall width is scarce

    Vertical storage turns a bike’s length into wall projection. Several bikes can occupy a shorter wall if the handlebars overlap. Feedback Sports recommends roughly 16 to 24 inches between Velo Hinge hooks depending on stud spacing and staggered heights. Its current Velo Hinge 2.0 FAQ explains a practical mockup: lay bikes near each other to see how handlebars nest, then transfer the height difference to the wall.

    That spacing is product guidance, not a universal rule. Wide mountain-bike bars, baskets, and brake levers demand more. Mark the full wheel and handlebar envelope, then protect the adjacent car door and the person loading the bike.

    Mountain bikes on staggered vertical wall racks beside an open garage bay
    Staggering vertical racks helps handlebars overlap, but each bicycle still needs a clear loading lane.

    Pivoting racks can recover the aisle after loading

    A pivoting rack holds the bike vertically, then swings it toward the wall. This can reduce how far the row occupies the aisle when stored. Feedback Sports lists the Velo Hinge 2.0 for up to 50 pounds when properly mounted to a wall stud, with a 4-inch hook opening and published compatibility from 700C by 23 mm through 29 by 3.0 inch combinations. See the manufacturer page for the exact fit diagram and instructions.

    Include the pivot sweep in the layout. Pedals and handlebars move sideways as the bike folds. A neighboring cabinet, car mirror, or second bike can stop the hinge before it reaches the useful angle.

    Horizontal cradles favor easy access and a long wall

    Horizontal racks support the frame on padded arms. The bike stays closer to normal carrying height and becomes easy to inspect before a ride. This format works nicely above a low cabinet or along a wall with no door, although the full wheelbase and handlebars occupy considerable width.

    Feedback Sports lists its Velo Wall Rack 2D at a 50-pound maximum, with cradle projection adjustable from 8 to 12 inches and vertical arm adjustment. The official product page warns that very wide handlebars, long wheelbases, and fat bikes may not suit it. Frame contact matters. Confirm that both cradles support strong tube locations without pressing cables or delicate finishes.

    Road bicycle held horizontally on padded frame cradles in a garage
    Horizontal cradles keep a favorite bike low and visible while consuming a long stretch of wall.

    Simple hooks still require a structural decision

    A vinyl-coated hook can be a sensible low-cost answer for a standard bike. Park Tool lists its 451 wood-thread hook at a 115-pound hook limit when securely screwed into solid material, while making the user responsible for the mounting material. Read the manufacturer page closely. The large hook rating does not turn thin drywall into structure.

    Confirm tire and rim fit, thread engagement, and the direction of loading. Use the fastener and substrate called for by the manufacturer. If you do not know what is inside the wall, find out before drilling or choose a supported floor rack.

    Keep bicycles outside the parking and door envelopes

    A vertically stored bike projects about its length from the wall until it pivots. A horizontal bike projects by its handlebar and pedal width while stretching along the wall. Tape both shapes on the floor and wall. Open the vehicle doors, house door, garage door, cabinets, and freezer. Then walk the normal path with grocery bags or a trash bin.

    Compare the remaining route with the garage workshop aisle clearance guide. A handlebar end at face height deserves extra space. Place a rear-wheel bumper or wall protector where the system expects one, and keep oily chains away from clothing paths and painted car panels.

    Store electric bikes for weight, heat, and cables

    The motor does not harm a rack, but the added weight changes lifting and mounting. Use the complete bike weight with battery and accessories when comparing rack capacity. Follow the bicycle and battery manufacturers’ storage and charging instructions. Do not assume removing the battery is optional or required; platform guidance varies.

    A floor rack is often the honest solution. It lets a rider roll the bike into place and keeps a heavy frame low. Give the kickstand, pedals, and handlebars room, and keep charging cords out of tire and walking paths. Check whether a front-wheel stand clears the brake rotor and fender, and whether the tire stays stable at normal pressure. A plain arrangement that works after a tiring ride will beat an overhead system that everyone avoids.

    Heavy electric bicycle parked in a floor rack near a garage outlet
    A floor rack is often the better answer when lifting a heavy electric bike would discourage daily use.

    Be cautious with ceiling storage

    Ceiling hoists and overhead cradles free wall and floor space, but they add lifting, rope management, and a falling-object concern. They also compete with the open garage door, tracks, opener, lights, and overhead racks. Use them only for bicycles light enough to handle safely and ridden rarely enough that the access penalty is acceptable.

    Verify the structure, fasteners, hardware capacity, locking method, and clear operating route from the exact manual. Never hang a bicycle where a partial release could reach a person or vehicle. If the ceiling location requires standing on another ladder while controlling the bike, choose a different storage method.

    Mock up the row before drilling

    Cut cardboard rectangles for the rack bodies and tape outlines for wheels, bars, and pedals. Mark stud locations. Bring every bicycle into position one at a time and rehearse the loading motion. Stagger heights only as much as each rider can manage.

    Leave the mockup for several days. If it blocks the route or requires moving another bike, revise it. Check the garage wall storage options for renters when permanent anchors are not permitted. A freestanding rack may consume more floor area, but it avoids unsafe guesses about an unfamiliar wall. If bikes must share the same surface with tools, compare the hardware and working heights in the garage wall storage systems guide before committing the studs.

    Write each rider’s name on the temporary position and try a normal weekday reset. Helmets, locks, pumps, and child seats need homes too. Watch which bike gets left in the aisle when someone returns tired or in a hurry. That abandoned bike usually exposes a hook set too high, a blocked loading lane, or an accessory that catches the neighboring handlebars. Fix the awkward step before drilling.

    Useful products to compare

    These links open current Amazon search results. Check the dimensions, manual, mounting hardware, warranty, and current availability for the exact model before you order.

    Before you buy or install

    Read the current manual for the exact product you are considering. Confirm its assembled dimensions, rated capacity, mounting requirements, included hardware, working clearances, warranty, and any limits that apply to your wall, floor, electrical circuit, or garage layout.

    Frequently asked questions

    Is it safe to hang a bike by one wheel?

    Use a rack designed for wheel storage and confirm the wheel, tire, bike weight, mounting surface, and hardware meet the manufacturer’s requirements. Do not force a fat tire, deep rim, fender, or incompatible wheel into a basic hook. Inspect the rack and contact point regularly.

    How far apart should vertical bike racks be?

    Spacing depends on handlebar width, bike size, stud locations, and whether heights are staggered. Feedback Sports suggests roughly 16 to 24 inches for its Velo Hinge setup as a starting point. Mock up the actual bikes and follow the exact rack instructions.

    What is the easiest storage for a heavy electric bike?

    A compatible floor stand is usually easiest because the bike can roll into place. A wall rack may carry the published weight but still require an uncomfortable lift. Consider the shortest and least strong regular rider, battery guidance, tire fit, and charging-cord route.

    Can a bike rack mount only to drywall?

    Use only the substrate and fasteners specified by the rack manufacturer. Many wall racks require a wood stud, masonry, or another solid support. Drywall by itself is not a safe default. If the wall structure is uncertain, choose a freestanding system or get qualified installation help.

  • Vertical vs Horizontal Bike Storage: Which Wall Layout Fits?

    Vertical vs Horizontal Bike Storage: Which Wall Layout Fits?

    Affiliate disclosure: As an Amazon Associate I earn from qualifying purchases. This article may contain affiliate links, and Bay & Bench may earn a commission at no extra cost to you. Read our full Affiliate Disclosure.

    The vertical vs horizontal bike storage decision comes down to which dimension your garage can spare. Vertical racks use less wall width per bicycle but push the bike farther into the room and usually require a higher lift. Horizontal cradles use a long wall section and tend to keep the bike at a friendlier height. Neither orientation is automatically safer for a rim or frame. Fit depends on the exact rack, bicycle, mounting structure, and the person loading it.

    Quick answer

    Choose vertical storage for three or more light to medium bikes when wall width is limited and riders can lift the front wheel comfortably. Stagger rack heights so handlebars overlap. Choose horizontal storage for one or two bikes, frequent access, and riders who prefer a lower lift. It works best on a long clear wall and with frame geometry that sits securely on padded cradles. Heavy electric bikes often belong on the floor even when a wall rack lists enough capacity.

    Vertical vs horizontal bike storage at a glance

    DecisionVertical storageHorizontal storage
    Wall widthLower per bike, especially when staggeredRoughly a bike-length wall per bike
    Projection into roomBike length unless rack pivotsHandlebar, pedal, and rack projection
    LiftingFront wheel rises highWhole bike lifts to cradle height
    Bike contactUsually tire or rim at front wheelUsually frame tubes on padded arms
    Multiple bikesDense rows are practicalRows require substantial wall length
    Daily accessGood when each bike has a clear loading laneVery good for one bike at waist to chest height
    Common mismatchTire, fender, weight, or liftFrame shape, wide bars, or short wall

    The garage storage systems overview helps decide whether bicycles should share a wall with tools or claim a separate zone.

    Compare wall width and floor projection together

    A vertical bike may need only a modest strip of wall, but its wheels can project five to six feet into the garage during loading and storage. A pivoting rack reduces that projection after the bike is hung, though pedals and bars still occupy depth. A horizontal bike stretches along most of its wheelbase while the bars and pedals define room depth.

    Measure the complete bicycle, not a generic diagram. Mark both the wall outline and the floor shadow. Open the nearest car door. A vertical system may win on paper yet block the driver’s shoulder path, while a horizontal bike above a low cabinet may use otherwise dead wall space.

    Vertical bike rack spacing depends on handlebars

    Feedback Sports recommends roughly 16 to 24 inches between its Velo Hinge 2.0 hooks, depending on stud spacing and staggered heights. The manufacturer FAQ suggests laying bikes together to see how the handlebars fit into neighboring frame triangles, then carrying the height difference to the wall.

    This is a useful mockup technique, not a universal spacing rule. A modern mountain bike with broad bars may require more room than a drop-bar road bike. Baskets, mirrors, brake levers, and child seats can prevent the intended overlap. Stagger only as high as the regular rider can comfortably load.

    Three bicycles staggered on vertical wall hooks in a narrow garage
    A staggered vertical row lets handlebars overlap, but the bike bodies project into the room.

    Horizontal racks depend on frame geometry

    Horizontal racks usually support the top tube or other frame tubes on two padded cradles. A level traditional diamond frame is easy to picture. Step-through, compact, full-suspension, and small children’s frames may require independently adjustable arms or a different storage style.

    The Feedback Sports Velo Wall Rack 2D allows horizontal and vertical arm adjustment, with cradles 8 to 12 inches from the wall and a 50-pound maximum load. Its official product page notes possible limitations with 780 mm and wider handlebars, long wheelbases, and fat bikes. Check cable routing and frame finish at both support points before trusting the fit.

    Single bicycle supported horizontally on adjustable padded wall arms
    Adjustable arms can level an unusual frame, provided the contact points and handlebar depth fit.

    Lifting style may decide before space does

    To load a vertical hook, you usually roll the bike onto the rear wheel and raise the front. To load a horizontal cradle, you lift most of the bike and place it onto two arms. One motion is not easier for everyone. Bicycle weight, handlebar shape, rider height, shoulder mobility, and balance all matter.

    Rehearse with the real bike away from vehicles. If the rider twists, strains, or loses control, lower the rack or choose floor storage. Capacity is only the hardware limit. It does not measure whether a parent, child, or tired commuter can make the required movement safely every day.

    Tire and wheel fit control vertical storage

    A vertical rack may contact the front tire, rim, or wheel at several points. Read the allowed wheel diameter, tire width, rim depth, fender clearance, and bike weight. Feedback Sports lists its Velo Hinge 2.0 for 700C by 23 mm through 29 by 3.0 inch combinations and up to 50 pounds with proper stud mounting. The product page provides the current fit details.

    Do not squeeze a fat tire into a narrow hook or let a hook press a fender. Deep carbon rims and unusual wheel systems deserve explicit manufacturer confirmation. A basic hook may carry plenty of weight but still be the wrong shape for the wheel.

    Frame contact controls horizontal storage

    Padded cradles protect paint only when the bike rests at stable, approved points. Dirt trapped under a pad can abrade a finish. Brake hoses, shift cables, and electronic wires should not carry the load. Inspect the support after the first few uses and periodically afterward.

    Some adjustable racks can angle their arms to accommodate a sloping tube. That does not guarantee every suspension layout or carbon frame is suitable. Ask the bicycle and rack manufacturers when the frame has delicate aerodynamic shapes, integrated storage, or unusual routing. If contact remains uncertain, tire-supported floor storage is the conservative choice.

    A pivot changes the vertical footprint

    Pivoting vertical racks let a stored bike swing toward the wall, which can recover aisle space. Steadyrack’s Classic range illustrates how fit is split by wheel diameter and tire width: its road, mountain, and fat-bike racks use different tire ranges. The current comparison page also publishes maximum weights and fender compatibility for each model.

    Measure the entire sweep. The handlebar arcs sideways and the pedal may approach the wall. Bikes must still separate enough to retrieve one without scraping its neighbor. Pivoting helps a dense row, but it does not erase the physical width of bars and bodies.

    Heavy electric bikes favor the floor

    An electric bike can fall below a wall rack’s published weight limit and still be impractical to lift. A stable floor stand avoids the high movement and makes daily access easier. It also accommodates many step-through frames without cradle questions.

    If wall storage remains attractive, weigh the complete bicycle as stored and follow both the bike and rack instructions. Consider the battery, front fender, wheel size, and where the motor mass sits. Keep charging cords outside the walking and rolling path. Do not use the rack as a charging-cable anchor.

    Test the orientation against the whole garage

    Tape full-size bike outlines on the wall and floor. Include a loading lane. Park the vehicle, open every door, run the garage door, and move trash bins or lawn equipment through their normal route. Compare the active space with the garage workshop aisle clearance guide.

    The test should include the shortest rider and the heaviest bike. Use cartons to represent nearby cabinets so handles and pedals cannot hide in a flat drawing. A few days of living with the tape usually settles the vertical vs horizontal argument faster than another product review.

    Cardboard bike outlines taped on a garage wall beside a parked car
    A full-size wall and floor mockup reveals collisions before the first mounting hole.

    One bike and a family row need different answers

    For one frequently ridden bicycle, horizontal storage can be wonderfully simple. Put the cradles at a height the rider can reach, leave space for the bars, and the bike comes down in one motion. The long wall footprint is less troublesome because no neighboring bikes need to overlap. A single vertical hook wins when the available wall is narrow, but make sure its loading lane does not cross the car.

    A family row changes the math. Vertical racks usually pack more bikes into a reasonable width, especially when road and mountain-bike handlebar heights alternate. Keep children’s bikes low or on the floor and reserve the highest position for a light bicycle handled by a capable adult. Use the garage storage planning guide to assign each rider a route. Test with every bicycle present. Product photos often make the row look easier by leaving one bike out.

    Choose the orientation that stays easy

    Vertical storage is the strong choice for a family row on a short wall, particularly when bikes are light enough to tip and lift. Horizontal storage is better for one or two bikes on a long wall and for riders who want a more direct lift. A mix is often best: daily heavy bikes on the floor, light adult bikes vertical, and one high-cost bike on an adjustable horizontal cradle.

    Renters and anyone unsure about wall structure should review garage wall storage for renters. A freestanding rack can be less compact, but it is better than an anchor chosen by guesswork.

    Useful products to compare

    These links open current Amazon search results. Check the dimensions, manual, mounting hardware, warranty, and current availability for the exact model before you order.

    Before you buy or install

    Read the current manual for the exact product you are considering. Confirm its assembled dimensions, rated capacity, mounting requirements, included hardware, working clearances, warranty, and any limits that apply to your wall, floor, electrical circuit, or garage layout.

    Frequently asked questions

    Does vertical bike storage damage wheels?

    A compatible wheel-support rack used within its fit and weight limits should support the bike as designed. Confirm tire width, rim depth, wheel diameter, fenders, and contact points. Do not force an incompatible wheel into a hook, and inspect both rack and wheel regularly.

    Which orientation saves more garage space?

    Vertical storage usually saves wall width per bike. Horizontal storage may use dead space above a low cabinet and can project less than a fixed vertical bike. Measure both the wall outline and floor projection with the car and doors in place.

    Is horizontal storage easier to load?

    It often keeps the bike at a lower final height, but you lift most of the bicycle at once. Vertical loading raises the front wheel while the rear stays on the floor for part of the motion. Test both movements with the real bike and regular rider.

    Can I mix vertical and horizontal racks?

    Yes. Many garages work better with daily heavy bikes on floor stands, lighter bikes in a vertical row, and one frequently maintained bike on a horizontal cradle. Keep every loading lane and rack sweep clear.

  • Garage Tire Storage Rack Guide: Fit the Rack to Your Wheels

    Garage Tire Storage Rack Guide: Fit the Rack to Your Wheels

    Affiliate disclosure: As an Amazon Associate I earn from qualifying purchases. This article may contain affiliate links, and Bay & Bench may earn a commission at no extra cost to you. Read our full Affiliate Disclosure.

    A garage tire storage rack guide should begin with the wheels in front of you, not with a product photo. Four mounted SUV wheels can be much heavier and wider than four bare passenger tires. A rack that looks generous online may crowd the garage door track, put the top tire beyond a comfortable lift, or miss every useful wall stud. This guide works from the set outward: identify whether the tires are mounted, measure the bundle, calculate the actual load, inspect the wall, and then choose a rack style. That order is less exciting than clicking “buy,” but it prevents most expensive mistakes.

    Quick answer

    For one seasonal set, a properly installed wall rack saves the most floor area when the wall structure and lifting height are suitable. A rolling rack is kinder to your back and easier to relocate, but it consumes floor space. Mounted wheels may be stacked or hung according to the tire maker’s guidance; unmounted tires should generally stand upright rather than hang or sit in a long stack. In every case, keep tires cool, dry, clean, shaded, and away from ozone-producing electrical equipment.

    Garage tire storage rack guide: start with the set you own

    Write down five facts before comparing racks: tire quantity, mounted or unmounted condition, maximum overall diameter, maximum section width, and weight of the heaviest tire or wheel assembly. Do not assume four matching wheels weigh the same after repairs, aftermarket wheel changes, or staggered fitments. If you cannot find a trustworthy wheel-and-tire weight, use a bathroom scale with a safe lifting method or ask the tire shop to weigh one assembly.

    Measure the set as it will sit. For an upright wall rack, line the wheels together and measure the total row width. Add room for your hands and for the rack’s end brackets. Measure the deepest projection from the wall, including the wheel face. Then use the process in our garage measurement guide to record door tracks, opener rails, windows, switches, steps, and the vehicle envelope.

    A rack is not a magic box. Its published width may describe the frame, the adjustable span, or usable tire space. Read the dimension drawing and installation manual for the exact model. If the page has no drawing, no load rating, and no anchoring instructions, keep shopping.

    Homeowner measuring the height and width of four mounted wheels before selecting a tire rack
    Measure the actual set, including the widest sidewall and wheel face, instead of buying from tire size alone.

    Mounted and unmounted tires need different support

    The storage orientation matters because the wheel changes how the tire carries its own shape. Michelin’s current consumer tire storage guidance says mounted tires can be hung or stacked, while tires without rims should stand upright and should not be hung or stacked. Follow the guidance for your tire brand if it differs.

    What you are storingSensible rack stylesMain fit checkHandling concern
    Four tires mounted on wheelsWall cradle, low floor rack, wheel tree, rolling rack, or stable stackTotal weight and wheel-face clearanceEach assembly may be awkward to lift
    Four unmounted tiresUpright floor rack or upright wall cradleSide support without pinching the sidewallsKeep the row stable and rotate tires periodically if the maker advises it
    Two staggered pairsAdjustable-width wall or floor rackWidest pair plus separatorsLabel positions before storage
    Multiple seasonal setsRolling two-level rack or several low racksTotal room, rated load, and caster capacityAvoid repeated lifting above shoulder height

    The table is a starting point, not permission to improvise. A shelf intended for boxes may have a wire spacing or edge shape that treats rubber poorly. A wheel hook must support the wheel in the manner its maker describes. Use a product designed for the load and orientation you own.

    Mounted wheels stacked flat beside unmounted tires stored upright on a low rack
    Mounted and unmounted tires need different storage orientations, so the first decision is what will be on the rack.

    Calculate the load without optimistic arithmetic

    Add the weight of every stored assembly, then compare that total with the rack’s stated capacity. Do not divide a 400-pound rating by four and assume each position is independently rated to 100 pounds. The rating applies to the complete installed product under the maker’s test and fastening conditions. Uneven loading, a missed stud, damaged masonry, or an extended adjustable frame can change the situation.

    As a useful reference point, Tire Rack’s current wall-mounted tire rack lists a 400-pound capacity, an inner width adjustable up to 52 inches, and a total width of 66 inches. Those figures describe that product, not all wall racks. Its page also says the unit attaches to wall studs. A lighter-looking rack from another maker may use different geometry and instructions.

    Leave a practical margin rather than shopping right at your calculated load. That margin does not repair weak framing or replace correct installation. It simply keeps normal uncertainty, such as a future wheel change or a mistaken weight estimate, from consuming the whole rating on day one. If the wall condition is uncertain, move the set to a floor rack and ask a qualified person to assess the mounting surface.

    Choose a location that works with the garage in motion

    Stand where the rack might go and move everything around it. Open the garage door through its full travel. Raise the vehicle hatch. Swing the service door. Pull the nearby cabinet drawer out. A wall can look vacant while the room is still, then become a collision zone during a normal Saturday.

    Keep the rack outside the car’s parking envelope and away from the path used to carry a wheel to the driveway. The overhead clearance guide explains how to map door hardware and vehicle height before placing anything high. Tire storage should also stay away from direct sun, hot pipes, generators, electric motors, and chemicals that can affect rubber. Michelin specifically calls for a cool, dry, clean indoor location away from sunlight, heat, and ozone sources.

    Height deserves honest judgment. A shelf above head level may clear the car yet force you to lift a heavy wheel with bent wrists while standing beside a fender. I would rather give up a strip of wall at chest height than save that strip and dread every seasonal changeover. If another adult cannot assist and the assemblies are heavy, a low rack or rolling cart is usually the better answer.

    A wall rack is only as good as the wall connection

    Find the framing or evaluate the masonry before buying. Stud spacing, wall finish thickness, concrete condition, and utilities behind the wall all affect installation. Do not substitute random anchors because the included hardware looks inconvenient. Follow the rack maker’s instructions for fastener type, quantity, spacing, pilot holes, and substrate. When the instructions require a ledger or specific structural attachment, treat that as part of the rack rather than an optional upgrade.

    Adjustable racks add another dimension: some change width at the crossbar while others move the tire support rails. Confirm that the chosen setting still lets every bracket land where the manual requires. The broader garage wall storage systems guide helps compare structural attachment and finished projection across rail, slatwall, and dedicated rack products.

    Install the empty frame, check it for level and square, then inspect every connection before loading. Add one wheel at a time. Watch for movement, wall crushing, loose hardware, or a rail that twists under the first load. Stop if anything changes. A rack full of wheels is not the moment to discover that one bracket never reached framing.

    Empty adjustable tire rack positioned against exposed wall studs during installation
    An empty rack is the right time to verify stud positions, level, fastener instructions, and installation clearance.

    Floor and rolling racks trade wall work for footprint

    A low floor rack avoids structural wall questions and keeps lifting close to the body. It is a strong choice for renters, garages with questionable masonry, and large wheel assemblies. The cost is floor space. Measure the rack with tires loaded, including the handle or caster sweep.

    A rolling rack makes sense when the set must move between a storage corner and the driveway. Tire Rack’s current rolling rack, for example, lists room for up to eight passenger or light-truck/SUV tires and publishes a 77 by 61.5 by 19.25 inch overall size. Those dimensions show why a rolling design needs a real parking address. It cannot live indefinitely in the aisle.

    Check the capacity of the rack, each shelf, and the casters. Look for wheel locks that can be reached after loading. Roll the empty unit across expansion joints and the garage threshold before trusting it with wheels. A tall loaded cart should move slowly on a clear, level route. If the route slopes or crosses a rough lip, a stationary low rack may be the calmer choice.

    Prepare the tires before they disappear for a season

    Clean off road salt, grit, brake residue, and moisture, then let the tires dry. Mark each tire’s vehicle position using a removable method that will not damage the wheel finish or tire. Keep the record with the car’s maintenance notes so the next rotation does not depend on memory.

    Michelin advises sealed plastic bags when possible and maintaining correct inflation for mounted tires during storage. Use clean, dry bags made for the purpose, remove as much trapped air as practical, and follow the tire maker’s instructions. Do not wrap a damp wheel and create a private humid chamber around its finish.

    Inspect tread, sidewalls, beads, valves, and wheels as you handle the set. Storage does not heal damage. If you see cuts, bulges, cracking, bent rims, persistent pressure loss, or anything else concerning, have a tire professional inspect the assembly before it returns to service. Also record the tire identification and manufacture information while it is easy to read. The rack keeps tires organized; it does not decide whether they remain fit for use.

    Mock up the rack at its loaded size

    Use painter’s tape to mark total width, top height, and loaded projection. A cardboard rectangle at the furthest point helps you feel how far the wheel faces enter the room. Park the car, open its doors, carry a laundry basket through the aisle, and operate the garage door. Leave the mockup up for a few days.

    Then rehearse the lift with a harmless object of similar weight and size, held close to your body. Do not climb while carrying a wheel. Do not stand on a rolling stool or the car sill. If the rack requires a ladder for loading, reconsider the height. A tire rack should reduce awkward handling, not turn a twice-yearly chore into a balancing act.

    Feed the measured dimensions into the planning sequence in how to plan garage storage. That exercise forces the tire set to compete honestly with bicycles, lawn equipment, doors, and parking. Seasonal items often win a premium wall simply because they arrived first. A mockup shows whether the same space would work harder for daily gear.

    Compare rack listings with one short worksheet

    For each candidate, record usable width, overall width, loaded depth, rack weight, rated load, required mounting surface, included hardware, adjustment range, warranty, and access to instructions. Add the height at which the bottom support will sit in your garage. These fields make vague listings obvious.

    Look closely at how the tires touch the rack. Broad, smooth supports are easier to understand than sharp edges or widely spaced wires. Check whether end stops retain the outside tires and whether the frame can fold when empty. A folding rack still needs room to unfold without hitting a cabinet or vehicle.

    Do the same comparison for floor options using our wall-mounted versus freestanding storage framework. The exact products differ, but the trade is familiar: wall storage saves floor space and demands trustworthy attachment; freestanding storage occupies the slab and is easier to relocate. Pick the drawback you can manage, not the product with the most dramatic capacity number.

    Mistakes that make a tire rack annoying or unsafe

    The first mistake is buying from tire diameter alone. Section width, wheel offset, overall row length, and total mass decide the fit. The second is mounting high because floor space is scarce. If you cannot load the top position with controlled movement, the space is not truly available.

    Other failures are quieter. Owners place tires beside a generator or electric motor, load damp wheels into sealed covers, hide the electrical panel, or let a rolling rack become a permanent aisle obstacle. Some use a generic shelf whose capacity is not documented for the span and installation. Others mix loose tires and mounted wheels in an orientation that conflicts with tire-maker guidance.

    Finally, avoid permanent assumptions. A future vehicle may use larger wheels. Keep the measurements and product manual, inspect fasteners when the rack is unloaded, and stop using components that bend, crack, corrode, or loosen. The best rack is not invisible. It is easy to load, easy to inspect, and boringly stable every time the seasons change.

    Useful products to compare

    These links open current Amazon search results. Check the dimensions, manual, mounting hardware, warranty, and current availability for the exact model before you order.

    Before you buy or install

    Read the current manual for the exact product you are considering. Confirm its assembled dimensions, rated capacity, mounting requirements, included hardware, working clearances, warranty, and any limits that apply to your wall, floor, electrical circuit, or garage layout.

    Frequently asked questions

    Should tires be stored vertically or horizontally?

    It depends on whether the tires are mounted on wheels. Michelin says mounted tires may be hung or stacked, while unmounted tires should stand upright and should not be hung or stacked. Check the current guidance from your tire manufacturer and use a rack designed for that orientation.

    How much weight should a garage tire rack hold?

    Add the verified weight of every tire or wheel assembly you will store, then choose a rack whose documented capacity exceeds that total under your planned installation conditions. Do not invent a capacity from the rack’s appearance. Follow the exact model’s mounting instructions.

    Can I mount a tire rack into drywall anchors?

    Drywall itself is not structural support for a loaded tire rack. Many products require attachment to wood studs or suitable masonry with specified fasteners. Follow the manufacturer’s instructions. If you cannot confirm the wall structure, use a floor rack or ask a qualified installer.

    Where should tires be stored in a garage?

    Choose a cool, dry, clean indoor area away from direct sunlight, heat, chemicals, and ozone-producing equipment such as some motors or generators. Keep the set outside door travel, the vehicle envelope, electrical access, and normal walking routes.

  • Lumber Storage in Small Garage Spaces: Keep Stock Straight and Reachable

    Lumber Storage in Small Garage Spaces: Keep Stock Straight and Reachable

    Affiliate disclosure: As an Amazon Associate I earn from qualifying purchases. This article may contain affiliate links, and Bay & Bench may earn a commission at no extra cost to you. Read our full Affiliate Disclosure.

    Lumber storage in small garage spaces becomes difficult for one simple reason: wood arrives in several shapes that do not want to share furniture. Eight-foot boards need support along their length. Full sheets need a broad, stable base. Short offcuts multiply until their bin becomes archaeology. Trying to solve all three with one deep shelf usually wastes wall area and makes the useful piece hard to reach. A better system separates the stock by shape, keeps weight close to sound structure, and reserves a clear route from the garage door to the bench or saw.

    Quick answer

    Store long, dry boards horizontally on a properly rated rack with enough support points to limit sag. Keep full sheet goods low, restrained, and either nearly vertical on a stable cart or flat on a base designed for the load. Use a low divided corral for short pieces. Raise wood off a damp slab, keep rain and direct sun away, and check the rack maker’s capacity and attachment instructions. Leave your longest stock path clear before assigning the wall.

    Lumber storage in small garage spaces starts with an inventory

    Measure the stock you keep, not the idealized stock you imagine buying. Sort it into long boards, short boards, narrow strips, sheet goods, turning blanks, and genuinely useful offcuts. Record the longest length, widest sheet, thickest bundle, and approximate quantity in each group. Then estimate weight from a reliable supplier or material reference. Wet construction lumber can be considerably heavier than the same boards after drying, so do not size a rack from a light sample.

    Measure the room with the same discipline. Our garage measurement guide covers wall width, curb ledges, door tracks, opener hardware, outlets, panels, windows, and vehicle movement. Add the path a full sheet or long board follows from the driveway. A rack can fit perfectly yet fail because a board cannot turn between the garage door and the wall.

    Inventory also reveals what to stop storing. Set a maximum offcut length below which pieces go to a project bin, recycling stream, or disposal route. Small garages are not lumberyards. Keeping twenty nearly identical scraps costs more useful access than it saves in material.

    Match each stock shape to a storage method

    Stock typeCompact storage methodSupport priorityAccess tradeoff
    Long boards and trimHorizontal wall-mounted cantilever rackSeveral level arms under the lengthExcellent visibility, but consumes a long wall
    Short boardsLow vertical corral with front restraintBroad floor base and divided baysFast sorting, limited to pieces that remain stable
    Full plywood or MDFLow sheet cart or rated vertical panel rackWide base, side restraint, suitable castersEasy selection, but heavy to move when full
    Thin strips and moldingNarrow horizontal cubbies or tubes designed for storageContinuous support for flexible piecesCompact, but labels and length sorting help
    Small offcutsShallow open bins near the benchKeep weight low and edges containedConvenient until the bin becomes too deep

    Use this table to divide the wall into smaller jobs. A horizontal rack can sit above a low sheet cart if the loaded projections, lift path, and total wall load all work. A short-stock corral can tuck beneath the lowest rack arm. The pieces may share a wall, but they should not depend on the same restraint.

    The comparison in 18 versus 24 inch garage shelves is helpful for nearby tools and finishes. Lumber itself rarely benefits from a deep general shelf unless the stock is short enough to sit fully supported.

    Keep long boards horizontal and supported

    Horizontal storage is the calmer choice for long stock in a tight room. It puts board ends in view, lets you remove one piece without lifting an entire vertical bundle, and reduces the risk of a tall board sliding into the aisle. The rack arms must share the load and line up so the stock does not twist around a high support.

    Choose support spacing from the rack instructions, stock stiffness, and the quality you need to preserve. Thin trim and flexible molding need closer or nearly continuous support. Thick framing boards tolerate wider spacing, but a visibly sagging board is asking for another arm. Keep the heaviest, thickest stock on lower levels. Put light molding higher, where it is less awkward to lift.

    Do not let ends project into a doorway or the normal head path. If the available wall is shorter than the boards, protect the ends and reconsider the room. The garage wall storage systems guide explains the difference between accessory panels and structural storage. A pegboard hook is not a lumber rack simply because a board rests on it.

    Long boards supported horizontally on three evenly spaced steel cantilever rack uprights
    Several support points reduce sag and make load sharing easier to inspect than one heroic bracket at each end.

    Treat rack capacity as a complete system

    A capacity statement has meaning only with its span, arm arrangement, fasteners, substrate, and loading instructions. Check whether the manufacturer rates each arm, each level, or the complete rack. Confirm whether the number assumes evenly distributed weight. Concentrating a stack over one arm can overload that point even when the arithmetic for the whole rack looks comfortable.

    Attach the uprights exactly as instructed. Find sound framing or use the specified masonry connection. Account for drywall thickness and any wall irregularity that prevents the upright from sitting flat. Do not hide a questionable connection behind more boards. If the wall structure is uncertain, use a freestanding rack designed for lumber and have the site assessed before adding weight.

    OSHA’s workplace rule on secure material storage is not a residential building code, but its plain principle is worth borrowing: stacked material should remain stable against sliding or collapse. In a home shop, that means front stops where needed, no climbing on racks, and no board pile that must be caught when one piece is removed.

    Store short boards vertically only when they stay controlled

    A low vertical corral turns awkward short stock into a readable library. Divide it by length or material, keep the tallest bay against the wall, and add a front rail high enough to retain the pieces. The base should carry the load; the wall connection prevents tipping. Do not hang the full weight from a decorative cabinet side.

    Set a maximum length for vertical storage based on stability and ceiling access. A long board that leans far into the room has a large sweep when it slips. Move those pieces to the horizontal rack. Avoid a bin so deep that retrieving one strip requires leaning over sharp ends. Several shallow bays are kinder than one crowded chest.

    This is also the moment to be ruthless with offcuts. Keep material you can name a plausible use for, not every rectangle larger than your palm. One bay for hardwood, one for common plywood, and a small tray for test pieces may be enough. Empty the bin on a schedule. If the front rail bows or pieces begin standing in the aisle, the collection has passed its designed capacity.

    Short lumber and narrow offcuts sorted upright in a low divided plywood corral
    A low corral makes short stock visible and restrained without putting long, unstable pieces on end.

    Give sheet goods a broad base and a restraint

    Full panels are heavy, flexible, and hard to steer. Store them close to the floor on a base that supports the bottom edge and cannot tip as one sheet is pulled away. A slight lean toward a solid back can be useful when the rack was designed for it. Do not lean sheets loose against drywall, where the stack can slide or trap moisture along the bottom edge.

    A mobile sheet cart works when the route is level, wide, and clear. Use a broad wheelbase, appropriately rated casters, accessible brakes, and side rails that contain the stack. Park it against a wall so it cannot wander. Before building or buying, tape the loaded footprint and try the turn from the garage door. The cart grows difficult quickly as panels accumulate.

    For a fixed shop, a low vertical rack may feel steadier. Flat storage protects sheet shape well but consumes a large footprint and encourages people to pile unrelated objects on top. Pick based on how often you use full sheets and whether you can safely extract the bottom panel. No layout eliminates the weight; it only changes when you handle it.

    Full plywood sheets secured on edge in a low rolling cart beside a clear garage route
    A broad base and side restraints matter more than a tiny footprint when several heavy panels travel together.

    Protect wood from slab moisture and weather swings

    Keep lumber away from liquid water and raise it off the concrete. The USDA Forest Products Laboratory’s Wood Handbook chapter on drying and moisture control recommends protecting stock from precipitation and spray. It also explains that storage conditions should reflect the wood’s intended use and moisture requirements.

    Dry framing lumber and plywood may tolerate solid piling in a protected shed under the conditions discussed by the handbook. Green or rewetted stock needs airflow and stickered stacking. Furniture parts, flooring, and machined stock are more sensitive to uncontrolled humidity. In a garage, the practical lesson is to identify what you bought. Do not seal wet lumber into a tight pile and expect it to behave like kiln-dried cabinet stock.

    Use a moisture meter as a comparative tool if the project demands it, and follow the meter instructions for species and temperature correction. Watch exterior walls and garage corners for condensation or leaks. A dehumidifier can help in a reasonably enclosed space, but it is not a substitute for fixing water entry. Leave inspection access around the rack so dampness does not stay hidden.

    Build the lumber path into the workshop layout

    Stand at the garage opening with an imaginary eight-foot board. Trace its trip to storage, then from storage to the saw. Include the turning arc and the length needed beyond the tool. The rack should face the easiest direction of travel. A beautiful rack on the wrong wall makes every project a furniture-moving exercise.

    Our garage workshop layout guide treats tools as stored and operating envelopes. Lumber needs the same treatment. A table saw’s footprint is small compared with the path of a full sheet. A miter saw needs side support beyond its cabinet. Store long pieces close to the tool that uses them most often, while keeping the stock path away from the parked car.

    Protect the daily aisle. The garage workshop aisle clearance guide shows how to test moving carts, open drawers, and carried materials rather than relying on one generic number. If a board has to pass a water heater, electrical panel, or exterior door, do not narrow that access with a permanent rack.

    Use a measured wall plan before buying brackets

    Draw the wall at scale. Mark every stud or suitable masonry location, the curb, outlets, switches, windows, and the maximum safe reach height. Add rectangles for the loaded rack, sheet cart, and short-stock corral. Then draw the longest board at the angle used to remove it. This small exercise catches conflicts that product dimensions do not show.

    Allow hand room between levels and above the top row. A six-inch gap may look efficient until a gloved hand cannot grip the back board. Leave enough vertical room to lift a piece over the front stop without striking the level above. Keep bark edges, splinters, and sharp metal away from the car door path.

    Run the rest of the room through the garage storage planning sequence. Lumber expands to fill kindness. Assign a maximum depth or board count to each bay and leave a visible empty zone. That blank space is not wasted. It is the buffer that receives material for the next project without forcing stock onto the floor.

    A monthly reset keeps the rack useful

    Inspect supports, fasteners, stops, wall surfaces, casters, and the wood itself. Look for sagging arms, loose screws, rust, mold, insects, water staining, or boards that have shifted beyond the end stop. Remove the stock before tightening or repairing a loaded rack. Follow the manufacturer rather than guessing at torque or replacement hardware.

    Return boards to the level that matches their length and weight. Pull pieces you no longer need. Sweep or vacuum settled dust without blowing it into the air. Keep finishes, fuels, and solvents away from lumber and dust-producing work. A wood rack is fuel storage as well as material storage, so give ignition sources their own safe area.

    The common failure is not structural drama. It is slow loss of access. One temporary board leans against the cart, then another blocks a caster, then the useful sheet sits behind both. Reset the path while the problem takes five minutes. Compact storage succeeds when material can leave without unloading the entire garage first.

    Choose the simplest rack that respects the load

    Buy a modular wall rack when you have sound structure, recurring long-stock storage, and a wall long enough to support it. Choose a low freestanding rack when wall attachment is uncertain or the system may move. Add a sheet cart only if its loaded route works. Build a short-stock corral when the offcuts are truly worth keeping.

    Before checkout, compare total capacity, capacity per arm or level, usable arm depth, upright spacing, fastener requirements, end stops, corrosion protection, warranty, and access to a real manual. Ignore claims such as “heavy duty” without numbers and conditions. If you make the rack yourself, design for the actual loads and substrate, and get qualified help when the structural work exceeds your experience.

    The result does not need to resemble a commercial lumber aisle. One long wall, a low panel cart, and a disciplined scrap limit can hold a surprising amount while leaving the garage usable. Straight stock that you can reach is worth more than twice as much wood buried behind a machine.

    Useful products to compare

    These links open current Amazon search results. Check the dimensions, manual, mounting hardware, warranty, and current availability for the exact model before you order.

    Before you buy or install

    Read the current manual for the exact product you are considering. Confirm its assembled dimensions, rated capacity, mounting requirements, included hardware, working clearances, warranty, and any limits that apply to your wall, floor, electrical circuit, or garage layout.

    Frequently asked questions

    Is it better to store lumber vertically or horizontally?

    Long boards are usually easier to keep stable and straight on a horizontal rack with several support points. A low vertical corral works well for shorter pieces when it has a broad base and front restraint. Full sheets need their own stable base and side restraint.

    Can lumber sit directly on a garage floor?

    It is better to raise wood off concrete so small leaks, condensation, and floor washing do not wet the stock. Use supports or a rack designed for the load, keep the area dry, and inspect the bottom layer rather than sealing it out of sight.

    How far apart should lumber rack supports be?

    There is no single spacing for every board. Follow the rack manufacturer’s layout and capacity instructions, then consider the stiffness and quality needs of your stock. Thin trim needs closer support than thick framing lumber. Add support if boards visibly sag.

    How should plywood be stored in a small garage?

    Keep full sheets low on a broad, stable base with restraints that prevent sliding or tipping. A rated vertical panel rack or a well-designed rolling cart can work. Test the loaded route and caster capacity before relying on a mobile cart.

  • Garage Ladder Storage Ideas That Keep the Rails Supported

    Garage Ladder Storage Ideas That Keep the Rails Supported

    Affiliate disclosure: As an Amazon Associate I earn from qualifying purchases. This article may contain affiliate links, and Bay & Bench may earn a commission at no extra cost to you. Read our full Affiliate Disclosure.

    The most useful garage ladder storage ideas support both rails, keep the ladder dry and inspectable, and let you remove it without climbing on something else. A light stepladder can hang low on a rated hook. A long extension ladder usually benefits from two horizontal supports or a secured vertical corner. Ceiling storage is possible, but the access and falling-object consequences are less forgiving. Measure the ladder’s folded size and weight, then map the garage door, vehicle, electrical equipment, and carrying route.

    Quick answer

    Store a long extension ladder horizontally on two or more rated supports spaced to prevent sag and movement, or vertically with a lower cradle plus a positive upper restraint. Keep a daily stepladder on a low wall hook or floor stand. Use ceiling storage only when the manufacturer approves the hardware and you can load it from the floor with full control. Do not hang ladders from rungs alone if the rack instructions call for rail support. Keep labels, feet, locks, ropes, rails, and rungs accessible for inspection.

    Garage ladder storage ideas compared

    Storage methodGood fitMain advantageMain check
    Low horizontal wall hooksStep or short multipurpose ladderEasy daily accessTwo-point support and door clearance
    High horizontal bracketsLong extension ladder used occasionallyKeeps floor clearControlled lifting and structure
    Secured vertical cornerLong ladder with narrow wall availableUses little wall widthBottom cradle and upper restraint
    Ceiling rackLight, rarely used ladderPreserves wall and floorDoor envelope and safe loading
    Freestanding floor slotHeavy or frequently used ladderNo overhead liftTip restraint and dry floor

    Place the ladder after mapping the larger garage storage system. Its removal path may be longer than the stored footprint.

    Measure folded size, weight, and moving shape

    Record total length, rail width, folded thickness, weight, and the location of ropes, locks, hinges, wheels, and stabilizers. A multipurpose ladder can be compact but dense. An extension ladder may be light enough to lift yet too long to turn between a parked vehicle and the garage door track.

    Carry the ladder through its real route with a spotter. Watch both ends. Mark the turning arc on the floor and wall. The storage location should let you grasp the ladder near balance without first sliding it across a car or electrical panel.

    Low wall hooks suit the ladder used every week

    Hang a stepladder where its center is roughly between knee and shoulder height for the regular user. Two hooks or a purpose-made ladder hook control the rails better than a single narrow point. Rubbermaid lists its FastTrack Ladder Hook at 50 pounds and allows it on the FastTrack rail or upright. The manufacturer page gives the exact model dimensions and installation context.

    Do not transfer that 50-pound number to a homemade screw hook or unrelated rail. Include the complete ladder and any attached accessories. Keep hook ends padded where the product provides it, and make sure the ladder cannot bounce free when a door slams.

    Folded stepladder hanging low on a rated wall hook near a garage side door
    A frequently used stepladder belongs low enough to remove without climbing or twisting.

    Support long ladders at more than one point

    A long ladder stored horizontally should not hang from one rung at its center. Use purpose-made supports placed according to the ladder and rack instructions so both rails remain controlled. The support spacing should prevent obvious sag while leaving feet, locks, rope, rails, and rungs visible.

    Mount the brackets into the structure and with the fasteners named by the hardware manufacturer. Drywall is a finish, not a default structural answer. Locate utilities before drilling. After loading, verify that the ladder cannot slide sideways or rotate off the brackets when lightly bumped.

    Vertical storage needs a bottom cradle and restraint

    A vertical extension ladder consumes little wall width. Place the feet in a stable lower cradle or floor stop so they cannot walk out. Add an upper strap, hook, or bracket that prevents the ladder from tipping into the room. The restraint should be easy to release while you remain balanced on the floor.

    Keep the ladder away from a corner that stays wet or collects road salt. Do not bury the lower feet behind bins. If you must move several items before reaching the restraint, the setup will become frustrating and may invite an uncontrolled pull.

    Long extension ladder stored vertically in a secured garage corner
    Vertical storage uses little wall width but needs a positive restraint against sliding or tipping.

    Ceiling storage has the highest access cost

    A ceiling rack can hold a light, seldom-used ladder above an inactive zone. It also places a long object over people or property and may require lifting at shoulder height or above. Use hardware specifically rated for the ladder and mounting structure. Follow the manual for every fastener, stop, strap, and loading direction.

    Operate the garage door through a full cycle before installation. Include tracks, springs, opener arm, emergency release, lights, ceiling racks, roof accessories, and the tallest vehicle. The overhead garage storage clearance guide provides a measured way to protect that moving envelope.

    Do not block electrical and emergency access

    Keep the stored ladder and its removal route away from electrical panels, service equipment, outlets, furnace or water-heater access, fire equipment, and the path out of the house. A metal ladder is a long conductive object. Plan its carrying path so it cannot contact exposed energized equipment.

    The storage rack itself should not hide labels or force the ladder through a low light fixture. If the only open wall is occupied by required service clearance, find another location. Storage convenience does not override access requirements that apply at the property.

    Keep the ladder ready for inspection

    OSHA’s workplace rule is not a home-storage code, but its defect list is a useful inspection prompt. It calls for visible-defect checks and removing ladders with broken or missing rungs, damaged rails, loose fastenings, or other structural defects from service. See the current OSHA ladder standard for the workplace language.

    At home, follow the ladder manufacturer’s inspection and care instructions. Do not paint or wrap rails in a way that hides damage. Store ropes untangled, keep feet clean, and leave the duty labels readable. Mark a defective ladder clearly and keep it out of use until the manufacturer-approved remedy is complete.

    Avoid pressure on locks, ropes, and fragile parts

    Support the ladder where its manufacturer permits. A wall hook should not carry the entire weight through a rope, spreader, plastic tray, hinge knob, or rung if that component was not intended as the storage point. Fold and lock multipurpose ladders as directed before lifting them into place.

    Do not cinch a strap so tightly that it bends a rail. The restraint should prevent movement, not reshape the ladder. Check rubber feet and plastic end caps for prolonged contact with oils, solvents, heat, or sharp bracket edges.

    Keep storage dry and away from damaging work

    Choose a clean, dry section of the garage. Repeated road spray, standing water, fertilizer dust, pool chemicals, battery residue, and grinding debris can attack hardware or hide defects. Do not place a ladder where a vehicle tire throws salty slush against the feet each winter. Keep it away from heat sources and any finishing area where overspray could coat labels, locks, or rung surfaces.

    Wood ladders need the care stated by their manufacturer, while aluminum and fiberglass models have their own inspection concerns. Do not invent a protective coating. A glossy paint layer can conceal cracks or deterioration, and solvents may affect plastics or labels. Clean with the approved method, let the ladder dry, and return it to supports that do not trap moisture against one rail.

    Label the storage location without hiding the ladder label

    Keep the manufacturer label and duty rating visible. A small wall label beside the rack can identify the ladder’s normal location and remind household members to secure the upper restraint. It can also show which ladder belongs there when the garage contains a short step ladder and a long extension ladder.

    Do not add tape, paint, or a home-made instruction panel over warnings or inspection points. Save the manual in a garage file and photograph the model information. If the ladder is loaned out, inspect it again when it returns. A dropped ladder can look almost normal while a rail, foot, rope, or lock has changed.

    Test the removal path with the garage full

    Park the vehicle and put bins, bikes, and carts in their normal positions. Remove the ladder from the mockup, turn it, and carry it outside. Repeat the return. If one end passes near a windshield, opener, hanging light, or person-height hook, adjust the location.

    Compare the route with garage workshop aisle clearance. A clear daily aisle can still fail a 16-foot ladder turn. The route should not require climbing, reversing blindly, or resting the ladder on the vehicle.

    Garage door fully open below a ladder storage mockup taped near the ceiling
    Test the open door, tracks, opener, vehicle roof, and removal path before choosing a high location.

    Choose access over a perfectly empty floor

    A low wall hook is often better than a ceiling rack because the ladder gets used without drama. A secured vertical slot may beat horizontal brackets when the wall is short. A freestanding floor position is reasonable for a heavy ladder if it remains dry, restrained, and outside the walkway.

    Use the garage measuring guide to document the location, then install the rack exactly as instructed. Recheck fasteners after the first few removals and during routine garage cleanups. The ladder should feel boring to retrieve. That is a compliment.

    Useful products to compare

    These links open current Amazon search results. Check the dimensions, manual, mounting hardware, warranty, and current availability for the exact model before you order.

    Before you buy or install

    Read the current manual for the exact product you are considering. Confirm its assembled dimensions, rated capacity, mounting requirements, included hardware, working clearances, warranty, and any limits that apply to your wall, floor, electrical circuit, or garage layout.

    Frequently asked questions

    Is it better to store an extension ladder horizontally or vertically?

    Horizontal storage on two or more suitable supports controls a long ladder well and makes inspection easy. Vertical storage uses less wall width but needs a stable bottom cradle and positive upper restraint. Choose the method with the safer loading and removal path.

    Can I hang a ladder from one rung?

    Use only the support points and orientation allowed by the ladder and rack instructions. A single rung or hook may allow a long ladder to rotate, slide, or sag. Two purpose-made supports under appropriate rail locations are usually easier to control.

    How high should a ladder rack be?

    Put frequently used ladders low enough to load and remove while standing securely on the floor. High storage may suit a light, rarely used ladder if the structure, rack, and access method are approved. Test the full garage door and vehicle envelope first.

    Should I lock a stored ladder?

    A strap or retaining device can prevent the ladder from bouncing or tipping. Security may also matter if the garage is accessible. The restraint must not damage rails, ropes, hinges, or locks, and an authorized user should be able to release it from a stable position.