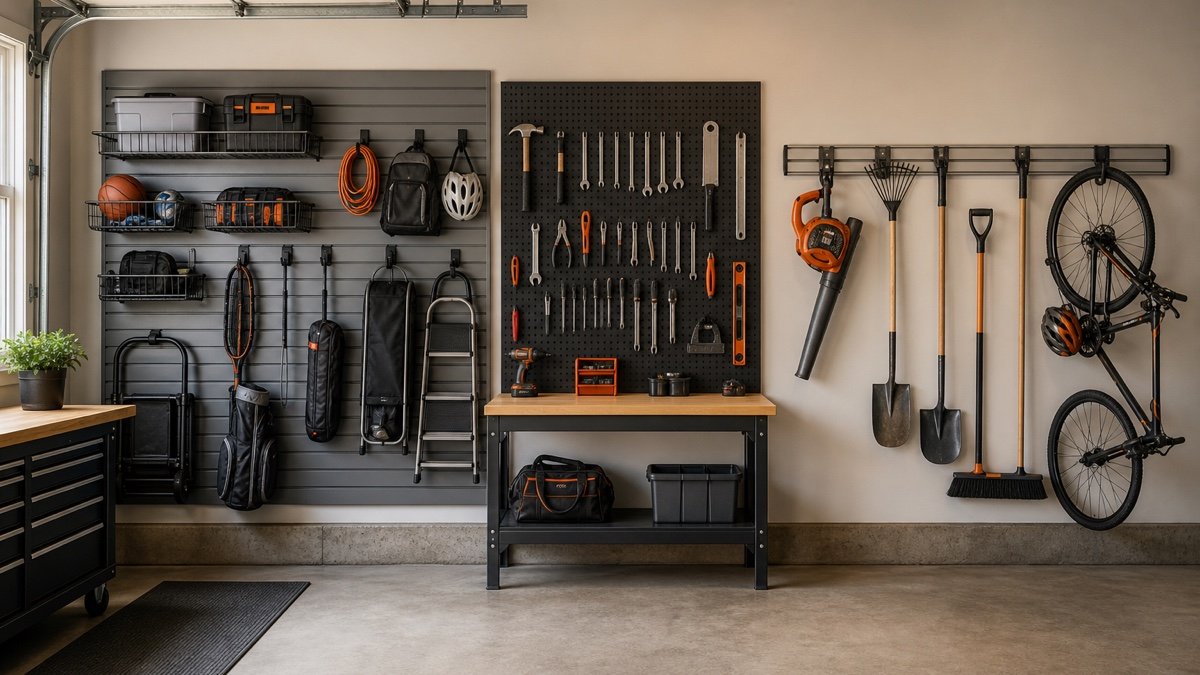
Author: Jeremy Moon

  • Slatwall vs Pegboard vs Track System for Garage Storage

    Slatwall vs Pegboard vs Track System for Garage Storage

    Affiliate disclosure: As an Amazon Associate I earn from qualifying purchases. This article may contain affiliate links, and Bay & Bench may earn a commission at no extra cost to you. Read our full Affiliate Disclosure.

    The slatwall vs pegboard vs track system decision sounds simple until you list what needs to hang. A garage wall can look organized in a product photo and still be irritating to use. The usual mistake is choosing the organizer first, then trying to make every rake, drill, extension cord, and box fit it. These three formats solve different storage problems. None is the automatic winner. The better choice depends on object size, how often the layout changes, and how much wall you want to cover.

    Quick answer

    Pegboard is usually the most efficient choice above a workbench where many small hand tools need fixed positions. A horizontal track is a good fit for long handled tools, bikes, ladders, hoses, and other bulky objects that need a few strong hooks. Garage rated slatwall makes sense when you want broad wall coverage and expect to mix hooks, baskets, shelves, and bins. Many garages work better with two systems than with one system stretched beyond its strengths.

    Start with the objects, not the wall system

    Make a rough inventory before comparing panels and rails. Put objects into four groups: small hand tools, long or awkward gear, items that need a basket or shelf, and things that should stay inside a closed cabinet. This takes twenty minutes and prevents a surprisingly expensive wall full of unused hooks.

    Pegboard earns its keep when the wall needs many close attachment points. Think screwdrivers, pliers, layout tools, sanding accessories, and small bins above a bench. A track does the opposite. It gives a small number of attachment points along a narrow horizontal rail, which is often enough for a shovel, bicycle, hose, or ladder. Slatwall sits between them. It covers more wall and accepts a wider mix of accessories, though the exact selection depends on the system.

    Measure the stored object as well as the wall. A bicycle hook needs room for the wheel and handlebars. A deep basket may project into a car door path. Run the first layout through our pegboard and slatwall layout planner, then mark the real footprint with painter’s tape.

    The practical differences at a glance

    FactorPegboardSlatwallHorizontal track
    Best everyday useSmall tools in dense layoutsMixed tools, bins, and display storageBulky gear on spaced hooks
    Wall coverageFull panel or selected areaUsually broad panel coverageNarrow rail across the wall
    RearrangingFast, but loose hooks may need retainersFast within the matching accessory systemVery fast along the rail
    Small item storageExcellent with bins and tool holdersGood with matching bins and shelvesLimited unless the system offers bins
    Large item storagePossible only within panel and hook ratingsGood when the system is rated for the loadOften the cleanest choice
    Accessory lock inHole size and board thickness matterProfiles are commonly proprietaryRails and hooks are commonly proprietary

    The table describes common formats, not a load chart. Published ratings vary by product, fastener pattern, wall construction, and accessory. Check the manual for the exact panel or rail you are considering.

    When pegboard is the sensible answer

    Pegboard is hard to beat above a working bench. The hole grid lets you place a short hook beside a long one, tuck a driver holder into a narrow gap, and change the layout without drilling another hole in the wall. You can see missing tools at a glance. That matters more during a project than a perfectly symmetrical display.

    The weak point is often the accessory fit, not the board. Pegboard comes in different materials, thicknesses, hole sizes, and hole spacing. Hooks advertised as universal may sit loosely or fail to engage a thicker panel. Buy a small accessory pack first and test it before ordering dozens. Retaining clips can keep frequently grabbed hooks from coming off with the tool.

    Leave a gap behind the panel so hook ends have room to pass through. Some metal panels form their own standoff, while wood or fiber panels usually need a frame or spacers. Mount the support into appropriate structure rather than asking the thin face of drywall to carry the layout.

    Pegboard becomes less pleasant with deep objects. A hedge trimmer, folded ladder, or heavy bicycle reaches farther from the wall and applies more leverage. Even when a specialty pegboard system publishes a suitable rating, the crowded hole pattern can make a large item feel wedged among small tools. Give bulky gear its own zone.
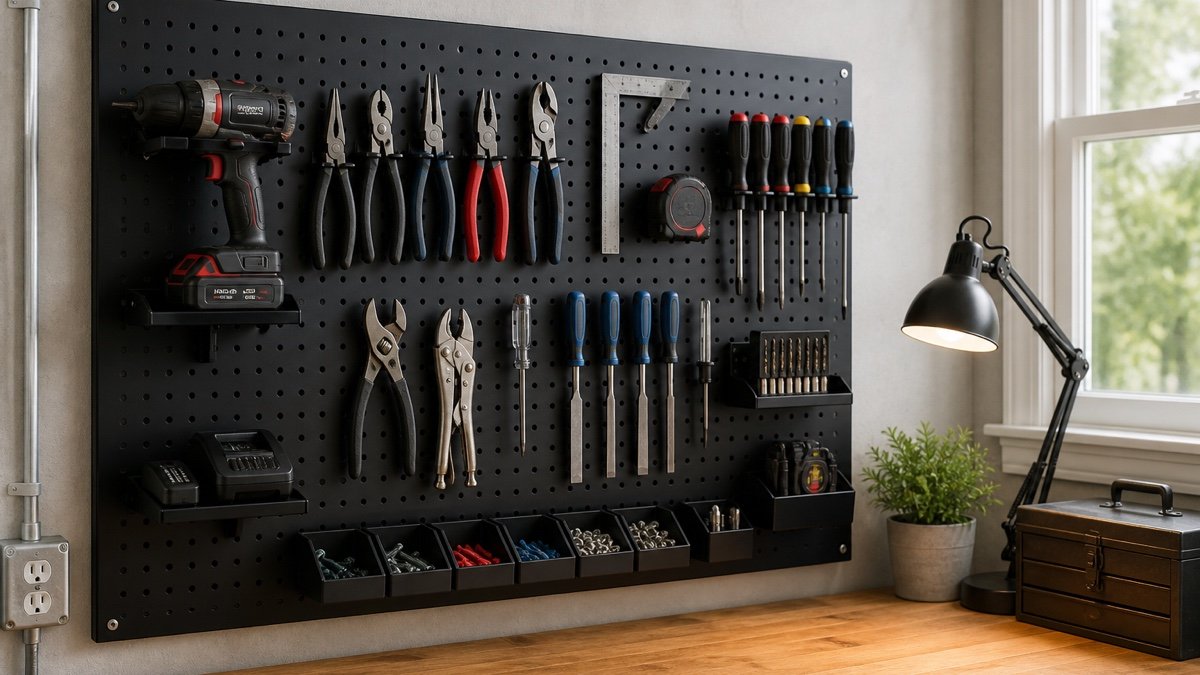
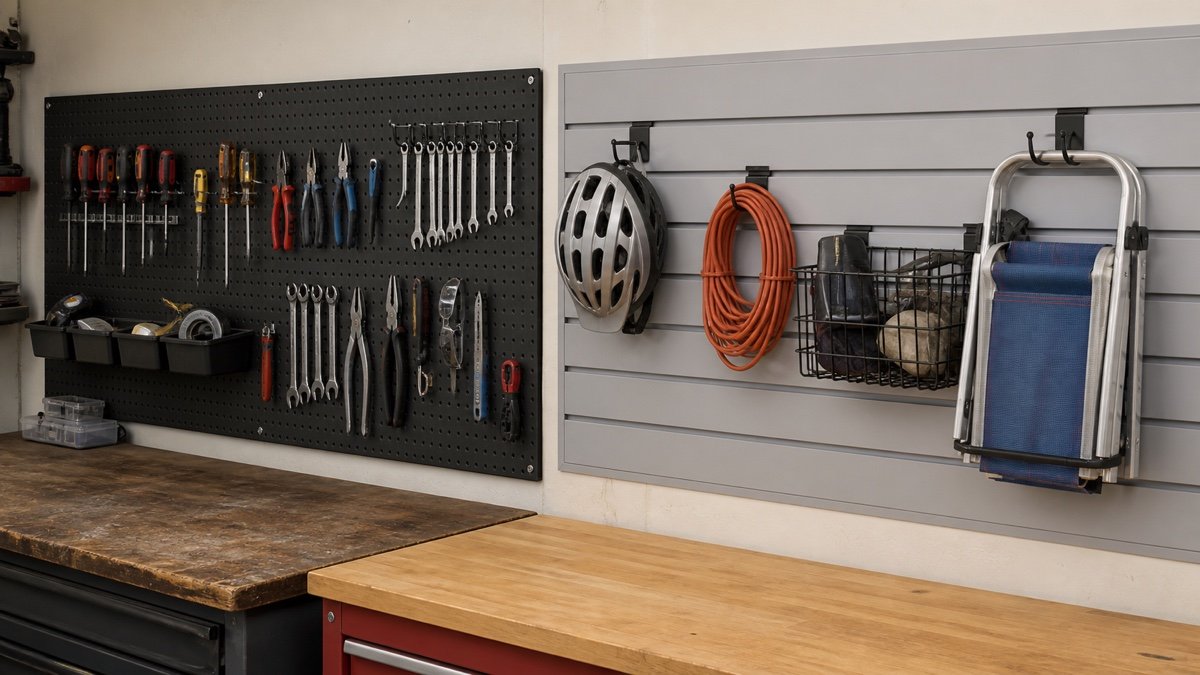
    When pegboard is the sensible answer in a practical garage setup
    When pegboard is the sensible answer, shown in a practical garage layout.

    Why people choose garage slatwall

    Slatwall gives the wall a finished, continuous surface. Horizontal channels run across the panel, so hooks and baskets can move sideways without leaving a patchwork of old screw holes. It is a good visual fit when the same wall needs to hold sports equipment, hand tools, cords, helmets, and a few containers.

    The word slatwall is broad. Retail display panels, wood based shop panels, PVC composite garage panels, and metal systems can look similar while carrying very different ratings. A hook that fits one channel profile may not seat correctly in another. Treat the panel and accessories as a matched system unless both manufacturers explicitly say otherwise.

    Full wall coverage costs more than one narrow track, and it takes more work to cut around outlets, switches, corners, and wall cabinets. That cost buys flexibility. You do not have to know the final hook location while installing the panels. If the garage changes from children’s bikes to lawn equipment a few years later, the wall can change with it.

    Slatwall also gives you places for baskets and short shelves without making the wall look improvised. Still, it should not replace proper shelving for every tote. Deep shelves hung high on a panel can make contents awkward to reach and place more force away from the wall. Use the system’s own load rules and keep dense storage low.

    Where a track system works best

    A horizontal garage track uses little wall area. Once the rail is mounted, hooks can usually slide or clip into new positions. That makes a track appealing for an unfinished garage or a wall that may receive cabinets later. The open drywall around it stays accessible.

    Tracks are particularly good for objects with odd outlines: long handled garden tools, folded chairs, hoses, ladders, strollers, and bicycles. Each item gets breathing room. You can move one hook instead of reorganizing a whole panel.

    The limitation shows up with small objects. Filling a track with tiny hooks and cups often wastes rail length, and the result can be less stable than a dense pegboard arrangement. Keep the track for gear that genuinely benefits from a substantial hook. Put drill bits, driver handles, and measuring tools closer to the bench.

    Rail shape and locking details differ among brands. Do not assume a hook will work because it appears to hang on the lip. A partially engaged hook can look fine while empty and shift when loaded. Buy accessories made for the selected system, observe each accessory rating, and follow the mounting instructions for the wall type.
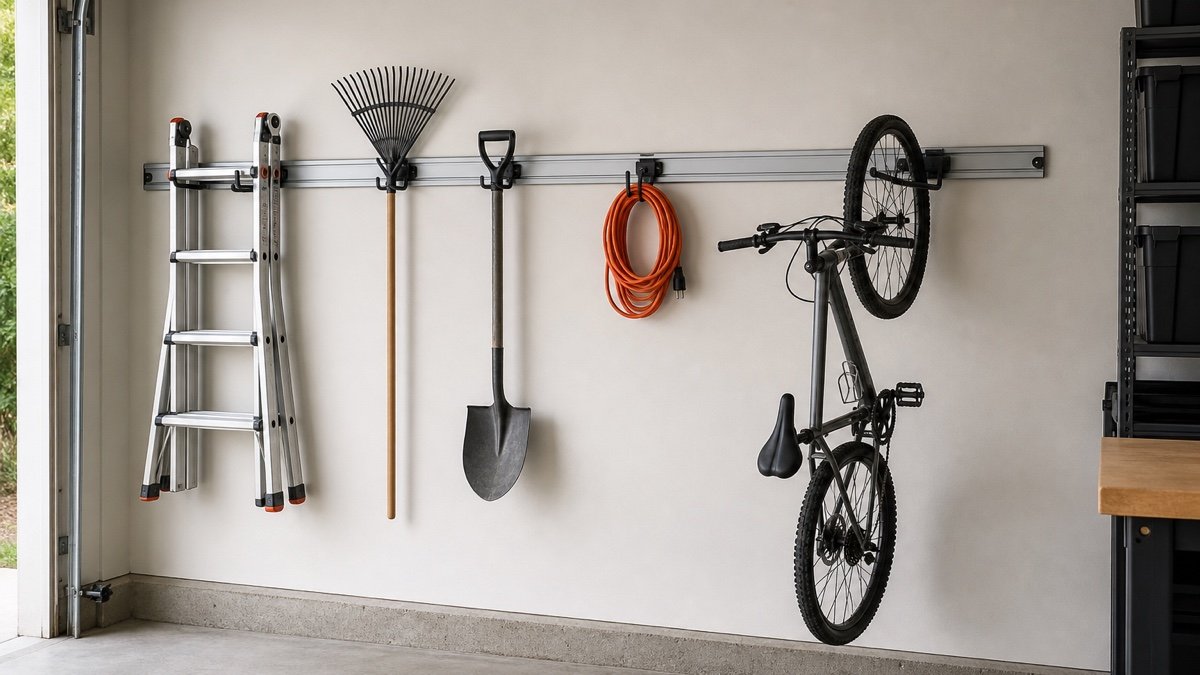
    Where a track system works best in a practical garage setup
    Where a track system works best, with the storage details visible in context.

    Installation changes the comparison

    The best organizer on paper can be the wrong one for a particular wall. Find studs, wiring, plumbing, masonry joints, and existing damage before choosing a panel size. Measure stud spacing instead of assuming it. An outlet in the center of a proposed slatwall area creates more cutting work than it would with a single track.

    Pegboard usually needs support around its perimeter and often across the middle. Full slatwall installations may need repeated fasteners across every panel. A track has fewer square feet of material, but its fasteners carry concentrated loads. None of these systems should be fastened according to a generic online diagram when the product includes its own instructions.

    Wall flatness matters too. A bowed wall can twist a rigid panel. An uneven masonry surface may keep a rail from sitting flat. Correct the mounting surface in the way the manufacturer permits. Do not force the organizer against a hump and hope the screws pull it straight.

    Plan height with the object attached, not just the empty hook. A rake handle can hit the ceiling. A bicycle may hang low enough to meet a car hood. Our broader garage measuring guide covers door travel, parking clearances, and work zones.

    A hybrid wall is often better

    One useful layout is a pegboard centered over the workbench, a track near the garage door for yard tools, and a short slatwall section for sports gear that changes with the season. This looks less uniform than a single showroom system, but it usually works better.

    Keep frequently used tools between comfortable shoulder and waist height. Place long tools where they can lift off the hook without striking a shelf. Reserve upper positions for light items. A wall mounted cabinet can handle chemicals, sharp items, and anything that should be kept away from children.

    Leave empty space. Filling every hole and channel on installation day gives you nowhere to put the next tool. A quarter of the wall can remain open without being wasted. That spare capacity will matter later.

    If the garage is still in the planning stage, begin with the garage storage planning guide. It helps separate parking, work, household, and outdoor equipment zones before hardware starts going up.

    Buying checklist

    • List the exact objects that will hang in the first six months.
    • Measure their weight, depth, and removal path.
    • Confirm panel material, rail profile, hole size, and accessory compatibility.
    • Read separate ratings for the wall system and each hook, basket, or shelf.
    • Check the required wall construction, fastener pattern, and hardware.
    • Price a usable setup, including hooks, bins, trim, screws, and spacers.
    • Verify that additional accessories are readily available before committing to a proprietary system.
    • Leave clear wall space for future changes.

    For a bench focused tool wall, pegboard is the simple starting point. For a flexible finished wall, slatwall is easier to expand. For large hanging objects, a track is tidy and efficient. The choice gets much easier once each wall zone has one job.

    Useful products to compare

    These links open current Amazon search results so you can compare dimensions, manuals, ratings, and availability for the exact models on your shortlist.

    Before you buy or install

    Check the current manual for the exact product you are considering. Confirm the assembled dimensions, load rules, mounting requirements, included hardware, clearances, warranty, and any limits that apply to your wall, floor, or garage layout.

    Frequently asked questions

    Is slatwall stronger than pegboard?

    Material alone does not answer that. Compare the published rating for the exact panel, its mounting method, and the specific hook or shelf. A garage rated pegboard can outperform a light display panel, and the reverse can also be true.

    Can pegboard hooks fit slatwall or track rails?

    Usually not. The attachment shapes are different, and even similar looking rail systems may use incompatible profiles. Use accessories approved for the exact system.

    Which system is best for bikes?

    A rated track or garage slatwall system with a matching bicycle hook is often easier to position than basic pegboard. Check the bicycle weight, wheel or frame contact, wall mounting, and the hook rating.

    Do I need to cover the whole garage wall?

    No. Selected zones are usually more economical. Cover the workbench area with pegboard or slatwall and use shorter tracks where bulky gear needs to hang.
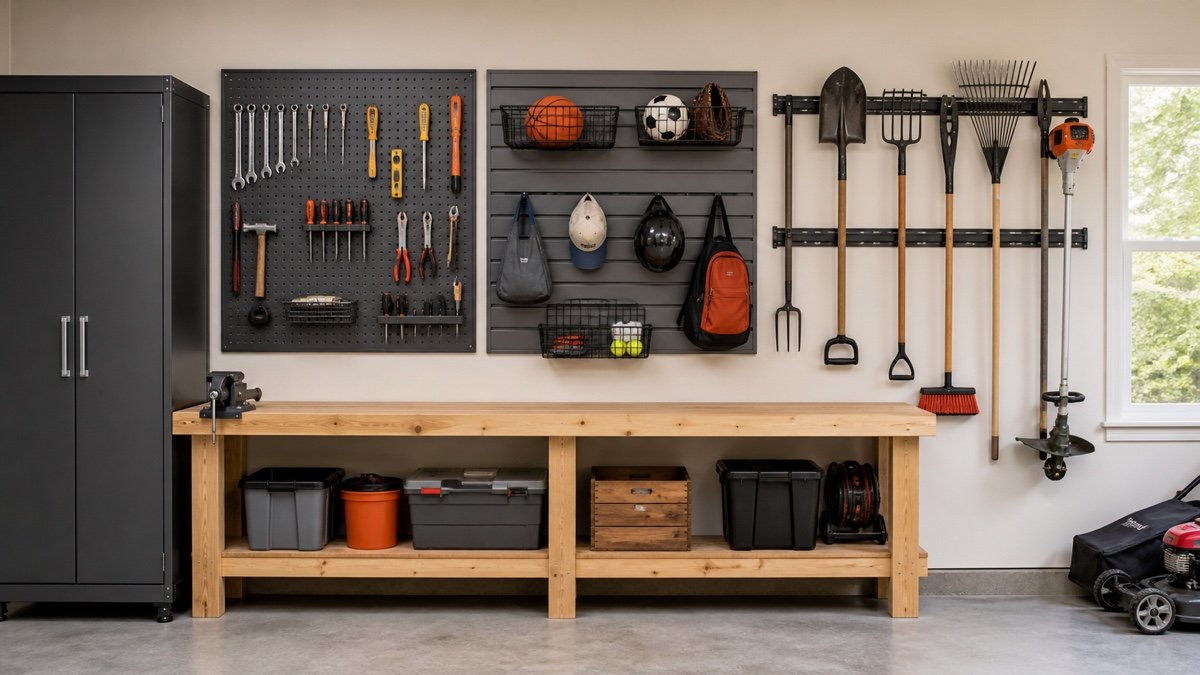
  • Garage Wall Storage Systems: Choose the Right Setup for Your Tools

    Garage Wall Storage Systems: Choose the Right Setup for Your Tools

    Affiliate disclosure: As an Amazon Associate I earn from qualifying purchases. This article may contain affiliate links, and Bay & Bench may earn a commission at no extra cost to you. Read our full Affiliate Disclosure.

    Garage wall storage systems can make an empty wall look like an easy win. Then you count the outlets, door tracks, studs, controls, and tools that don’t hang neatly. The right system is less about matching hooks and more about assigning each object a sensible home. Small hand tools behave well on pegboard. Bulky sports gear benefits from baskets and deeper hooks. A ladder or bicycle asks more of the mounting system. Start with that difference and the wall becomes much easier to plan.

    Quick answer

    Use pegboard for small tools and dense visual organization, slatwall for flexible baskets and medium-size gear, and a structural rail system for long or awkward items when the maker permits the load. Add shelves for bins and cabinets for items that need dust control or restricted access. Most garages work better with two compatible zones than with one system forced across every wall.

    Map the wall before choosing a system

    Photograph each wall straight on, then measure the clear width and height. Mark windows, outlets, switches, electrical equipment, plumbing, utility controls, stairs, and the complete travel path of the garage door. Include the open hatch of the tallest vehicle that uses the space.

    Next, outline storage zones with painter’s tape. Keep frequently used tools near the workbench or exit where they are used. Yard tools need enough vertical room that handles don’t cross a door path. Sports equipment needs space to come off the hook without hitting a parked car.

    Our garage measuring guide helps capture the room before product shopping begins. The pegboard and slatwall layout planner can then estimate panel coverage and accessory positions.

    Do not cover required access areas or assume an empty patch of drywall is safe to drill. Identify the supporting structure and hidden services first.

    Pegboard suits small tools and frequent changes

    Pegboard earns its keep above a workbench. Holes repeat across the panel, so hooks and small holders can move as the tool collection changes. It is easy to see whether a wrench or pair of pliers is missing, and dense spacing makes good use of a modest area.

    Panel material and hole pattern matter. Traditional fiberboard, metal panels, and plastic panels do not share identical ratings, fire behavior, moisture tolerance, or accessory fit. Some hooks need clips to resist lifting out when a tool is removed. Check compatibility rather than assuming every pegboard accessory is universal.

    Pegboard is less convincing for deep baskets, wide sports gear, and heavy objects concentrated on one hook. A long tool can swing, and a bulky item may cover several rows of useful holes. Keep it focused on hand tools, measuring gear, and light accessories unless the specific system says otherwise.

    A spacer or frame usually creates room for hook ends behind the panel. Install it exactly as directed and account for the finished depth above the bench.

    Pegboard suits small tools and frequent changes in a practical garage setup
    Pegboard suits small tools and frequent changes, shown in a practical garage layout.

    Slatwall handles baskets and changing categories

    Slatwall uses horizontal channels instead of a field of holes. Hooks, baskets, shelves, and specialty holders can slide or relocate along those channels. That makes the format comfortable with helmets, balls, cords, garden supplies, and medium-size bins.

    A full panel gives the wall a finished look, but material and profile differences can lock you into a particular accessory family. Before covering a large area, price the hooks and baskets you will actually need. The panel is only part of the budget.

    Check whether the panel is intended for garage conditions and how its rating changes with accessory type, fastener pattern, and mounting structure. Don’t infer the capacity of one brand from a visually similar panel. Even when two hooks appear to fit, the maker may not approve the combination.

    Slatwall works best where storage categories change but the overall wall zone stays put. A family sports wall is a good example. Baskets and hooks can move as equipment sizes change without drilling a new hole for each revision.

    Rail systems concentrate support where it is needed

    A rail or track system uses one or more horizontal mounting members with compatible hooks. It can be a good fit for long-handled yard tools, folded ladders, bicycles, hoses, and other awkward shapes. The open wall between rails stays visible, so the installation can use less material than a full panel.

    That does not make every rail a heavy-load solution. Capacity depends on the exact track, hook, mounting pattern, fasteners, wall structure, and the way the object pulls away from the wall. A bicycle or ladder creates different leverage than a shovel held close to the surface.

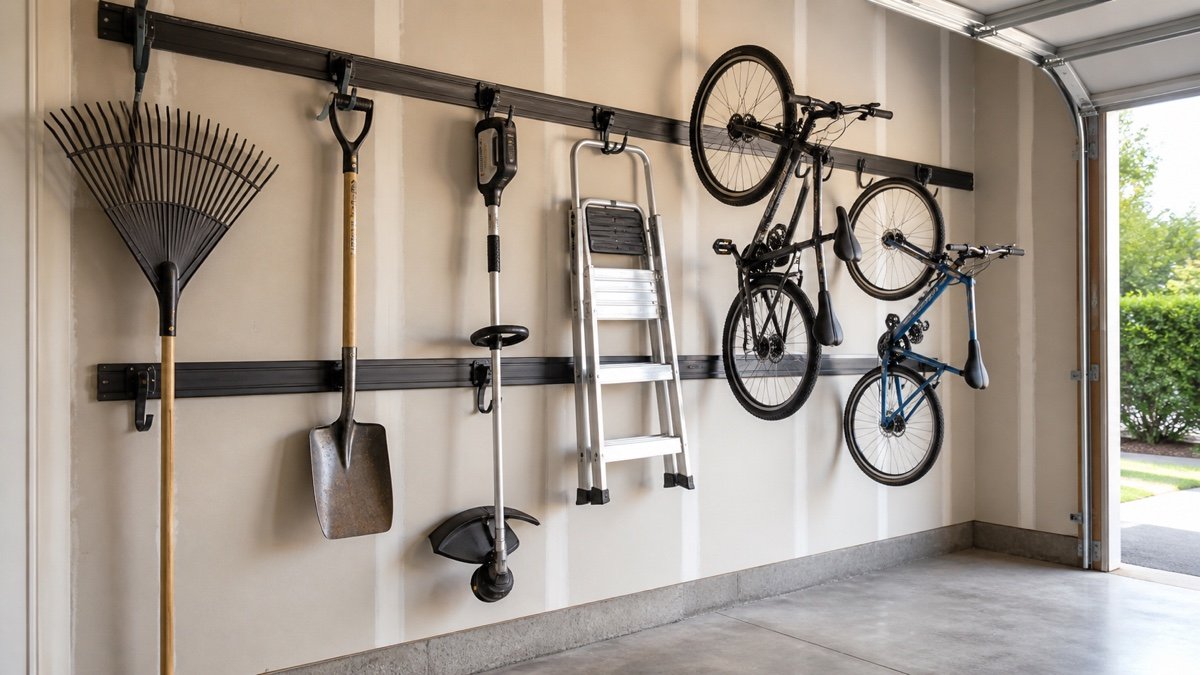
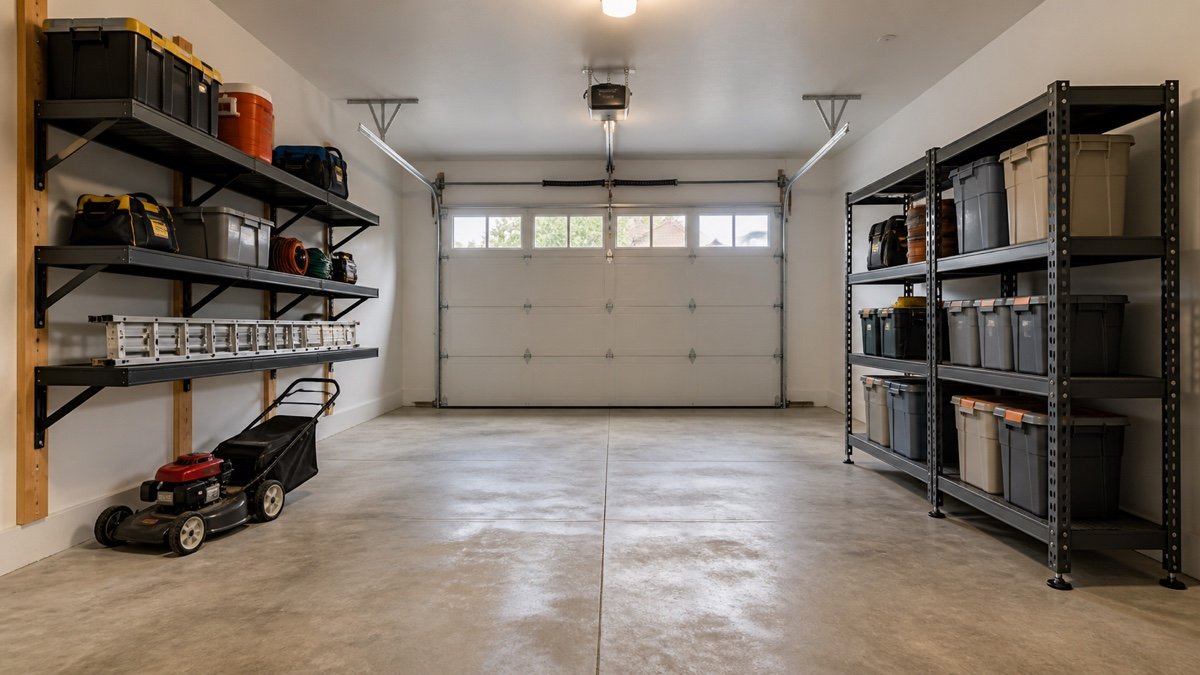
    Follow the manual for rail spacing and fastener positions. Use only compatible hooks, close any required retaining mechanism, and check that a hanging object cannot swing into the vehicle or garage door. The example shown keeps a clear floor and separates tools, ladder, and bicycles across supported rail positions.

    Rail systems concentrate support where it is needed in a practical garage setup
    Rail systems concentrate support where it is needed, with the storage details visible in context.

    Shelves and cabinets solve the things hooks cannot

    Not every object belongs on display. Boxes of sanding discs, detailing supplies, spare hardware, and small power tool accessories often work better in bins on a shelf. A shallow shelf above the bench can support these containers without consuming an entire wall panel.

    Cabinets hide visual clutter and can protect contents from some dust. Lockable models may help control access, but a lock does not make a cabinet suitable for every chemical, battery, fuel, or hazardous material. Follow product labels, cabinet instructions, and local requirements.

    Wall-mounted cabinets also depend on the building structure and approved installation. Freestanding cabinets shift some demands to the floor but may still need restraint. The wall-mounted vs freestanding cabinet comparison covers that choice in detail.

    Compare the main garage wall storage formats

    SystemGood fitMain checkLikely limitation
    PegboardHand tools and small holdersPanel, hole, hook, and clip compatibilityBulky gear covers many useful positions
    SlatwallBaskets, sports gear, cords, and flexible zonesPanel profile and accessory familyAccessory cost can grow quickly
    Rail or trackLong tools and awkward individual itemsMounting structure and leverage at each hookLess useful for many tiny tools
    Wall shelfBins, cases, and supplies with flat basesDepth, bracket spacing, and clear reachItems behind the front row are harder to see
    CabinetDust control, visual calm, and controlled accessDoor swing, mounting, and contentsHigher cost and less instant visibility

    A hybrid wall usually makes more sense than choosing a winner. Use each format where its shape and access pattern fit the inventory.

    Check the whole cost, not just the starter kit

    Starter bundles can make a system look inexpensive. Build a real list before comparing totals: panel or rail coverage, edge trim, mounting hardware, hooks, baskets, shelves, bins, and any specialty holders. Add a little room for future changes, but don’t buy a pile of hooks with no assigned job.

    Accessory availability matters over time. A proprietary system may be pleasant to use while compatible parts remain easy to find. A more common format may offer broader choices, though compatibility still needs checking. Read the warranty and replacement policy before committing an entire wall.

    Use the garage storage budget calculator to compare complete setups. Enter the accessories, not just the base panel price.

    Plan access by frequency and weight

    Place everyday hand tools close to the work surface and within a comfortable reach. Yard tools used at the driveway can sit nearer the garage opening, provided they remain clear of the door path. Seasonal gear can move higher, but only if you have a safe way to retrieve it.

    Weight changes placement. Dense objects should not be raised merely to clear the floor. Keep them low when practical, and avoid a hook position that requires lifting while twisting around a vehicle. An object that is easy to hang in an empty garage may be awkward when both cars are home.

    Leave enough room to remove each item. A bicycle stored flat against the wall still needs a path for its handlebar and pedals. A deep basket needs upward or outward movement before it releases from the panel. Tape those movement envelopes on the wall.

    Installation and inspection deserve time

    Locate the intended support and compare it with the current instructions for the exact system. Choose fasteners approved for that structure and application. If you cannot identify the wall construction, or if the wall shows moisture damage or cracking, get qualified help before loading it.

    Keep drilling away from suspected wiring, plumbing, and other hidden services. Preserve access and required clearances around electrical panels, appliances, utilities, sprinklers, and garage door hardware. Local rules and equipment instructions control those areas.

    After loading the wall, inspect hooks, panels, rails, fasteners, and the surrounding surface. Look again after a few days and after any heavy impact. Stop using a position that moves, bends, cracks, or releases unexpectedly.

    A tidy wall should also remain editable. Photograph the finished setup and keep a short inventory of hook types. When the storage mix changes, move an accessory rather than forcing a new object into a poor position.

    A practical mixed wall plan

    For a typical garage workshop, pegboard above the bench can carry the small tools used during a project. A nearby slatwall zone can take baskets, cords, and sports gear. One properly installed rail section can hold the ladder and long yard tools. Shelves or cabinets finish the plan for bins and items that should not hang.

    Draw the zones first, then buy the minimum hardware needed to complete one wall. Use it for a couple of weeks. You may find that the rake belongs by the driveway or that a basket blocks the work light. Small corrections are cheap before the rest of the garage is covered.

    For the wider room plan, start with our garage storage systems guide and garage storage planning guide. Wall storage works best when it supports the floor layout instead of fighting it.

    Useful products to compare

    These links open current Amazon search results so you can compare dimensions, manuals, ratings, and availability for the exact models on your shortlist.

    Before you buy or install

    Check the current manual for the exact product you are considering. Confirm the assembled dimensions, load rules, mounting requirements, included hardware, clearances, warranty, and any limits that apply to your wall, floor, or garage layout.

    Frequently asked questions

    What is the best garage wall storage system?

    The best format depends on the inventory. Pegboard suits small tools, slatwall suits baskets and changing gear, and rails suit selected long or awkward objects. Many garages benefit from a mix.

    Is pegboard or slatwall better for a garage?

    Pegboard is often more efficient for many small hand tools. Slatwall is usually more comfortable with baskets and medium-size gear. Panel material, accessory compatibility, mounting, and cost still need comparison.

    Can garage wall storage be installed over drywall?

    Drywall may remain as the finish, but the system usually needs attachment to a suitable supporting structure according to its instructions. Do not treat drywall alone as proof of support.

    How much wall storage should I buy?

    Map the objects and movement space first, then cover one useful zone. Living with a smaller installation helps reveal which hooks and panels deserve expansion.

  • Garage Shelf Spacing Guide: Plan Openings That Fit Your Stuff

    Garage Shelf Spacing Guide: Plan Openings That Fit Your Stuff

    Affiliate disclosure: As an Amazon Associate I earn from qualifying purchases. This article may contain affiliate links, and Bay & Bench may earn a commission at no extra cost to you. Read our full Affiliate Disclosure.

    Garage shelf spacing looks tidy when every opening is equal, at least in an empty product photo. Once real bins arrive, that symmetry often wastes a surprising amount of height. One opening is too short for a cooler. Another holds a small parts case with a foot of air above it. Better spacing starts with the objects, not with a favorite number. Measure the loaded items, add room for your hands, and build a few useful opening sizes instead of repeating the same gap from floor to top.

    Quick answer

    There is no universal best spacing for garage shelves. Measure the tallest point of each loaded bin or object, then add enough clearance to lift, tilt, and slide it without catching the shelf above. Group similar heights together. Keep heavy items low, everyday items within comfortable reach, and light seasonal gear on the highest usable level.

    Measure the clear opening, not the post holes

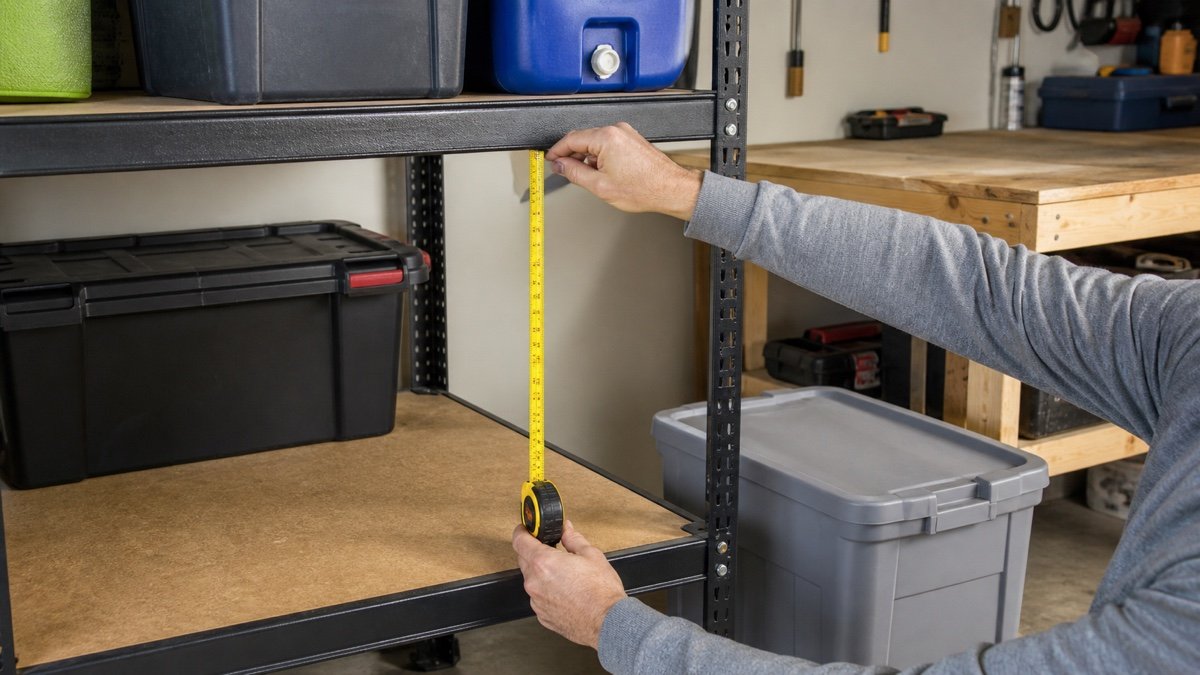
    Shelf listings may describe overall height or adjustment increments, but your tote only cares about the clear opening. Measure from the usable top surface of the lower shelf to the lowest solid part of the shelf above. That part might be the deck, a front beam, or a brace.

    Then measure the stored object at its tallest loaded point. Include the lid, handle, wheels, a bow in the plastic, and anything that sticks above the rim. Empty totes are often shorter and squarer than packed ones.

    The difference between those two measurements is handling clearance. You need room to raise the tote over a shelf lip and angle it into the opening. A box that technically clears by a fraction of an inch will become irritating after the third use. It may not fit at all when the lid bulges.

    Use the garage shelving planner to test opening heights and tote counts before moving every shelf.

    Measure the clear opening, not the post holes in a practical garage setup
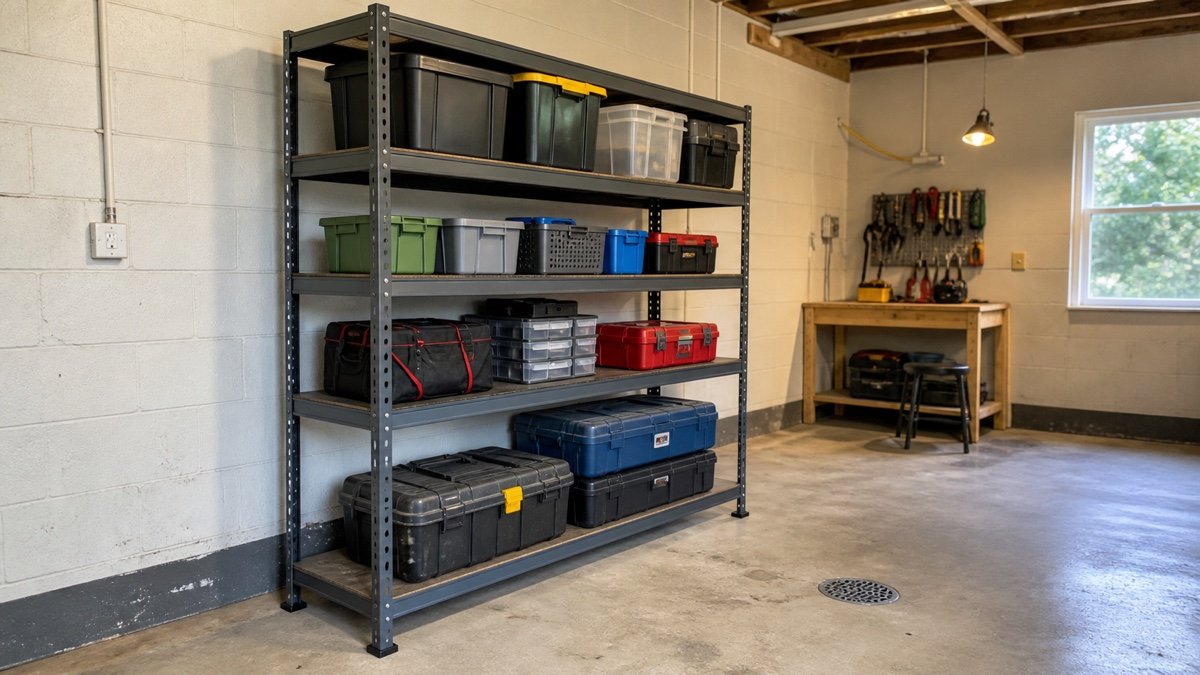
    Measure the clear opening, not the post holes, shown in a practical garage layout.

    Inventory first, then sort by height

    Pull the items intended for the rack into one place. This is the slightly messy part, but it prevents a worse result later. Measure each item and note how often you use it. A phone note is enough.

    Sort the list into a few height groups rather than designing a custom opening for every box. Common totes may share one group, small parts cases another, and bulky coolers or camping bags a third. Leave one adjustable bay for the odd item that never matches anything else.

    Frequency matters as much as height. Daily and weekly items should sit where you can see and lift them without crouching deeply or climbing. Heavy cases stay low even if they would fit on a higher shelf. Light seasonal goods can occupy the upper opening.

    If you haven’t chosen a rack yet, compare usable dimensions in the garage shelving buying guide. Outside height and width don’t tell you the space between beams.

    Useful starting ranges, not fixed rules

    The ranges below are rough planning prompts for common household objects. They are not standards and they don’t replace measuring your own items. Add or remove space based on handles, shelf lips, retrieval angle, and the adjustment increments available on the rack.

    Storage groupPlanning opening to testWhat to check
    Shallow parts cases and trays6 to 10 inchesFinger room and room to open or remove the case
    Small bins and compact tool cases10 to 14 inchesHandle height and front beam clearance
    Common lidded totes14 to 18 inchesLoaded lid height and lifting angle
    Coolers and medium bulky gear18 to 24 inchesHandle swing, wheels, and safe lifting
    Large seasonal items24 inches or moreWhether a shelf is better than an open floor bay

    A 17 inch tote does not promise that an 18 inch opening will feel good. Test the real tote. If the front beam is deep or the tote has a raised handle, more room may be needed.

    Build different zones into the same rack

    A useful rack rarely needs identical openings. A tall bottom bay can accept coolers, rolling cases, or large camping bags. Two medium openings can take the tote size you own most. A shallow shelf near eye level keeps batteries, sanding supplies, or small cases from vanishing inside a tall cavity.

    This approach also limits stacking. Two totes piled inside one oversized opening seem efficient until you need the bottom one. If the rack has enough shelf levels, giving each row its own opening is usually easier to maintain.

    Don’t remove shelf levels just to create dramatic empty height. Many racks use shelves or beams as part of the assembled structure, and the maker may specify their position or minimum number. Follow the instructions. If the desired layout conflicts with them, choose a different rack.

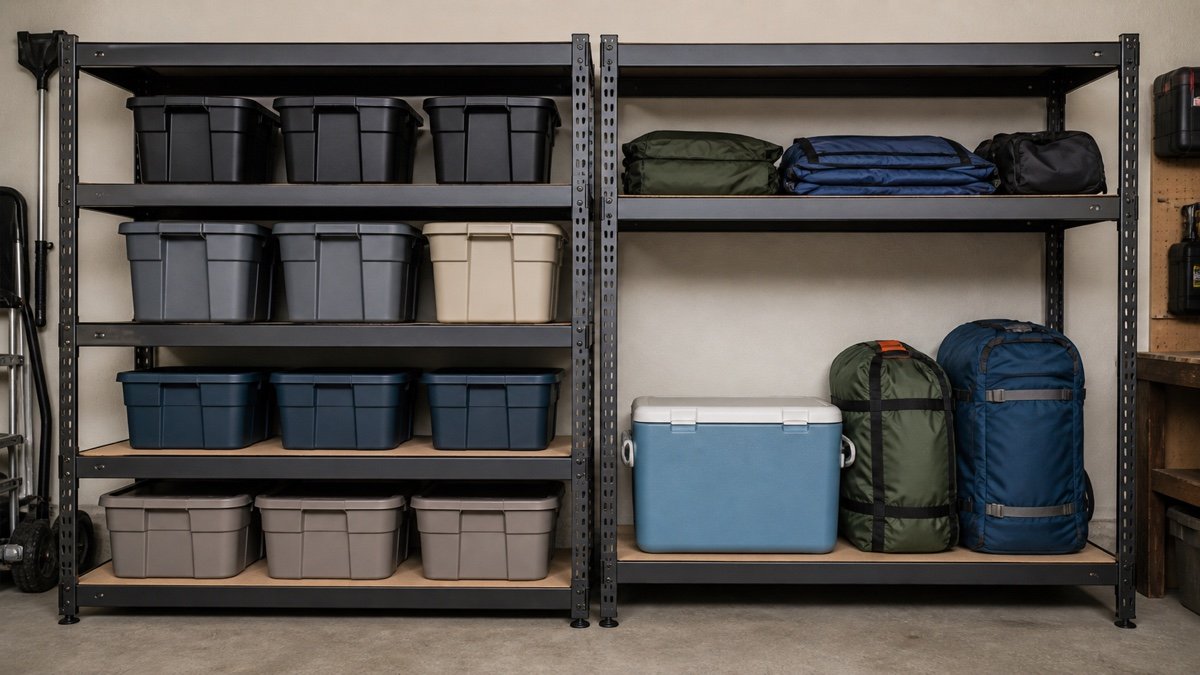
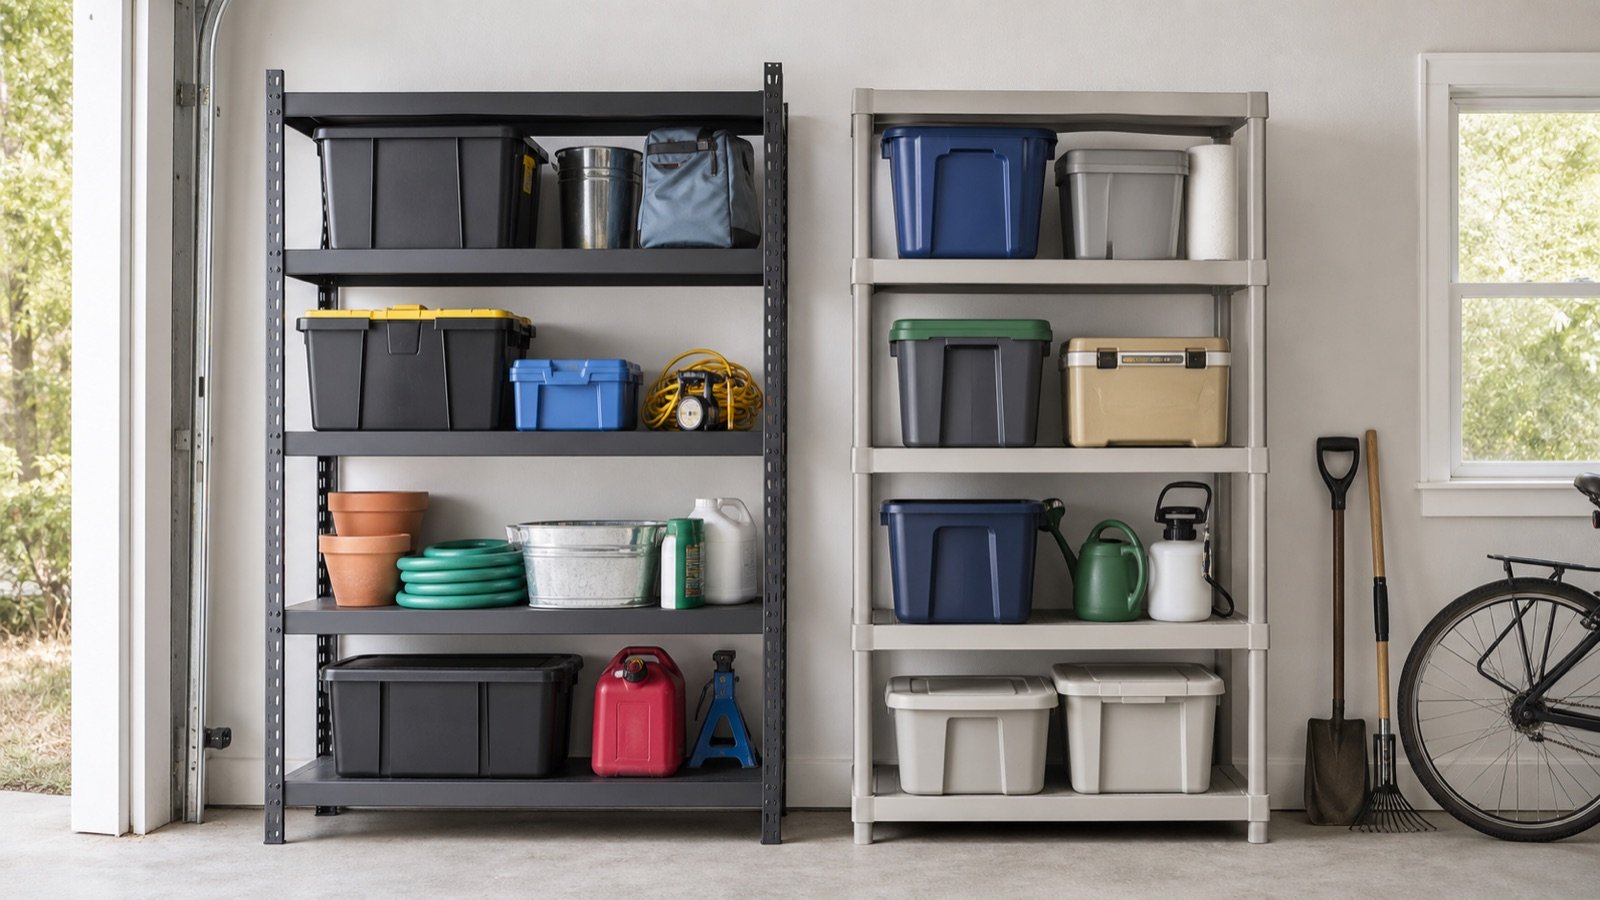
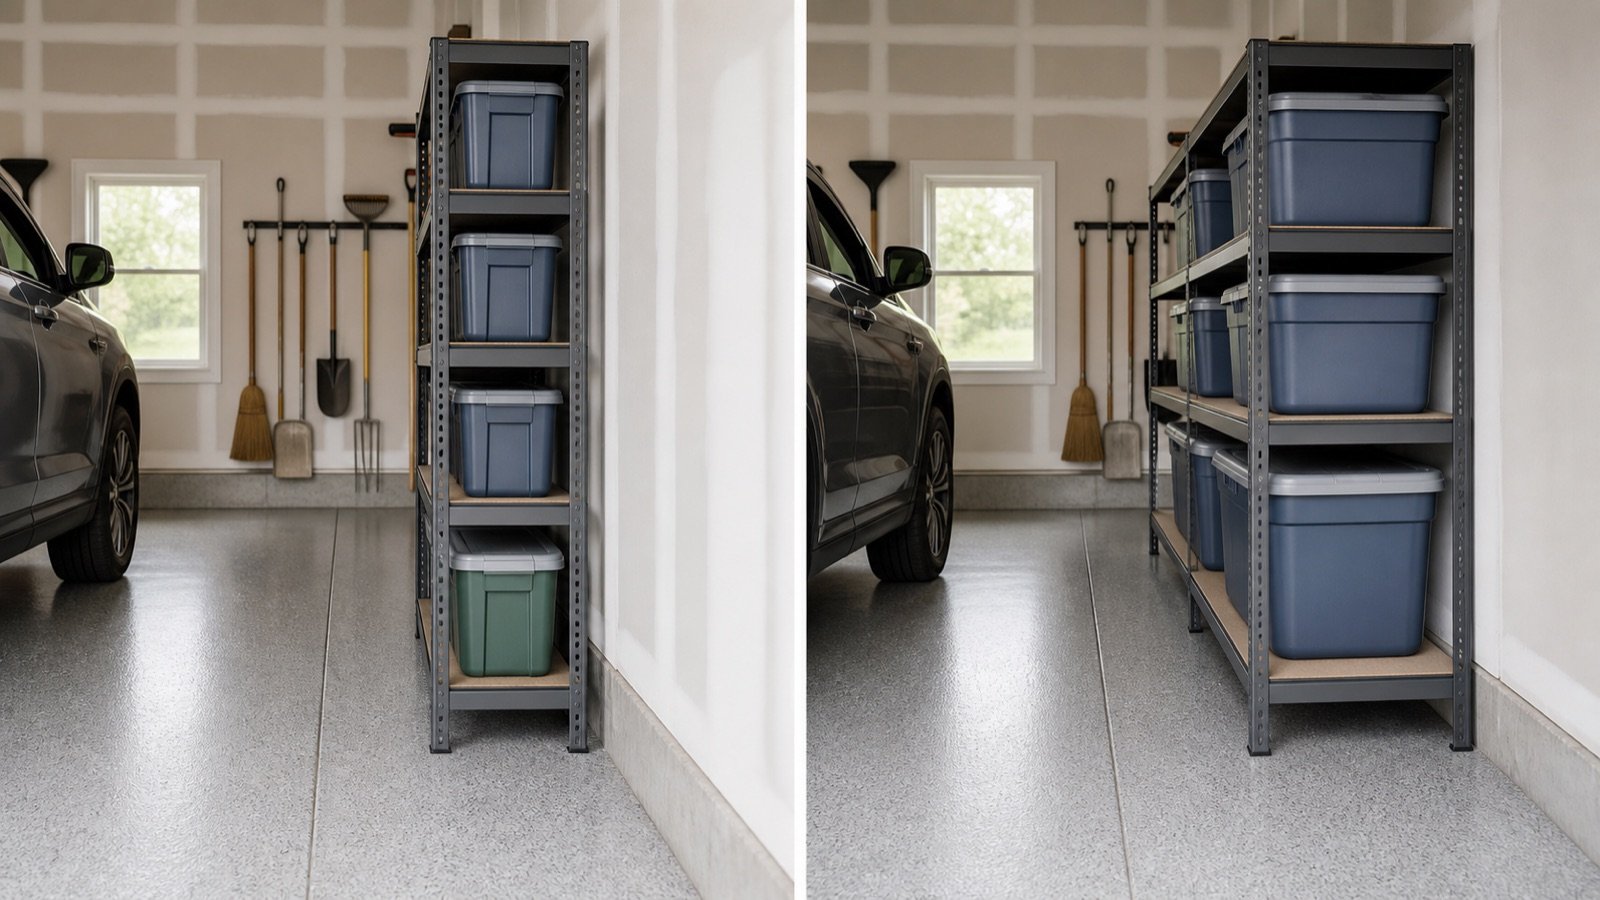
    The example shown here uses compact tote openings on one side and a tall gear bay on the other. It is a reminder to design around categories, not symmetry.

    Build different zones into the same rack in a practical garage setup
    Build different zones into the same rack, with the storage details visible in context.

    Adjustment pitch changes the final number

    Adjustable shelving moves in steps. If the post slots are spaced at fixed intervals, the exact opening you calculated may not be available. Round up to the next permitted position, assemble one bay, and test it with the loaded item.

    Remember that moving one shelf changes two openings. Gaining two inches below takes two inches from the space above. Work from the largest fixed object first, then set the nearby levels. It is much quicker than making tiny changes from the top downward.

    Wire decks, solid panels, and shelf beams can also have different thicknesses. Measure the finished shelf, not just the distance between matching holes. Our wire vs solid shelf comparison covers the practical differences between those surfaces.

    Plan for hands, lids, and awkward movement

    Most spacing mistakes happen because the planner measures only the object. Retrieval uses extra room. Your hands wrap around handles. A hinged lid rises. A long tool case rotates before it clears the posts. A cooler with wheels may need to tip slightly before it comes forward.

    Set the tote on a table at the proposed shelf height and mimic the real movement. If you have to pinch your fingers or drag the lid against the surface above, increase the opening. For a frequently used object, a little empty air is not wasted space. It buys an easier routine.

    Front posts reduce the clear width, too. Check both height and width where the item passes through the frame. A wide tote may fit on the deck but fail to enter between the posts.

    Keep the top and bottom shelves practical

    The highest shelf should hold items you can retrieve by the access method you actually intend to use. If a stable step ladder is required, plan a clear place to open it. Don’t depend on a bumper, rolling stool, or lower shelf as a step.

    At floor level, leave enough room to sweep and notice moisture if the shelf design permits adjustment. Garages can take in rainwater and melting snow. Cardboard sitting close to a wet slab is a poor match, even when it fits perfectly. Use suitable containers and follow the shelf maker’s requirements for the lowest level.

    Keep required access clear around electrical equipment, appliances, door hardware, sprinklers, and utilities. Those clearances depend on the equipment and local rules, so shelf spacing should not be used to squeeze storage into a prohibited area.

    A five-minute spacing worksheet

    1. Measure every loaded item at its tallest and widest point.
    2. Group items by similar height and note how often each group is used.
    3. Choose a handling allowance by physically lifting and sliding one sample item.
    4. Round each planned opening up to an adjustment position the rack permits.
    5. Check the total against the rack’s usable height, including beams and shelf thickness.
    6. Load one bay as a trial before rebuilding the rest.

    If the numbers do not fit, don’t shave every opening until retrieval becomes miserable. Reduce the number of categories on the rack, use shallower containers, or move one bulky object to a different storage format. The garage storage planning guide can help place that overflow elsewhere.

    Useful products to compare

    These links open current Amazon search results so you can compare dimensions, manuals, ratings, and availability for the exact models on your shortlist.

    Before you buy or install

    Check the current manual for the exact product you are considering. Confirm the assembled dimensions, load rules, mounting requirements, included hardware, clearances, warranty, and any limits that apply to your wall, floor, or garage layout.

    Frequently asked questions

    What is the standard spacing between garage shelves?

    There is no single standard that fits every garage. The right clear opening comes from the loaded item height, handling room, shelf construction, and the rack’s adjustment increments.

    How much clearance should I leave above a storage tote?

    Leave enough to lift the tote over any shelf lip and slide it out without scraping the lid or your hands. Test a loaded tote at the planned shelf height instead of relying on a universal allowance.

    Should garage shelves be evenly spaced?

    Usually not. A mix of shallow, medium, and tall openings uses vertical space better when your bins and equipment have different heights.

    Where should heavy items go on garage shelves?

    Keep heavy items on lower levels when practical, within the shelf’s published limits and distribution rules. This reduces awkward lifting and helps keep a freestanding rack’s center of gravity lower.

  • Wall-Mounted vs Freestanding Garage Shelves: Which Fits Better?

    Wall-Mounted vs Freestanding Garage Shelves: Which Fits Better?

    Affiliate disclosure: As an Amazon Associate I earn from qualifying purchases. This article may contain affiliate links, and Bay & Bench may earn a commission at no extra cost to you. Read our full Affiliate Disclosure.

    The wall-mounted vs freestanding garage shelves decision sounds simple until you put both options in a real room. A shelf can be strong, well made, and still be wrong for the garage. Wall-mounted shelving clears the floor and can span awkward equipment below. Freestanding shelving is easier to place, easier to move, and less dependent on the wall. The better choice comes down to what you store, what the wall can support, and how the garage changes through the year. Those practical limits matter more than whether one format looks cleaner.

    Quick answer

    Choose wall-mounted garage shelves when you have a verified mounting structure, need open floor space below, and are comfortable with a fixed layout. Choose freestanding shelves when the walls are unsuitable, the layout may change, or you want simpler assembly. A mixed setup often works best: fixed wall shelves above equipment, plus a freestanding rack for heavy bins that need to stay low.

    Start with the room, not the shelf

    Stand in the garage with both vehicles parked where they normally sit. Open every car door, lift the hatch, move the mower, and walk the route from the house to the driveway. The empty rectangle on a product page doesn’t show any of that.

    Wall-mounted shelves work well where the floor needs to stay open. A mower, snow blower, rolling cart, or shop vacuum can live underneath. Freestanding racks claim floor space from the first day, but they can cover a wall that isn’t suitable for structural mounting. They can also move when a workbench grows or a second vehicle arrives.

    Measure the usable wall width, available depth, and clear aisle before comparing products. Our garage measuring guide covers doors, outlets, controls, and vehicle movement that are easy to miss. If shelf depth is the main problem, the 18 vs 24 inch shelf comparison gives that decision its own treatment.

    Where wall-mounted shelves earn their place

    The obvious benefit is a clear floor. That matters in a garage because dirt, leaves, and water collect around anything that sits permanently at ground level. Open space is easier to sweep, and it leaves room for equipment with an irregular footprint.

    Wall shelving can also start above a work surface or above the hood line of a parked mower. You choose the vertical position rather than accepting the lowest shelf height built into a rack. A long run may feel less bulky because there are no front posts breaking up the view.

    There is a tradeoff. The layout becomes tied to the wall and to the manufacturer’s approved mounting points. Stud position, masonry condition, shelf depth, bracket spacing, fasteners, and the stored load all matter. Drywall is a finish, not proof of support. Find out what is behind it before buying a system, and use the exact installation instructions for that model.

    Wall-mounted shelves are a sensible match for totes, garden supplies, detailing gear, and other items that fit the published shelf depth. Keep the heaviest objects within comfortable reach and avoid loading a high shelf with something you can barely lift on the floor.

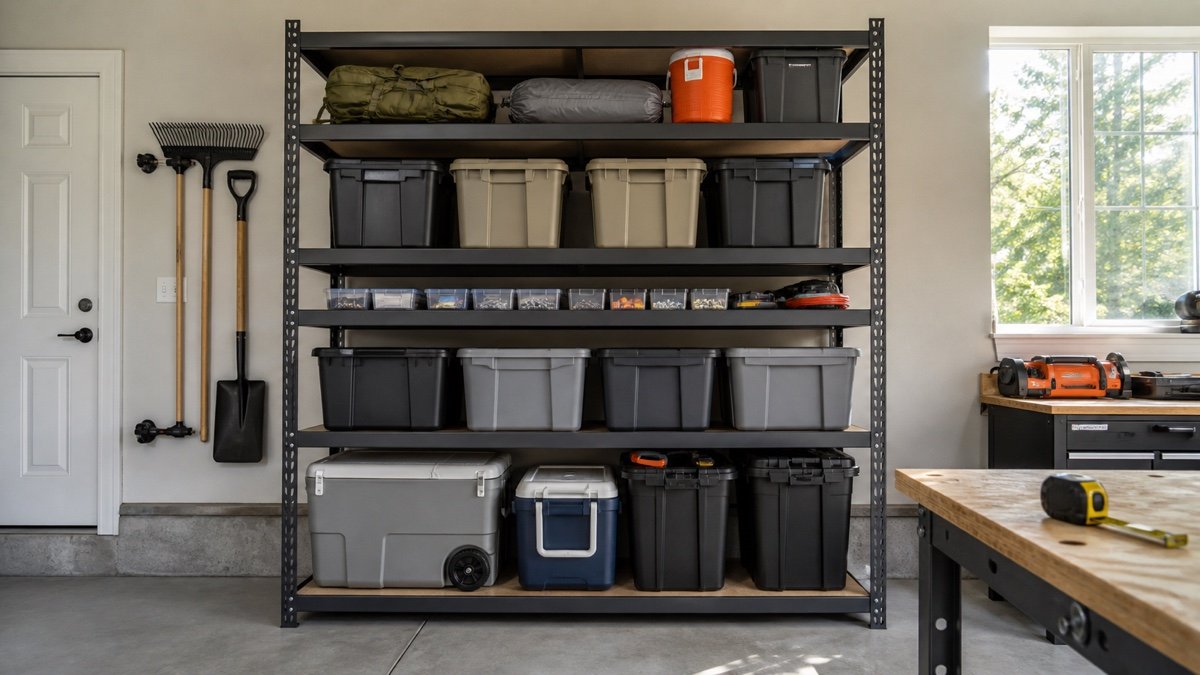
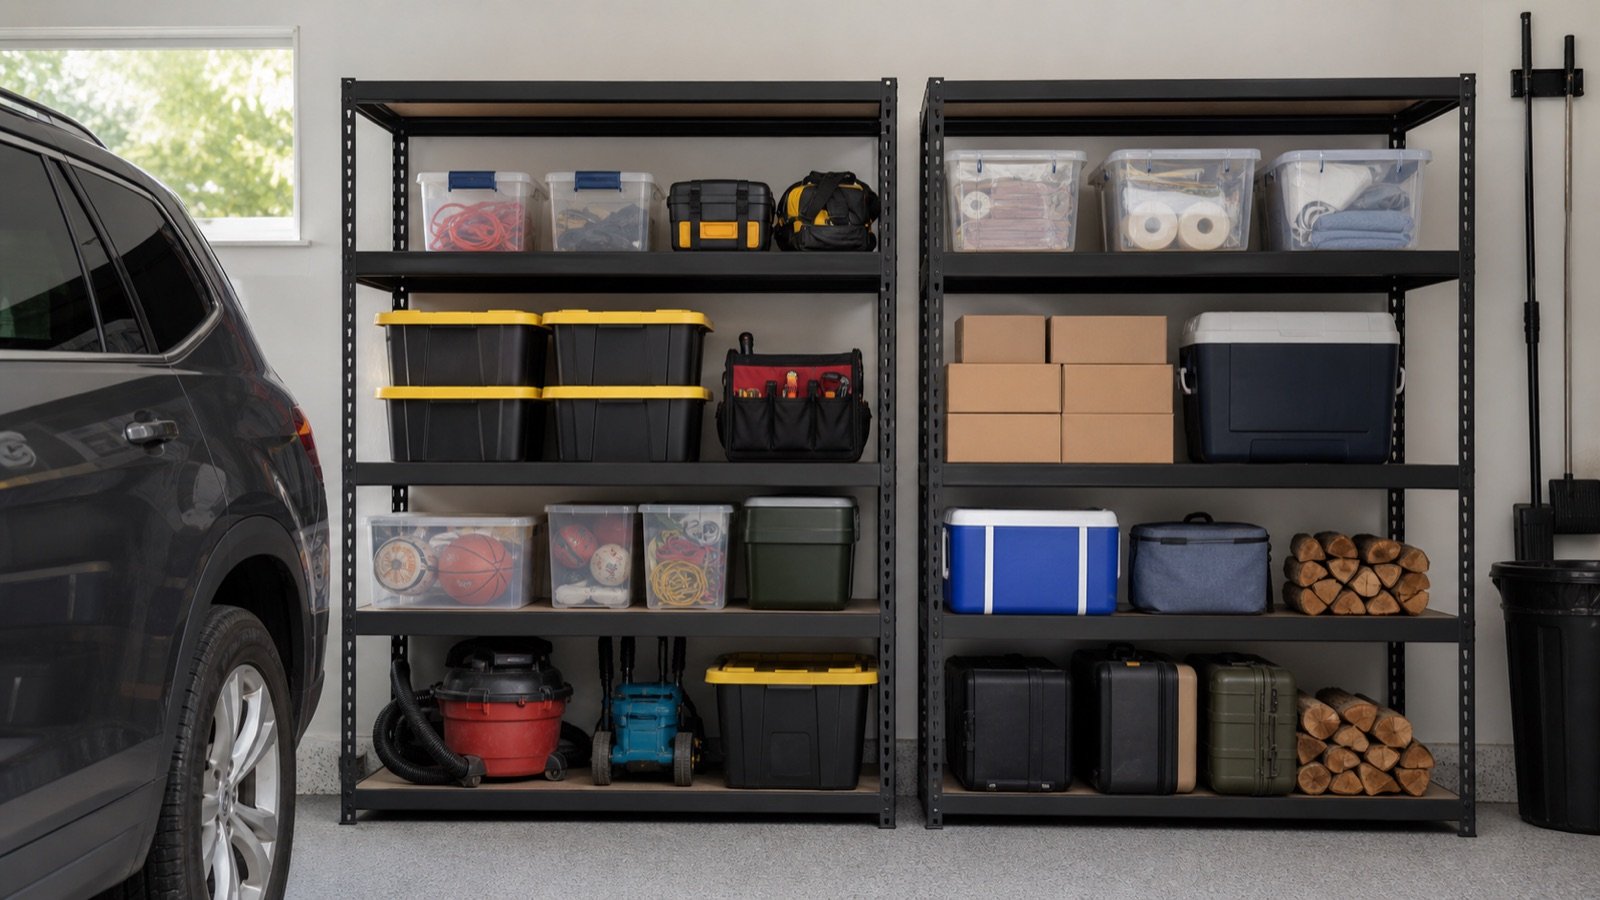
    Where wall-mounted shelves earn their place in a practical garage setup
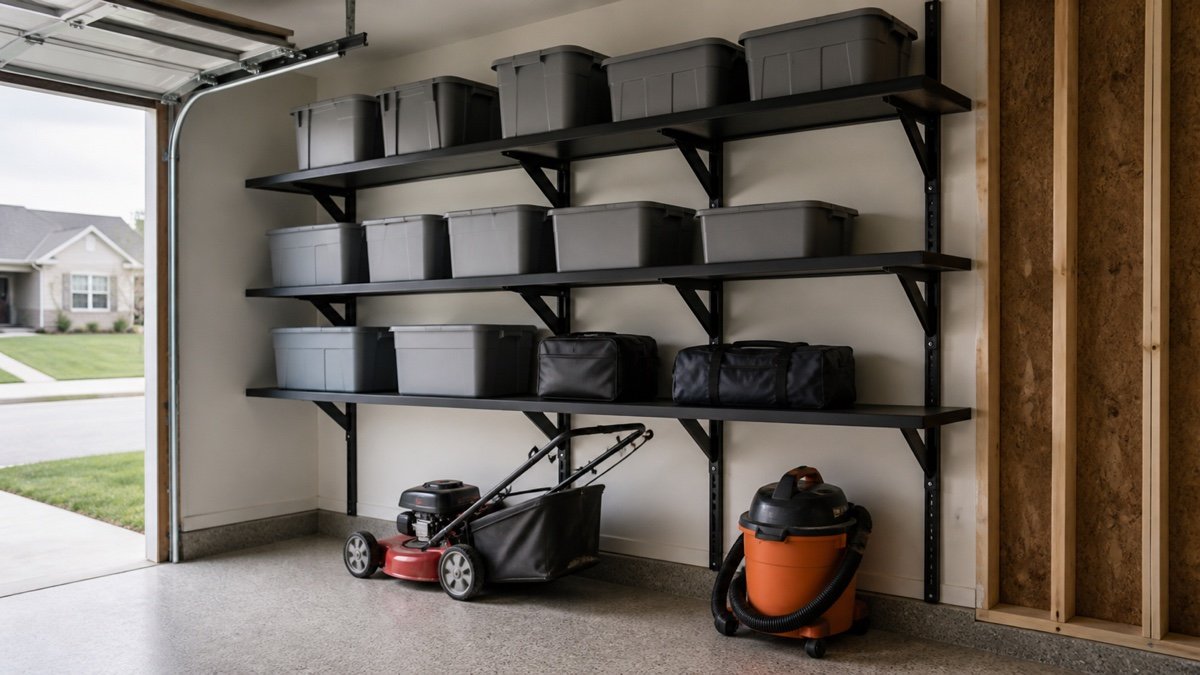
    Where wall-mounted shelves earn their place, shown in a practical garage layout.

    Why freestanding shelves are easier to live with

    A freestanding rack asks less of the wall. Assemble it on a suitable floor, level it as the instructions require, and you can start organizing without opening drywall or drilling masonry. That makes it useful for renters, unfinished block walls, and garages crowded with plumbing or electrical runs.

    Adjustable shelf levels are another practical advantage. If the camping cooler is replaced by a taller model, the opening can often be changed without relocating the entire unit. A rack can also move to the opposite wall during a garage redesign, although a loaded rack should be emptied before it moves.

    The front posts cost a little access width, and the feet occupy floor area. A sloped, cracked, or uneven slab may need approved leveling provisions. Tall racks may also require restraint against tipping according to the maker’s directions. Being called freestanding does not automatically mean a unit should remain unattached in every situation.

    Put dense tool cases and other heavy objects on lower shelves. Lighter totes can go higher. This lowers the center of gravity and makes everyday lifting less awkward. Still, the rack’s published rating and distribution rules set the limit. A tidy arrangement isn’t a substitute for those numbers.

    Why freestanding shelves are easier to live with in a practical garage setup
    Why freestanding shelves are easier to live with, with the storage details visible in context.

    Wall-mounted and freestanding shelves compared

    Decision pointWall-mounted shelvesFreestanding shelves
    Floor accessFloor can remain open below the shelf runPosts and feet stay on the slab
    Wall requirementNeeds a suitable, verified mounting structureLess dependent on the wall, though restraint may still be required
    Layout changesRelocation means removing and reinstalling hardwareCan be repositioned after it is fully unloaded
    Uneven surfacesWall condition and alignment affect installationFloor slope and approved leveling method affect stability
    AccessNo front posts, but brackets may limit some placementsFront posts reduce the clear loading width
    Best fitFixed zones above equipment or a work surfaceHeavy bins, changing inventories, and unsuitable walls

    Neither column tells you which product can carry more. Capacity varies by design, size, mounting, and load distribution. Compare the manuals for the exact models on your shortlist.

    Wall and floor conditions can settle the decision

    A finished wall can hide studs, blocking, pipes, and wiring. A masonry wall can have hollow areas, weak joints, or a surface that needs a specific anchor. If you cannot identify a suitable structure and match it to the shelf instructions, don’t guess. A qualified installer can assess a questionable wall.

    Freestanding racks shift the question to the slab. Check for a strong slope, broken edges, drains, curbs, and places where water regularly pools. Follow the maker’s directions for leveling, foot placement, anchoring, and wall restraint. Don’t stack scrap wood under one leg as a permanent fix.

    Also look upward. Garage door tracks, opener hardware, windows, overhead lights, and an open vehicle hatch may occupy space above either shelf style. Mark the proposed shelf outline with painter’s tape, then operate the door and vehicle hatch while someone watches from a safe position.

    Capacity is a chain, not one headline number

    Product listings often lead with a large capacity figure. Read the smaller wording. The number may apply per shelf, per complete unit, or only when the load is spread evenly. Accessories and added shelf spans can have different limits.

    For a wall system, the shelf deck, brackets, rails, fasteners, mounting pattern, and building structure all take part. The weakest verified limit governs the setup. For a freestanding rack, shelf beams, deck panels, posts, connectors, feet, floor condition, and any required restraint matter in the same way.

    Weigh loaded totes if the contents are dense. A bin of shop towels and a matching bin of metal hardware look identical from the aisle, but they don’t behave alike. Place concentrated loads over supported areas as the instructions allow, and stop using a unit if you notice movement, bent parts, loose hardware, or damage around mounting points.

    Depth and access matter every day

    Deep shelves hold more front to back, but capacity isn’t useful if the rear tote disappears behind the front one. In a narrow garage, extra depth also steals door clearance and walking space. A shallow wall shelf may be perfect for car care bottles and small bins, while a deeper freestanding rack handles large totes at the end wall.

    Run the intended tote layout through the garage shelving planner. Measure the loaded tote, including handles and a lid that bows upward. Leave enough opening height to lift the rim over the shelf edge without scraping your knuckles.

    Think about retrieval, too. Items used every week belong between knee and shoulder height when practical. Seasonal items can sit higher. Store heavy objects low, and don’t plan around repeated twisting from a ladder.

    A mixed layout often feels less forced

    You don’t have to choose one format for the whole garage. A wall-mounted run above lawn equipment keeps an awkward floor zone useful. A sturdy freestanding rack at the back wall can hold bulky bins and tool cases. Closed cabinets can take chemicals or items that need controlled access, subject to their labels and local requirements.

    Before ordering, compare the complete dimensions, shelf adjustment method, deck material, replacement parts, installation instructions, and warranty. The garage shelving buying guide turns those checks into a broader shopping process. Our steel vs resin guide helps once you have settled on the basic format.

    The most useful system is the one that leaves the garage easy to move through after everything is loaded. Tape both footprints into the room, place the actual bins inside those boundaries, and live with the mock layout for a day. Annoying clearances show up quickly.

    Useful products to compare

    These links open current Amazon search results so you can compare dimensions, manuals, ratings, and availability for the exact models on your shortlist.

    Before you buy or install

    Check the current manual for the exact product you are considering. Confirm the assembled dimensions, load rules, mounting requirements, included hardware, clearances, warranty, and any limits that apply to your wall, floor, or garage layout.

    Frequently asked questions

    Are wall-mounted garage shelves stronger than freestanding shelves?

    Not automatically. Strength depends on the exact shelf design, span, brackets or frame, fasteners, installation, building structure, and load distribution. Compare published ratings and instructions for the specific models.

    Do freestanding garage shelves need to be anchored?

    Some do. Height, depth, floor condition, location, and the manufacturer’s instructions affect restraint requirements. Follow the manual rather than relying on the word freestanding.

    Which shelf type works better in a small garage?

    Wall-mounted shelves can preserve floor space, while a shallow freestanding rack may work where the wall cannot be drilled. Vehicle and door clearance usually decide the better fit.

    Can I combine both shelf types?

    Yes. Wall shelves are useful above equipment, while a freestanding rack can carry bulky bins at a convenient height. Keep each system within its own installation and loading rules.

  • Wire vs Solid Garage Shelving

    Wire vs Solid Garage Shelving

    Affiliate disclosure: As an Amazon Associate I earn from qualifying purchases. This article may contain affiliate links, and Bay & Bench may earn a commission at no extra cost to you. Read our full Affiliate Disclosure.

    Wire lets air and dust pass through. Solid decks keep small parts and spills on the shelf. The better surface depends on what can fall, leak, snag, or need wiping in that particular zone.

    Quick answer

    Choose wire for bins, airflow, and areas where loose dust should not collect on the deck. Choose solid shelves for small hardware, bottles, and objects that need a flat sliding surface. Add fitted trays or liners only when the shelf maker permits them.

    Wire vs Solid Garage Shelving
    Planning example for wire vs solid garage shelving.

    Wire is open by design

    Wire shelves expose the underside of every object to air and let loose dirt fall. That can help around closed totes. Narrow feet, small boxes, and loose fasteners may sit badly or fall through.

    Some plastic bins drag or catch on wire, especially when heavily loaded.

    Solid shelves contain the mess

    A solid surface supports small items and makes it easier to slide boxes. It also catches every drip. That is useful only if the deck tolerates the liquid and can be cleaned before moisture spreads.

    Composite decks need special care in damp garages. Check edges and coating rather than assuming every solid shelf is washable.

    Spills change the decision

    Do not rely on either shelf to contain hazardous products. Store chemicals according to their labels and use compatible secondary containment. A wire shelf can let a leak reach everything below; a flat deck can let it spread sideways.

    Surface comparison

    UseWireSolid
    Closed totesGood airflowEasy sliding
    Small hardwareNeeds bins or trayFlat support
    DustFalls to lower levelsCollects on deck
    Liquid leakPasses throughMay pool or spread
    Narrow feetCan wobbleUsually steadier

    Liners can make a hybrid

    A rigid fitted liner gives wire shelving a smoother zone for small items. Check that it does not interfere with clips, ventilation, fire requirements, or the manufacturer’s load assumptions. Avoid makeshift cardboard where moisture or chemicals are present.

    Match surfaces to shelves

    You may not need one answer for the whole rack. Use trays for hardware, closed bins for loose parts, and open wire for bulky dry containers. The object should dictate the local surface.

    Pair this decision with the shelving buying guide and the shelving planner.

    Noise and stability are easy to overlook

    Metal containers and tools can rattle on wire. Narrow legs may rock between rods. A fitted tray can quiet a local work zone, while closed bins solve many small-item problems without covering the entire shelf.

    Solid decks feel steadier under small objects, but a slick surface may let bins slide when bumped. Shelf lips and bin feet matter.

    Cleaning happens below the shelf too

    Dust that falls through wire does not disappear. It lands on lower objects or the floor. Solid shelves keep each level separate but require wiping. Decide which cleaning pattern suits the stored goods.

    Use shallow removable trays under messy items. They are easier to wash than dismantling a full shelf and make leaks visible sooner.

    Useful products to compare

    Use these searches to compare current dimensions, ratings, manuals, and availability. Check the exact model before buying.

    Before you buy or install

    Download the current manual for the exact model. Confirm assembled and packaged dimensions, individual and total load ratings, required clearances, mounting structure, included hardware, warranty, and inspection instructions. Product listings and specifications can change.

    Mark the footprint or platform edges in the garage. Operate the vehicle doors and garage door, carry the intended bin through the access route, and check service panels and utilities. Do not improvise around electrical, gas, fire, or structural conditions.

    Frequently asked questions

    Can I put a liner on wire shelving?

    Often, but use a fitted product compatible with the shelf and do not block required ventilation or connections.

    Which surface is easier to clean?

    Solid washable decks are easy to wipe. Wire has more individual rods but does not hold as much loose dust on one level.

    Which is better for paint cans and bottles?

    A stable solid surface or compatible tray is usually easier, but store every product according to its label and use secondary containment where needed.

    Last reviewed: July 2026. Verify current product specifications and installation requirements before purchase.

  • Steel vs Resin Garage Shelving

    Steel vs Resin Garage Shelving

    Affiliate disclosure: As an Amazon Associate I earn from qualifying purchases. This article may contain affiliate links, and Bay & Bench may earn a commission at no extra cost to you. Read our full Affiliate Disclosure.

    Steel is the usual choice for dense tools and long shelf spans. Resin is easy to wash and will not rust. Either material can disappoint when the shelf dimensions or published ratings do not match the load.

    Quick answer

    Choose steel for compact heavy objects and broad modular choices, after checking finish and corrosion conditions. Choose resin for damp, washable storage and lighter household goods. Compare exact per shelf ratings and restraint instructions.

    Steel vs Resin Garage Shelving
    Planning example for steel vs resin garage shelving.

    Material does not replace specifications

    A thin steel shelf may carry less than a well-designed resin shelf. A thick resin frame may still creep under heat or long-term loading. Product geometry, span, bracing, and rating matter more than a one-word material label.

    Where steel makes sense

    Steel racks are common around power tools, automotive supplies, and dense bins. Adjustable boltless designs can offer many shelf positions. Scratched finishes and damp floors deserve attention, so inspect contact points and follow care instructions.

    Where resin is pleasant to own

    Resin units are often light to move before loading and simple to wipe down. Molded shelves do not have a coating that can rust. They suit sports gear, cleaning supplies, and household bins when the stated ratings fit.

    Daily differences

    FactorSteelResin
    Dense loadsMany strong optionsVerify span and rating
    Water cleanupFinish needs careUsually simple to wash
    AssemblyMay need mallet or fastenersOften press fit
    AdjustabilityCommon on many systemsVaries, sometimes fixed
    Unit weightOften heavierOften lighter

    Check stability

    Tall shelving needs a flat footing and correct assembly regardless of material. Keep heavy items low and use wall restraint when the instructions call for it. Do not assume a light resin unit is safe to leave unrestrained or that a heavy steel unit cannot tip.

    Choose by storage zone

    A garage does not need one material everywhere. Steel can handle the tool zone while resin serves a damp garden or cleaning zone. Keep incompatible chemicals separated according to their labels.

    Continue with the garage shelving buying guide to compare dimensions and shelf surfaces.

    Temperature and sunlight matter

    Garages can become hot, and direct sun near an open door can warm one side of a rack. Read the product guidance for environmental limits. Resin response to heat and steel coating durability vary by design.

    Keep both materials away from sources of heat or chemicals that their documentation does not permit.

    Moving the unit later

    Resin sections may be light enough to reposition while empty. Steel systems can be heavier but may offer boltless parts that separate. Neither should be dragged while loaded.

    If you expect frequent layout changes, look at the empty unit weight, disassembly instructions, and availability of replacement clips or shelves.

    Useful products to compare

    Use these searches to compare current dimensions, ratings, manuals, and availability. Check the exact model before buying.

    Before you buy or install

    Download the current manual for the exact model. Confirm assembled and packaged dimensions, individual and total load ratings, required clearances, mounting structure, included hardware, warranty, and inspection instructions. Product listings and specifications can change.

    Mark the footprint or platform edges in the garage. Operate the vehicle doors and garage door, carry the intended bin through the access route, and check service panels and utilities. Do not improvise around electrical, gas, fire, or structural conditions.

    Frequently asked questions

    Does resin shelving sag?

    Any shelf can deflect when the load, span, heat, or long-term use exceeds its design. Follow the exact rating and distribution rules.

    Will steel shelves rust in a garage?

    Damage, condensation, salt, and finish quality affect corrosion. Inspect the coating and keep the feet out of standing water.

    Can I mix steel and resin shelves?

    Yes. Choosing each unit for its storage zone is often more sensible than forcing one material throughout the garage.

    Last reviewed: July 2026. Verify current product specifications and installation requirements before purchase.

  • 18 vs 24-Inch-Deep Garage Shelves

    18 vs 24-Inch-Deep Garage Shelves

    Affiliate disclosure: As an Amazon Associate I earn from qualifying purchases. This article may contain affiliate links, and Bay & Bench may earn a commission at no extra cost to you. Read our full Affiliate Disclosure.

    Six inches sounds minor until it runs beside a parked car for eight feet. Shelf depth affects the aisle every day, while extra capacity matters only when the objects use it.

    Quick answer

    Choose 18 inch shelves for tighter parking, medium bins, and better visibility. Choose 24 inch shelves for genuinely deep totes and bulky gear, provided the aisle and reach still work. Measure usable deck depth, not just the product name.

    18 vs 24-Inch-Deep Garage Shelves
    Planning example for 18 vs 24-inch-deep garage shelves.

    Tape both footprints

    Mark 18 and 24 inches from the wall, including any base gap or upright projection. Park the vehicle and walk the route carrying the largest tote. Open the nearest car door.

    The better depth is the one that passes this test without forcing awkward movement.

    What 18 inches does well

    Shallow shelves make labels easier to see and reduce double rows. They suit many medium bins, tool cases, gardening supplies, and household stock. Less depth also discourages forgotten objects at the back.

    When 24 inches earns its space

    Large totes, coolers, shop equipment, and wide automotive gear may need the deeper deck. Confirm that the object sits fully supported and fits between the uprights.

    Do not buy deep shelves for future capacity without naming the objects that will occupy it.

    Compare the tradeoffs

    Factor18 inch24 inch
    Aisle usePreserves 6 inchesConsumes 6 more inches
    VisibilityEasier single rowsMore chance of hidden items
    Large tote fitMay leave overhangOften better, verify exact tote
    ReachEasy to reach rearHarder on high shelves

    Use mixed depths carefully

    A deep rack at the back wall and shallow shelving beside the vehicle can make sense. Keep transitions visible so shoulders and carried bins do not catch a projecting corner.

    Measure the usable shelf

    Frames, lips, braces, and uprights can reduce usable space. Check the clear depth and opening in the manual. Then enter the wall and unit dimensions in the shelving planner.

    The broader buying guide covers materials and ratings.

    High shelves make depth harder to use

    Deep storage above eye level hides labels and pushes the rear row beyond comfortable reach. A 24 inch deck that works at waist height can be irritating near the top of the rack. Plan depth and shelf height together.

    If deep upper shelves are unavoidable, use one light pull-forward bin per position instead of loose objects in two rows.

    Calculate capacity with real bins

    Divide usable shelf width by the loaded bin width, then check depth and opening height. Repeat for every shelf. Marketing photos often use containers chosen to make the rack look full; your bin family may leave large gaps.

    A cardboard template of the shelf opening is a quick way to test handles and lids in the store or garage.

    Useful products to compare

    Use these searches to compare current dimensions, ratings, manuals, and availability. Check the exact model before buying.

    Before you buy or install

    Download the current manual for the exact model. Confirm assembled and packaged dimensions, individual and total load ratings, required clearances, mounting structure, included hardware, warranty, and inspection instructions. Product listings and specifications can change.

    Mark the footprint or platform edges in the garage. Operate the vehicle doors and garage door, carry the intended bin through the access route, and check service panels and utilities. Do not improvise around electrical, gas, fire, or structural conditions.

    Frequently asked questions

    Will an 18 inch tote fit an 18 inch shelf?

    Not necessarily. Measure the tote at its widest point and compare it with the usable deck and upright opening.

    Can bins overhang the shelf?

    Follow the shelf and bin instructions. Overhang can reduce stability and make retrieval awkward.

    Which depth is better for a one car garage?

    Often 18 inches, but only a parked vehicle and tape mockup can confirm the room.

    Last reviewed: July 2026. Verify current product specifications and installation requirements before purchase.

  • Garage Shelving Buying Guide: Depth, Load, and Layout

    Garage Shelving Buying Guide: Depth, Load, and Layout

    Affiliate disclosure: As an Amazon Associate I earn from qualifying purchases. This article may contain affiliate links, and Bay & Bench may earn a commission at no extra cost to you. Read our full Affiliate Disclosure.

    Garage shelving works when the shelf matches the objects, not when the box carries the largest capacity number. Depth, clear opening, shelf surface, and the way you retrieve a bin matter every week.

    Quick answer

    Measure the largest tote and the parking aisle. Compare usable shelf dimensions, per shelf ratings, upright spacing, surface material, leveling, restraint instructions, and whether replacement shelves or add-on bays are available.

    Garage Shelving Buying Guide: Depth, Load, and Layout
    Planning example for garage shelving buying guide: depth, load, and layout.

    Start with the objects

    List the widest, deepest, tallest, and heaviest objects intended for the rack. Measure totes at the lid and handles. A shelf can be wide enough overall while the clear opening between uprights is too narrow.

    Keep dense tools low. Reserve eye-level shelves for frequently used bins and supplies.

    Depth changes the aisle

    Eighteen inch shelves keep contents visible and preserve six inches compared with a 24 inch unit. Deeper shelves handle larger totes, but small objects disappear behind one another.

    Use the garage shelving planner and read the depth comparison before buying.

    Read load ratings carefully

    Check the rating for each shelf and the whole unit. Look for conditions such as evenly distributed load and required wall restraint. Shelf capacity does not override floor condition, assembly errors, or instability from a tall narrow frame.

    Do not use the rack as a ladder.

    Choose a shelf surface

    Wire permits airflow and lets dust fall through, but small parts and spills need trays. Solid steel, resin, or composite decks support little objects and wipe clean differently. Moisture matters, especially with unfinished particleboard.

    The wire vs solid guide looks at the daily tradeoffs.

    Material and environment

    Steel handles dense loads well when the complete design and finish suit the environment. Resin avoids rust and is easy to wash, but heat, shelf span, and product rating still matter. Compare the exact models in our steel vs resin shelving guide.

    Specification sheet

    SpecificationWhy it matters
    Outside W x D x HRoom and aisle fit
    Clear shelf openingActual object access
    Adjustable spacingTall bins and changing use
    Per shelf ratingLocal load limit
    Total ratingComplete unit limit
    Surface materialSpills, small parts, moisture
    Restraint instructionsStability and installation

    Shelf spacing sets usable capacity

    Count shelf levels only after assigning bin heights. Five closely spaced decks may hold less useful gear than four well-spaced shelves. Include the thickness of beams and decks when calculating the clear opening.

    Put the tallest object in the lowest practical zone. Raising it above shoulder height makes both loading and inspection harder.

    Test the floor and the feet

    Garage floors slope toward the door and may have joints, curbs, or drains. Small adjustable feet can help with minor variation when the product allows it, but they are not a cure for a poor location. Check whether feet, casters, or base plates concentrate load on a fragile surface.

    Assemble and level the empty rack before adding weight. Recheck it after the first full loading.

    Useful products to compare

    Use these searches to compare current dimensions, ratings, manuals, and availability. Check the exact model before buying.

    Before you buy or install

    Download the current manual for the exact model. Confirm assembled and packaged dimensions, individual and total load ratings, required clearances, mounting structure, included hardware, warranty, and inspection instructions. Product listings and specifications can change.

    Mark the footprint or platform edges in the garage. Operate the vehicle doors and garage door, carry the intended bin through the access route, and check service panels and utilities. Do not improvise around electrical, gas, fire, or structural conditions.

    Frequently asked questions

    How deep should garage shelves be?

    Use the shallowest shelf that fits the largest intended bin while preserving the aisle.

    Do high load ratings mean the rack is stable?

    No. Stability also depends on assembly, floor, proportions, restraint, placement, and correct loading.

    Are adjustable shelves worth it?

    Usually, if the adjustment range matches your bins and the hardware is easy to reposition safely.

    Last reviewed: July 2026. Verify current product specifications and installation requirements before purchase.

  • Garage Storage Rack Above the Garage Door: A Clearance Guide

    Garage Storage Rack Above the Garage Door: A Clearance Guide

    Affiliate disclosure: As an Amazon Associate I earn from qualifying purchases. This article may contain affiliate links, and Bay & Bench may earn a commission at no extra cost to you. Read our full Affiliate Disclosure.

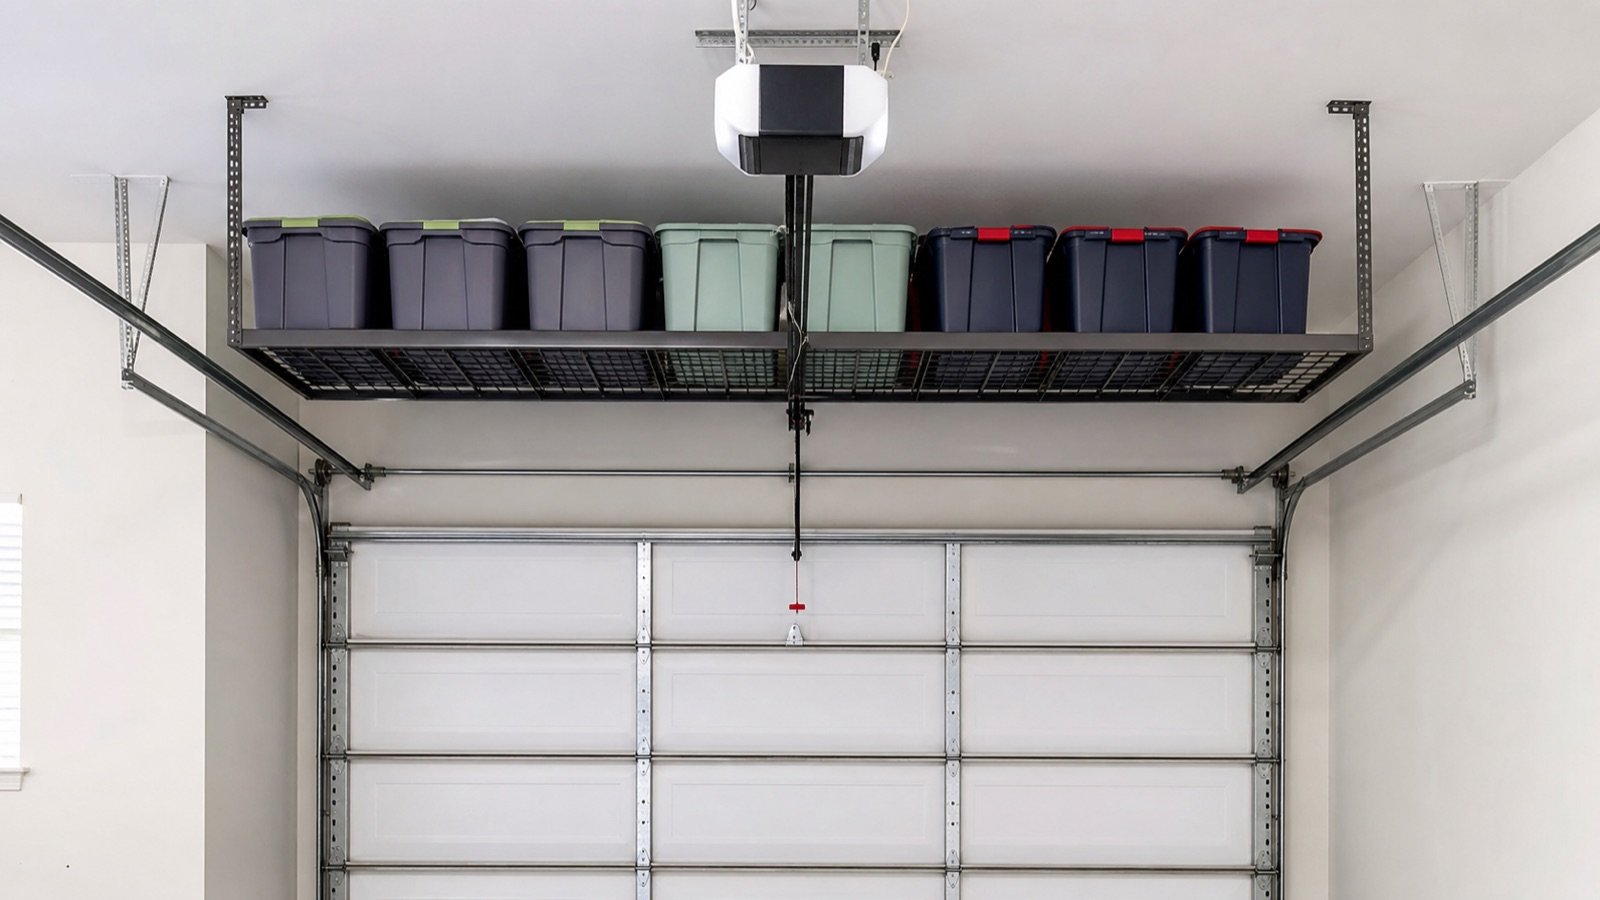
    The space above a garage door can be useful, but it is not empty space. Door panels, tracks, the opener, springs, cables, and emergency hardware all need room to move and service access.

    Quick answer

    Operate the door through its full cycle and map the highest moving point. Add the rack frame, tote height, handling gap, and every clearance required by both the rack and door equipment. If those zones overlap, move or resize the rack.

    Garage Storage Rack Above the Garage Door: A Clearance Guide
    Planning example for garage storage rack above the garage door: a clearance guide.

    Watch a complete door cycle

    Stand inside the garage and watch from the side while another person operates the door safely. The panel path changes through the curved track. The opener arm and emergency release move too.

    Never place yourself beneath unsupported components or interfere with door hardware while measuring.

    Map service space

    Technicians need access to springs, cables, tracks, fasteners, opener components, and manual release hardware. A rack that clears normal movement can still make inspection or repair difficult.

    Ask the door manufacturer or service provider when required clearances are not documented.

    Build the vertical stack

    Start at the lowest usable ceiling point. Subtract mounting space, tote height, handling room, platform thickness, and the moving door envelope. Use the calculator to organize the numbers, then verify them physically.

    Choose the rack orientation

    A narrow platform parallel to the door may stay outside the opener rail. A rack across the garage may offer more capacity but cross several moving and service zones. Smaller modules can work around hardware more easily.

    Store the right things

    Above-door storage favors light seasonal totes. Keep each bin closed and stable. Avoid loose objects that vibration might move, and do not store materials whose labels prohibit garage heat or overhead locations.

    Final check before ordering

    • Door clears through the entire cycle.
    • Emergency release remains visible and reachable.
    • Tracks, springs, cables, and opener retain service access.
    • Rack mounting follows the exact structural requirements.
    • Totes can be loaded from a stable position.
    • The selected load remains within every verified limit.

    Return to the broader overhead storage buying guide to compare platform sizes and deck formats.

    Door type changes the available zone

    A sectional overhead door follows curved tracks. Other door types move differently, and high-lift configurations change the ceiling envelope. Do not transfer measurements from a neighbor’s garage or an online diagram to your door.

    Record the door and opener model when possible. Current technical documents or a service technician can answer questions that a tape measure cannot.

    Vibration and falling objects deserve attention

    A garage door cycles beneath or beside the storage area. Use closed bins in good condition and keep every object within the platform edge. Loose sports gear, scrap wood, and open boxes do not belong above a moving door.

    Listen after loading. New rattles, rubbing, or movement are reasons to stop the door and inspect the area.

    Useful products to compare

    Use these searches to compare current dimensions, ratings, manuals, and availability. Check the exact model before buying.

    Before you buy or install

    Download the current manual for the exact model. Confirm assembled and packaged dimensions, individual and total load ratings, required clearances, mounting structure, included hardware, warranty, and inspection instructions. Product listings and specifications can change.

    Mark the footprint or platform edges in the garage. Operate the vehicle doors and garage door, carry the intended bin through the access route, and check service panels and utilities. Do not improvise around electrical, gas, fire, or structural conditions.

    Frequently asked questions

    Can a rack touch the garage door tracks?

    No. Keep the clearances required by the rack and door equipment, including service access.

    Can I move the opener to make space?

    Changes to door and opener systems should follow manufacturer requirements and may need qualified service. Do not redesign them around a rack casually.

    What is best stored above the door?

    Light, stable, seasonal goods in closed totes are usually the sensible use.

    Last reviewed: July 2026. Verify current product specifications and installation requirements before purchase.

  • Fixed vs Adjustable Overhead Garage Racks

    Fixed vs Adjustable Overhead Garage Racks

    Affiliate disclosure: As an Amazon Associate I earn from qualifying purchases. This article may contain affiliate links, and Bay & Bench may earn a commission at no extra cost to you. Read our full Affiliate Disclosure.

    Adjustability is useful when it solves a measured problem. If every support ends up at the same height and never moves again, a simpler fixed setup may be the cleaner choice.

    Quick answer

    Choose adjustable drop supports when ceiling height, obstructions, or tote sizes demand a specific platform level permitted by the manual. Choose fixed supports when the required height is known, the mounting plane is straightforward, and fewer joints suit the application.

    Fixed vs Adjustable Overhead Garage Racks
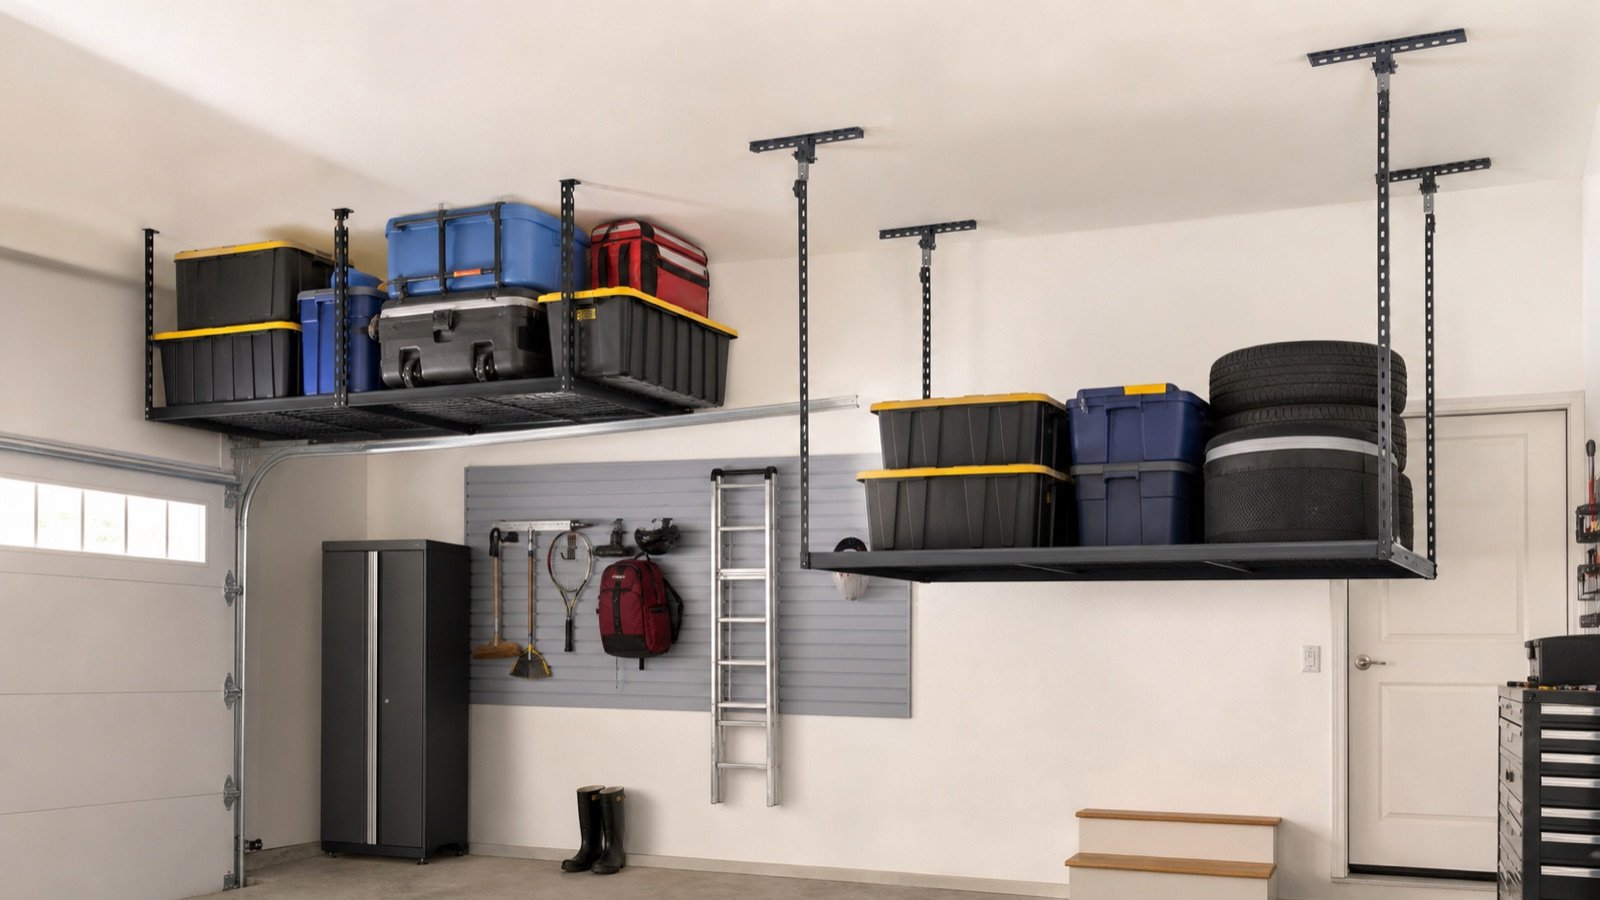
    Planning example for fixed vs adjustable overhead garage racks.

    What adjustable usually means

    Many adjustable racks use slotted vertical posts with a set of approved hole positions. Adjustment is not continuous, and the allowed range may change with rack size or configuration. Read the exact manual before assuming a desired drop is available.

    Where adjustment helps

    A measured drop can place the platform above an open door while preserving tote space. Separate approved settings may also help with a sloped ceiling or a beam, although every support and connection must follow the instructions.

    The clearance guide shows which dimensions to collect.

    Why fixed can be appealing

    Fixed hardware has fewer adjustment points and fewer opportunities to choose the wrong hole. That simplicity can make inspection easier. It does not remove the need for correct structure, fasteners, leveling, and load distribution.

    Side by side

    FactorFixedAdjustable
    Drop choicesOne designed heightApproved positions within a range
    Changing totesMay require new storage planMay permit a different setting
    PartsOften fewer jointsMore connection points to inspect
    Uneven geometryLess flexibleCan offer approved correction

    Do not plan on frequent adjustment

    A loaded ceiling rack is not a height adjustable desk. Changing the drop normally means unloading, supporting, loosening, aligning, and reinstalling parts according to the manual. Choose a setting you expect to keep.

    Decision rule

    Measure the lowest obstruction and the loaded tote. If one fixed configuration gives comfortable handling room and clearance, extra adjustment may add little. If the fit depends on a narrow height window, an adjustable model can be worth comparing.

    Whatever you choose, record the final setting and include it in periodic inspections.

    Adjustment can create setup errors

    More holes mean more possible configurations to verify. Count exposed holes or measure the final drop at every post before loading. Photograph the connections so a later inspection can tell whether anything moved.

    Use only approved fasteners and hole positions. A post that looks nearly aligned should not be forced into a custom setting.

    Future vehicles are worth one measurement

    If you expect to replace a sedan with an SUV, record the likely roof and hatch height before settling on a low rack. This does not justify buying excess adjustment. It simply prevents a platform from locking the garage to the current vehicle.

    Changing the rack later may be possible, but unloading and reinstalling it is work. A sensible initial height is cheaper.

    Useful products to compare

    Use these searches to compare current dimensions, ratings, manuals, and availability. Check the exact model before buying.

    Before you buy or install

    Download the current manual for the exact model. Confirm assembled and packaged dimensions, individual and total load ratings, required clearances, mounting structure, included hardware, warranty, and inspection instructions. Product listings and specifications can change.

    Mark the footprint or platform edges in the garage. Operate the vehicle doors and garage door, carry the intended bin through the access route, and check service panels and utilities. Do not improvise around electrical, gas, fire, or structural conditions.

    Frequently asked questions

    Can I change rack height after installation?

    Only as the manufacturer permits. Unload the rack and follow the adjustment procedure rather than moving loaded supports.

    Are fixed racks stronger?

    Not automatically. Compare the exact published ratings and required configuration.

    Can adjustable posts handle a sloped ceiling?

    Some systems may accommodate certain layouts, but the manual must explicitly support the installation.

    Last reviewed: July 2026. Verify current product specifications and installation requirements before purchase.